API 网关提供客户端与网关之间数据加密的能力,支持 RSA、ECC、国密三种加密算法,保证数据传输过程中的安全性。
目前仅支持对 HTTP 类型的 API 调用进行数据加密。
使用流程

根据加密算法,生成密钥。
网关管控平台创建应用并开启加密能力。
客户端编码配置密钥(当前仅支持 Java 语言)。
发起调用进行验证。
前提条件
安装 OpenSSL 1.1.1 或更新版本。
步骤一:生成密钥
使用 OpenSSL 工具生成 RSA、ECC 或国密算法的密钥,并记录保存生成的密钥。
生成 RSA 密钥
生成 RSA 私钥。
说明可选择 1024 或 2048 密钥长度。
openssl genpkey -algorithm RSA -out private_key.pem -pkeyopt rsa_keygen_bits:2048根据 RSA 私钥生成 RSA 公钥。
openssl rsa -pubout -in private_key.pem -out public_key.pem
生成 ECC 密钥
生成 ECC 的私钥。
说明必须选择 secp256k1 曲线。
openssl ecparam -name secp256k1 -genkey -noout -out secp256k1-key.pem根据
secp256k1-key.pem密钥对生成 ECC 公钥。openssl ec -in secp256k1-key.pem -pubout -out ecpubkey.pem
生成国密密钥
生成 SM2 的私钥。
openssl ecparam -name SM2 -genkey -noout -out sm2-key.pem根据 SM2 私钥生成 SM2 公钥。
openssl ec -in sm2-key.pem -pubout -out sm2pubkey.pem
步骤二:配置应用加密
创建应用。
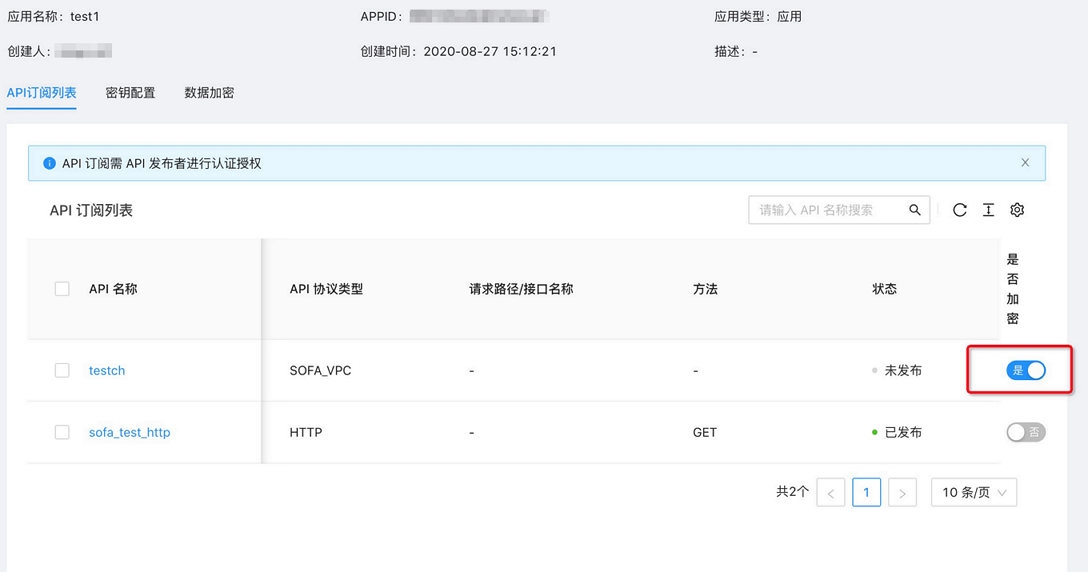
在 数据加密 页签,开启加密开关,选择加密算法,填写密钥。
说明格式必须携带
-----BEGIN PUBLIC KEY-----及-----END PUBLIC KEY-----。
对应用开启加密后,默认该应用可访问的所有 API 都会进行加解密,如果部分 API 不需要加解密,可以在 API 列表关闭。
步骤三:配置客户端密钥
配置客户端加密,必须升级 SDK 到 2.4.0 版本及以上。代码示例如下:
当前只支持 Java-SDK。
公钥是一个字符串,请保留密钥的换行符。
只有创建时 apiClient 传递了加密算法和公钥,并且
request.NeedEncrypt为 true 时,才会进行加解密。任意条件不满足都不会进行加解密。HTTP 应用类型的请求,必须签名生成
SignUtil.signWithUriDate,但不要求验签。如果 API 开启了密钥认证,您还需要在工程中配置相应的 Access Key 和 Secret Key,推荐使用启动参数和环境变量的形式。
# 客户端请求的ak、sk,就是应用的密钥信息
gateway.accessKey=<yourAccessKeyId>
gateway.secretKey=<yourAccessKeySecret>
apigateway.url=<yourGatewayURL>
gateway.pubKey =<yourPubKey>
   @Value("${gateway.accessKey}")
   private String accessKey;

   @Value("${gateway.secretKey}")
   private String secretKey;

    @Value("${apigateway.url}")
    private String gatewayurl;

   @Value("${gateway.pubKey}")
   private String pubKey;

String path ="/xxxxx/test/post";//请求路径
String methodType ="POST";//请求方法
String body ="{}";//请求体

ApiSecretKey apiSecretKey =newApiSecretKey(gateway.accessKey, gateway.secretKey);
List<ApiSecretKey> secretKeys =newArrayList<>();
secretKeys.add(apiSecretKey);


DefaultSdkApiRequest req =newDefaultSdkApiRequest();
req.setPath(path);
req.setClientCheckSign(true);
req.setRequestType(methodType);
req.setNeedEncrypt(true);

//填充签名
SignResponse<String,String>  signResponse =SignUtil.signWithUriDate(
newSignRequest(path, methodType, body.getBytes(), subAppAccessKey, subAppSecretKey),false);
for(String k : signResponse.keySet()){
    req.getHeaderParams().put(k, signResponse.get(k));
}

//需要加密
ApiClient apiClient =newDefaultApiClient(gatewayUrl, secretKeys,EncryptEnum.ECC, pubKey);
//apiClient = new DefaultApiClient(gatewayUrl, secretKeys);
步骤四:发起请求并验证
apiClient 配置完成之后,即可对 API 发起调用。代码示例如下:
@Test
publicvoid testNoSignHttp(){
ParamPostRequest request =newParamPostRequest();
request.setPath("simple/demo");
// 是否对响应进行签名校验
request.setClientCheckSign(false);
ApiResponse response = apiClient.execute(request);
System.out.println(JSON.toJSONString(response));
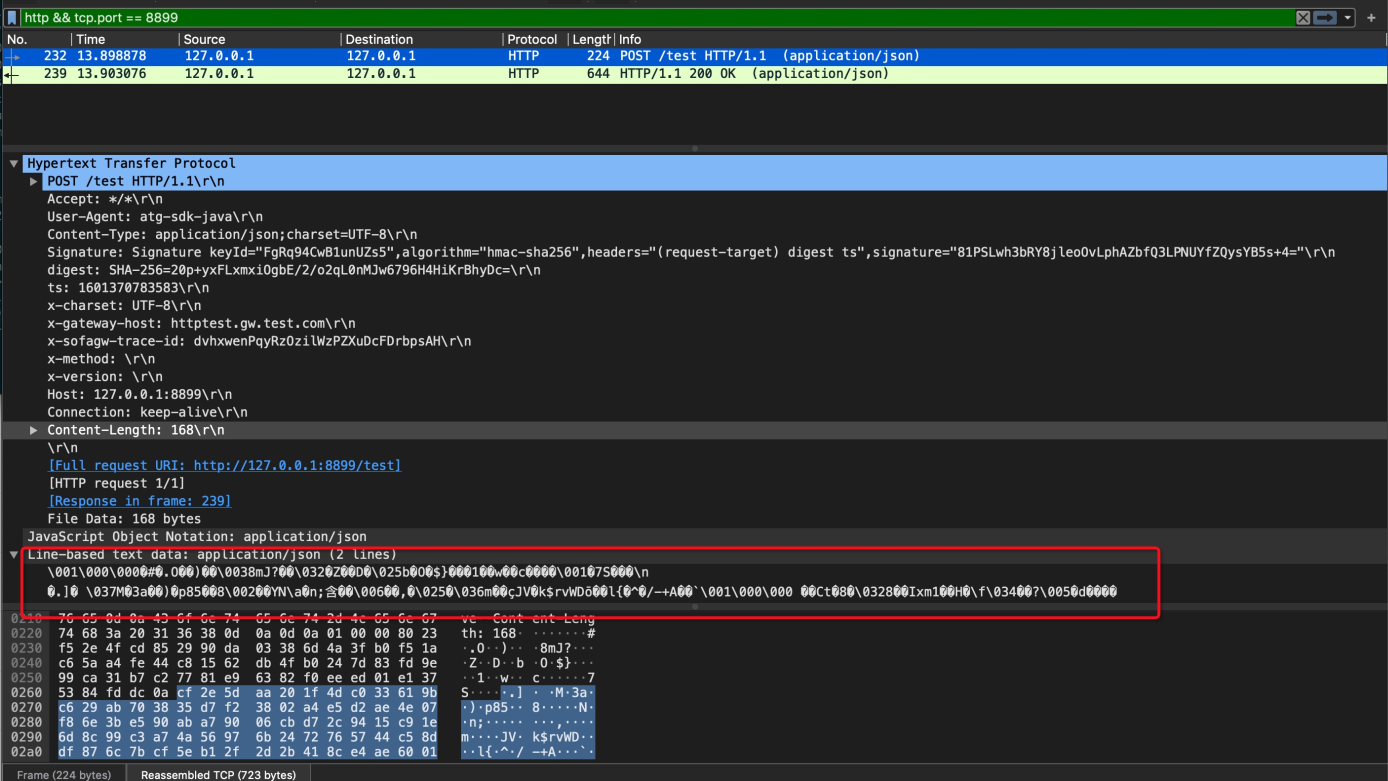
}如需对加密功能进行验证,运行调用代码后,使用 Tcpdump 命令进行网络抓包,下图所示为加密后的效果。
- 本页导读 (0)