激光雷达-相机融合实验
本实验通过激光雷达点云与相机图像数据融合,输出场景中检测到的车辆数,以及输出车辆的位置信息。
场景简介
本实验通过激光雷达点云与相机图像数据融合,输出场景中检测到的车辆数,以及输出车辆的位置信息。
实验室资源方式简介
进入实操前,请确保阿里云账号满足以下条件:
个人账号资源
使用您个人的云资源进行操作,资源归属于个人。
平台仅提供手册参考,不会对资源做任何操作。
确保已完成云工开物300元代金券领取。
已通过实名认证且账户余额≥100元。
本次实验将在您的账号下开通实操所需计算型实例规格族c7a,费用约为:17元/时(具体金额取决于实验完成的时间),需要您通过阿里云云工开物学生专属300元抵扣金兑换本次实操的云资源。
如果您调整了资源规格、使用时长,或执行了本方案以外的操作,可能导致费用发生变化,请以控制台显示的实际价格和最终账单为准。
领取专属权益及创建实验资源
在开始实验之前,请先点击右侧屏幕的“进入实操”再进行后续操作

本次实验需要您通过领取阿里云云工开物学生专属300元抵扣券兑换本次实操的云资源,如未领取请先点击领取。(若已领取请跳过)

实验产生的费用优先使用优惠券,优惠券使用完毕后需您自行承担。

实验步骤
1、服务部署
点击链接,进入部署页面
按下图设置【服务实例名称】、【地域】、【实例密码】
服务实例名称:test(可自定义命名)
地域:华东2(上海)
实例密码:Sjtu@520
说明输入实例密码时请注意大小写,请记住您设置的实例名称及对应密码,后续实验过程会用到。
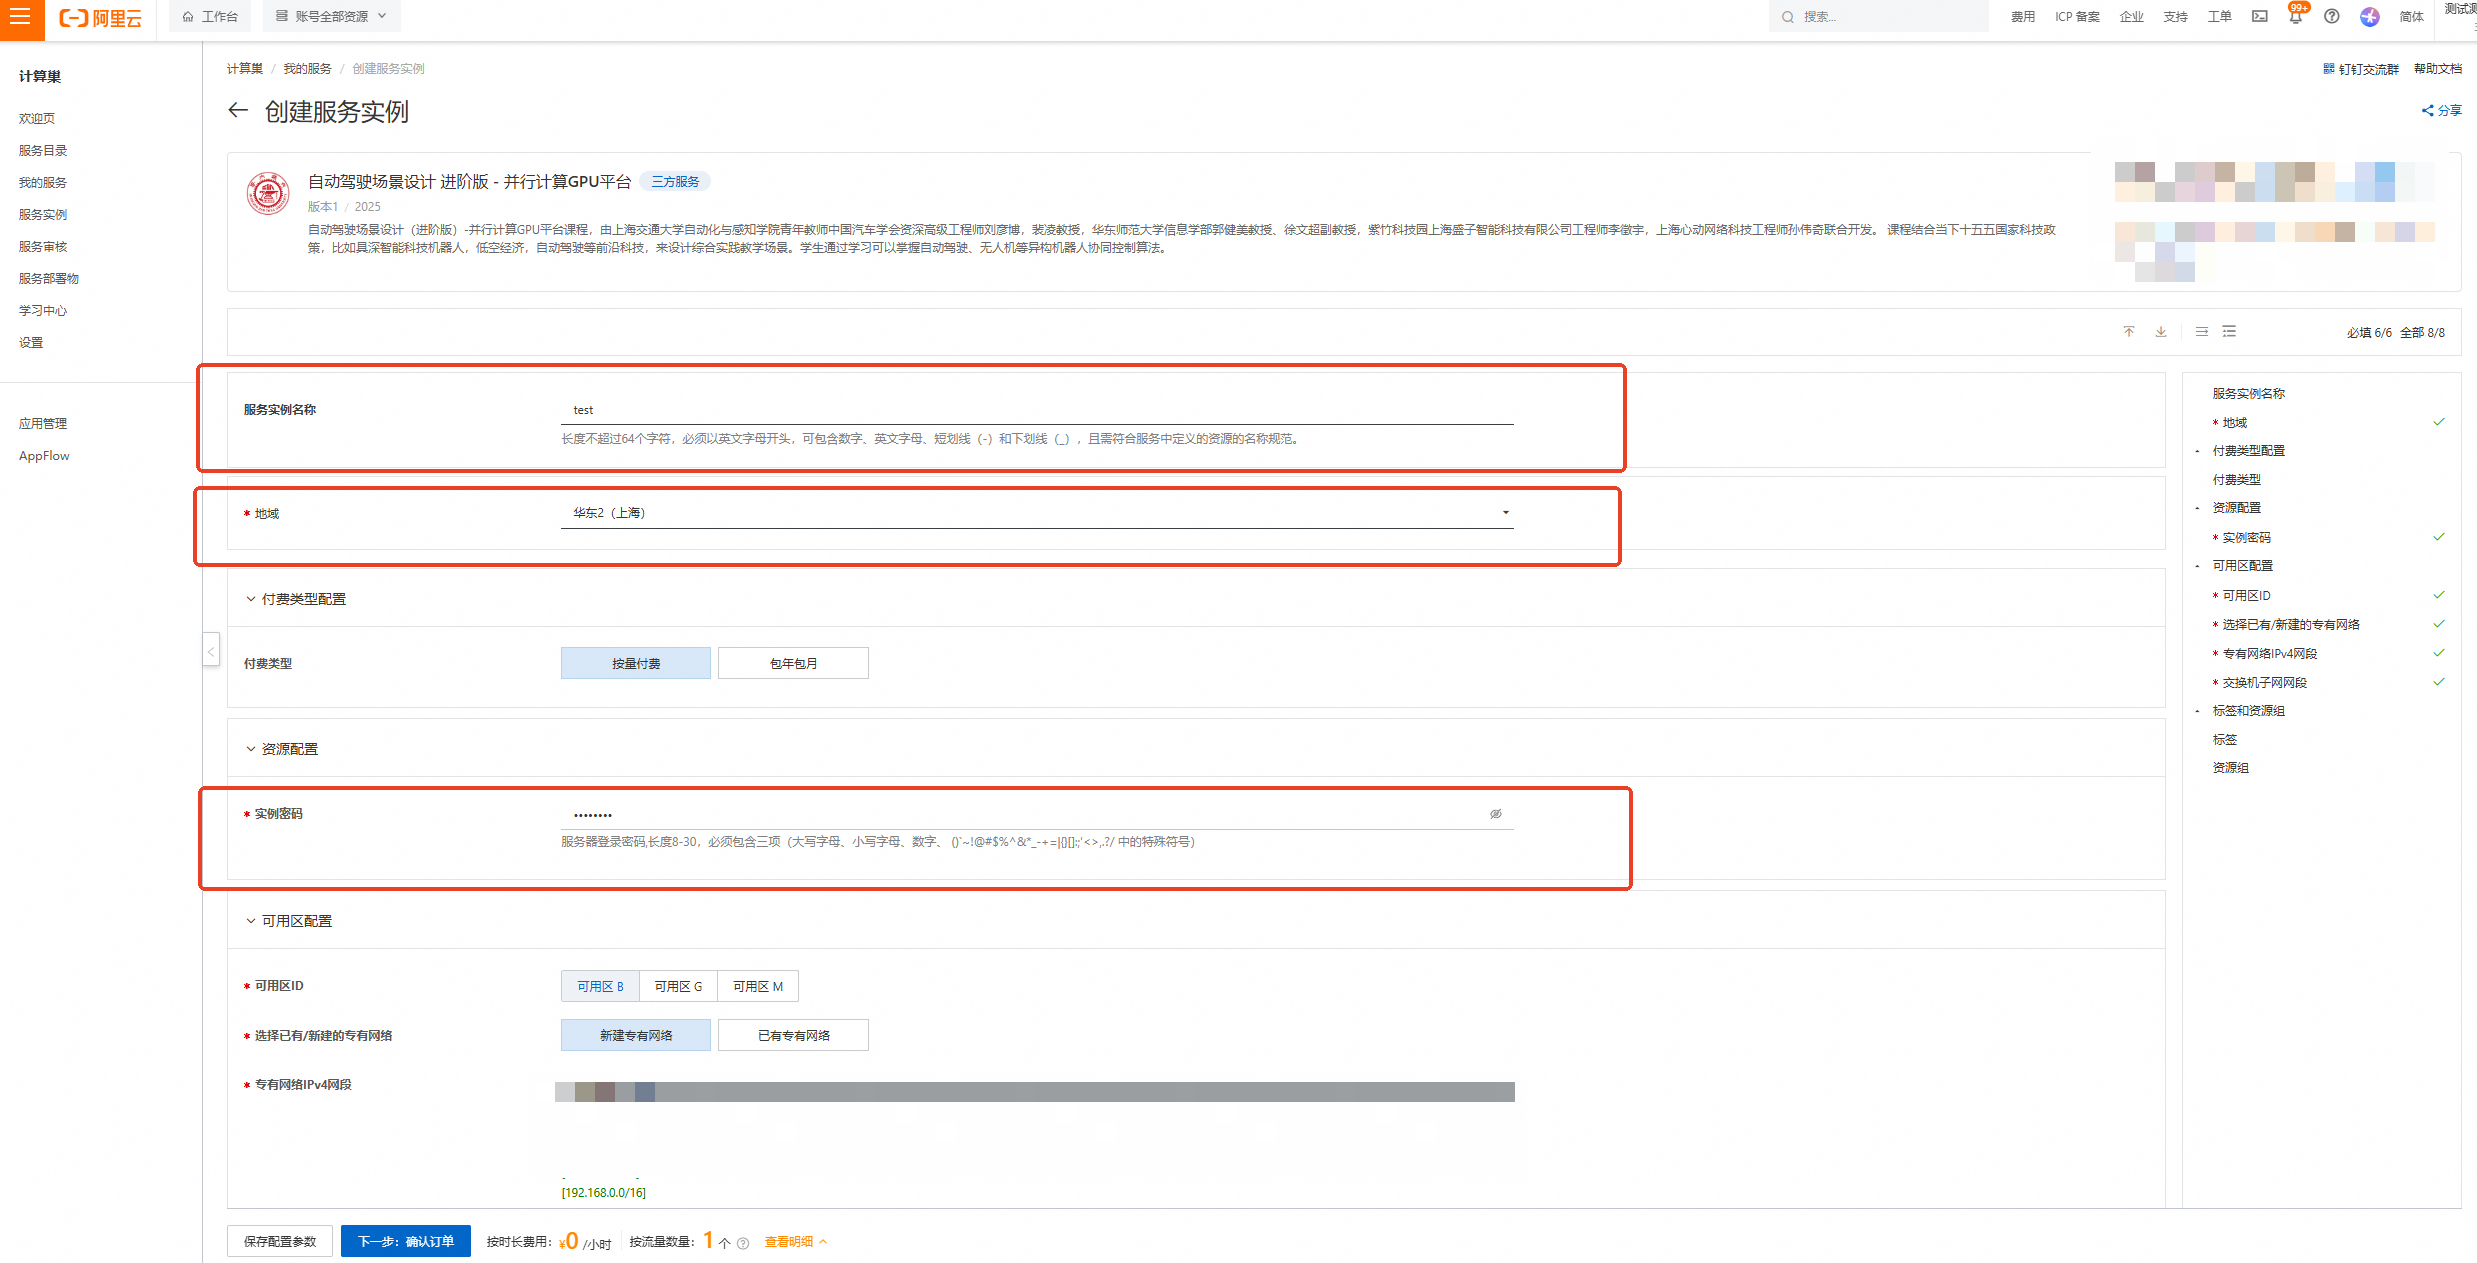
完成填写后点击【下一步:确认订单】

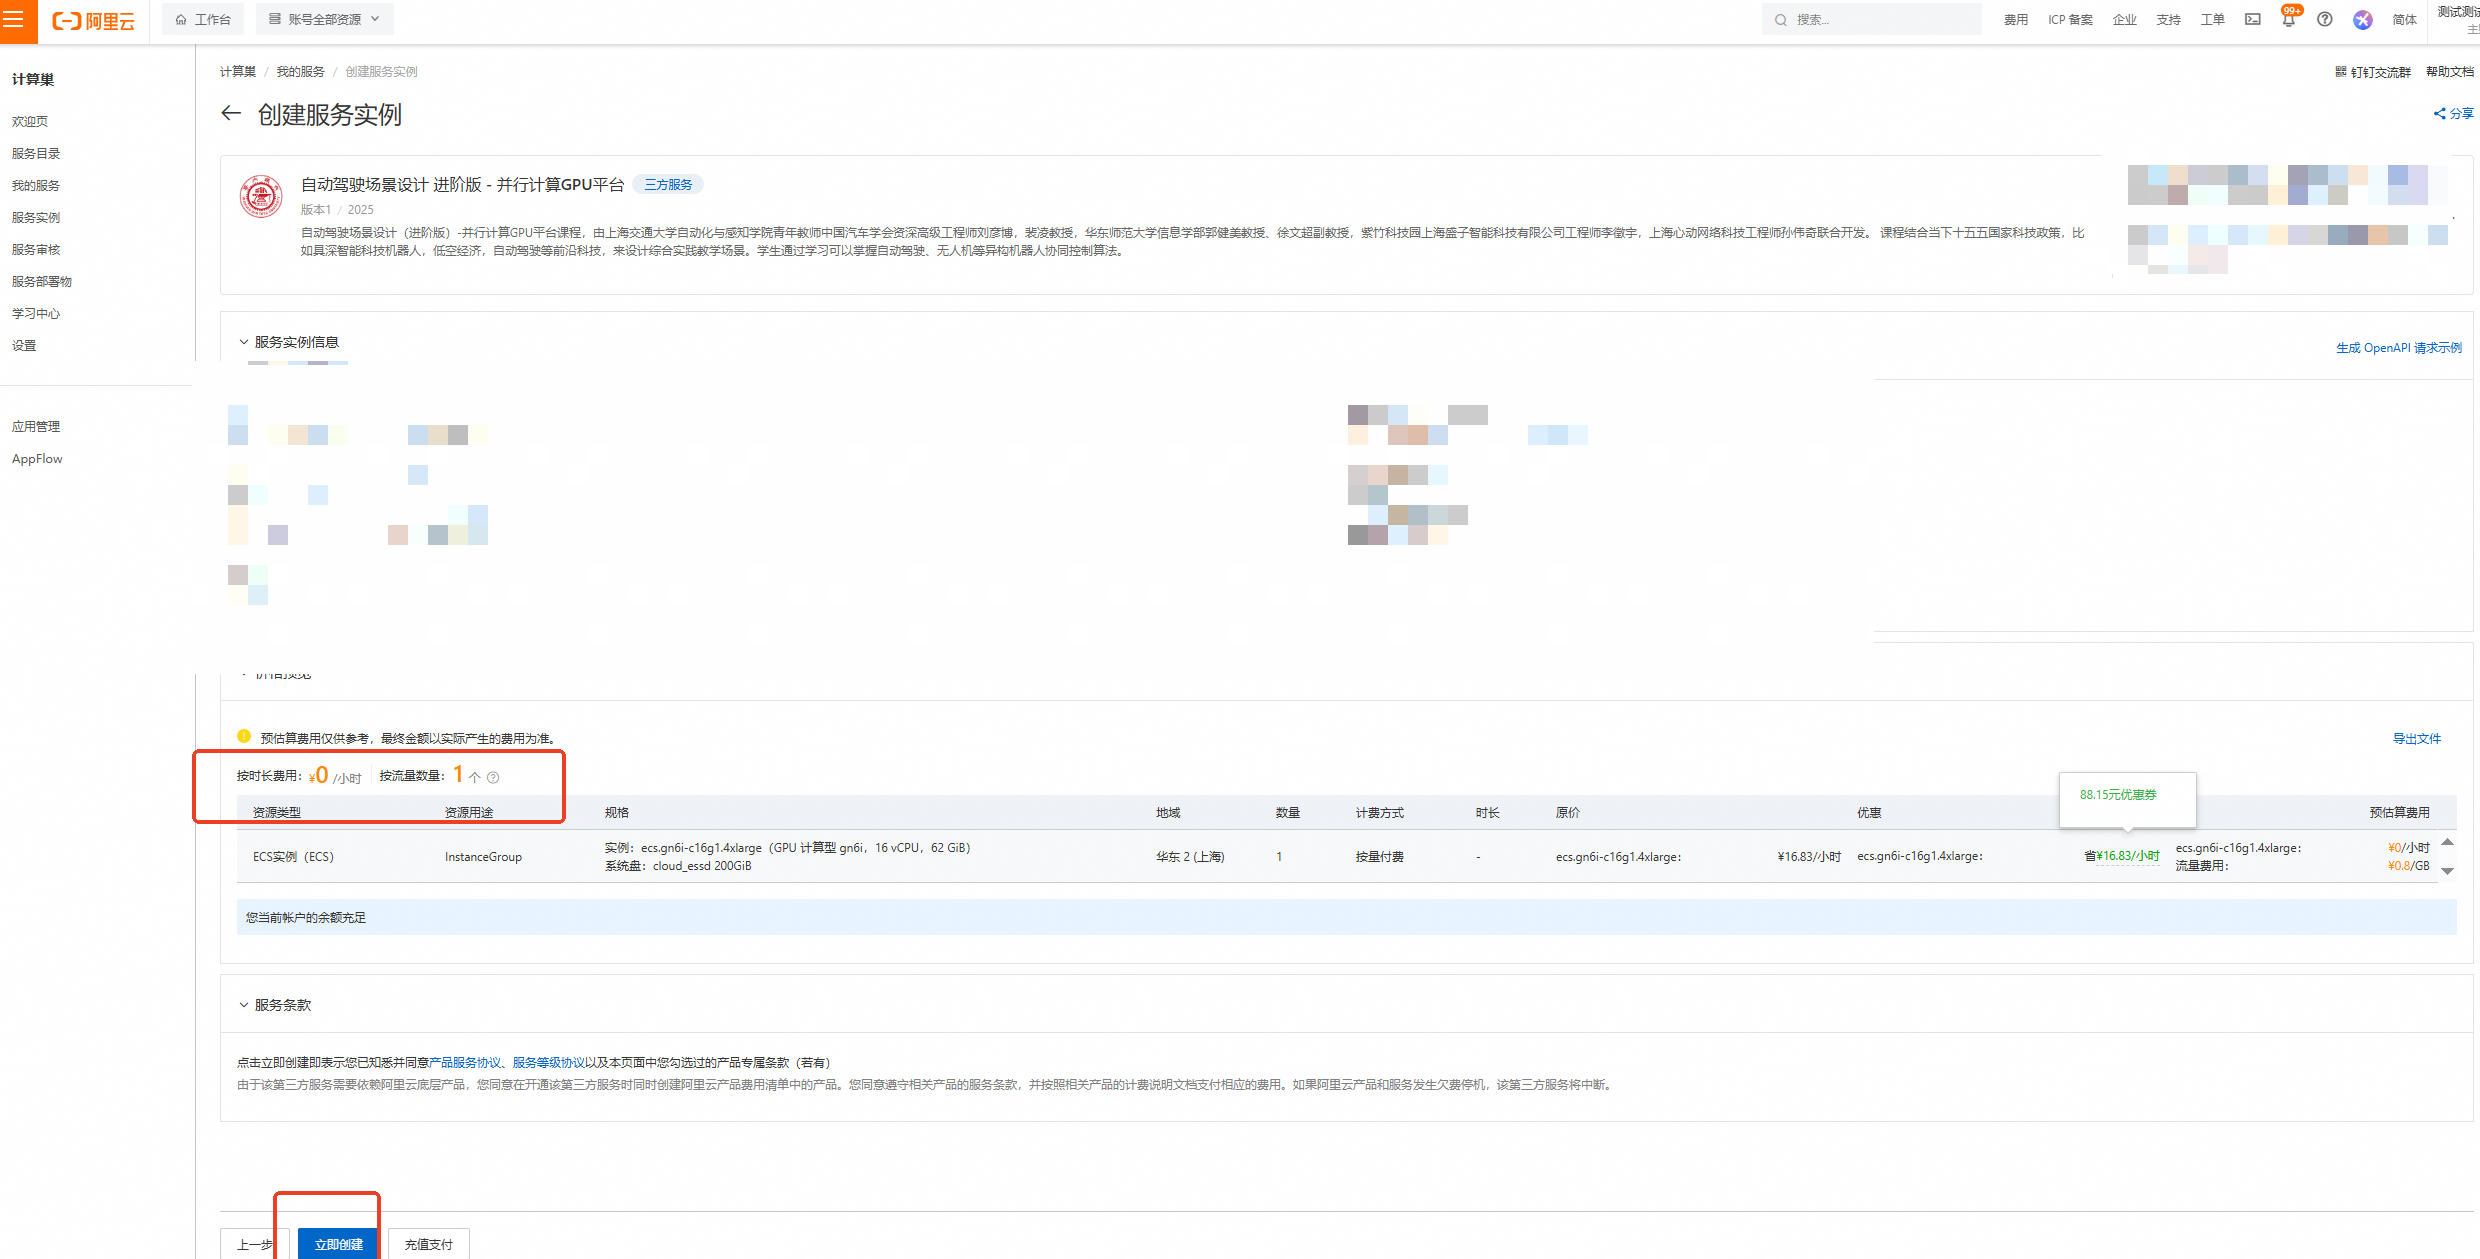
核对实例信息及价格预览,无误请点击【立即创建】
 重要
重要领取300元优惠券后,资源应为0元/小时,且会提示【您当前账户的余额充足】!若提示余额不足等,请检查是否正确领取优惠券
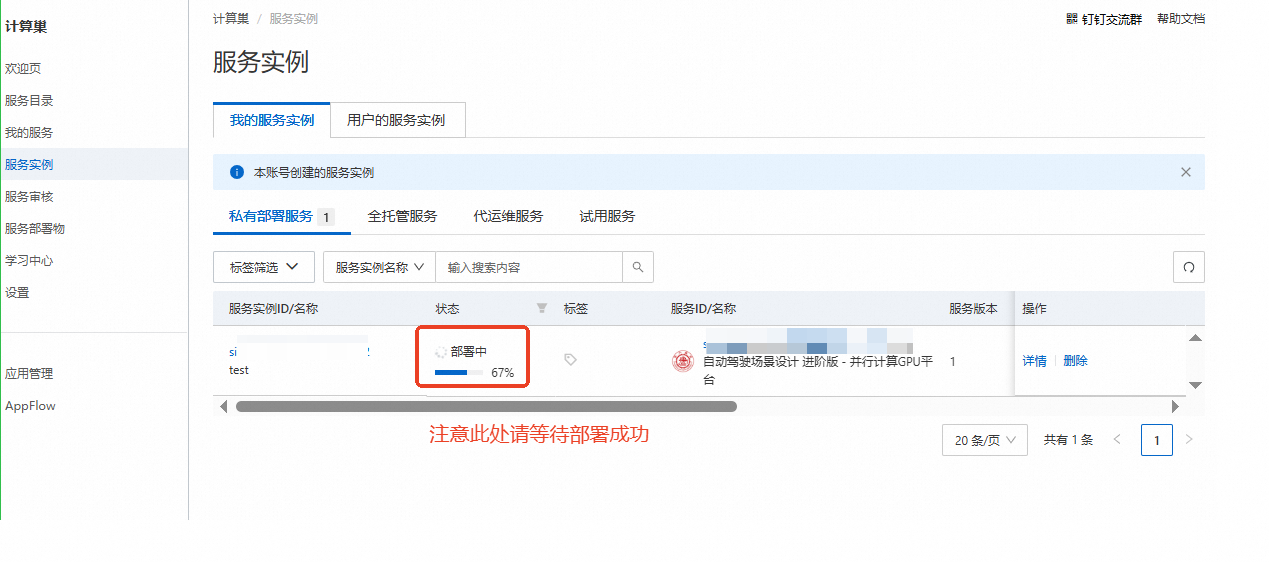
创建成功,点击【去列表查看】
查看实例,并等待部署
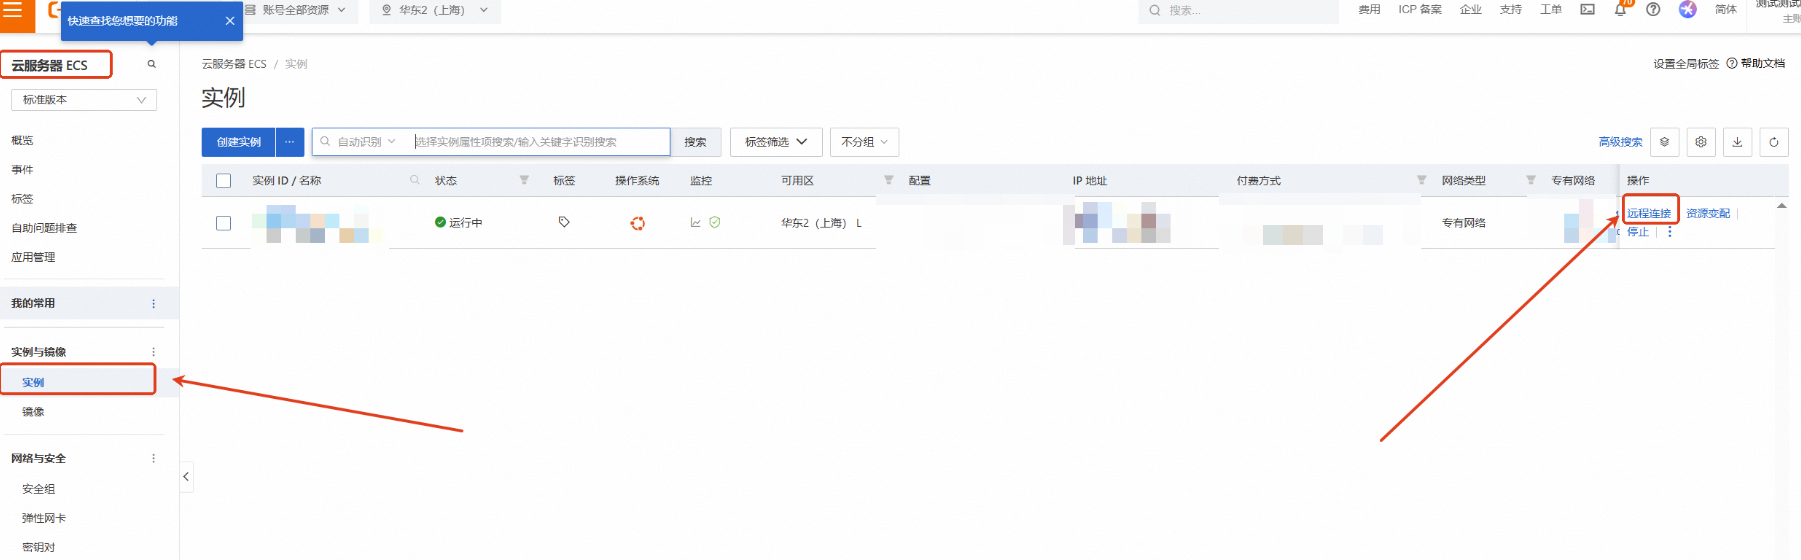
点击左侧的图标展开目录,选择目录中的【云服务器ECS】
云服务器ECS—实例—远程连接
下拉展开更多登录方式,选择【通过VNC远程连接】
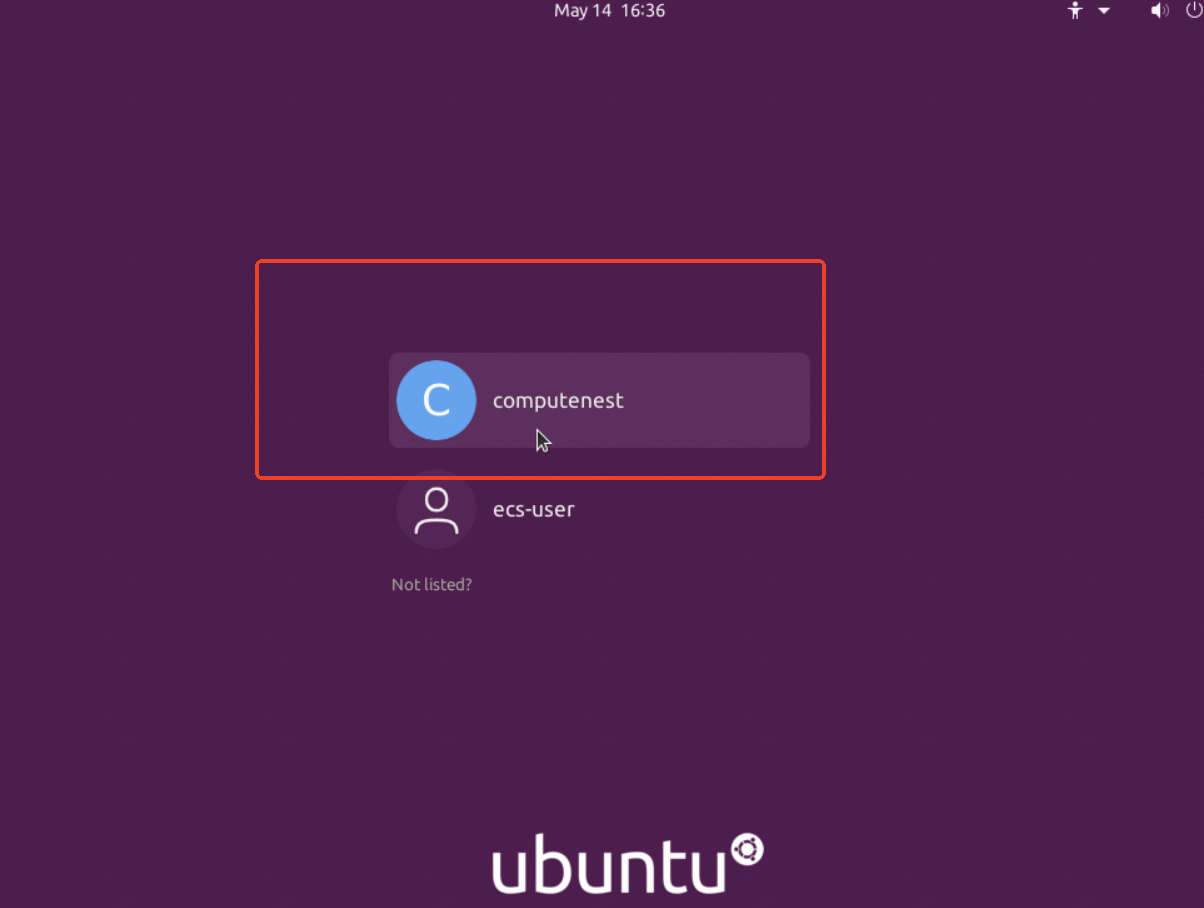
选择computenest,并输入实例密码:computenest,回车
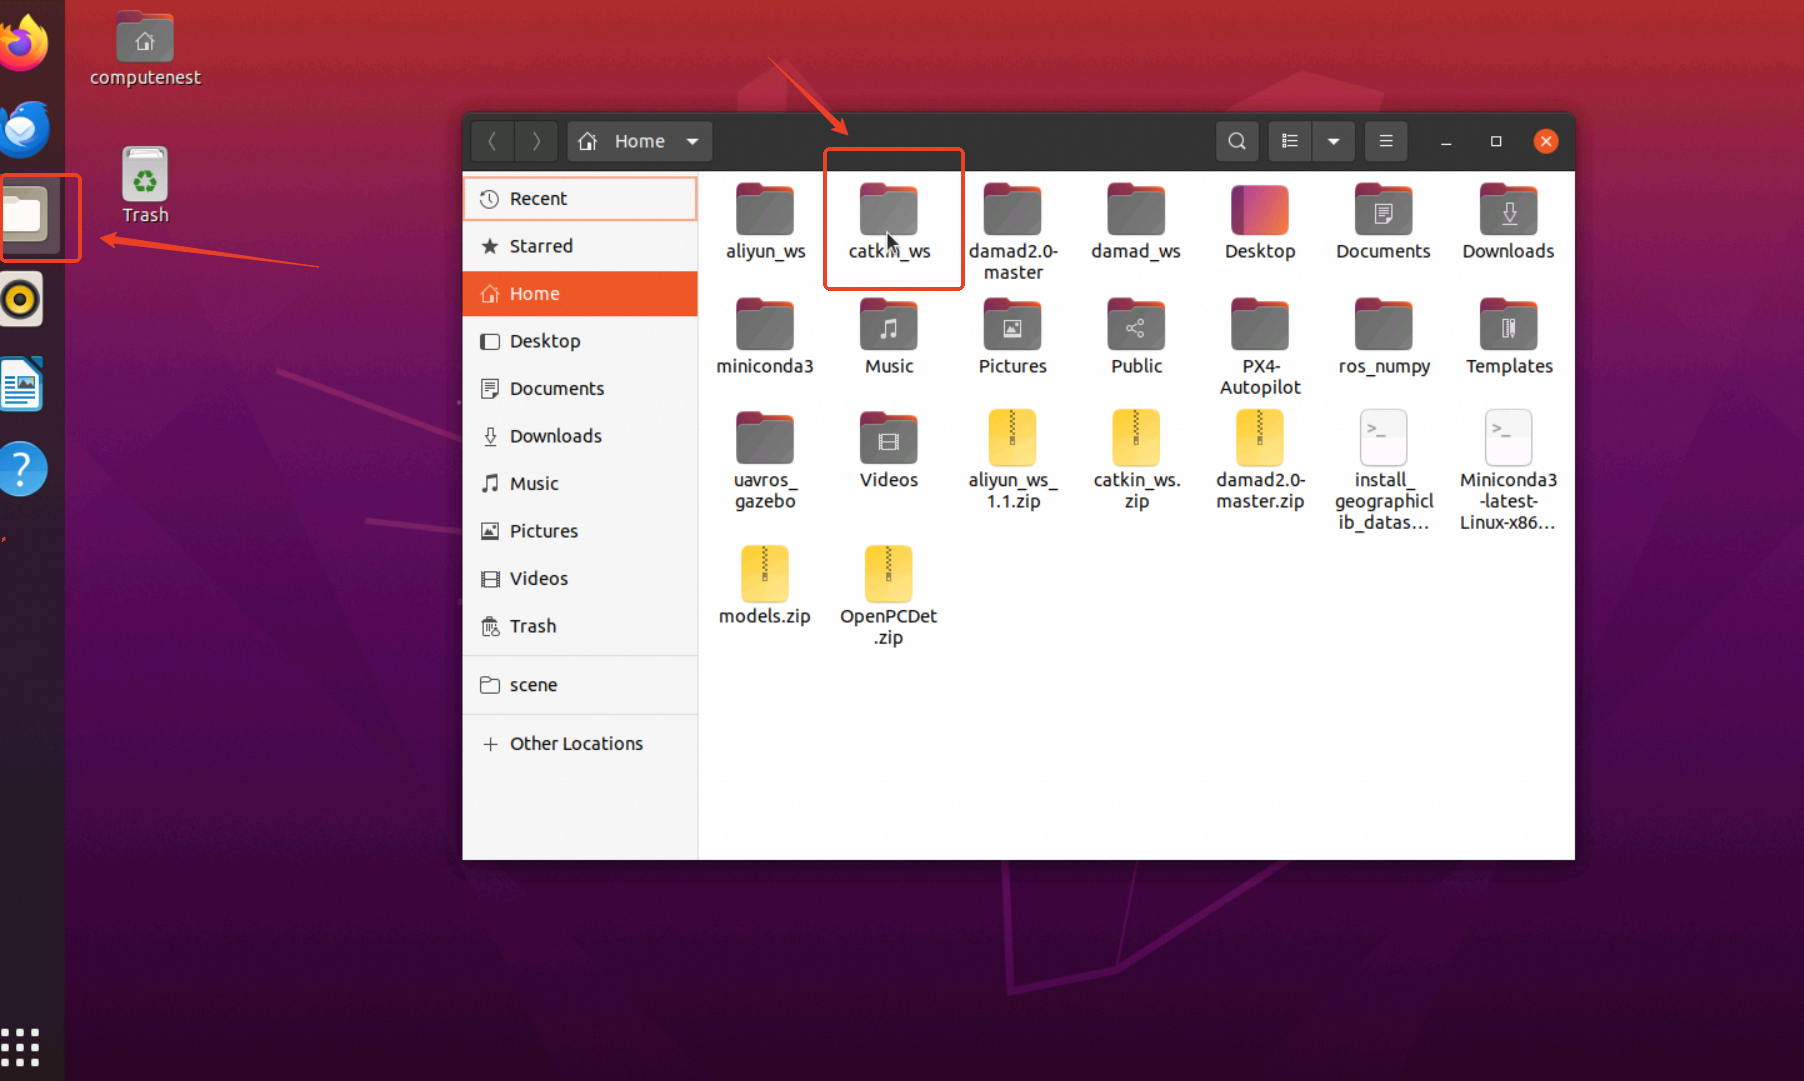
进入镜像后,点击左侧第3个图标,打开文件夹后点击catkin_ws文件夹
进入catkin_ws文件夹,在空白处点击鼠标右键,选择Open in Terminal
2、代码部分
生成gazebo仿真环境需要调用spawn.launch
<launch> <!-- 定义启动文件中的参数 --> <arg name="paused" default="false"/> <!-- 是否暂停仿真,默认为false --> <arg name="use_sim_time" default="true"/> <!-- 是否使用仿真时间,默认为true --> <arg name="gui" default="true"/> <!-- 是否启动GUI,默认为true --> <arg name="headless" default="false"/> <!-- 是否无头模式,默认为false --> <arg name="debug" default="false"/> <!-- 是否调试模式,默认为false --> <arg name="verbose" default="false"/> <!-- 是否详细输出,默认为false --> <arg name="model" value="$(find site_model)/urdf/car.urdf"/> <!-- 机器人的URDF模型路径 --> <!-- Start gazebo and load the world --> <include file="$(find gazebo_ros)/launch/empty_world.launch" > <arg name="paused" value="$(arg paused)"/> <arg name="use_sim_time" value="$(arg use_sim_time)"/> <arg name="gui" value="$(arg gui)"/> <arg name="headless" value="$(arg headless)"/> <arg name="debug" value="$(arg debug)"/> <arg name="verbose" value="$(arg verbose)"/> </include> <!-- Spawn the site --> <node name="tf_footprint_base" pkg="tf" type="static_transform_publisher" args="0 0 0 0 0 0 base_link base_footprint 40" /> <arg name="gpu" default="false"/> <arg name="organize_cloud" default="false"/> <param name="robot_description" command="$(find xacro)/xacro --inorder '$(find site_model)/urdf/site_model.urdf.xacro' organize_cloud:=$(arg organize_cloud) gpu:=$(arg gpu)" /> <node pkg="gazebo_ros" type="spawn_model" name="spawn_model" args="-urdf -param /robot_description -model site_model"/> <node pkg="robot_state_publisher" type="robot_state_publisher" name="robot_state_publisher"> <param name="publish_frequency" type="double" value="30.0" /> </node> <node name="fake_joint_calibration" pkg="rostopic" type="rostopic" args="pub /calibrated std_msgs/Bool true"/> <!-- 从yaml文件加载联合控制器的参数 --> <rosparam file="$(find pkg)/config/ctrl.yaml" command="load"/> <!-- 加载机器人模型描述参数 --> <group ns="car1"> <param name="robot_description" textfile="$(find pkg)/urdf/car1.urdf"/> <node name= "robot_state_publisher" pkg= "robot_state_publisher" type= "robot_state_publisher"> <param name="publish_frequency" type="double" value="20.0" /> </node> <node name="urdf_spawner" pkg="gazebo_ros" type="spawn_model" respawn="false" output="screen" args="-urdf -model car1 -param robot_description -x -1.5 -y -3 -z 0.05"/> <node name="controller_manager" pkg="controller_manager" type="spawner" respawn="true" output="screen" ns="/car1" args="left_rear_wheel_velocity_controller right_rear_wheel_velocity_controller left_front_wheel_velocity_controller right_front_wheel_velocity_controller left_steering_hinge_position_controller right_steering_hinge_position_controller joint_state_controller"/> </group> <group ns="car2"> <param name="robot_description" textfile="$(find pkg)/urdf/car2.urdf"/> <node name= "robot_state_publisher" pkg= "robot_state_publisher" type= "robot_state_publisher"> <param name="publish_frequency" type="double" value="20.0" /> </node> <node name="urdf_spawner" pkg="gazebo_ros" type="spawn_model" respawn="false" output="screen" args="-urdf -model car2 -param robot_description -x -1.5 -y -4 -z 0.05"/> <node name="controller_manager" pkg="controller_manager" type="spawner" respawn="true" output="screen" ns="/car2" args="left_rear_wheel_velocity_controller right_rear_wheel_velocity_controller left_front_wheel_velocity_controller right_front_wheel_velocity_controller left_steering_hinge_position_controller right_steering_hinge_position_controller joint_state_controller"/> </group> <node pkg="site_model" type="ServoCommands.py" name="ServoCommands" output="screen"/> </launch>场景生成后调用camera_listener.py激活激光雷达周围的相机。
#!/usr/bin/env python3 # 指定脚本使用系统环境中的 Python 3 解释器执行 ############################################################# # This py file subscribe the topic of cameras and publish # # the integrated information. # ############################################################# # 脚本功能描述:订阅相机话题并发布整合后的信息 import rospy # 导入 ROS Python 客户端库,用于与 ROS 系统交互 from sensor_msgs.msg import Image # 导入 ROS 的 Image 消息类型,用于接收相机数据 from msgs.msg._MsgCamera import * # camera msgs class # 导入自定义的相机消息类型 MsgCamera import std_msgs.msg # 导入 ROS 的标准消息类型,用于消息头部的定义 import numpy as np # 导入 NumPy 模块,用于数值计算 import message_filters # 导入 message_filters 库,用于同步多个话题的消息 def camera_listener(image11, image12, image13, image14, image41, image42, image43, image44): """ 回调函数,用于处理接收到的摄像头图像,并将其集成到一个消息中。 :param image11: 第一组相机图像 :param image12: 第二组相机图像 :param image13: 第三组相机图像 :param image14: 第四组相机图像 :param image41: 第五组相机图像 :param image42: 第六组相机图像 :param image43: 第七组相机图像 :param image44: 第八组相机图像 """ # 创建消息对象 msgcamera = MsgCamera() # 创建一个 MsgCamera 消息对象,用于整合所有相机数据 mark = [image11, image12, image13, image14, image41, image42, image43, image44] # 将所有相机消息放入一个列表中 for i in mark: msgcamera.camera.append(i) # 将每个相机消息添加到 MsgCamera 消息对象的 camera 列表中 # 添加时间戳 msgcamera.header = std_msgs.msg.Header() # 创建一个标准消息头部对象 msgcamera.header.stamp = rospy.Time.now() # 设置消息的时间戳为当前时间 # Publish pub = rospy.Publisher("/camera_msgs_combined", MsgCamera, queue_size=1) # 创建一个发布者,用于发布整合后的相机消息,话题名为 "/camera_msgs_combined" pub.publish(msgcamera) # 发布整合后的相机消息 if __name__ == '__main__': # 主程序入口,确保脚本直接运行时执行以下代码 rospy.init_node('camera_listener', anonymous=True) # 初始化 ROS 节点,节点名为 'camera_listener',anonymous=True 表示节点名唯一 sub_image_11 = message_filters.Subscriber('/image_raw_11', Image) # 创建一个订阅者,订阅话题 '/image_raw_11',消息类型为 Image sub_image_12 = message_filters.Subscriber('/image_raw_12', Image) # 创建一个订阅者,订阅话题 '/image_raw_12',消息类型为 Image sub_image_13 = message_filters.Subscriber('/image_raw_13', Image) # 创建一个订阅者,订阅话题 '/image_raw_13',消息类型为 Image sub_image_14 = message_filters.Subscriber('/image_raw_14', Image) # 创建一个订阅者,订阅话题 '/image_raw_14',消息类型为 Image sub_image_41 = message_filters.Subscriber('/image_raw_41', Image) # 创建一个订阅者,订阅话题 '/image_raw_41',消息类型为 Image sub_image_42 = message_filters.Subscriber('/image_raw_42', Image) # 创建一个订阅者,订阅话题 '/image_raw_42',消息类型为 Image sub_image_43 = message_filters.Subscriber('/image_raw_43', Image) # 创建一个订阅者,订阅话题 '/image_raw_43',消息类型为 Image sub_image_44 = message_filters.Subscriber('/image_raw_44', Image) # 创建一个订阅者,订阅话题 '/image_raw_44',消息类型为 Image sync = message_filters.ApproximateTimeSynchronizer([sub_image_11, sub_image_12, sub_image_13, sub_image_14, sub_image_41, sub_image_42, sub_image_43, sub_image_44], 10, 1) # 创建一个时间同步器,用于同步来自多个相机的消息,队列大小为 10,时间差阈值为 1 秒 sync.registerCallback(camera_listener) # 注册回调函数 camera_listener,当同步器接收到所有相机的消息时调用该函数 print("Camera Listener Begin.") # 打印提示信息,表示相机监听器已启动 rospy.spin() # 进入 ROS 事件循环,保持节点运行,直到节点被关闭随后调用pointcloud_listener.py激活激光雷达。
#!/usr/bin/env python3 # 指定脚本使用系统环境中的 Python 3 解释器执行 ############################################################# # This py file subscribe the topic of lidars and output a # # list of them. # ############################################################# # 脚本功能描述:订阅激光雷达话题并输出它们的列表 import rospy # 导入 ROS Python 客户端库,用于与 ROS 系统交互 import std_msgs.msg # 导入 ROS 的标准消息类型,用于消息头部的定义 import message_filters # 导入 message_filters 库,用于同步多个话题的消息 from sensor_msgs.msg import PointCloud2 # 导入 ROS 的 PointCloud2 消息类型,用于接收激光雷达数据 # self-defined msg from msgs.msg._ListPointCloud import * # 导入自定义的 ListPointCloud 消息类型 def pointcloud_listener(cloud11, cloud12, cloud2): """ 回调函数,用于处理接收到的点云数据,并将其集成到一个消息中。 :param cloud11: 第一组点云数据 :param cloud12: 第二组点云数据 :param cloud2: 第三组点云数据 """ msgcloud = ListPointCloud() # 创建一个 ListPointCloud 消息对象,用于整合所有激光雷达数据 msgcloud.pointcloud.append(cloud11) # 将第一个激光雷达的点云消息添加到 ListPointCloud 消息对象的 pointcloud 列表中 msgcloud.pointcloud.append(cloud12) # 将第二个激光雷达的点云消息添加到 ListPointCloud 消息对象的 pointcloud 列表中 msgcloud.pointcloud.append(cloud2) # 将第三个激光雷达的点云消息添加到 ListPointCloud 消息对象的 pointcloud 列表中 # Add time stamp msgcloud.header = std_msgs.msg.Header() # 创建一个标准消息头部对象 msgcloud.header.stamp = rospy.Time.now() # 设置消息的时间戳为当前时间 # Publish pub = rospy.Publisher("/pointcloud_list", ListPointCloud, queue_size=1) # 创建一个发布者,用于发布整合后的激光雷达消息,话题名为 "/pointcloud_list" pub.publish(msgcloud) # 发布整合后的激光雷达消息 if __name__ == '__main__': # 主程序入口,确保脚本直接运行时执行以下代码 rospy.init_node('lidar_listener', anonymous=True) # 初始化 ROS 节点,节点名为 'lidar_listener',anonymous=True 表示节点名唯一 sub_cloudpts_11 = message_filters.Subscriber('/velodyne1_points', PointCloud2) # 创建一个订阅者,订阅话题 '/velodyne1_points',消息类型为 PointCloud2 sub_cloudpts_12 = message_filters.Subscriber('/velodyne2_points', PointCloud2) # 创建一个订阅者,订阅话题 '/velodyne2_points',消息类型为 PointCloud2 sub_cloudpts_2 = message_filters.Subscriber('/velodyne3_points', PointCloud2) # 创建一个订阅者,订阅话题 '/velodyne3_points',消息类型为 PointCloud2 sync = message_filters.ApproximateTimeSynchronizer([sub_cloudpts_11, sub_cloudpts_12, sub_cloudpts_2], 10, 1) # 创建一个时间同步器,用于同步来自多个激光雷达的消息,队列大小为 10,时间差阈值为 1 秒 sync.registerCallback(pointcloud_listener) # 注册回调函数 pointcloud_listener,当同步器接收到所有激光雷达的消息时调用该函数 print("PointCloud List Begin.") # 打印提示信息,表示激光雷达监听器已启动 rospy.spin() # 进入 ROS 事件循环,保持节点运行,直到节点被关闭随后调用pointcloud_combiner合并所有点云并固定其坐标。
/*########################################################### # This py file subscribe the topic of lidars and publish # # the integrated information. # ###########################################################*/ #include <ros/ros.h> // 包含 ROS 核心库 #include <sensor_msgs/PointCloud2.h> // 包含 ROS 的 PointCloud2 消息类型 #include <pcl_conversions/pcl_conversions.h> // 包含 PCL 与 ROS 消息转换的库 #include <pcl/io/pcd_io.h> // 包含 PCL 的 I/O 操作库 #include <pcl/point_cloud.h> // 包含 PCL 点云库 #include <pcl/filters/statistical_outlier_removal.h> // 包含 PCL 的统计离群值去除库 #include <pcl/filters/extract_indices.h> // 包含 PCL 的索引提取库 #include <pcl/sample_consensus/method_types.h> // 包含 PCL 的样本一致性方法类型库 #include <pcl/sample_consensus/model_types.h> // 包含 PCL 的样本一致性模型类型库 #include <pcl/segmentation/sac_segmentation.h> // 包含 PCL 的样本一致性分割库 #include <pcl/ModelCoefficients.h> // 包含 PCL 的模型系数库 #include <pcl/point_types.h> // 包含 PCL 的点类型库 #include <msgs/ListPointCloud.h> // 包含自定义的 ListPointCloud 消息类型 using namespace std; // 使用标准命名空间 typedef pcl::PointXYZI PointT; // 定义点云格式为 XYZI typedef pcl::PointCloud<PointT> PointCloudT; // 定义点云类型为 PointCloudT #define lidar11_x -0.55740706 // 定义第一个激光雷达的 x 偏移量 #define lidar11_y 1.25432157 // 定义第一个激光雷达的 y 偏移量 #define lidar11_z 0.006 // 定义第一个激光雷达的 z 偏移量 #define lidar12_x 0.43254243 // 定义第二个激光雷达的 x 偏移量 #define lidar12_y 0.26437207 // 定义第二个激光雷达的 y 偏移量 #define lidar12_z 0.006 // 定义第二个激光雷达的 z 偏移量 #define lidar2_x 9.74248361e-04 // 定义第三个激光雷达的 x 偏移量 #define lidar2_y -9.89292350e-01 // 定义第三个激光雷达的 y 偏移量 #define lidar2_z 1.91780397e-01 // 定义第三个激光雷达的 z 偏移量 class pointcloud_combiner // 定义点云合并类 { private: ros::NodeHandle nh; // ROS 节点句柄 ros::Publisher pub; // ROS 发布者 ros::Subscriber sub; // ROS 订阅者 public: pointcloud_combiner() // 构造函数 { pub = nh.advertise<sensor_msgs::PointCloud2>("/point_cloud_combined", 1); // 初始化发布者,发布话题为 "/point_cloud_combined" sub = nh.subscribe("/pointcloud_list", 1, &pointcloud_combiner::callback, this); // 初始化订阅者,订阅话题为 "/pointcloud_list" } void callback(const msgs::ListPointCloud& pointcloud_list) // 回调函数,处理接收到的点云消息 { // define pointcloud type: sensor_msgs::PointCloud2 sensor_msgs::PointCloud2 cloud11, cloud12, cloud2; // 定义三个点云消息对象 cloud11 = pointcloud_list.pointcloud[0]; // 获取第一个激光雷达的点云消息 cloud12 = pointcloud_list.pointcloud[1]; // 获取第二个激光雷达的点云消息 cloud2 = pointcloud_list.pointcloud[2]; // 获取第三个激光雷达的点云消息 // Transform cloud from type sensor_msgs::PointCloud2 to pcl::PointCloud PointCloudT cloud11_pcl, cloud12_pcl, cloud2_pcl; // 定义三个 PCL 点云对象 pcl::fromROSMsg(cloud11, cloud11_pcl); // 将第一个点云消息转换为 PCL 点云 pcl::fromROSMsg(cloud12, cloud12_pcl); // 将第二个点云消息转换为 PCL 点云 pcl::fromROSMsg(cloud2, cloud2_pcl); // 将第三个点云消息转换为 PCL 点云 // 调整点云位置 for(int i=0;i<cloud2_pcl.points.size();i++) // 遍历第三个激光雷达的点云 { // cloud11 if(i<cloud11_pcl.points.size()) // 如果当前索引在第一个激光雷达点云范围内 { cloud11_pcl.points[i].x += lidar11_x; // 调整第一个激光雷达点云的 x 坐标 cloud11_pcl.points[i].y += lidar11_y; // 调整第一个激光雷达点云的 y 坐标 cloud11_pcl.points[i].z += lidar11_z; // 调整第一个激光雷达点云的 z 坐标 } // cloud12 if(i<cloud12_pcl.points.size()) // 如果当前索引在第二个激光雷达点云范围内 { cloud12_pcl.points[i].x += lidar12_x; // 调整第二个激光雷达点云的 x 坐标 cloud12_pcl.points[i].y += lidar12_y; // 调整第二个激光雷达点云的 y 坐标 cloud12_pcl.points[i].z += lidar12_z; // 调整第二个激光雷达点云的 z 坐标 } cloud2_pcl.points[i].x += lidar2_x; // 调整第三个激光雷达点云的 x 坐标 cloud2_pcl.points[i].y += lidar2_y; // 调整第三个激光雷达点云的 y 坐标 cloud2_pcl.points[i].z += lidar2_z; // 调整第三个激光雷达点云的 z 坐标 } // 合并点云并去除地面 PointCloudT cloud = cloud11_pcl + cloud12_pcl + cloud2_pcl; // 合并三个激光雷达的点云 PointCloudT cloud_filtered, cloud_segmented; // 定义过滤后的点云和分割后的点云 //剔除离群值 pcl::StatisticalOutlierRemoval<pcl::PointXYZI> statFilter; // 创建统计离群值去除对象 statFilter.setInputCloud(cloud.makeShared()); // 设置输入点云 statFilter.setMeanK(10); // 设置均值 K 值 statFilter.setStddevMulThresh(0.2); // 设置标准差乘数阈值 statFilter.filter(cloud_filtered); // 执行滤波,输出过滤后的点云 //RANSAC算法 分割 pcl::ModelCoefficients coefficients;//初始化模型系数 pcl::PointIndices::Ptr inliers(new pcl::PointIndices());//初始化索引参数 pcl::SACSegmentation<pcl::PointXYZI> segmentation;//创建算法 segmentation.setModelType(pcl::SACMODEL_PLANE);//设置分割模型为平面模型 segmentation.setMethodType(pcl::SAC_RANSAC);//设置迭代算法 segmentation.setMaxIterations(1000);//设置最大迭代次数 segmentation.setDistanceThreshold(0.01);//设置最大距离阈值 segmentation.setInputCloud(cloud_filtered.makeShared());//输入点云(已经过滤波和降采样) segmentation.segment(*inliers, coefficients);//输出点云结果 ×inliers是结果点云的索引,coe是模型系数 //发布模型系数 pcl_msgs::ModelCoefficients ros_coefficients; // 定义 ROS 模型系数消息 pcl_conversions::fromPCL(coefficients, ros_coefficients);//pcl->msg //发布抽样的内点索引 pcl_msgs::PointIndices ros_inliers; // 定义 ROS 内点索引消息 pcl_conversions::fromPCL(*inliers, ros_inliers); // 将 PCL 内点索引转换为 ROS 消息 //创建分割点云,从点云中提取内点 pcl::ExtractIndices<pcl::PointXYZI> extract; // 创建索引提取对象 extract.setInputCloud(cloud_filtered.makeShared()); // 设置输入点云 extract.setIndices(inliers); // 设置索引 extract.setNegative(true); // 提取外点 extract.filter(cloud_segmented); // 执行提取,输出分割后的点云 cout << "Combined cloud size: " << cloud_segmented.points.size() << endl; // 打印合并后的点云大小 // 发布合并后的点云 ros::Publisher pub = nh.advertise<sensor_msgs::PointCloud2>("/point_cloud_combined", 1); // 初始化发布者 sensor_msgs::PointCloud2 output; // 定义输出点云消息 pcl::toROSMsg(cloud_segmented, output); // 将 PCL 点云转换为 ROS 消息 output.header.frame_id = "point_cloud"; // 设置消息的坐标系 output.header.stamp = ros::Time::now(); // 设置消息的时间戳 pub.publish(output); // 发布合并后的点云 消息 } }; int main (int argc, char **argv) // 主函数 { ros::init (argc, argv, "pointcloud_combiner"); // 初始化 ROS 节点,节点名为 "pointcloud_combiner" pointcloud_combiner ptc; // 创建点云合并对象 cout << "Pointcloud Combine Begin." << endl; // 打印提示信息,表示点云合并开始 ros::spin(); // 进入 ROS 事件循环 return 0; // 返回 0,表示程序正常退出 }分别调用ServoCommands.py和KeyControl.py控制小车行驶。
ServoCommand.py如下:
#!/usr/bin/python3 # 指定脚本使用 Python 3 解释器执行 import rospy # 导入 ROS Python 客户端库,用于与 ROS 系统交互 from std_msgs.msg import Float64 # 导入 ROS 标准消息类型 Float64,用于发布浮点数数据 from ackermann_msgs.msg import AckermannDriveStamped # 导入 AckermannDriveStamped 消息类型,用于接收速度和转向命令 def set_throttle_steer(data): # 定义回调函数,用于处理接收到的 AckermannDriveStamped 消息 # 创建发布者对象,用于向各个车轮速度控制器发布速度命令 pub_vel_left_rear_wheel = rospy.Publisher("/car1/left_rear_wheel_velocity_controller/command", Float64, queue_size=10) pub_vel_right_rear_wheel = rospy.Publisher("/car1/right_rear_wheel_velocity_controller/command", Float64, queue_size=10) pub_vel_left_front_wheel = rospy.Publisher("/car1/left_front_wheel_velocity_controller/command", Float64, queue_size=10) pub_vel_right_front_wheel = rospy.Publisher("/car1/right_front_wheel_velocity_controller/command", Float64, queue_size=10) # 创建发布者对象,用于向转向控制器发布转向角度命令 pub_pos_left_steering_hinge = rospy.Publisher("/car1/left_steering_hinge_position_controller/command", Float64, queue_size=10) pub_pos_right_steering_hinge = rospy.Publisher("/car1/right_steering_hinge_position_controller/command", Float64, queue_size=10) # 从接收到的消息中提取速度值,并乘以 28 进行缩放 throttle = data.drive.speed * 28 # 从接收到的消息中提取转向角度值 steer = data.drive.steering_angle # 向四个车轮的速度控制器发布速度命令 pub_vel_left_rear_wheel.publish(throttle) pub_vel_right_rear_wheel.publish(throttle) pub_vel_left_front_wheel.publish(throttle) pub_vel_right_front_wheel.publish(throttle) # 向两个转向控制器发布转向角度命令 pub_pos_left_steering_hinge.publish(steer) pub_pos_right_steering_hinge.publish(steer) def servo_commands(): # 定义主函数,用于初始化 ROS 节点并订阅消息 # 初始化 ROS 节点,节点名称为 'servo_commands1',anonymous=True 表示节点名称会自动添加唯一后缀 rospy.init_node('servo_commands1', anonymous=True) # 订阅 "/car1/ackermann_cmd_mux/output" 主题,接收 AckermannDriveStamped 消息,并调用 set_throttle_steer 回调函数处理 rospy.Subscriber("/car1/ackermann_cmd_mux/output", AckermannDriveStamped, set_throttle_steer) # 保持节点运行,等待消息并调用回调函数 rospy.spin() if __name__=='__main__': # 主程序入口,确保脚本直接运行时执行以下代码 try: # 调用 servo_commands 函数,启动 ROS 节点 servo_commands() except rospy.ROSInternalException: # 捕获 ROS 内部异常并忽略,防止程序崩溃 passKeyControl.py如下:
#! /usr/bin/env python # 指定脚本使用系统环境中的 Python 解释器执行 import rospy # 导入 ROS Python 客户端库,用于与 ROS 系统交互 import sys, select, termios, tty # 导入系统、终端设置和终端输入输出相关的库 from ackermann_msgs.msg import AckermannDriveStamped # 导入 AckermannDriveStamped 消息类型,用于发布速度和转向命令 def getKey(): # 定义函数,用于从终端获取单个按键输入 tty.setraw(sys.stdin.fileno()) # 设置终端为原始模式,禁用行缓冲和特殊字符处理 select.select([sys.stdin], [], [], 0) # 监听标准输入,等待用户按键 key = sys.stdin.read(1) # 读取用户按下的单个字符 termios.tcsetattr(sys.stdin, termios.TCSADRAIN, settings) # 恢复终端原始设置 return key # 返回用户按下的字符 settings = termios.tcgetattr(sys.stdin) # 获取当前终端设置并保存到变量 settings 中 def pub_cmd(): # 定义主函数,用于发布速度和转向命令 index = 1 # 定义车辆索引,默认为 1 rospy.init_node("pub_cmd") # 初始化 ROS 节点,节点名称为 "pub_cmd" # rospy.set_param("Car Index", 1) # 注释掉的代码:设置 ROS 参数 "Car Index" 为 1 pub = rospy.Publisher("/car"+str(index)+"/ackermann_cmd_mux/output", AckermannDriveStamped, queue_size=10) # 创建发布者对象,用于向指定主题发布 AckermannDriveStamped 消息 akm = AckermannDriveStamped() # 创建 AckermannDriveStamped 消息对象 while 1: # 进入无限循环,持续监听键盘输入 x=0 # 初始化速度变量,默认为 0 a=0 # 初始化转向角度变量,默认为 0 key = getKey() # 调用 getKey 函数获取用户按下的按键 rospy.loginfo("键盘已录入:%s", key) # 记录日志,显示用户按下的按键 if key == 'w': # 如果按下 'w' 键,设置前进速度 x=0.3 a=0 elif key == 's': # 如果按下 's' 键,设置后退速度 x=-0.3 a=0 elif key == 'a': # 如果按下 'a' 键,设置左转 x=0.3 a=0.7 elif key == 'd': # 如果按下 'd' 键,设置右转 x=0.3 a=-0.7 elif key == 'x': # 如果按下 'x' 键,停止车辆 x=0 a=0 elif key == 'o': # 如果按下 'o' 键,退出循环 break else: # 如果按下其他键,跳过当前循环 continue # akm.drive.speed = x*6.97674 # 注释掉的代码:将速度值乘以 6.97674 进行缩放 akm.drive.speed = x # 设置消息中的速度值 akm.drive.steering_angle = a*0.7 # 设置消息中的转向角度值,并乘以 0.7 进行缩放 # akm.drive.jerk = 2 # 注释掉的代码:设置消息中的 jerk 值 pub.publish(akm) # 发布消息到指定主题 if __name__=="__main__": # 主程序入口,确保脚本直接运行时执行以下代码 pub_cmd() # 调用 pub_cmd 函数,启动 ROS 节点 pass # 占位符,无实际作用调用src.LidCamFusion.fusion运行相机-激光雷达融合程序。
#!/usr/bin/env python3
#############################################################
# 多传感器融合节点 - 激光雷达与摄像头数据融合系统               #
# 功能:                                                    #
# 1. 激光雷达点云与摄像头图像的时间同步                      #
# 2. 基于深度学习的3D目标检测与2D视觉检测                    #
# 3. 多模态数据融合与目标跟踪                                #
# 4. 实时可视化与性能评估                                    #
#############################################################

# ======================= 模块导入 ========================
# 标准库
from pathlib import Path  # 路径处理
import argparse  # 命令行参数解析
import yaml  # YAML配置文件解析
import os  # 系统接口
import time  # 时间处理
import numpy as np  # 数值计算

# ROS相关
import rospy  # ROS Python接口
from termcolor import colored  # 终端彩色输出
import message_filters  # 消息同步
import ros_numpy  # ROS消息与numpy转换

# ROS消息类型
from visualization_msgs.msg import MarkerArray  # RViz可视化标记
from sensor_msgs.msg import PointCloud2  # 点云数据
from nav_msgs.msg import Odometry  # 里程计数据

# 自定义消息
from msgs.msg._MsgCamera import *  # 摄像头复合消息
from msgs.msg._MsgLidCam import *  # 融合结果消息
from msgs.msg._MsgLidCamObject import *  # 目标对象消息

# 项目模块
from .OpenPCDet.tools.pred import *  # 点云3D检测模型
from ..utils.yolo.yolo import YOLO  # YOLO视觉检测器
from ..utils.poi_and_roi import (  # 感兴趣区域处理
    pointcloud_roi,
    image_roi
)
from ..utils.visualization import (  # 可视化工具
    lidar_camera_match2visual,
    display_rviz
)
from ..utils.evaluation import eval3d  # 评估模块
from ..utils.common_utils import (  # 通用工具
    get_gt_boxes3d,
    label2camera,
    label2camera_
)
from ..utils.transform import (  # 坐标变换
    lidar2pixel,
    box_to_corner_3d,
    get_dpm,
    p2w,
    world2pixel
)

# ====================== 核心函数注释 ======================
def fusion(pointcloud=None, msgcamera=None, odom=None, counter=None):
    """
    多传感器数据融合主函数

    参数:
        pointcloud (PointCloud2): ROS点云消息,包含XYZ坐标和强度
        msgcamera (MsgCamera): 包含8个摄像头画面的复合消息
        odom (Odometry): 里程计数据,用于评估模式下的真值获取
        counter (int): 评估模式下的数据采样索引

    处理流程:
        1. 数据预处理(评估模式加载样本/实时模式转换ROS消息)
        2. 点云3D目标检测与ROI提取
        3. 图像2D目标检测与ROI提取
        4. 多模态目标匹配(基于IoU的关联匹配)
        5. 融合优化(位置修正/航向角优化)
        6. 结果发布与可视化处理

    输出:
        发布融合结果到/lidar_camera_fused话题
    """
    global start_time  # 用于帧率计算的时间戳

    # ----------------- 数据预处理分支 -----------------
    if params.eval:  # 评估模式
        # 加载预存点云样本(N,4)[x,y,z,intensity]
        pcd_path = os.path.join(ROOT_DIR/'dataset'/'test_dataset'/'pcd', f'{counter}.txt')
        points = np.loadtxt(pcd_path)

        # 加载8个摄像头图像(PIL格式)
        img_dir = ROOT_DIR/'dataset'/'test_dataset'/'img'/str(counter)
        images = [Image.fromarray(cv2.imread(str(img_dir/f'{num}.jpg')))
                for num in range(8)]
        odom = odoms[counter]  # 加载对应的里程计数据
    else:  # 实时模式
        # 校验输入消息类型[5]
        assert isinstance(pointcloud, PointCloud2), "Invalid pointcloud type"
        assert isinstance(msgcamera, MsgCamera), "Invalid camera message type"

        # 初始化ROS发布器(队列长度1保证实时性)
        pub_lidcam = rospy.Publisher("/lidar_camera_fused", MsgLidCam, queue_size=1)

        # 转换ROS点云为numpy数组(N,4)
        points = convert_ros_pointcloud_to_numpy(pointcloud)

        # 提取8个摄像头画面
        images = [img for img in msgcamera.camera]

    # --------------- 点云处理流程 ---------------
    # 3D目标检测获取预测框(boxes3d)、类别标签和置信度
    pred_boxes3d, pred_labels, pred_scores = pointcloud_detector.get_pred_dicts(points, False)

    # 提取感兴趣区域(返回相机编号、3D角点、像素坐标)
    cameras, pred_corners3d, pixel_poses = pointcloud_roi(calib, pred_boxes3d)

    # --------------- 图像处理流程 ---------------
    # 对每个摄像头画面进行YOLO检测(返回[left, top, right, bottom, score, class])
    pred_boxes2d = [image_roi(img, yolo) for img in images]

    # --------------- 评估模式处理 ---------------
    gt_boxes3d = gt_cameras = gt_corners3d = gt_pixel_poses = None
    if params.savem or params.re:  # 需要保存匹配结果或在线评估
        assert isinstance(odom, (Odometry, np.ndarray)), "Invalid odom type"
        # 获取真值3D边界框(来自里程计或预存数据)
        gt_boxes3d = get_gt_boxes3d(odom)
        # 提取真值感兴趣区域
        gt_cameras, gt_corners3d, gt_pixel_poses = pointcloud_roi(calib, gt_boxes3d)

    # --------------- 多模态匹配 ---------------
    iou_thresh = config['lid_cam_fusion']['iou_thresh']  # 从配置获取IoU阈值
    # 执行匹配算法(返回匹配列表、未匹配图像/雷达目标)
    match, image, lidar, vehicles = get_match(cameras, pixel_poses, pred_boxes2d, iou_thresh)

    # --------------- 融合优化 ---------------
    # 优化3D边界框位置和姿态
    updated_boxes3d, updated_corners3d, updated_pixel_poses = get_fusion(
        match, pred_boxes2d, pred_boxes3d,
        pred_corners3d, pred_scores, pixel_poses
    )

    # --------------- 实时结果发布 ---------------
    if not params.eval:
        # 生成ROS融合消息
        msglidcam = get_msgldcam(match, updated_boxes3d, image, lidar)
        # 发布到指定话题
        pub_lidcam.publish(msglidcam)
        fps = get_fps()  # 计算帧率

    # --------------- 评估模块 ---------------
    # TODO: 支持多评估器并行[3]
    if params.eval or params.re:
        eval.eval(odom, pred_boxes3d, updated_boxes3d, pred_scores)

    # --------------- 可视化处理 ---------------
    if params.disp:  # RViz可视化
        # 生成3D边界框标记
        marker_array = display_rviz(pred_corners3d, vehicles, gt_corners3d)
        pub_marker = rospy.Publisher('/display_rviz', MarkerArray, queue_size=1)
        pub_marker.publish(marker_array)

    # --------------- 终端输出 ---------------
    if params.printl:  # 打印激光雷达检测结果
        print2screen_lidar(pred_boxes3d, pred_labels, pred_scores)
    if params.printm:  # 打印匹配结果
        print2screen_match(match, image, lidar)

    # --------------- 结果保存 ---------------
    if params.savem:  # 保存匹配可视化结果
        output_dir = str(ROOT_DIR / config['output']['LidCamFusion_dir'])
        lidar_camera_match2visual(
            match, image, lidar, pred_boxes2d,
            pixel_poses, msgcamera, output_dir,
            gt_cameras, gt_pixel_poses
        )

def get_fps():
    """计算实时帧率(单位:FPS)[5]"""
    global start_time
    cur_time = time.time()
    time_span = cur_time - start_time
    start_time = cur_time  # 重置计时器
    return 1 / time_span

# ====================== 匹配算法 ======================
def get_match(cameras, pixel_poses, boxes2d, iou_thresh):
    """
    多模态目标匹配算法[2,5]

    参数:
        cameras (list): 各目标可见的摄像头编号列表
        pixel_poses (list): 3D框在图像平面的投影坐标
        boxes2d (list): 各摄像头的2D检测框列表
        iou_thresh (float): 匹配阈值

    返回:
        match (list): 匹配对列表[cam_num, vehicle_num, ...]
        image (list): 未匹配的2D检测目标
        lidar (list): 未匹配的3D检测目标
        vehicles (list): 已匹配的车辆索引

    算法流程:
        1. 初始化匹配状态标签
        2. 遍历每个3D目标,寻找最优2D匹配
        3. 根据IoU阈值筛选有效匹配
        4. 记录未匹配目标
    """
    match = []  # 匹配成功对列表
    vehicles = []  # 已匹配车辆索引
    labels_set = []  # 2D框匹配状态(0未匹配,1已匹配)

    # 初始化2D框状态标签
    for camera in range(len(boxes2d)):
        labels = [0] * len(boxes2d[camera])
        labels_set.append(labels)

    # 遍历每个3D目标
    for vehicle, pixel_pose in enumerate(pixel_poses):
        # 遍历该目标可见的摄像头
        for i, camera in enumerate(cameras[vehicle]):
            box2d = boxes2d[camera-1]  # 获取对应摄像头2D检测
            labels = labels_set[camera-1]

            # 生成3D框的2D投影边界
            bbox = get_bbox_from_box3d(pixel_pose[i])

            if len(box2d) != 0:
                # 计算IoU矩阵
                iou2ds = get_iou2d(bbox, box2d, labels, iou_thresh)
                valid_indices = np.where(iou2ds != -1)[0]

                if len(valid_indices) > 0:
                    # 获取最大IoU索引
                    idx = np.argmax(iou2ds)
                    if iou2ds[idx] >= iou_thresh:
                        labels_set[camera-1][idx] = 1  # 标记为已匹配
                        if vehicle not in vehicles:
                            vehicles.append(vehicle)
                            # 记录匹配信息:摄像头号,车辆号,分数等
                            cur_match = [camera, vehicle, i, idx, box2d[idx][4]]
                            match.append(cur_match)

    # 收集未匹配的2D目标
    image = []
    for camera in range(len(boxes2d)):
        cur_image = [camera+1]
        for box, label in zip(boxes2d[camera], labels_set[camera]):
            if not label:
                cur_image.append(box)
        image.append(cur_image)

    # 收集未匹配的3D目标
    lidar = []
    for vehicle in range(len(pixel_poses)):
        if vehicle not in vehicles:
            lidar.append([cameras[vehicle], vehicle])

    return match, image, lidar, vehicles

# ====================== 几何计算 ======================
def get_bbox_from_box3d(pixel_pose):
    """
    从3D框投影坐标生成2D边界框[5]

    参数:
        pixel_pose (np.array): 3D框8个角点的像素坐标

    返回:
        np.array: [x_min, y_min, x_max, y_max]
    """
    W = config['camera']['width']
    H = config['camera']['height']

    x_coords = pixel_pose[:,0]
    y_coords = pixel_pose[:,1]

    # 边界裁剪(防止超出图像范围)
    x_min = max(np.min(x_coords), 0)
    x_max = min(np.max(x_coords), W)
    y_min = max(np.min(y_coords), 0)
    y_max = min(np.max(y_coords), H)

    return np.array([x_min, y_min, x_max, y_max])

def get_iou2d(boxa, boxesb, labels, iou_thresh):
    """
    计算2D IoU(交并比)[5]

    参数:
        boxa (np.array): 3D投影的2D边界框
        boxesb (list): 2D检测框列表
        labels (list): 2D框匹配状态
        iou_thresh (float): 有效阈值

    返回:
        np.array: 各2D框的IoU值(无效匹配标记为-1)
    """
    W = config['camera']['width']
    H = config['camera']['height']

    def single_iou(a, b):
        """计算两个矩形的交并比"""
        # 交集坐标计算
        x1 = max(a[0], b[0], 0)
        y1 = max(a[1], b[1], 0)
        x2 = min(a[2], b[2], W)
        y2 = min(a[3], b[3], H)

        # 面积计算
        inter_area = max(0, x2 - x1) * max(0, y2 - y1)
        a_area = (a[2]-a[0])*(a[3]-a[1])
        b_area = (b[2]-b[0])*(b[3]-b[1])

        return inter_area / (a_area + b_area - inter_area + 1e-6)  # 防除零

    iou_list = []
    for box, label in zip(boxesb, labels):
        if not label:  # 仅处理未匹配的框
            iou = single_iou(boxa, box)
            iou = iou if iou >= iou_thresh else -1
        else:
            iou = -1
        iou_list.append(iou)

    return np.array(iou_list)

def get_fusion(match, boxes2d, boxes3d_origin, corners3d_origin, scores3d, pixels_poses_origin):
    """
    多模态数据融合优化函数

    参数:
        match: 匹配列表 [摄像头编号, 雷达目标编号, 摄像头视角编号, 2D框编号, 置信度]
        boxes2d: 所有摄像头的2D检测框集合
        boxes3d_origin: 原始雷达3D边界框 [x,y,z,l,w,h,ry]
        corners3d_origin: 3D框角点坐标
        scores3d: 雷达检测置信度
        pixels_poses_origin: 3D框在图像平面的投影坐标

    返回:
        优化后的3D框、角点坐标和像素投影

    功能:
        1. 根据匹配关系融合激光雷达和摄像头数据
        2. 修正3D框的水平位置和旋转角度
        3. 应用加权融合策略(摄像头和雷达权重)
    """
    import copy
    # 深拷贝防止修改原始数据
    boxes3d = copy.deepcopy(boxes3d_origin)        # 3D边界框 [N,7]
    corners3d = copy.deepcopy(corners3d_origin)    # 角点坐标 [N,8,3]
    pixels_poses = copy.deepcopy(pixels_poses_origin)  # 像素投影坐标 [N,M,8,2]

    # 摄像头安装位置补偿系数(根据物理安装位置预设)
    xcameras = np.array([-2, 4, 6, -8])  # X轴方向补偿系数
    ycameras = np.array([1, -3, -5, 7])   # Y轴方向补偿系数

    # 遍历所有匹配对
    for obj in match:
        # 解析匹配参数
        camera_num, vehicle_num, camera_num_vehicle, box2d_num, score2d = obj
        box2d = boxes2d[camera_num-1][box2d_num]  # 获取对应的2D检测框
        # 提取当前目标的3D信息
        box3d = boxes3d[vehicle_num]              # [x,y,z,l,w,h,ry]
        corner3d = corners3d[vehicle_num]        # 8个角点坐标
        score3d = scores3d[vehicle_num]           # 雷达检测置信度
        pixel_pose = pixels_poses[vehicle_num][camera_num_vehicle]  # 当前视角的像素投影

        # 截断检测(排除部分可见目标)
        if is_truncated(box2d, pixel_pose):
            continue  # 跳过截断目标

        # 获取融合权重配置(来自配置文件)
        CAMERA = config['lid_cam_fusion']['camera_weight']  # 摄像头权重
        LIDAR = config['lid_cam_fusion']['lidar_weight']    # 雷达权重
        assert (CAMERA+LIDAR==1), '权重和必须为1'  # 校验权重合法性

        # 初始化雷达修正向量(7个参数:x,y,z,l,w,h,ry)
        lidar_increment = np.array([0] * 7).astype(np.float64)

        # ================= 水平位置修正 =================
        # 计算投影中心坐标
        lidar_center = np.array([
            np.mean([pixel_pose[0][0], pixel_pose[1][0], pixel_pose[2][0], pixel_pose[3][0]]),  # X中心
            np.mean([pixel_pose[0][1], pixel_pose[3][1], pixel_pose[4][1], pixel_pose[7][1]])   # Y中心
        ])
        camera_center = np.array([
            np.mean([box2d[0], box2d[2]]),  # 2D框X中心(left和right的平均)
            np.mean([box2d[1], box2d[3]])   # 2D框Y中心(top和bottom的平均)
        ])

        # 计算水平偏移量(考虑摄像头权重)
        horizontal_diff = (lidar_center[0] - camera_center[0]) * CAMERA

        # X/Y轴补偿判断(根据摄像头安装位置)
        if camera_num in abs(xcameras):
            # X轴方向补偿(例如侧面摄像头)
            dpm = get_dpm(calib, camera_num, box3d[0:2], 0)  # 获取像素到米转换系数
            axis_index = np.where(abs(xcameras)==camera_num)[0][0]
            lidar_increment[1] += np.sign(xcameras[axis_index]) * dpm * horizontal_diff
        elif camera_num in abs(ycameras):
            # Y轴方向补偿(例如前视/后视摄像头)
            dpm = get_dpm(calib, camera_num, box3d[0:2], 1)
            axis_index = np.where(abs(ycameras)==camera_num)[0][0]
            lidar_increment[0] += np.sign(ycameras[axis_index]) * dpm * horizontal_diff

        # 应用位置修正
        box3d += lidar_increment          # 更新3D框参数
        corner3d[:,0:2] += lidar_increment[0:2]  # 更新角点XY坐标

        # ================= 旋转角度修正 =================
        # 重新投影计算边界框
        pixel_pose = lidar2pixel(calib, label2camera[camera_num], corner3d)
        bbox = get_bbox_from_box3d(pixel_pose)  # 获取修正后的2D投影框

        # 计算长宽比差异
        lidar_ratio = bbox[0] / bbox[1]     # 投影框宽高比
        camera_ratio = box2d[0] / box2d[1]  # 检测框宽高比

        INCREMENT_RY = 0.01  # 旋转角调整步长
        # 试探性旋转角度调整
        box3d[6] += INCREMENT_RY  # 增加旋转角
        corner3d = box_to_corner_3d(np.array([box3d]))[0]  # 生成新角点
        box3d[6] -= INCREMENT_RY  # 恢复原始值

        # 计算新投影的长宽比
        pixel_pose = lidar2pixel(calib, label2camera[camera_num], corner3d)
        bbox = get_bbox_from_box3d(pixel_pose)
        lidar_ratio_new = bbox[0] / bbox[1]

        # 判断旋转方向(顺时针/逆时针)
        anticlockwise = None
        if abs(lidar_ratio_new-camera_ratio) < abs(lidar_ratio-camera_ratio):
            anticlockwise = 1  # 逆时针
        else:
            # 反向试探
            box3d[6] -= INCREMENT_RY
            corner3d = box_to_corner_3d(np.array([box3d]))[0]
            box3d[6] -= INCREMENT_RY
            pixel_pose = lidar2pixel(calib, label2camera[camera_num], corner3d)
            bbox = get_bbox_from_box3d(pixel_pose)
            lidar_ratio_new = bbox[0] / bbox[1]
            if abs(lidar_ratio_new-camera_ratio) < abs(lidar_ratio-camera_ratio):
                anticlockwise = -1  # 顺时针

        # 迭代调整旋转角
        if anticlockwise is not None:
            is_decrease = 1  # 是否持续优化标志
            last_diff = 1e3  # 上一次差异值
            while(abs(lidar_ratio_new-camera_ratio) > abs(lidar_ratio-camera_ratio) * LIDAR and is_decrease):
                lidar_increment[6] += anticlockwise * INCREMENT_RY  # 角度累计修正量
                box3d[6] += anticlockwise * INCREMENT_RY            # 更新当前角度
                corner3d = box_to_corner_3d(np.array([box3d]))[0]  # 生成新角点
                pixel_pose = lidar2pixel(calib, label2camera[camera_num], corner3d)
                bbox = get_bbox_from_box3d(pixel_pose)
                lidar_ratio_new = bbox[0] / bbox[1]  # 计算新比例

                # 终止条件判断
                if not abs(lidar_ratio_new-camera_ratio) < last_diff:
                    is_decrease = 0
                last_diff = abs(lidar_ratio_new-camera_ratio)

    return boxes3d, corners3d, pixels_poses

def get_msgldcam(match, updated_boxes3d, image, lidar) -> MsgLidCam:
    """
    生成ROS融合消息

    参数:
        match: 匹配列表
        updated_boxes3d: 优化后的3D框集合
        image: 未匹配的摄像头目标
        lidar: 未匹配的雷达目标

    返回:
        MsgLidCam: ROS自定义消息格式

    功能:
        1. 将匹配目标分为交叉路口和环岛两类
        2. 添加未匹配的雷达目标
        3. 预留摄像头目标处理接口(TODO)
    """
    msglidcam = MsgLidCam()
    msglidcam.header.stamp = rospy.Time.now()  # 时间戳

    # 添加匹配车辆
    for obj in match:
        vehicle_num = obj[1]
        box3d = updated_boxes3d[vehicle_num]

        msglidcamobject = MsgLidCamObject()
        msglidcamobject.pos_x = box3d[0]   # X坐标
        msglidcamobject.pos_y = box3d[1]   # Y坐标
        msglidcamobject.alpha = box3d[6]  # 航向角

        # 根据Y坐标分类(交叉路口/环岛)
        if msglidcamobject.pos_y >= 0:
            msglidcam.objects_intersection.append(msglidcamobject)
            msglidcam.num_intersection += 1
        else:
            msglidcam.objects_circle.append(msglidcamobject)
            msglidcam.num_circle += 1

    # 添加未匹配雷达目标
    for obj in lidar:
        vehicle_num = obj[1]
        box3d = updated_boxes3d[vehicle_num]

        msglidcamobject = MsgLidCamObject()
        msglidcamobject.pos_x = box3d[0]
        msglidcamobject.pos_y = box3d[1]
        msglidcamobject.alpha = box3d[6]
        if msglidcamobject.pos_y >= 0:
            msglidcam.objects_intersection.append(msglidcamobject)
            msglidcam.num_intersection += 1
        else:
            msglidcam.objects_circle.append(msglidcamobject)
            msglidcam.num_circle += 1

    # TODO: 摄像头目标处理(需解决坐标转换问题)
    # for obj in image:
    #     if len(obj) != 1 and not is_truncated(obj[1]):
    #         box3d = get_boxes3d_from_boxes2d(calib, np.array(obj))
    #         ...(略)...

    return msglidcam


def get_boxes3d_from_boxes2d(center, camera_num):
    """基于2D检测框中心生成3D坐标(单目摄像头深度估计方法)
    参数:
        center: 2D框中心坐标(x,y)
        camera_num: 摄像头编号(1-8)
    返回:
        pos_wld: 世界坐标系下的3D坐标
    算法:
        1. 加载相机外参(w2c)和投影矩阵(c2p)
        2. 使用p2w函数进行逆投影计算(需预设深度值0.1米)
    """
    # 加载相机参数(来自geometry配置文件)
    w2c = np.array(geometry['cameras'][label2camera_[camera_num]]['w2c']).reshape(4,4)  # 世界到相机坐标变换矩阵
    c2p = np.array(geometry['cameras'][label2camera_[camera_num]]['c2p']).reshape(3,4)  # 相机到像素投影矩阵
    # 执行逆投影计算(假设深度为0.1米,实际应用需优化深度估计[2,6])
    pos_wld, _ = p2w(center, 0.1, w2c, c2p)
    return pos_wld

def is_truncated(box2d=None, pixel_pose=None):
    """检测目标是否被图像边界截断
    参数:
        box2d: [left, top, right, bottom] 格式的2D框
        pixel_pose: 3D框投影的像素坐标集合
    返回:
        bool: 是否发生截断
    判断逻辑:
        - 2D框越界检测
        - 3D投影点越界检测(至少有一个角点超出图像范围)
    """
    W = config['camera']['width']   # 图像宽度(如1280)
    H = config['camera']['height']  # 图像高度(如720)

    # 2D框截断检测
    if box2d is not None:
        if box2d[0] <= 0 or box2d[1] <= 0 or box2d[2] >= W or box2d[3] >= H:
            return True
    # 3D投影点截断检测
    if pixel_pose is not None:
        xaxis = np.array(pixel_pose)[:,0]
        yaxis = np.array(pixel_pose)[:,1]
        if np.min(xaxis) <= 0 or np.min(yaxis) <= 0 or np.max(xaxis) >= W or np.max(yaxis) >= H:
            return True
    return False

def convert_ros_pointcloud_to_numpy(pointcloud: PointCloud2):
    """转换ROS PointCloud2消息为numpy数组
    参数:
        pointcloud: ROS点云消息
    返回:
        points: numpy数组[N,4],包含x,y,z坐标和反射强度
    说明:
        使用ros_numpy库实现高效数据转换,保留原始点云空间信息[4]
    """
    pc = ros_numpy.numpify(pointcloud)  # ROS消息转numpy结构化数组
    points = np.zeros((pc.shape[0],4))   # 初始化输出数组
    points[:,0] = pc['x']  # X坐标
    points[:,1] = pc['y']  # Y坐标
    points[:,2] = pc['z']  # Z坐标
    # points[:,3] = pc['intensity']  # 反射强度(当前代码未启用)
    return points

def print2screen_lidar(pred_boxes3d, pred_labels, pred_scores):
    """打印LiDAR检测结果到终端
    参数:
        pred_boxes3d: 预测的3D边界框列表
        pred_labels: 类别标签(1:车辆,2:行人,3:自行车)
        pred_scores: 检测置信度
    界面设计:
        采用表格化输出,增强可读性(参考工业级可视化标准[1])
    """
    label2class = {1: 'Car', 2: 'Pedstrain', 3: 'Bicycle' }  # 类别映射表
    print("+-------------------------------------------------------------------------------------------+")
    print("num_car: ", len(pred_boxes3d))  # 输出检测总数
    for i in range(len(pred_boxes3d)):
        # 输出单目标详细信息(位置/尺寸/航向角)
        print(i+1, " ==> ", label2class[int(pred_labels[i])], "  score: ", pred_scores[i])
        print("  ", pred_boxes3d[i][0:3], " ", pred_boxes3d[i][3:6], " ", pred_boxes3d[i][6])
    print("+-------------------------------------------------------------------------------------------+\n")

def print2screen_match(match, image, lidar):
    """打印多模态匹配结果到终端
    参数:
        match: 匹配对列表
        image: 未匹配的摄像头目标
        lidar: 未匹配的雷达目标
    功能:
        调试信息输出,用于验证匹配算法有效性[7]
    """
    print("+-------------------------------------------------------------------------------------------+")
    print("match: ", match)  # 匹配对详细信息
    print("image: ", image)  # 图像未匹配目标
    print("lidar: ", lidar)  # 雷达未匹配目标
    print("+-------------------------------------------------------------------------------------------+\n")

def eval_fusion():
    """批量评估模式入口
    说明:
        加载30000帧测试数据执行离线评估(地平线测试标准[1])
    """
    limit = 30000  # 测试集规模
    counter = 0
    while(counter != limit):
        fusion(counter=counter)  # 逐帧处理
        counter += 1
    import sys
    sys.exit(0)  # 评估完成后退出


if __name__ == '__main__':
    # 初始化系统路径和参数解析器
    ROOT_DIR = Path('/home/computenest/catkin_ws/src/site_model')  # 设置项目根目录

    # 创建命令行参数解析器(支持评估模式与可视化配置)
    parser = argparse.ArgumentParser()
    parser.add_argument("--config", help="主配置文件路径", default=str(ROOT_DIR/'config/config.yaml'))  # YAML格式配置参数
    parser.add_argument("--geometry", help="传感器几何参数文件", default=str(ROOT_DIR/'config/geometry.yaml'))  # 包含相机/LiDAR外参
    parser.add_argument("--eval", help="启用离线评估模式", action='store_true')  # 从数据集加载数据而非实时流
    parser.add_argument("--gt", help="启用真值计算", action='store_true')  # 需要里程计数据支持
    parser.add_argument("--re", help="在线评估模式", action='store_true')  # 实时运行并评估
    parser.add_argument("--disp", help="启用RViz可视化", action='store_true')  # 显示3D检测框
    parser.add_argument("--savem", help="保存匹配结果", action='store_true')  # 输出融合过程图像
    parser.add_argument("--printl", help="打印LiDAR检测结果", action='store_true')  # 控制台输出
    parser.add_argument("--printm", help="打印匹配日志", action='store_true')  # 显示传感器关联信息
    params = parser.parse_args()

    # 加载主配置文件(包含算法参数)
    with open(params.config, 'r') as f:
        try:
            config = yaml.load(f, Loader=yaml.FullLoader)  # 解析YAML格式参数[1]
        except:
            print(colored('配置文件解析失败','red'))  # 异常处理
            exit(1)

    # 加载几何参数文件(传感器标定数据)
    with open(params.geometry, 'r') as z:
        try:
            geometry = yaml.load(z, Loader=yaml.FullLoader)  # 包含相机内外参矩阵[3]
        except:
            print(colored('几何参数文件错误','red'))
            exit(1)

    # 初始化检测模型
    pointcloud_detector = RT_Pred(ROOT_DIR, config)  # 基于OpenPCDet的3D检测器[5]
    yolo = YOLO(ROOT_DIR)  # YOLOv5视觉检测器(608x608输入)
    calib_dir = str(ROOT_DIR.joinpath(config['calib']['calib_dir']))  # 标定文件路径
    calib = np.loadtxt(os.path.join(calib_dir, 'calib.txt'))  # 加载外参矩阵(LiDAR到相机)

    # 评估模式初始化
    if params.eval or params.re:
        import os
        import datetime
        log_dir = str(ROOT_DIR)+'/src/LidCamFusion/eval/%s/' % datetime.datetime.now().strftime('%Y%m%d-%H%M%S')
        os.makedirs(log_dir, exist_ok=True)  # 创建带时间戳的日志目录
        eval = eval3d(log_dir)  # 初始化评估器(计算mAP/NDS指标)[4]

    # 离线评估分支(使用预存数据集)
    if params.eval:
        odoms = np.loadtxt(os.path.join(str(ROOT_DIR/'dataset/test_dataset/odom'), '30000.txt'))  # 加载3万帧真值
        eval_fusion()  # 执行批量评估流程

    # 实时运行分支
    else:
        rospy.init_node('lidar_camera_fusion', anonymous=True)  # 初始化ROS节点

        fps = 0  # 帧率计数器
        # 创建消息订阅器(LiDAR点云和相机数据)
        sub_pointcloud = message_filters.Subscriber('/point_cloud_combined', PointCloud2)  # 64线LiDAR数据
        sub_camera = message_filters.Subscriber('/camera_msgs_combined', MsgCamera)  # 8路相机同步消息

        # 带真值评估模式
        if params.savem or params.re:
            # TODO: 定义车辆数量(动态目标追踪容量)
            sub_odom = message_filters.Subscriber('/car1/base_pose_ground_truth', Odometry)  # 真值里程计
            # 创建时间同步器(1秒时间窗,0.1秒偏移容忍)[1]
            sync = message_filters.ApproximateTimeSynchronizer([sub_pointcloud, sub_camera, sub_odom], 1, 0.1)
            sync.registerCallback(fusion)  # 注册融合回调函数
            print("启动带真值评估的融合系统")
            start_time = time.time()
            rospy.spin()  # 进入ROS事件循环

        # 基础运行模式
        else:
            # 创建双传感器同步器(10Hz采样率)
            sync = message_filters.ApproximateTimeSynchronizer([sub_pointcloud, sub_camera], 1, 0.1)
            sync.registerCallback(fusion)
            print("启动基础融合系统")
            start_time = time.time()
            rospy.spin()
3、实验操作
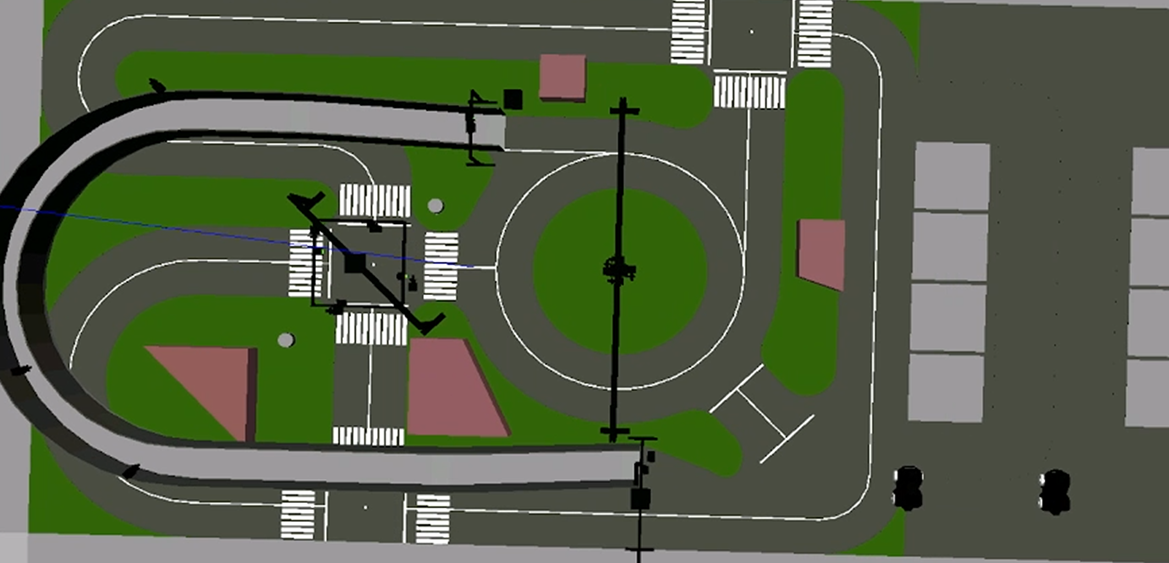
在~/catkin_ws文件夹中新建终端,输出以下命令开启仿真环境。
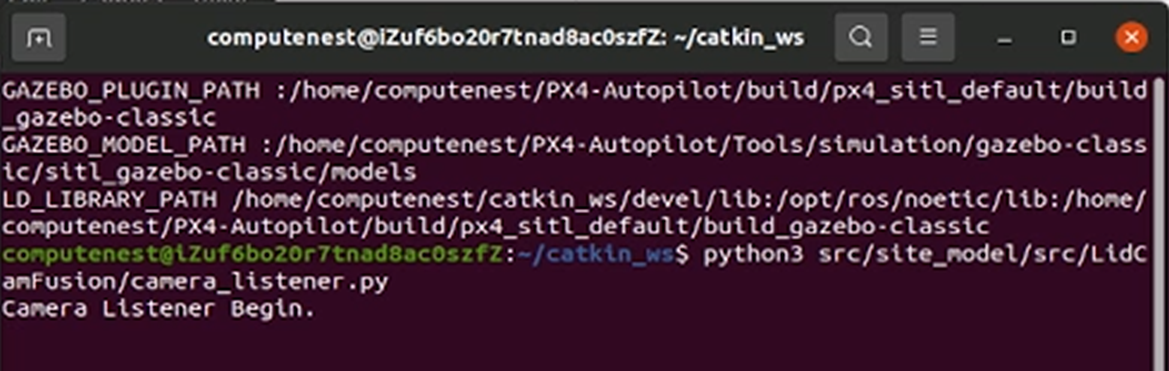
source devel/setup.bash roslaunch site_model spawn.launch在~/catkin_ws文件夹中新建终端,输出以下命令激活激光雷达周围的相机。
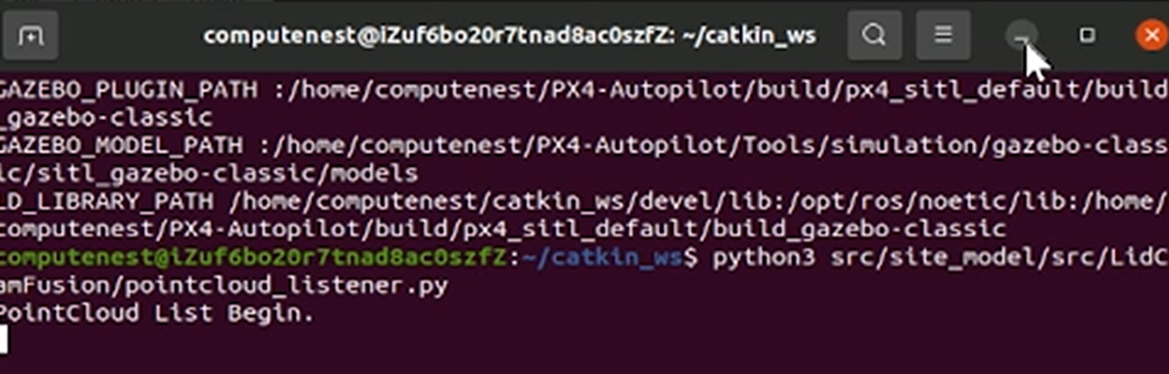
python3 src/site_model/src/LidCamFusion/camera_listener.py在~/catkin_ws文件夹中新建终端,输出以下命令激活激光雷达。
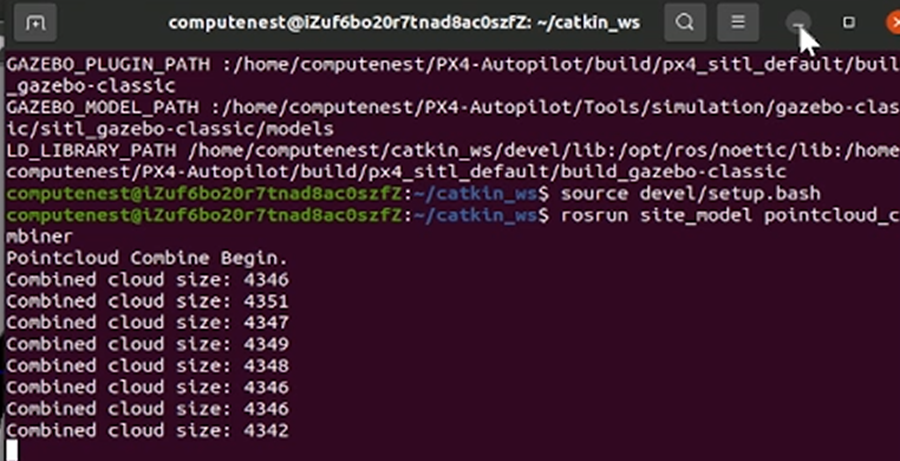
python3 src/site_model/src/LidCamFusion/pointcloud_listener.py在~/catkin_ws文件夹中新建终端,输出以下命令合并所有点云并固定其坐标。
source devel/setup.bash rosrun site_model pointcloud_combiner在~/catkin_ws文件夹中新建两个终端,分别输出以下命令开启小车控制。
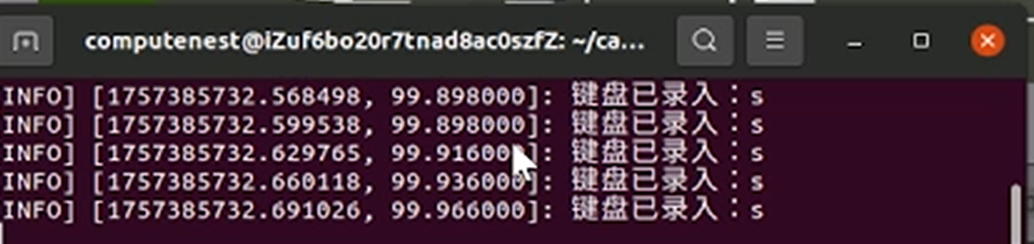
cd src/site_model/src/scripts_wx/
python3 ServoCommands.py
cd src/site_model/src/scripts_wx/ python3 KeyControl.py在~/catkin_ws文件夹中新建终端,输出以下命令运行相机-激光雷达融合程序。
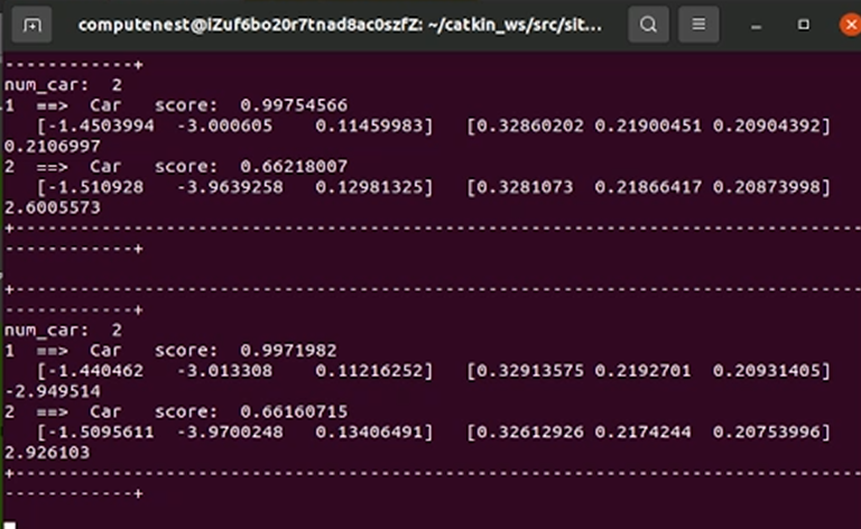
cd src/site_model/
python3 -m src.LidCamFusion.fusion --printl


清理资源
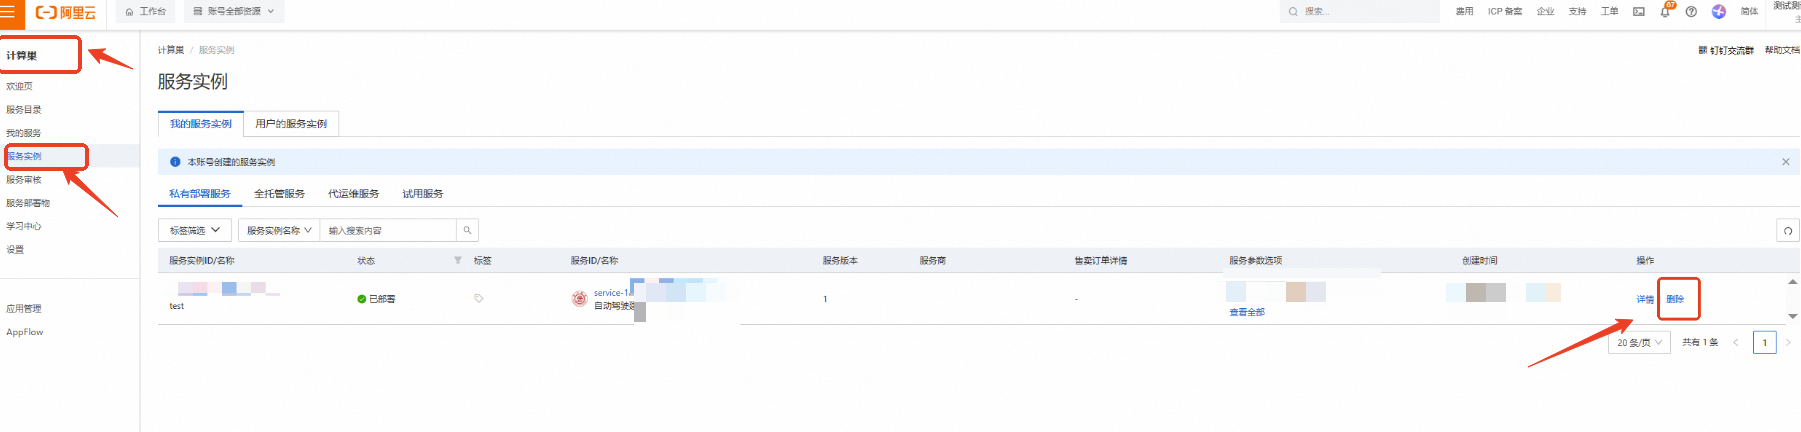
计算巢—服务实例—复制服务实例ID,点击【删除】
在弹窗粘贴服务实例ID,并进行勾选,点击【确定删除】
完成安全验证后,即可成功释放实例。
回到云服务器ECS——实例,检查是否成功释放资源


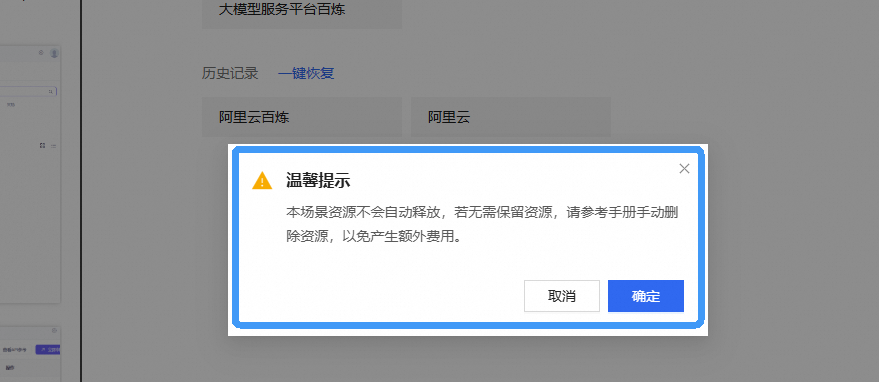
关闭实验
在完成实验后,点击 结束实操
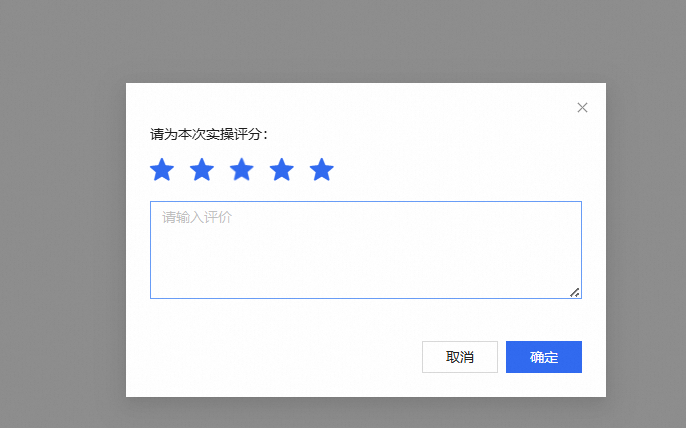
点击 取消 回到实验页面,点击 确定 跳转实验评分
请为本次实验评分,并给出您的建议,点击 确认,结束本次实验