CronJob is a workload that does not manage Pods directly; it creates independent Job instances on a schedule and tracks their status. Use it for periodic tasks such as backups, report generation, or emails. This topic shows how to create a CronJob in the console or with kubectl.
Create a CronJob with the ACK console or kubectl.
The sample images are public. Your cluster needs Internet access to pull them:
-
[Enable Internet access for an existing cluster](https://www.alibabacloud.com/help/en/document_detail/178480.html) (recommended): Create a public NAT gateway for the Virtual Private Cloud (VPC) hosting the cluster to enable Internet access for all resources.
-
[Assign static public IPs to nodes](https://www.alibabacloud.com/help/en/document_detail/2858287.html): Nodes with public IPs can pull public images, but every node running the workload needs a public IP.
Prerequisites
-
An ACK cluster with Internet access
-
(For kubectl) kubectl is connected to the cluster
Create a CronJob with the console
-
Log on to the ACK console. In the left-side navigation pane, click Clusters.
-
On the Clusters page, click your cluster name. In the left-side pane, choose Workloads > CronJobs.
-
On the CronJobs page, click Create from Image.
-
On the Basic Information page, configure basic settings and click Next to go to the Container page.
-
In the General section, set Image Name to
registry.cn-hangzhou.aliyuncs.com/acs-sample/nginx:latest. In the Lifecycle section, configure the Start parameter. Click Next to go to the Advanced page.-
Command:
/bin/sh -
Parameter:
["-c", "echo 'starting...'; COUNTER=0; while [ $COUNTER -lt 5 ]; do sleep 2; COUNTER=$((COUNTER+1)); echo $COUNTER; done; echo 'finished'; exit 0"]
ImportantThe cluster needs Internet access to pull
registry.cn-hangzhou.aliyuncs.com/acs-sample/nginx:latest. If you selected Configure SNAT for VPC during cluster creation, it is already enabled. Otherwise, enable Internet access for the cluster.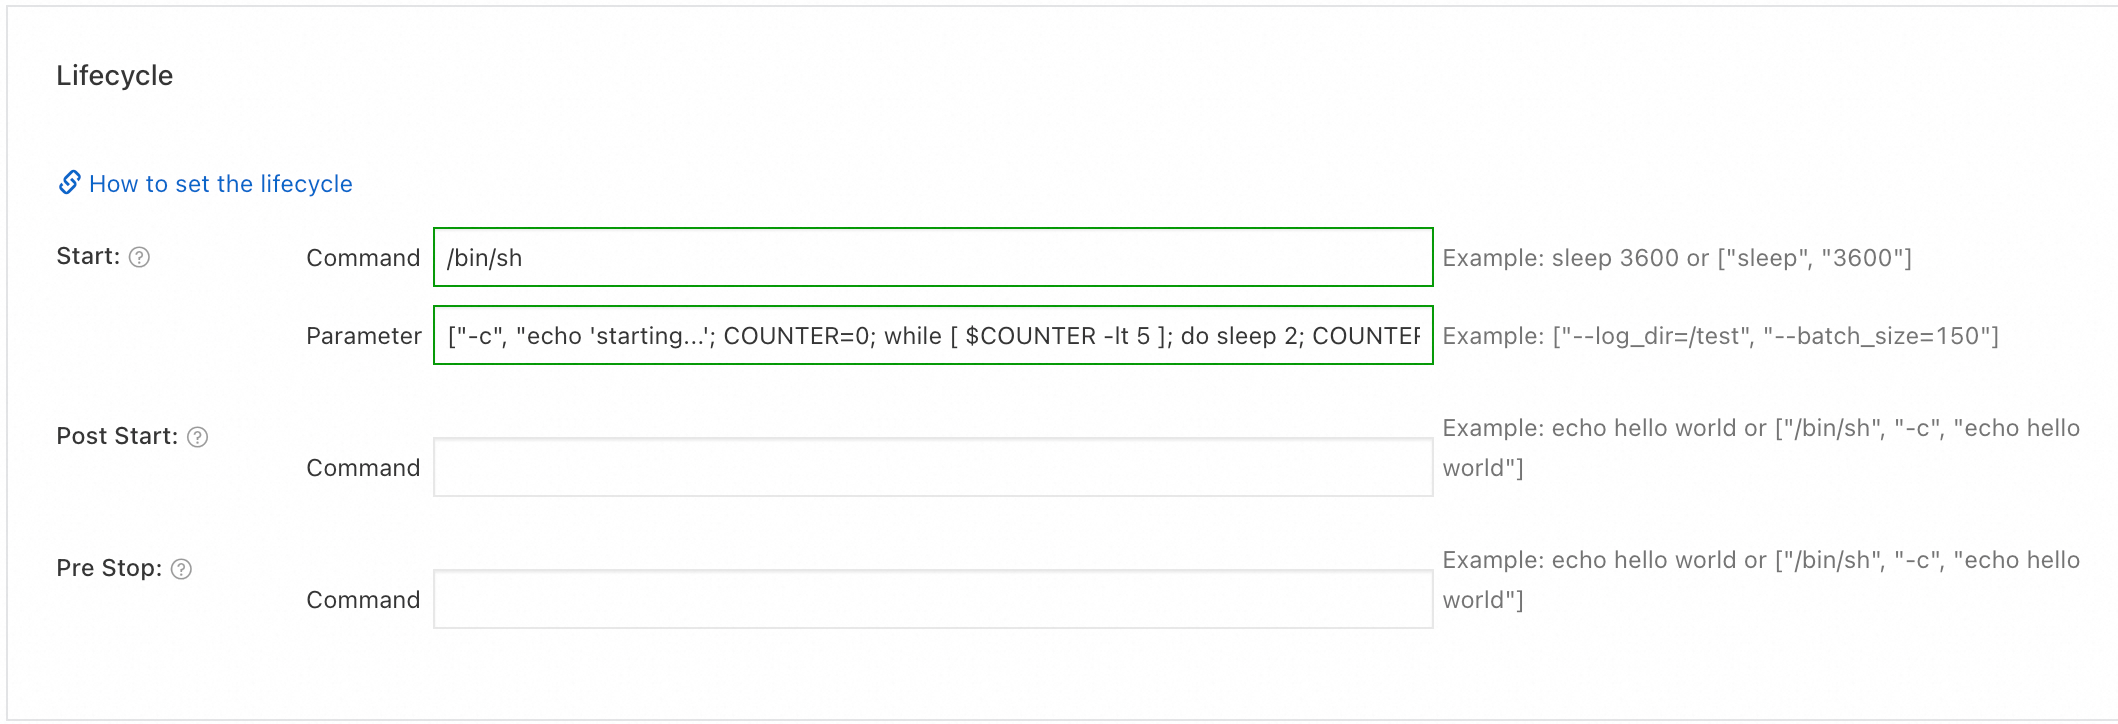
-
-
On the Advanced page, configure scheduling and job settings. For this example, set the schedule to every 2 minutes and keep other options at defaults. Click Create.
CronJob settings
Parameter Description Schedule Frequency. Choose a preset (hourly, daily, weekly, monthly) or enter a custom cron expression ( minute hour day-of-month month day-of-week). See Cron expression syntax.Concurrency policy Behavior when a new Job is due while the previous one still runs. Forbid: skip the new Job (for sequential or dependent jobs).Allow: run both concurrently (for independent jobs).Replace: terminate the running Job and start a new one (when only the latest result matters).Job history
Parameter Description Successful Jobs History Limit Number of recent successful Jobs to retain. Older ones are deleted. Failed Jobs History Limit Number of recent failed Jobs to retain. Job settings
Parameter Kubernetes field Description Default Completions jobTemplate.spec.completionsNumber of Pods that must complete for the Job to succeed. — Parallelism jobTemplate.spec.parallelismMaximum number of Pods running concurrently. — Timeout jobTemplate.spec.activeDeadlineSecondsMaximum runtime for a Job. The Job stops when this limit is reached, regardless of completion status. 600 seconds BackoffLimit jobTemplate.spec.backoffLimitMaximum retries across all Pods before the Job is marked as failed. 6 Restart jobTemplate.spec.template.spec.restartPolicyPod restart behavior on failure. Never: restart the container in place without creating a new Pod (restarts don't count towardbackoffLimit).On Failure: create a new Pod to replace the failed one.— Labels, annotations
Parameter Description Pod Labels Labels added to each Pod. ACK adds app: <application-name>by default. Used to match Pods to workloads and services.Pod Annotations Annotations added to each Pod. Some ACK features require specific annotations. 
-
Once created, Jobs appear at 2-minute intervals.

Create a CronJob with kubectl
Connect to the cluster via kubectl before proceeding.
-
Save the following YAML as
cronjob.yaml.jobTemplate.spechas the same structure as a standalone Job spec.apiVersion: batch/v1 kind: CronJob metadata: name: example-cronjob labels: app: cronjob spec: schedule: "*/2 * * * *" # Run every 2 minutes concurrencyPolicy: Forbid # Skip new Job if previous one is still running successfulJobsHistoryLimit: 3 # Keep the 3 most recent successful Jobs failedJobsHistoryLimit: 2 # Keep the 2 most recent failed Jobs jobTemplate: spec: completions: 1 # Job succeeds after 1 Pod completes parallelism: 1 # Run one Pod at a time template: spec: containers: - name: counter image: anolis-registry.cn-zhangjiakou.cr.aliyuncs.com/openanolis/nginx:1.14.1-8.6 command: - /bin/sh - -c - | echo "starting..."; COUNTER=0; while [ $COUNTER -lt 5 ]; do sleep 2; COUNTER=$((COUNTER+1)); echo "${COUNTER}"; done; echo "finished"; exit 0 restartPolicy: Never # Do not restart the Pod on failure -
Apply the manifest:
kubectl apply -f cronjob.yamlExpected output:
cronjob.batch/example-cronjob created
Verify the CronJob
Confirm the CronJob runs on schedule.
-
Check the CronJob status:
kubectl get cronjob example-cronjobExpected output:
NAME SCHEDULE SUSPEND ACTIVE LAST SCHEDULE AGE example-cronjob */2 * * * * False 0 <none> 15sSUSPENDisFalse, meaning the CronJob is active and triggers on schedule. -
After about 10 minutes, list the Jobs created by the CronJob:
kubectl get jobExpected output:
NAME                       STATUS     COMPLETIONS   DURATION   AGE
example-cronjob-2901**22   Complete   1/1           31s        5m13s
example-cronjob-2901**23   Complete   1/1           31s        3m13s
example-cronjob-2901**24   Complete   1/1           26s        73s
Jobs appear at 2-minute intervals and show
Completestatus when finished. -
Check a Job Pod's logs:
# List Pods for the most recent Job
kubectl get pods --selector=job-name=<job-name>

# View logs
kubectl logs <pod-name>
Replace
<job-name>with a Job name from the output above (e.g.,example-cronjob-2901**24). Successful output ends withfinished.
Cron expression syntax
A cron expression consists of five space-separated fields:
# .---------------- minute (0–59)
# |  .------------- hour (0–23)
# |  |  .---------- day of month (1–31)
# |  |  |  .------- month (1–12)
# |  |  |  |  .---- day of week (0–6, Sunday to Saturday)
# |  |  |  |  |
  *  *  *  *  *
Common shorthand entries:
| Entry | Description | Equivalent |
|---|---|---|
@hourly |
Run once an hour at the start of the hour | 0 * * * * |
@daily (or @midnight) |
Run once a day at midnight | 0 0 * * * |
@weekly |
Run once a week at midnight on Sunday | 0 0 * * 0 |
@monthly |
Run once a month at midnight on the first day | 0 0 1 * * |
@yearly (or @annually) |
Run once a year at midnight on January 1 | 0 0 1 1 * |
Build and validate cron expressions with crontab.guru.