Alert configuration
The alerting feature in MSHA (Multi-active Zone Disaster Recovery) helps you promptly identify potential system risks. By configuring alert rules and DingTalk notifications, you receive alerts in specified groups. This allows you to investigate and resolve issues based on the alert content.
Step 1: Set up a DingTalk chatbot
To receive alert notifications in a specific DingTalk group, you must first set up a DingTalk chatbot. Follow these steps to add a custom chatbot and obtain its webhook URL.
In the DingTalk desktop client, open the desired group and click the group settings icon in the upper-right corner.
In the Group Settings panel, click Chatbot.
In the Chatbot panel, click Add Bot.
In the Group Bot dialog box, click the + icon in the Add Bot section and select Custom.
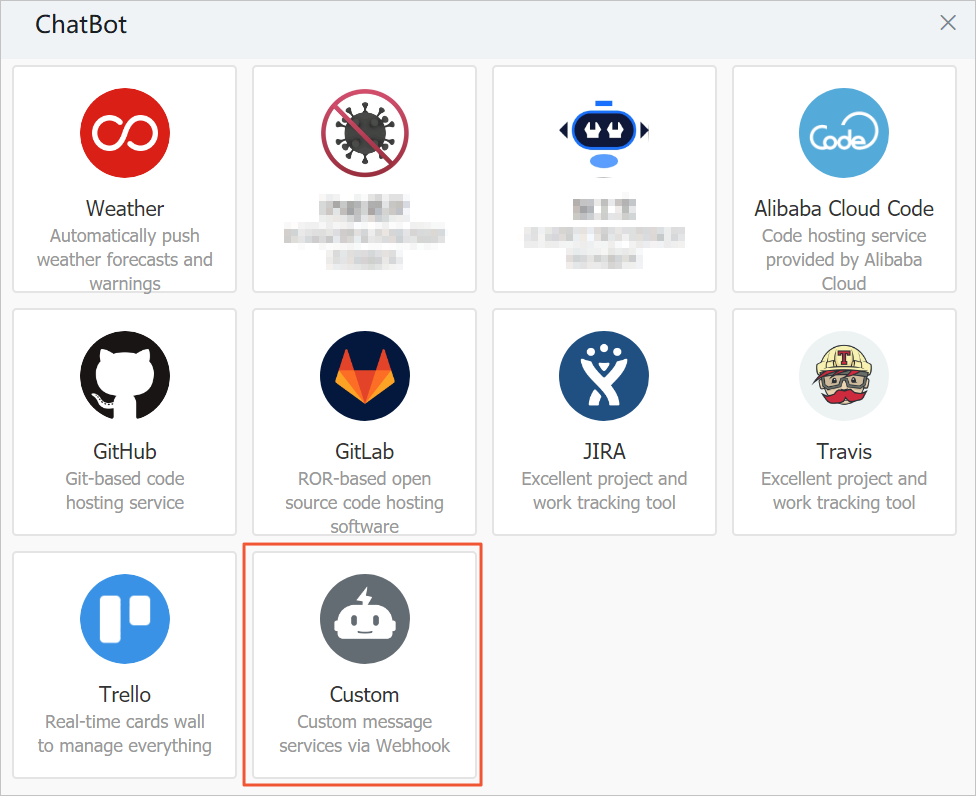
In the Bot Details dialog box, click Add.
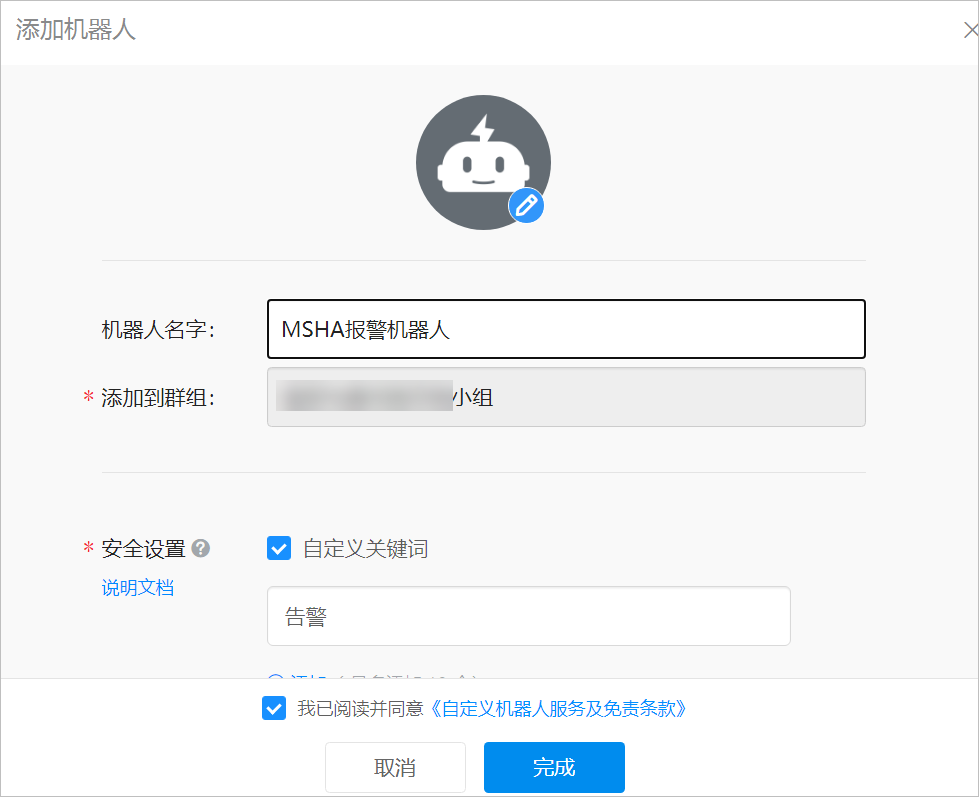
In the Add Bot dialog box, set the chatbot's name and avatar. Under Security Settings, you must select and configure at least one option: Custom Keywords or Signature. You can also select both. Select I have read and agreed to the "Custom Robot Service and Disclaimer", and then click Finish.
In the Add Bot dialog box, copy the generated chatbot
webhook URL, and then click Finish.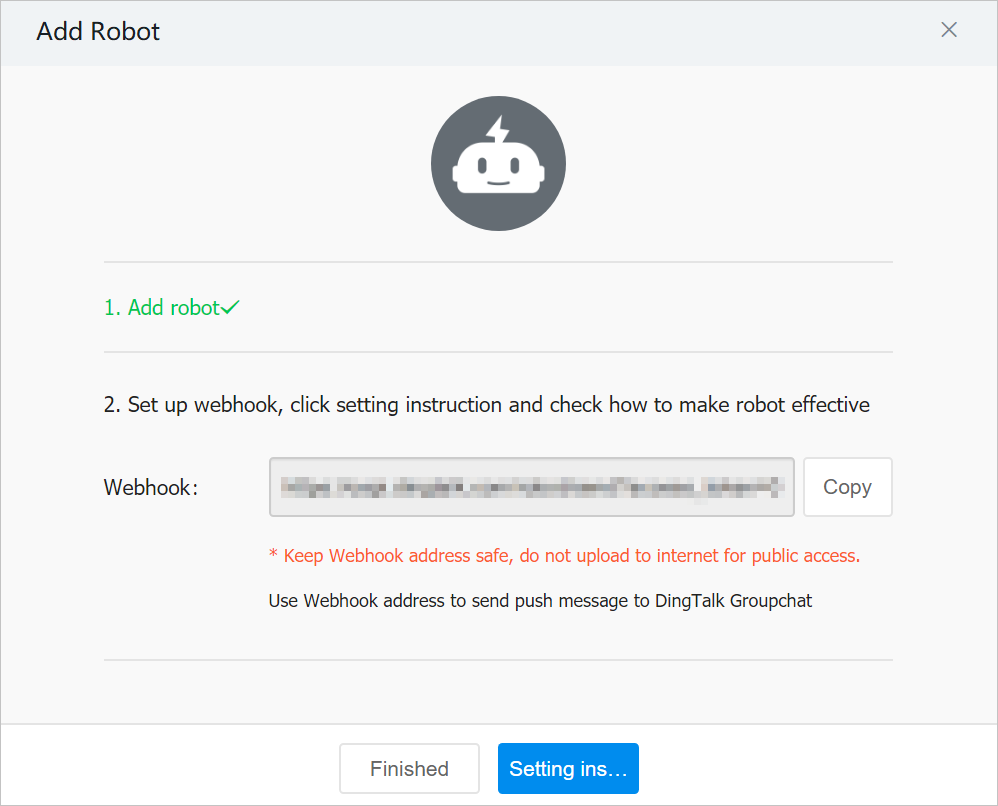 Important
Keep this
webhook URLsecure and do not publish it on external websites. Leaking this URL creates a security risk.
Step 2: Create an alert contact
Create an alert contact to receive alert notifications. You will need to provide the webhook URL from the DingTalk chatbot that sends the notifications.
Log on to the MSHA console.
In the navigation pane, choose .
On the Alert Configuration page, click Manage Alert Contact Group to go to the Alert Contacts page.
On the Alert Contacts tab, click Create Contact. In the Set Alert Contact panel that appears, set the contact name and the
webhook URLof the DingTalk chatbot. For information about how to obtain thewebhook URL, see Step 1: Set up a DingTalk chatbot.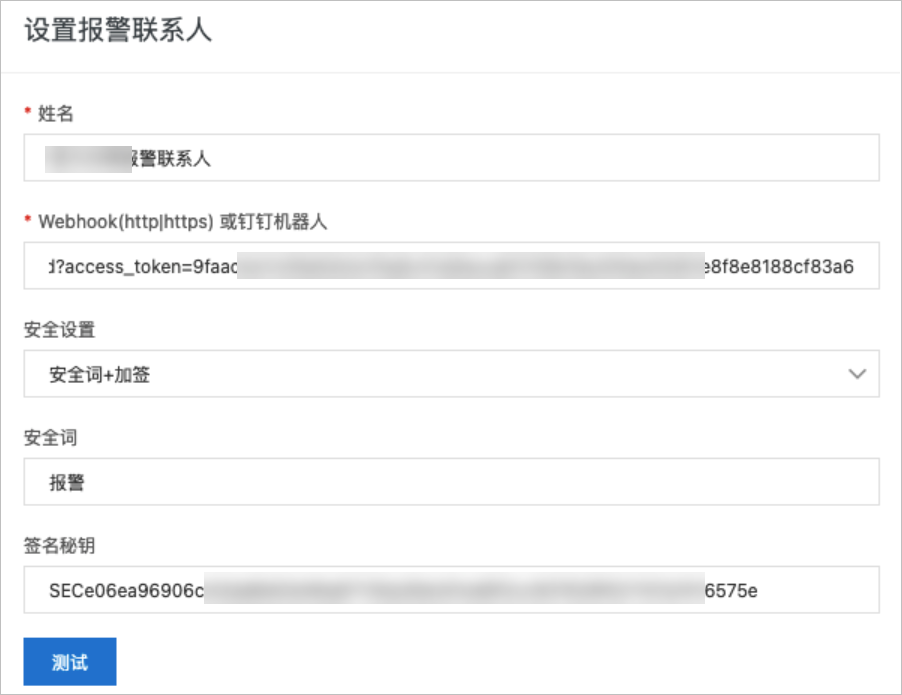 Note
NoteMSHA supports three security settings:
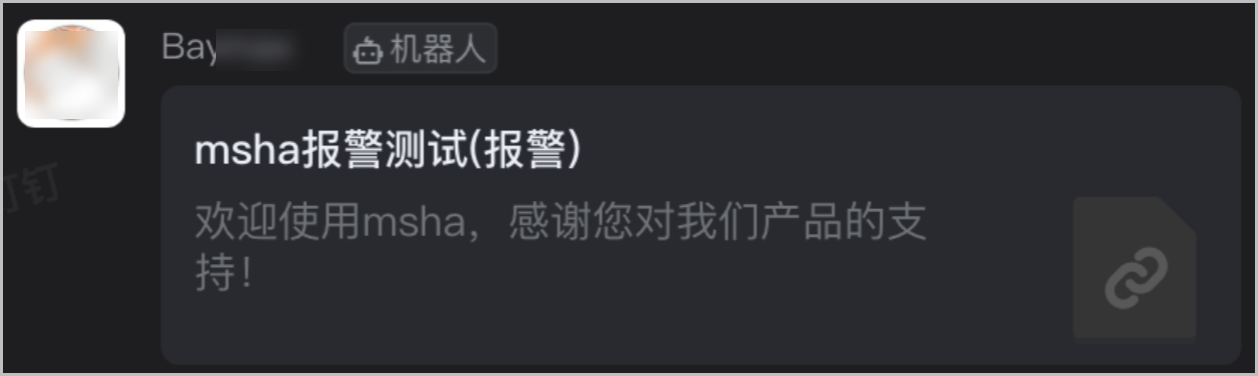
custom keywords,signature, and a combination of both. Based on your DingTalk chatbot's configuration, select the appropriate setting and enter the required information. You can find thesignature keyon the DingTalk chatbot's settings page.After you complete the configuration, click Test to verify the notification setup. If you receive a test alert in your DingTalk group as shown in the following figure, the test is successful. Click OK to finish creating the alert contact. If the test fails, check your DingTalk chatbot configuration and contact information for errors.
Related operations
Edit an alert contact:
On the Alert Contacts page, click Edit in the Actions column for the target contact. You can modify the contact information and run the test again.
Delete an alert contact:
On the Alert Contacts page, click Delete in the Actions column for the target contact. In the dialog box that appears, click OK to delete the alert contact.
NoteYou cannot delete an alert contact while it is in use by an alert rule.
Step 3: Create an alert contact group
MSHA alert rules send notifications to alert contact groups. You can add multiple alert contacts to a group so that all members receive the same alerts.
Log on to the MSHA console.
In the navigation pane, choose .
On the Alert Configuration page, click Manage Alert Contact Group to go to the Alert Contacts page.
On the Alert Contacts page, click the Alert Contact Groups tab.
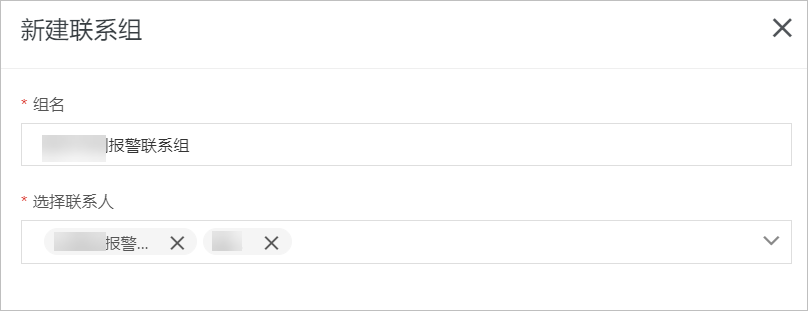
Click Create Contact Group. In the Create Contact Group panel that appears, set a group name, select the contacts to receive alerts, and then click OK.
 Note
NoteYou can select multiple alert contacts to receive alert notifications.
You cannot create an alert contact in an alert contact group. To create an alert contact, see Step 2: Create an alert contact.
Related operations
View alert contact group details:
Click the
icon to the left of the target alert contact group name to view all alert contacts in the group.Add alert contacts to an alert contact group:
Click the
icon to the right of the target alert contact group name. In the Edit Contact Group panel, you can add or remove contacts in the group.Delete an alert contact group
Click the
icon to the right of the alert contact group name that you want to delete. In the dialog box that appears, click OK to delete the alert contact group.NoteYou cannot delete an alert contact group while it is in use by an alert rule.
 icon to the left of the target alert contact group name to view all alert contacts in the group.
 icon to the right of the target alert contact group name. In the Edit Contact Group panel, you can add or remove contacts in the group.
 icon to the right of the alert contact group name that you want to delete. In the dialog box that appears, click OK to delete the alert contact group.
Step 4: Configure an alert rule
Configure alert rules to be promptly notified of MSHA monitoring events. These notifications provide the information needed to investigate and resolve issues.
Log on to the MSHA console.
In the navigation pane, choose .
On the Alert Configuration page, click Create Alert Rule.
In the Create Alert Rule dialog box, configure the parameters and click OK.
Parameter
Description
Rule Name
Enter a custom name for the alert rule.
Rule Type
Select the alert rule type.
Namespace
Alerts apply at the MSHA namespace level. Select the namespace that you want to monitor.
Metric
Select the metric to monitor. You can select Check All to monitor all metrics in the specified namespace.
Silence Period
Select the silence period for the rule. This determines how long alerts for the same event are suppressed before being sent again.
Notification Recipient
Select the alert contact group to notify. For more information, see Step 3: Create an alert contact group.
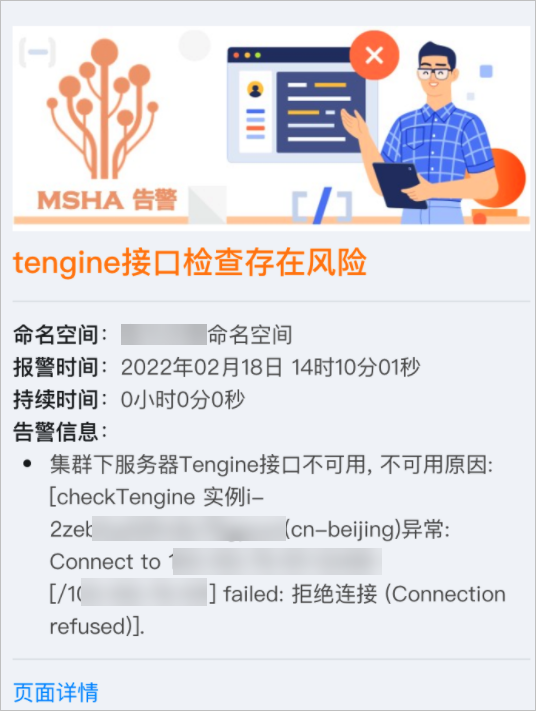
After the alert rule is created, you will begin receiving alert notifications in your DingTalk group.
Related operations
Disable an alert rule:
In the Actions column for the rule you want to disable, click Disable. In the dialog box that appears, click OK. The disabled rule will no longer trigger alerts.
Enable an alert rule:
In the Actions column for the rule you want to enable, click Enable. In the dialog box that appears, click OK. The enabled rule will resume triggering alerts.
Delete an alert rule
In the Actions column for the rule you want to delete, click Delete. In the dialog box that appears, click OK to delete the rule.
Step 5: View alert history
Follow these steps to view your alert history.
Log on to the MSHA console.
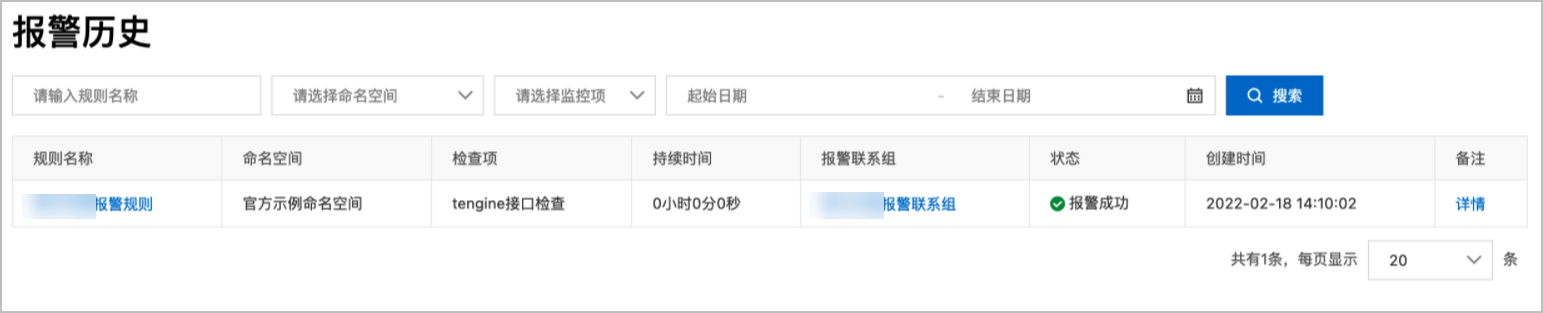
In the navigation pane, choose . The Alert History page lists all alerts that were triggered and sent to contacts.