Workflow
This topic describes the development workflow for the TPP personalization algorithm, which includes creating an instance, developing code, creating and publishing a solution, creating and deploying a scenario, accessing the scenario, and viewing service monitoring.
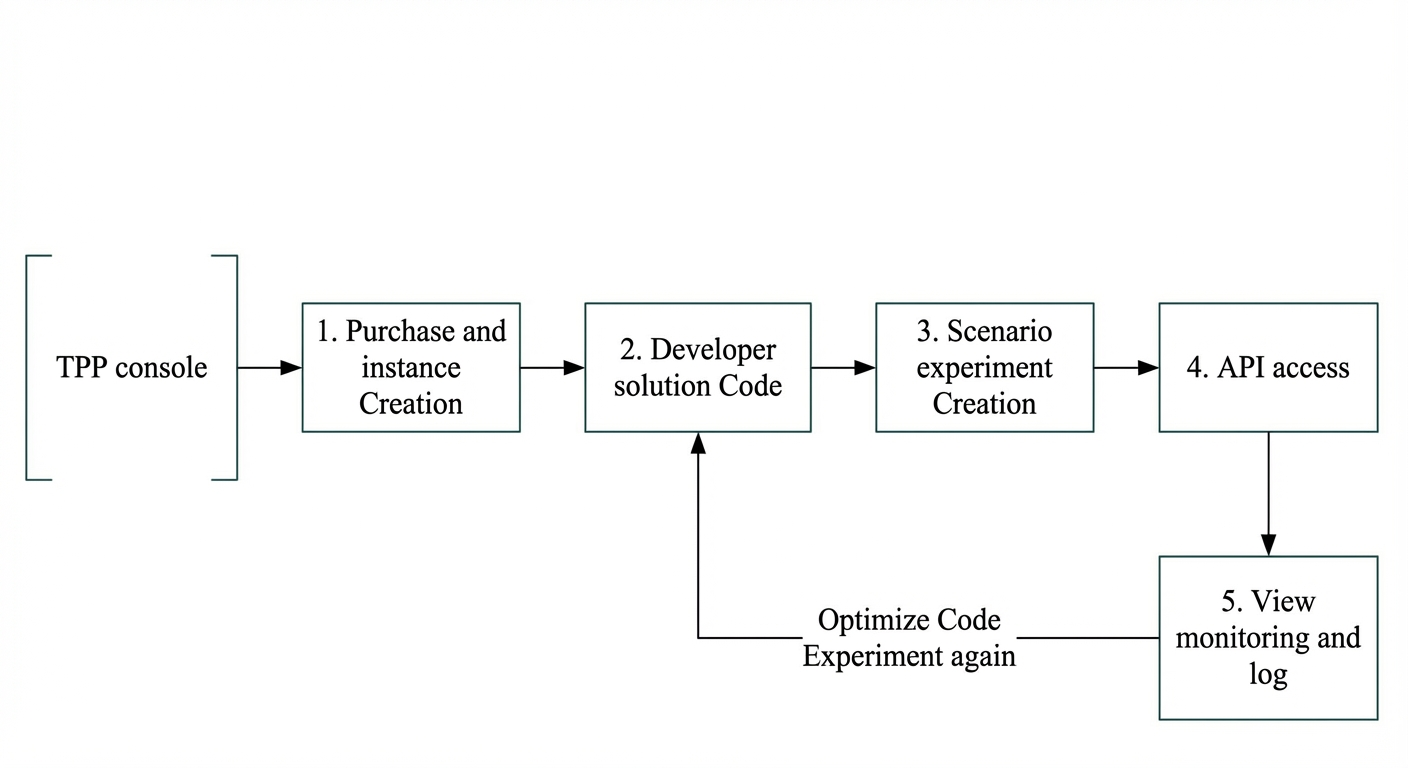
The workflow is as follows:
Purchase and create an instance
Purchase a TPP instance. After you place the order, TPP automatically starts a service cluster.
Develop solution code
Write TPP code in Java using the TPP solution development SDK. Store the code in a Git-based Codeup repository.
In the TPP console, create a solution. Enter the Codeup address, set the default configurations (optional), and publish the solution.
Create a scenario experiment
Create a scenario in the TPP console. Machine resources are allocated only after the scenario is created.
Within the scenario, create an A/B test. Associate the solution, set the experiment configuration, and publish the experiment. The code runs on the machines only after the experiment is published.
API access
Use the account and password for the instance to call the TPP service invocation API and access the published scenario.
Note: The first time you access the API, TPP must review the request and manually attach an SLB.
View monitoring and logs
You can view the TPP solution error logs to troubleshoot issues in your code.
You can view the TPP scenario monitoring to collect metrics for the scenario, such as Queries Per Second (QPS) and Response Time (RT).