Enterprise SSO integration with Supabase
Cloud-native data warehouse AnalyticDB for PostgreSQL integrates with the open-source Supabase authentication system, enabling enterprises to configure SAML 2.0 SSO. This is ideal for building private Coding Agent platforms with unified identity authentication.
Prerequisites
-
You have created a Supabase project. The project must be created after the following dates:
-
China region: April 1, 2026.
-
Singapore: April 1, 2025.
-
-
If your SSO identity provider (IdP) and Supabase are not in the same VPC, you must enable public access for Supabase.
Procedure
Step 1: Obtain Supabase project information
After you create a Supabase project, obtain the following information.
|
Item |
Description |
Example |
|
Supabase URL |
Your Supabase project URL. |
|
|
Anon Key (public key) |
A public key safe to use in frontend code. |
|
|
Service Role Key (secret key) |
A secret key for backend administrative operations only. Never expose in frontend code. |
|
Verify project status
curl 'https://<your-supabase-url>/auth/v1/health' \
  -H 'apikey: <your-anon-key>'
Example response
{"version":"vunspecified","name":"GoTrue","description":"GoTrue is a user registration and authentication API"}Step 2: Obtain SP metadata
The SAML service provider (SP) metadata is publicly accessible at:
https://<your-supabase-url>/sso/saml/metadataConfigure your IdP with the following URLs:
|
URL type |
Value |
|
ACS URL |
|
|
Entity ID |
|
Step 3: Configure redirect URL
-
Log in to the Supabase Dashboard. In the sidebar, click Authentication > URL Configuration.
-
In the Site URL section, enter your frontend domain URL and click Save changes.
Step 4: Register identity provider (IdP)
Register your IdP with Supabase using the Management API.
Method 1: Register via metadata URL
If your IdP provides a public metadata URL, run:
curl -X POST 'https://<your-supabase-url>/auth/v1/admin/sso/providers' \
  -H 'apikey: <your-service-role-key>' \
  -H 'Authorization: Bearer <your-service-role-key>' \
  -H 'Content-Type: application/json' \
  -d '{
    "type": "saml",
    "metadata_url": "https://<your-idp>/samlp/metadata/<client-id>",
    "domains": ["yourdomain.com"]
  }'
Method 2: Register via metadata XML
If the metadata URL is not publicly accessible, provide the XML content directly:
# 1. Obtain the metadata XML from an environment that can access the IdP.
curl 'https://<your-idp>/samlp/metadata/<client-id>' > idp-metadata.xml

# 2. Register with Supabase.
curl -X POST 'https://<your-supabase-url>/auth/v1/admin/sso/providers' \
  -H 'apikey: <your-service-role-key>' \
  -H 'Authorization: Bearer <your-service-role-key>' \
  -H 'Content-Type: application/json' \
  -d '{
    "type": "saml",
    "metadata_xml": "<EntityDescriptor ...>...</EntityDescriptor>",
    "domains": ["yourdomain.com"]
  }'
Example: Auth0 registration
Auth0 metadata URL format:
https://<tenant>.auth0.com/samlp/metadata/<client-id>Complete registration command:
curl -X POST 'https://<your-supabase-url>/auth/v1/admin/sso/providers' \
  -H 'apikey: <your-service-role-key>' \
  -H 'Authorization: Bearer <your-service-role-key>' \
  -H 'Content-Type: application/json' \
  -d '{
    "type": "saml",
    "metadata_url": "https://dev-xxx.auth0.com/samlp/metadata/YOUR_CLIENT_ID",
    "domains": ["example.com"]
  }'
Save returned provider ID
Save the id field from the response. You need this ID to initiate SSO sign-in from the frontend.
Example response:
{
  "id": "xxxxxxxx-xxxx-xxxx-xxxx-xxxxxxxxxxxx",
  "type": "saml",
  "saml": {
    "entity_id": "urn:dev-xxx.auth0.com"
  },
  "domains": [{"domain": "example.com"}]
}
Step 5: Configure SP information in IdP
After registration, configure the Supabase SP information in your IdP.
Required configuration items
|
Parameter |
Value |
|
ACS URL (callback URL) |
|
|
Entity ID (SP Entity ID) |
|
|
NameID Format |
|
|
Frontend callback URL |
|
Example: Configuration steps for Auth0
-
Log in to the Auth0 Dashboard.
-
Go to Applications and click the target application.
-
Click the Addons tab and enable SAML2 Web App.
-
In the dialog box that appears, configure the following settings:
-
Application Callback URL
-
Settings
-
-
Click Enable, and then click Save.
-
On the application's main page, add your frontend URL to Allowed Callback URLs.
Step 6: Frontend integration
-
Install the dependency.
npm install @supabase/supabase-js -
Initialize the client. SAML SSO must use the
implicitflow.import { createClient } from '@supabase/supabase-js' const supabase = createClient( 'https://<your-supabase-url>', '<your-anon-key>', { auth: { flowType: 'implicit', detectSessionInUrl: true, persistSession: true, autoRefreshToken: true, } } ) -
Initiate SSO sign-in.
-
Initiate sign-in using the provider ID:
const { data, error } = await supabase.auth.signInWithSSO({ providerId: '<your-provider-id>', options: { redirectTo: window.location.origin } }) if (error) { console.error('Sign-in failed:', error.message) return } if (data?.url) { window.location.href = data.url } -
Alternatively, automatically match the provider using a domain:
const { data, error } = await supabase.auth.signInWithSSO({
  domain: 'yourdomain.com'
})
-
-
Handle the sign-in callback.
After the IdP authenticates the user, it redirects back to the frontend. The URL has the following format:
https://<your-app-domain>/#access_token=<jwt>&refresh_token=<token>&expires_in=3600&token_type=bearerBecause supabase-js initializes asynchronously, manually parse the URL hash:
function decodeJWT(token) { try { return JSON.parse(atob(token.split('.')[1].replace(/-/g, '+').replace(/_/g, '/'))) } catch { return null } } async function init() { const hash = window.location.hash.substring(1) if (hash.includes('access_token')) { const params = new URLSearchParams(hash) const accessToken = params.get('access_token') const refreshToken = params.get('refresh_token') const expiresAt = params.get('expires_at') window.history.replaceState({}, '', window.location.pathname) const payload = decodeJWT(accessToken) if (payload) { const session = { access_token: accessToken, refresh_token: refreshToken || '', expires_at: expiresAt ? parseInt(expiresAt) : payload.exp, token_type: 'bearer', user: { id: payload.sub, email: payload.email, role: payload.role, app_metadata: payload.app_metadata || {}, user_metadata: payload.user_metadata || {}, } } onLoginSuccess(session) return } } const { data: { session } } = await supabase.auth.getSession() if (session) { onLoginSuccess(session) } else { showLoginPage() } } document.addEventListener('DOMContentLoaded', init) -
View the JWT payload structure.
After a successful sign-in, the decoded JWT contains these key fields:
{
  "sub": "8c308927-4ba1-4507-b6f8-f751b791****",
  "email": "user@example.com",
  "role": "authenticated",
  "aal": "aal1",
  "amr": [{
    "method": "sso/saml",
    "timestamp": 1774928127,
    "provider": "xxxxxxxx-xxxx-xxxx-xxxx-xxxxxxxxxxxx"
  }],
  "app_metadata": {
    "provider": "sso:xxxxxxxx-xxxx-xxxx-xxxx-xxxxxxxxxxxx"
  },
  "session_id": "aeaf9cdb-dbcd-46ab-95a5-ff956e69****"
}
Verify SSO sign-in by checking
amr[0].method === 'sso/saml'.
Complete example project
The following is a minimal, runnable example. For an online demo, see sso-demo.
-
main.js
import { createClient } from '@supabase/supabase-js' const SUPABASE_URL = 'https://<your-supabase-url>' const SUPABASE_ANON_KEY = '<your-anon-key>' const AUTH0_PROVIDER_ID = '<auth0-provider-id>' const supabase = createClient(SUPABASE_URL, SUPABASE_ANON_KEY, { auth: { flowType: 'implicit', detectSessionInUrl: true } }) function decodeJWT(token) { try { return JSON.parse(atob(token.split('.')[1].replace(/-/g, '+').replace(/_/g, '/'))) } catch { return null } } window.signInWithAuth0 = async () => { const { data, error } = await supabase.auth.signInWithSSO({ providerId: AUTH0_PROVIDER_ID, options: { redirectTo: window.location.origin } }) if (error) return alert(error.message) if (data?.url) window.location.href = data.url } window.signOut = async () => { await supabase.auth.signOut() window.location.reload() } async function init() { const hash = window.location.hash.substring(1) if (hash.includes('access_token')) { const p = new URLSearchParams(hash) const token = p.get('access_token') const payload = decodeJWT(token) window.history.replaceState({}, '', window.location.pathname) if (payload) { showUser({ token, payload, refresh_token: p.get('refresh_token') }) return } } const { data: { session } } = await supabase.auth.getSession() if (session) { showUser({ token: session.access_token, payload: decodeJWT(session.access_token) }) } } function showUser({ token, payload }) { document.getElementById('login').style.display = 'none' document.getElementById('user').innerHTML = ` <p><strong>Email: </strong>${payload.email}</p> <p><strong>User ID: </strong>${payload.sub}</p> <p><strong>Authentication Method: </strong>${payload.amr?.[0]?.method}</p> <button onclick="signOut()">Sign out</button> ` } document.addEventListener('DOMContentLoaded', init) -
index.html
<!DOCTYPE html>
<html lang="en">
<head>
  <meta charset="UTF-8">
  <meta name="viewport" content="width=device-width, initial-scale=1.0">
  <title>SSO Login</title>
</head>
<body>
  <div id="login">
    <button onclick="signInWithAuth0()">Sign in with Auth0</button>
  </div>
  <div id="user"></div>
  <script type="module" src="/main.js"></script>
</body>
</html>
The code above implements an Auth0 SSO sign-in flow.
|
|
|
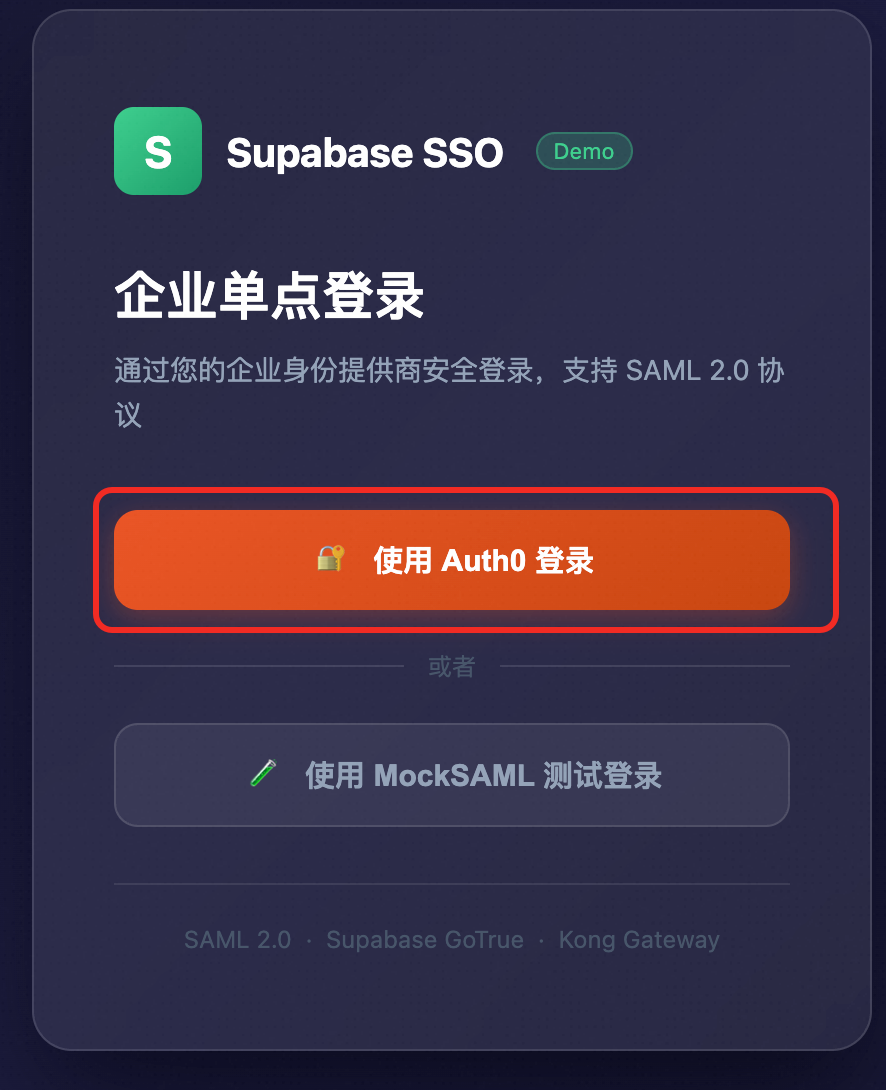
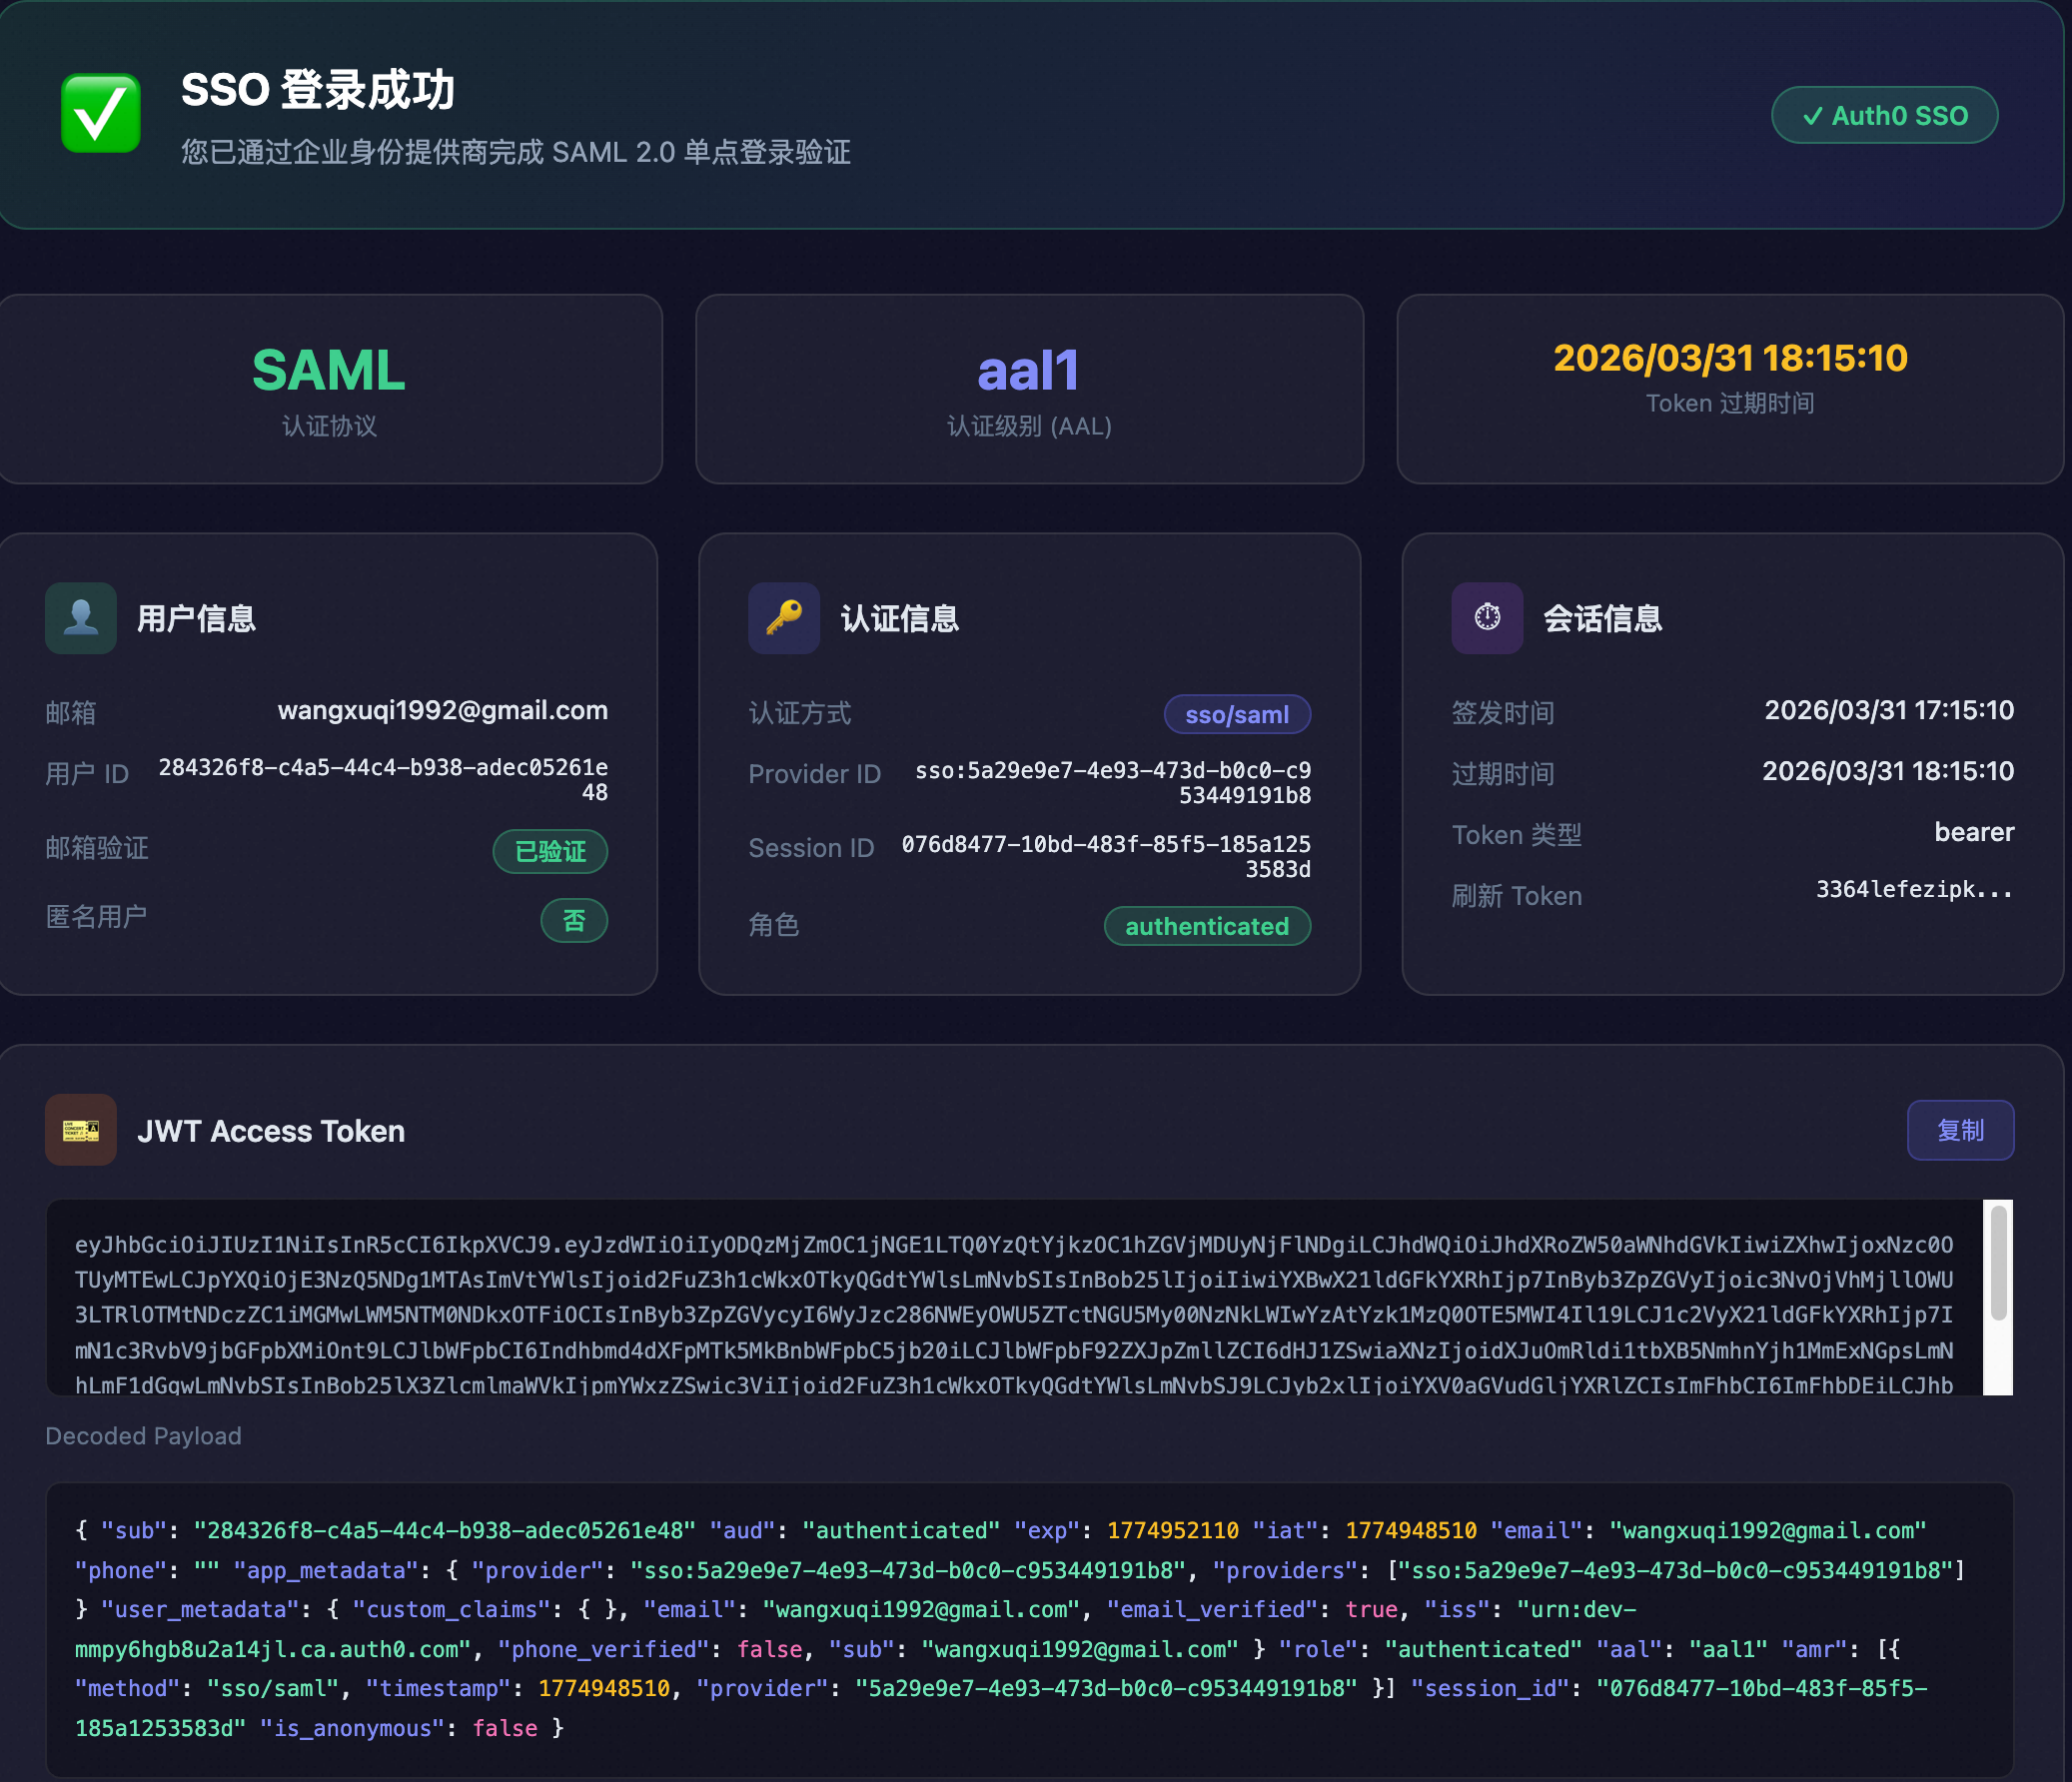
You can view SSO user records in the auth.users table of your Supabase project. The is_sso_user field for these users is set to TRUE.

Manage providers
Use the following API operations to manage SSO providers. All operations require the service role key.
List providers
curl 'https://<your-supabase-url>/auth/v1/admin/sso/providers' \
  -H 'apikey: <your-service-role-key>' \
  -H 'Authorization: Bearer <your-service-role-key>'
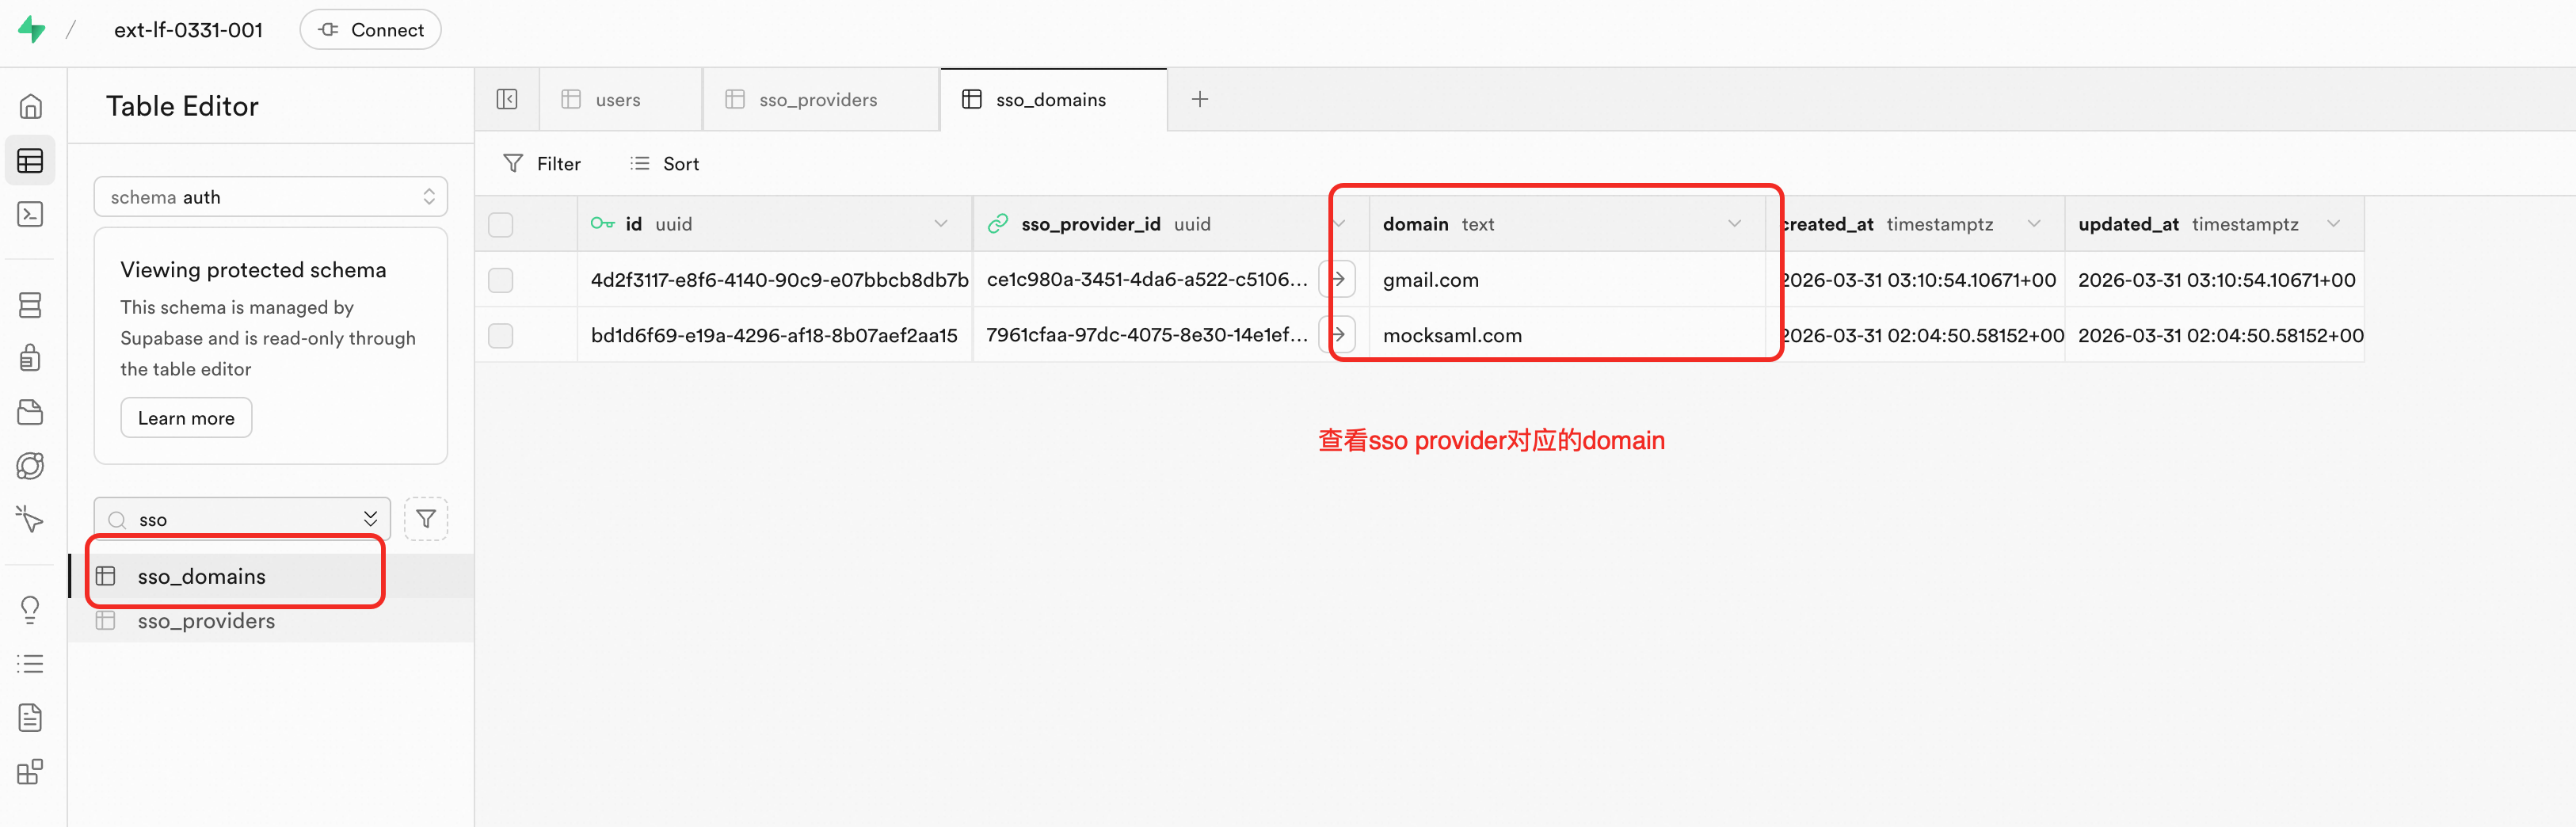
You can also check the auth.sso_domains and auth.sso_providers tables in the Supabase Dashboard to verify registered providers.
Get provider
curl 'https://<your-supabase-url>/auth/v1/admin/sso/providers/<provider-id>' \
  -H 'apikey: <your-service-role-key>' \
  -H 'Authorization: Bearer <your-service-role-key>'
Update provider
curl -X PUT 'https://<your-supabase-url>/auth/v1/admin/sso/providers/<provider-id>' \
  -H 'apikey: <your-service-role-key>' \
  -H 'Authorization: Bearer <your-service-role-key>' \
  -H 'Content-Type: application/json' \
  -d '{"metadata_url": "https://<your-idp>/samlp/metadata/<client-id>"}'
Delete provider
curl -X DELETE 'https://<your-supabase-url>/auth/v1/admin/sso/providers/<provider-id>' \
  -H 'apikey: <your-service-role-key>' \
  -H 'Authorization: Bearer <your-service-role-key>'
FAQ
Page does not redirect after sign-in
Verify that flowType: 'implicit' is set in the createClient configuration. The default PKCE flow may cause issues in SAML callback scenarios.
Sign-in page remains after callback
The SDK initializes asynchronously. Manually parse the access_token from the URL hash on DOMContentLoaded. Do not rely solely on supabase.auth.getSession() to handle the callback.
Sign-in failed: No such SSO provider
-
Check whether the
providerIdin your frontend code matches the ID that was returned during registration. -
Perform a hard refresh of your browser (Cmd+Shift+R or Ctrl+Shift+R) to clear the cache.
Sign-in failed: Failed to fetch
-
Check your network connection to the Supabase project.
-
Run a test command in the browser console to verify connectivity.
Incorrect redirect after sign-in
Set the frontend URL in options.redirectTo of signInWithSSO(). This overrides the default Site URL.
SAML RelayState has expired
SSO sign-in URLs expire after a few minutes. Call signInWithSSO() for each new attempt. Do not reuse old URLs.
Auth0 error: invalid_request
Check that Allowed Callback URLs in your Auth0 settings includes your frontend domain, and that the Application Callback URL is set to the Supabase ACS URL.