Use edge functions in AnalyticDB Supabase
AnalyticDB for PostgreSQL Supabase Edge Functions is a fully managed edge computing service that lets you deploy TypeScript Deno functions to your AnalyticDB Supabase projects. Compared with the open-source self-hosted Supabase, AnalyticDB Supabase provides complete Edge Functions management capabilities, giving you full control over your code and data with a development experience consistent with Supabase Cloud.
Overview
AnalyticDB Supabase Edge Functions provides a Deno-based edge computing solution that offers a modern serverless experience for full-stack application developers.
The open-source community version of Supabase does not include a function management backend, so self-hosted users cannot deploy to a production environment through a GUI or CLI. AnalyticDB Supabase fills this gap with its own Edge Functions management platform. All your code and configuration data reside in your private environment, making the feature production-ready.
AnalyticDB Supabase also provides centralized management of Edge Function secrets. You can store sensitive information, such as an Alibaba Cloud Model Studio API key, in a key vault and retrieve it using Deno.env.get, avoiding hardcoded credentials or client-side exposure.
Benefits
-
Native TypeScript development: No compilation or packaging is required. Deploy TypeScript source code directly.
-
Ecosystem integration: Directly access Supabase services such as the database, user authentication, and Object Storage Service from within a function without extra configuration.
-
Isolation and high performance: The sandbox mechanism and Deno security model ensure that each request runs independently, providing millisecond-level responses and nearly imperceptible cold starts.
Procedure
Deploy an edge function
Via dashboard
-
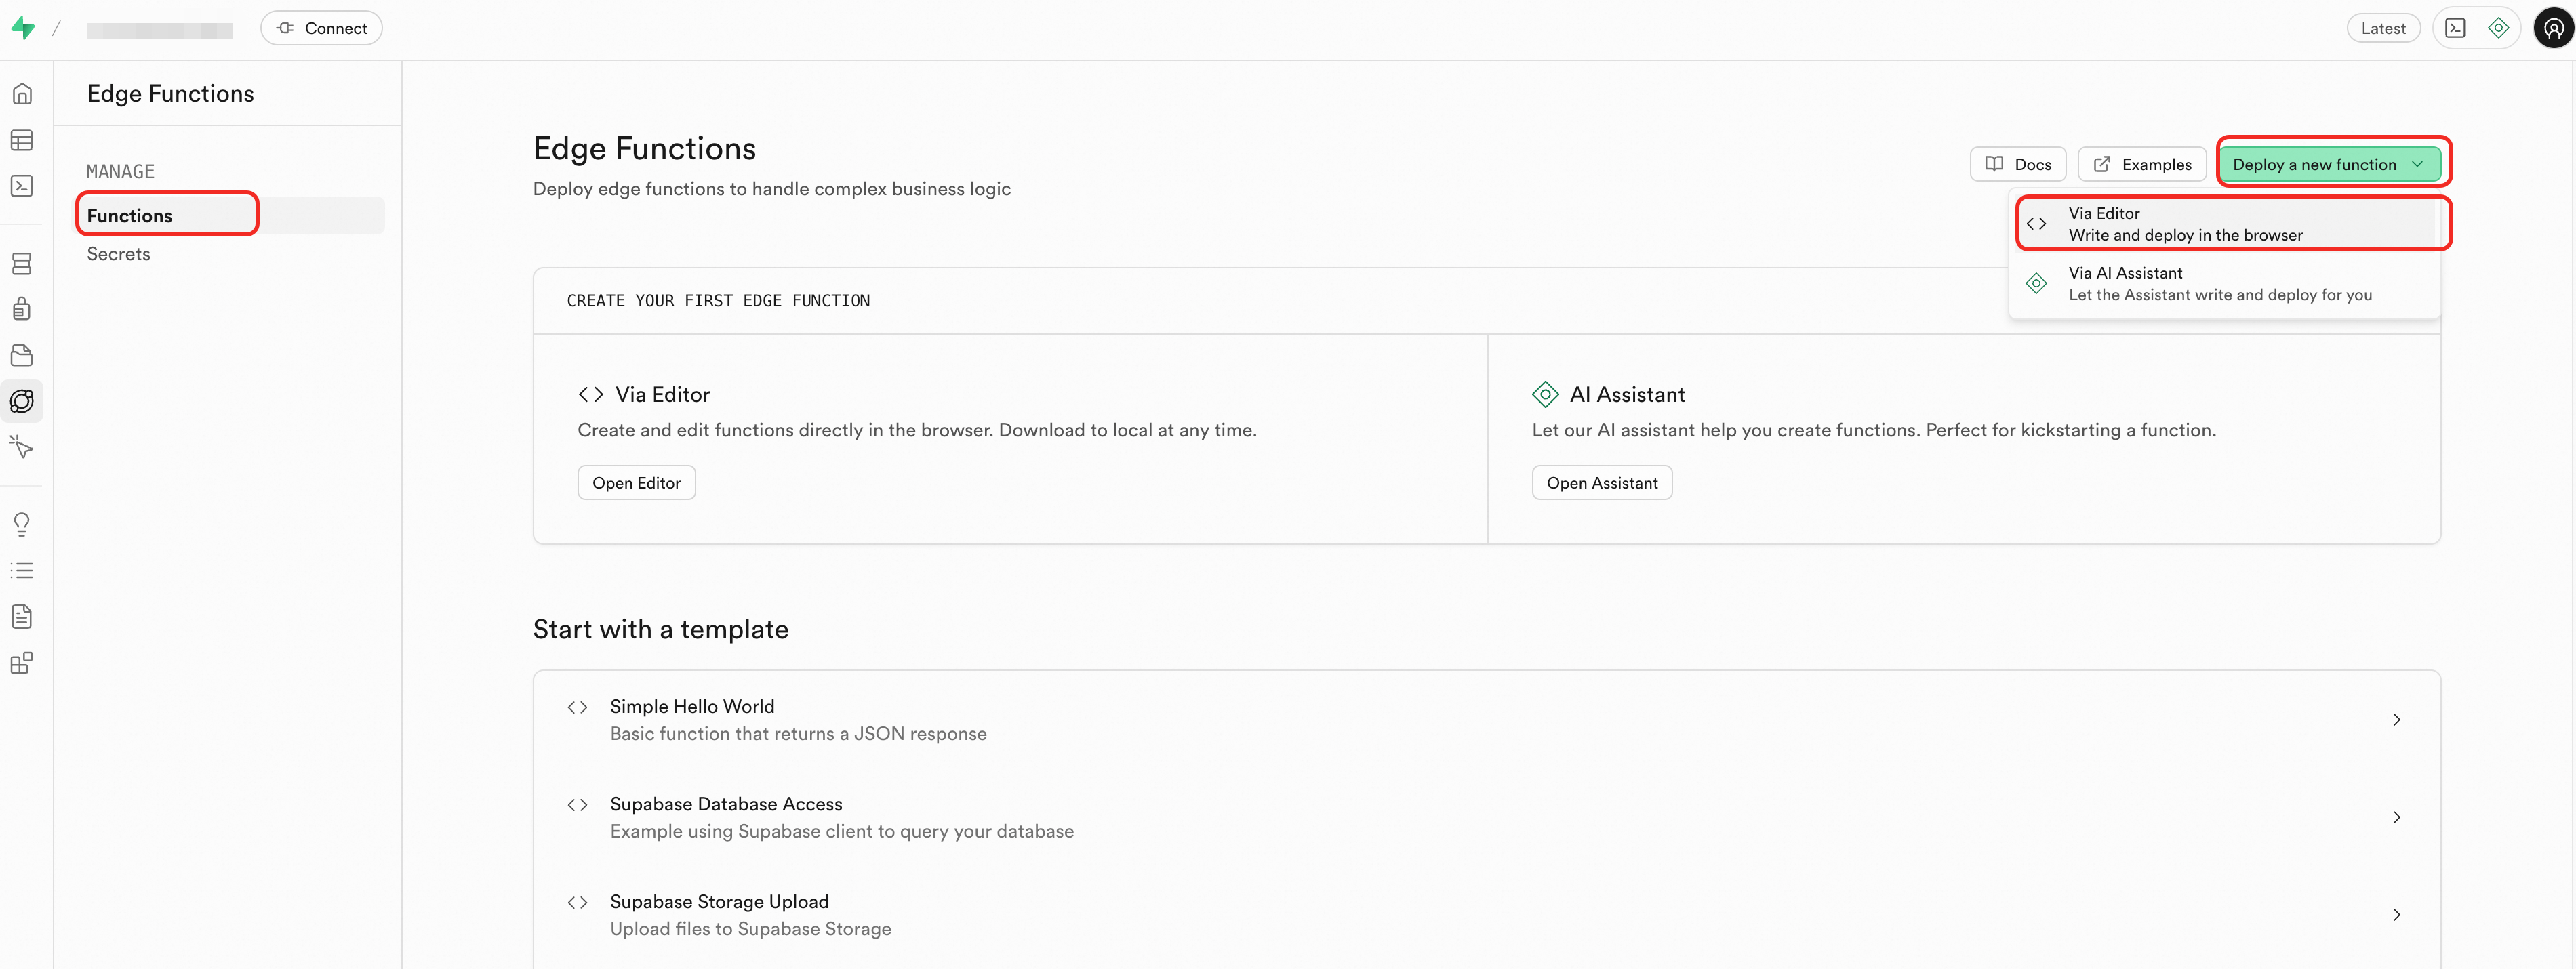
In the sidebar, click Edge Function > Functions.
-
In the upper-right corner of the page, click Deploy a new function and select Via Editor from the drop-down list.
-
Write your code in the code editor.
ImportantTo import third-party dependencies or call public APIs in a function, you need to enable public network access for the AnalyticDB for PostgreSQL Supabase project.
The following example includes
index.ts(the entry file) and foo.ts.-
The
index.tsfile is as follows:import { foo } from './foo.ts'; console.info('server started'); Deno.serve(async (req)=>{ const { name } = await req.json(); const data = { message: `Hello ${foo()} ${name}!` }; return new Response(JSON.stringify(data), { headers: { 'Content-Type': 'application/json', 'Connection': 'keep-alive' } }); }); -
The
foo.tsfile is as follows:export function foo() { return 'bar'; }
-
-
In the lower-right corner, enter a name for the Edge Function and click Deploy.
Via CLI
-
Obtain and configure the
SUPABASE_API_URLandSUPABASE_API_KEYfor the target project.The
SUPABASE_API_KEYis a service role key. For information about how to obtain the key, see Get API Keys. You can complete the configuration in one of the following ways:-
Environment variable:
export SUPABASE_API_KEY=xxx -
.envfile:SUPABASE_API_KEY=xxx -
Command-line parameter:
-key xxx
The following example shows configuration using environment variables:
export SUPABASE_API_URL=https://sbp-xxx.supabase.opentrust.net export SUPABASE_API_KEY=eyJ0eXAiOiJKV1QiLCJhbGciOiJIUzI1NiJ9.eyJyb2xlIjoic2Vxxxx -
-
Prepare the function files.
This example uses the following function directory structure, which includes
index.ts(the entry file) andfoo.ts.supabase └── functions └── hello ├── foo.ts └── index.ts-
The
index.tsfile is as follows:import { foo } from './foo.ts'; console.info('server started'); Deno.serve(async (req)=>{ const { name } = await req.json(); const data = { message: `Hello ${foo()} ${name}!` }; return new Response(JSON.stringify(data), { headers: { 'Content-Type': 'application/json', 'Connection': 'keep-alive' } }); }); -
The
foo.tsfile is as follows:export function foo() { return 'bar'; }
-
-
Download the functions-cli tool. When you run the following commands, replace
functions-cliwith the name of the downloaded CLI tool. -
Deploy the function.
Note-
The deployment command searches for the
supabase/functions/path and a function directory namedhelloin the directory where you run the command. -
If the "At least one file is required" error occurs, log on to the console. In the Actions column of the target Supabase project, choose and then retry the operation. If your project version is v1.0.0, the database connection string is updated after the upgrade.
./functions-cli deploy helloTo disable JWT verification when you deploy an Edge Function, add the
--no-verify-jwtparameter. For example:./functions-cli deploy hello --no-verify-jwt -
Test an edge function
Via dashboard
-
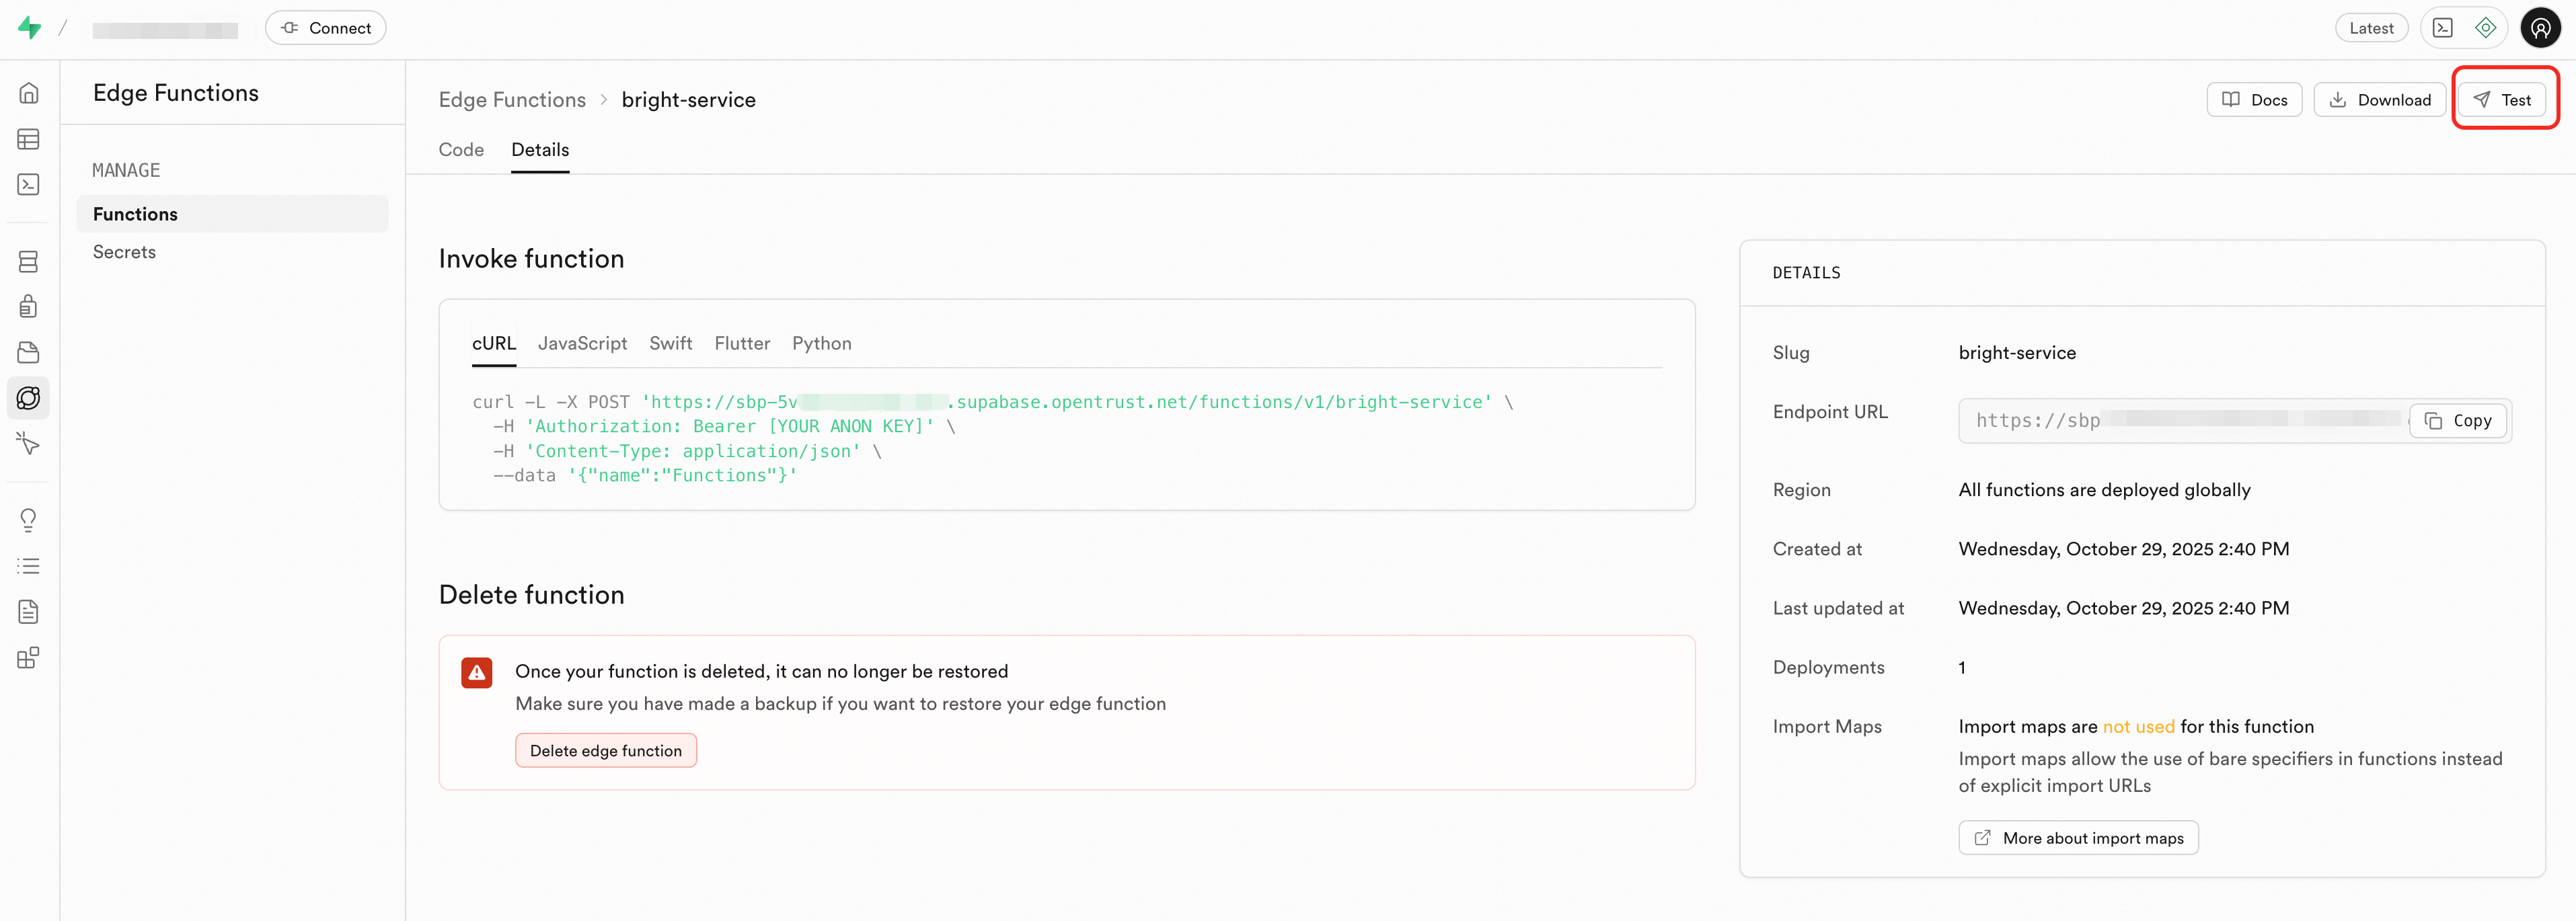
In the upper-right corner of the Functions page, click Test.
-
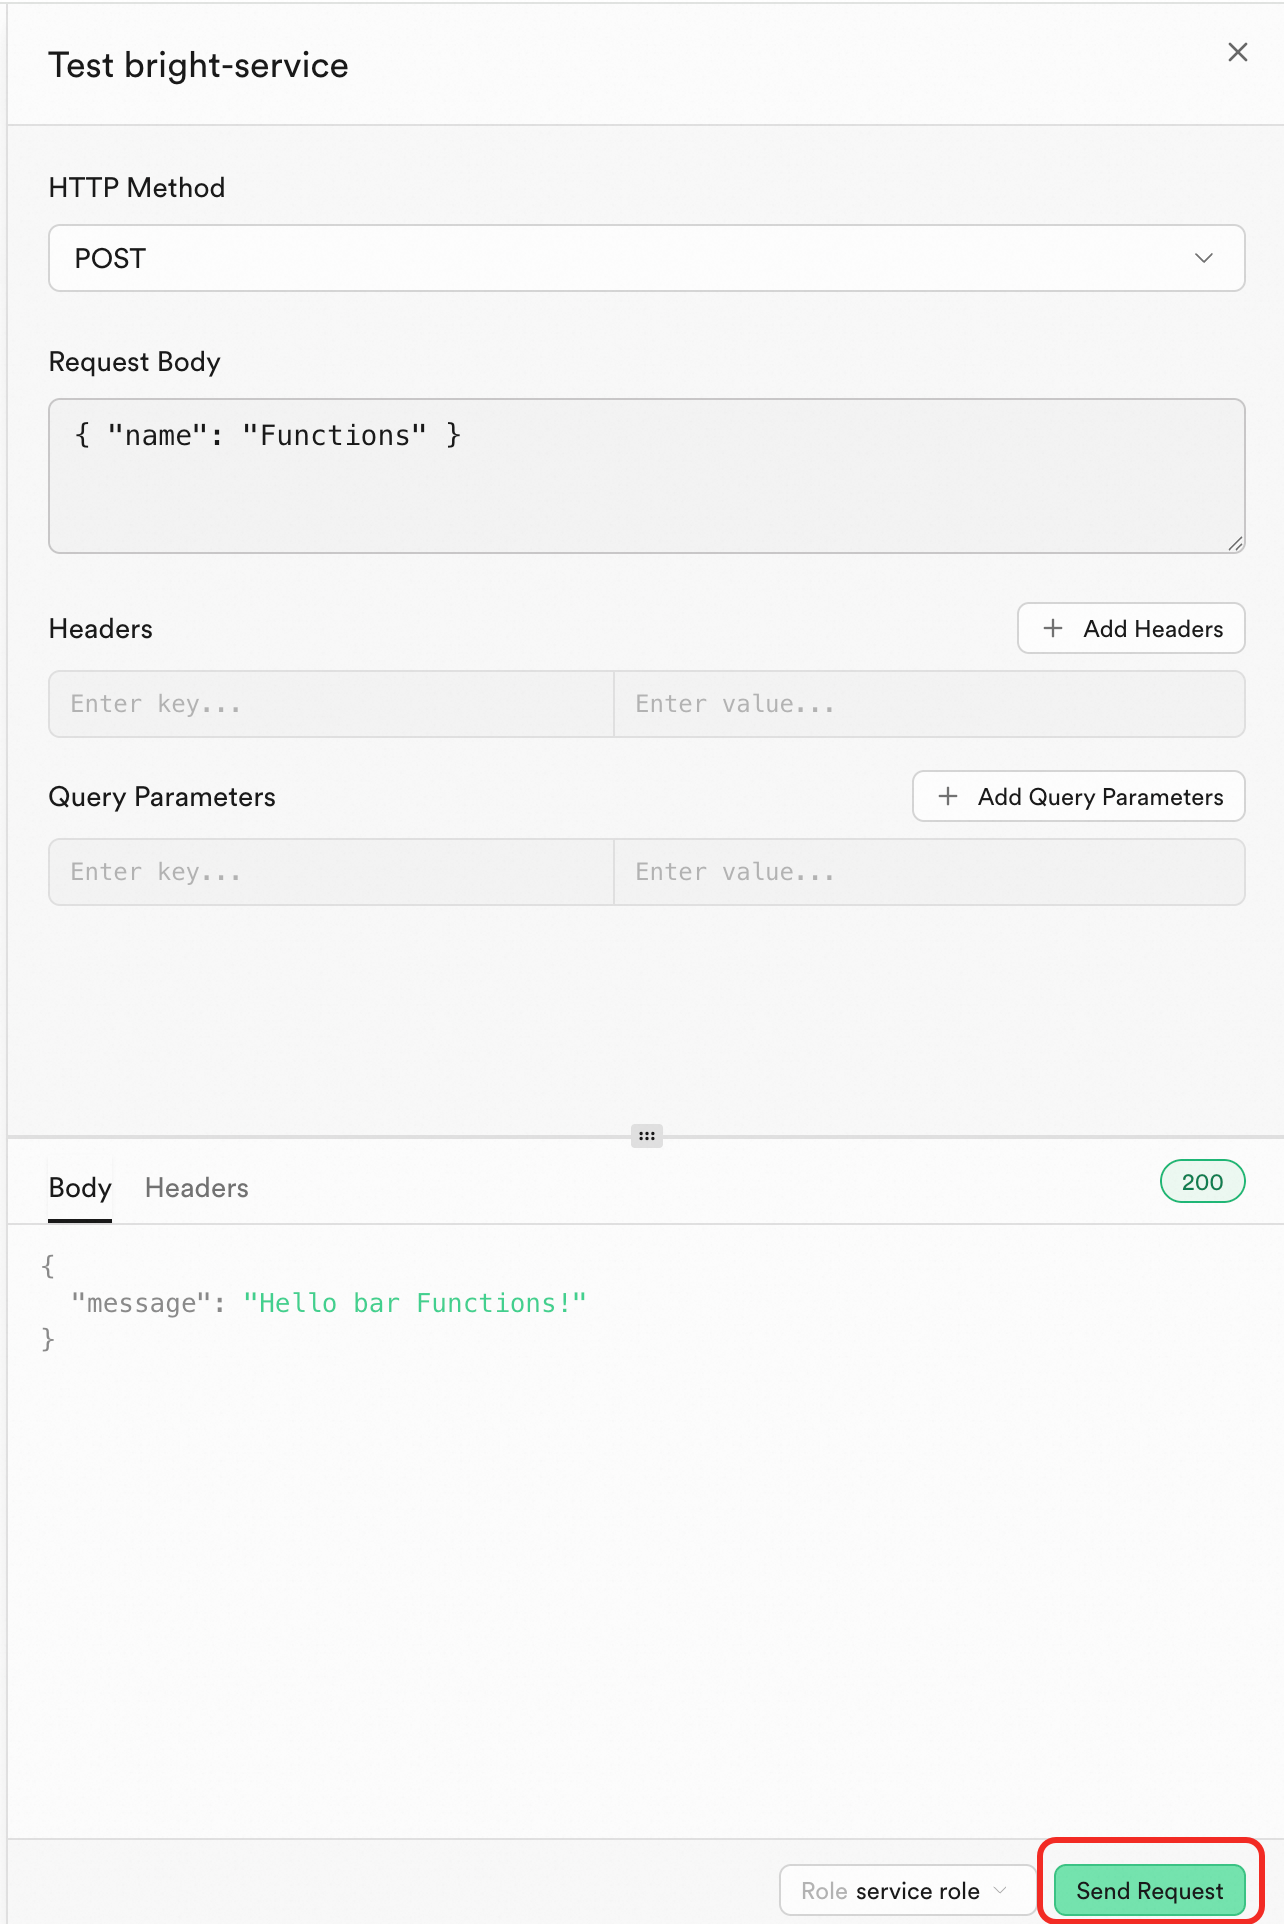
In the panel, click Send Request in the lower-right corner.
Via curl command
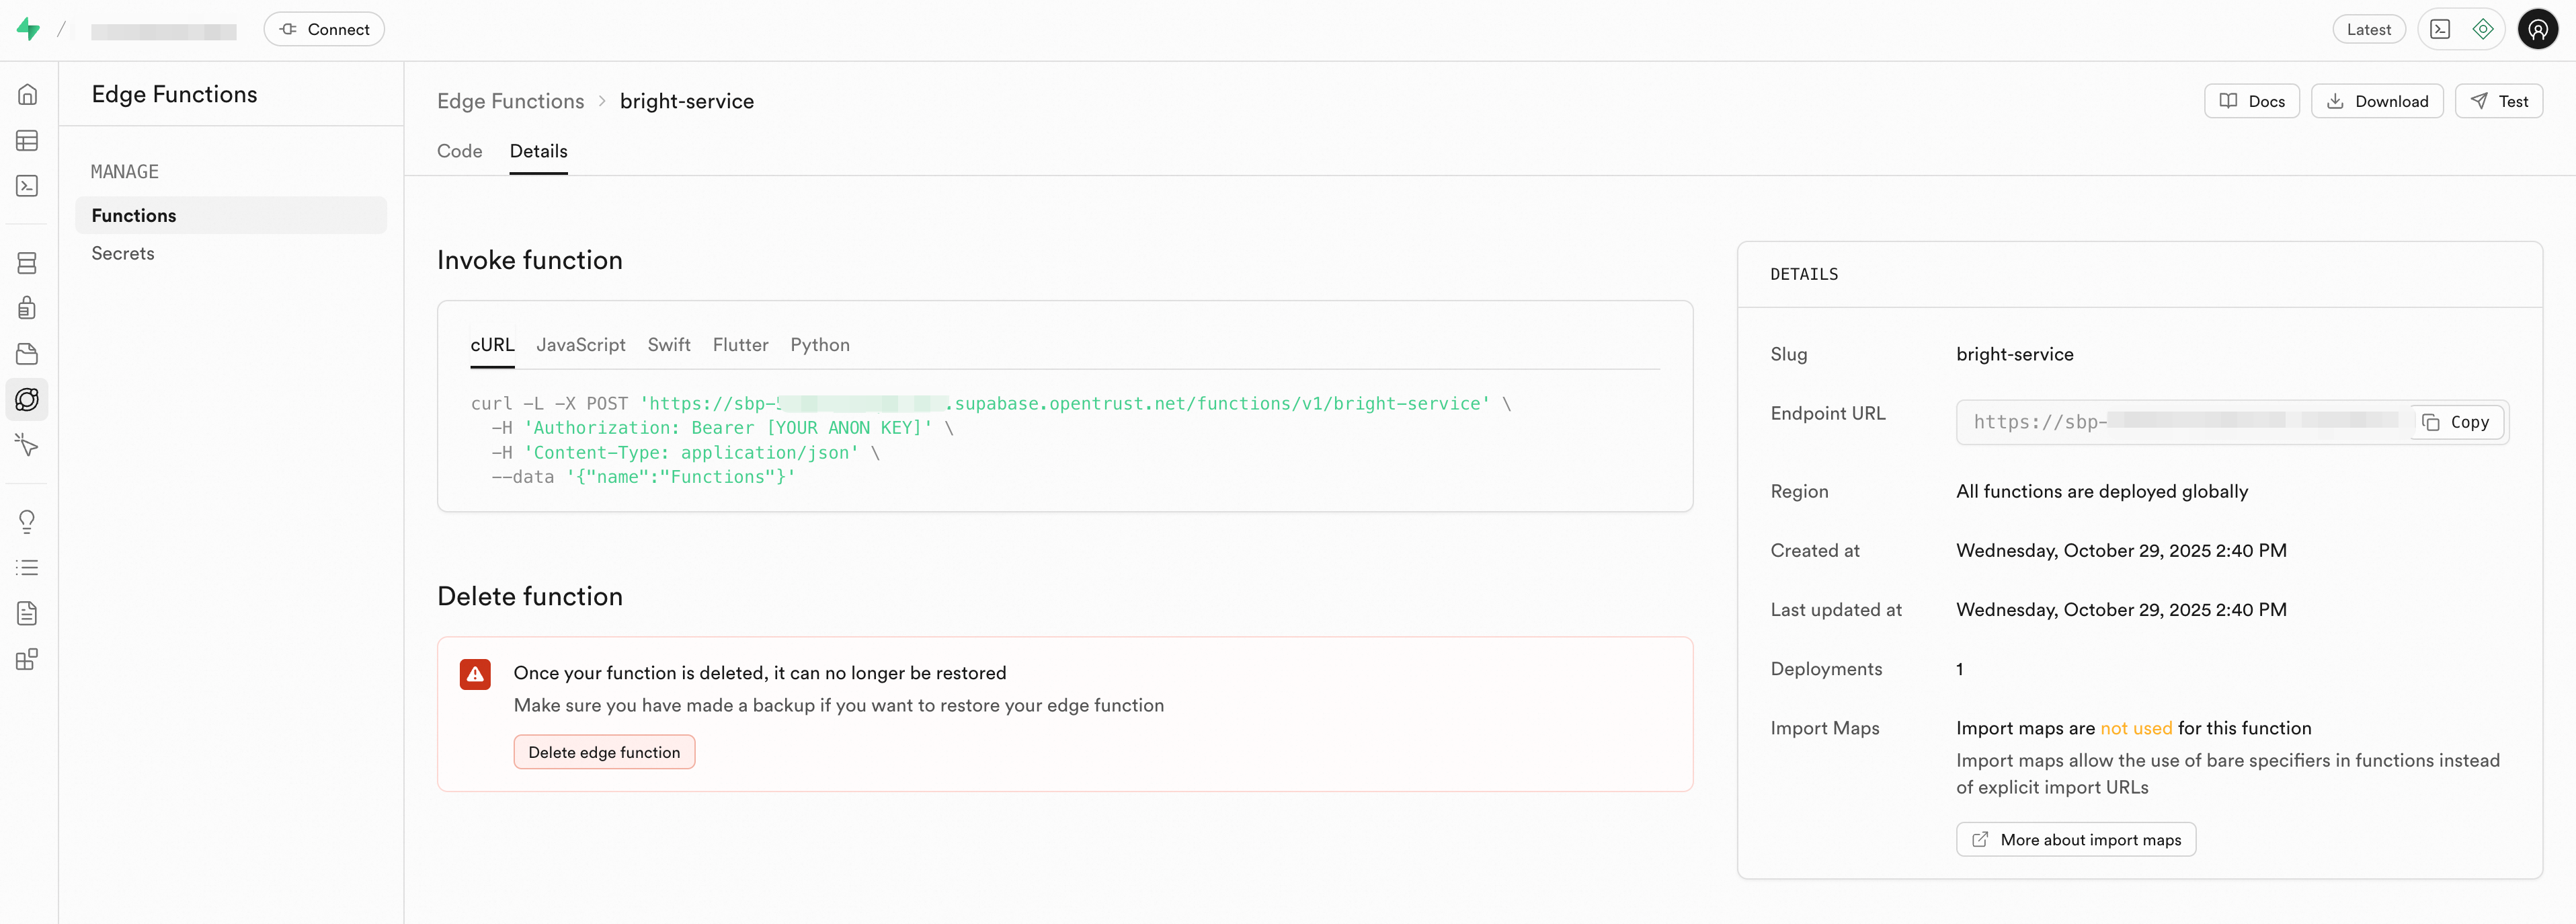
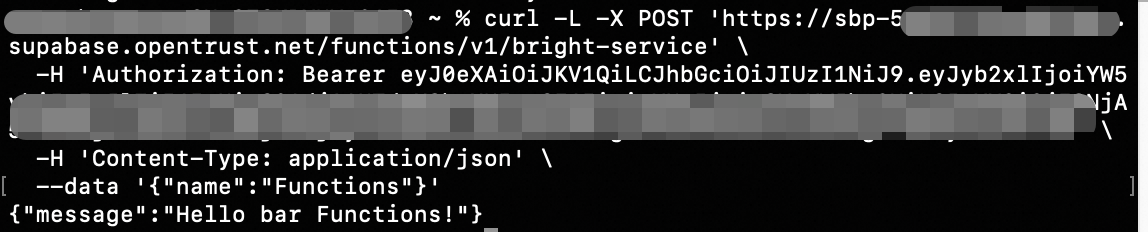
On the Details tab, copy the curl command and replace [YOUR ANON KEY] with an anonymous key or a service role key.
Example output:
Update an edge function
-
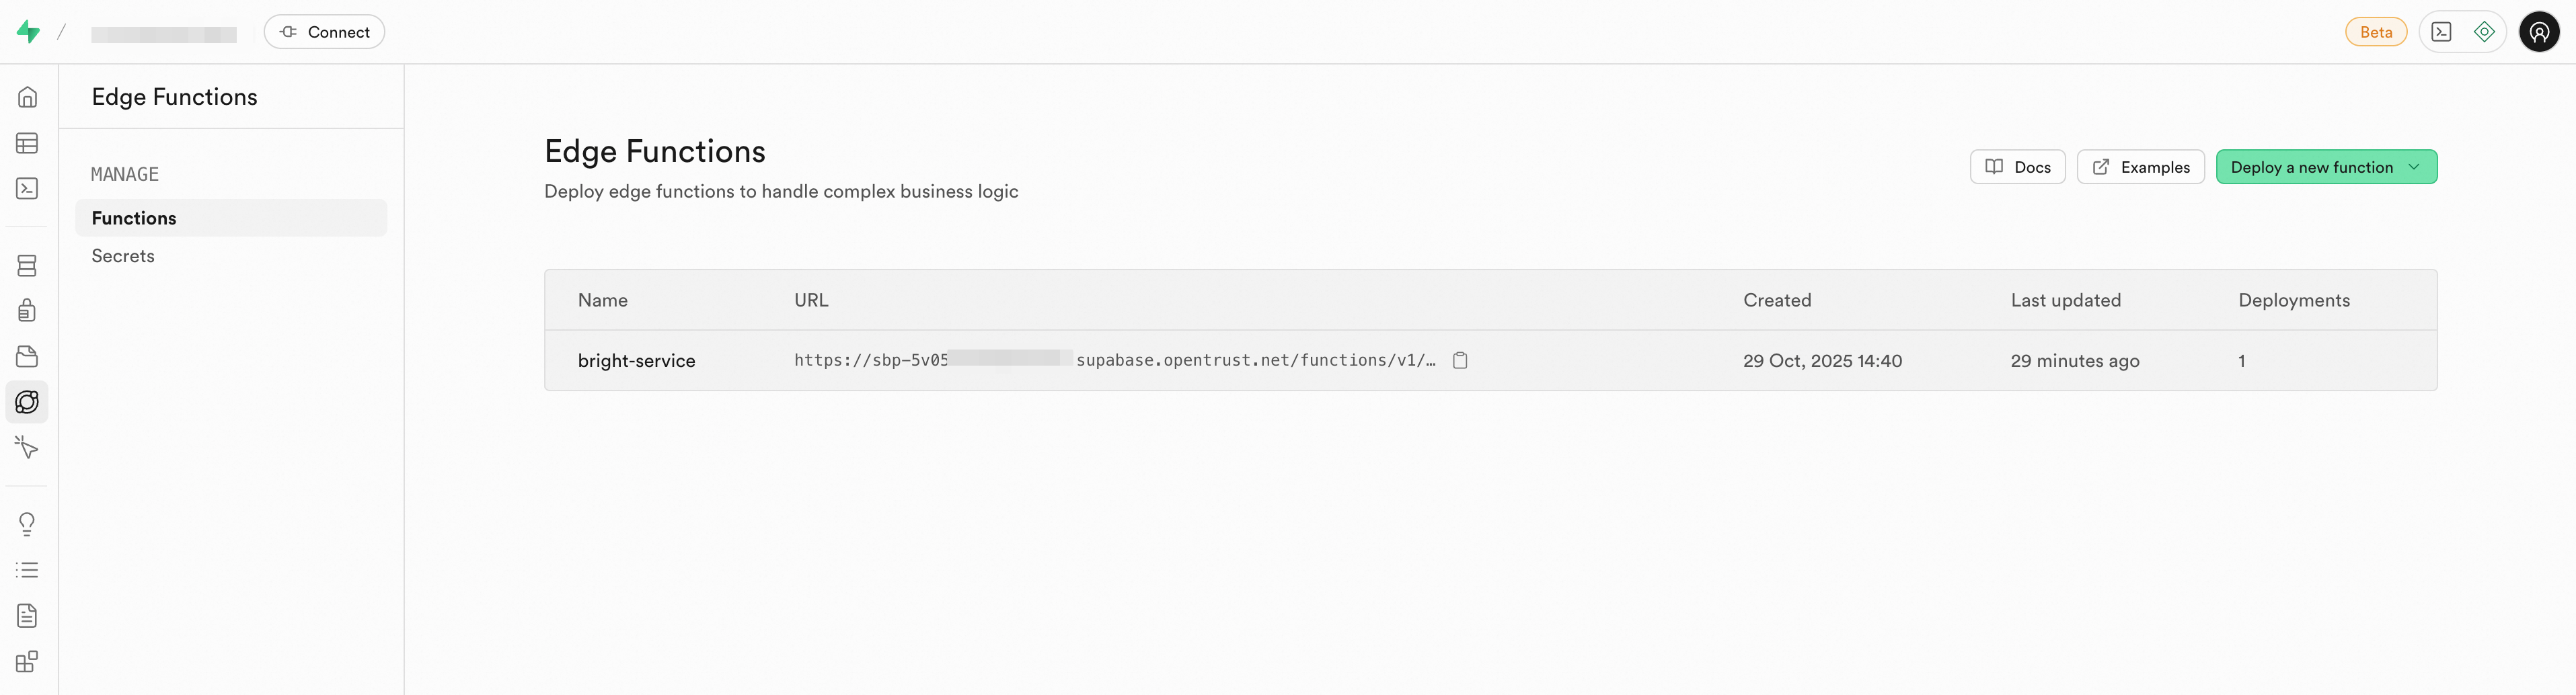
In the sidebar, click Edge Function > Functions, and then click the target function.

-
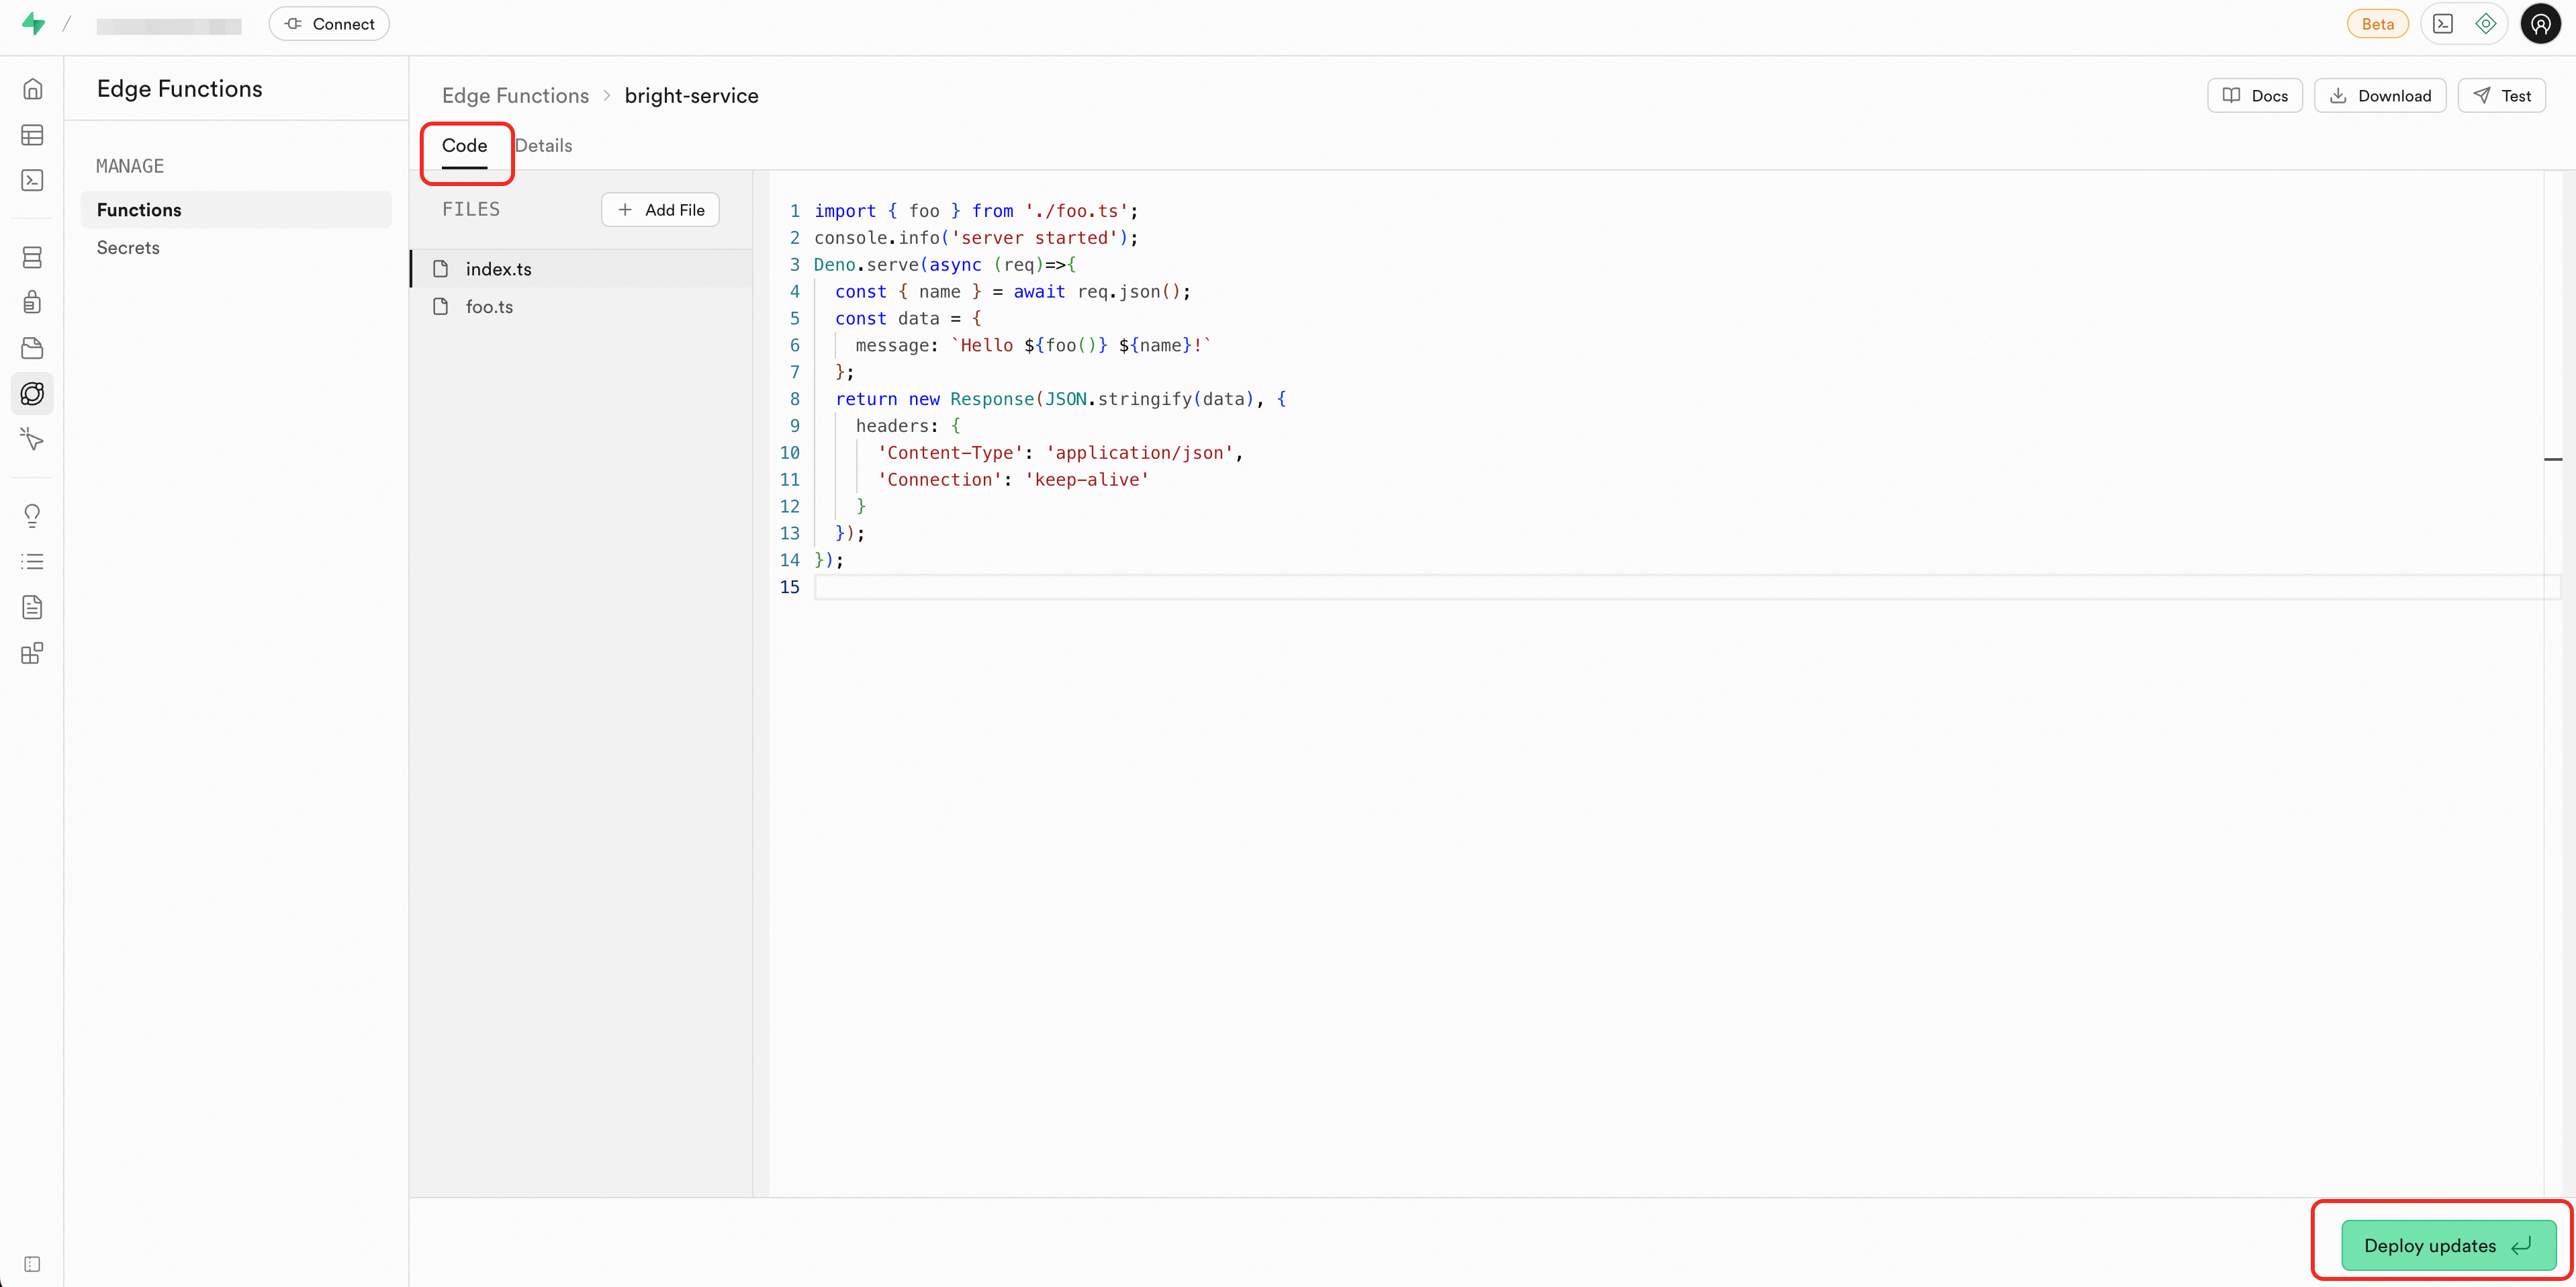
Click the Code tab and edit the target file.
-
In the lower-right corner, click Deploy updates to update the Edge Function.
Migrate an edge function
Migrate from Supabase Cloud
Step 1: Get project information
-
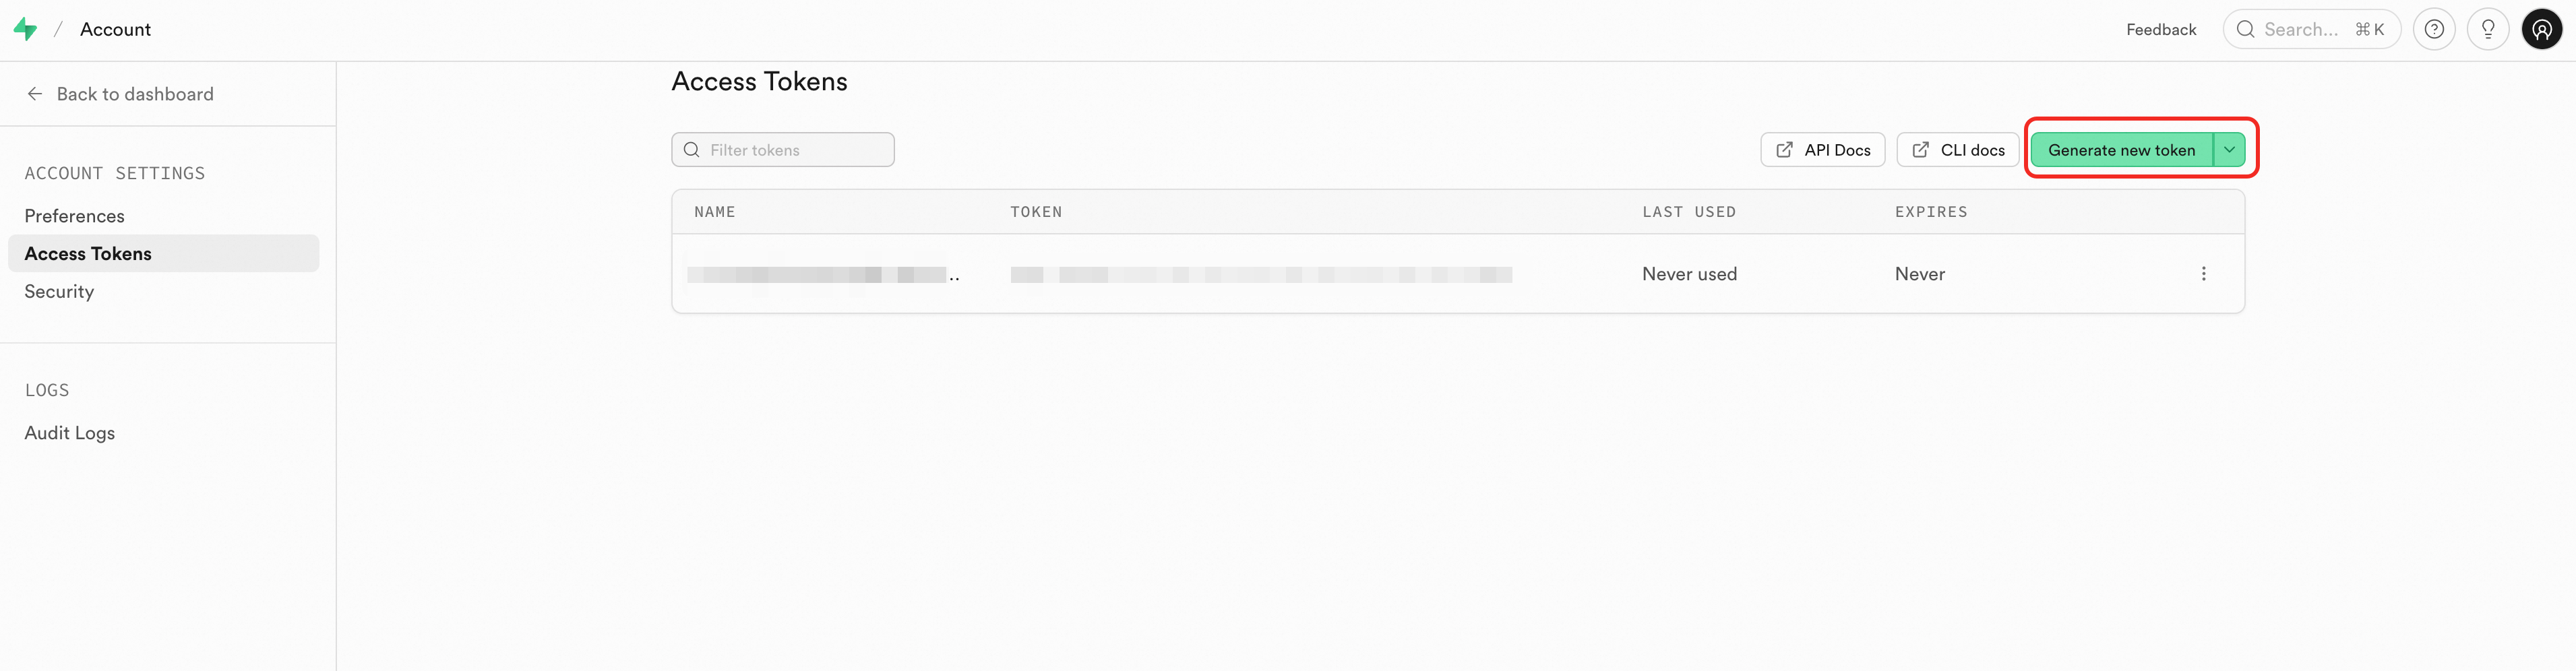
Obtain a personal access token for the source project.
-
Go to the Supabase Cloud console.
-
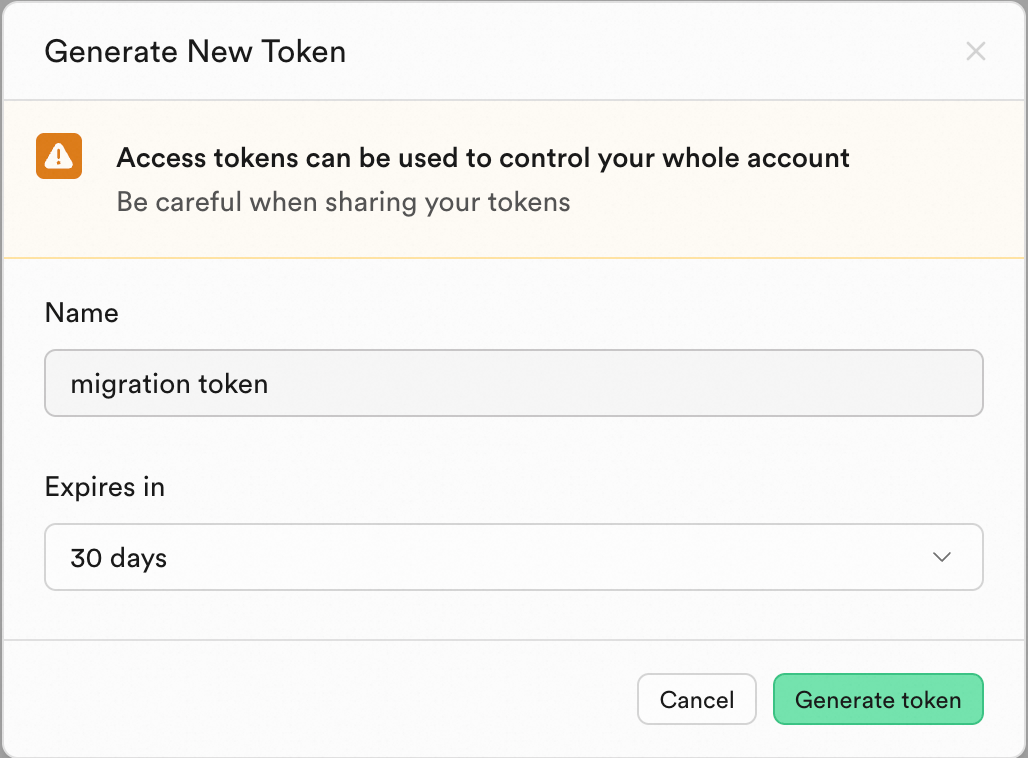
On the Access Tokens page, click Generate new token.
-
Enter a token name and click Generate token.
-
Copy and securely store the token.
-
-
Obtain the Project Ref for the source project.
-
Go to the Supabase console.
-
Click the source project and check the URL in your browser's address bar. The last part of the URL path is the Project Ref. For example, if the URL is
https://supabase.com/dashboard/project/qeqfhfoebrtkbmwd****, the Project Ref isqeqfhfoebrtkbmwd****.
-
-
Obtain the
SUPABASE_API_URLandSUPABASE_API_KEYfor the target project. TheSUPABASE_API_KEYis the service role key. For more information, see Get API Keys. -
(Optional) Configure the project information. You can do so in one of the following ways:
-
Environment variable:
export SUPABASE_API_KEY=xxx -
.envfile:SUPABASE_API_KEY=xxx -
Command-line parameter:
-key xxx
The following example shows how to configure the information by using environment variables:
export SUPABASE_SOURCE_REF=abcdefghijkl**** export SUPABASE_SOURCE_TOKEN=sbp_1760f47cc82fe3466dce9aa********* export SUPABASE_API_URL=https://sbp-xxx.supabase.opentrust.net export SUPABASE_API_KEY=eyJ0eXAiOiJKV1QiLCJhbGciOiJIUzI1NiJ9.eyJyb2xlIjoic2V**** -
Step 2: Install Deno
For more information, see Installation.
Step 3: Migrate using the CLI
-
Download the functions-cli tool. When you run the following commands, replace
functions-cliwith the name of the downloaded CLI tool. -
Run the migration command.
Single function
Migrate a specific function by its slug:
# Basic usage
./functions-cli migrate \
  -s hello \
  --source-ref abcdefghijkl**** \
  --source-token sbp_1a2b3c4d5e6f7g8h**** \
  --target-key eyJ0eXAiOiJKV1QiLCJhbGciOiJIUzI1NiJ9.eyJyb2xlIjoic2V**** \
  --target-url https://sbp-****.supabase.opentrust.net
All functions
./functions-cli migrate \
  --all \
  --source-ref abcdefghijkl**** \
  --source-token sbp_1a2b3c4d5e6f7g8h**** \
  --target-key eyJ0eXAiOiJKV1QiLCJhbGciOiJIUzI1NiJ9.eyJyb2xlIjoic2V**** \
  --target-url https://sbp-****.supabase.opentrust.net
Sync between projects
Step 1: Get project information
-
Obtain the
SUPABASE_API_URLandSUPABASE_API_KEYfor the source and target projects. TheSUPABASE_API_KEYis the service role key. For more information, see Get API Keys. -
(Optional) Configure the project information. You can do so in one of the following ways:
-
Environment variable:
export SUPABASE_API_KEY=xxx -
.envfile:SUPABASE_API_KEY=xxx -
Command-line parameter:
-key xxx
The following example shows how to configure the information by using environment variables:
export SOURCE_API_URL=https://sbp-source***.supabase.opentrust.net export SOURCE_API_KEY=eyJ0eXAiOiJKV1QiLCJhbGciOiJIUzI1NiJ9.eyJyb2xlIjoic2V**** export SUPABASE_API_URL=https://sbp-target***.supabase.opentrust.net export SUPABASE_API_KEY=eyJ0eXAiOiJKV1QiLCJhbGciOiJIUzI1NiJ9.eyJyb2xlIjoic2V**** -
Step 2: Install Deno
For more information, see Installation.
Step 3: Sync using the CLI
-
Download the functions-cli tool. When you run the following commands, replace
functions-cliwith the name of the downloaded CLI tool. -
Run the sync command.
Single function
Sync a specific function by its slug:
./functions-cli sync \
  -s hello \
  --source-key eyJ0eXAiOiJKV1QiLCJhbGciOiJIUzI1Ni**** \
  --source-url https://sbp-source***.supabase.opentrust.net \
  --target-key eyJ0eXAiOiJKV1QiLCJhbGciOiJIUzI1Ni**** \
  --target-url https://sbp-target***.supabase.opentrust.net
All functions
./functions-cli sync \
  --all \
  --source-key eyJ0eXAiOiJKV1QiLCJhbGciOiJIUzI1NiJ9.source_key_**** \
  --source-url https://sbp-source****.supabase.opentrust.net \
  --target-key eyJ0eXAiOiJKV1QiLCJhbGciOiJIUzI1NiJ9.target_key_**** \
  --target-url https://sbp-target****.supabase.opentrust.net
Delete an edge function
-
In the sidebar, click Edge Function > Functions, and then click the target function.
-
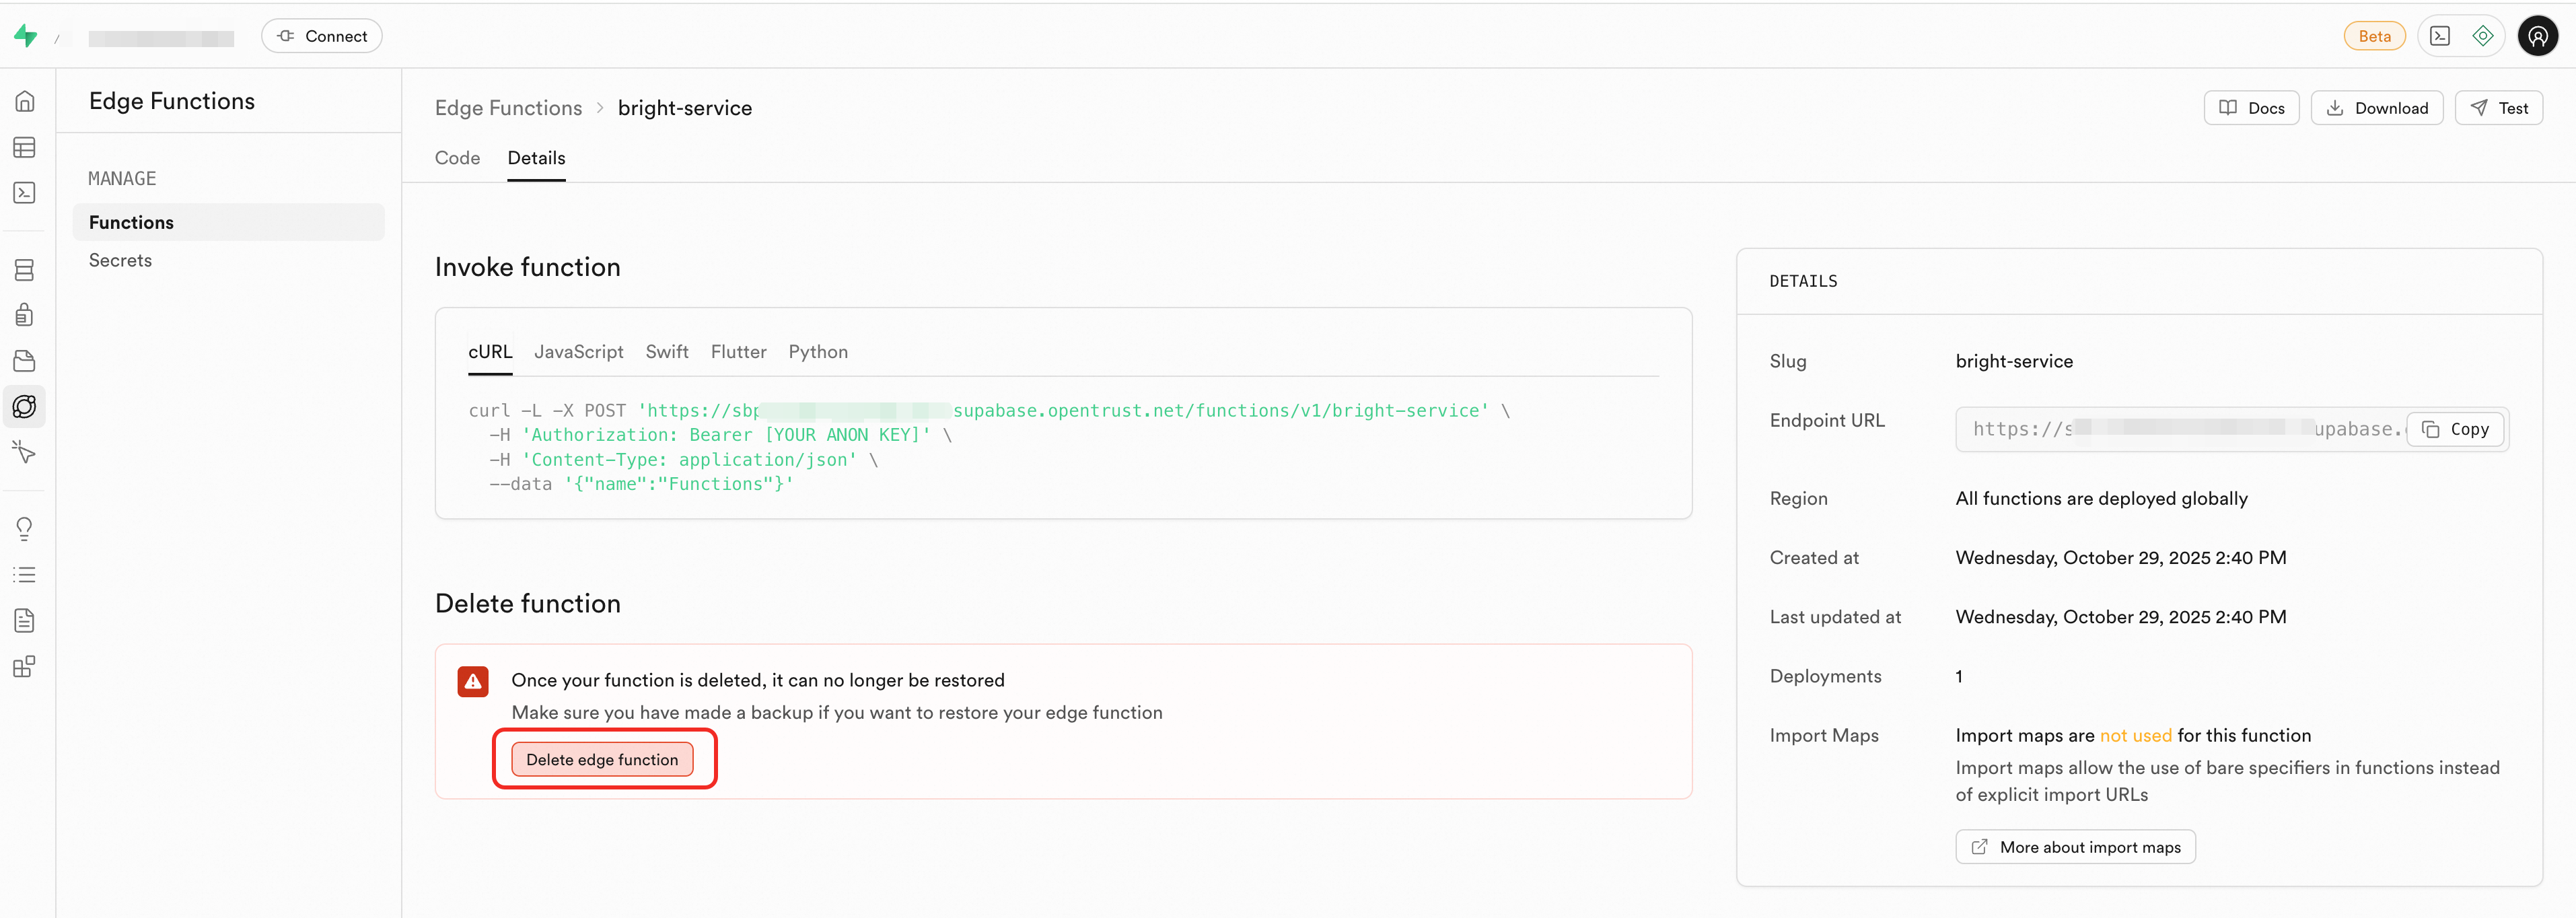
Click the Details tab.
-
In the Delete function section, click the Delete edge function button. In the confirmation dialog, click Delete.
Secrets management
AnalyticDB Supabase provides centralized management of Edge Function secrets. You can store sensitive information in the key vault of the function's runtime environment and retrieve it using Deno.env.get, avoiding hardcoded credentials or client-side exposure.
Default secrets
Edge Functions can access the following secrets by default:
|
Parameter |
Description |
|
SUPABASE_URL |
The API gateway URL of the AnalyticDB Supabase project. |
|
SUPABASE_LOCAL_URL |
The local API gateway URL for the AnalyticDB Supabase project. This URL bypasses the public network for lower latency. |
|
SUPABASE_ANON_KEY |
The anonymous key for the AnalyticDB Supabase API. When Row Level Security is enabled, this key is safe to use in a browser. |
|
SUPABASE_SERVICE_ROLE_KEY |
The service role key for the AnalyticDB Supabase API. This key is safe for use in Edge Functions but must never be exposed in a browser. This key bypasses Row Level Security restrictions. |
Create custom secrets
Via dashboard
-
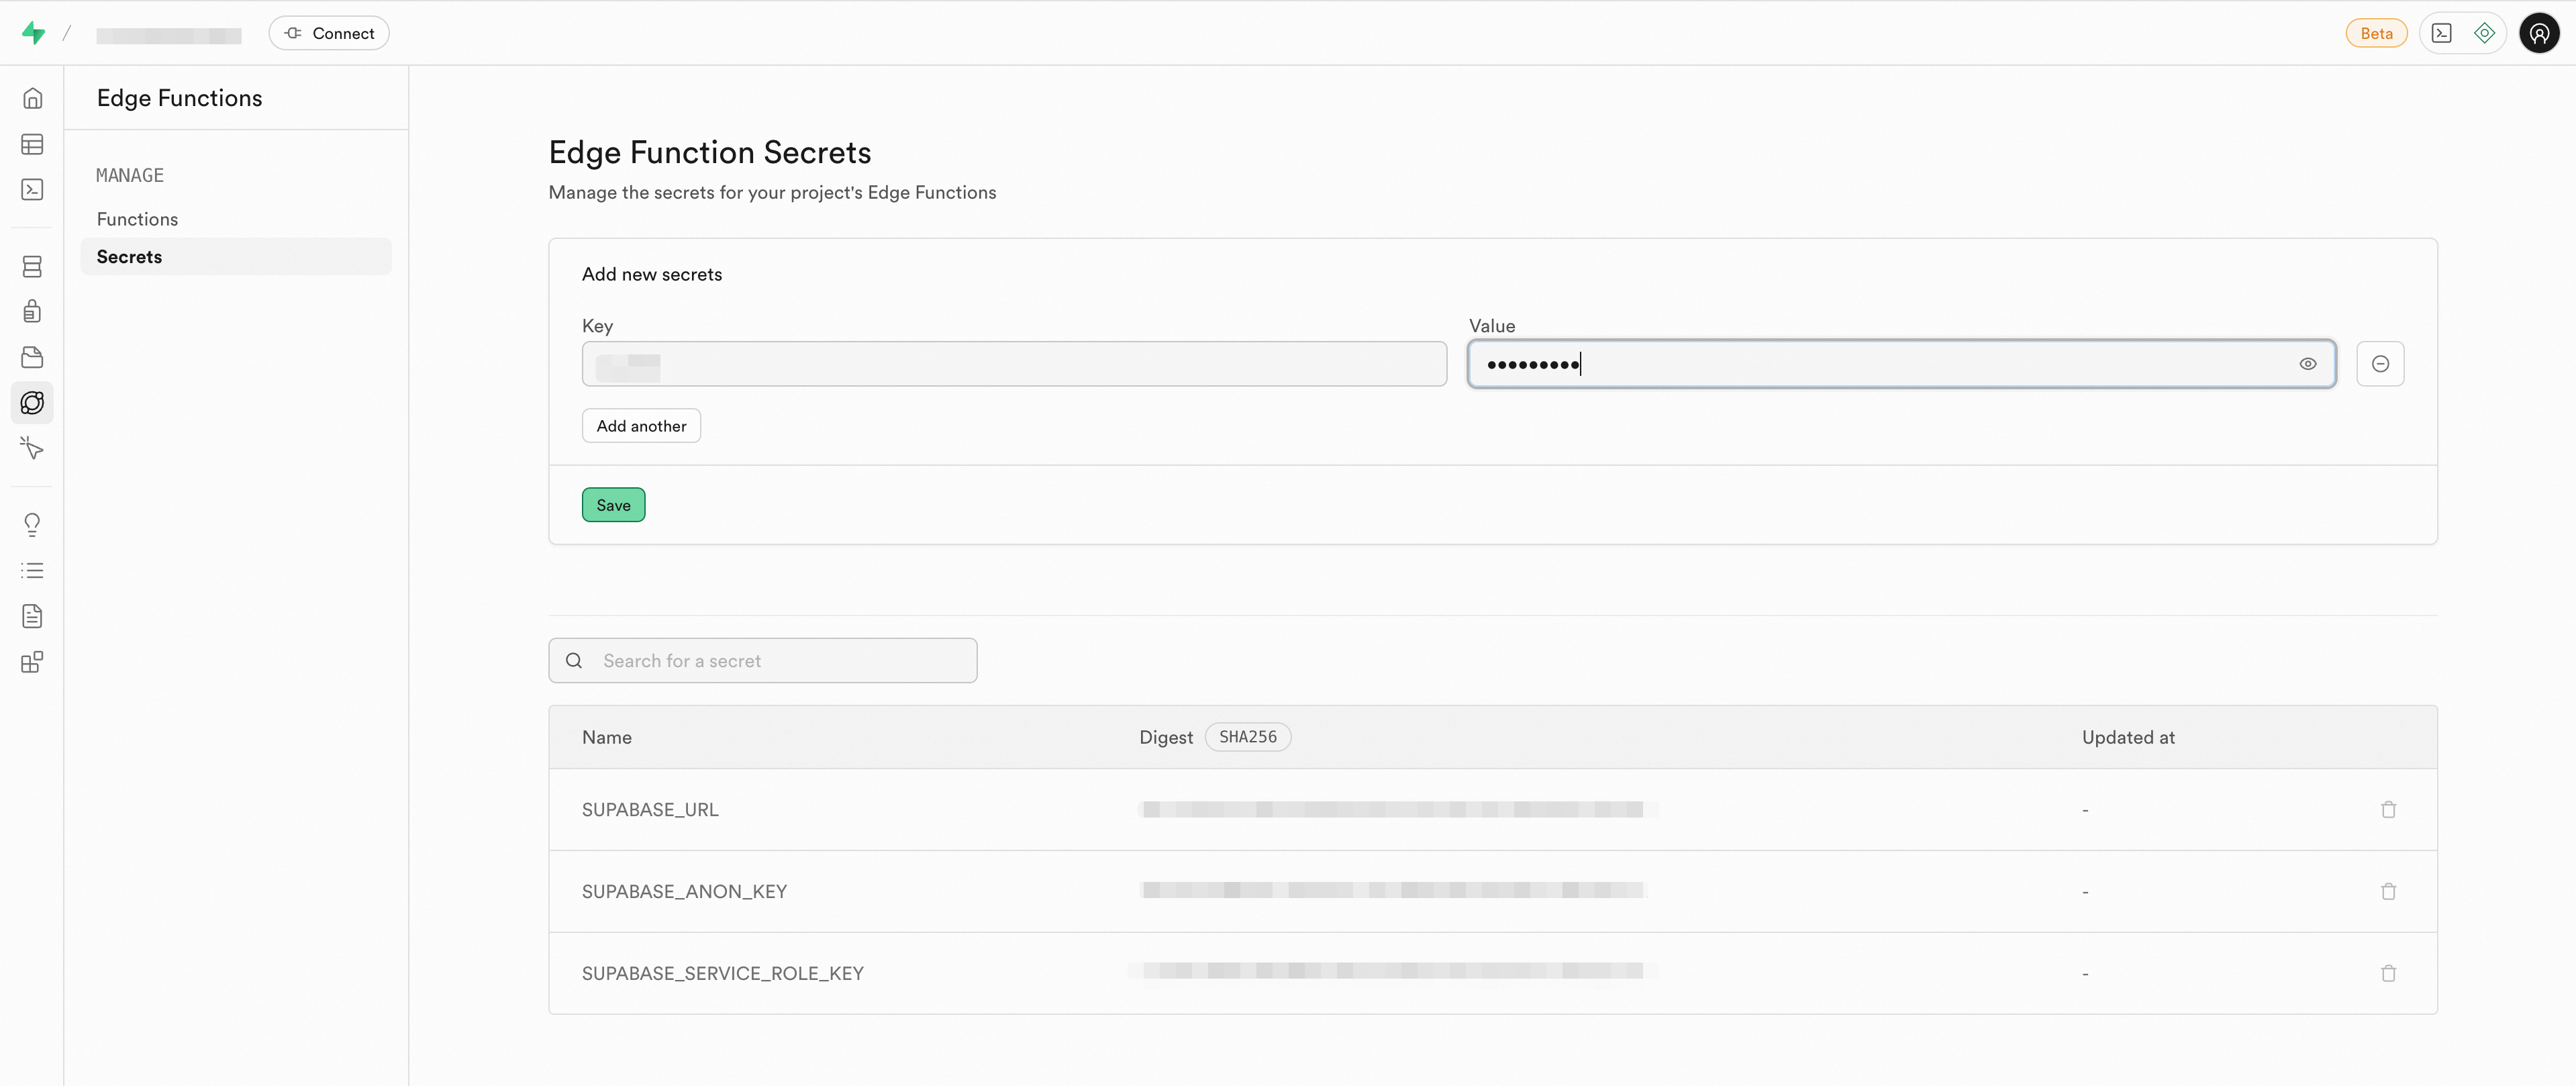
In the sidebar, click Edge Function > Secrets.
-
Enter the key and value.
-
Click save to add the secret.
Via CLI
-
Download the functions-cli tool. When you run the following commands, replace
functions-cliwith the name of the downloaded CLI tool. -
Run the command to set the secrets.
# Add a single secret
functions-cli secrets set DASHSCOPE_API_KEY=sk_test123456

# Add multiple secrets
functions-cli secrets set DASHSCOPE_API_KEY=sk_test123456 OPENAI_API_KEY=test123456

# Add secrets from an .env file
functions-cli secrets set --env-file supabase/functions/.env
Retrieve secrets in an edge function
Use Deno's built-in Deno.env.get() method to access environment variables by name. For a usage scenario, see Integrate with AI services.
Deno.env.get('NAME_OF_SECRET')