Access MSE Nacos services via HTTP API
Create an HTTP API in Cloud-native API Gateway to route external requests to microservices registered in MSE Nacos. This topic covers API creation, route configuration, and debugging.
Prerequisites
-
An MSE Nacos instance is created. Create a Nacos engine.
-
A microservice demo is registered with MSE Nacos. Register Spring Cloud applications with an MSE Nacos registry.
ImportantCloud-native API Gateway does not support on-premises services registered with MSE Nacos or ZooKeeper.
-
A Cloud-native API Gateway instance is created. Create a gateway instance.
Overview
-
Create an HTTP API: Configure basic API information.
-
-
Configure routing rules: Map API requests to the target MSE Nacos service.
-
Instance: Select the gateway instance for deployment.
-
Associate a service: Link service instances to the route for dynamic discovery.
-
-
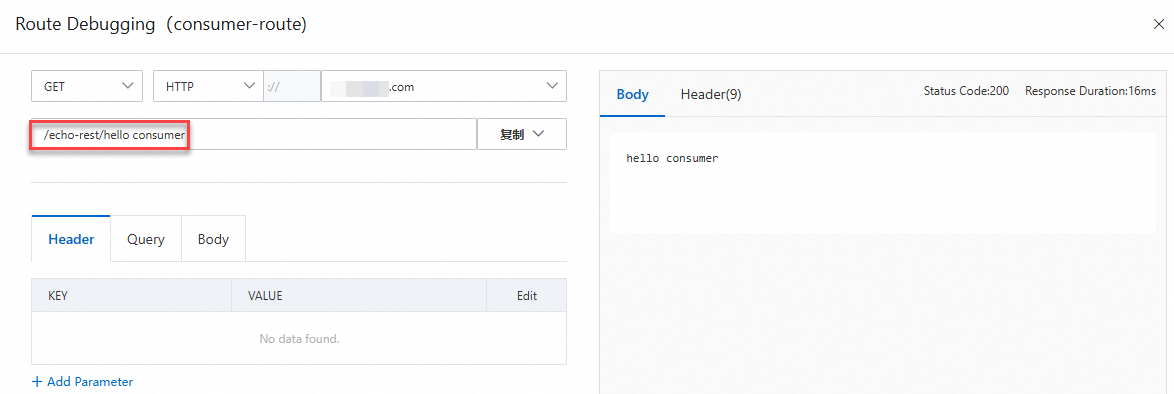
Debug the route: Simulate requests to verify the gateway-to-Nacos integration.
Step 1: Create an HTTP API
-
Log on to the API Gateway console.
-
In the left-side navigation pane, click . In the top navigation bar, select a region.
-
On the API page, click Create API.
-
In the Create API dialog box, select HTTP API and click Create. On the next page, enter an API Name and a Description.
Step 2: Create a route
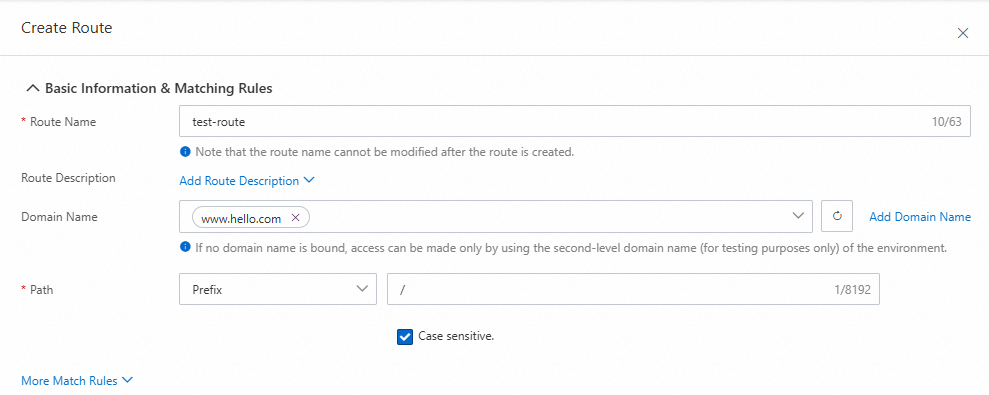
Click the API name to open the details page. Click Create Route. In the Create Route panel, configure the following parameters.
Configure basic route information
-
Domain Name: Click Add Domain Name to create a new domain name.
-
Path: Matches requests starting with the specified path, such as
/.
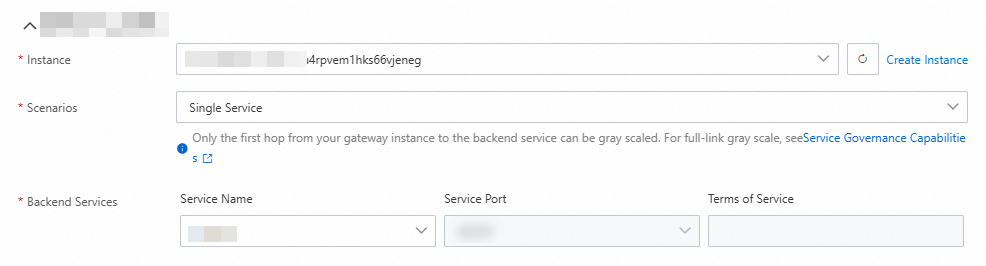
Instance and backend service
-
For Instance, select your Cloud-native API Gateway instance.
-
Use case: Select Single Service.
Associate a service
-
In the Backend Services section, click Create Service from the Service Name drop-down list.

-
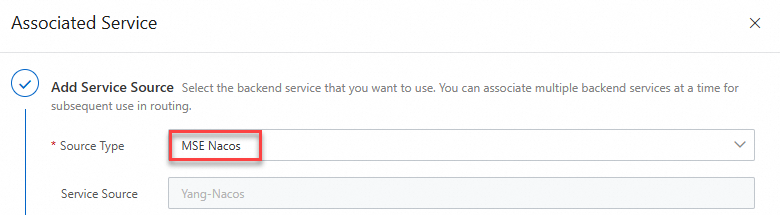
Create a service source.
-
Set Source Type to MSE Nacos.
-
Click Add Source, select the Nacos cluster where the service is deployed, and then click OK.
-
-
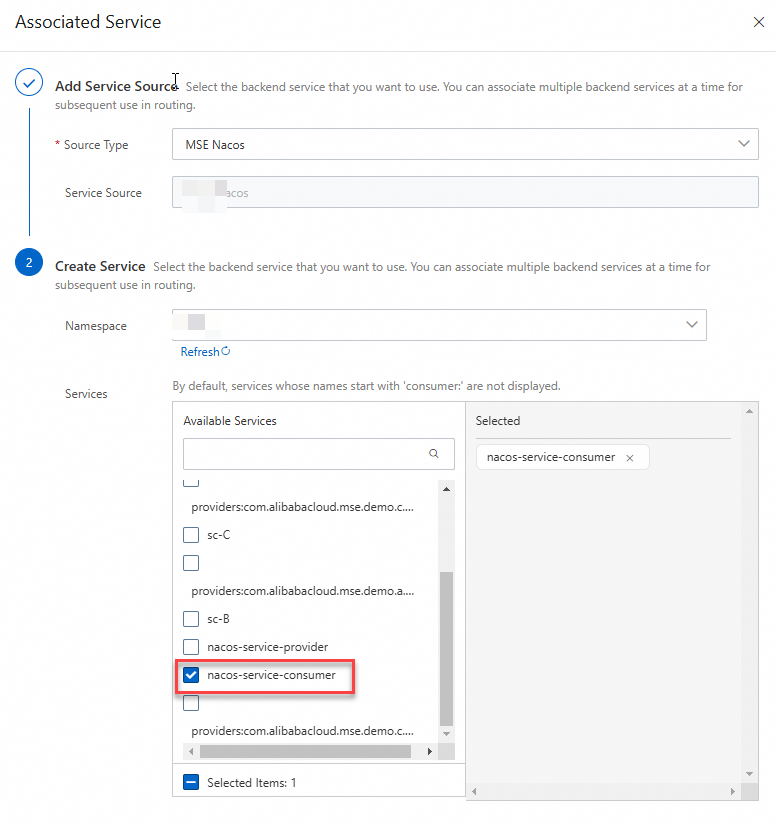
Create a service:
-
Namespace: Select the namespace of your demo project.
-
Services: Select the service consumer from your microservices project.
-
Save and publish
Step 3: Debug the route
-
After the route is published, click Debug in the Actions column of the target route.
-
In the debugging panel, enter the API parameters and click Send. The response appears on the right.

Related documentation
-
Access applications in a container service by using an HTTP API
-
Cloud-native API Gateway FAQ