An AppServer that uses AUI Kits for chit-chat rooms provides background capabilities such as logon and room management. This helps you publish apps in an efficient and innovative manner.
How it works
Workflow of AppServer

To establish services such as chit-chat rooms based on the AUI Kits framework, the scenario-based SDKs must be integrated with services such as ApsaraVideo Live and instant messaging (IM). You can integrate the SDKs with ApsaraVideo Live for co-streaming and IM for interactive messaging. AppServer encapsulates the capabilities of the preceding services and provides a set of standardized API operations over HTTP for scenario-based SDKs. This reduces the development costs.
You need to deploy and maintain AppServer by yourself.
Project framework
Build a framework based on the mainstream Java 8 and Spring Boot 2.
Build a repository based on MyBatis-Plus.
Implement permission control based on Spring Security and JSON Web Token (JWT).
Project deployment
Prerequisites
All relevant preparations are complete. For more information, see Console configurations.
Java 8 is installed in your environment.
Create a database
Manually create a database and execute the following SQL statements to create a table in the database. In this example, a MySQL database is used.
CREATE TABLE `room_infos` (
`id` char(32) NOT NULL,
`created_at` datetime DEFAULT NULL,
`updated_at` datetime DEFAULT NULL,
`title` varchar(256) DEFAULT NULL,
`extends` mediumtext,
`status` tinyint DEFAULT NULL,
`chat_id` char(32) DEFAULT NULL,
`notice` varchar(256) DEFAULT NULL,
`cover_url` varchar(256) DEFAULT NULL,
`anchor_id` varchar(256) DEFAULT NULL,
`anchor_nick` varchar(256) DEFAULT NULL,
`meeting_info` mediumtext,
`show_code` int NOT NULL,
`started_at` datetime DEFAULT NULL,
`stopped_at` datetime DEFAULT NULL,
PRIMARY KEY (`id`),
KEY `idx_create_at` (`created_at`),
UNIQUE KEY `udx_show_code`(`show_code`)
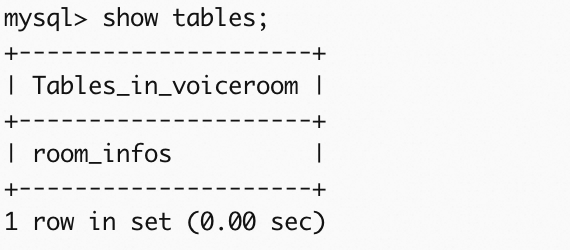
) ENGINE=InnoDBA table is created and the output in the following figure is displayed.
Deploy AppServer by using the source code
In this example, the source code is used to build and deploy AppServer.
When you deploy the server for the first time, you must edit the code/src/main/java/com/aliyuncs/aui/common/utils/JwtUtils.java file and set the `SECRET` property to a random string.
Configure the project
Download the source code to your server.
Open the
application.ymlfile in theServer\Java\code\src\main\resourcesdirectory and configure relevant parameters.Parameter
Description
# The database address, username, and password.
    url: jdbc:mysql://*****:3306/****?useUnicode=true&characterEncoding=UTF-8&useSSL=false&serverTimezone=Asia/Shanghai
    username: "r*****"
    password: "p*****"
url: the hostname or IP address of the MySQL database server or the name of the MySQL database.
username: the username that is used to log on to the MySQL database.
password: the password that is used to log on to the MySQL database.
# The configurations of the points of presence (POPs). The AccessKey pair of your account must be configured to use IM and ApsaraVideo Live services.
 biz:
  openapi:
    access:
      key: "*********"
      secret: "*********"
The AccessKey pair that is used for identity authentication when you call the API operations of IM and ApsaraVideo Live services. An AccessKey pair consists of an AccessKey ID and an AccessKey secret.
The AccessKey ID is used to identify a user.
The AccessKey secret is used to verify the identity of the user. You must keep your AccessKey secret confidential.
For more information, see Create an AccessKey pair.
# The configurations of the IM application.
  new_im:
    appId: "********"
    appKey: "********"
    appSign: "********"
For more information about the ID of the IM application, see the "Create an IM application" section of the Preparations topic.
# The configurations of the co-streaming application.
  live_mic:
    app_id: 7c61********
    app_key: c461b*********
For more information about the application ID and application key, see the "Create an ARTC application" section of the Preparations topic.
Configure service-oriented authentication settings
In this project, you need to call the/login interface to obtain the authentication token, put the token in the request header, and then call other interfaces. However, the token generation method of this project is relatively simple and is only applicable to testing. Users need to adjust their authentication policies when developing based on Demo. Users can configure authentication according to their own business requirements, including the token generation algorithm can also be customized, to ensure that the same algorithm is used to generate and verify tokens.
For code files related to authentication token, seecode/src/main/java/com/aliyuncs/aui/common/utils/JwtUtils.java。

For the /login interface description, see API reference.
Package and run the project
Packaging
You can use the built-in Maven in IntelliJ IDEA to package the project. The generated JAR file is located in the target directory.
Navigate to the
Server\Java\codepath and run the following command to package the project.mvn package -DskipTestsCopy the JAR package from the
targetdirectory to the server.scp xxx.jar root@ip:/root
Run the project
Open a terminal in the directory that contains the JAR package.
The application runs in and prints logs to the terminal.
java -jar ***.jarThe process runs in the background and writes the logs to the nohup.out file.
nohup java -jar ***.jar &Verify that the project started successfully.
Access the relevant API. If a response similar to the one in the following figure is returned, the AppServer has started successfully.