Integrate ASM with Argo CD for GitOps
Argo CD monitors a git repository for changes to application resources, compares the desired state with the live state in a cluster, and then automatically or manually synchronizes the changes. To enhance the efficiency and traceability of service deployments in your Kubernetes environment, you can integrate Argo CD with ASM to implement GitOps. This approach uses a version control system to automate application deployment, which simplifies the deployment process, ensures configuration consistency, provides a transparent operational history, improves system maintainability and stability, and reduces maintenance costs.
Prerequisites
-
You have created an ASM instance of version 1.12.4.50 or later. For more information, see Create an ASM instance.
-
You have created a git repository.
Background information
GitOps is a way to implement continuous deployment for cloud-native applications. Alibaba Cloud Service Mesh (ASM) integrates with ArgoCD to release and update applications and implement GitOps. Developers commit application definitions (such as Deployments and Services) and traffic management rules (such as VirtualServices, Gateways, and DestinationRules) written in YAML to a Git repository. ArgoCD monitors the state of application resources in the cluster, such as Deployments, Services, and VirtualServices, and compares the current state with the desired state defined in the Git repository. The Git repository is used as the source of truth. When the repository is updated, ArgoCD supports automatic or manual synchronization and deployment of applications.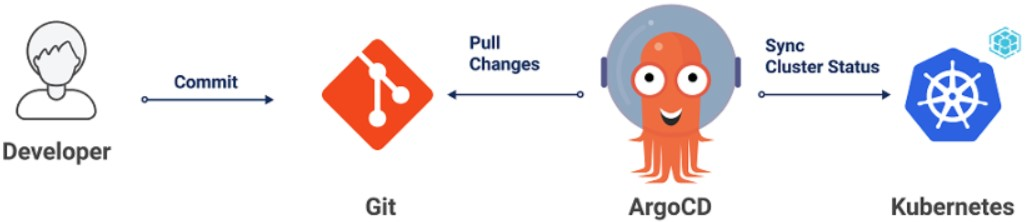
Step 1: Install Argo CD
You can either install Argo CD manually or use the built-in Argo CD feature in Application Center of Container Service for Kubernetes (ACK). This tutorial uses a manual installation of Argo CD to demonstrate the integration with ASM and implementation of GitOps.
-
To manually install Argo CD, see the Argo CD documentation.
-
Application Center in Container Service for Kubernetes (ACK) includes a built-in Argo CD feature that eliminates the need for manual installation. Application Center lets you check application status, deploy application versions to Kubernetes clusters from git repositories and Helm charts, and manage releases and rollbacks. For more information, see Application Center overview.
Step 2: Enable data plane KubeAPI access
Because Alibaba Cloud Service Mesh (ASM) is a managed Istio-compatible control plane where the control plane and data plane (Service Mesh) are in different Kubernetes cluster environments, you must enable data plane KubeAPI access in ASM. This allows ArgoCD to access Istio resources in the ASM cluster in the same
-
Log on to the ASM console. In the left-side navigation pane, choose .
-
On the Mesh Management page, find the ASM instance that you want to configure. Click the name of the ASM instance or click Manage in the Actions column.
-
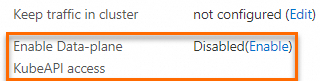
In the Basic Information section, click Enable next to Enable Data-plane KubeAPI access.
-
In the dialog box that appears, click Submit.
Step 3: Create an ASM ingress gateway
-
Log on to the ASM console. In the left-side navigation pane, choose .
-
On the Mesh Management page, click the name of the ASM instance. In the left-side navigation pane, choose .
-
On the Ingress Gateway page, click Create. Set the basic information for the gateway, and then click Create.
The following table describes some of the key parameters. For more information about all parameters, see Create an ingress gateway.
Parameter
Description
Name
This topic uses ingressgateway as an example.
Gateway types
Select North-South IngressGateway.
Port Mapping
Click Add Port and configure the following protocols and ports.
-
Set Protocol to HTTP and Service Port to 80.
-
Set Protocol to HTTPS and Service Port to 443.
-
Step 4: Deploy Istio resources with Argo CD
You can define Istio resources as Kubernetes manifests and store them in the same git repository used for your application's Kubernetes resources.
-
Create the bookinfo sample application.
-
In the Argo CD UI, click NEW APP and configure the following parameters.
-
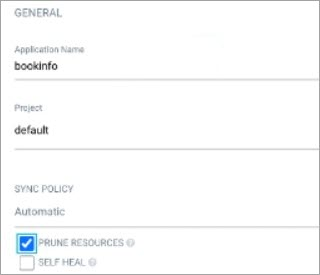
In the GENERAL section, set Application Name to bookinfo, set Project to default, and select PRUNE RESOURCES.
-
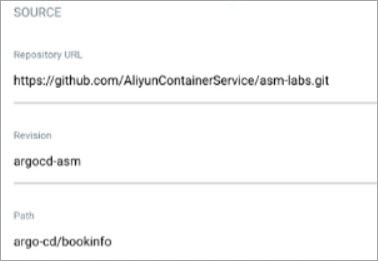
In the SOURCE section, set Repository URL to https://github.com/AliyunContainerService/asm-labs.git, Revision to argocd-asm, and Path to argo-cd/bookinfo.
-
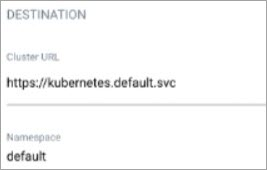
In the DESTINATION section, set Cluster URL to https://kubernetes.default.svc and Namespace to default.
-
-
After you configure the parameters, click CREATE at the top of the page.
After the application is created, you can view the status of the bookinfo application in the Argo CD UI.
 Click bookinfo to view the status of the created resources.
-
-
Check the resource status in the ASM console.
-
Log on to the ASM console. In the left-side navigation pane, choose .
-
On the Mesh Management page, click the name of the ASM instance. In the left-side navigation pane, choose .
-
On the Virtual Service page, verify that the bookinfo VirtualService is created.
-
-
Check the resource status in the ACK console.
Log on to the ACK console. In the left navigation pane, click Clusters.
On the Clusters page, click the name of your cluster. In the left navigation pane, click .
-
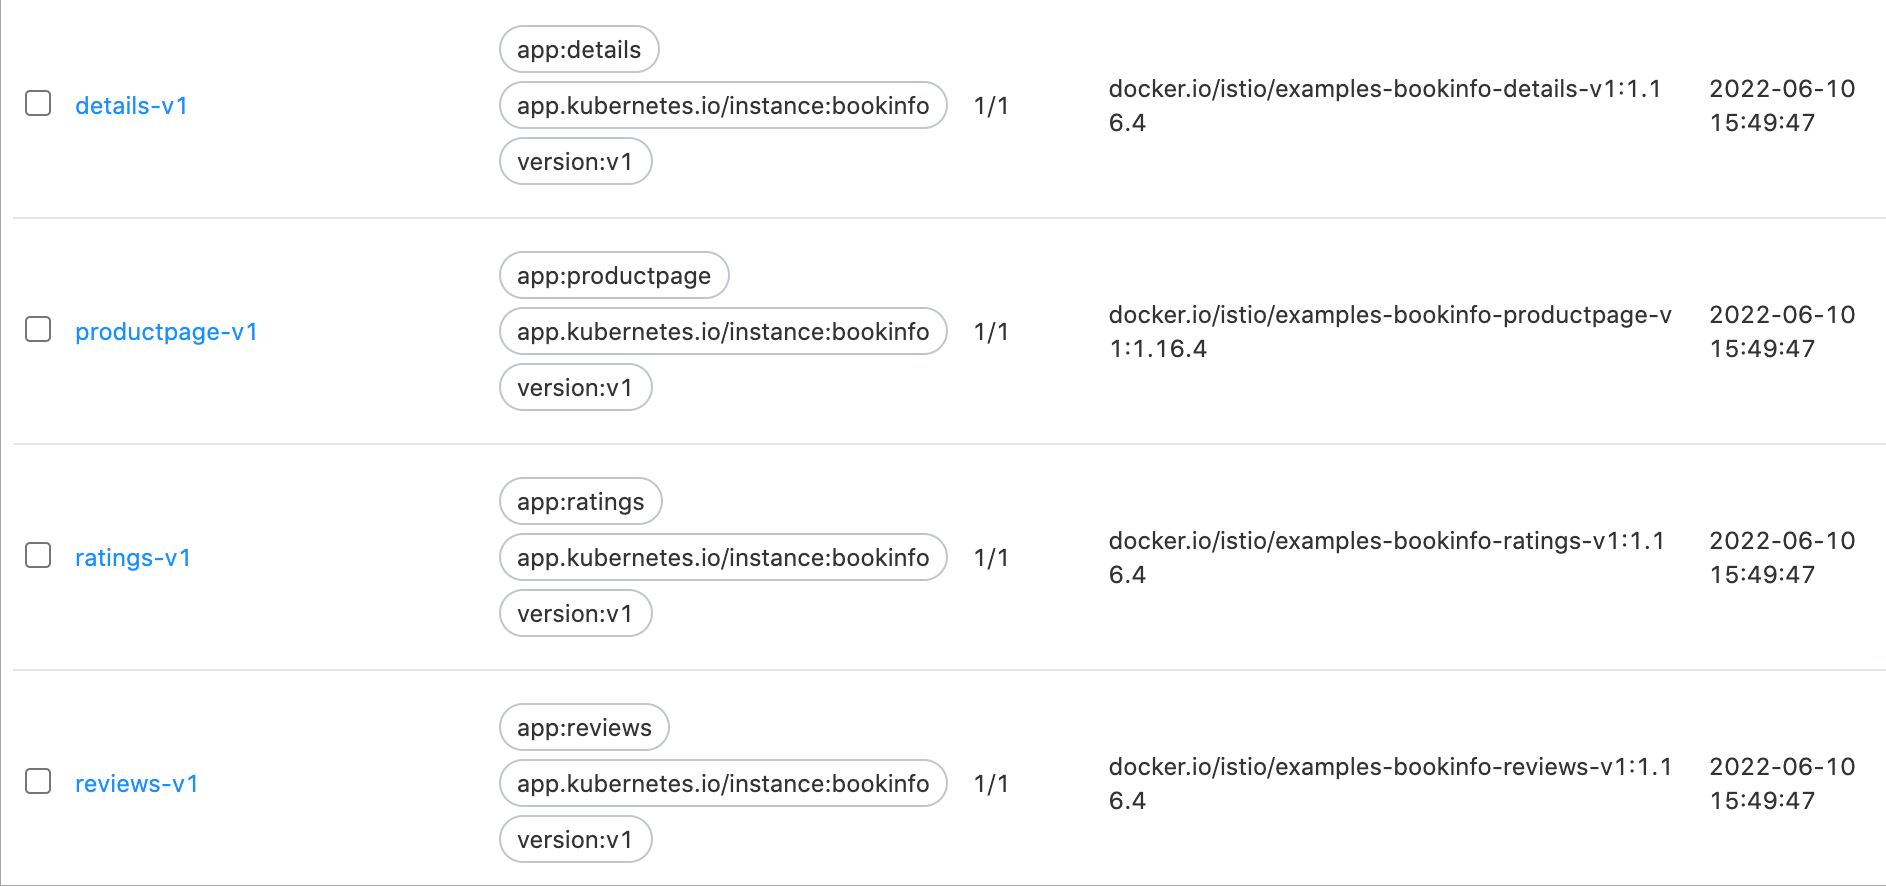
Verify that the Deployments are created.
-
Access the ASM gateway.
-
Obtain the address of the ASM gateway.
-
Log on to the ASM console. In the left-side navigation pane, choose .
-
On the Mesh Management page, click the name of the ASM instance. In the left-side navigation pane, choose .
-
On the Ingress Gateway page, find the target gateway and obtain its Service address.
-
-
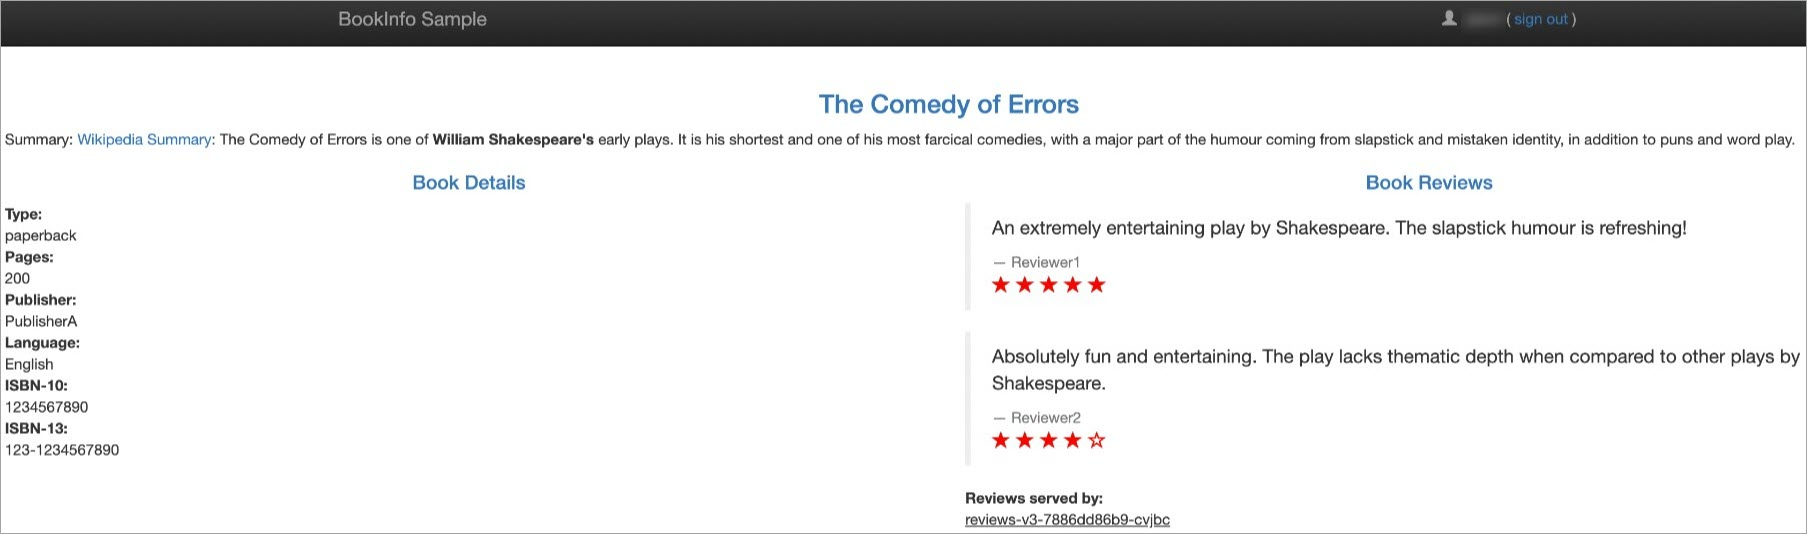
In your browser, go to http://{Your ASM gateway address}/productpage.
The following page appears. Because the reviews service of the Istio bookinfo application has three versions and traffic is not routed to a specific version, the data on the right side of the page changes each time you refresh the page.
-
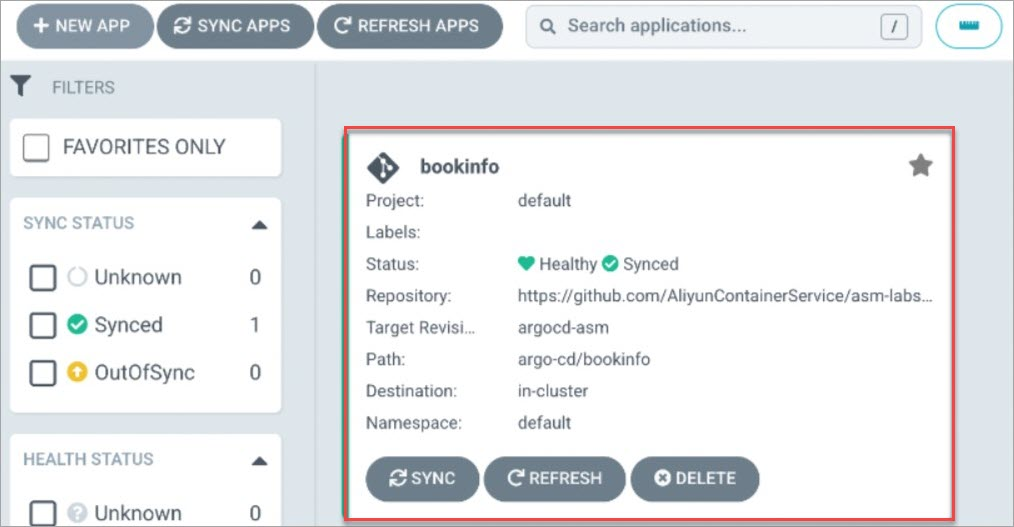 Click bookinfo to view the status of the created resources.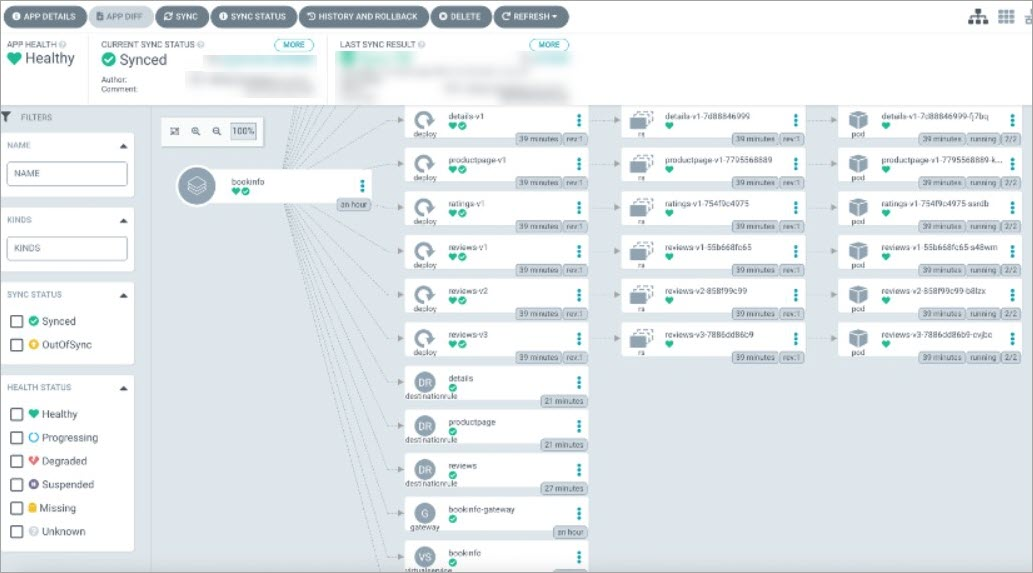
Step 5: Configure traffic routing with GitOps
Configure a traffic routing rule. When you access http://{Your ASM gateway address}/productpage, the page displays the v1 version of the reviews if you are not logged in. If you log in with the username jason, the page displays the v2 version of the reviews.
-
Modify the local VirtualService and Deployment YAML files.
-
The following snippet shows the modified VirtualService YAML file:
apiVersion: networking.istio.io/v1alpha3 kind: VirtualService metadata: name: reviews spec: hosts: - reviews http: - match: - headers: end-user: exact: jason route: - destination: host: reviews subset: v2 - route: - destination: host: reviews subset: v1 --- -
The following snippet shows the modified Deployment YAML file:
apiVersion: apps/v1
kind: Deployment
metadata:
  namespace: argocd
  name: reviews-v1
  labels:
    app: reviews
    version: v1
spec:
  replicas: 2
-
-
Run the following commands to add reviews-v1 to the git repository.
git add * git commit -m "reviews-v1" git push -
Synchronize the Git configuration to the cluster.
If you enabled auto-sync in Argo CD, Argo CD automatically synchronizes the Git configuration to the cluster. If auto-sync is not enabled, you can synchronize the configuration manually as follows:
-
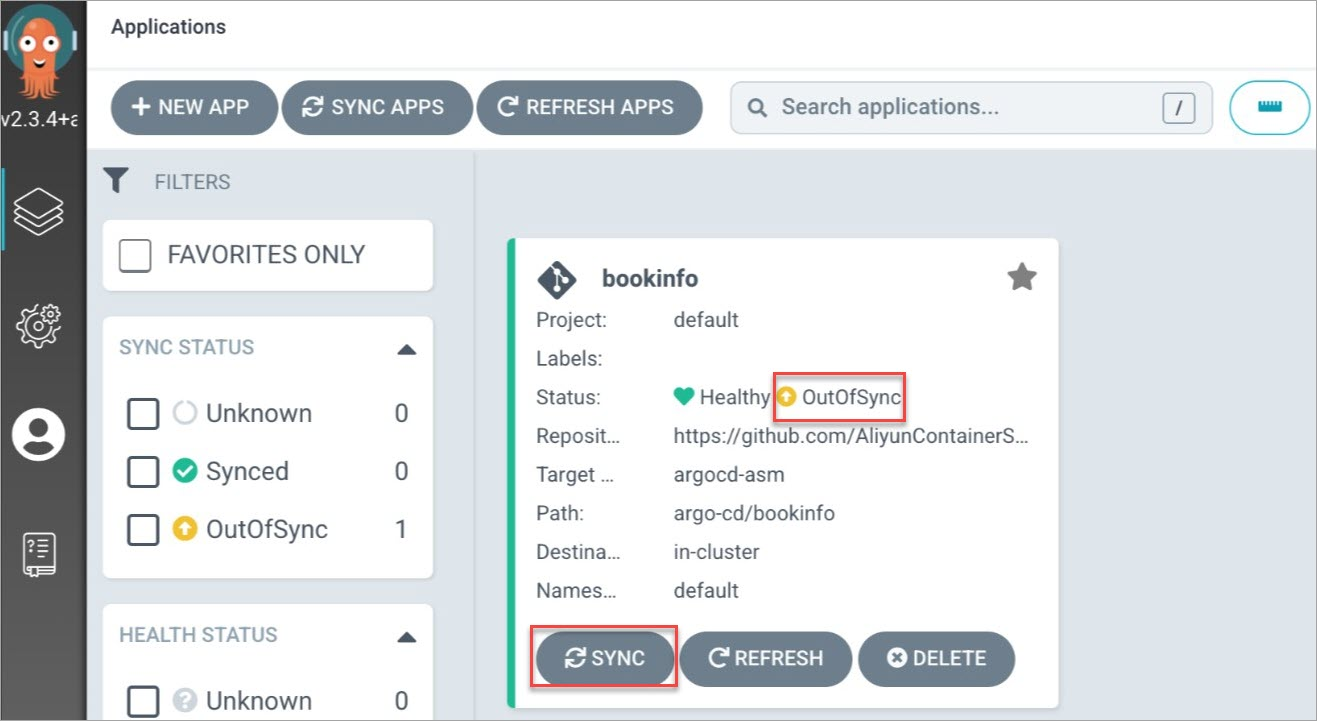
On the bookinfo card in the Argo CD UI, click SYNC.
When a file is changed, an OutOfSync indicator appears to the right of Status on the bookinfo card.
-
At the top of the panel that appears, click SYNCHRONIZE.
After the synchronization is complete, you can view the created resources in the ASM console and the updated resources in the ACK console. For more information, see Check the resource status in the ASM console and Check the resource status in the ACK console.
-
-
Verify the result.
-
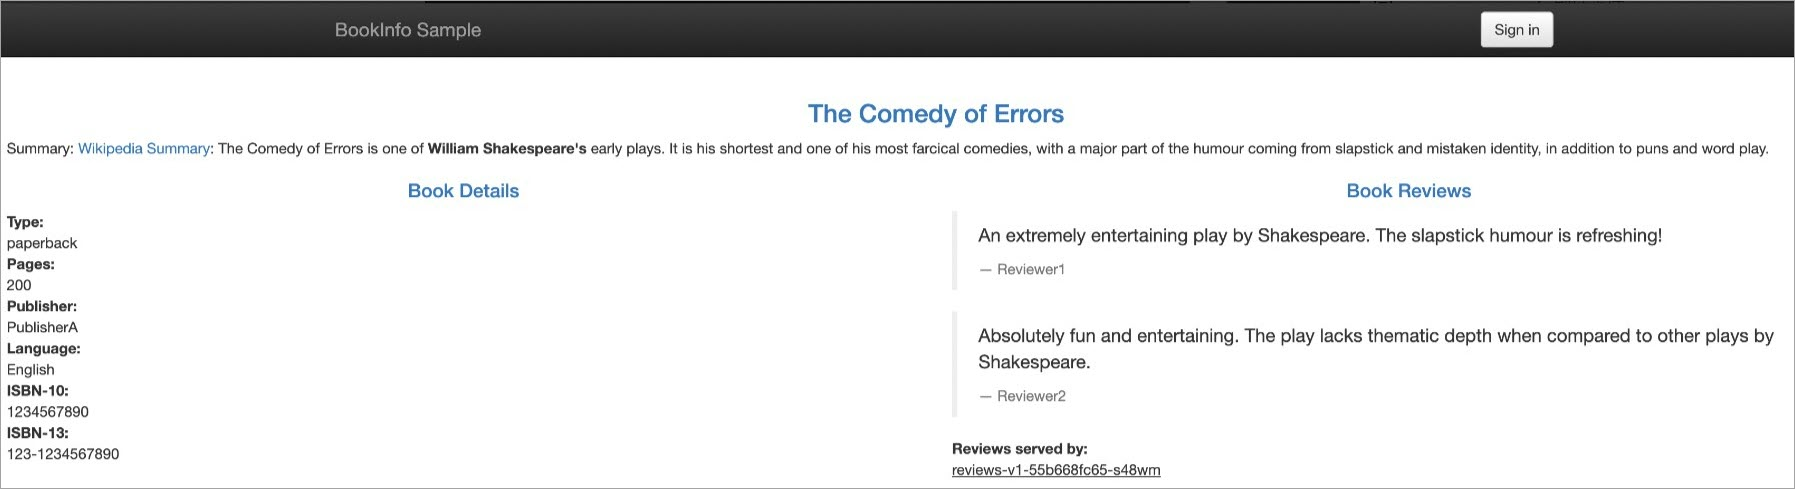
In your browser, go to http://{Your ASM gateway address}/productpage without logging in.
The page shows the v1 version of the reviews.
-
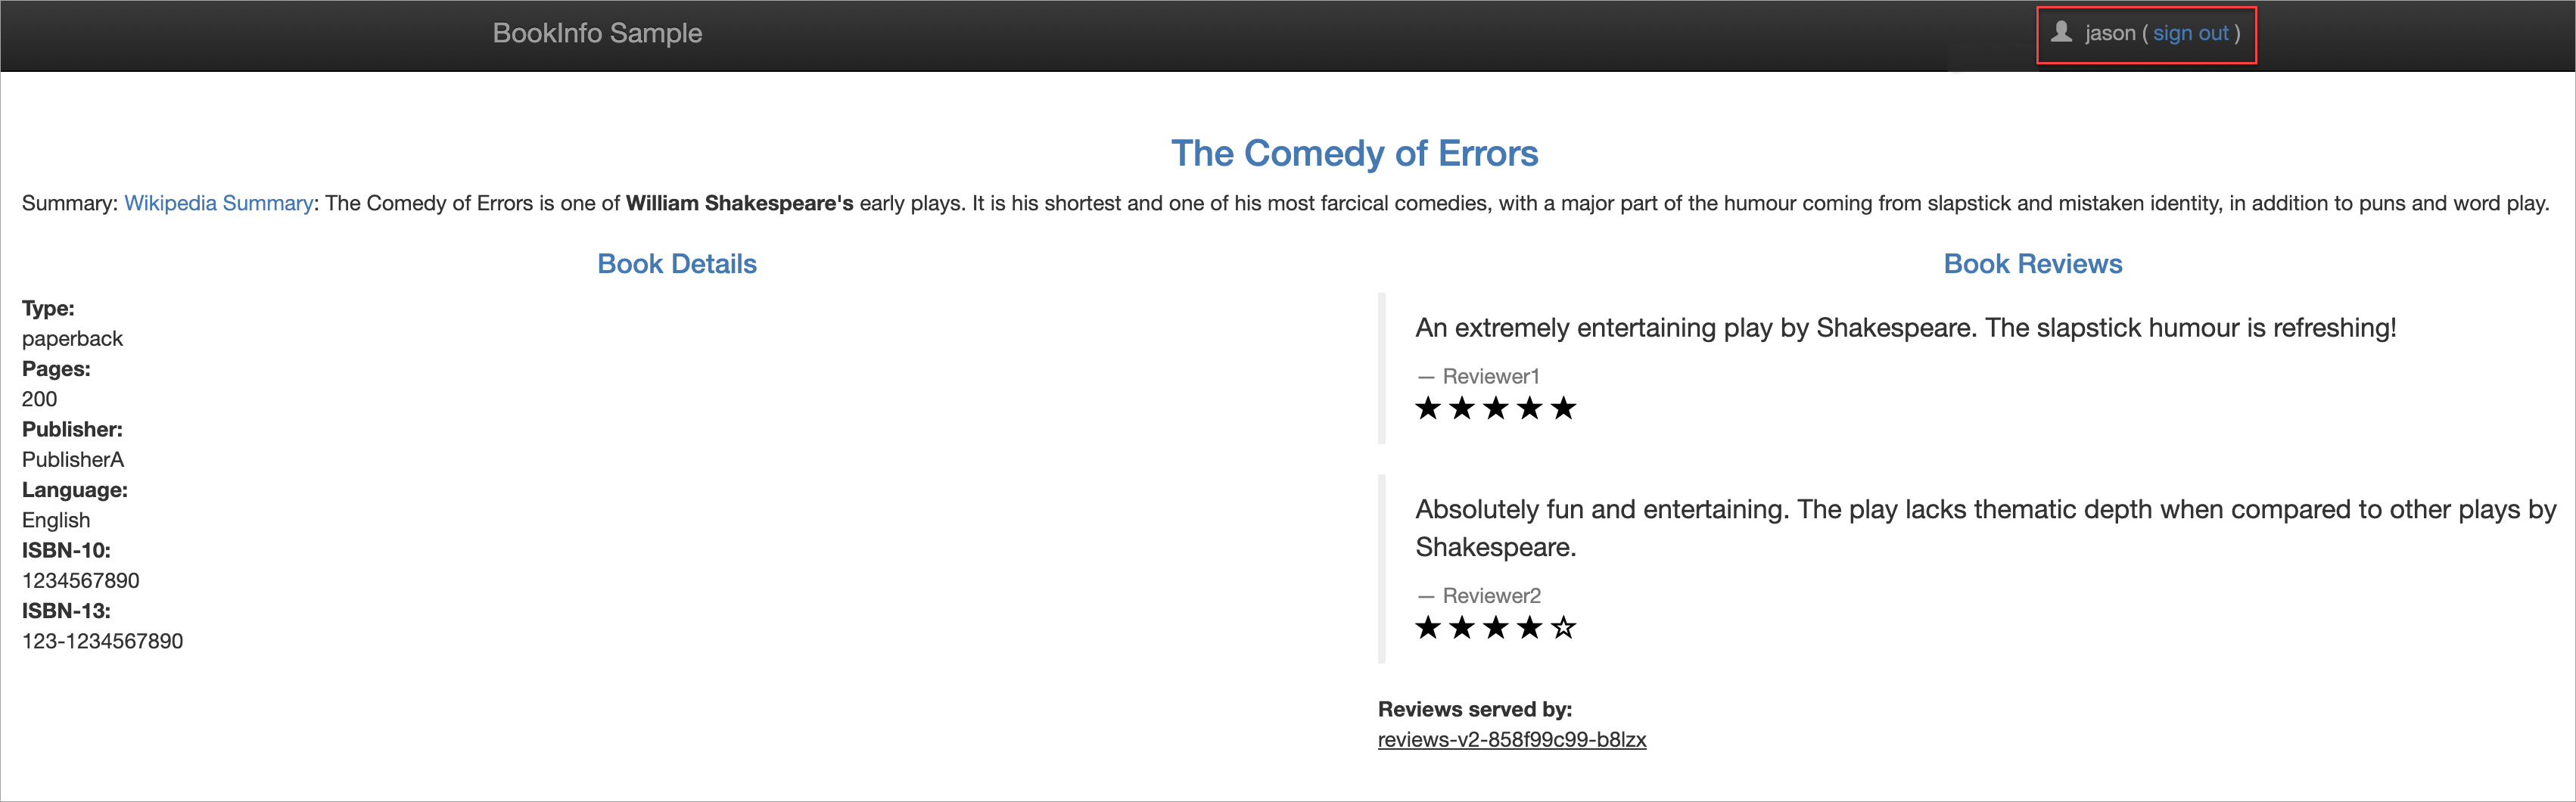
Log in with the username jason. You can use any password.
The page shows the v2 version of the reviews.
-