Develop custom components offline, upload them, and then use them in the page designer. This topic shows you how.
Custom component development workflow
The following figure shows the workflow for developing a custom component.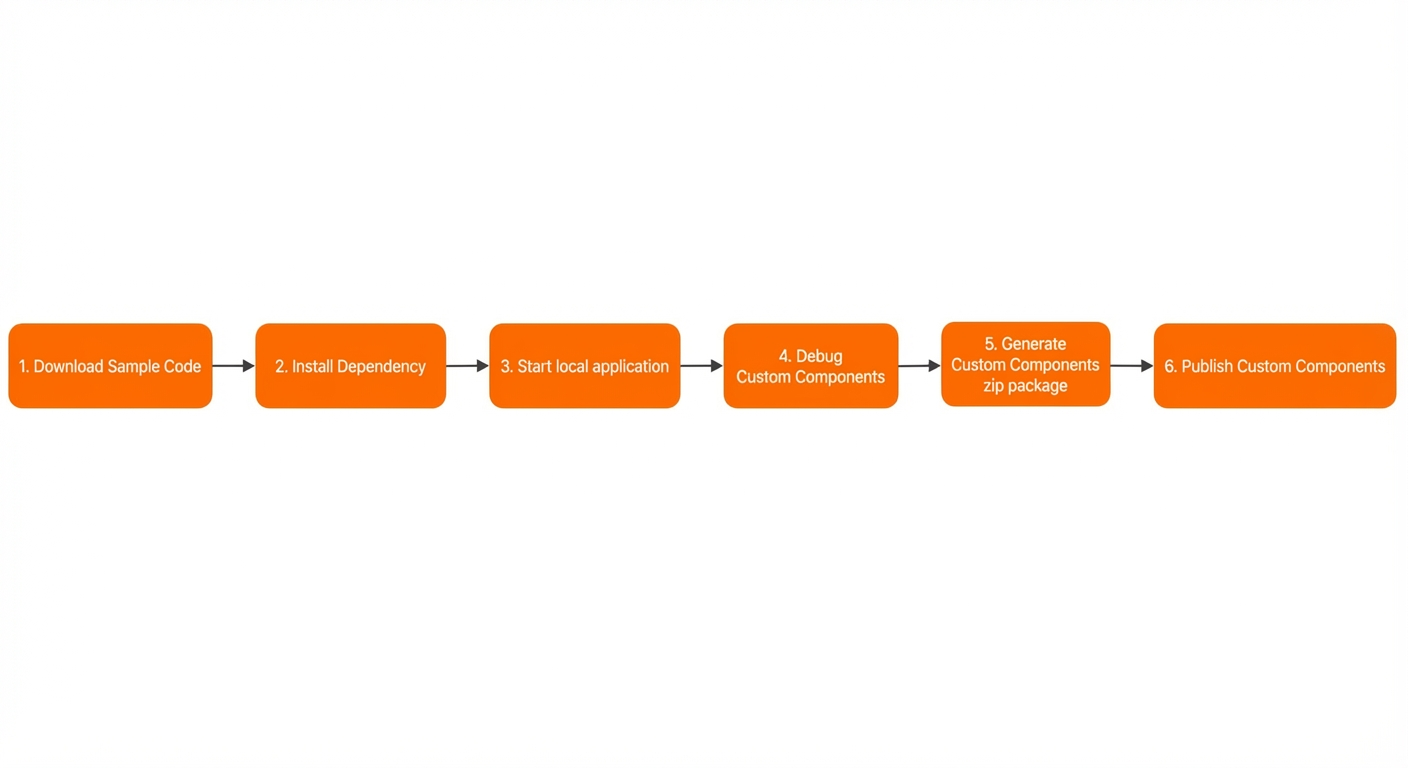
Prerequisites
nodeversion: 14.20.xnpmversion: 6.14.x
Development procedure
Step 1: Download the sample code
To download the development template, see Download sample code.
Step 2: Install dependencies
Unzip the downloaded zip file, go to the project root directory, and run npm install to install dependencies.
npm installStep 3: Start the local application
Run the npm start command to start the local application. In the project's root directory, run the npm start command to start the local development server. After the compilation succeeds, the terminal displays output similar to the following example.
D:\test-xxx >npm start
> @ali/buf-test-materials@1.0.0 start xxx
> gulp start
[15:40:16] Requiring external module xxx
[15:40:20] Using gulpfile D:\test-maxxx
[15:40:20] Starting 'start'...
10% building 0/0 modules 0 active  ?wds?: Project is running at http://localhost:xxx
?wds?: webpack output is served from /
?wds?: Content not from webpack is served from ./
?wds?: 404s will fallback to /index.html
Starting the development server...
10% building 0/3 modules 3 active D:\test-materials\node_modules\awesome-typescript-xxx
Using typescript@3.9.10 from typescript
?atl?: Using tsconfig.json from D:\test-materxxx
94% after seal ?atl?: Checking started in a sexxx
?atl?: Time: 45ms
?wdm?: Hash: 1bd1e7ed58c49acaxxx
Version: webpack 4.46.0
Time: 3520ms
Built at: 2023/02/15 15:40:24
          Asset      Size   Chunks              Chunk Names
...
Compiled successfully.`
Step 4: Debug the custom component
You can preview and debug local custom components directly in any page designer without uploading them. Follow these steps to debug:
Open any page designer. On the left is the Component Panel, which contains component categories such as Layout, Basic, and Form. In the center is a blank canvas with the prompt "Drag a component or template here," and on the right is the Properties Panel.
Copy
&__bwfInjectFrom__=http%3A%2F%2Flocalhost%3A3200, append it to the page designer URL, and press Enter to refresh. Your custom component then appears on the Custom Components tab of the Component Panel.
Step 5: Generate the component zip
Run npm run build to generate a component.zip file in the project's root directory.
D:\test xxx      >npm run build
> @ali/bwf-test-materials@1.0.0 build D:\test-xxx
> gulp build
[15:46:05] Requiring external module ts-xxx
[15:46:09] Using gulpfile D:\test-materixxxx
[15:46:09] Starting 'build'...
10% building 0/3 modules 3 active D:\test-materials\node_modules\awesom
  Using typescript@3.9.10 from typescript
i ?atl?: Using tsconfig.json from D:/test-materi
92% chunk asset optimization UglifyJSPlugin(node:16072) [DEP0097] DeprecationWarning: Using a domain property
sync_context variant of MakeCallback or the AsyncResource class instead. (Triggered by calling processImmediat
(Use node --trace-deprecation ... to show where the warning was created)
94% after seali ?atl?: Checking started in a separate process...
i ?atl?: Time: 108ms
[15:46:13] Finished 'build' after 3.61 s
> @ali/bwf-test-materials@1.0.0 postbuixx
> gulp zip
[15:46:13] Requiring external module ts-xxx
[15:46:17] Using gulpfile D:\test-materxxxx
[15:46:17] Starting 'zip'...
[15:46:17] Finished 'zip' after 25 ms
D:\test-materials>
Step 6: Publish the custom component
Log in to BizWorks, in the select Platform drop-down list selected light application assembly platform.
Click the
 icon or the text box in the upper-right corner of the page. From the drop-down list, click the name of the project that you want to view and click the Applications tab. On the Applications page, click the name of the target lightweight application.
 In the application navigation pane, click Extensions. On the Extensions page, click the Custom Components tab.
On the Custom Components tab of the Extension Management page, click Add Custom Component.
In the Add Custom Component panel, upload the zip file by dragging it into the dashed-line box or clicking within it to select the file.
Enter a Custom Component Name and an optional Description. The Code is populated automatically.
Click OK.
The newly added custom component appears on the Custom Components page.
Edit a custom component
On the Custom Components page, click the name of the target custom component, or click Edit in its Actions column.
In the Edit Custom Component panel, modify the Custom Component Name and Description, and then click OK.
Download a custom component
On the Custom Components page, click Download in the Actions column for the target component.
Delete a custom component
On the Custom Components page, click Delete in the Actions column for the target component.
In the confirmation dialog box, click Delete.
Download sample code
On the Custom Components page, click Download Sample Code.