ComfyUI is a new WebUI based on a node-based workflow for the Stable Diffusion algorithm. Function AI supports one-click deployment of ComfyUI image generation projects and provides full lifecycle management for applications, from project development to API calls. This topic describes how to quickly deploy and use ComfyUI.
Project development phase: Debug prompts and workflows, install models and plugins, and generate images or videos that meet your expectations.
API calling phase: The image generation environment is set up during the project development phase by installing models, plugins, and dependencies. During the API calling phase, you run workflows in this environment to generate images elastically and efficiently using a Serverless API.
Prerequisites
You have authorized a Resource Access Management (RAM) user to use image generation projects.
For a better experience, make sure your account balance is at least CNY 100. To save costs, claim a new customer trial package.
Deploy a ComfyUI project with one click
Log on to the Function Compute 3.0 console. In the navigation pane on the left, click Function AI. On the Function AI page, click Projects in the navigation bar. Then, choose .
NoteIf Function Compute (FC) 3.0 is displayed in the upper-left corner, you are using the 3.0 console.
Set Project type to ComfyUI Project, enter a project name, select a Region, and then click Deploy Project.
NoteGPU fees are calculated using a serverless billing method based on actual usage. The estimated cost is for reference only.
If your users are in a specific geographic area, create the project in the corresponding region. If the GPU specification resources in the current region do not meet your needs, select a different region.
In the Project Resource Preview dialog box, confirm the Billing details and Resource usage for the products involved in this deployment. Then, click Confirm Deployment.
After the deployment is complete, the workspace starts automatically, and the project enters the development phase. This is the debugging phase where you use the WebUI to generate images or videos.
Starting the workspace launches a GPU instance. You can download models, install plugins, and generate images and videos by debugging prompts and workflows.
When you are finished, shut down the workspace promptly. After the workspace is shut down, the function instance is destroyed, and billing stops. You must start the workspace again before you can use it next time.
In the ComfyUI project workspace, set the prompt and click the Execute button to generate the image.
The generated image is stored in the
output/folder. You can go to the File Management tab to find it in the corresponding folder.Upload plugins and models.
Upload plugins
In the ComfyUI workspace, choose . Then, click Install in the row of the target plugin. Alternatively, on the File Management tab of the ComfyUI interface, upload the target plugin to the
custom_nodes/folder.Upload models
On the File Management tab of the ComfyUI interface, upload the target model to the
models/folder.
After you upload custom plugins and models, debug the workflow, and generate a satisfactory image, you can publish an API.
Publish an API
Publishing an API deploys the currently debugged workspace, which includes the source code, plugins, and dependency packages required by ComfyUI.
Publishing an API creates a new function. You can configure new resource specifications and elastic policies to generate images elastically with a Serverless API.
On the project development page, click Publish API in the upper-right corner.
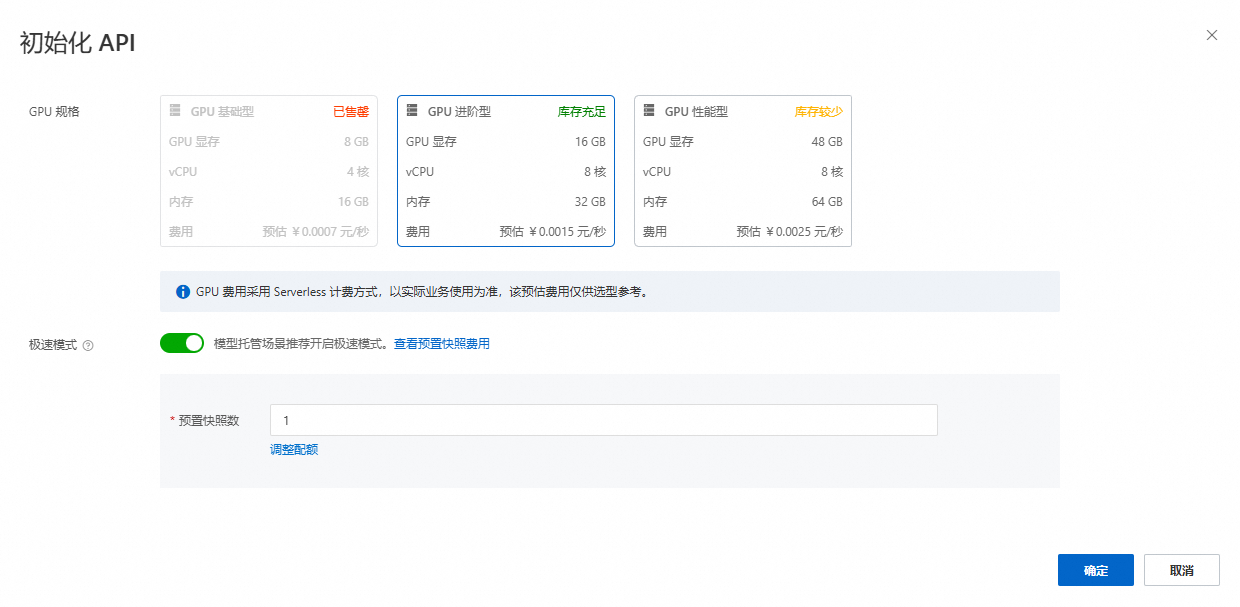
In the dialog box that appears, select a GPU specification, set the startup snapshot for Express mode, and then click OK.
 Important
When you publish an API, Express mode is enabled by default for the API calling phase. A provisioned snapshot is configured to reserve elastic resources in advance and avoid cold starts. When you are not generating images, you are charged a small fee for the snapshot. When you are generating images, you are billed based on active GPU usage. If you do not plan to use the ComfyUI project for a period of time, go to the API Calling page and click the Configuration Management tab to disable Express mode, as shown in the following figure.

After the API is published, select the API Calling tab. You can use a Curl command or a third-party tool such as Postman to call the API and generate images elastically.
Delete a project
Click the project name to go to the project details page, and then click Delete.
In the dialog box that appears, you can see the resources to be deleted. By default, Function AI deletes all services under the project. If you want to keep a resource, clear the checkbox for that service. Only the selected services will be deleted.
Select the I understand that deleting this project and the selected services will immediately interrupt their online operations. This action cannot be undone and will permanently delete all dependent cloud resources. checkbox, and then click Confirm Deletion.