This topic describes key operations in customer information management, including adding customers, creating custom fields, and managing customer data in batches.
Function Overview
Customer information management involves recording, classifying, analyzing, and managing customer data such as basic information, communication records, service requirements, and tickets.
Feature Access
Log on to the Cloud Contact Center console. In the left navigation pane, choose Instance Management - V2 and click the endpoint of a specific instance to open its console.
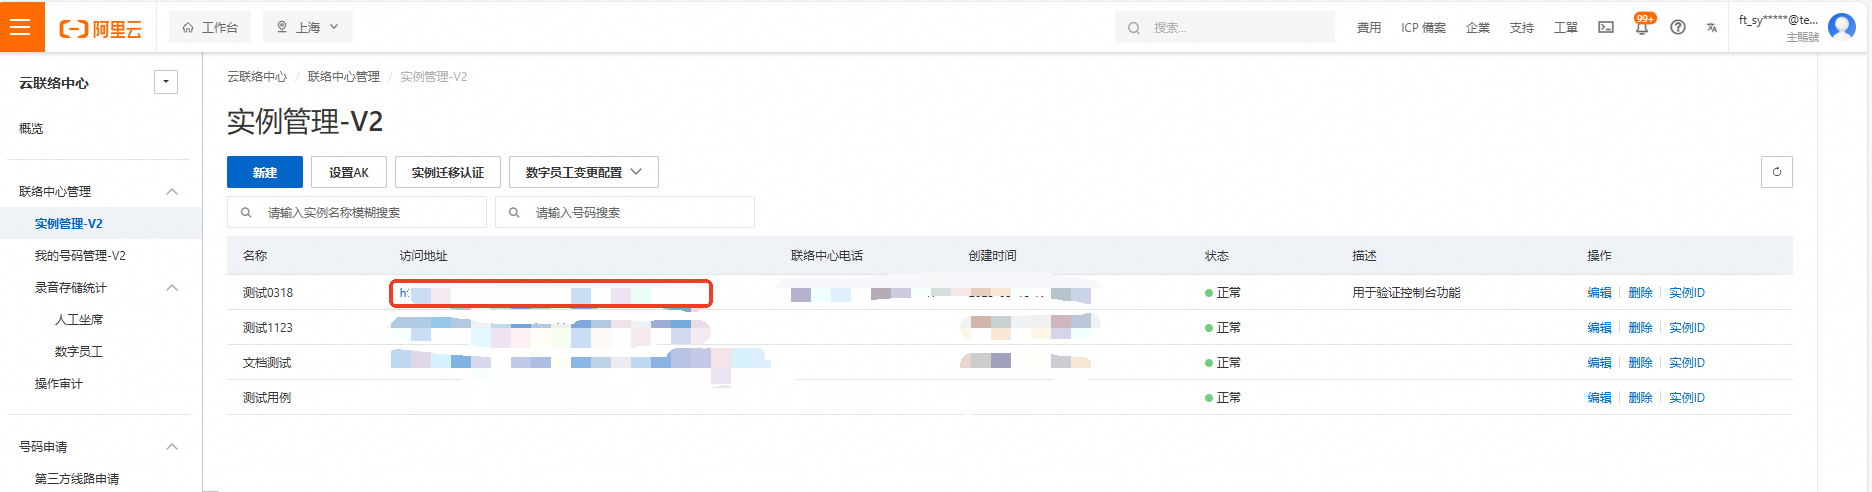
Click the menu button in the upper-right corner of the page and select Business Management to open the Business Management console. In the left navigation pane, choose Customer to access the customer information management interface.

Add Customers
On the Customer Management page, click Add Customer and enter the required field values.
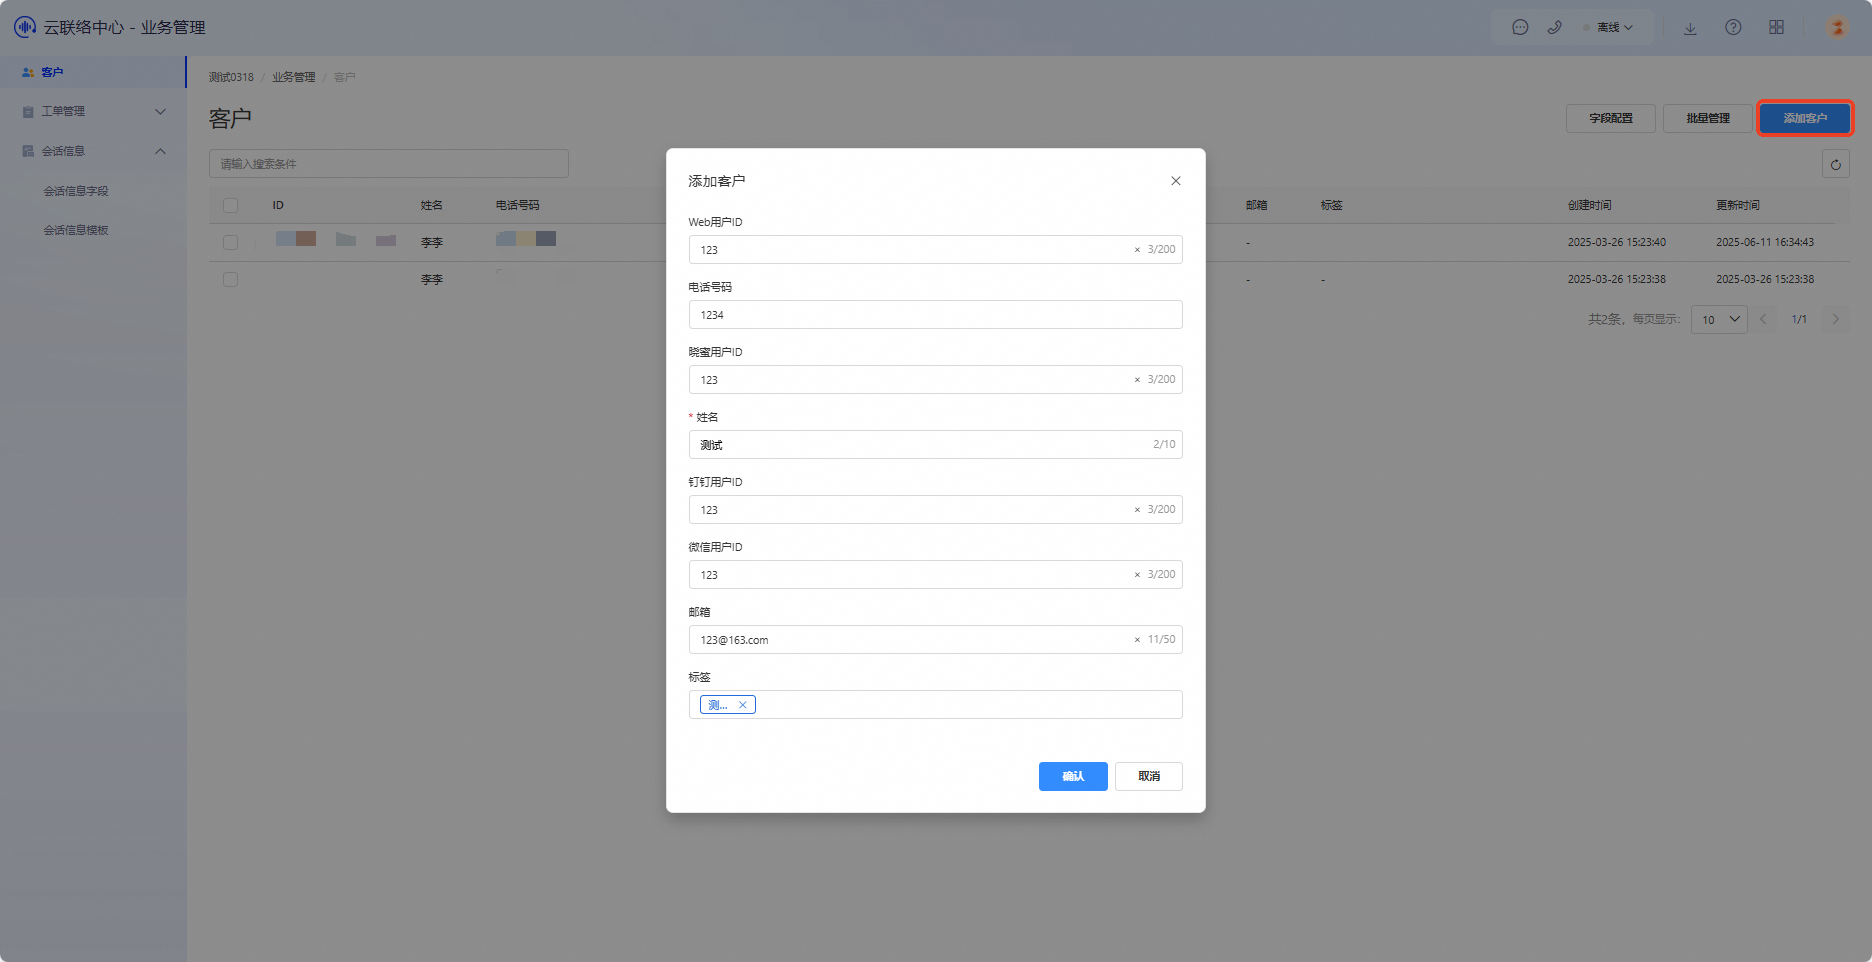
The added customer information appears as follows:
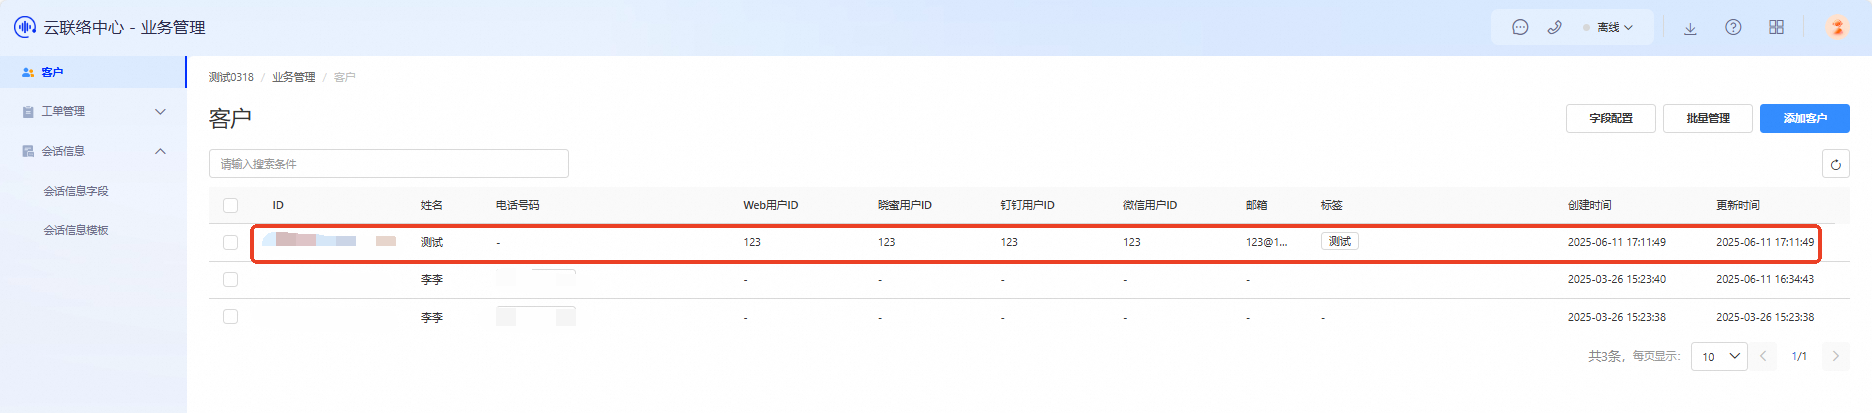
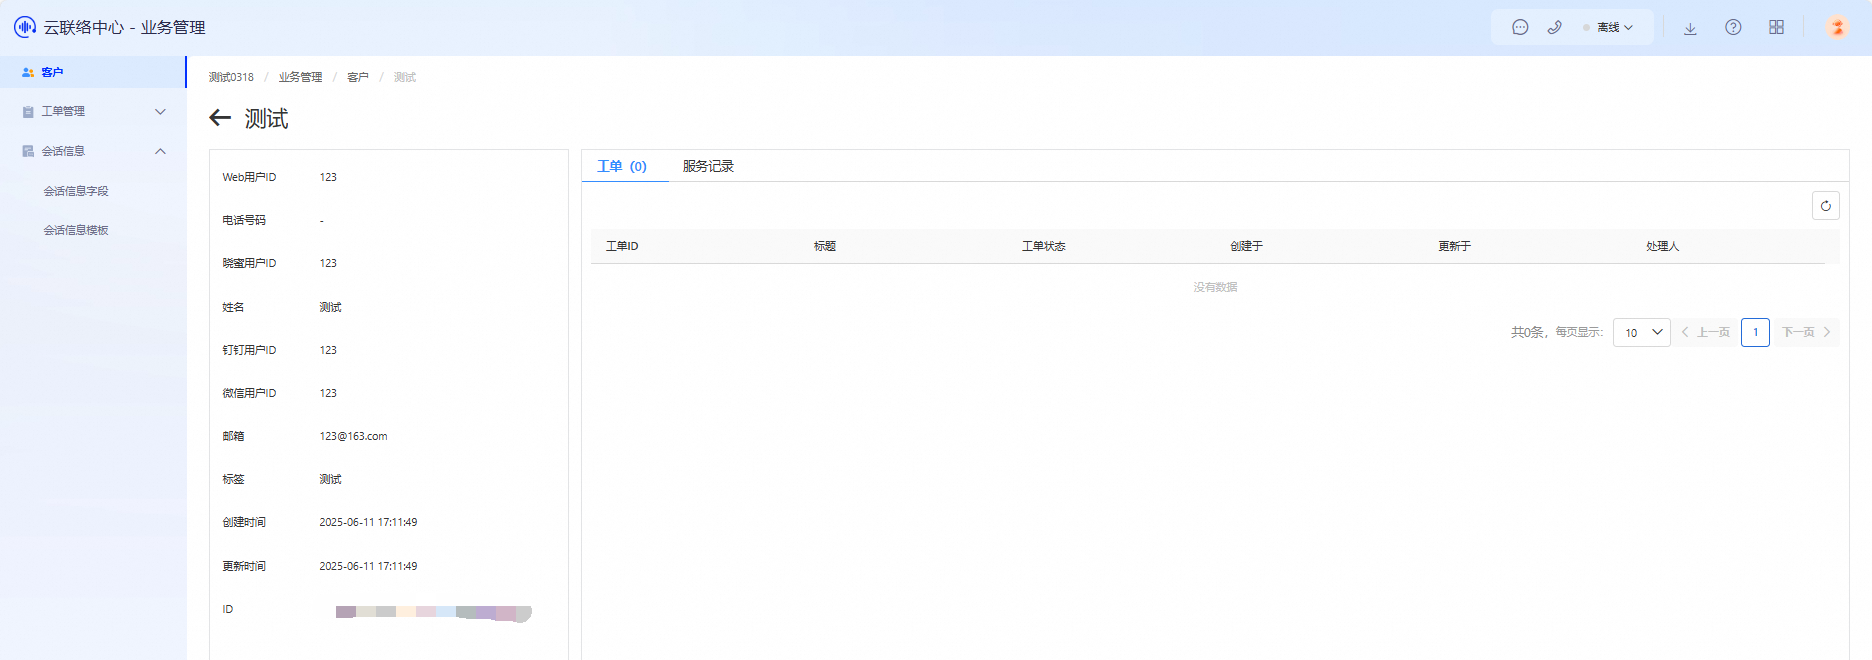
Click anywhere inside the customer card to open the detailed view for that customer. On this page, you can view the customer’s tickets and service records.
Add Fields
If the system’s default basic customer fields do not meet your needs, you can add custom fields.
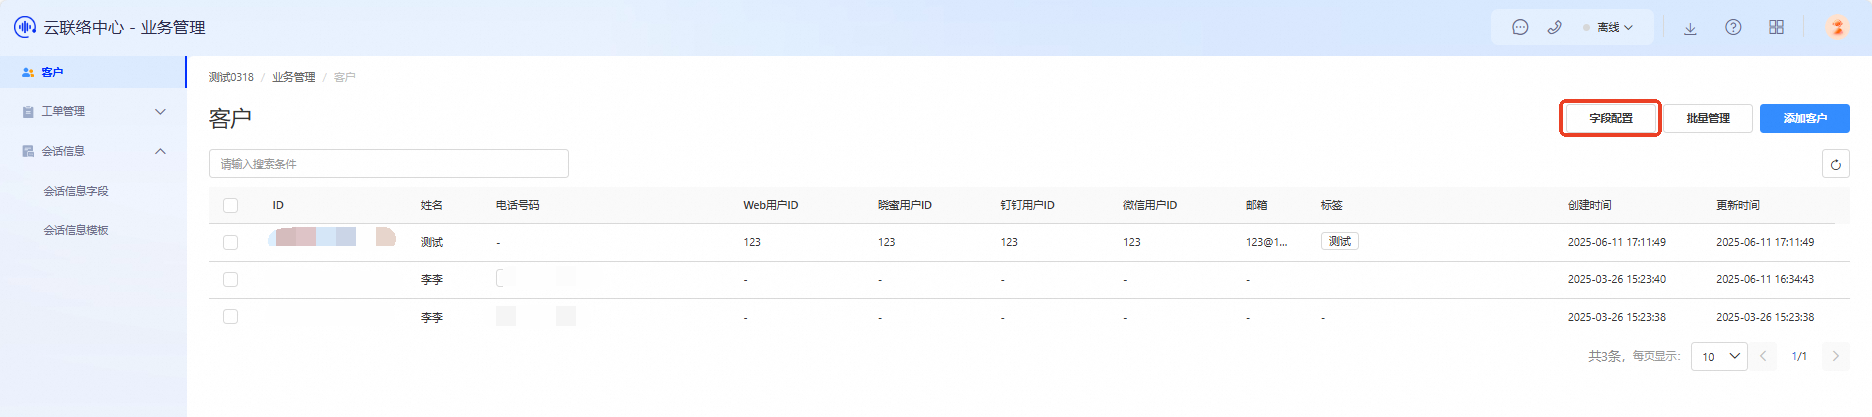
Click Field Configuration to open the field management interface.

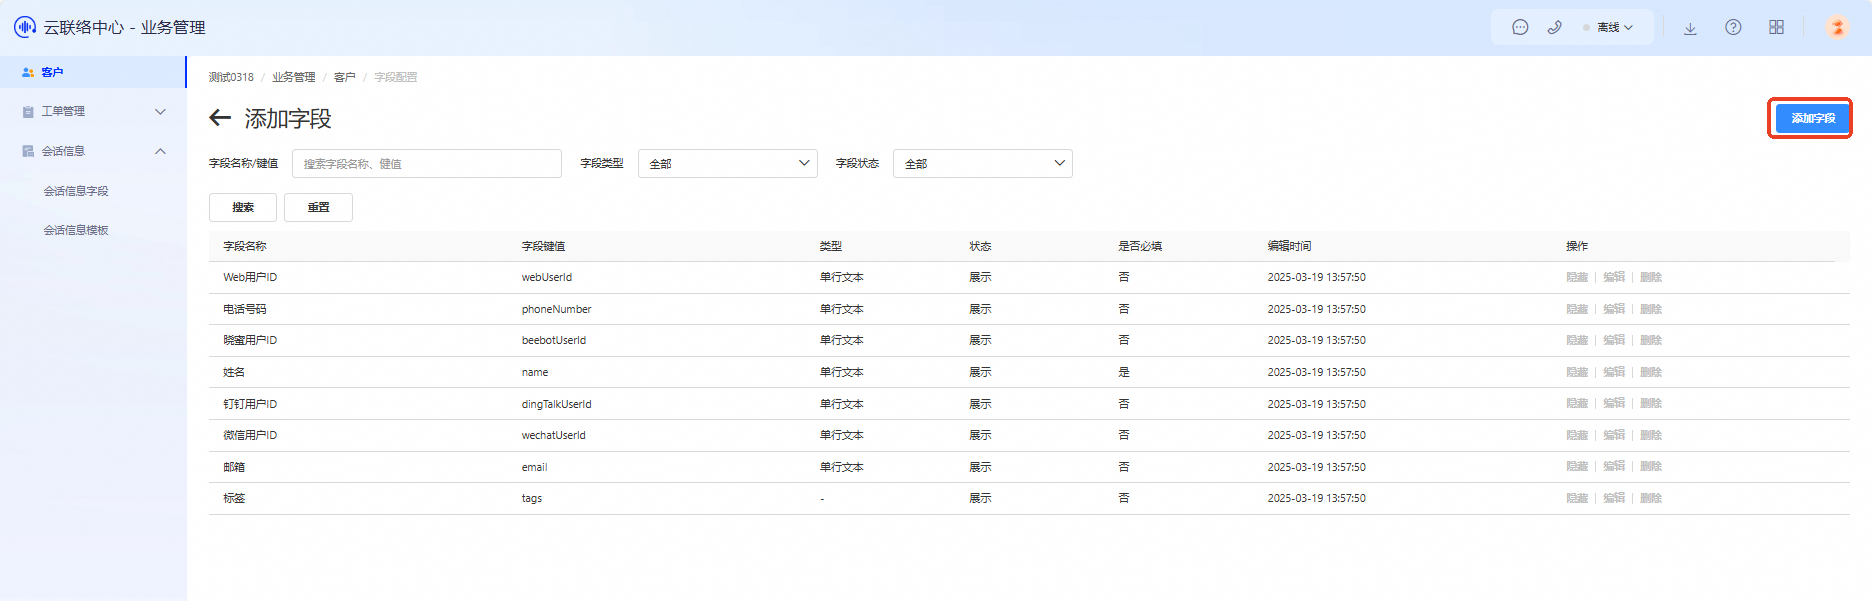
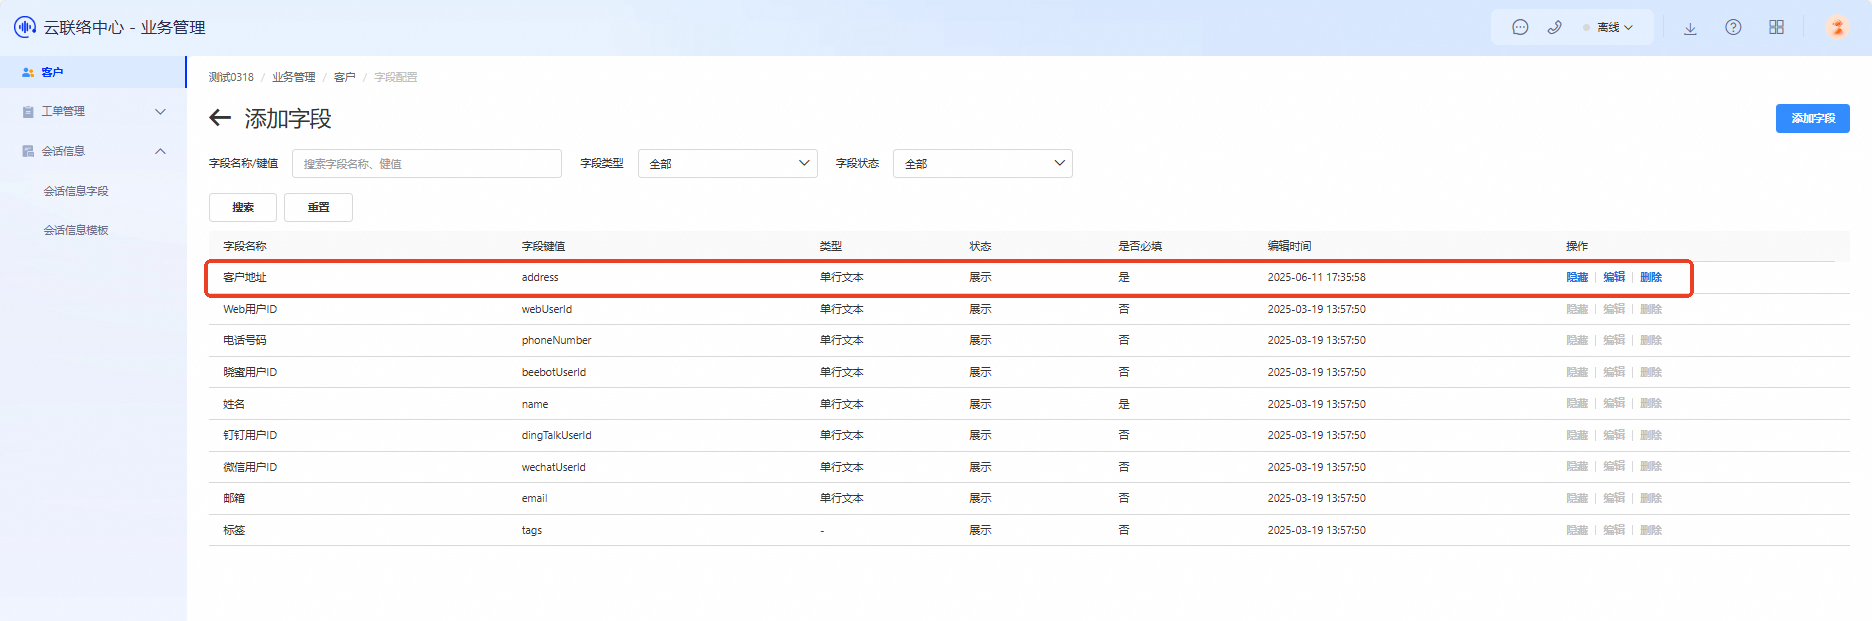
The system includes default fields such as Web User ID, Phone Number, Lingque User ID, Name, DingTalk User ID, WeChat User ID, Email, and Tag. Click Add Field to create a new custom field.
NoteYou cannot edit or delete system default fields.
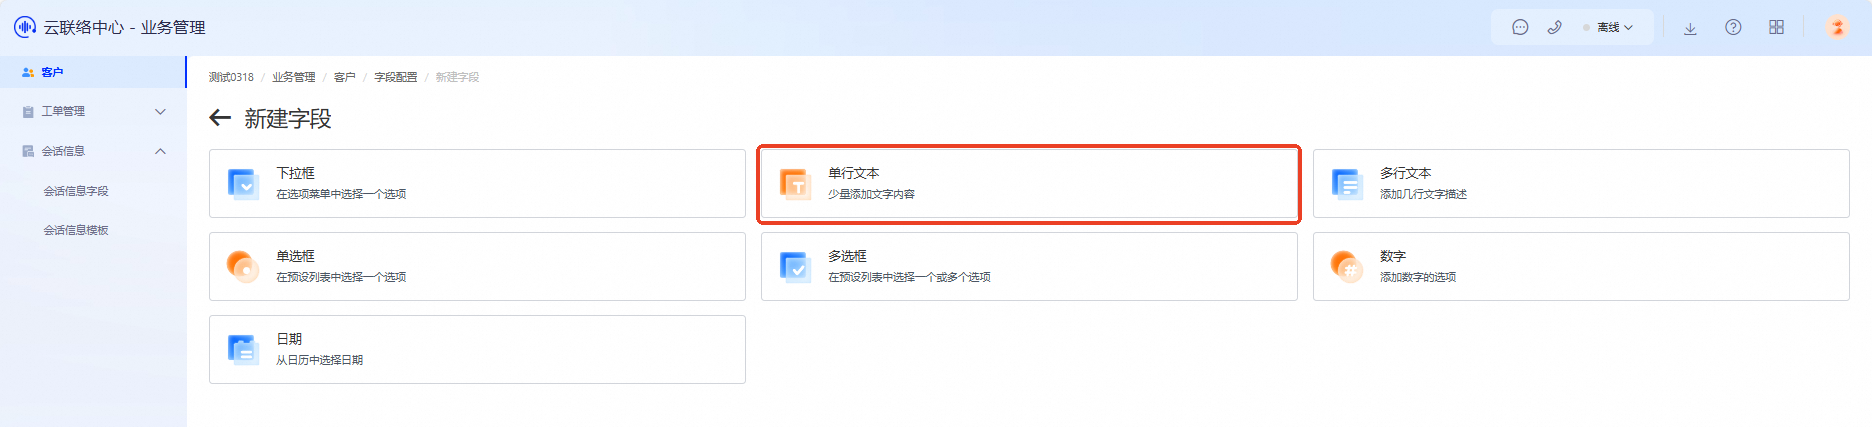
On the New Field page, choose the field type you want to create. This example uses Single-line Text.
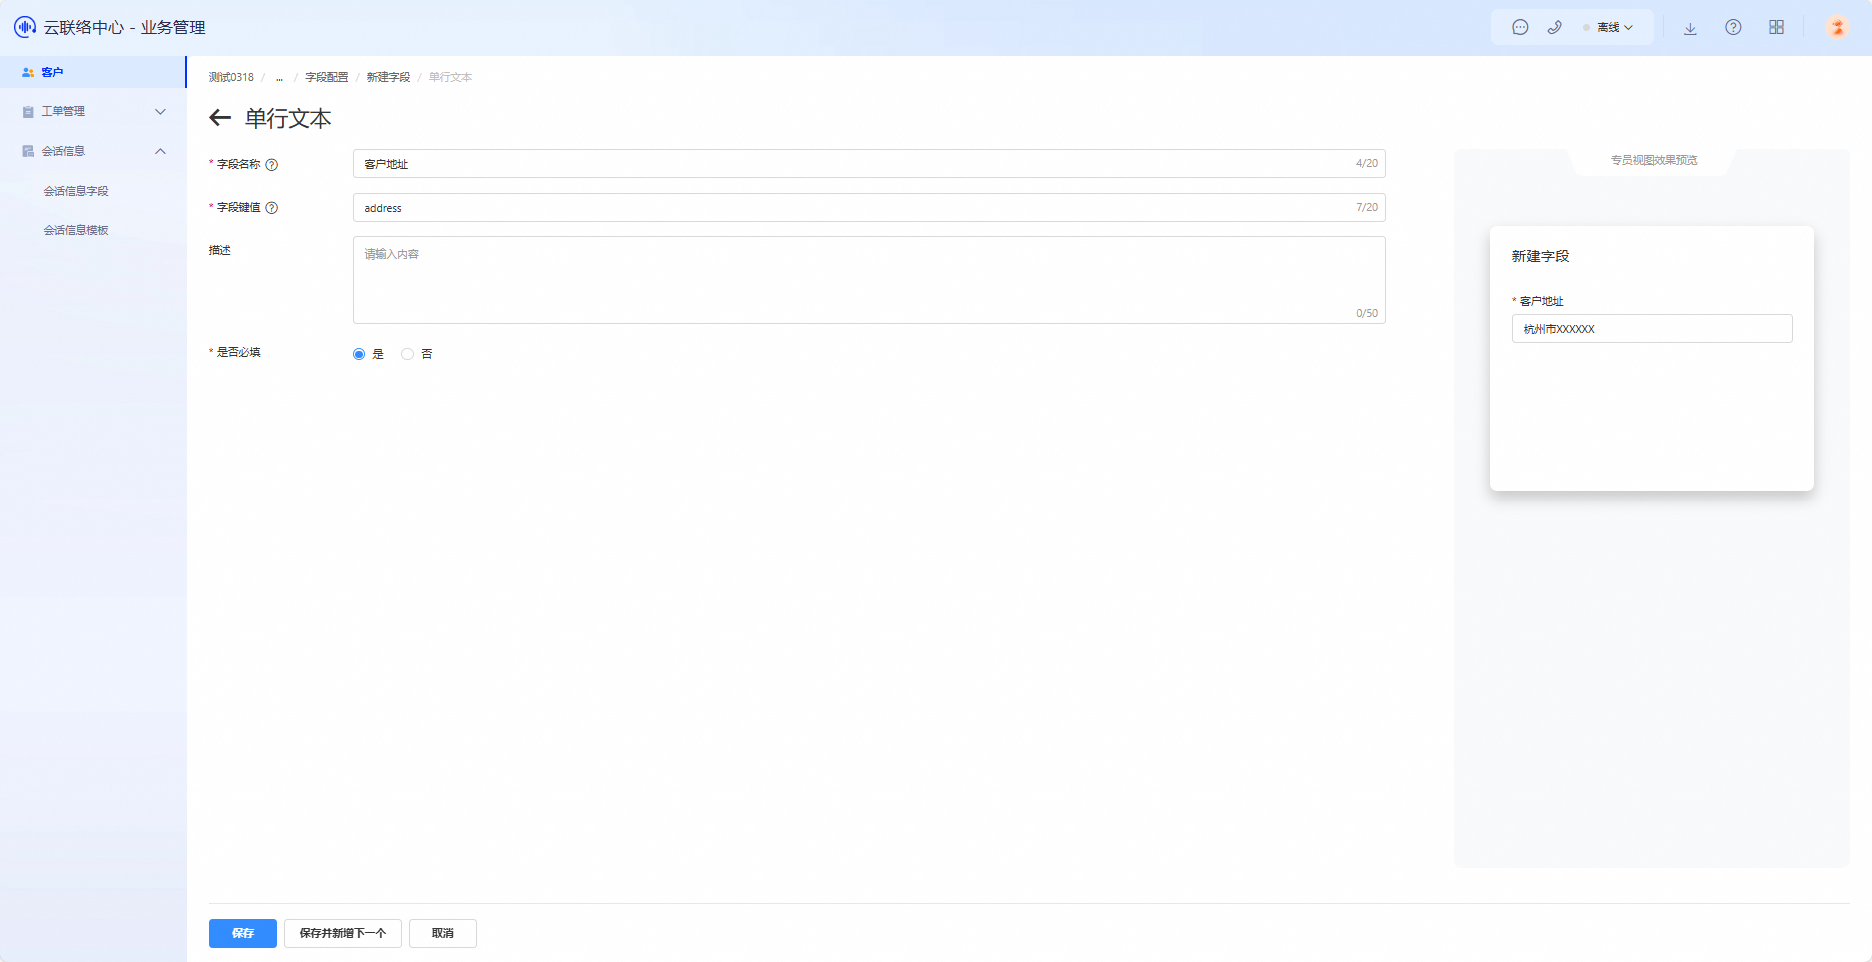
Click the Single-line Text field type. In the editor, enter the field name, field key, description, and other details.
Click Save. The new field appears in the field list.
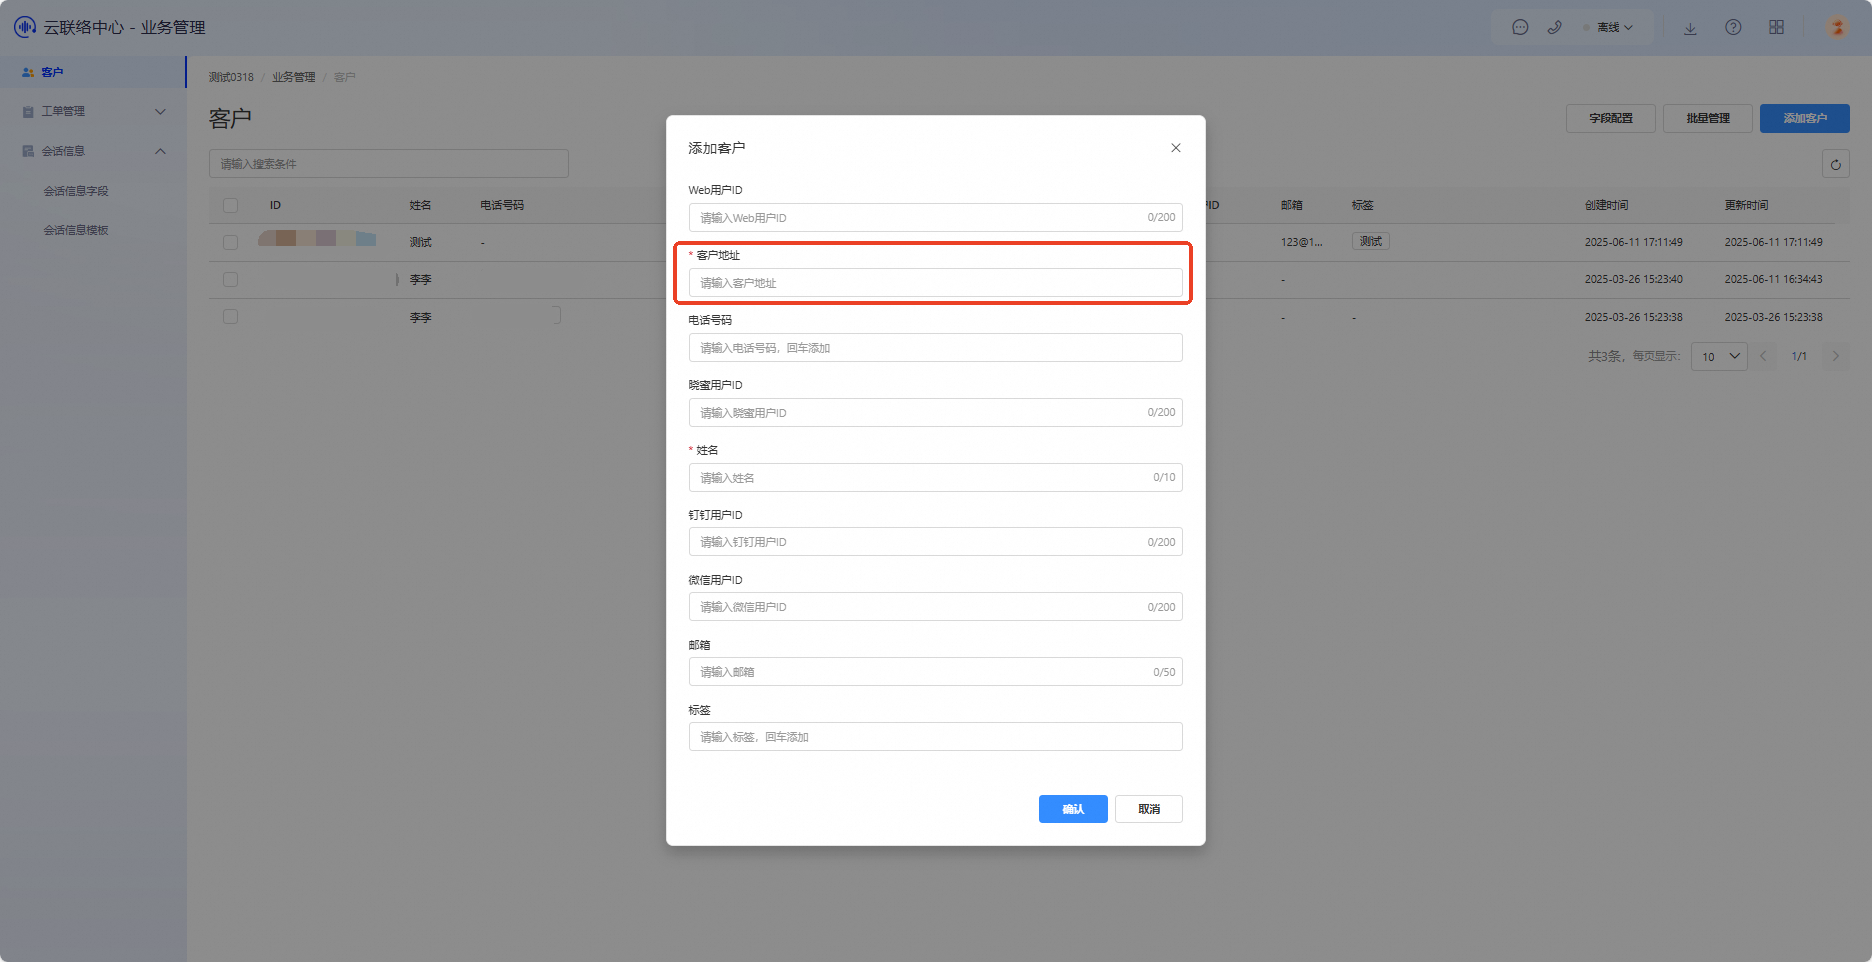
You can validate the newly added field information in Add Customer.
Batch Management
Batch Add
If you already have a local customer information file, you can import it to add multiple customers at once.
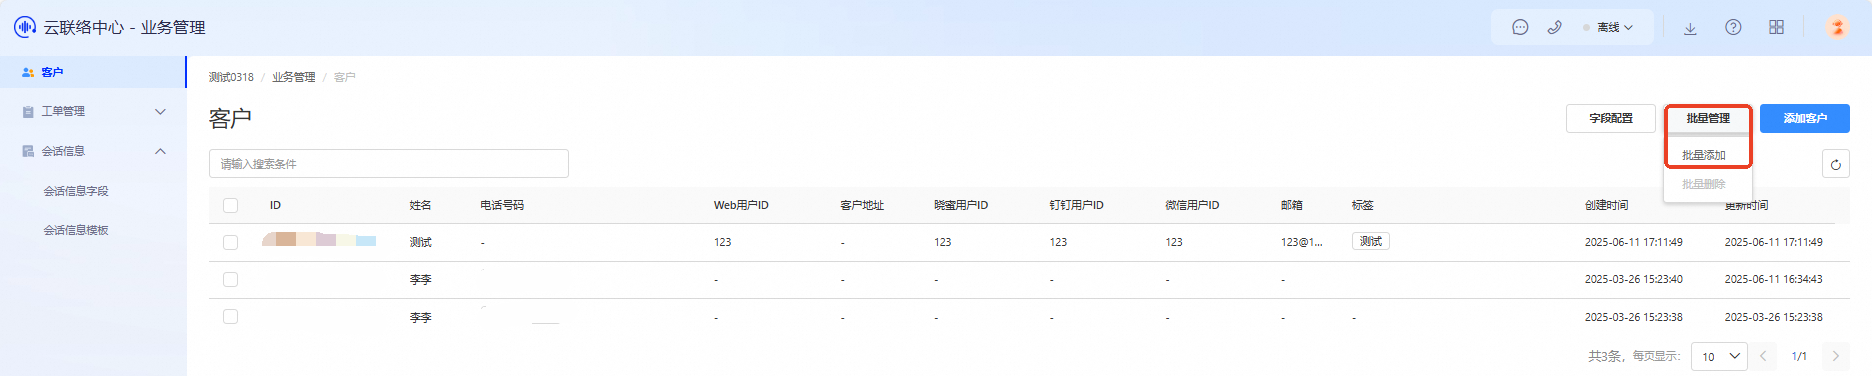
Click Batch Management and choose Batch Add.
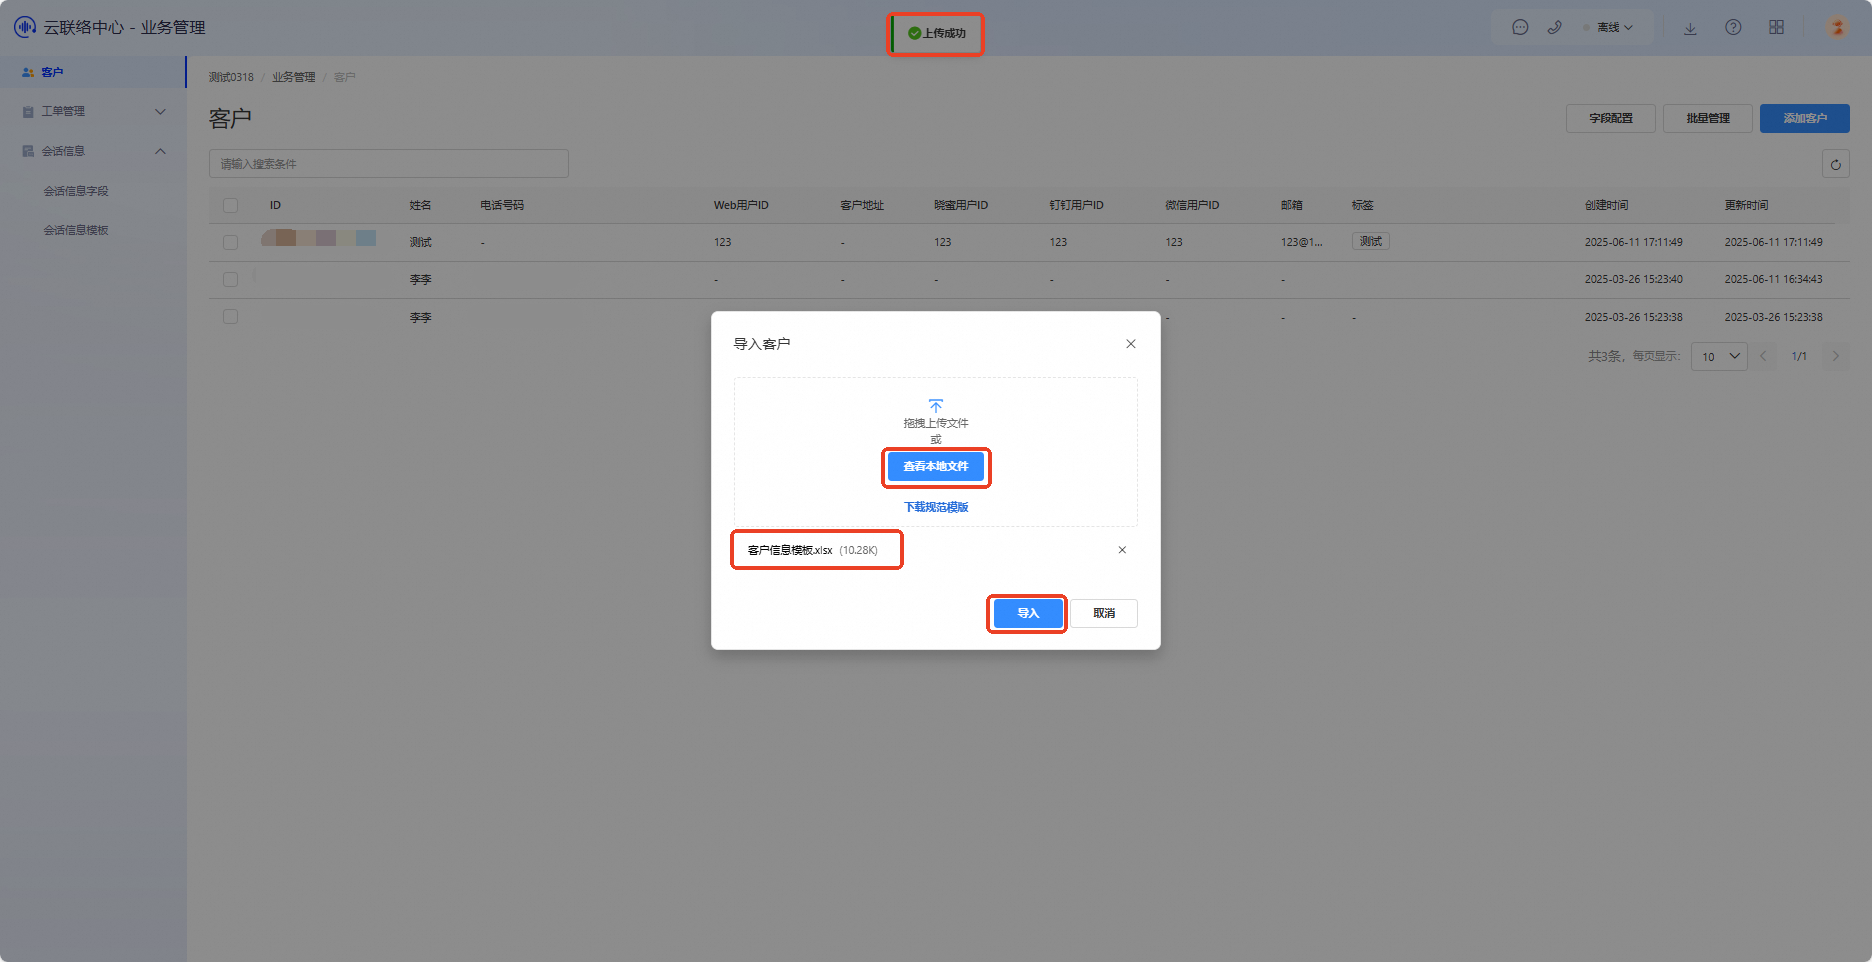
Click View Local File to import a properly formatted local customer file. If you do not have a formatted file, download the template, fill it out, and then upload it.
Assume your local customer file contains the following data:
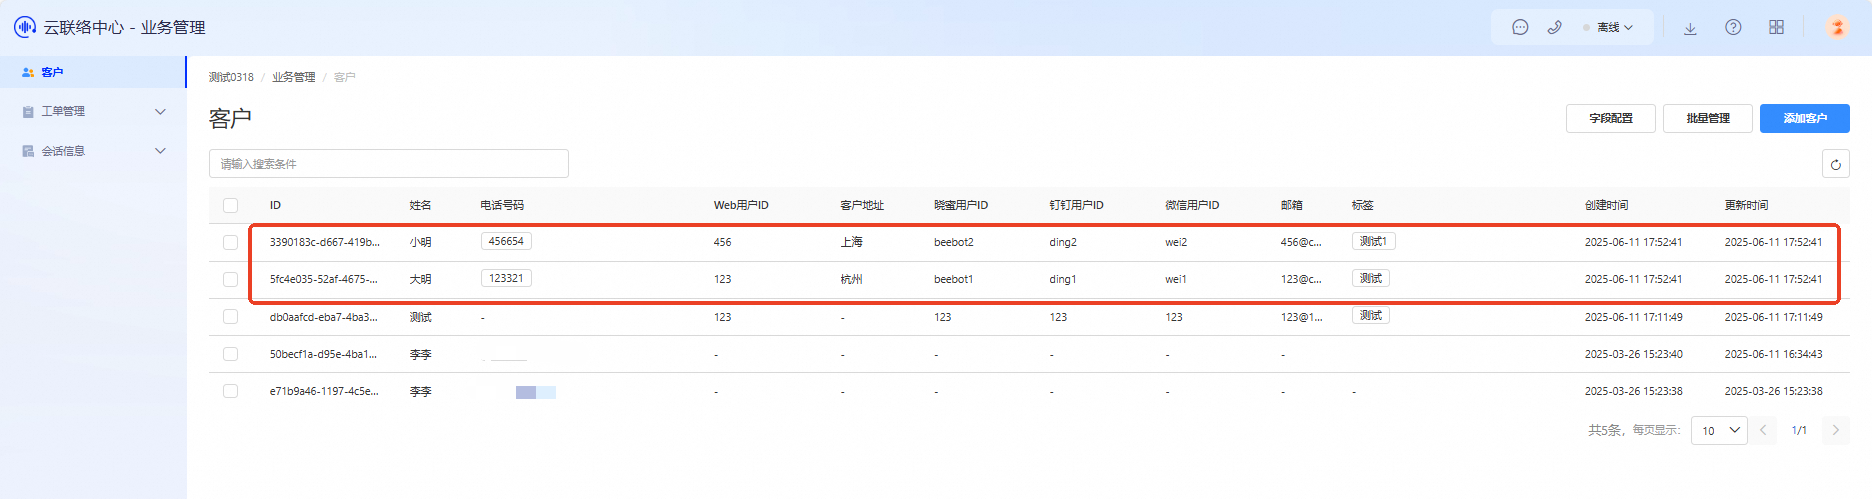
After import, the result appears as follows:

Batch Delete
To remove multiple unneeded customer records, use batch delete.
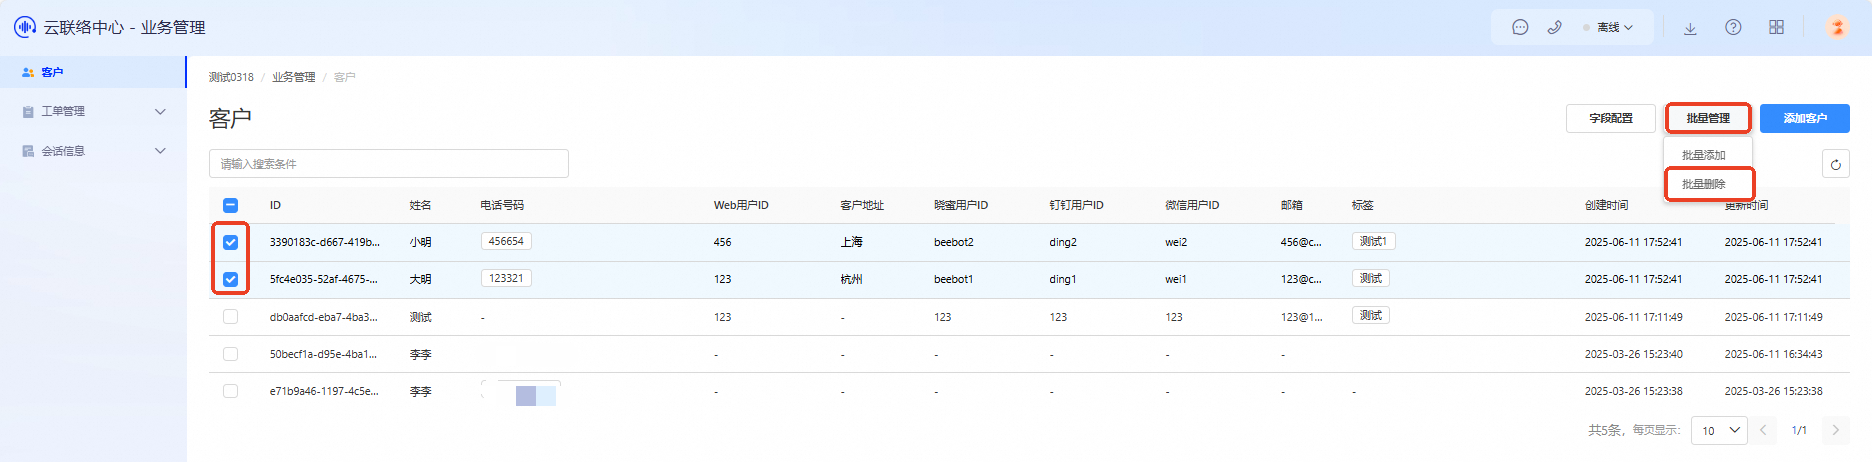
On the Customer Management page, select the check boxes next to the customers you want to delete.
Click Batch Management and choose Batch Delete.
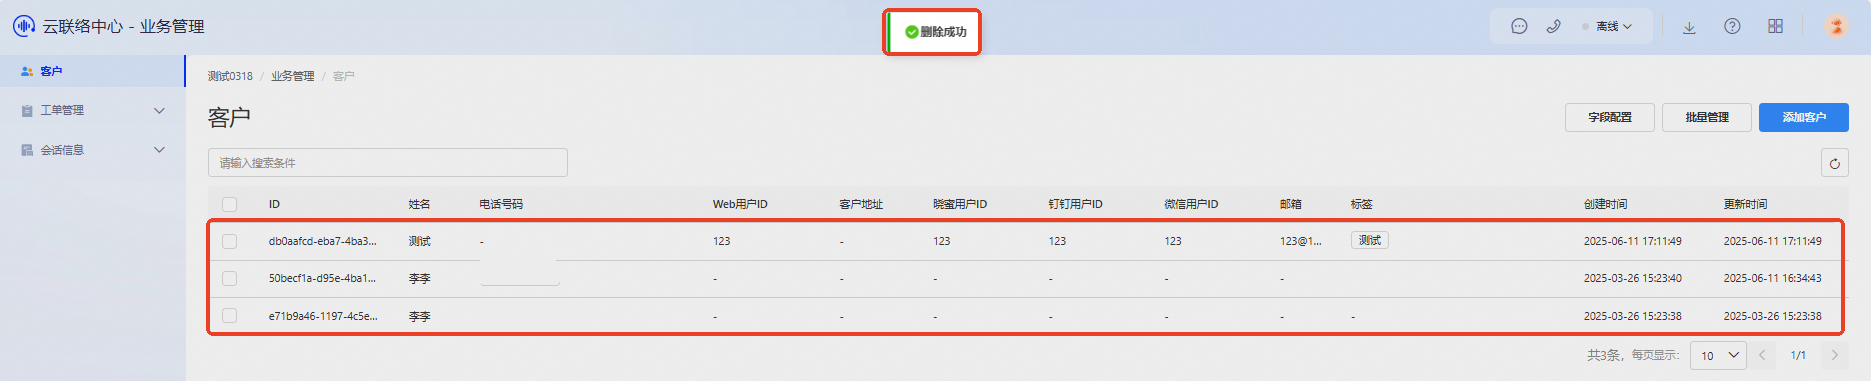
Click Confirm. The system deletes all selected records and displays a “Deletion successful” message.