The event push service sends events you subscribe to in your Cloud Contact Center instance to a specified message queue. Analyze this data to monitor and query events in real time, improving work efficiency and service quality. This tutorial explains how to use the data push service.
Prerequisites
Before starting this tutorial, complete the following tasks:
Activate Message Queue for RocketMQ.
You have activated the Cloud Contact Center service.
Cloud Contact Center uses Message Queue for RocketMQ version 4.0. To request access to version 4.0, use this link: Apply for version 4.0.
Configure Message Queue for RocketMQ
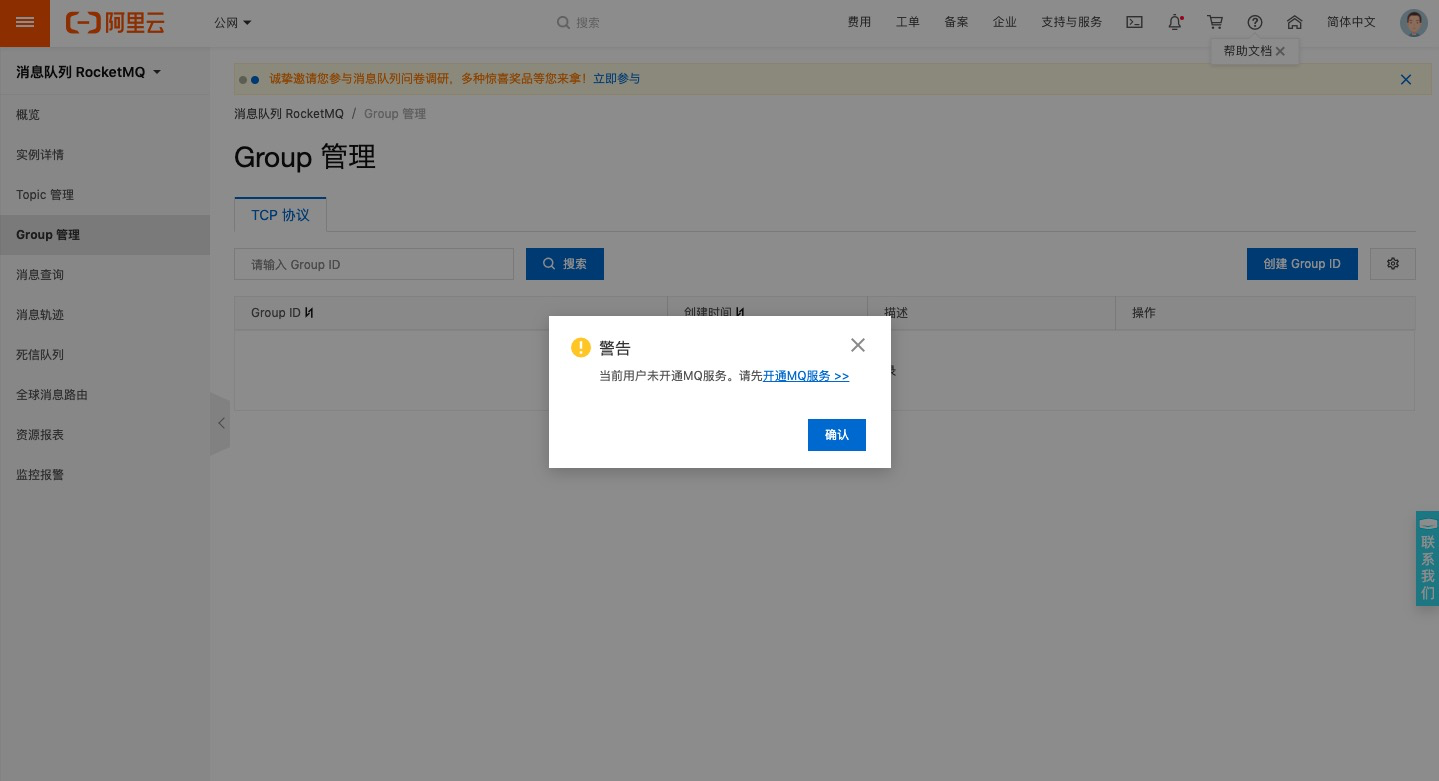
Log on to the Message Queue console using your Alibaba Cloud account. On your first login, you will be prompted to activate the MQ service. Click Activate Now. For pricing details, see Billing overview.
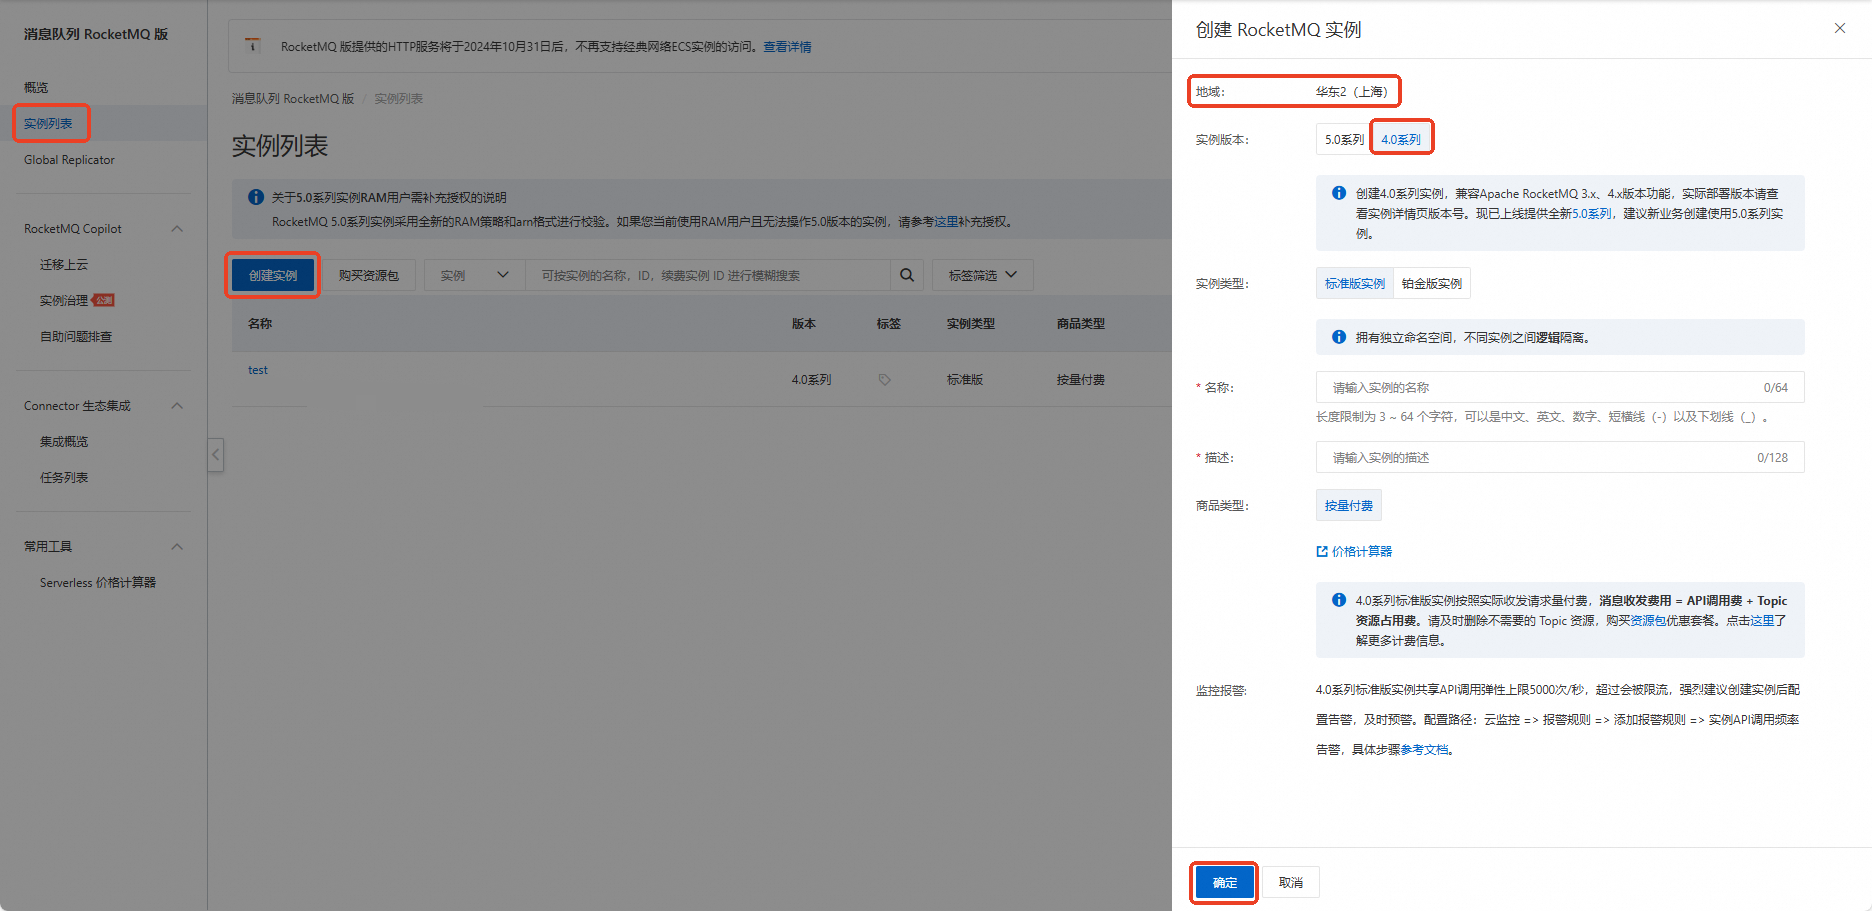
In the navigation pane on the left of the Message Queue for RocketMQ console, select Instances to go to the instances page. Click Create Instance to open the RocketMQ instance creation form.
Select the 4.0 series as the instance version, enter the required information, and click OK to create the instance.
ImportantWhen using Message Queue for RocketMQ, note the following network access restrictions: Topics and Group IDs must be created in the same instance within the same region to communicate. Currently, only the China (Shanghai) region supports private network access. All other regions support public network access. For more information about regions, see Regions and zones.
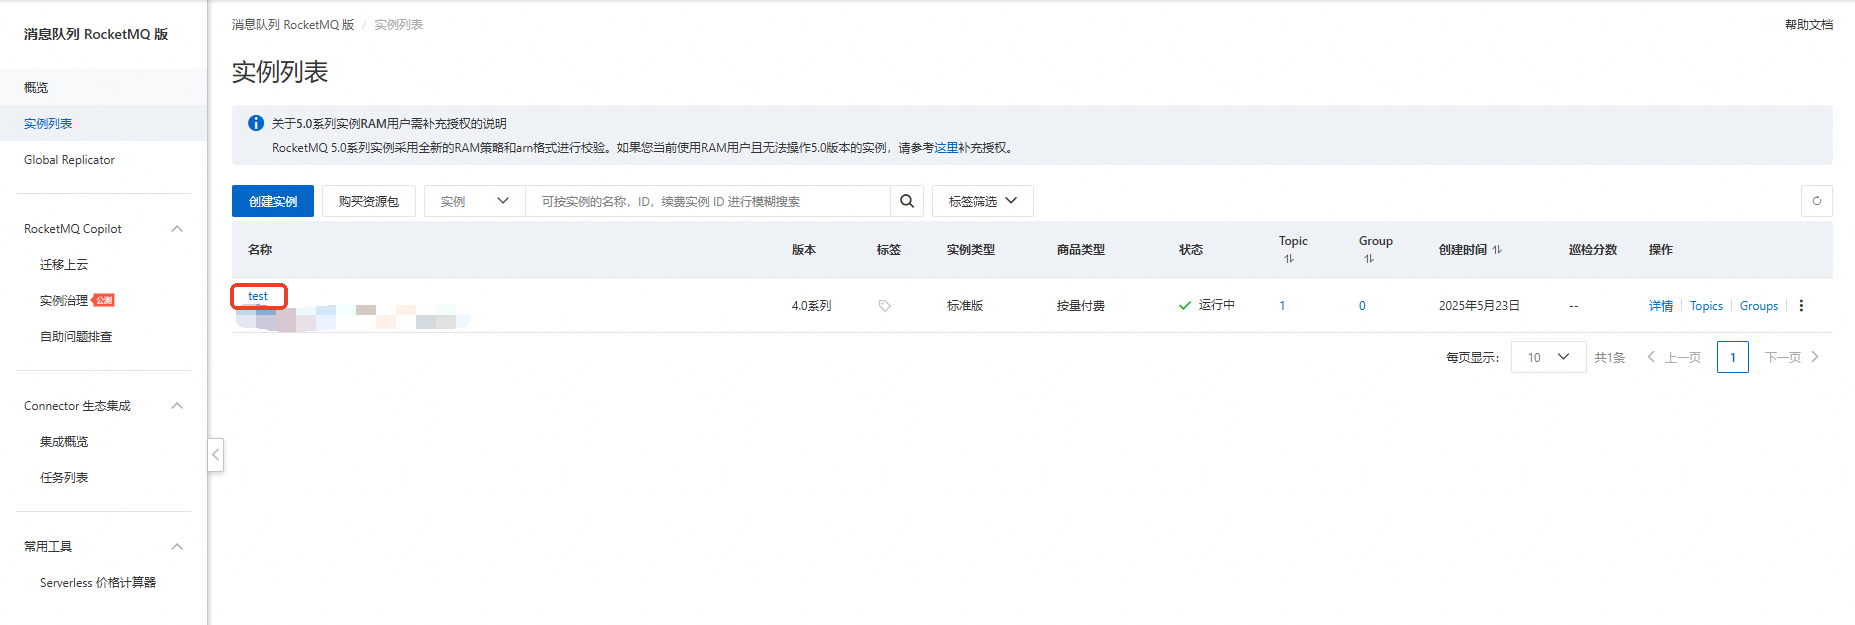
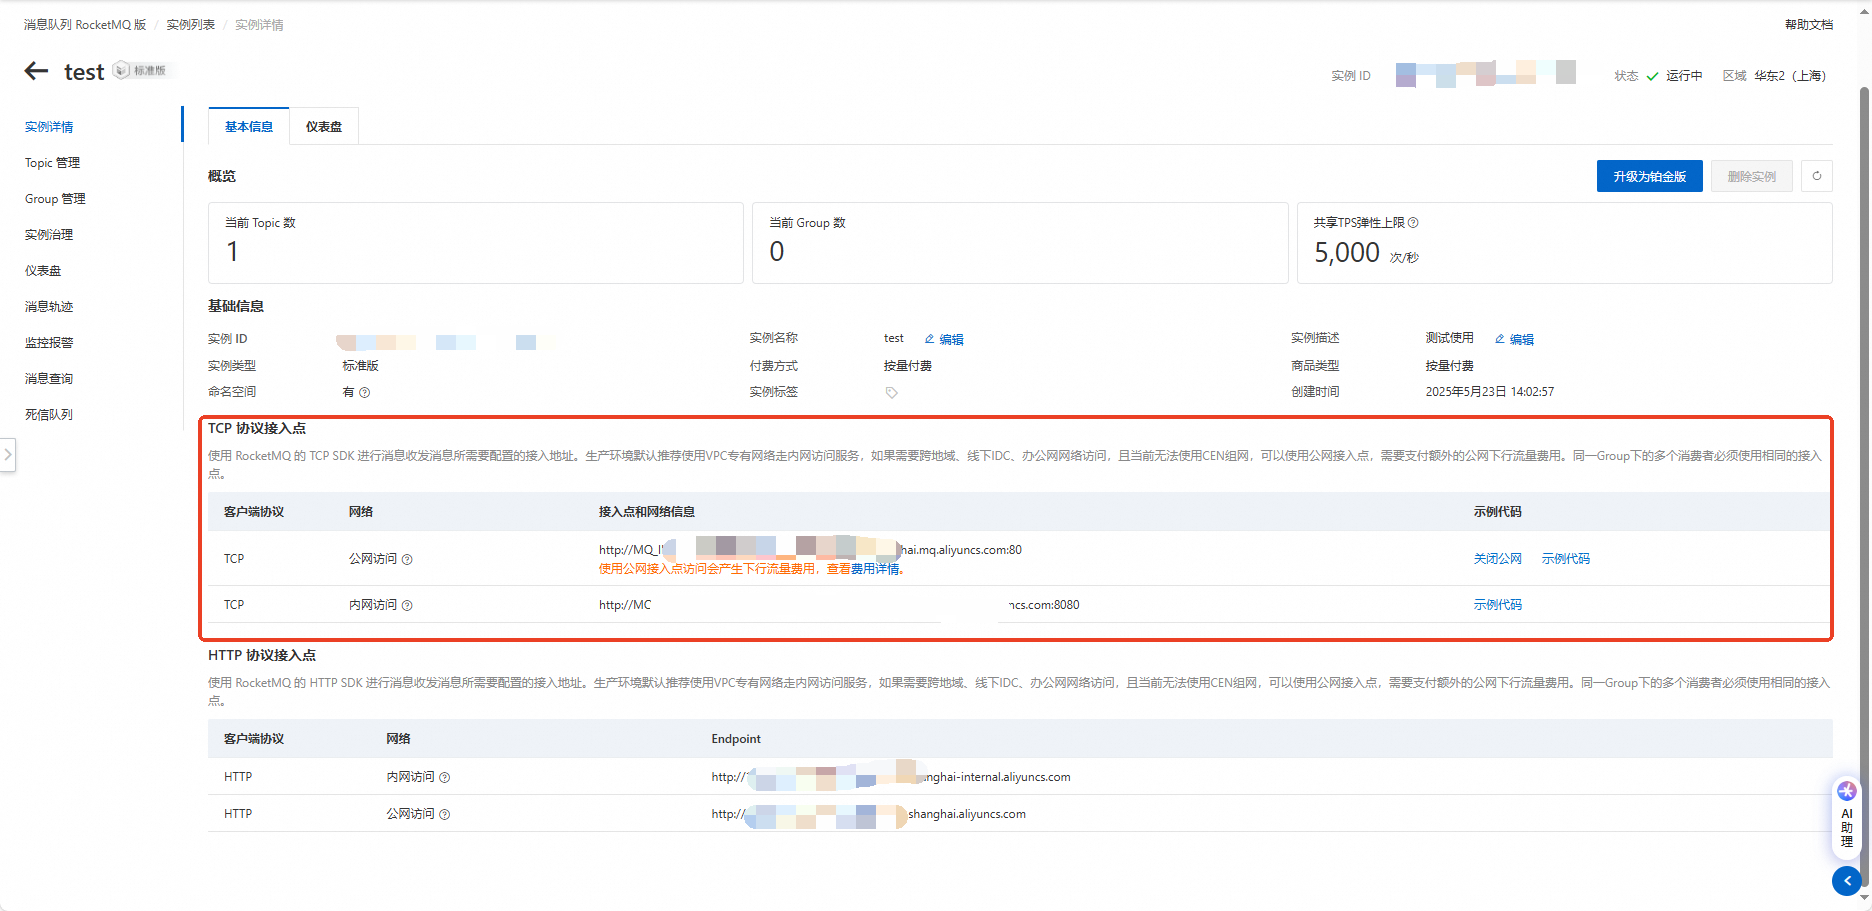
After the instance is created, click the instance name in the instances list to open its details page. Record your endpoint information.
NoteOnly public TCP endpoints are supported (private network access is available only in Shanghai).
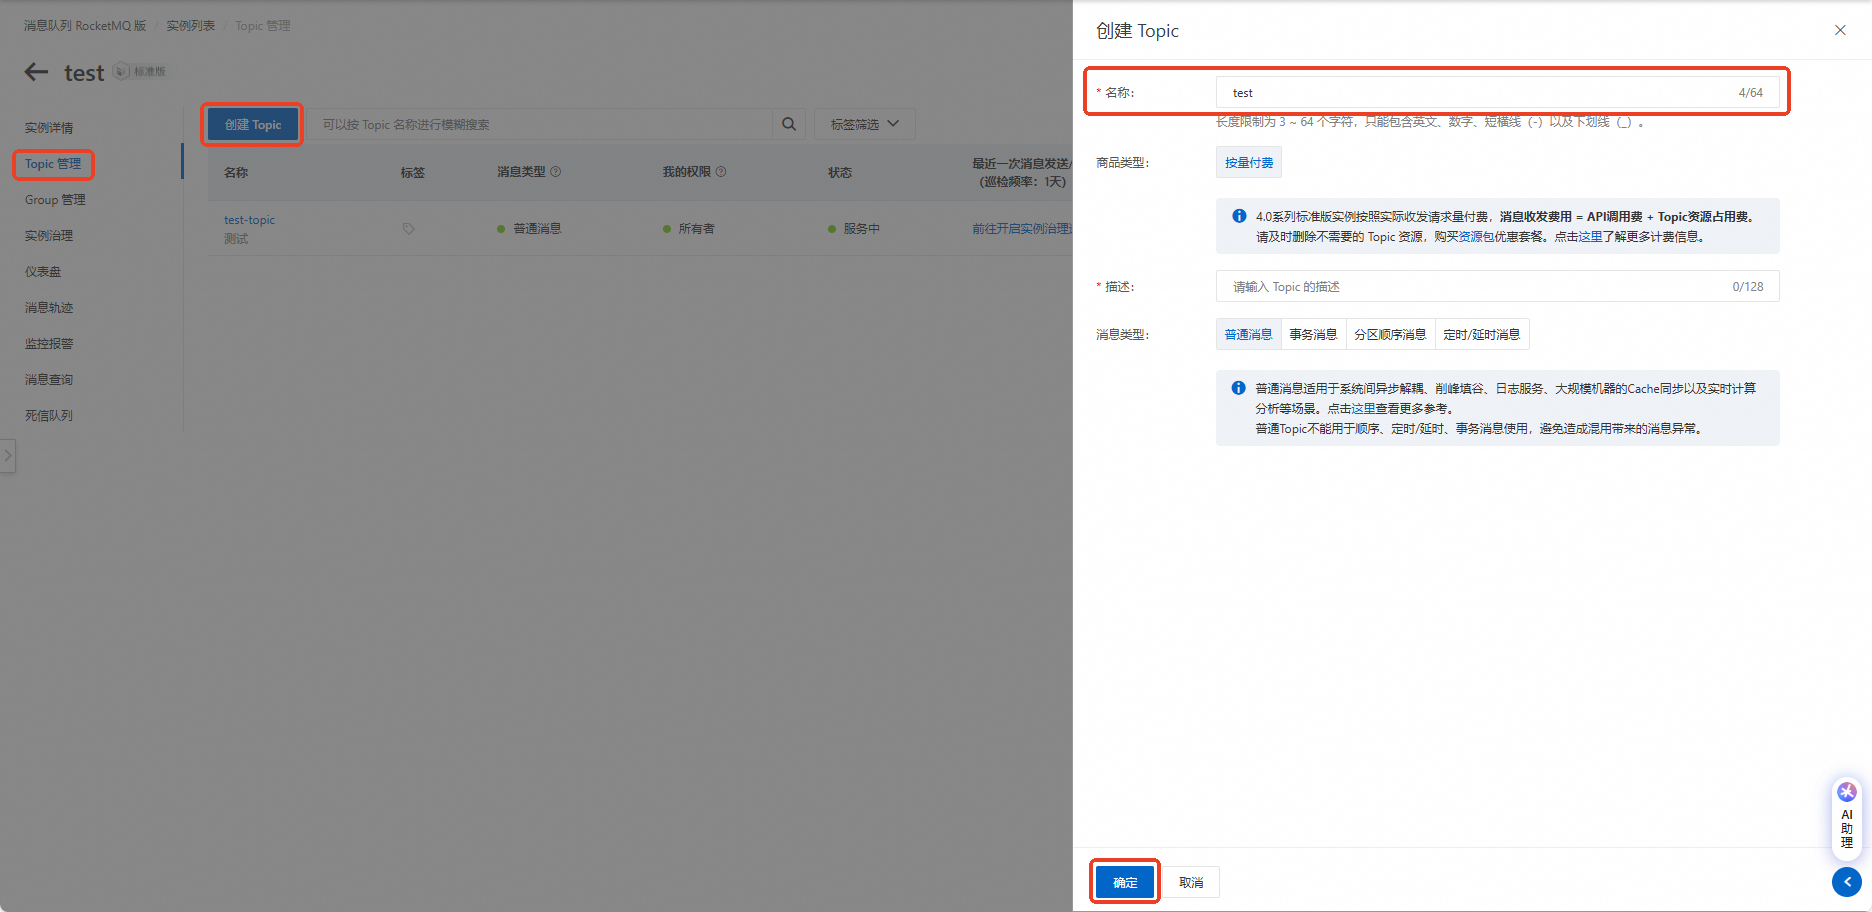
In the navigation pane on the left of the instance details page, select Topics. Click Create Topic, enter the required information, and click OK to create the topic. Record the topic name.
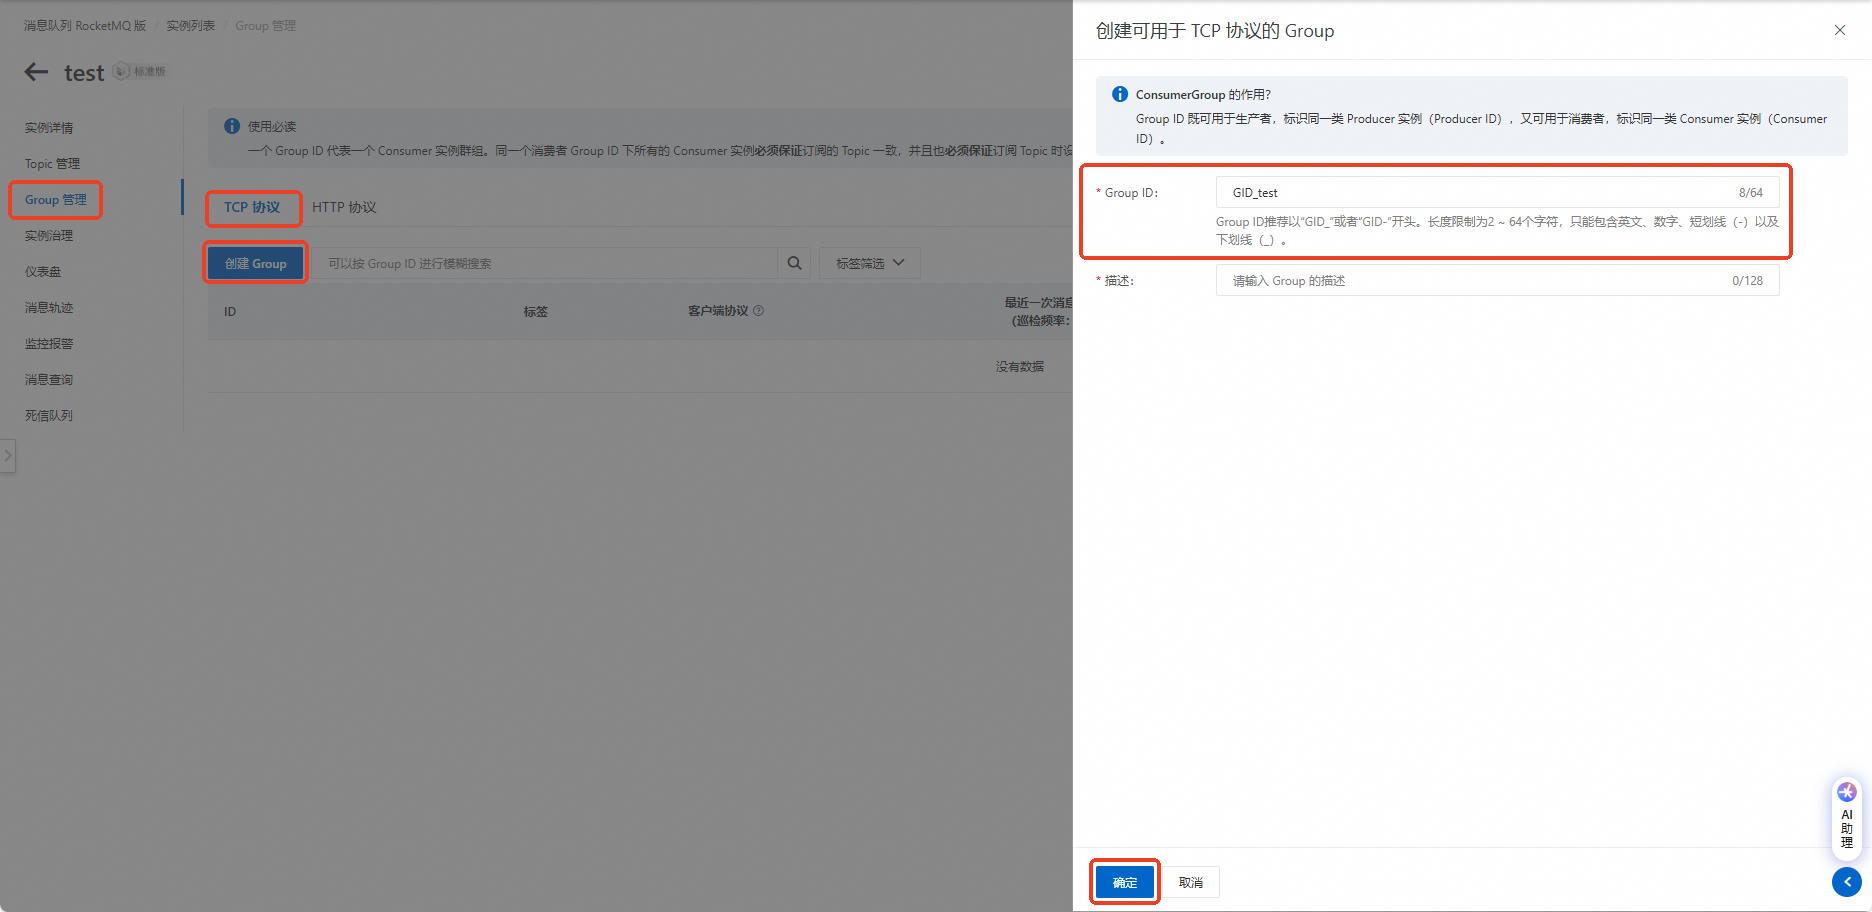
In the navigation pane on the left of the instance details page, select Groups. Click Create Group, enter the required information, and click OK to create the group. Record the Group ID.

Configure event push
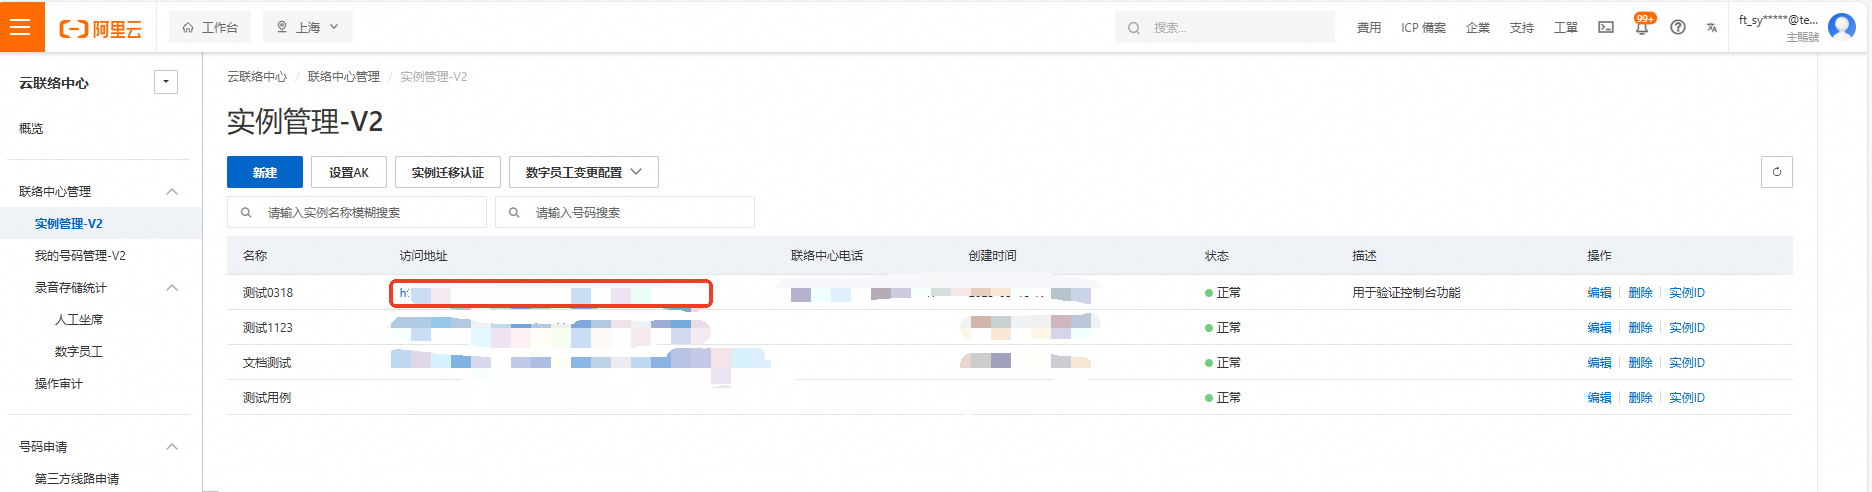
Log on to the Cloud Contact Center console. In the navigation pane on the left, select Instance Management - V2. Click the access address of your target instance to open its console.
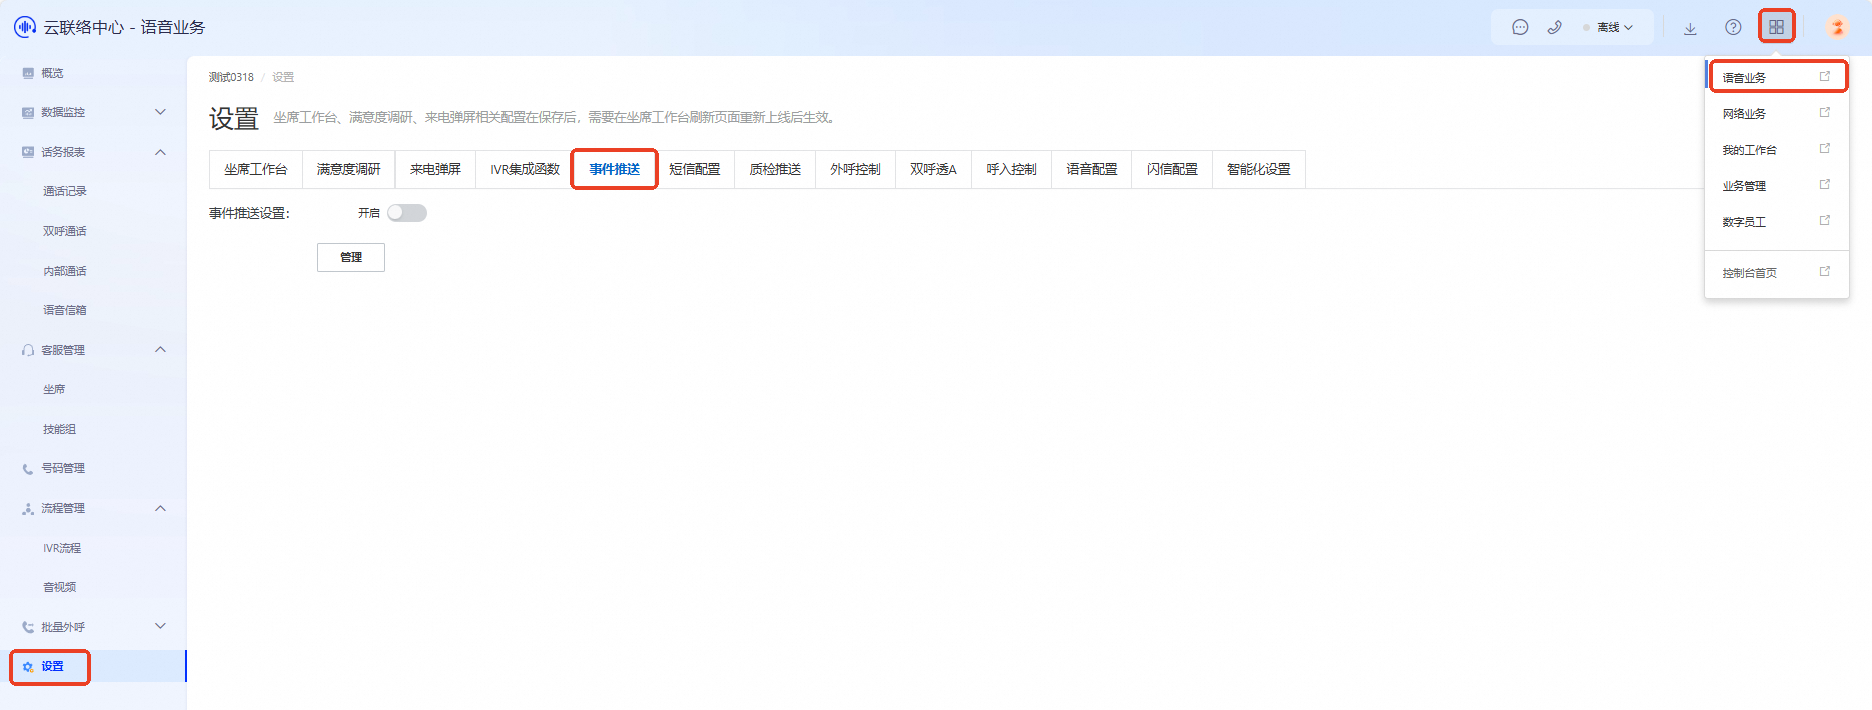
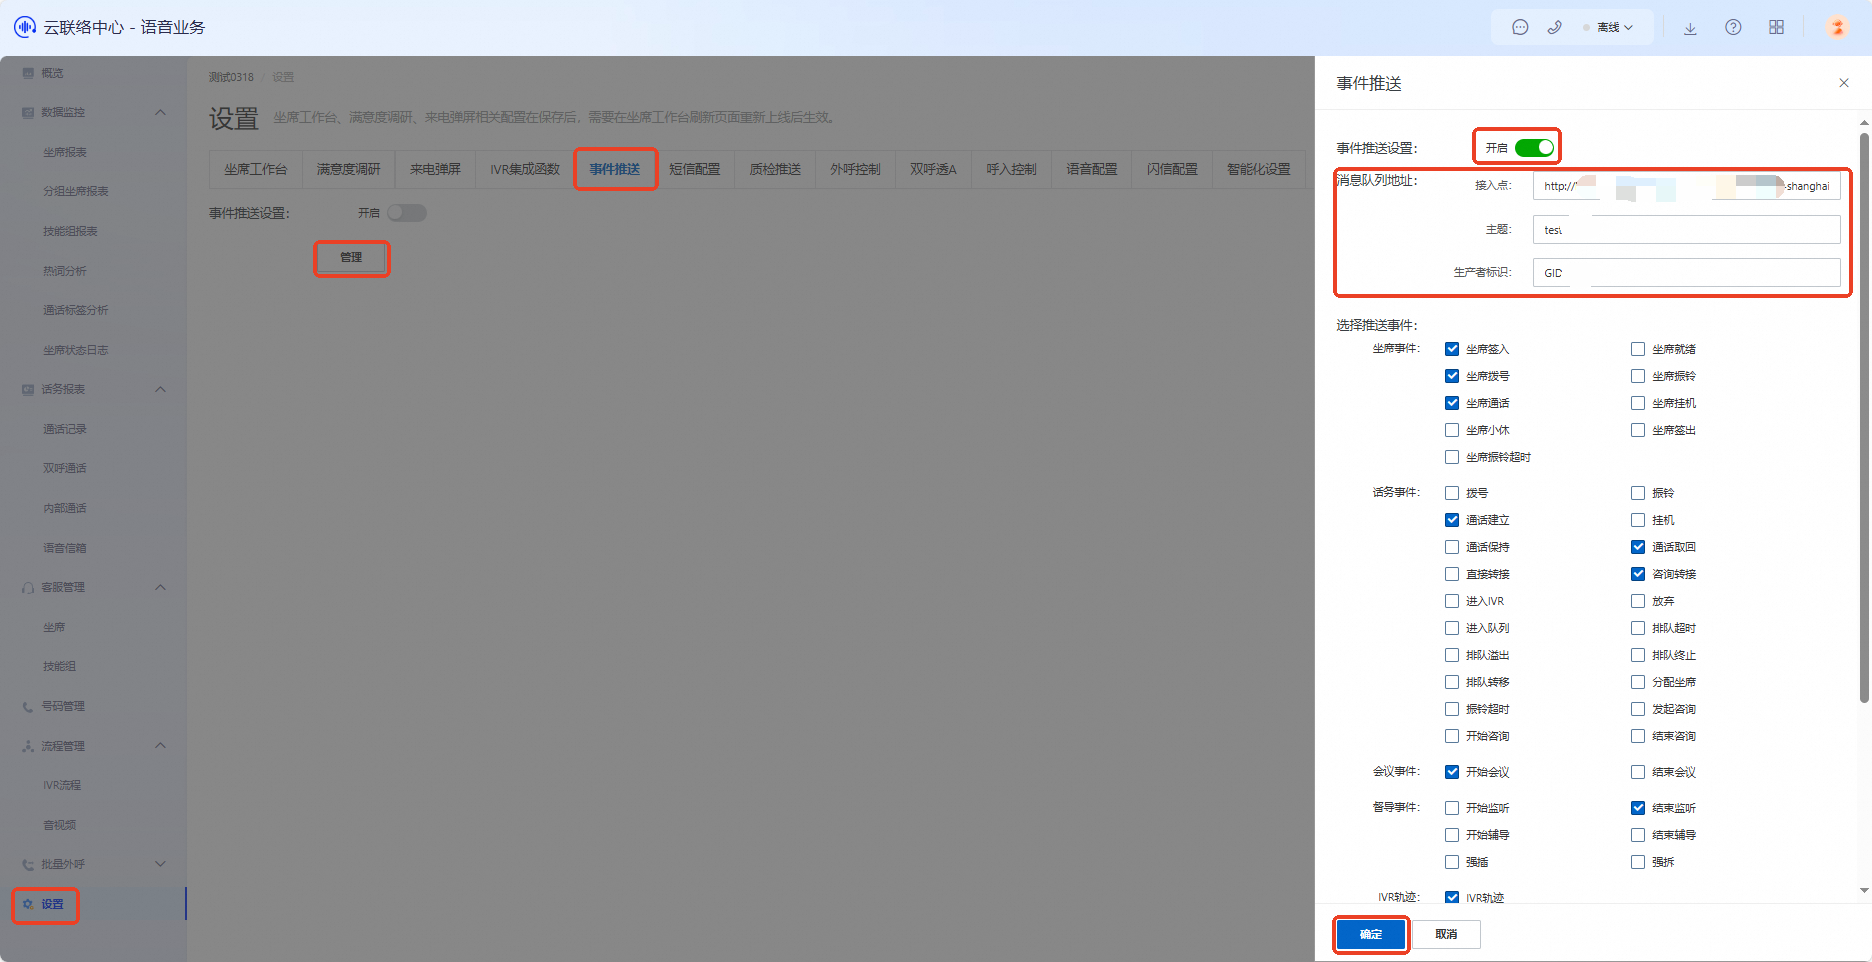
Click the menu button in the upper-right corner and select Voice Services to open the voice services management console. In the navigation pane on the left, choose Settings > Event Push to open the event push configuration page.
Click Manage to open the event push configuration form. Click Enable. Enter the Endpoint, Topic, and Producer Group ID. Then, check the event types you want to subscribe to based on your needs. After completing the configuration, click OK to save your event push settings.
How to test whether event push works
You have now successfully subscribed to the event push service for your Cloud Contact Center instance. To verify that event push is working, integrate with Message Queue for RocketMQ. For more information about Message Queue for RocketMQ and how to integrate it, see What is ApsaraMQ for RocketMQ.