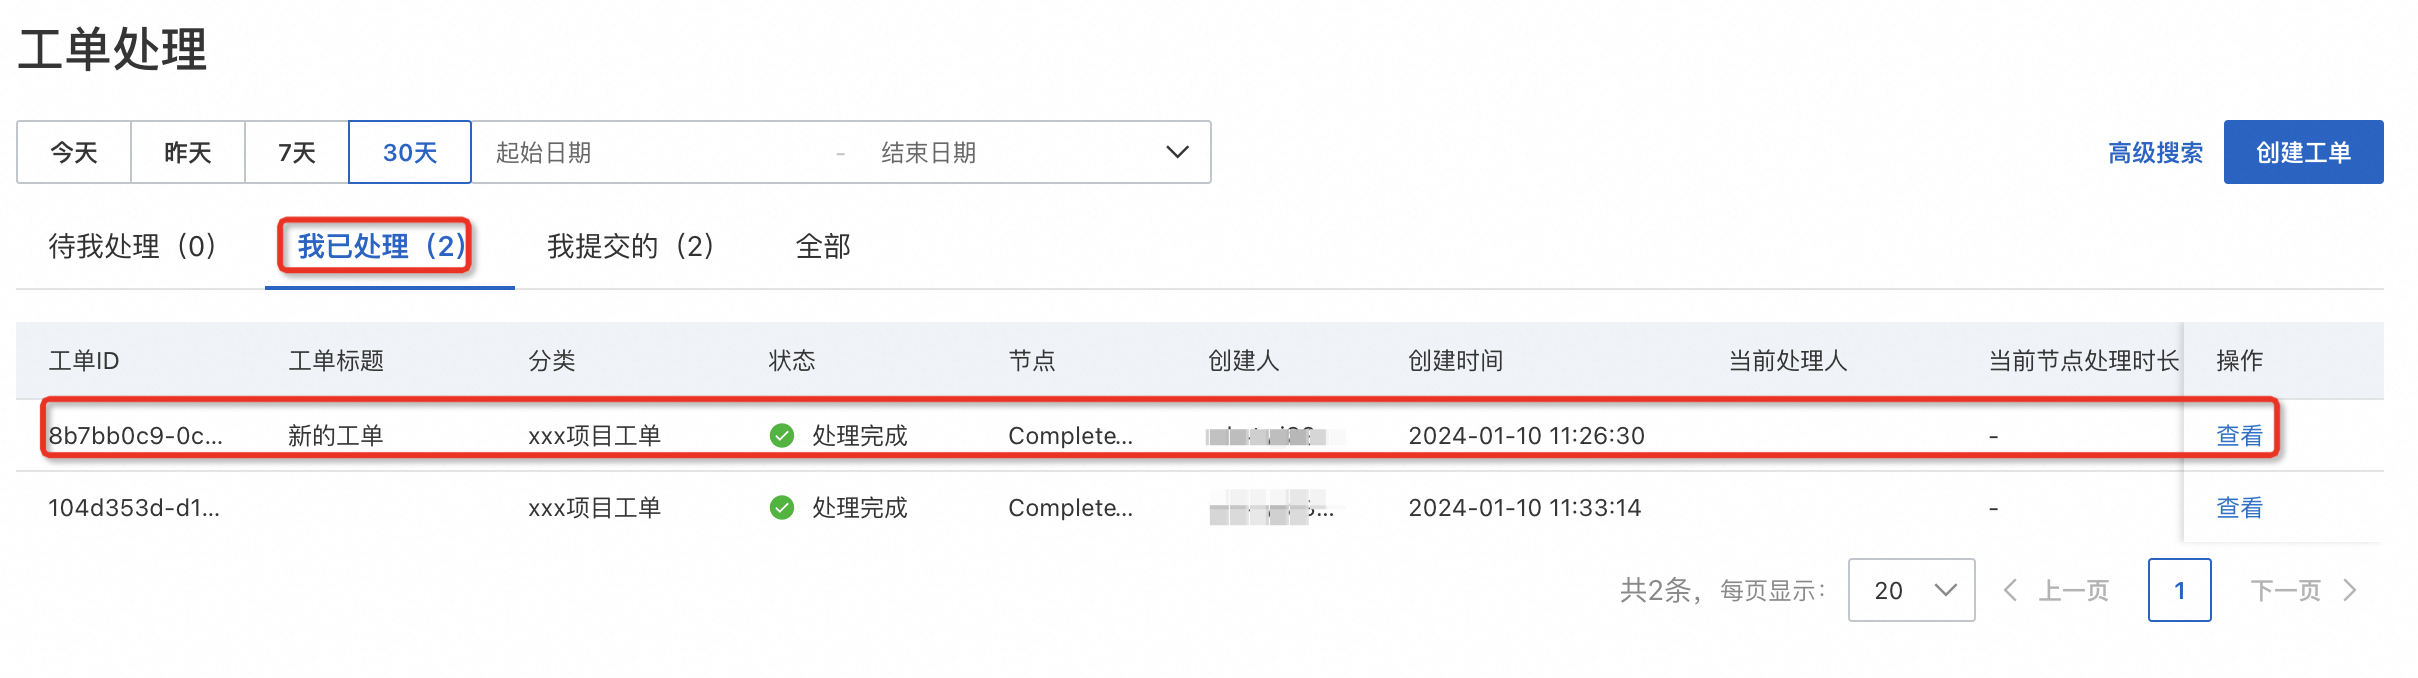
Function overview
Ticket Management helps you record, track, and resolve customer issues or requests. It includes features for ticket processing, ticket templates, and ticket fields.
Access the feature
Click "Business Management" in the upper-right corner. Then, click the icon on the left.
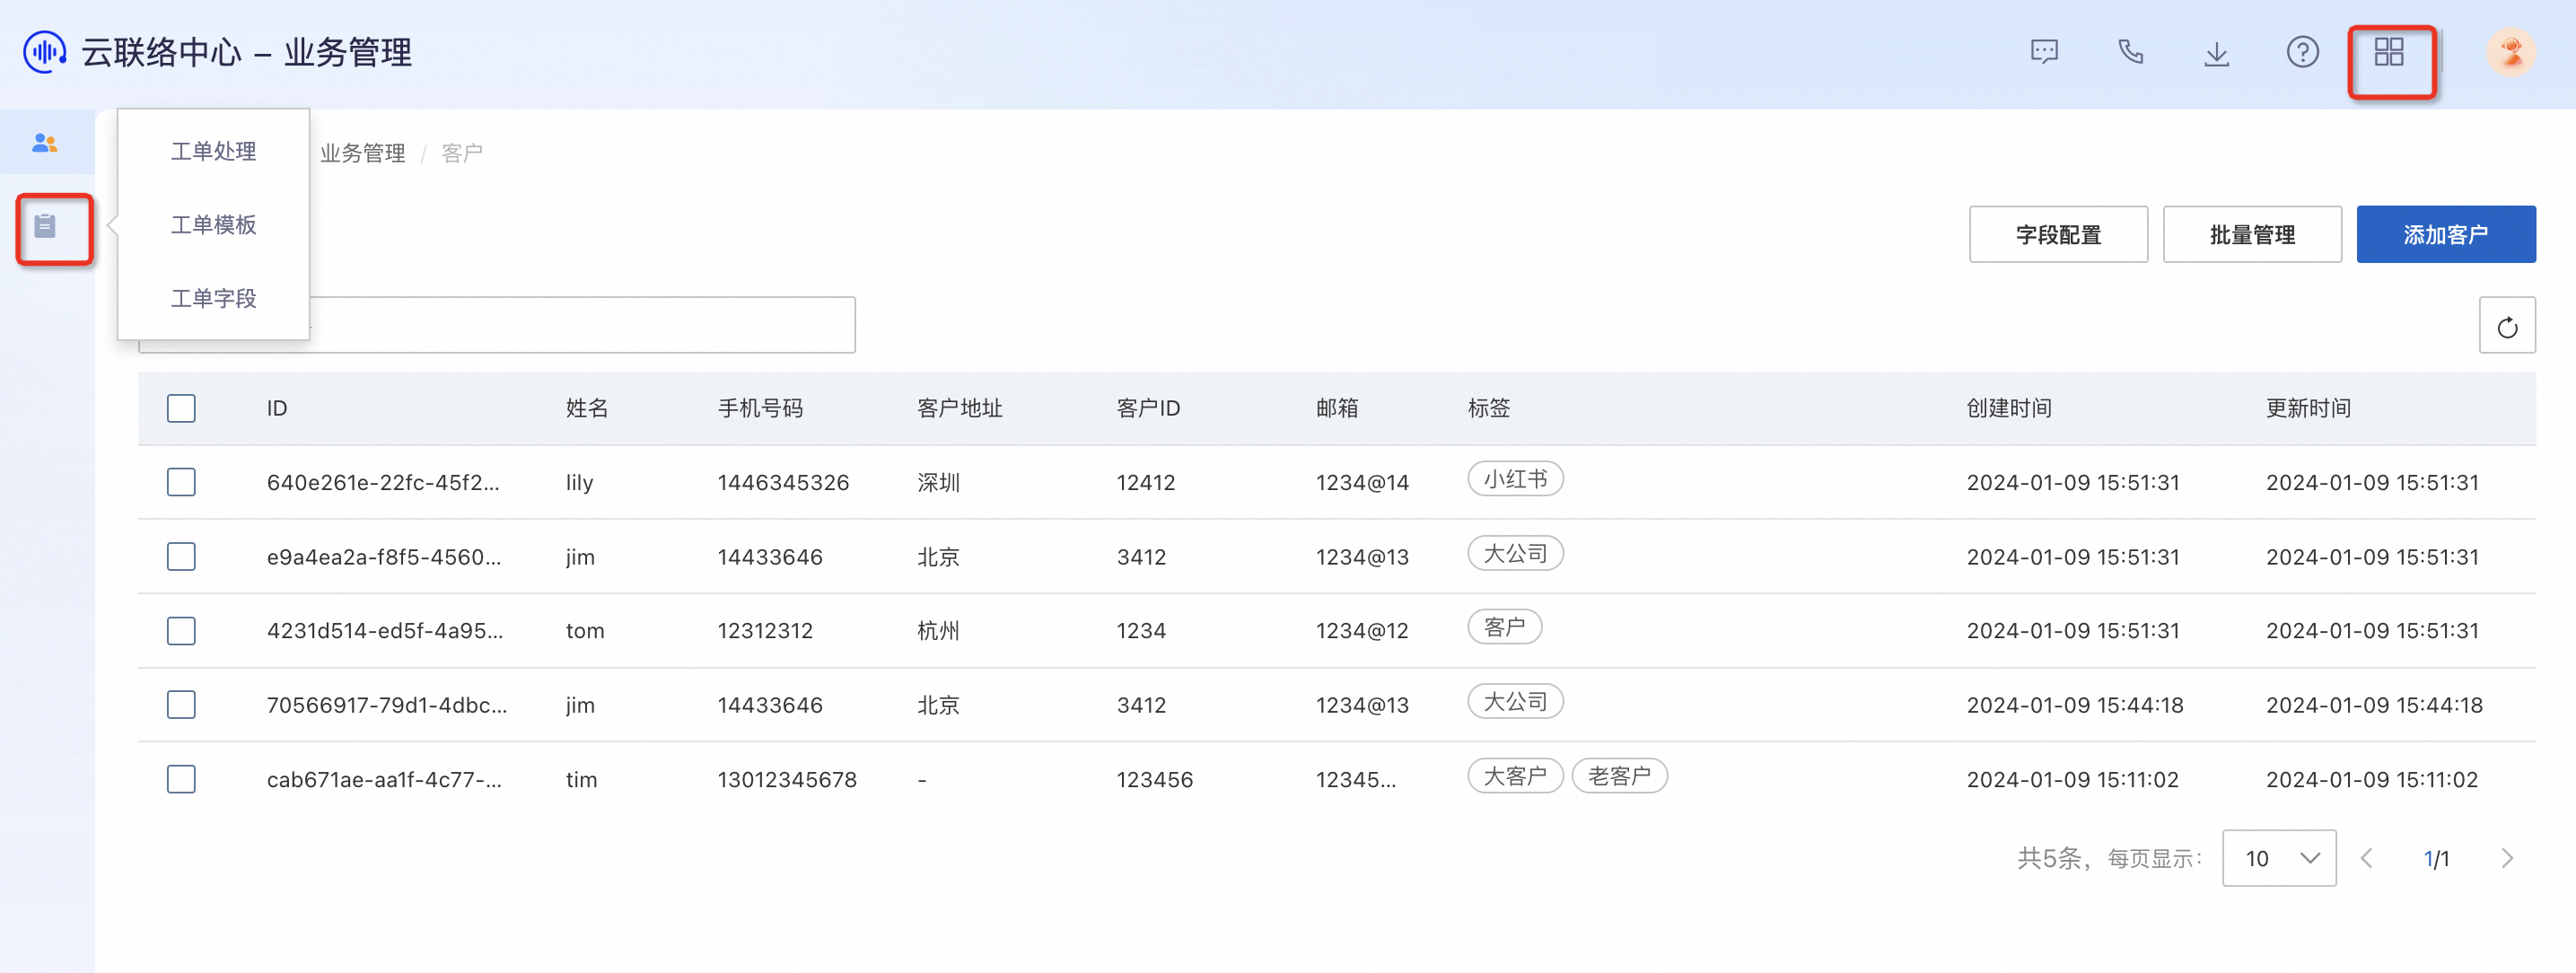
Operations
Step 1: Add a ticket field
By default, the system includes only a Title field. You can add more fields.
Click Ticket Field, and then click New Field.
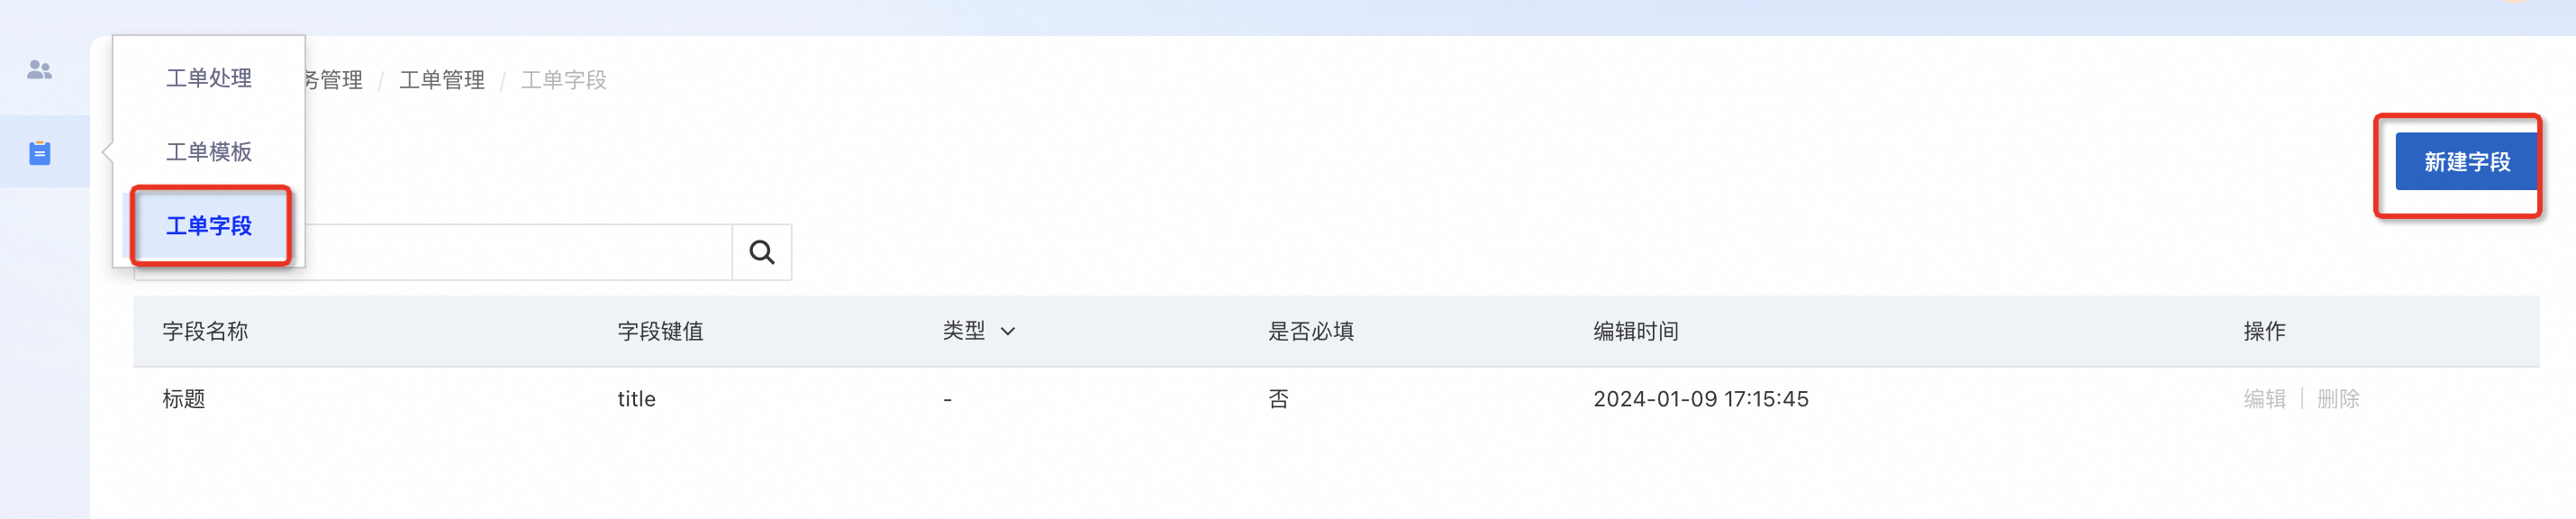
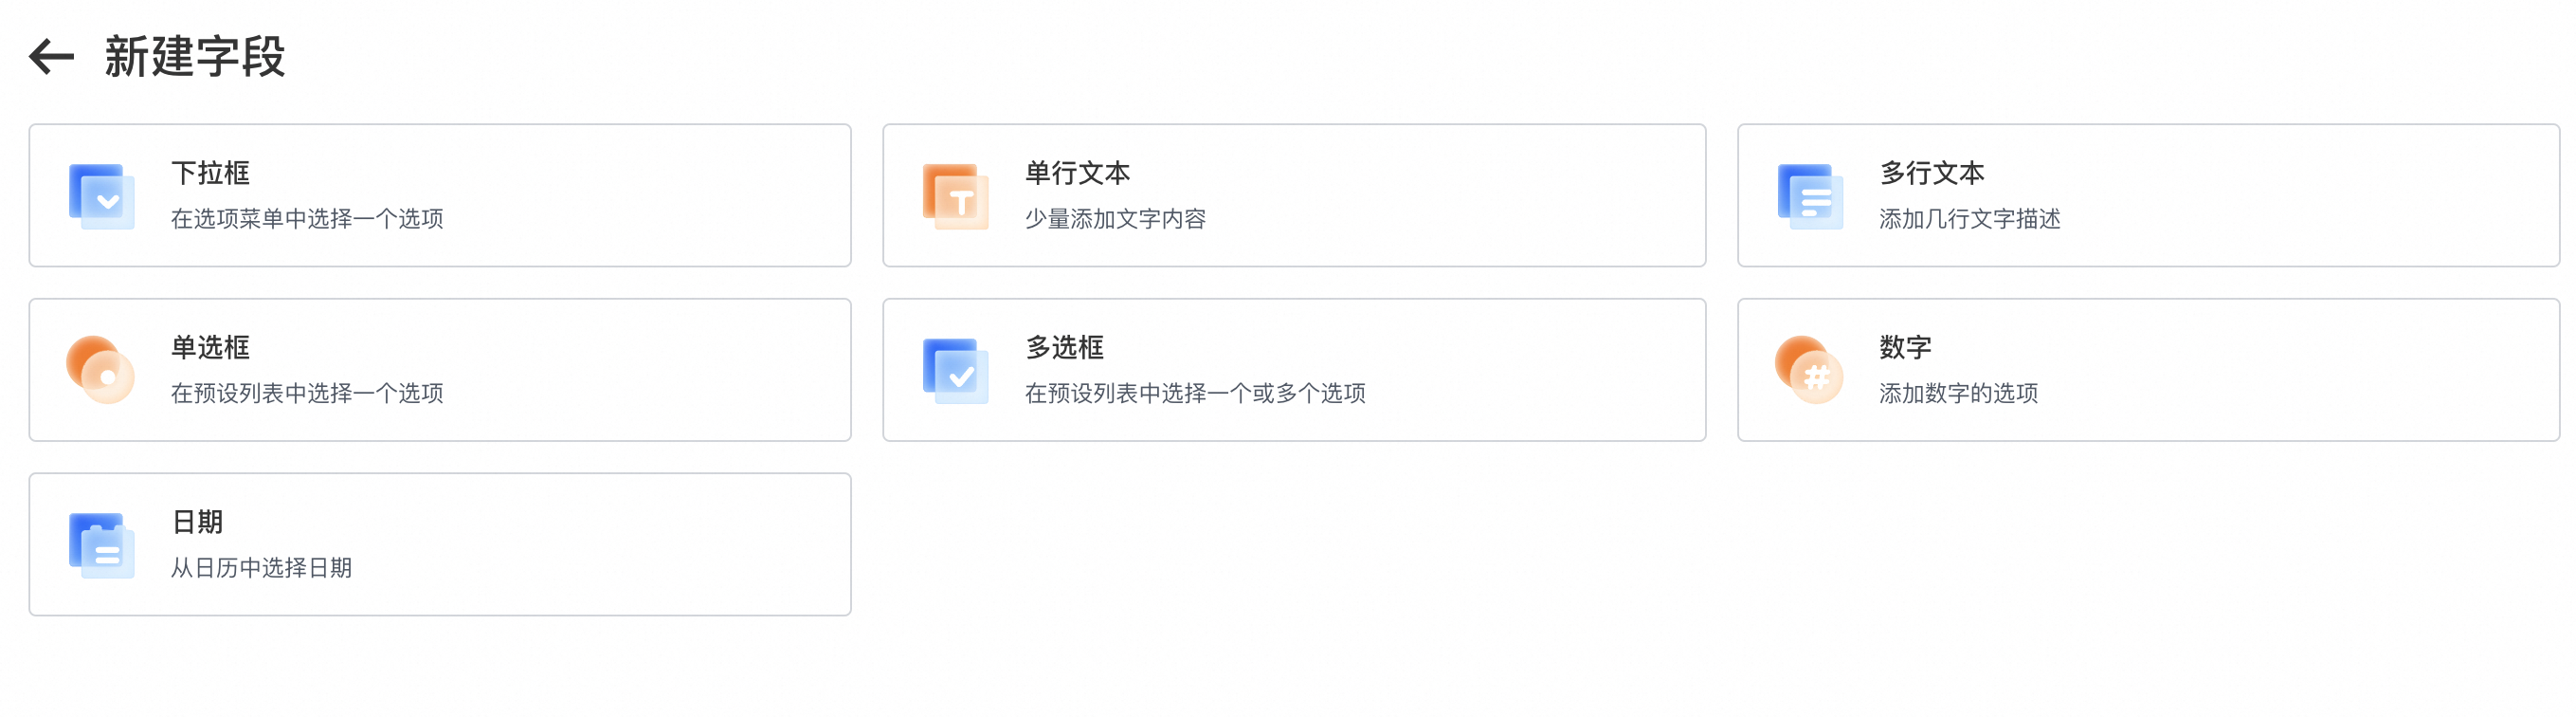
The field configuration page appears.
The default Title field cannot be edited or deleted.
For example, to add a drop-down list, enter the field name, key-value pair, and description on the configuration page, as shown in the following figure:
You can add more fields to enrich your ticket information. These fields can be selected later when you create ticket templates. The process is the same as adding a drop-down list. Add fields as needed.
Common ticket fields include title, type, priority, status, creation date, customer information, associated project, problem description, attachments, impact scope, expected completion time, assigned team, tags, and resolution notes. Customize the fields based on your business needs.
The examples are for demonstration purposes only.
Step 2: Add a ticket category
After you add the ticket fields, you can create a ticket template.
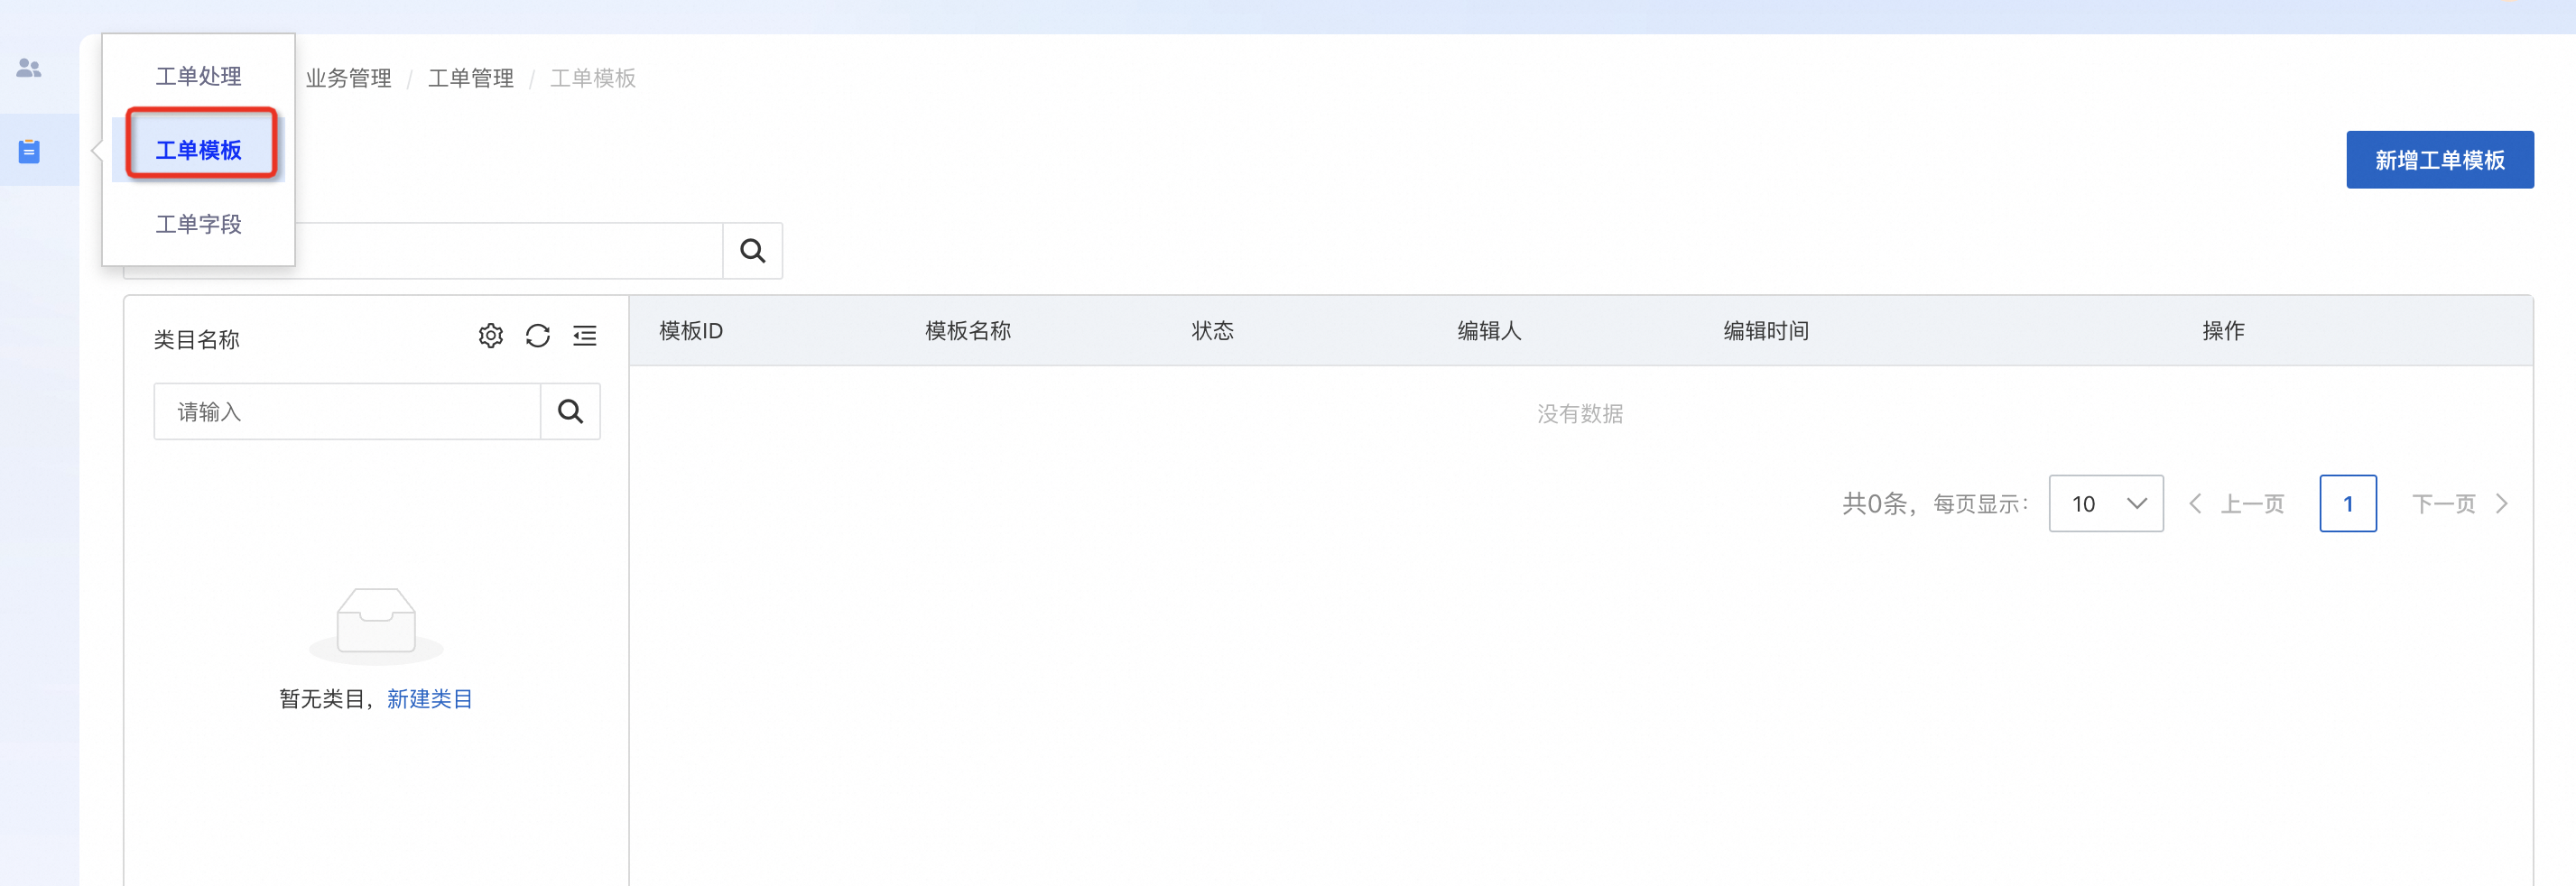
First, add a category. This helps you organize different ticket templates later.
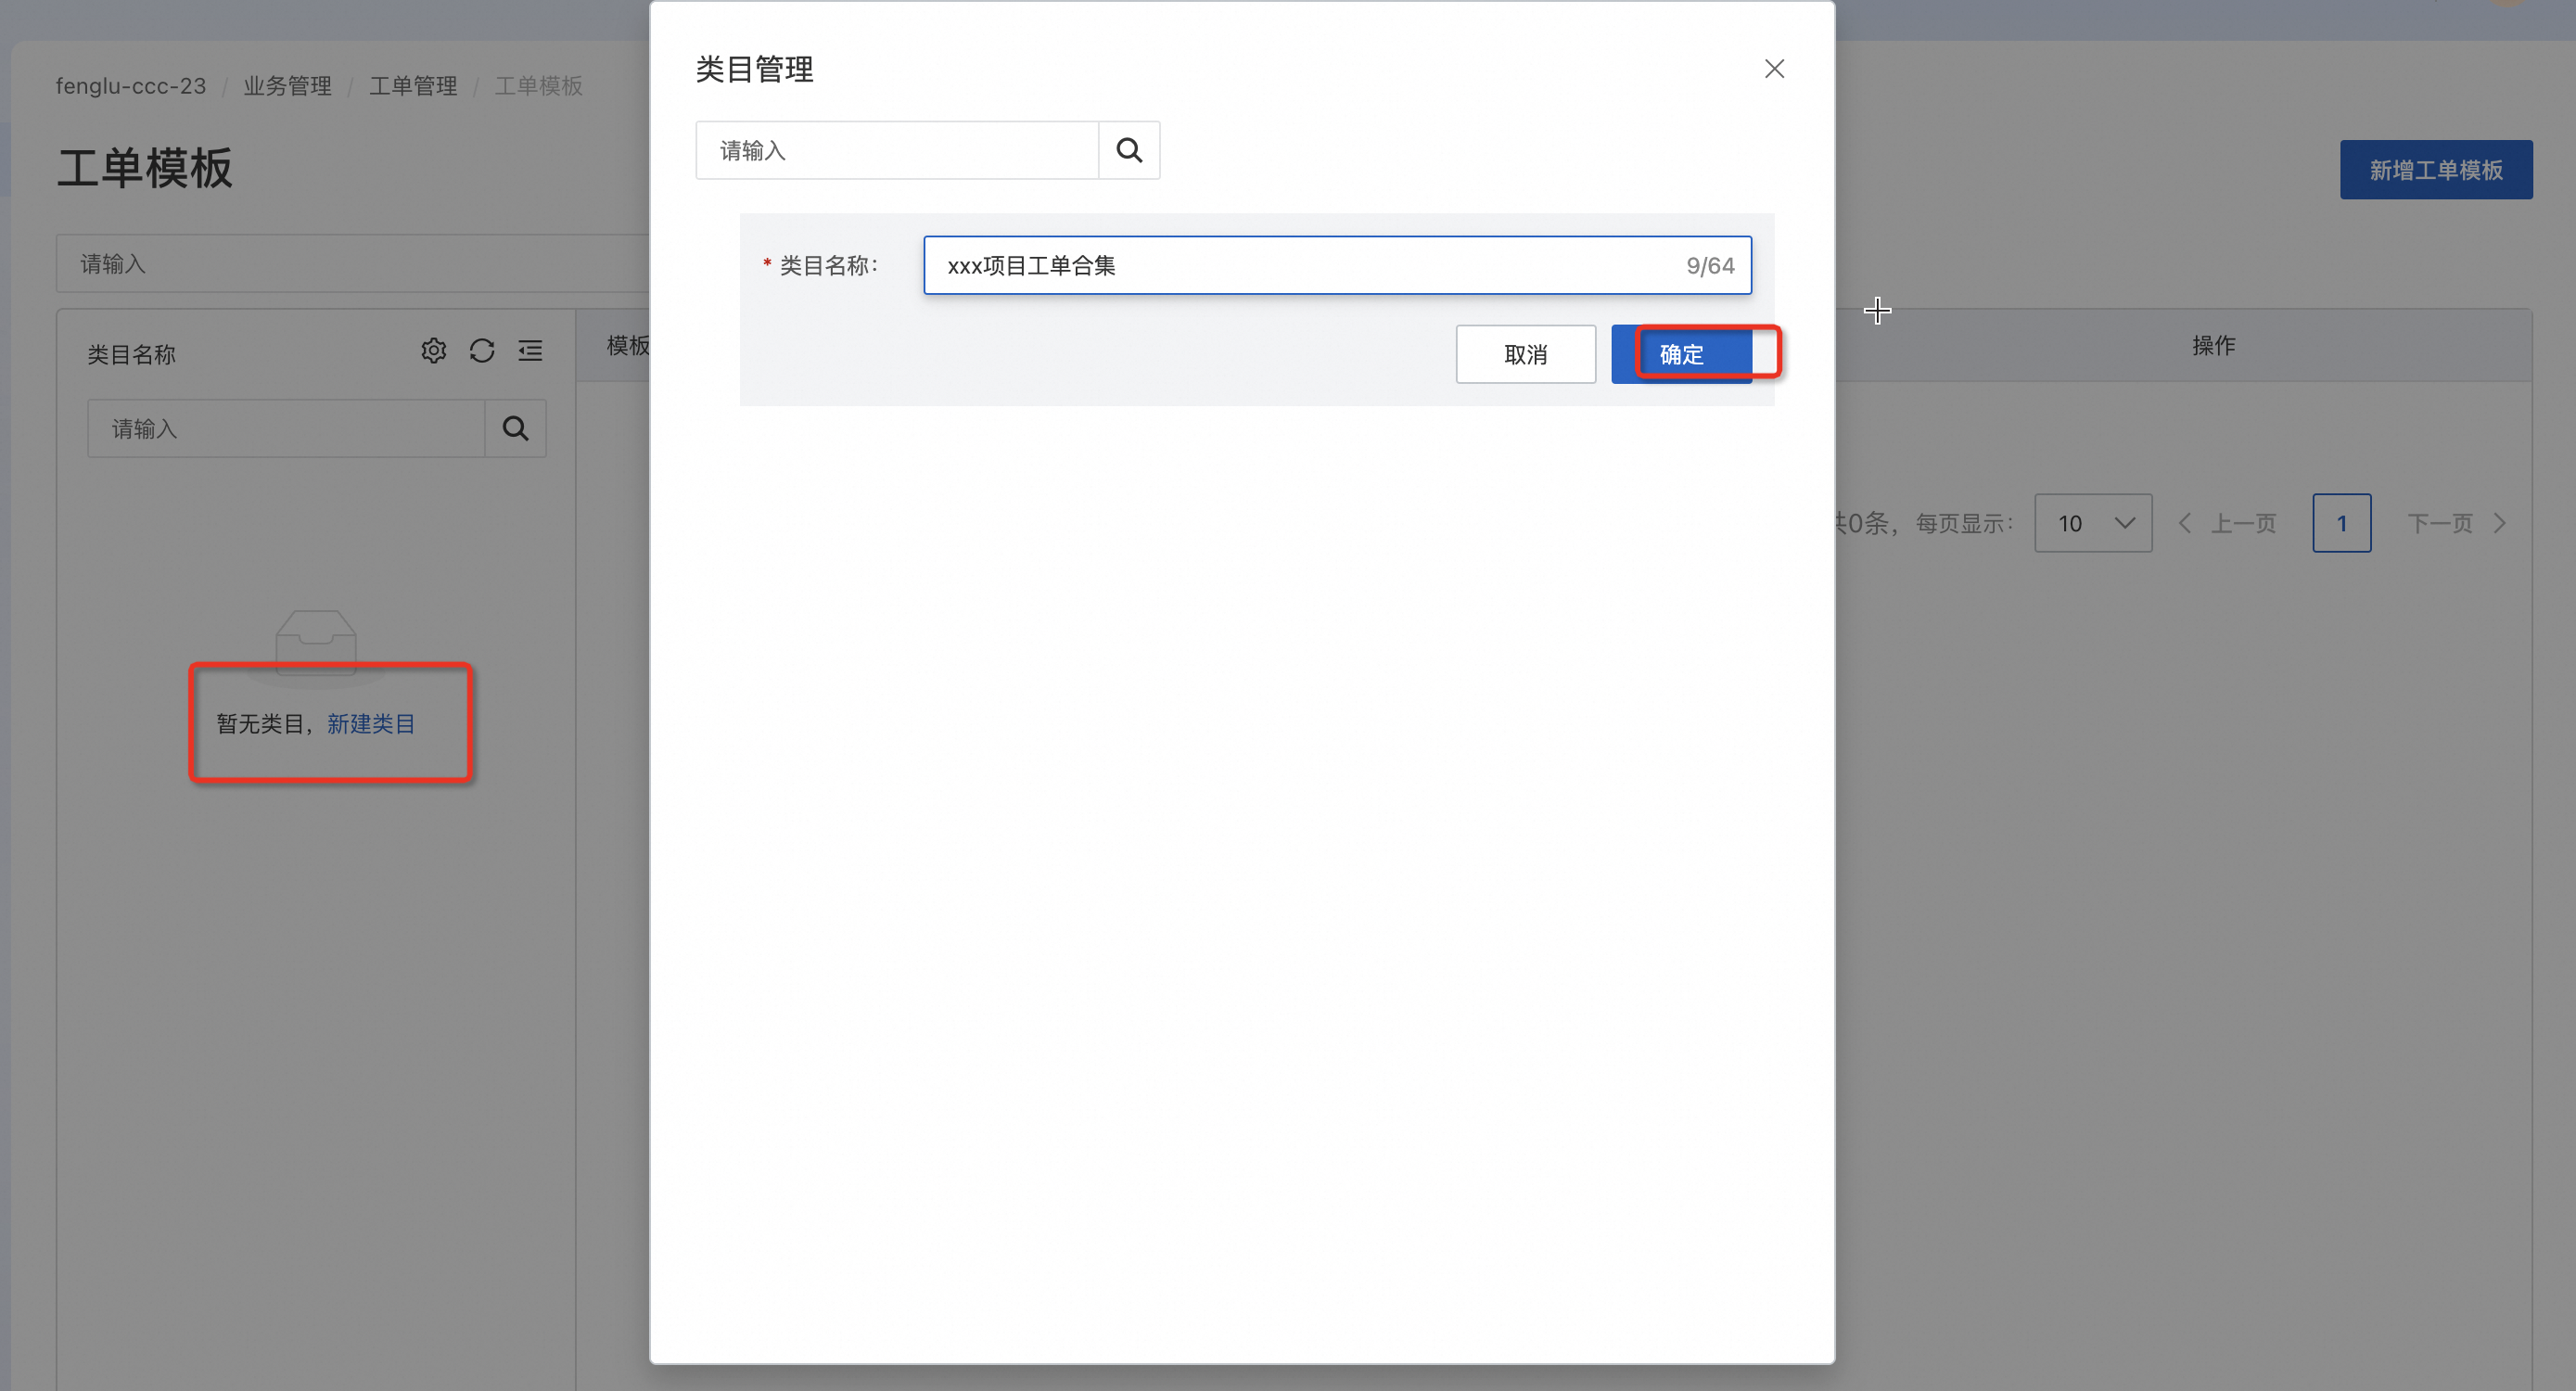
After you create the category, refresh the page to view it.
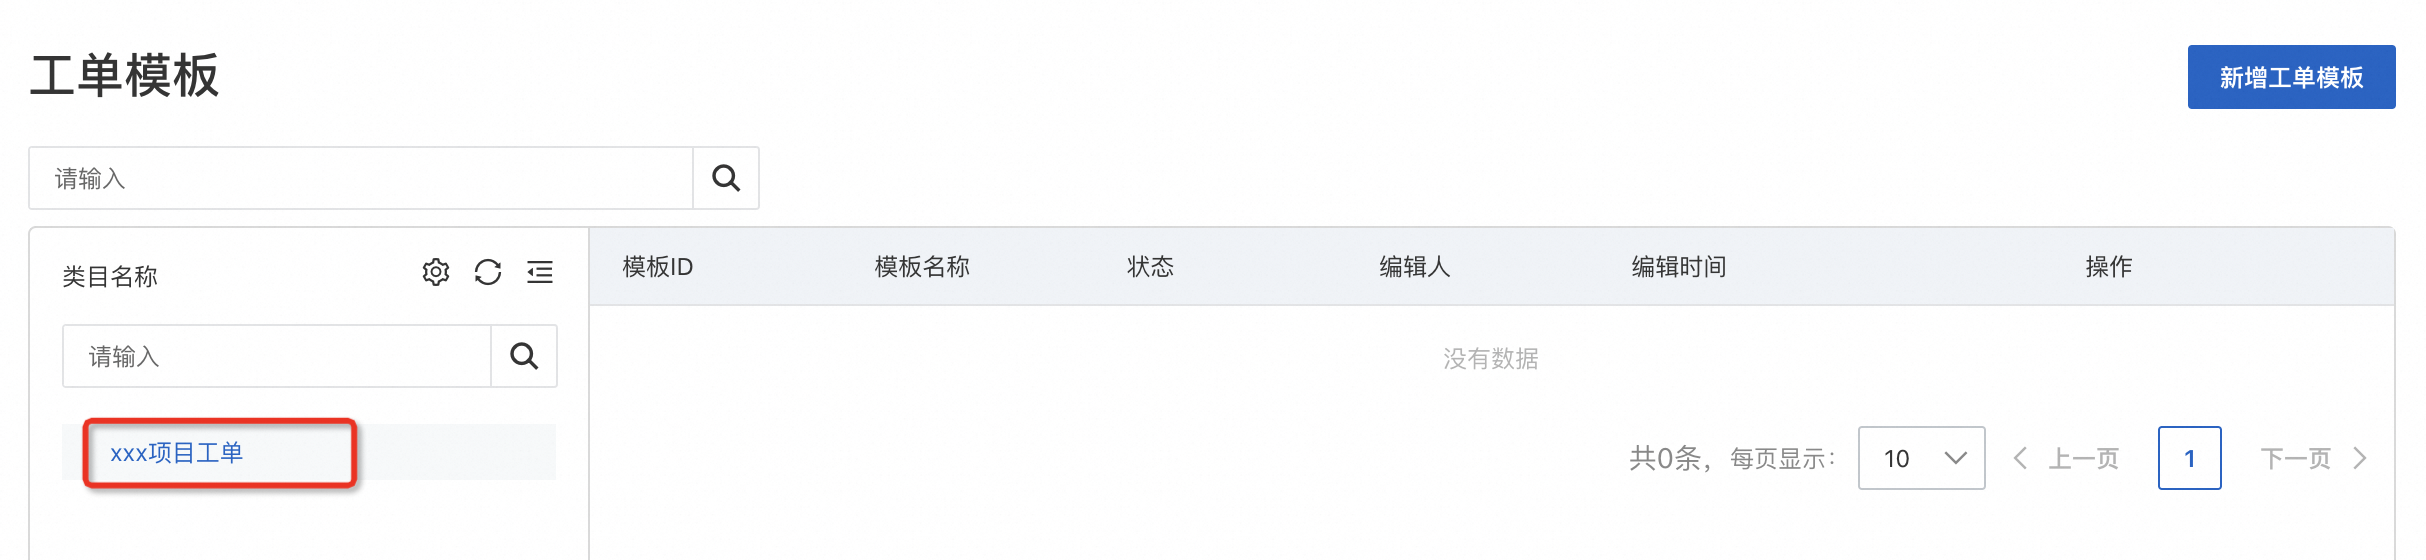
Step 3: Add a ticket template - Configure content
After you add the category, click Add Ticket Template to create a new template.
The fields that you created are displayed. Select the checkboxes for the fields that you want to include in this template. When you are finished, click Next.
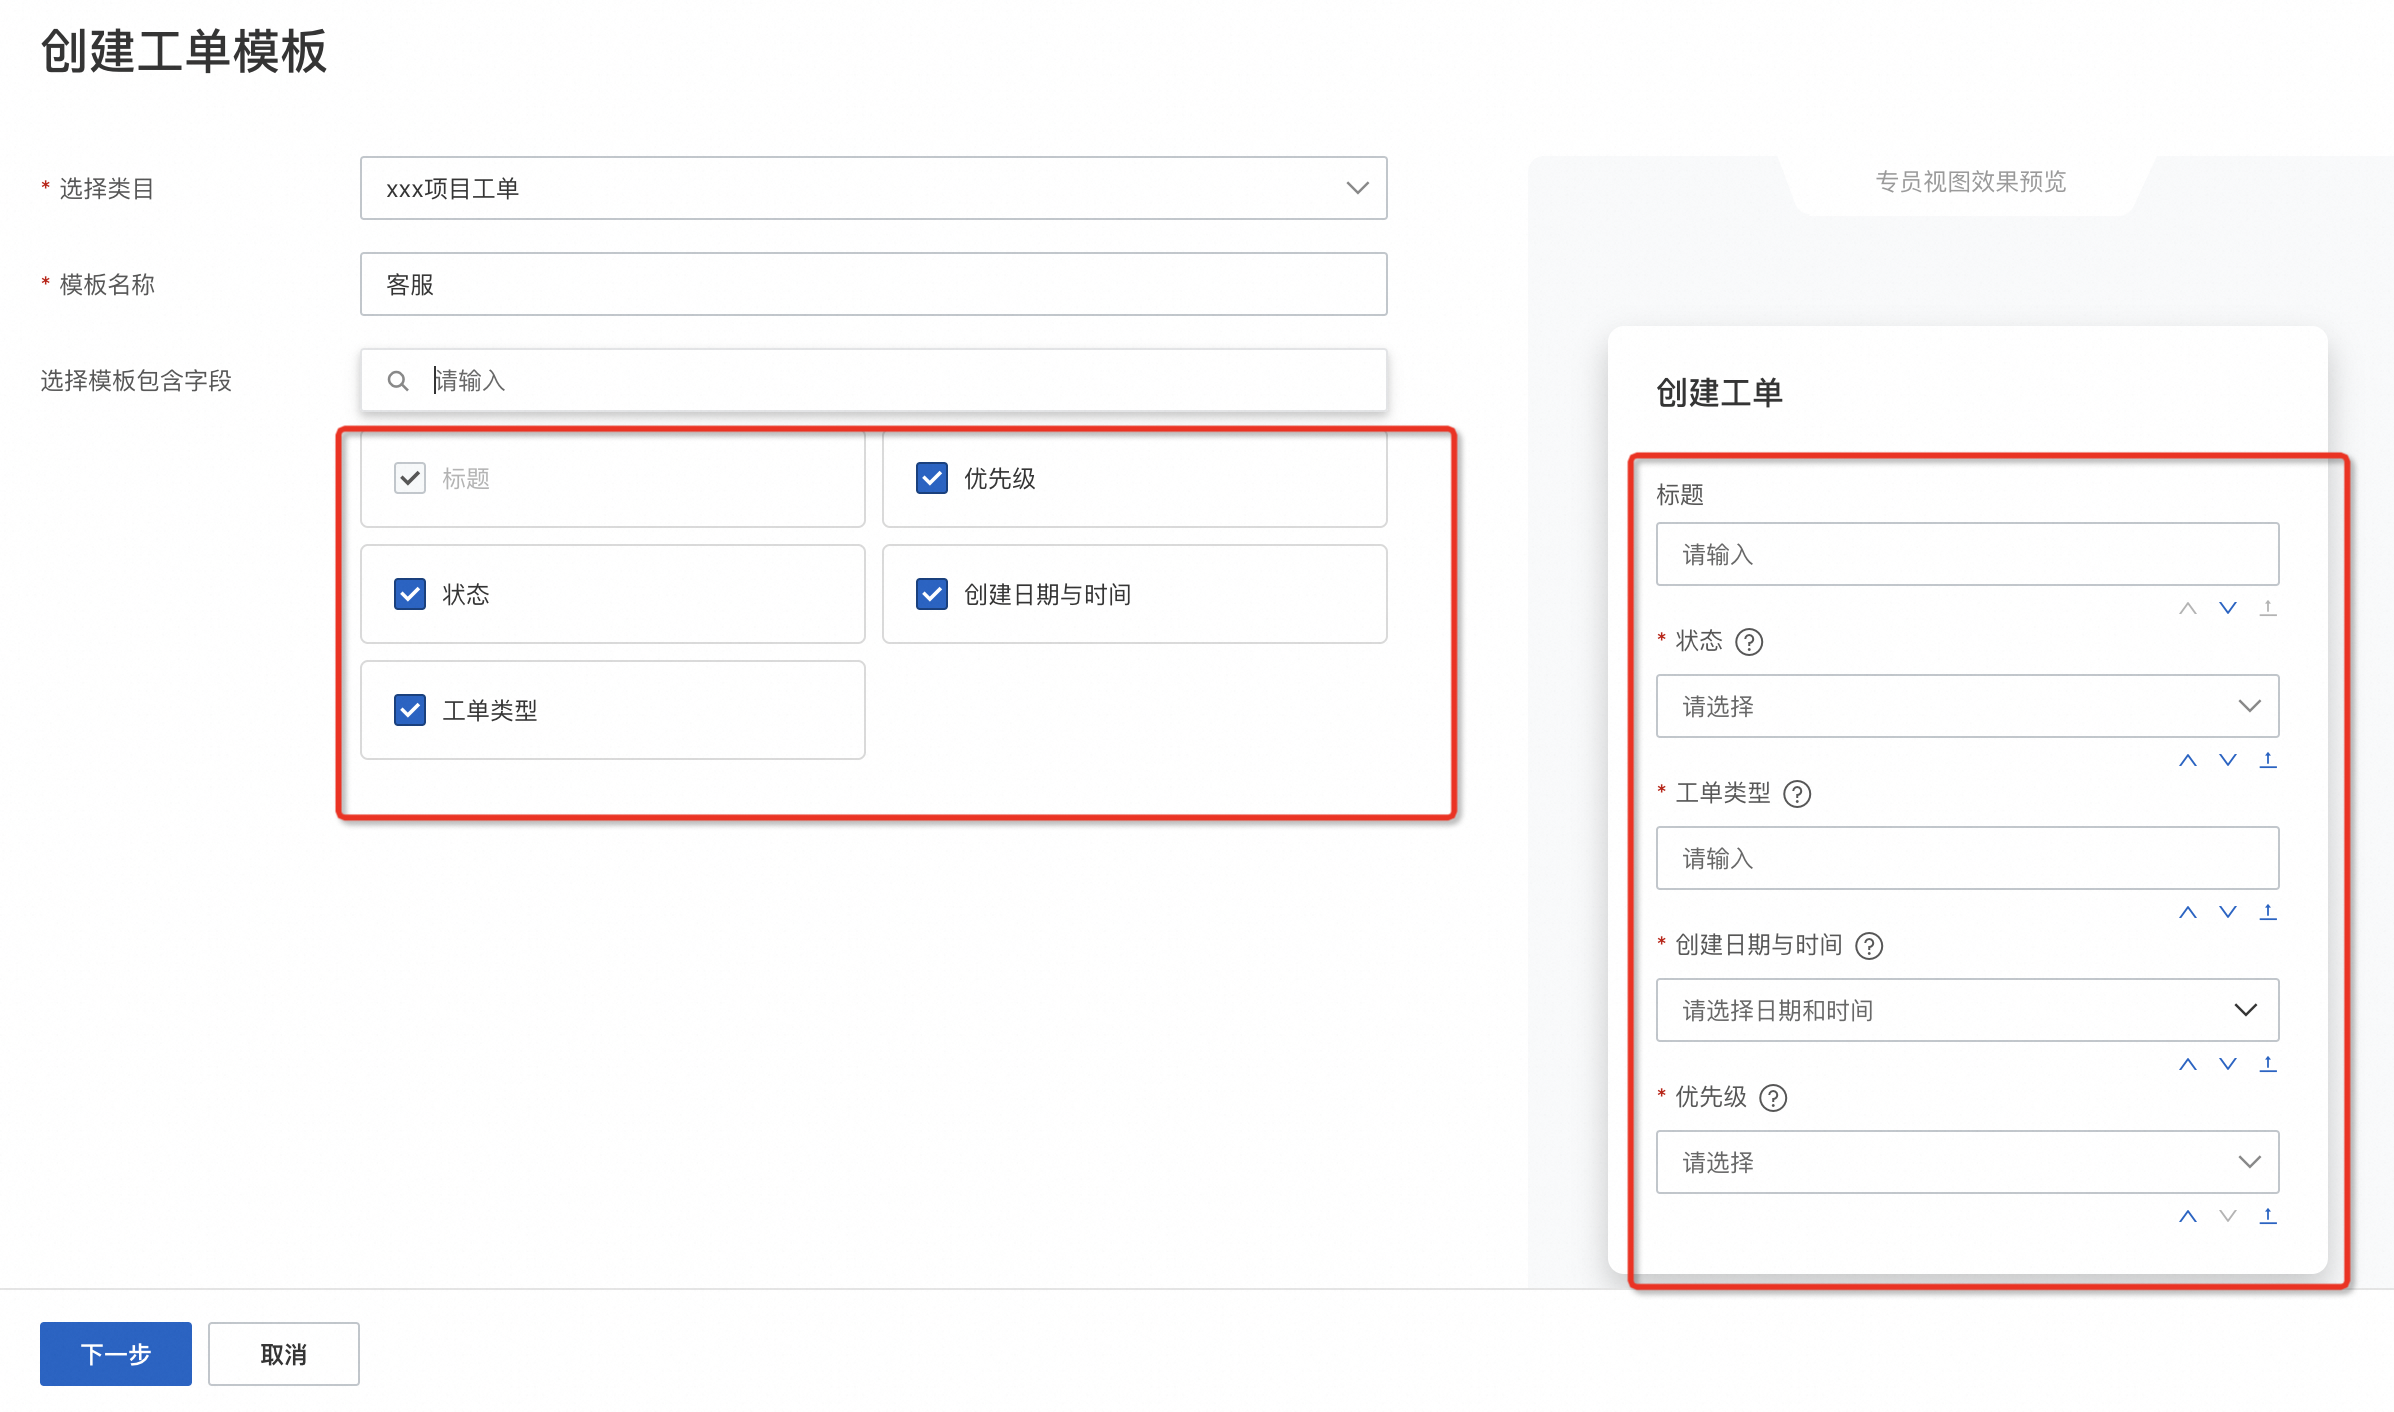
Step 4: Add a ticket template - Configure nodes
Configure flow nodes to assign tickets created from this template to a specific skill group or agent.
Drag items from the toolbox to the canvas to configure the nodes.
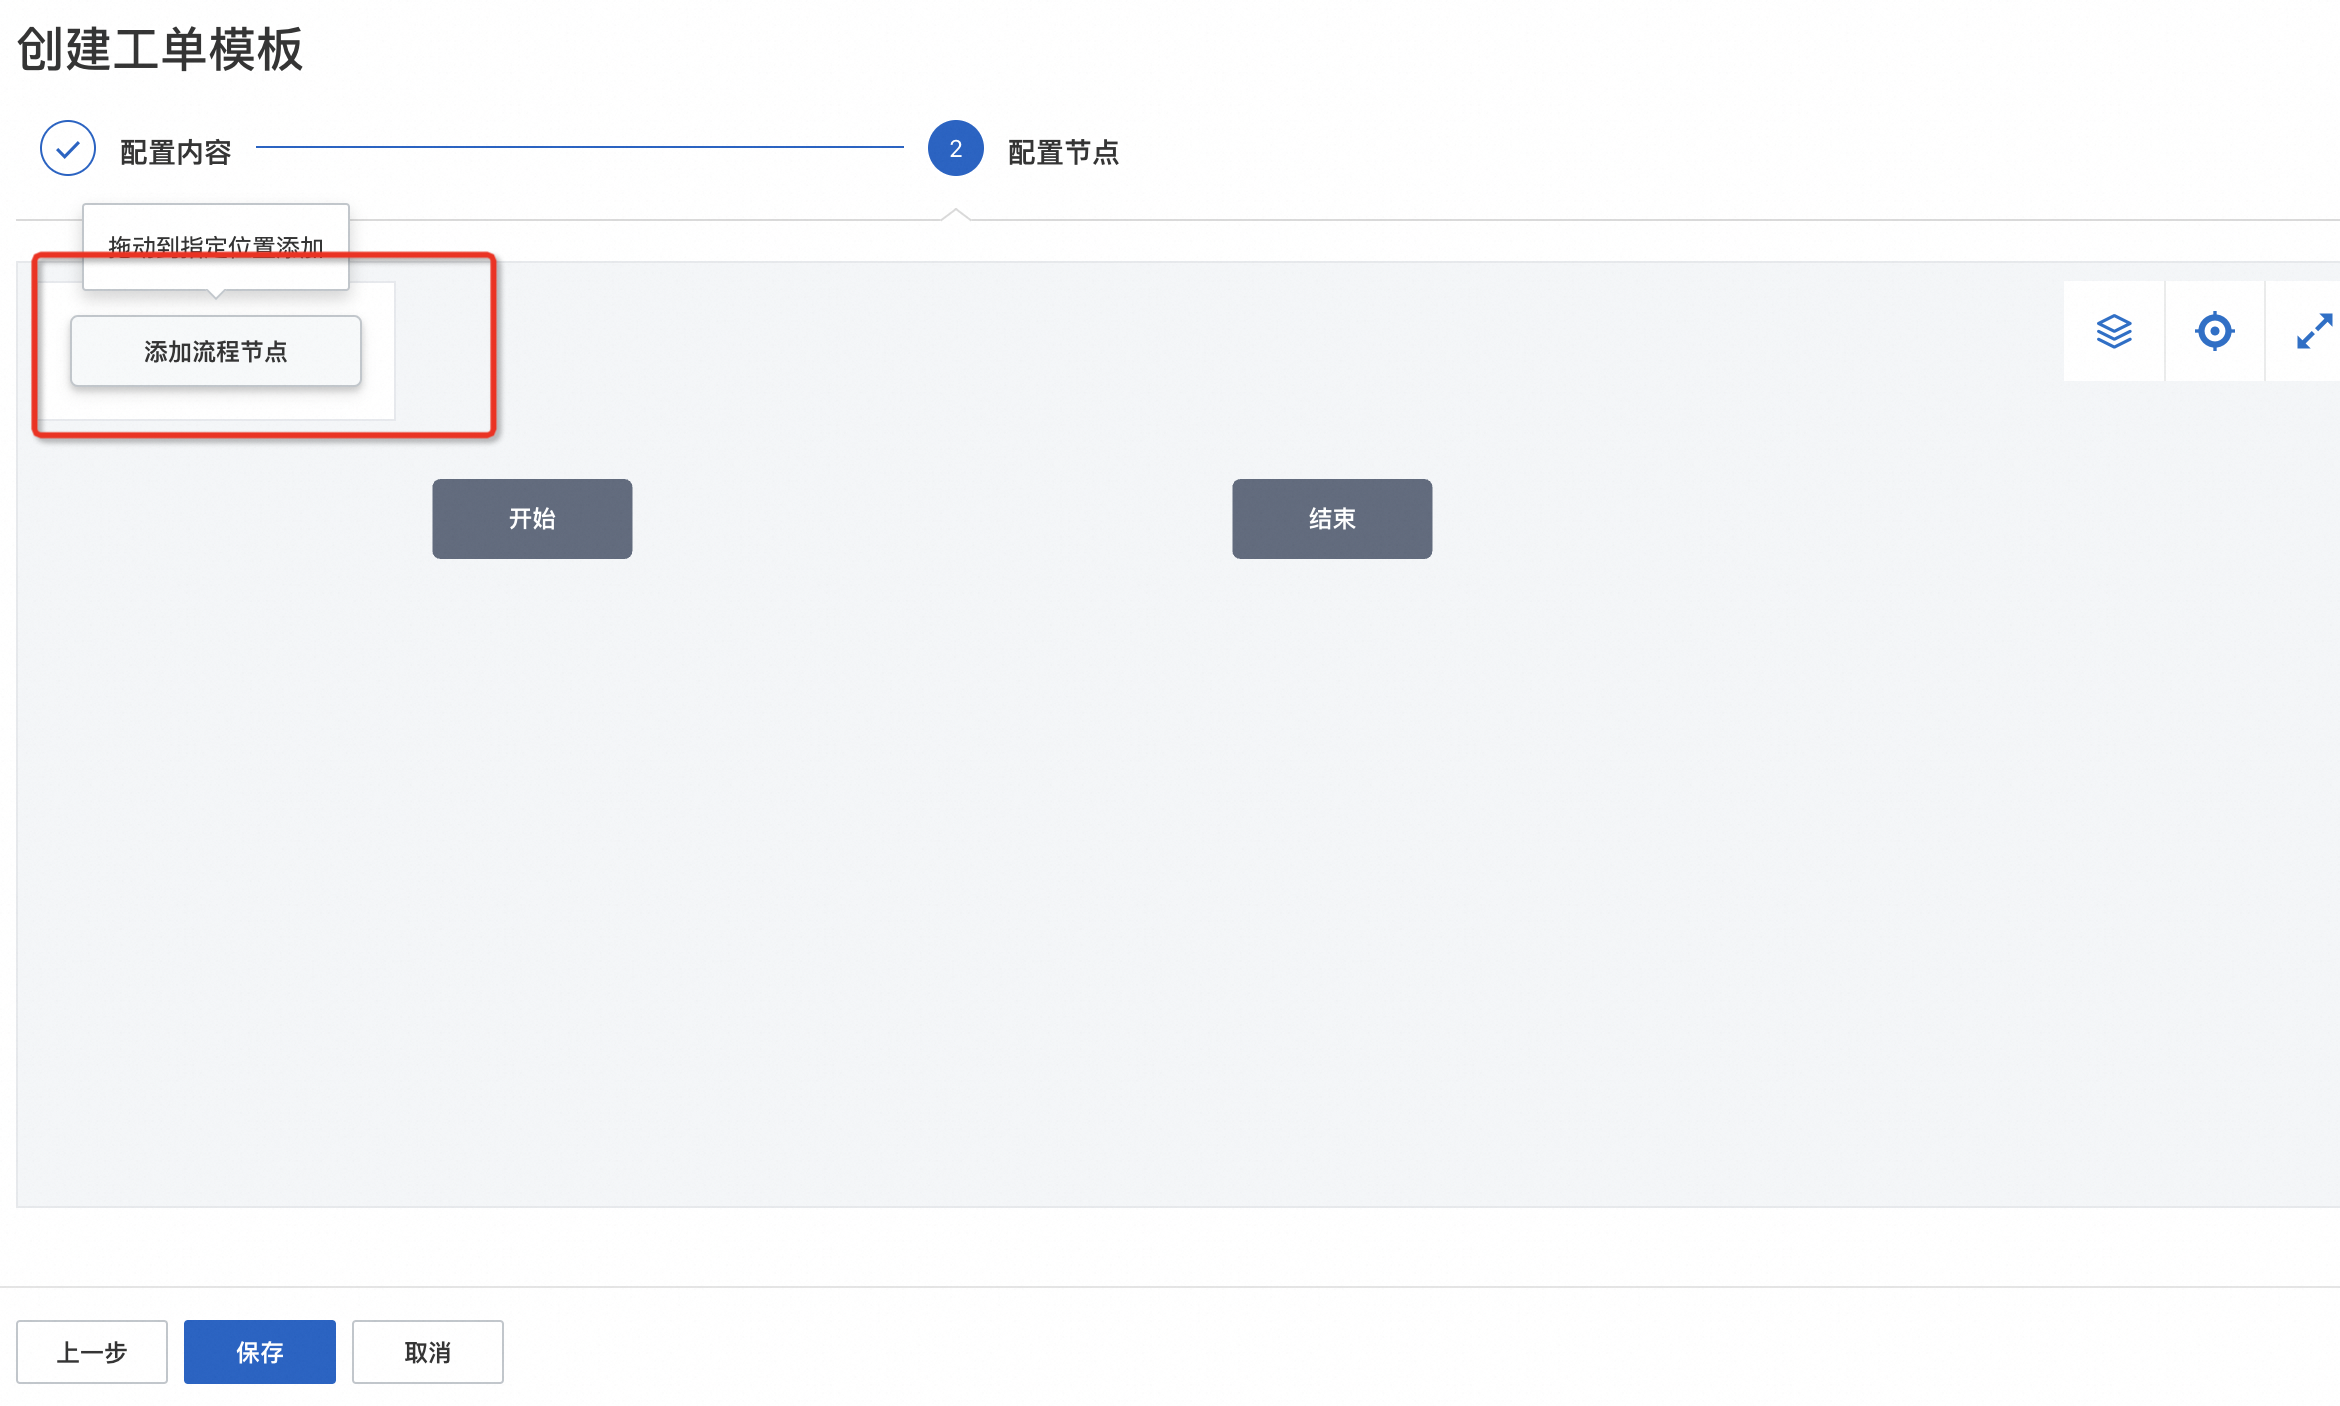
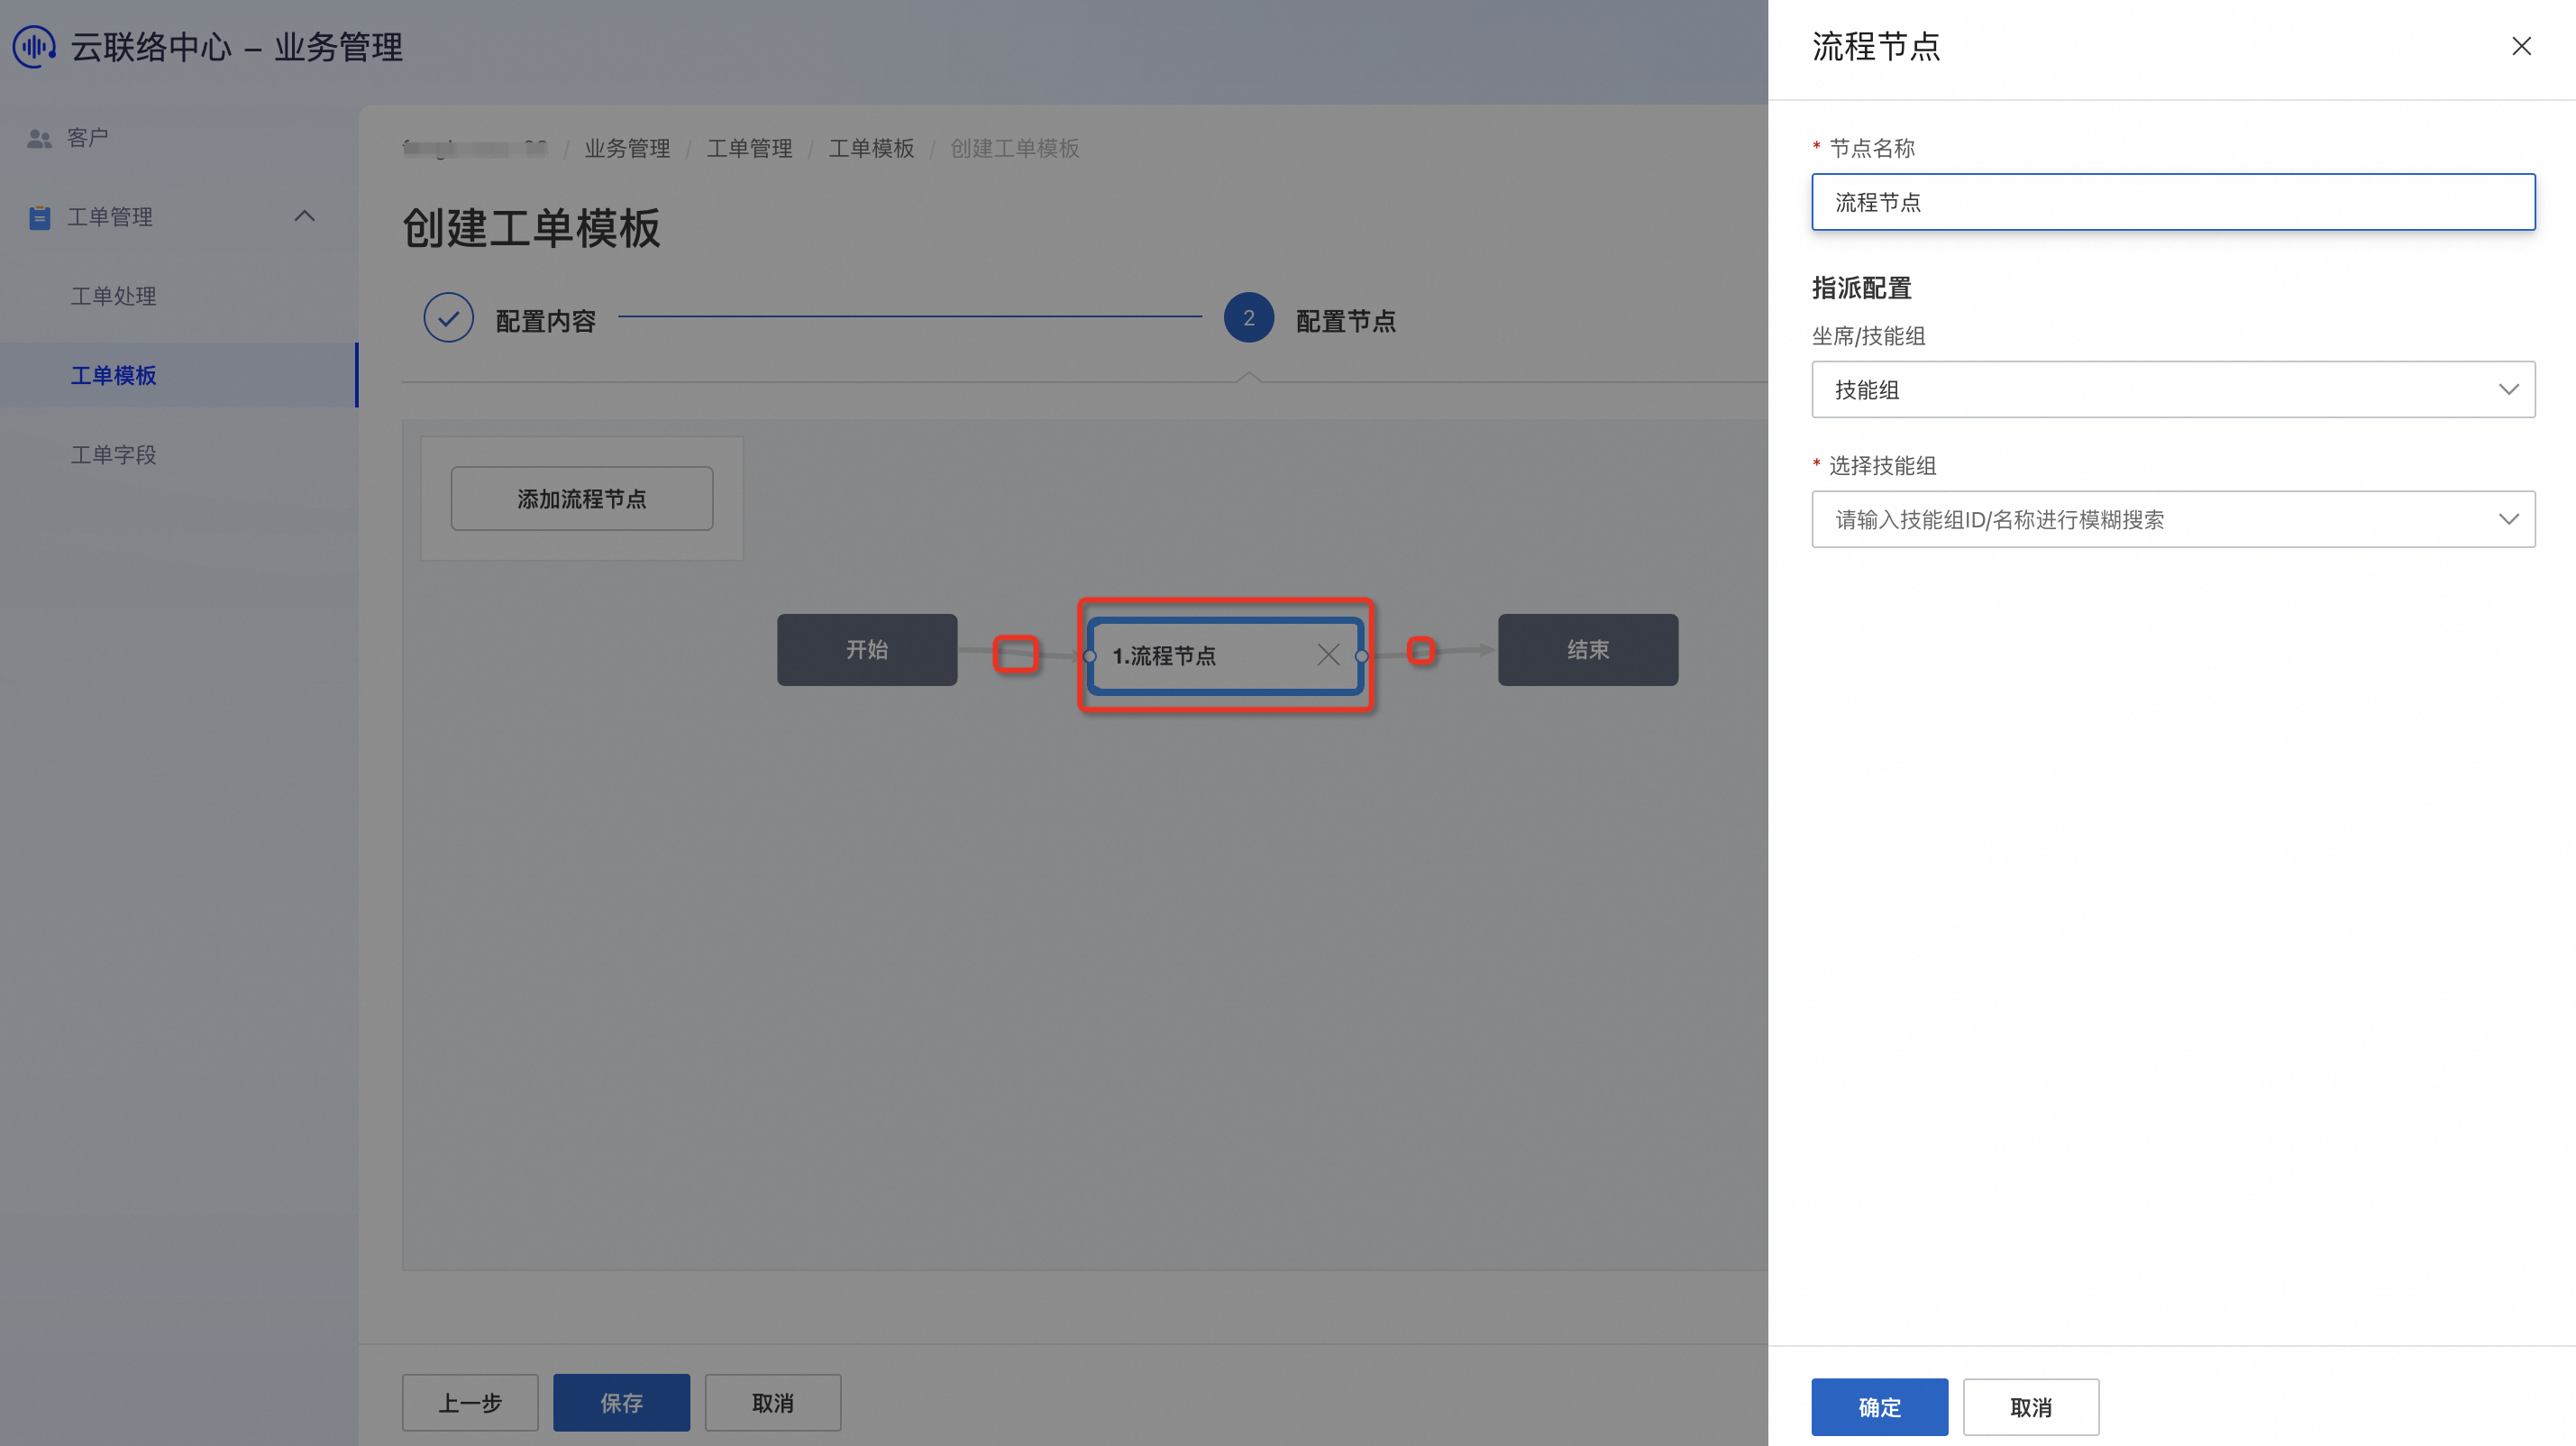
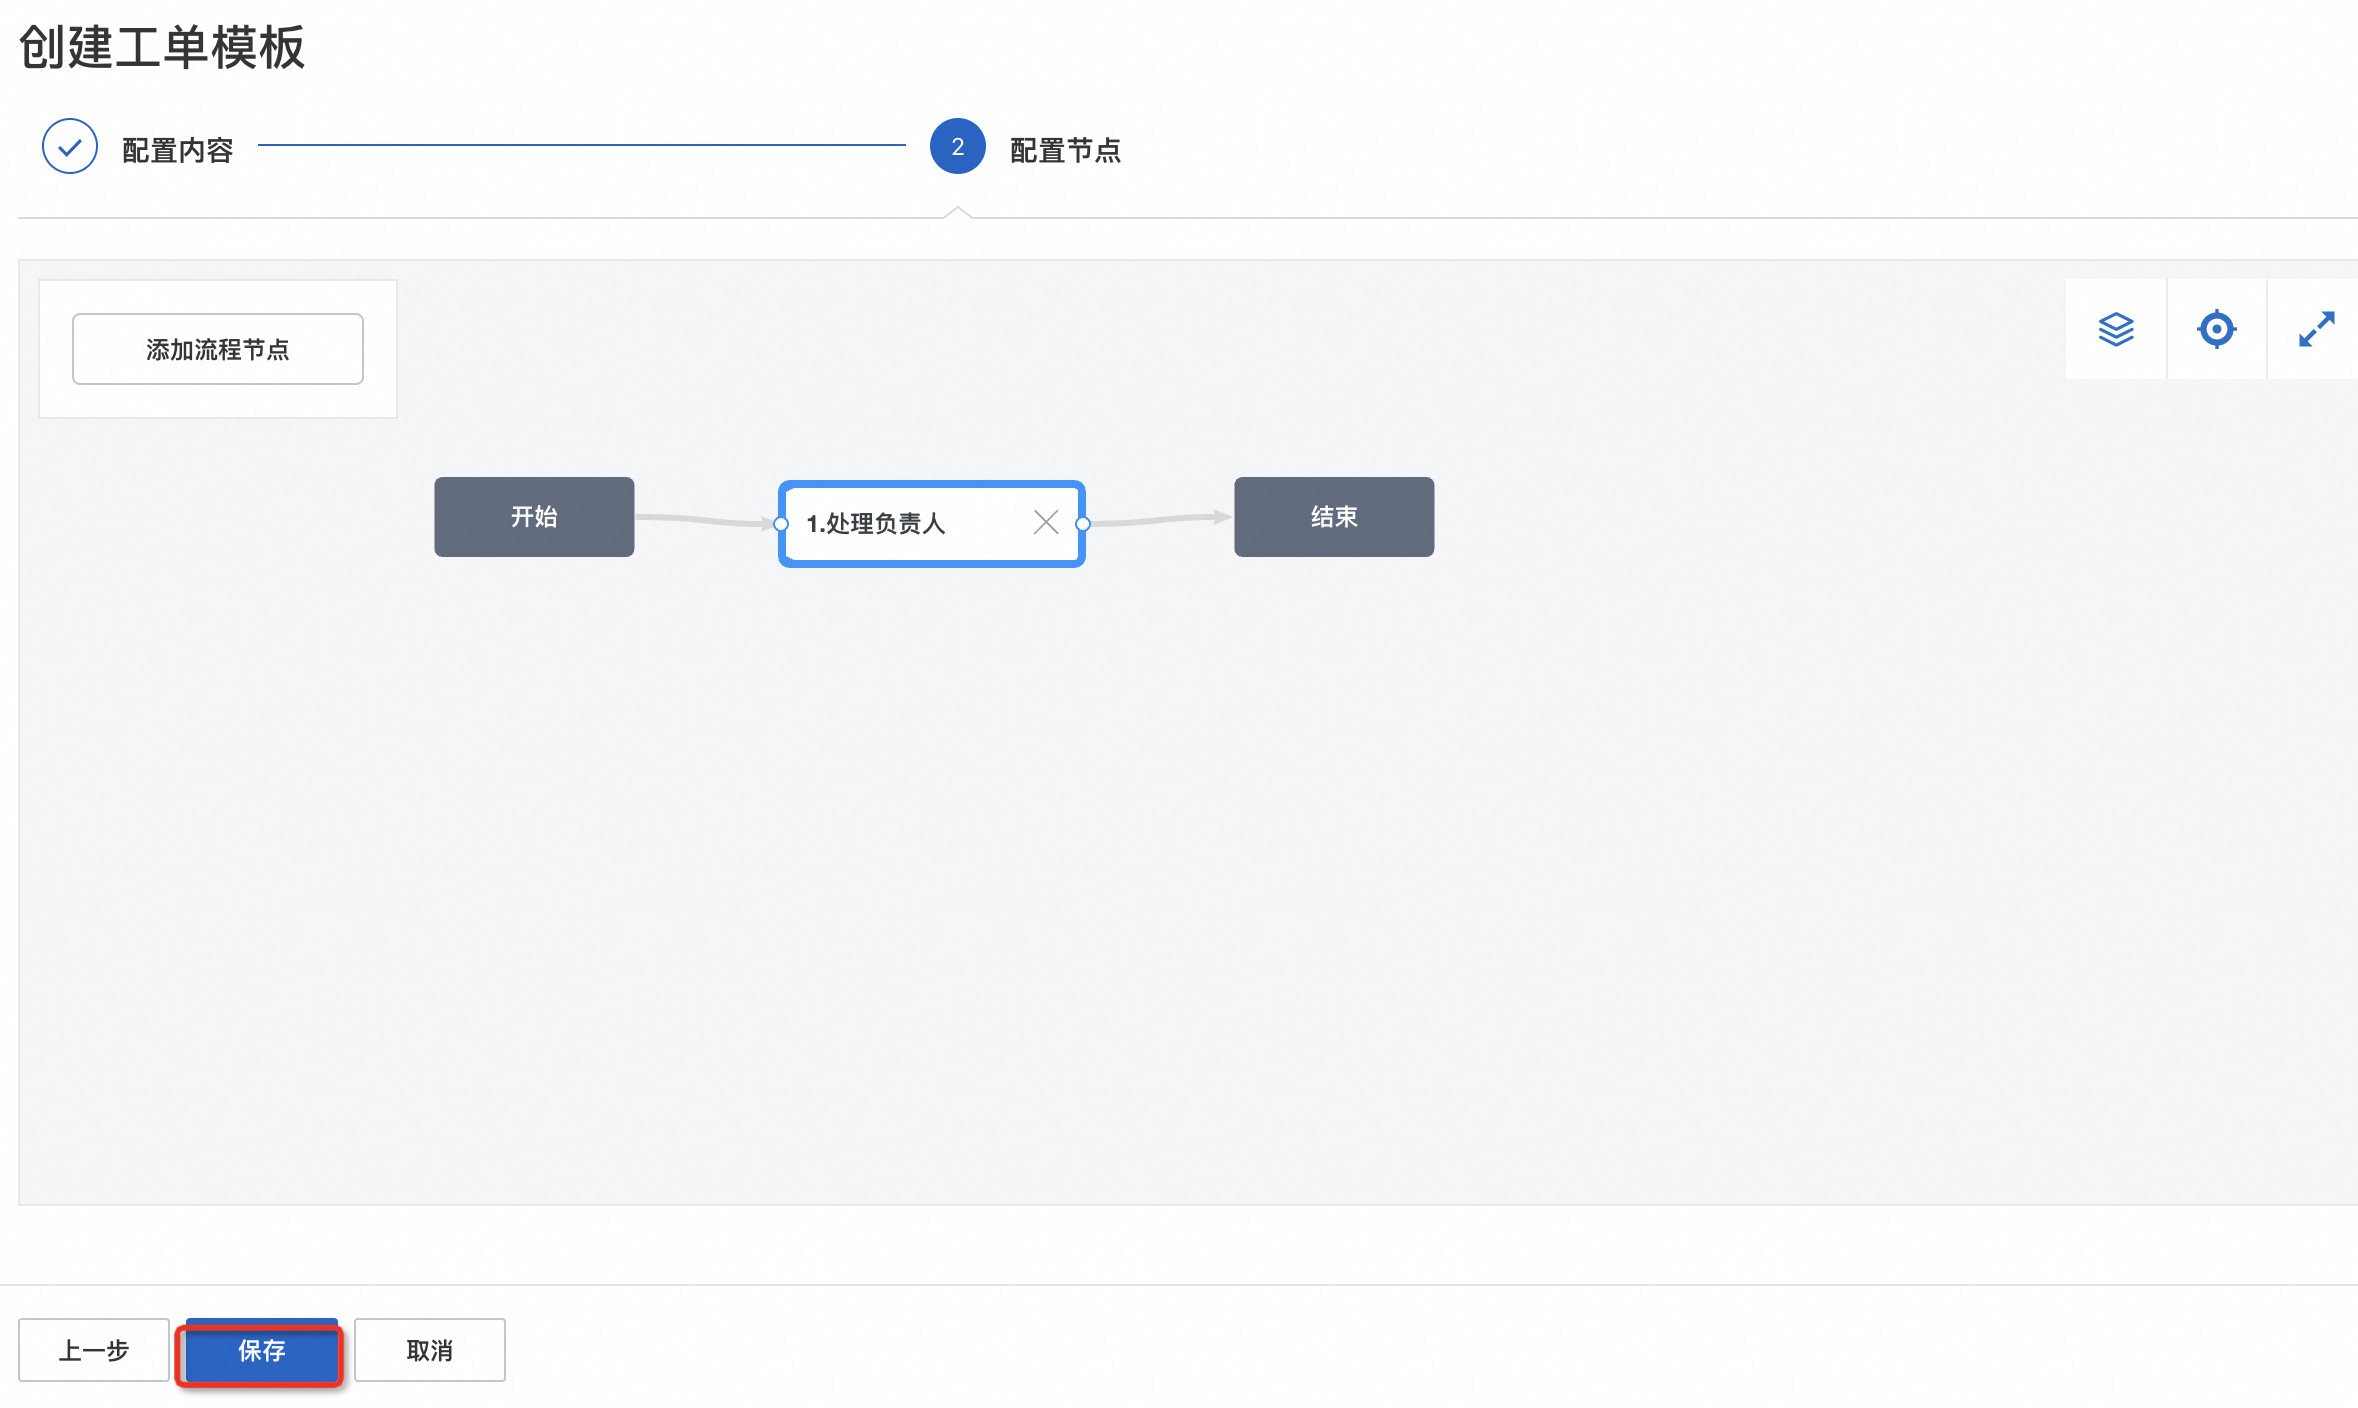
Connect the start and end nodes. Then, click the flow node to open the configuration page.
Change the node name and assign a skill group or agent. When you are finished, click Confirm.
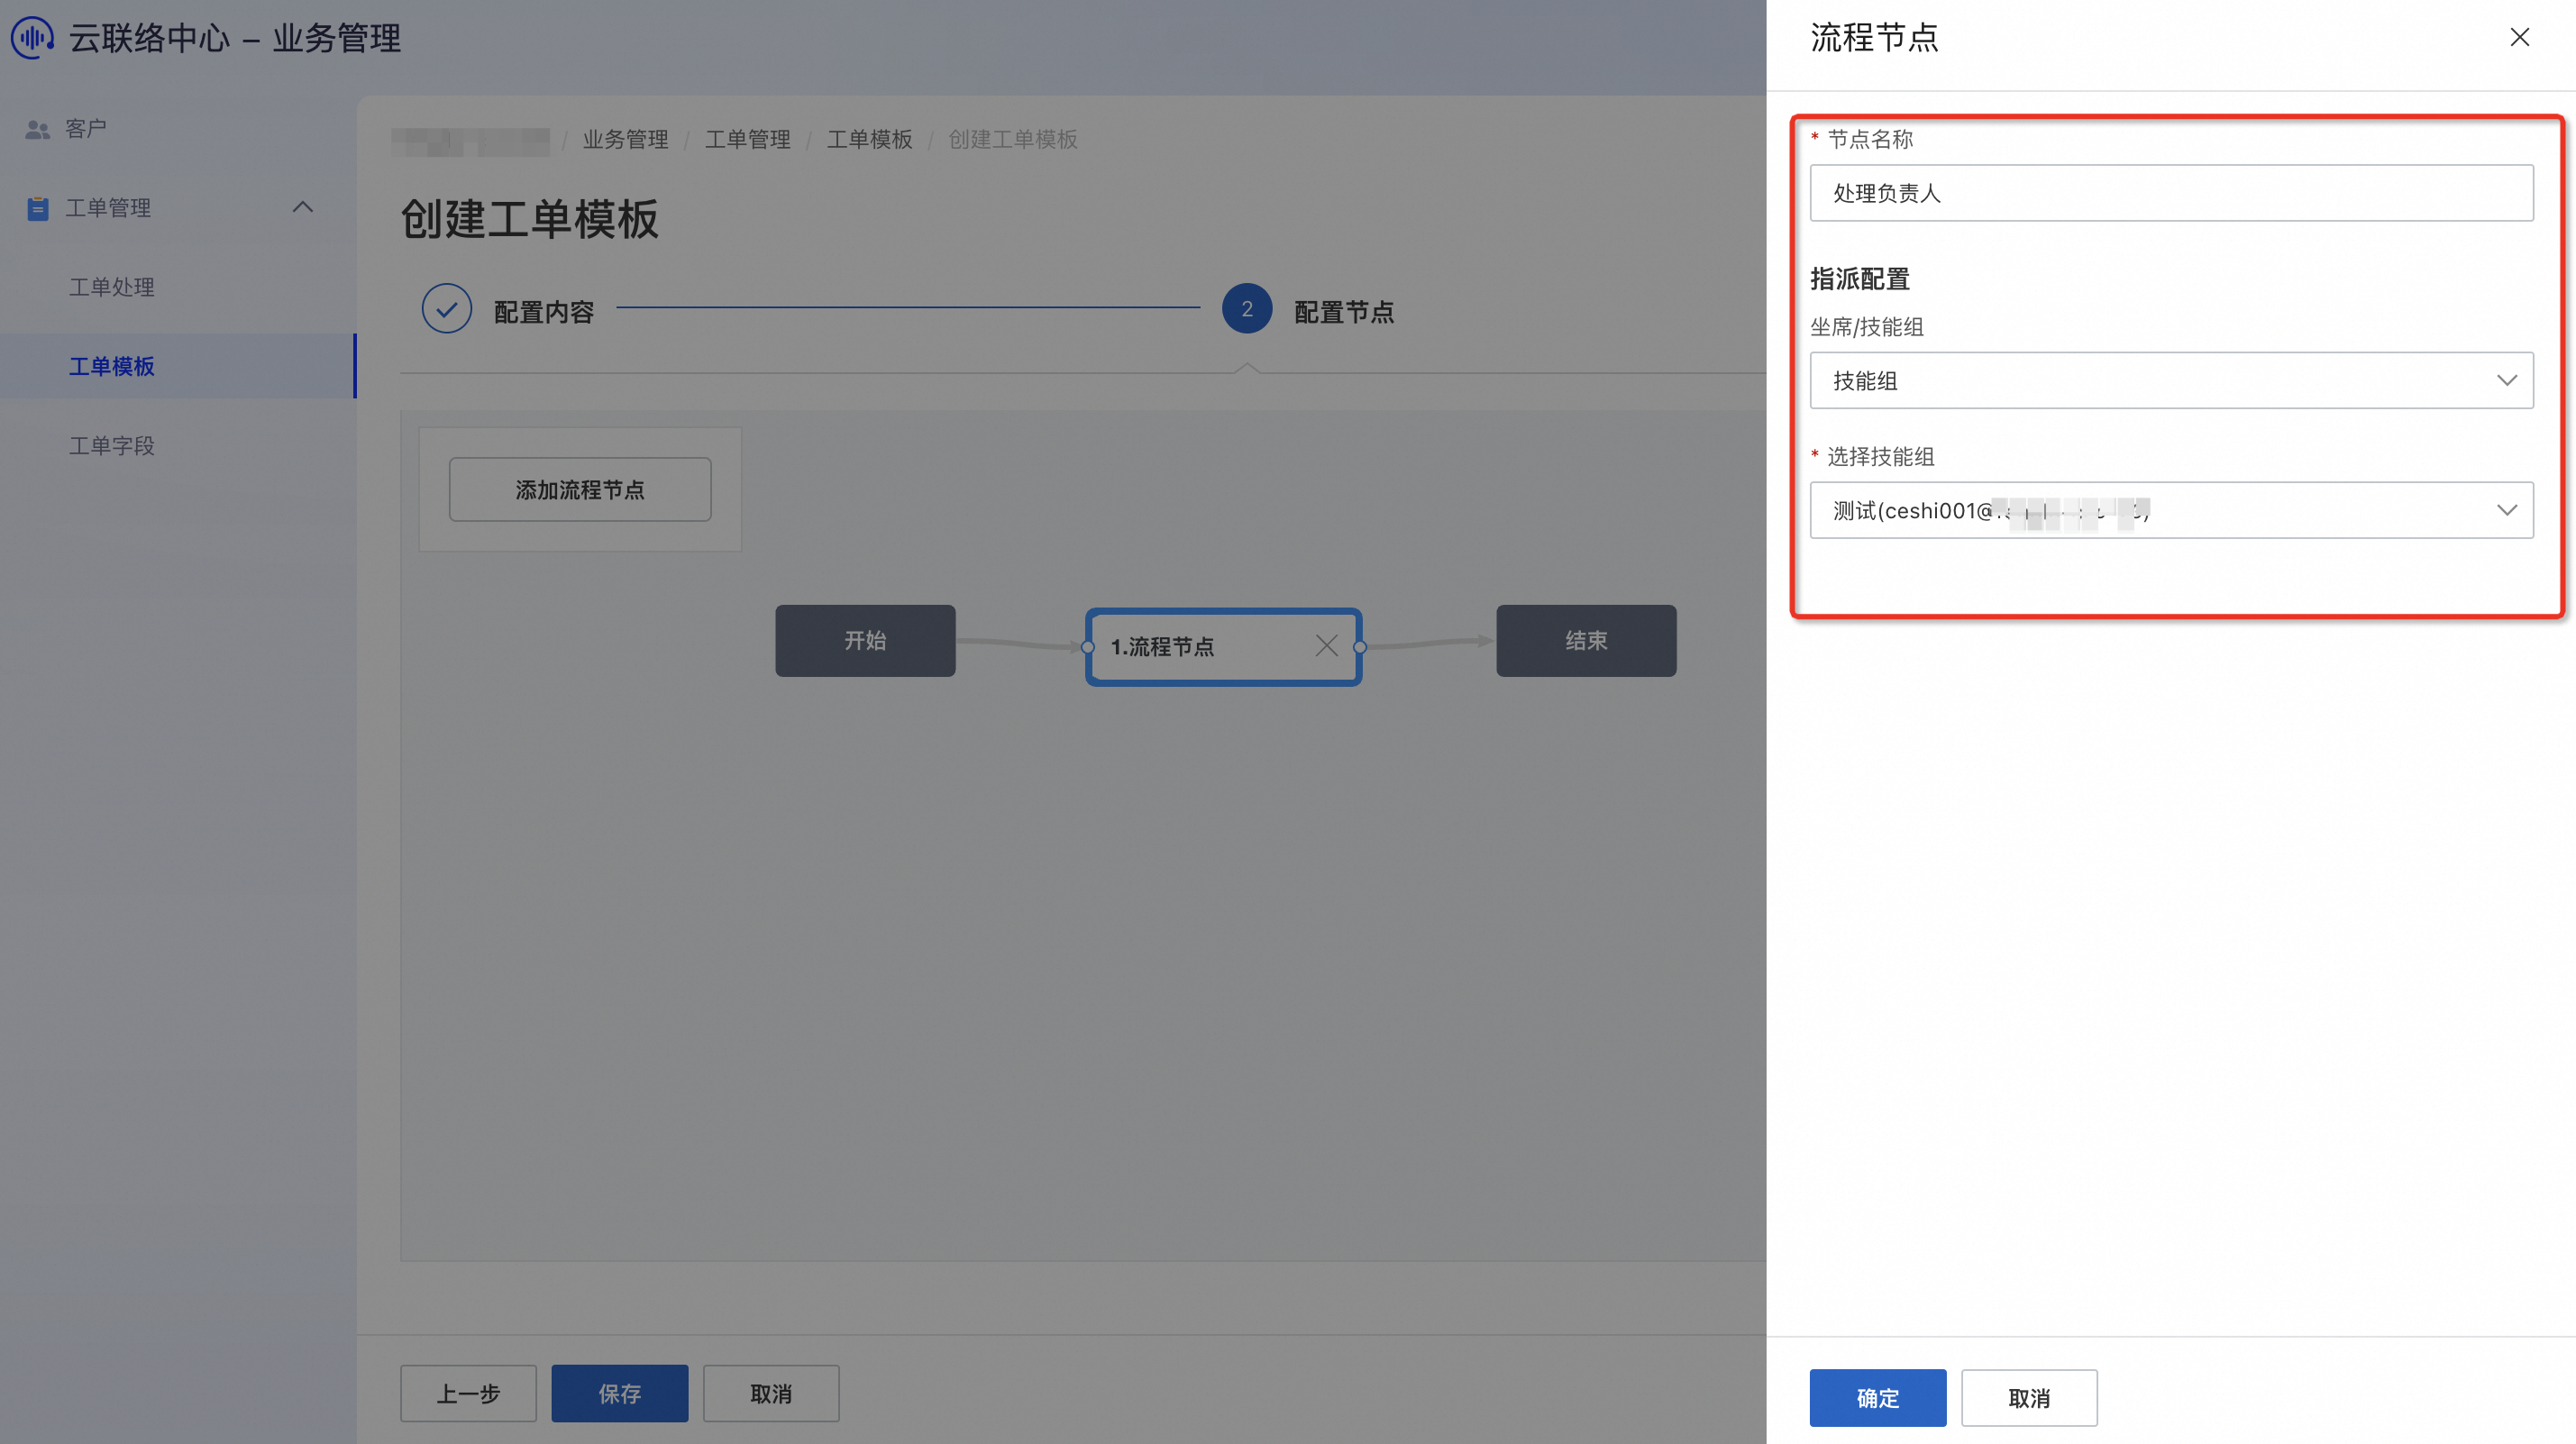
Click the Save button.
Click Publish.
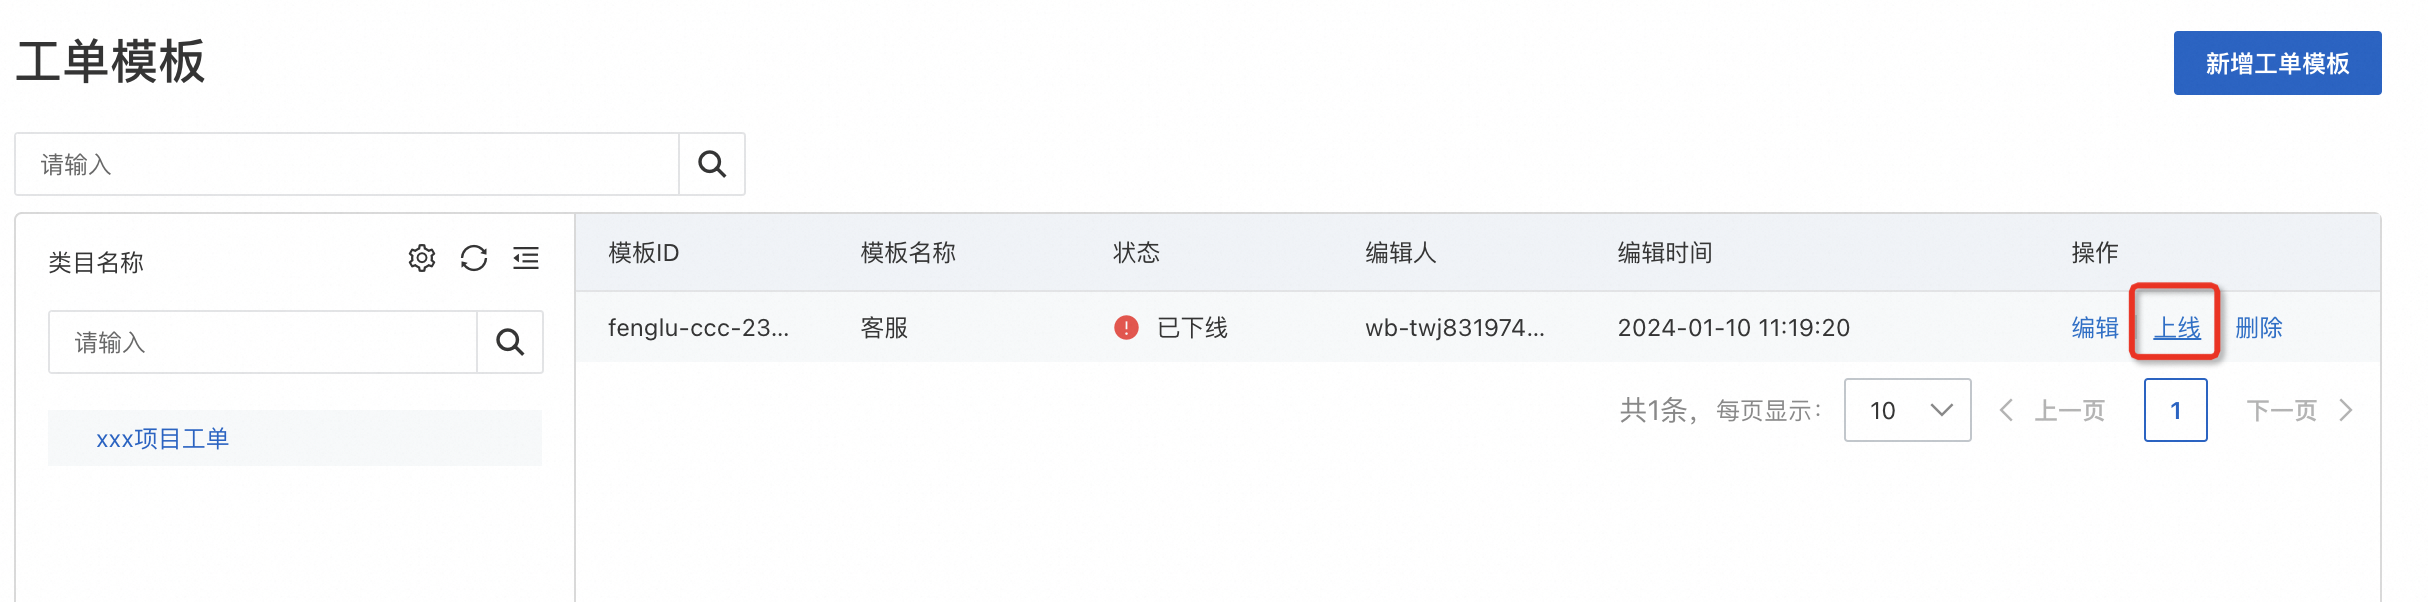
To edit a ticket template, you must first unpublish it.
Step 5: Create a ticket
After you create ticket fields and ticket templates, you can create a ticket.
Click Create Ticket.
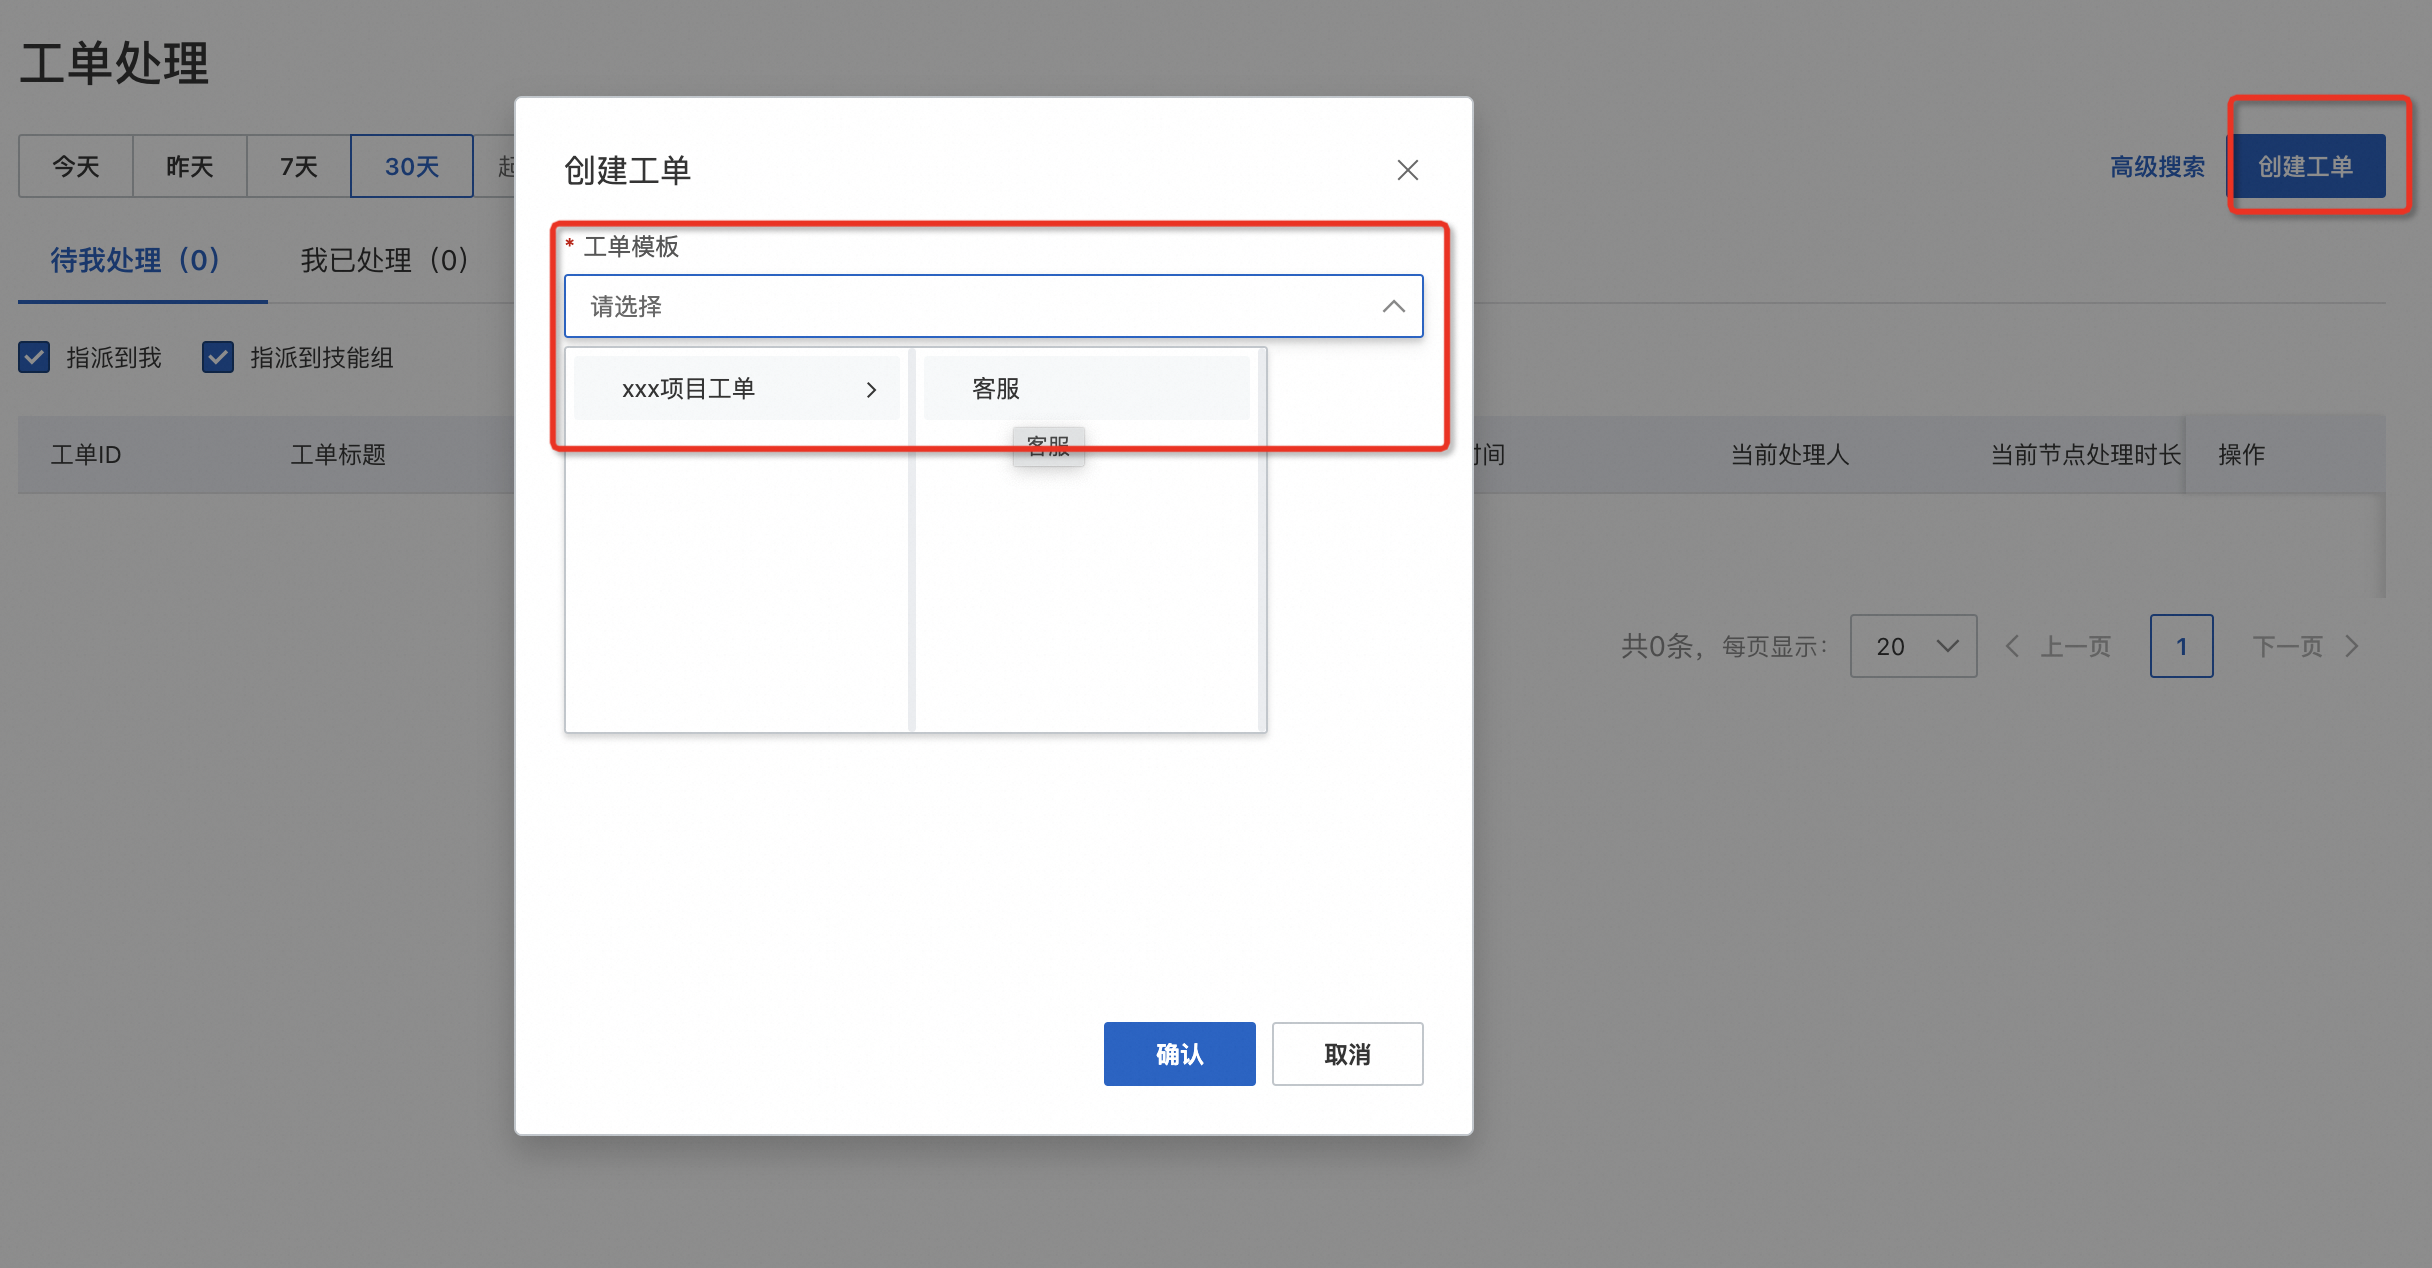
Configure the ticket fields, and then click Confirm.
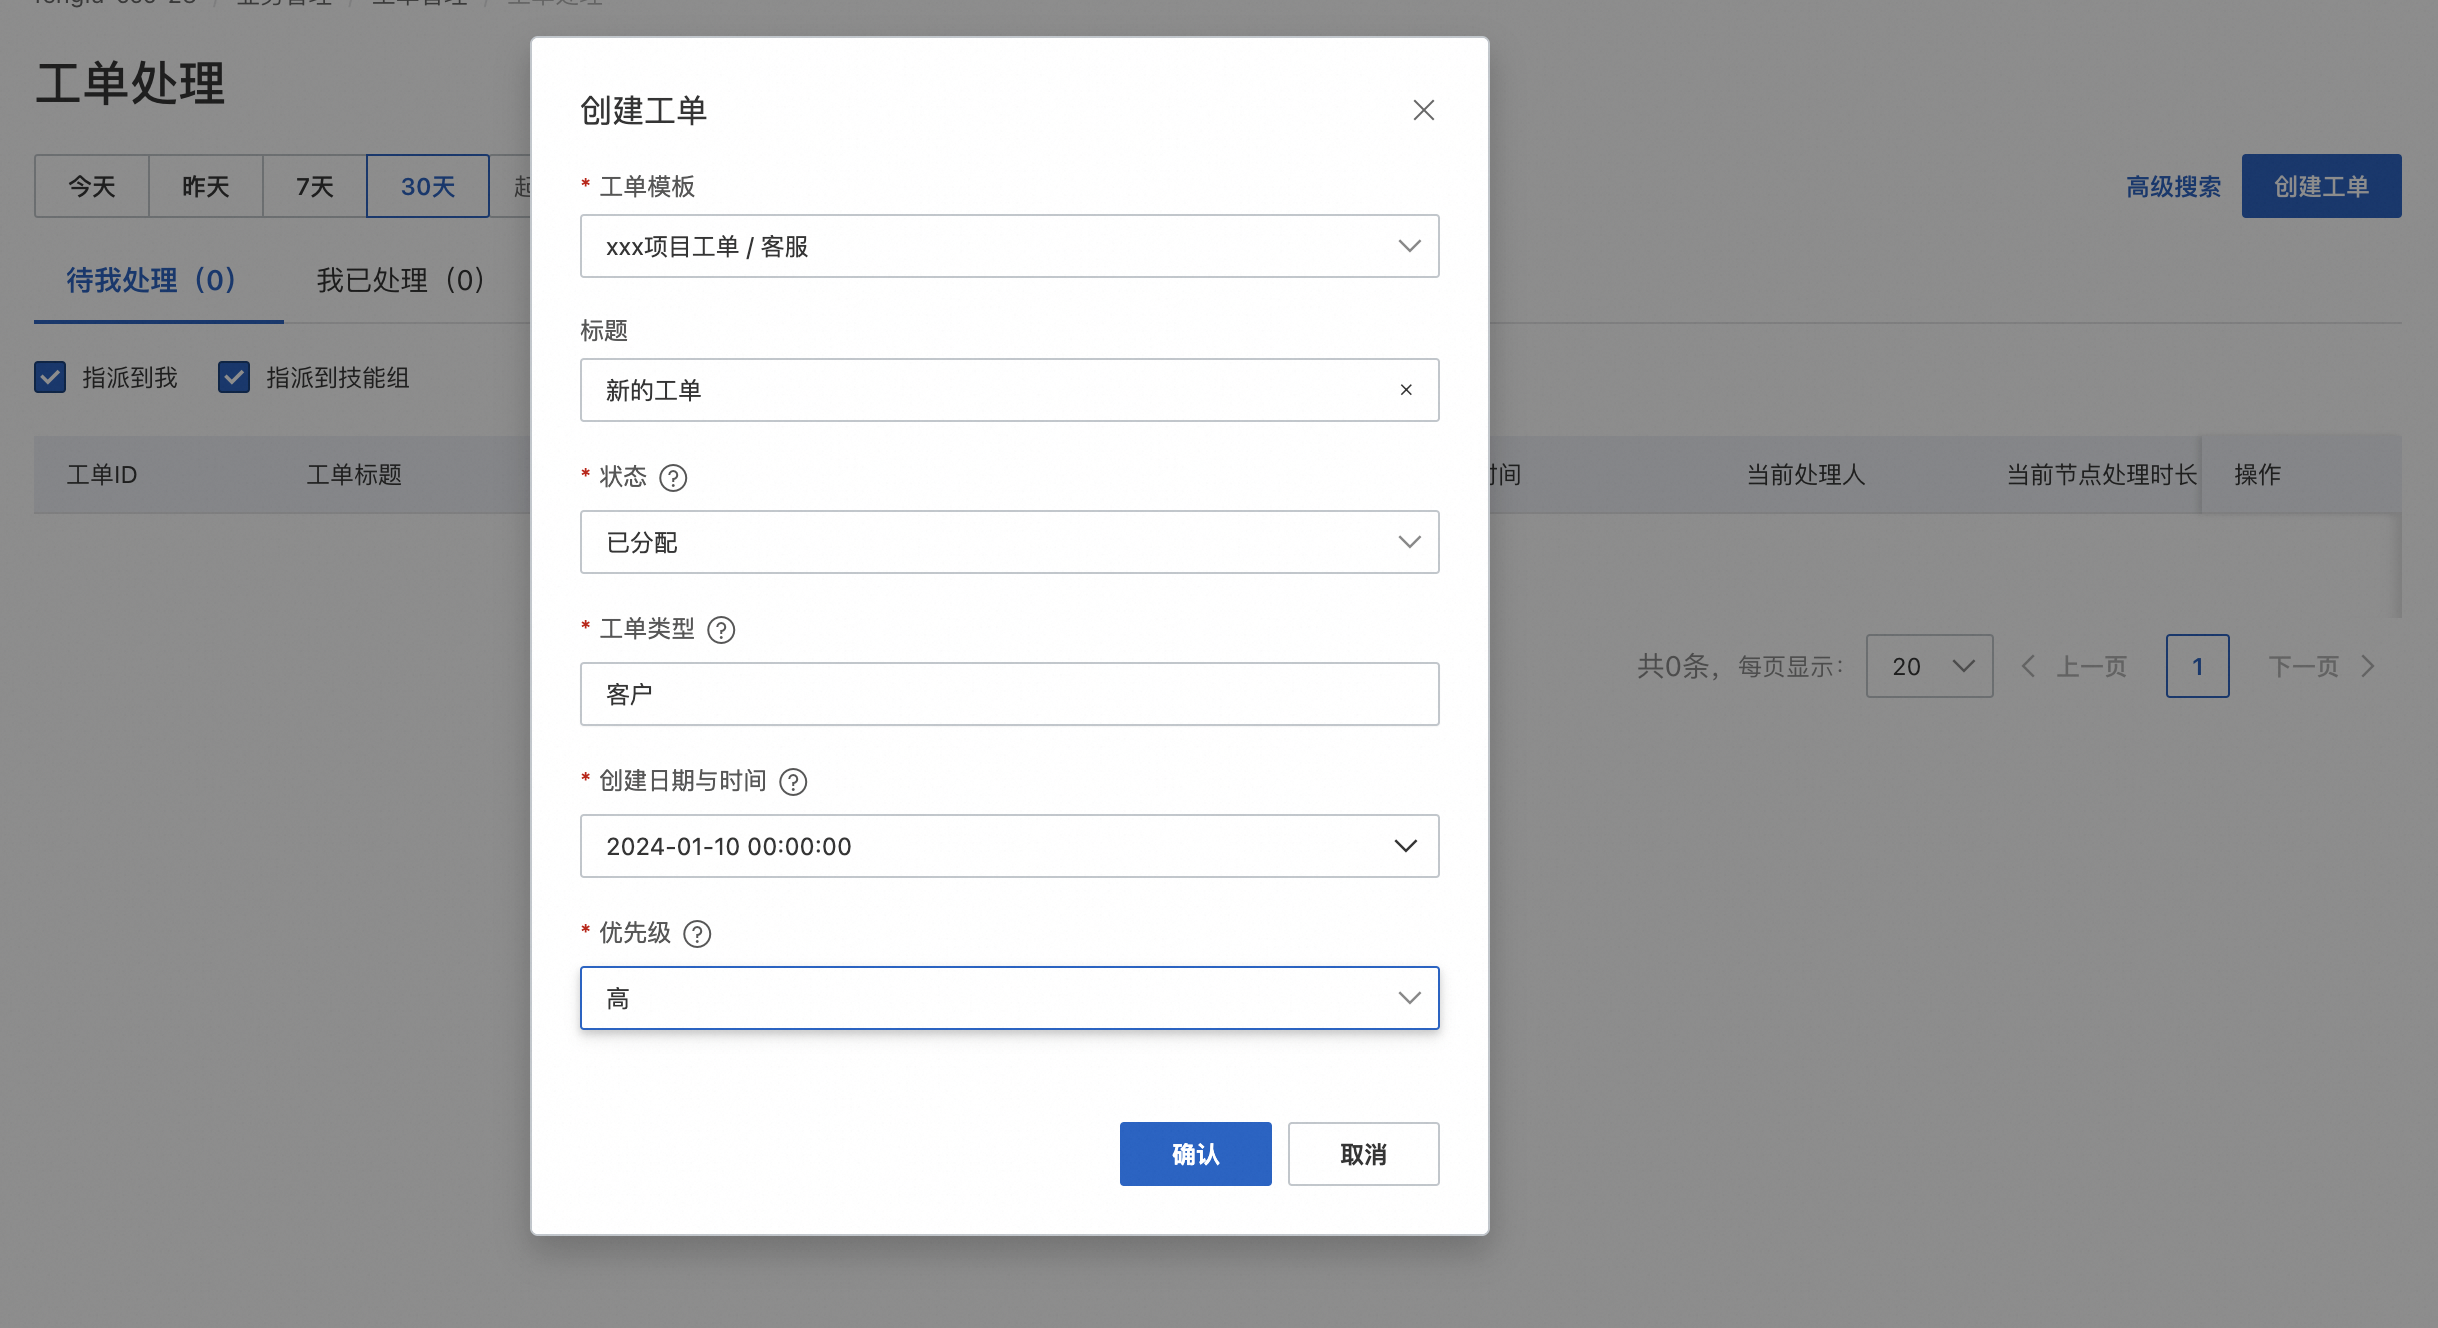
The ticket that you created appears in the My pending tickets list.
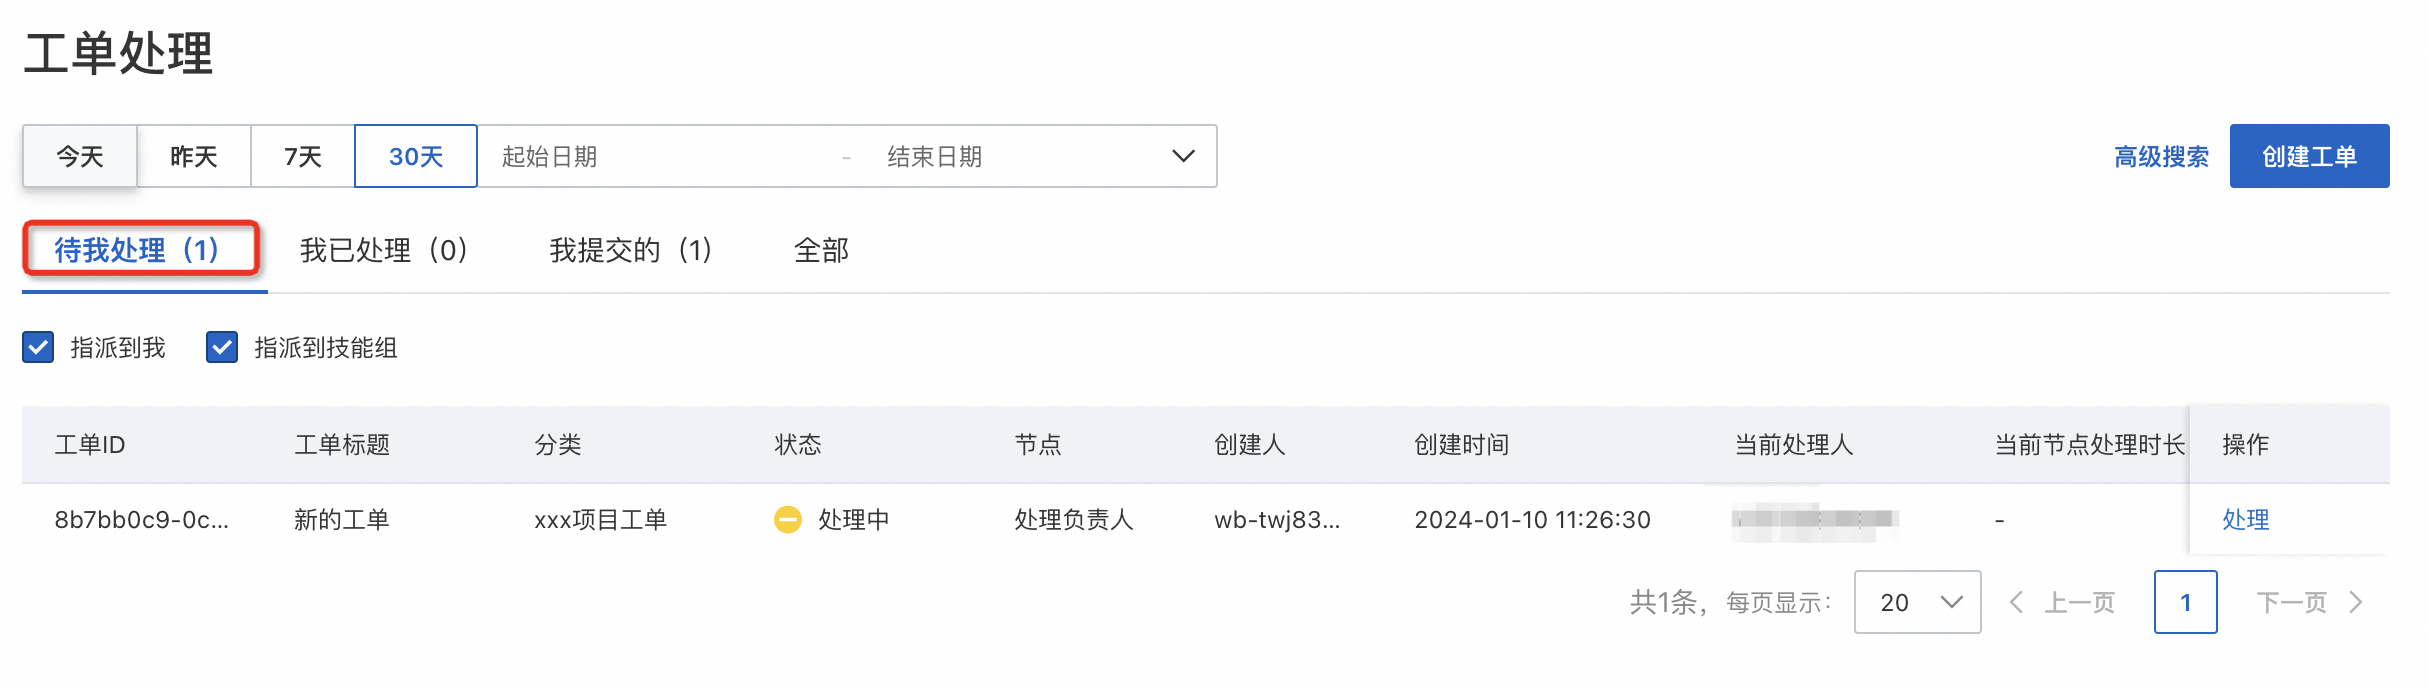
Step 6: Process a ticket
Click Process to open the ticket details page.

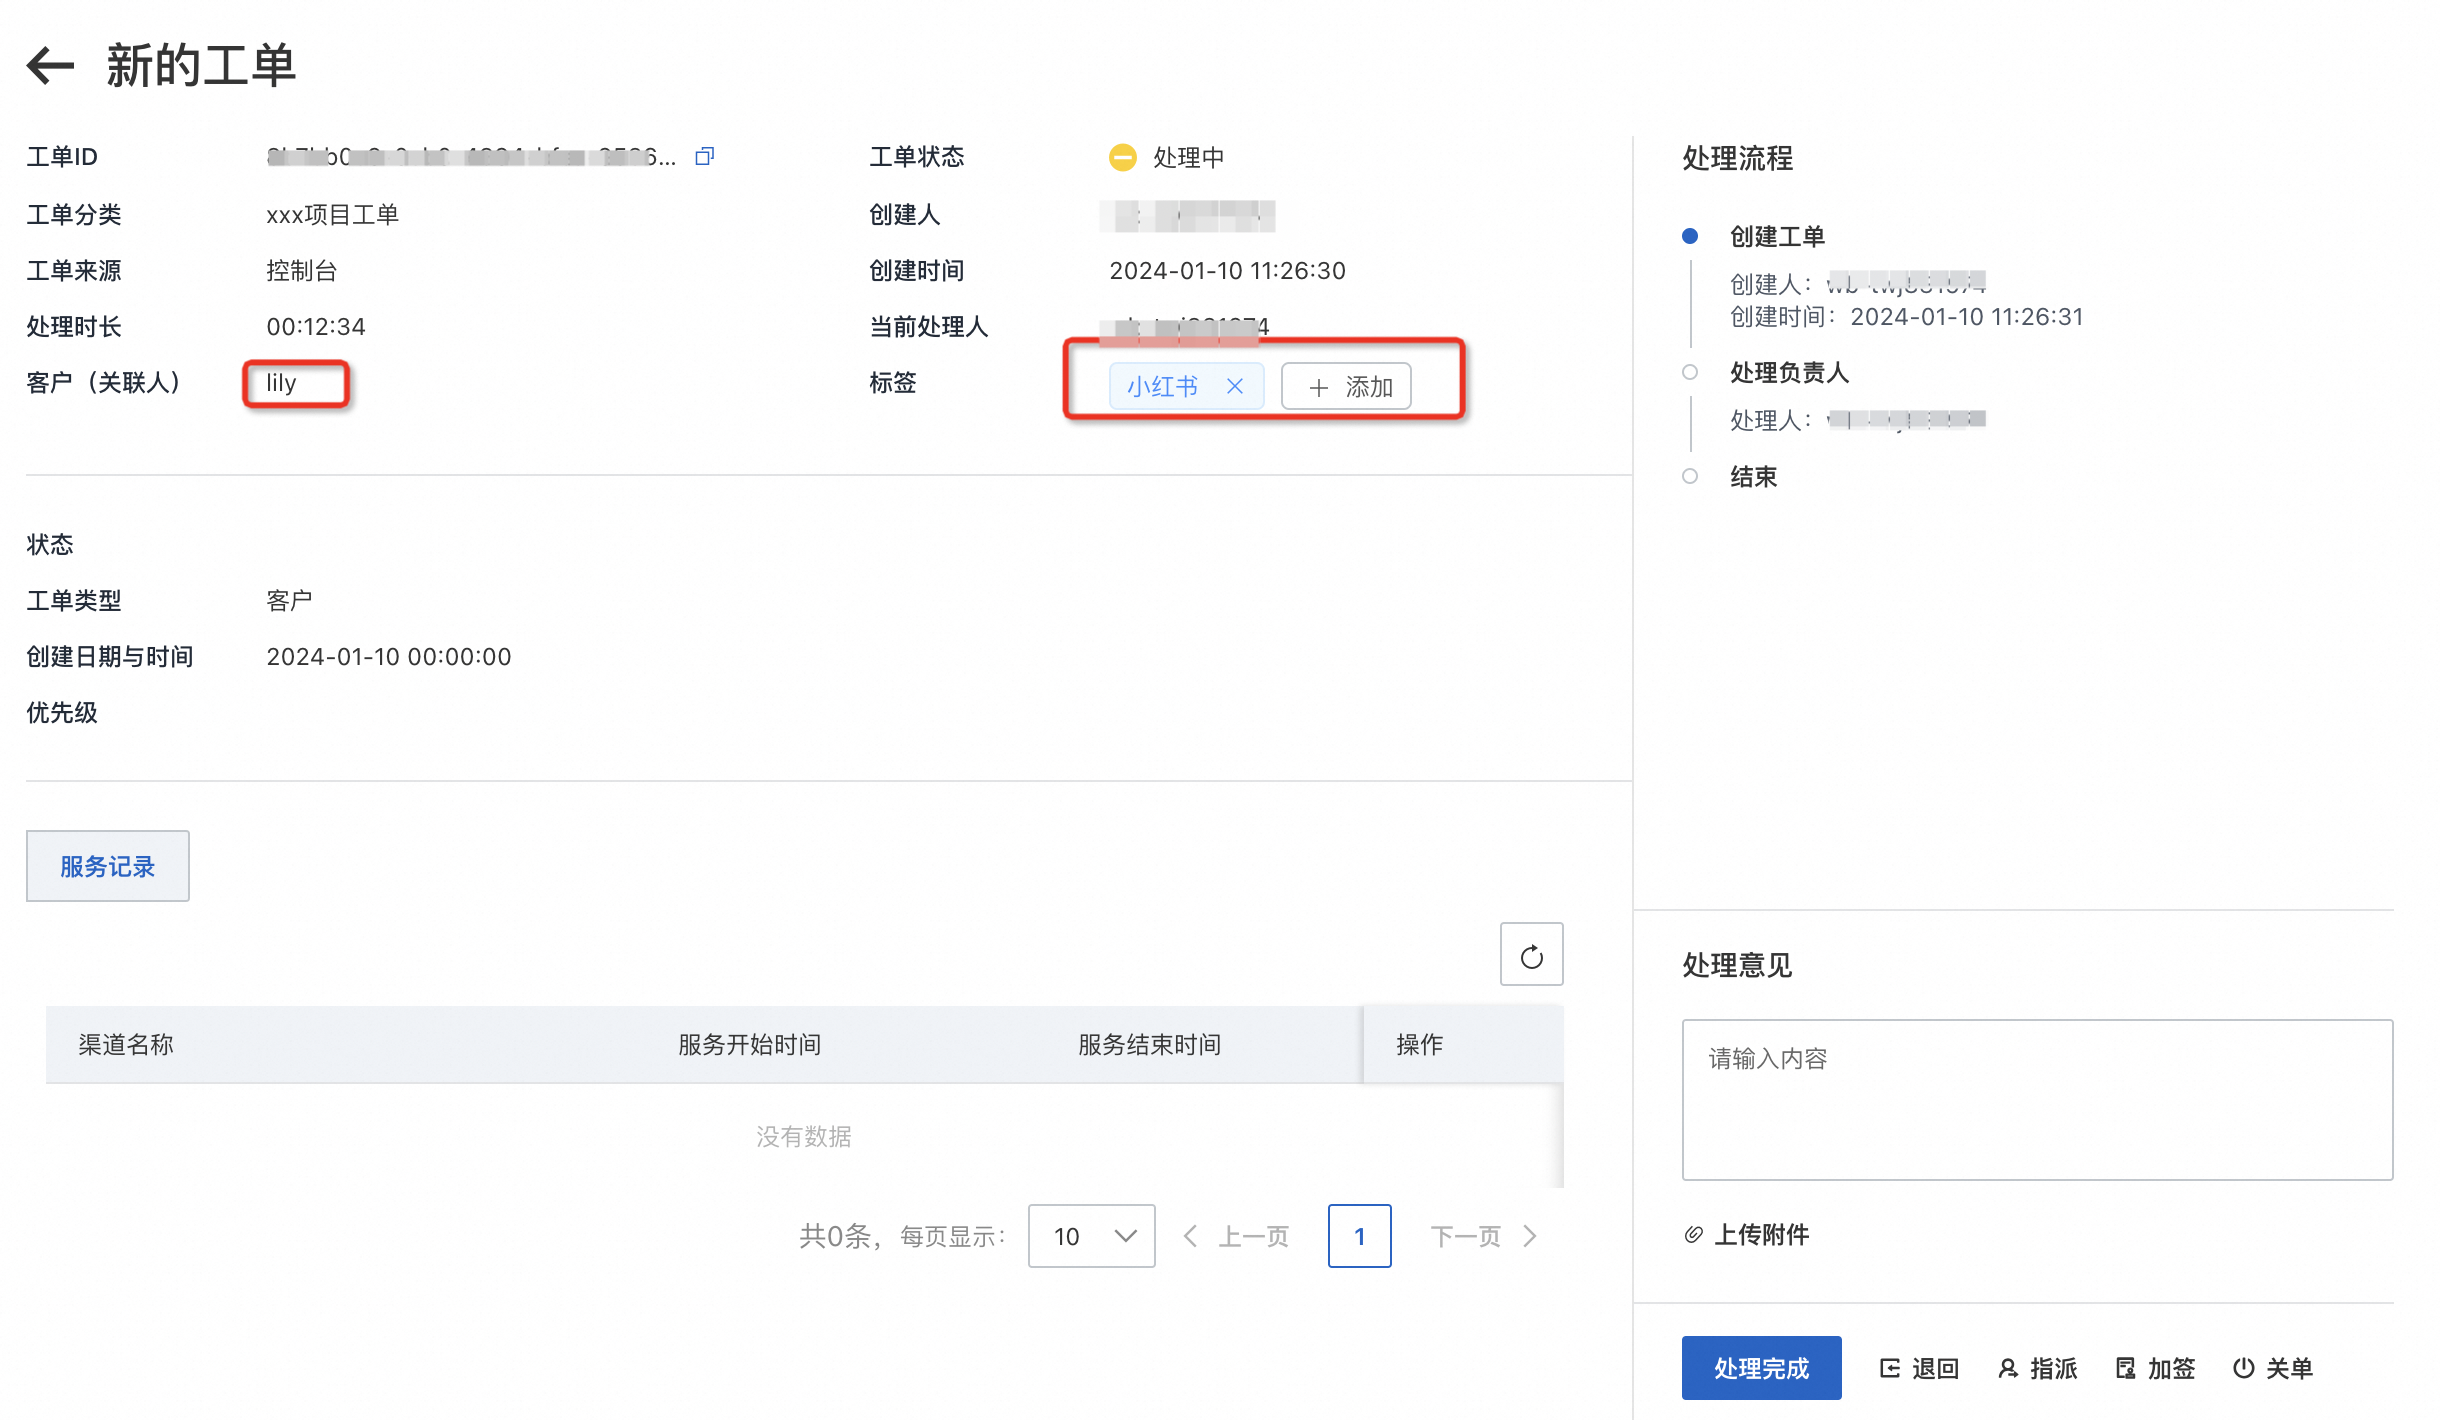
Click Associate Customer to link the ticket to a customer.
When you are finished, click Confirm. The page displays the following information:
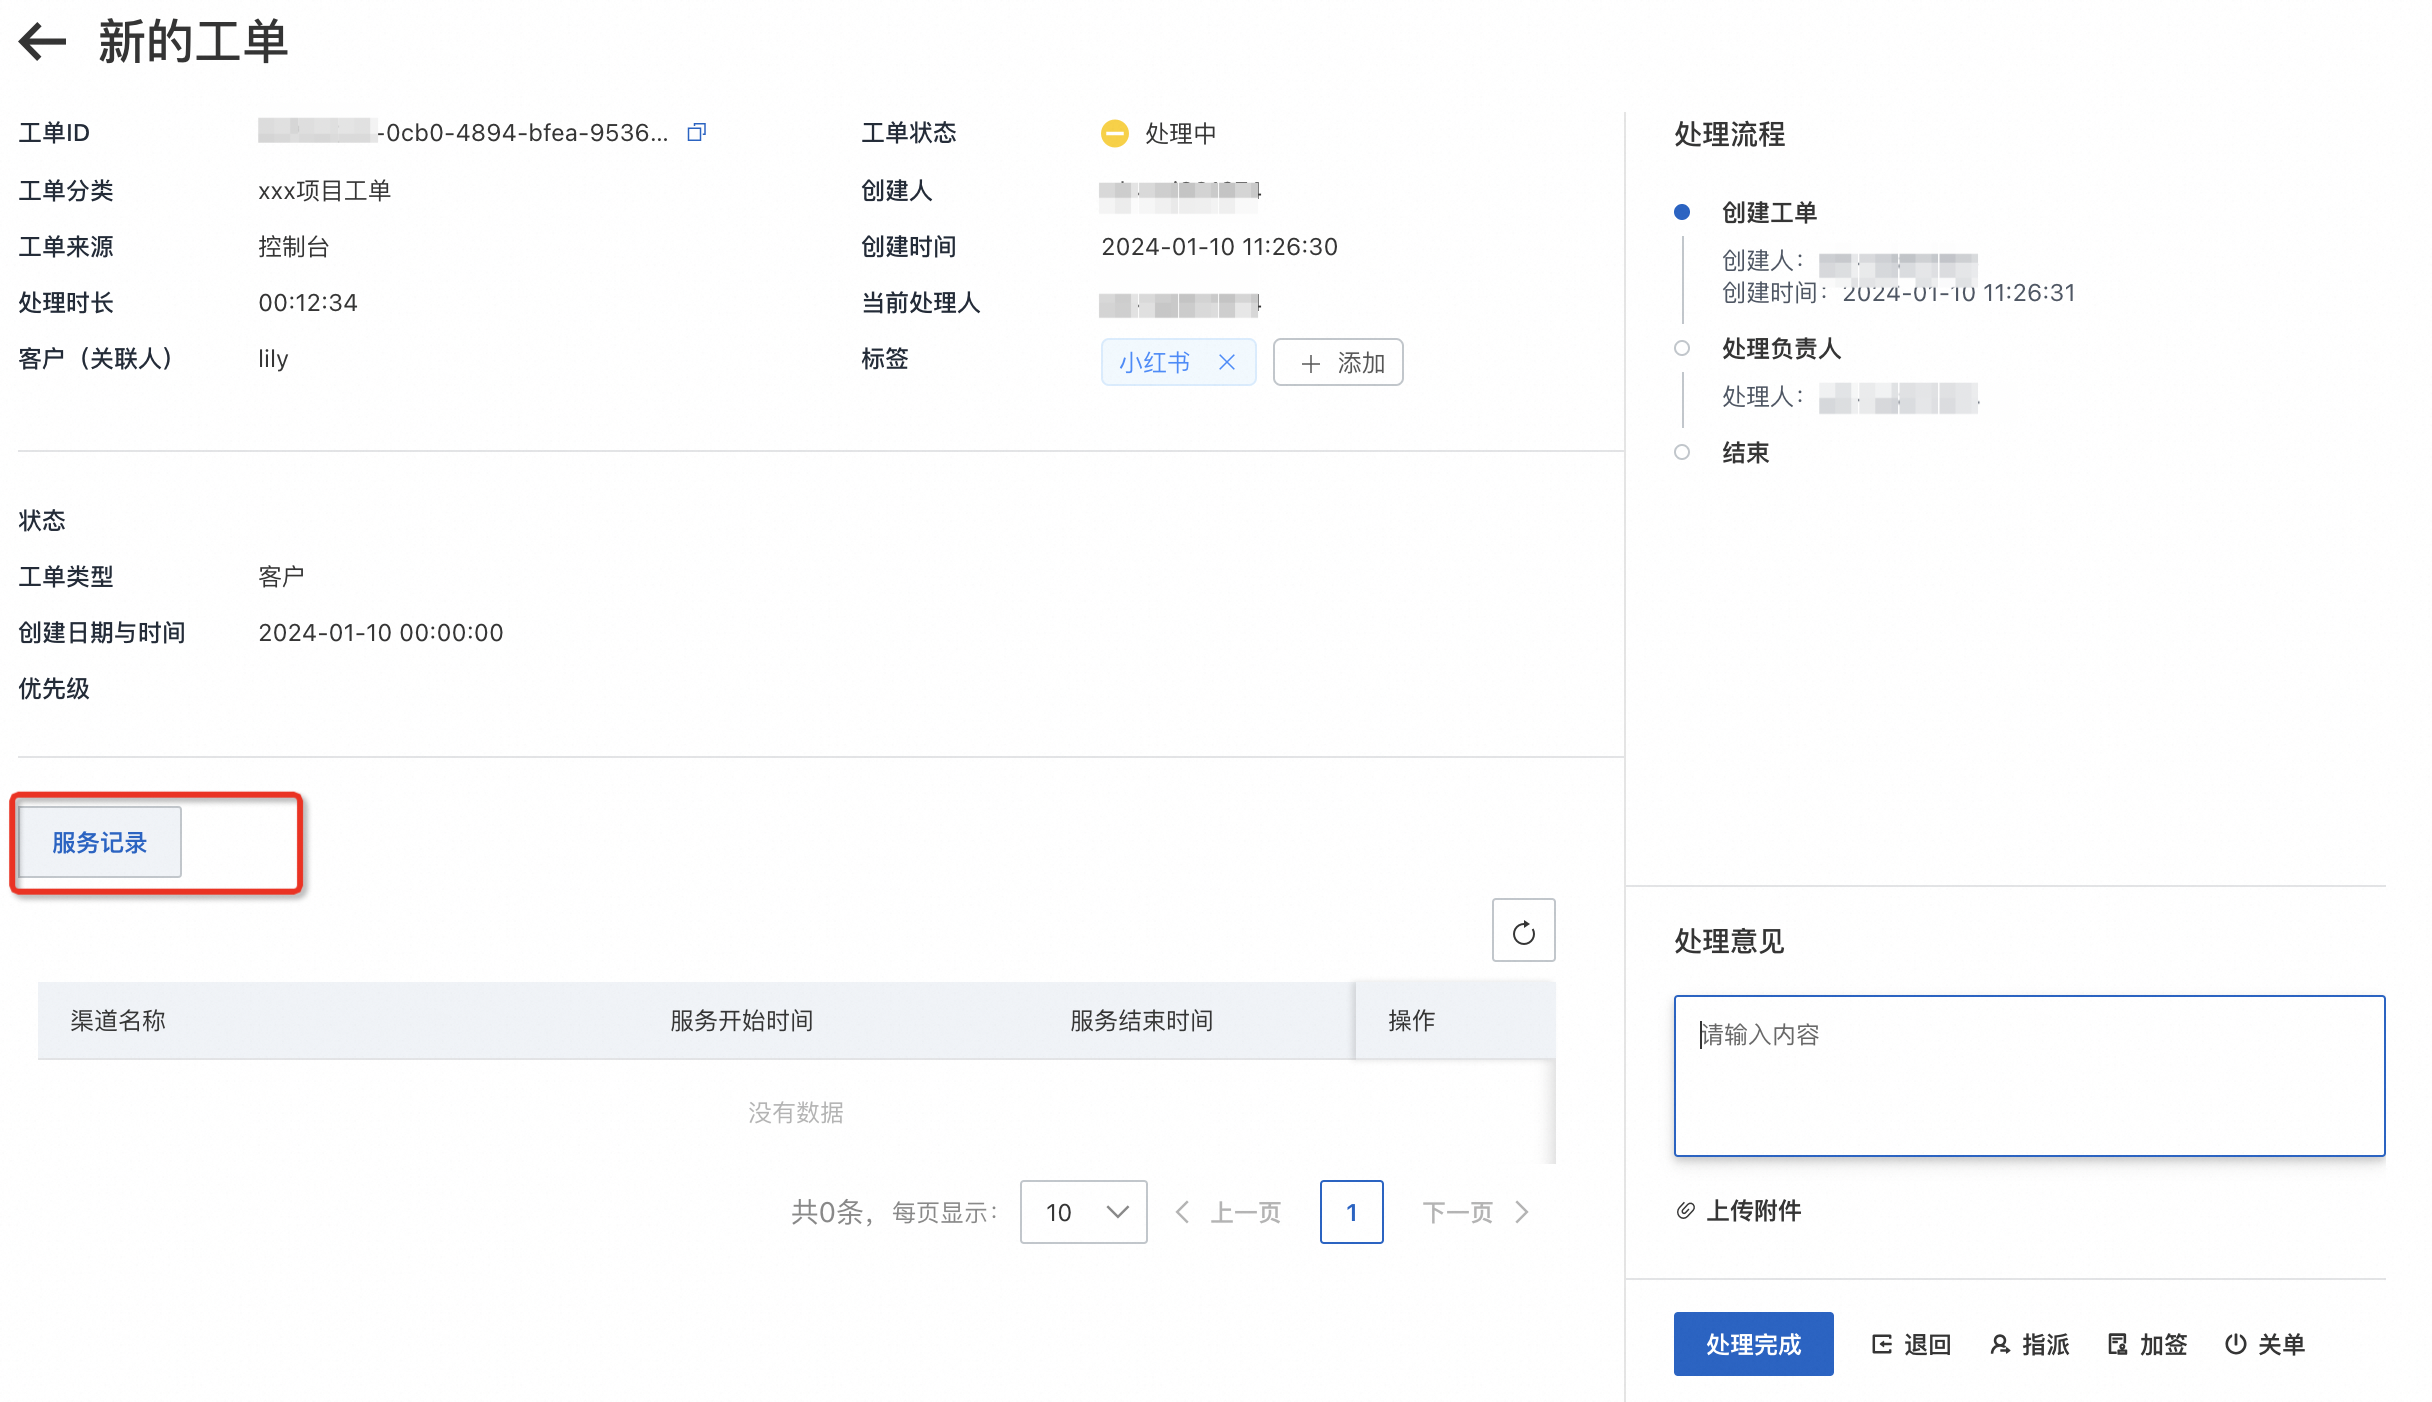
Information, such as the Service Record, is displayed at the bottom. This helps you track the service procedure for the ticket.
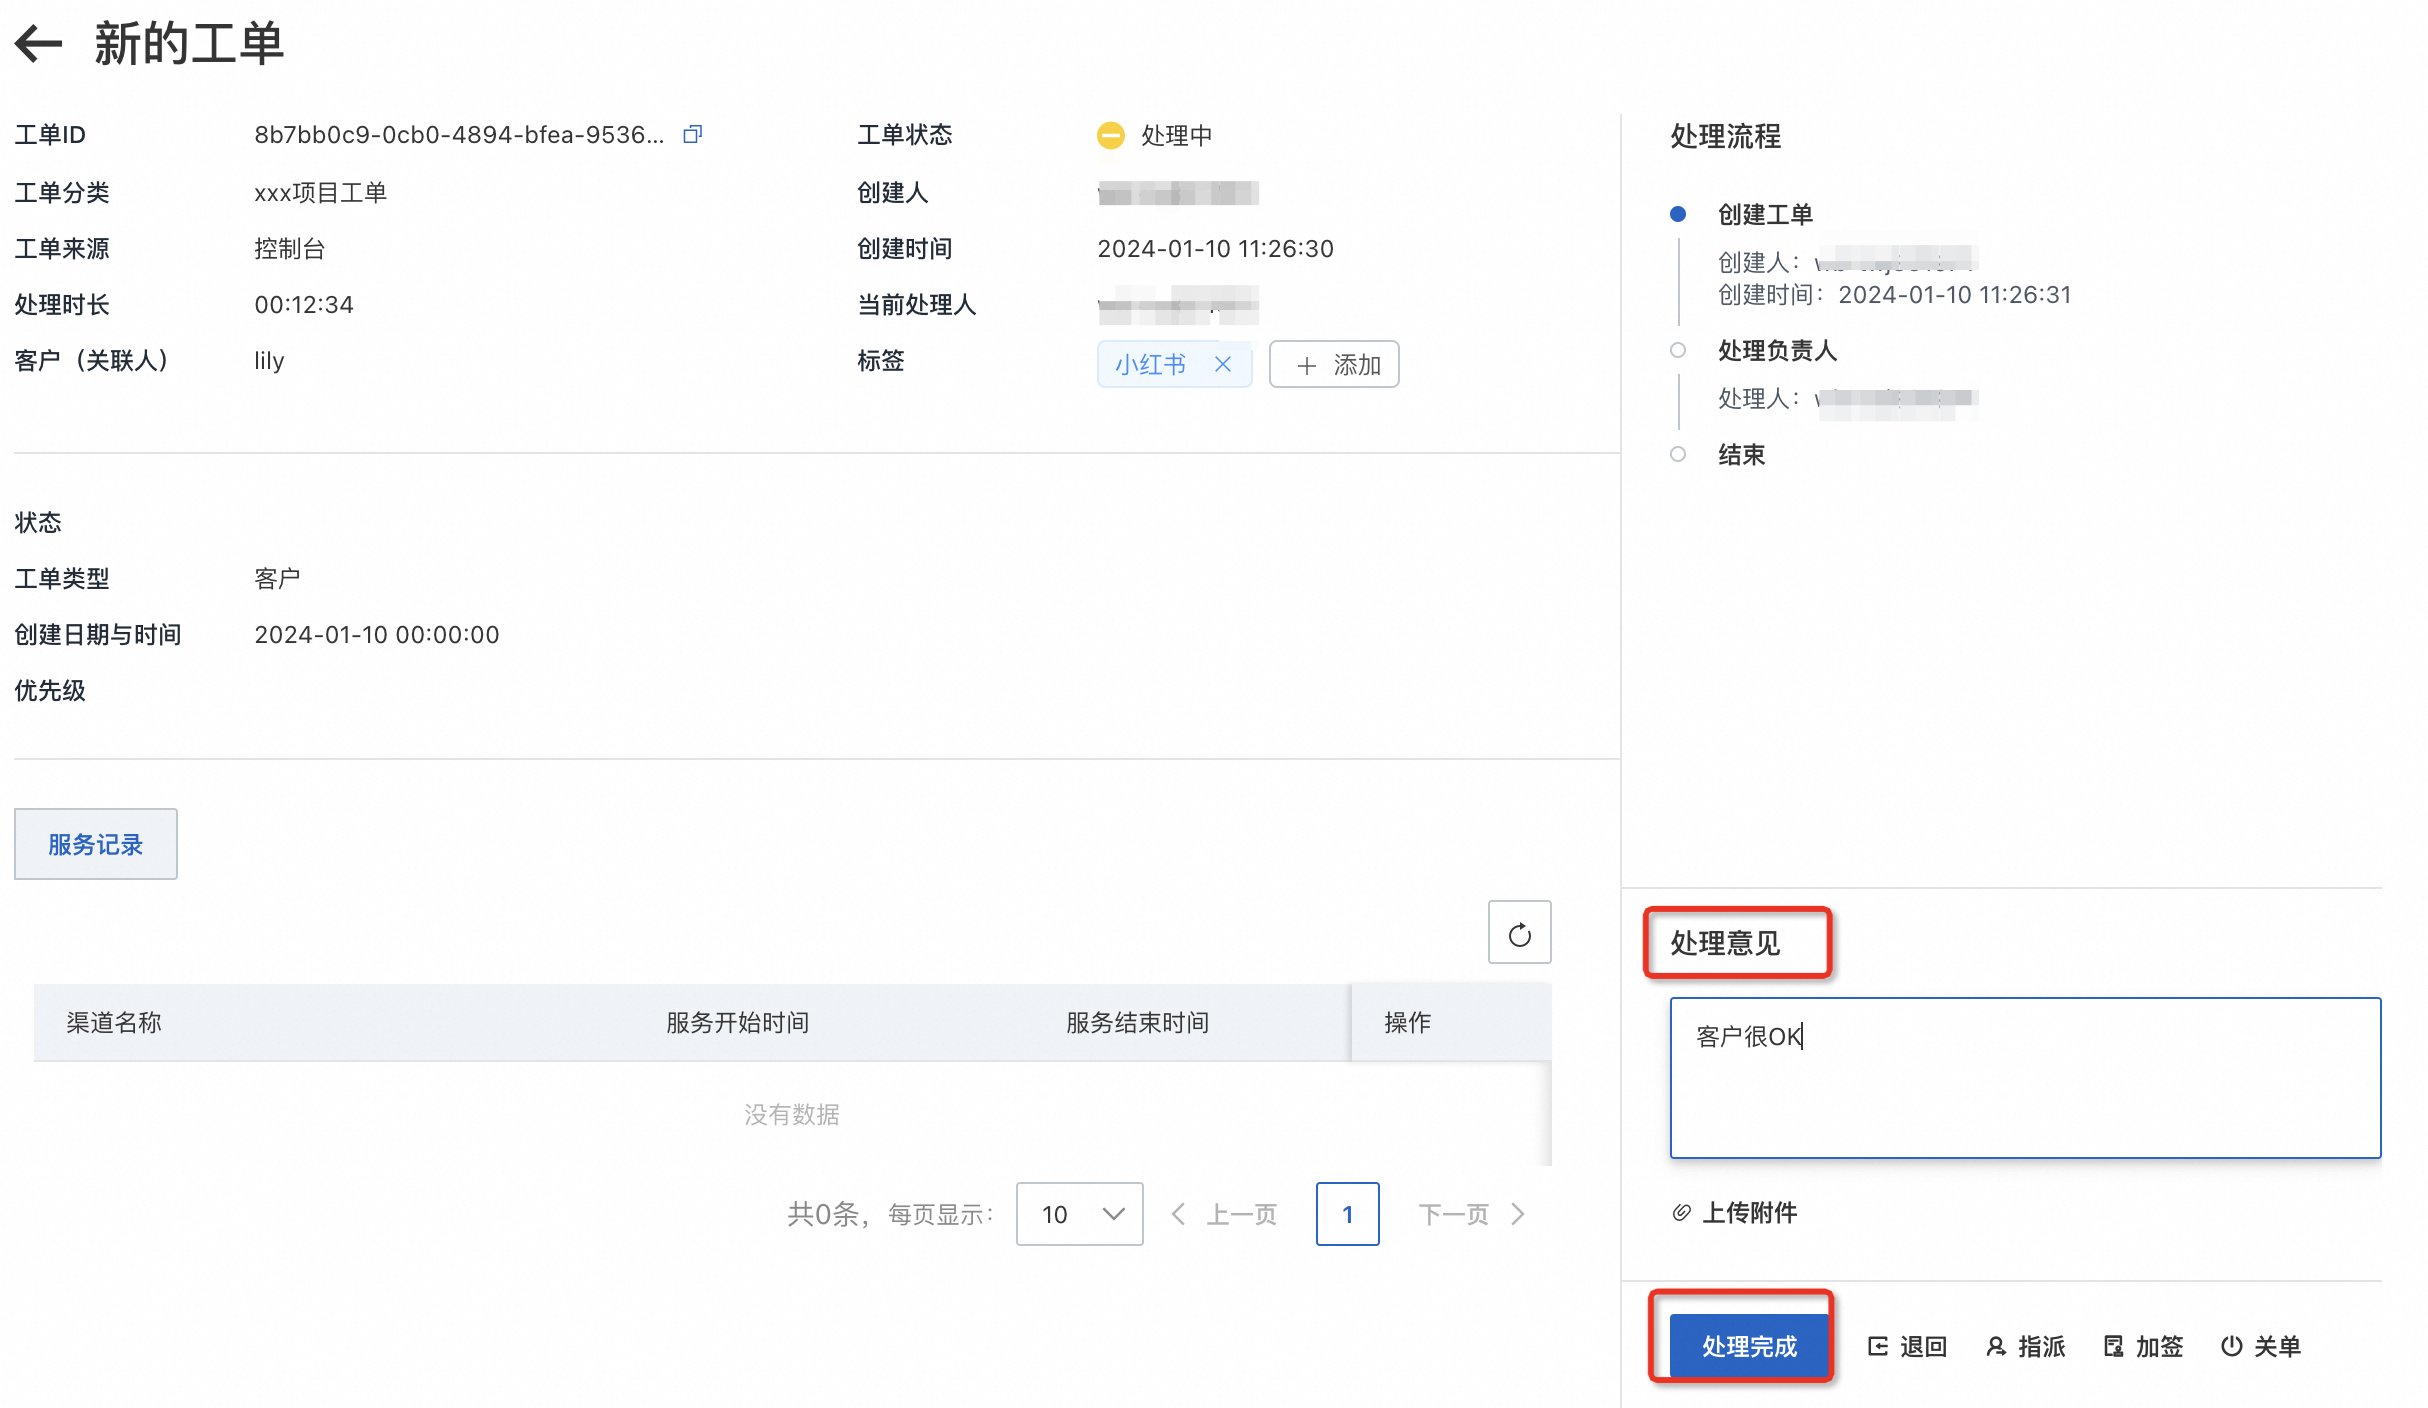
Add resolution notes as needed. If there are no other issues, click Complete Processing.
You can view the processed ticket in the ticket status bar.