Agent message workbench
This topic describes how customer service representatives use the Agent Message Workbench to handle customer sessions, including online/offline management, session intake, transfer, closing, custom views, customer information management, and quick replies.
Prerequisites
You have enabled Customer Service Agent. For more information, see Authorize and activate.
The administrator has created and assigned your customer service account. For more information, see Assign accounts.
You have logged in for the first time and changed your logon password.
Procedure
Log in to the workbench
Go to the Agent Message Workbench.
Enter your Login Account and Password.
Click Log In.
Bookmark the Agent Message Workbench URL for easy access later. The URL is: https://intl.dycpaas.com/
Agent online/offline management
Customer service representatives must set their online status to receive customer sessions.
After logging in to the workbench, view your current status in the upper-left corner.
Click Go Online.
After going online:
The button changes to Go Offline.
"Online" is displayed.
You start receiving customer sessions.
To go offline, click Go Offline.
Session allocation rules
The system automatically assigns customer sessions based on the following priorities.
When agents are online:
Dedicated agent first — Sessions are assigned to agents who have created a custom view containing the corresponding business phone number.
Load balancing — When multiple dedicated agents are available, the session is assigned to the agent with the fewest unread messages.
Fallback — When no dedicated agent is available, the session is assigned to the online agent with the fewest unread messages.
When all agents are offline:
Sessions are preferentially assigned to dedicated agents (agents who have created a custom view containing the corresponding business phone number), prioritizing those with the fewest unread sessions.
Sessions remain in the unread queue and are processed when an agent comes online.
A dedicated agent is an agent who has created a custom view that includes the corresponding business phone number.
Session allocation examples
Example 1: Dedicated agent priority
Business phone number: 123456789
Agent A: Online, no custom view created
Agent B: Online, custom view containing 123456789
Result: When a user sends a message to 123456789, the session is assigned to Agent B.
Example 2: Load balancing
Agent A: Online, custom view for 123456789, 5 unread messages
Agent B: Online, custom view for 123456789, 2 unread messages
Result: The session is assigned to Agent B (fewer unread messages).
Example 3: No dedicated agent
Agent A: Online, 3 unread messages
Agent B: Online, 1 unread message
Neither has created a custom view for 123456789
Result: The session is assigned to Agent B (fewer unread messages).
Session management
View the session list
The left side of the workbench displays the session list with the following default views:
All: All sessions assigned to the current account.
Unread: Sessions with unread messages.
Accept a session
User-initiated sessions
When a user sends a message, the session appears in the left Unread list.
In the session list on the left, find the session you want to handle.
Click the session to enter the conversation.
Start communicating with the customer.
Agent-initiated sessions
Customer service representatives can proactively initiate a session with a customer.
At the top of the session list, click New Session.
In the dialog box, fill in the session information:
Sending Channel: Select WhatsApp.
Sending Number: Select a business phone number.
Target Customer: Enter the customer's phone number or BSUID.
Click OK to create the session.
In the conversation area, select a message template or enter a message and send it.
Pin a session
Pin important sessions to the top for quick access.
Open the session you want to pin.
Click the Pin icon
 above the conversation area.
The session is pinned at the top of the session list.
Click the icon again to unpin.
Search session content
Search historical messages within the current session.
Click the Search Session icon
 above the conversation area.
The top search bar is automatically focused.
Enter keywords to search.
Transfer a session
Transfer the current session to another agent.
In the current session, click the Transfer icon
 above the conversation area.
In the Transfer to Another Agent dialog box, select the Target Agent.
Enter the Transfer Notes.
Click Transfer.
After the transfer, the original agent can no longer see this session. The session is moved to the target agent's session list.
Close a session
Close a session after the customer's inquiry is resolved.
In the upper-right corner of the conversation area, click the Close Session icon
 .
.In the confirmation dialog box, click Confirm Close.
The session is moved to the Closed tab.
If there are no messages from either party within 30 minutes, the current session is automatically closed.
Restore a closed session
If you need to continue handling a closed session, restore it as follows.
Click the Closed tab.
In the closed session list, find the session you want to restore.
Right-click the session.
In the context menu, select one of the following options:
Restore Session: Restores the session to "In Progress" status.
Permanently Close: Permanently closes the session.
Custom views
Create custom views to filter and categorize sessions by specific conditions.
Create a custom view
Method 1: Create by setting filter conditions
Click the Filter button above the session list.
In the filter dialog box, set the conditions:
Channel Type: Select WhatsApp, then select a business phone number.
Customer Tag: Select an existing tag categorization, then select tags.
Click Save as Custom View.
Enter a view name and click OK to save.
Method 2: Create from current filter results
When conditions are already filtered:
Click the Save as Custom View button in the upper-right corner.
In the dialog box, enter the view name.
Click OK to save.
Method 3: Create by clicking the Add button
Click the "+" button at the bottom of the session list on the left.
In the dialog box, set the filter conditions.
Click Save as Custom View.
Enter a view name and click OK to save.
Manage custom views
Custom views are displayed in the session list on the left.
Edit a view
Click the custom view you want to edit.
Click the Edit icon
 below the view name.
Modify the filter conditions.
Click Update View to save.
Delete a view
Find the custom view you want to delete.
Click the Delete icon
 below the view name.
In the confirmation dialog box, click OK.
 below the view name.
Deletion is irreversible. Proceed with caution.
Customer information management
View customer information
Click the Customer Info icon  above the conversation area to show or hide the customer profile panel.
The customer profile panel on the right displays the following information:
Customer profile: nickname, phone number, tags
Basic information: customer ID, channel, country/region
Contact information: customer group, remarks
Transfer notes: transfer agent's remarks
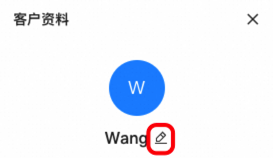
Change customer nickname
In the customer profile panel on the right, find the Nickname field (defaults to the phone number or ID).
Click the Edit icon next to the nickname.
In the edit pop-up, enter the new nickname.
Click OK to save.
Add tags to a customer
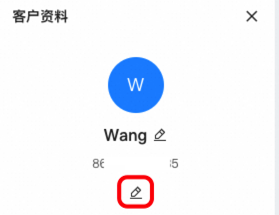
Save to contacts
Save the customer to the intelligent campaign > Audience Management in the Chat App Message Service console for future management and marketing.
In the customer profile panel on the right, click Save to Contacts.
In the dialog box:
Select an Audience Group.
Enter Remarks.
Click OK to save.
The saved information includes: customer name, phone number, and remarks.
Use quick replies
Use quick replies configured by the administrator to quickly respond to common customer inquiries.
Insert a quick reply
Below the message input box, click the Quick Replies icon
.The quick message selection panel is displayed, showing available quick replies.
Click the quick reply you want to use.
The message content is automatically filled in or appended to the input box.
NoteIf the input box already has content, the quick reply is appended after the existing content.
(Optional) Edit the message as needed.
Click Send.
 .
.Search for a quick reply
When there are many quick replies, use search to quickly find what you need.
Click the Quick Replies icon
below the input box.In the quick message selection panel, click View All.
The quick reply library dialog box opens.
Enter keywords in the search box.
The system displays matching quick replies.
Click the quick reply, then click Insert.
The message content is filled in the input box.