Synchronize data with DataWorks
You can use DataWorks to synchronize data from MaxCompute to ApsaraDB for ClickHouse. This topic uses MaxCompute as an example.
Background information
DataWorks supports offline synchronization from various data sources to ApsaraDB for ClickHouse. For more information about the supported data source types, see Supported data sources and read/write plug-ins.
Prerequisites
-
A workspace is created, and MaxCompute is selected for the engine service. For more information, see Create a workspace.
-
An exclusive resource group for data integration is created and configured. For more information, see Use an exclusive resource group for data integration.
-
A destination ApsaraDB for ClickHouse cluster is created, along with a database account and password. For more information, see Create a cluster and Create an account.
-
You have the required permissions to log on to the database. For more information, see Prepare permissions.
-
If a RAM user uses DataWorks, the Alibaba Cloud account must grant the required roles to the RAM user. For more information, see Add workspace members.
Usage notes
-
ApsaraDB for ClickHouse supports only exclusive resource groups for data integration.
-
If you need to synchronize a table again, run the
TRUNCATE TABLE <table_name>;statement to clear the ApsaraDB for ClickHouse table.
Procedure
-
Create data sources.
You must create a data source for both MaxCompute and ApsaraDB for ClickHouse.
NoteFor information about how to create a data source, see Add a MaxCompute compute engine and Add an ApsaraDB for ClickHouse data source.
-
Create a MaxCompute table.
-
Log on to the DataWorks console.
-
In the left-side navigation pane, click Workspace.
-
In the upper-left corner of the page, select the region of your workspace.
-
On the Workspace list page, find the target workspace, and in the Actions column, click .
-
On the Scheduled Workflow page, move the pointer over the
 icon and choose .
 -
In the Create Table dialog box, select a Path, enter a Name, such as odptabletest1, and then click Create.
-
In the General section, configure the parameters.
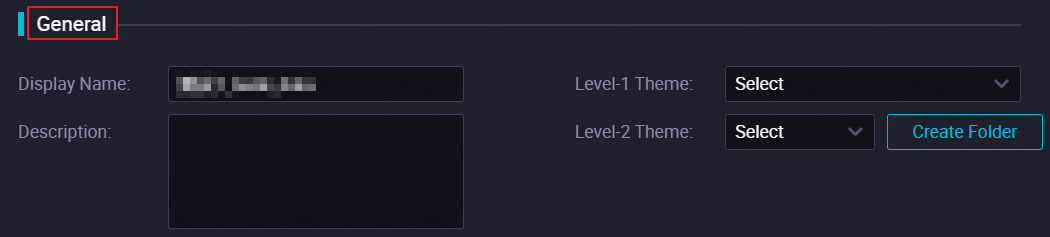
The following table describes the parameters.
Parameter
Description
Display name
The display name of the table.
Theme
In DataWorks, themes function like folders, allowing you to categorize tables by business purpose. You can define level-1 and level-2 themes to organize tables.
NoteThese themes help you organize and find tables on the Table Management page. If no suitable themes are available, you can create one. For more information, see Define table themes.
-
In the toolbar, click DDL.
-
In the DDL Statement dialog box, enter the following table creation statement and click Generate Table Schema.
CREATE TABLE IF NOT EXISTS odptabletest1 ( v1 TINYINT, v2 SMALLINT ); -
Click Commit to Development Environment and then click Commit to Production Environment.
-
-
Write data to the MaxCompute table.
-
On the Scheduled Workflow page, click Ad Hoc Query in the left-side navigation pane.
-
Move the pointer over the
 icon and choose .
 -
In the Create Node dialog box, select a Path and enter a Name.
-
Click OK.
-
On the node's editor page, enter the following statement.
insert into odptabletest1 values (1,"a"),(2,"b"),(3,"c"),(4,"d"); -
In the toolbar, click the
 icon.
icon. -
In the MaxCompute calculation cost estimate window, click Run.
-
-
Create an ApsaraDB for ClickHouse table.
-
Log on to the ApsaraDB for ClickHouse console.
-
In the upper-left corner of the page, select the region of the destination cluster.
-
On the Clusters page, select the appropriate instance type for your destination cluster, and then click the cluster ID.
-
On the Cluster Information page, click Log On to Database in the upper-right corner.
-
On the Log on to instance page, enter the database account and password, and click Log On.
-
Enter the table creation statement and click Execute (F8):
create table default.dataworktest ON CLUSTER default ( v1 Int, v2 String ) ENGINE = MergeTree ORDER BY v1;NoteThe schema of the ApsaraDB for ClickHouse table must be compatible with that of the MaxCompute table.
-
-
Create a business flow.
If you already have a Workflow, you can skip this step.
-
On the Data Analytics page, click Data Analytics in the left-side navigation pane.
-
Move the pointer over the
icon and select Create Workflow. -
In the Create Workflow dialog box, enter a Workflow Name.
ImportantThe business name must be 1 to 128 characters in length and can contain letters, Chinese characters, digits, underscores (_), and periods (.).
-
Click Create.
-
-
Create an offline synchronization node.
-
Expand the business flow and right-click Data Integration.
-
Choose .
-
In the Create Node dialog box, enter a Name and select a Path.
ImportantThe node name must be 1 to 128 characters in length and can contain letters, Chinese characters, digits, underscores (_), and periods (.).
-
Click OK.
-
-
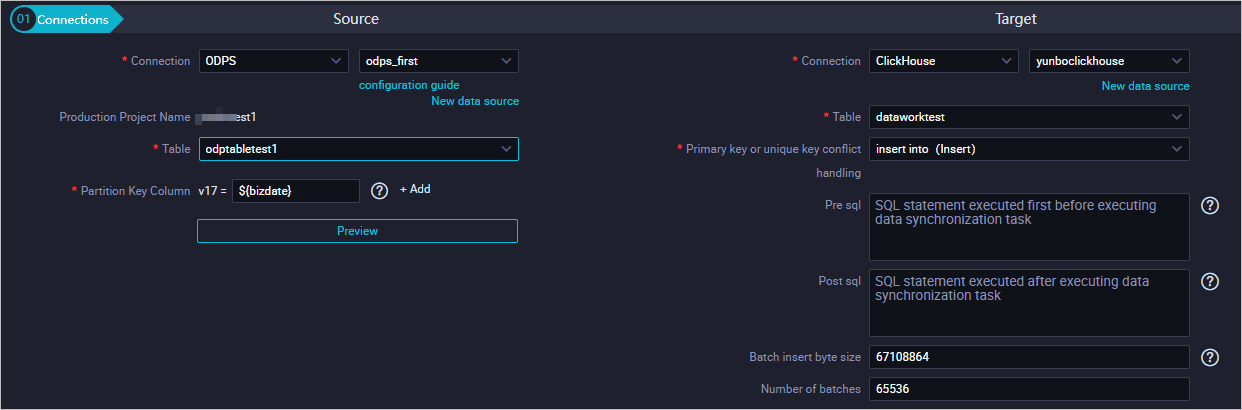
Configure the data source and destination.
-
Configure data source: Select the MaxCompute data source.

The following table describes the parameters.
Parameter
Description
Data Source
The type and name of the data source.
Production Project Name
You cannot change the default value.
Table
The table from which you want to synchronize data.
Partitions
To perform daily incremental updates, restrict your incremental data to a date-specific partition. For example, set the value of partition v17 to ${bizdate}.
NoteDataWorks does not support field mapping for partitioned MaxCompute tables. You must configure partition fields separately.
NoteFor more information about the parameters, see MaxCompute Reader.
-
Configure data destination: Select ClickHouse as the data source type.
The following table describes the parameters.
Parameter
Description
Data Source
The type and name of the data source. Select ClickHouse as the type.
Table
The table to which you want to synchronize data.
Primary or Unique Key Conflict Handling
This value is fixed to insert into (insert).
Statement Run Before Writing
The SQL statements to execute before the data synchronization task starts.
Statement Run After Writing
The SQL statements to execute after the data synchronization task completes.
Batch Insert Size (Bytes)
The maximum data size that can be written per batch.
Records per Batch
The number of records that can be written per batch.
-
(Optional) Field Mapping: You can specify the one-to-one mapping between the Field on the left and the Field on the right.
NoteFor more information about the parameters, see Configure field mappings.
-
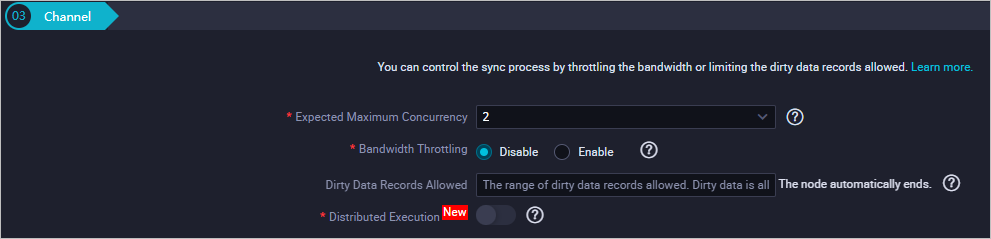
(Optional) Channel: Configure the job rate limit and dirty data check rules.
NoteFor more information about the parameters, see Configure channel control policies for batch synchronization tasks.
-
-
Configure the resource group for data integration.
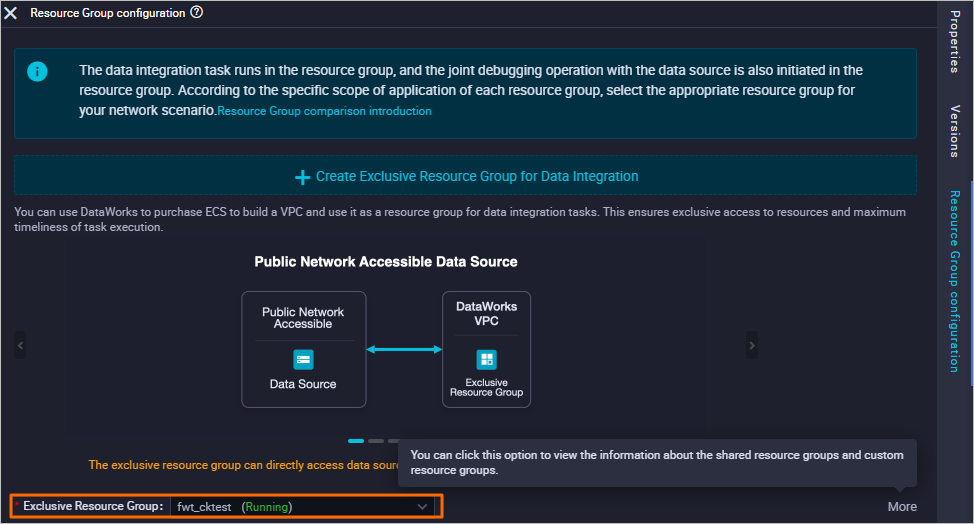
In the right-side pane, click Resource Group configuration and select the Exclusive Data Integration Resource Group that you created.
-
Save and run the data synchronization task.
-
In the toolbar, click the
icon to save the data synchronization task. -
In the toolbar, click the
icon to run the data synchronization task.
-

 icon to save the data synchronization task.
 icon to run the data synchronization task.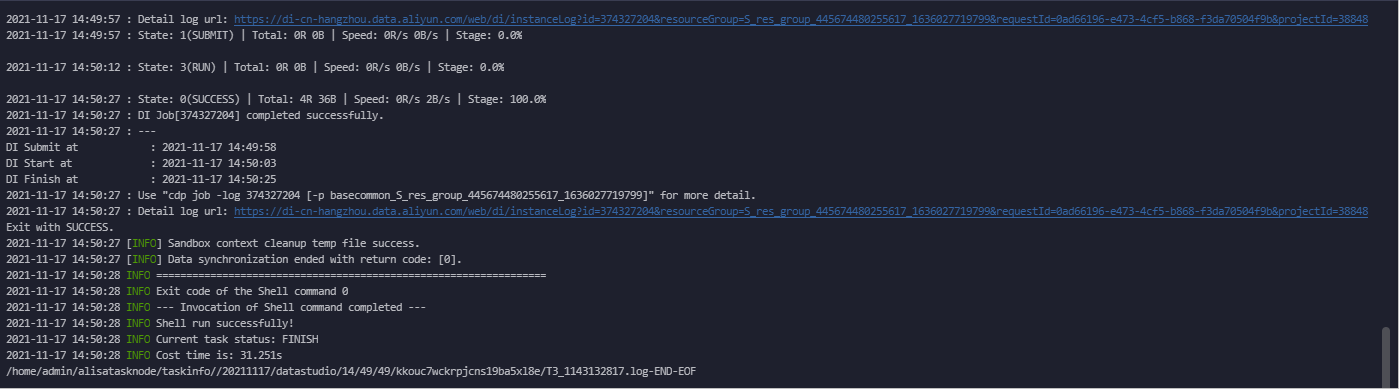
Verify the synchronization result
-
Log on to the ApsaraDB for ClickHouse console.
-
In the upper-left corner of the page, select the region of the destination cluster.
-
On the Clusters page, select the appropriate instance type for your destination cluster, and then click the cluster ID.
-
On the Cluster Information page, click Log On to Database in the upper-right corner.
-
On the Log on to instance page, enter the database account and password, and click Log On.
-
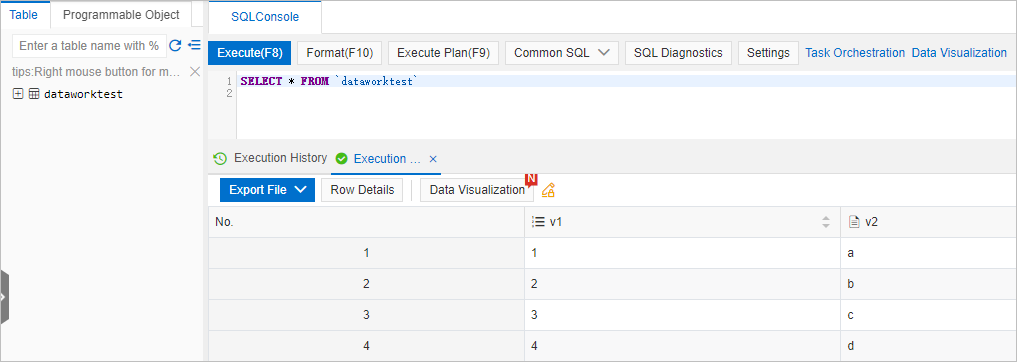
Enter the following query statement and click Execute (F8) to check the result:
SELECT * FROM dataworktest;The query result is as follows:
NoteA successful query result confirms that the data has been synchronized from DataWorks to ApsaraDB for ClickHouse.