Synchronize users or groups in Microsoft Entra ID by using SCIM
Synchronize users or groups from Microsoft Entra ID (formerly Azure AD) to CloudSSO by using SCIM.
Prerequisites
All Microsoft Entra ID operations in this guide require the Global Administrator role. To create a user and assign the role, see the official Microsoft Entra ID documentation.
Step 1: Create SCIM credentials in the CloudSSO console
Log on to the Cloud SSO console.
In the left-side navigation pane, click Settings.
On the User Setting tab, in the SCIM user synchronization settings section, click Create New SCIM key.
In the SCIM Credential Generated dialog box, copy the SCIM key, and then click OK.
Step 2: Enable SCIM synchronization in the CloudSSO console
-
Log on to the CloudSSO console.
-
In the left-side navigation pane, click Settings.
-
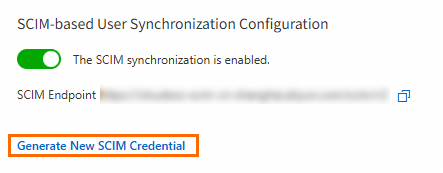
On the User Setting tab, in the SCIM User Synchronization Configuration section, turn on the SCIM synchronization switch.
Copy and save the SCIM endpoint for later use.
Step 3: Configure SAML in Microsoft Entra ID
-
Log on to the Azure portal as the global administrator of Microsoft Entra ID.
-
In the upper-left corner of the homepage, click the
 icon.
icon. -
In the left-side navigation pane, choose .
-
Click New application.
-
On the Browse Microsoft Entra App Gallery page, click Create your own application.
-
In the Create your own application panel, enter a name for your application. In this example, enter CloudSSODemo. Then, select Integrate any other application you don't find in the gallery (Non-gallery) and click Create.
Step 4: Assign users or groups to the application in Microsoft Entra ID
-
On the CloudSSODemo page, choose .
-
On the page that appears, click Add user/group.
-
Select users or groups.
-
Click Assign.
Step 5: Configure SCIM synchronization in Microsoft Entra ID
-
On the CloudSSODemo page, choose .
-
Click New configuration and configure administrator credentials.
-
Enter the SCIM endpoint for Tenant URL.
Copy the SCIM Endpoint value from the CloudSSO console Settings page.
-
Enter a SCIM credential for Secret token.
To obtain the credential, perform the operations in Step 1: Create SCIM credentials in the CloudSSO console.
-
Click Test Connectivity.
-
If the test is successful, click Create.
-
-
On the Provisioning page, choose .
-
In the Mappings section, configure attribute mappings.
-
Click Provision Microsoft Entra ID Users to configure attribute mappings for users.
-
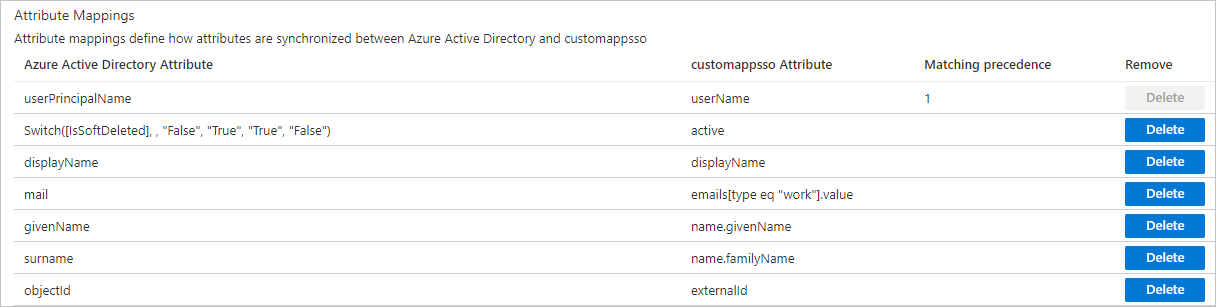
Find externalId in the customappsso Attribute column, click its Azure Active Directory Attribute value, and change Source attribute to objectId.
-
Keep only the attribute mappings shown below and delete the rest.
-
-
Click Provision Microsoft Entra ID Groups to configure attribute mappings for groups. Keep only the attribute mappings shown below and delete the rest.

NoteCloudSSO user and group names have character restrictions. If a Microsoft Entra ID user or group name contains unsupported characters, the mapping fails. To fix this, click displayName in the Azure Active Directory Attribute column, set Mapping type to Expression, and enter an expression to remove or replace unsupported characters. Expression syntax is described in the Microsoft Entra ID documentation.
-
-
In the Settings section, select Sync only assigned users and groups for Scope.
-
In the Provisioning Status section, turn on the switch.
-
Click Save.
-
-
Go to the Overview page and refresh to view the synchronization results.
Verify the synchronization results
-
Log on to the CloudSSO console.
-
Go to the User or Group page to view the synchronized users or groups.
The Source of synchronized users or groups displays as SCIM Synchronization. For more information, see View user information and View the information about a group.