User guide
This Alibaba Cloud guide is for regular users whose accounts are created by an administrator. It describes how to log on at the /user entry and use your Agent. You do not need to access the admin console. If a configuration or an action does not appear on the page, the administrator has not enabled that feature yet.
Before you begin
Confirm the following information with the administrator:
The platform access URL and the logon method.
The account created for you, or the enterprise single sign-on method that you are allowed to use.
The Agent Configurations, models, and message channels available to you.
The instance quota for you or for your group, and whether a token or budget limit applies.
Log on and get started
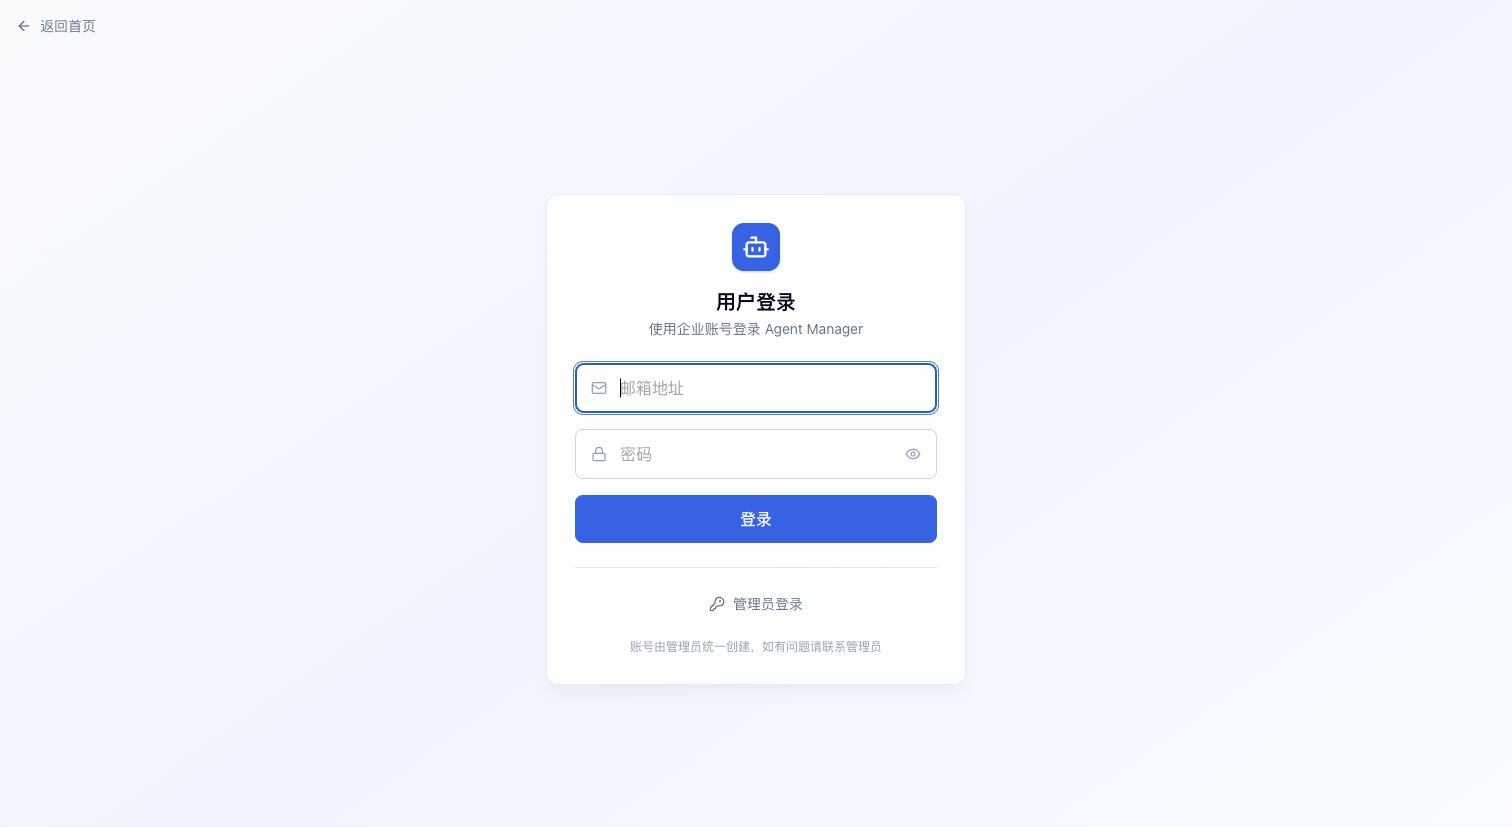
Open the platform access URL to go to the user logon page.
Log on with the email password that the administrator provided, or with OAuth or SAML SSO.
After you log on, the user-side home page appears. To open the user-side Instance List directly, go to
<platform URL>/user.If the administrator requires you to change your password on the first logon, change the password before you return to the user side.
The left-side navigation pane on the user side contains the following entries:
| Entry | Purpose |
| Instance List | Create, access, and manage your own Agent instances. |
| Skill Marketplace | Browse the available Skills and install a Skill to an existing instance. |
| My Groups | View the groups and the group instances that the administrator assigned to you. |
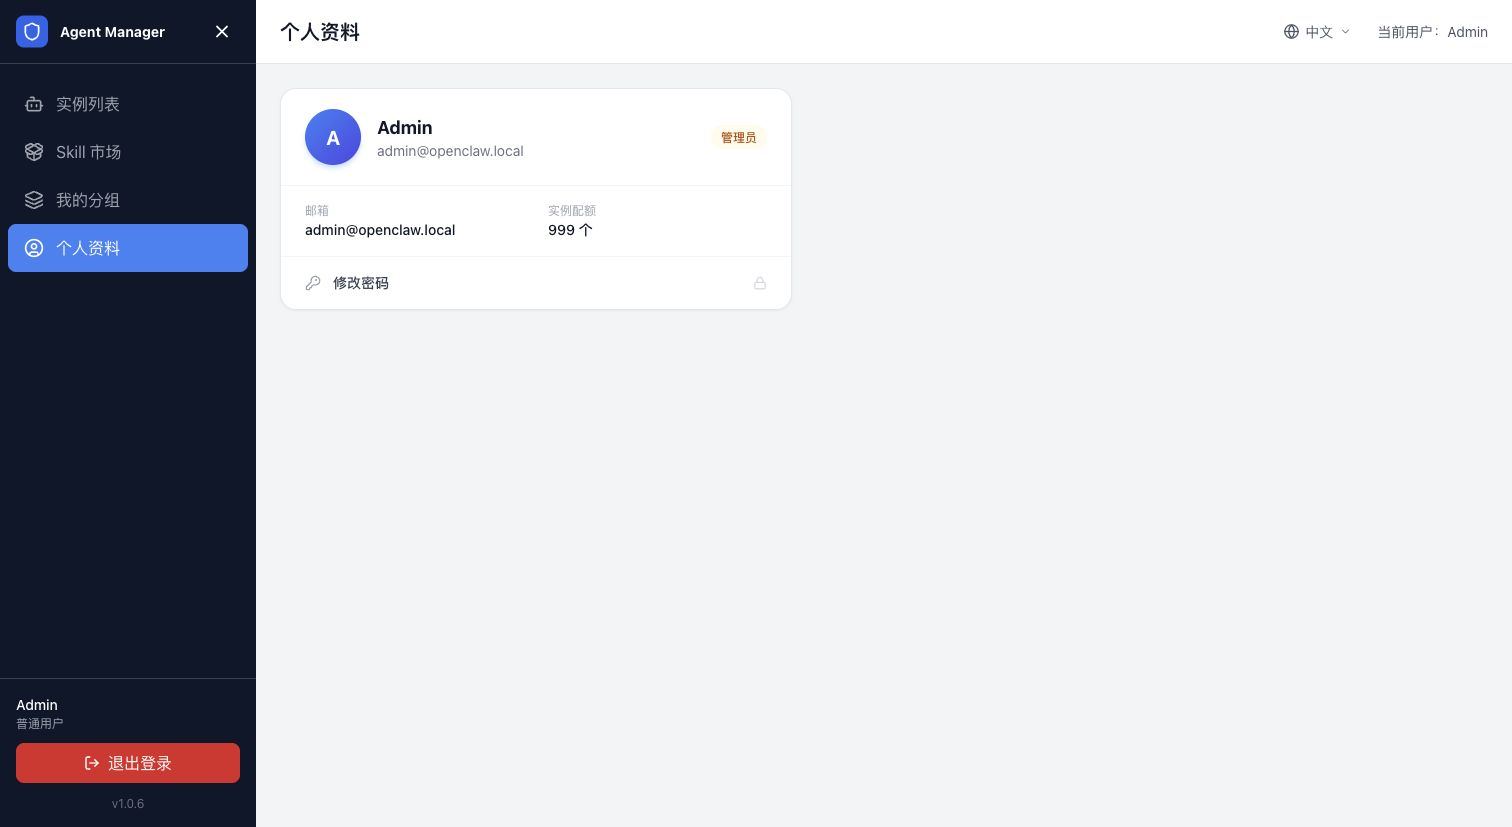
| Profile | View your account, instance quota, and token usage, and change your password. |
Create and use an Agent
Create an instance
Go to
/user/instancesand click Create Instance.Select the instance ownership. Personal means that only you can see the instance. A group instance is shared by the group members.
Select an Agent Configuration that the administrator has configured.
Select the Skills that you need in Skills Space. Skills marked as required are added to the instance automatically.
Enter the instance name.
Select an available AI model. If the administrator has not enabled any model, contact the administrator.
Select message channels as needed and enter the channel configuration.
Click Create Instance and wait until the instance status changes to Running.
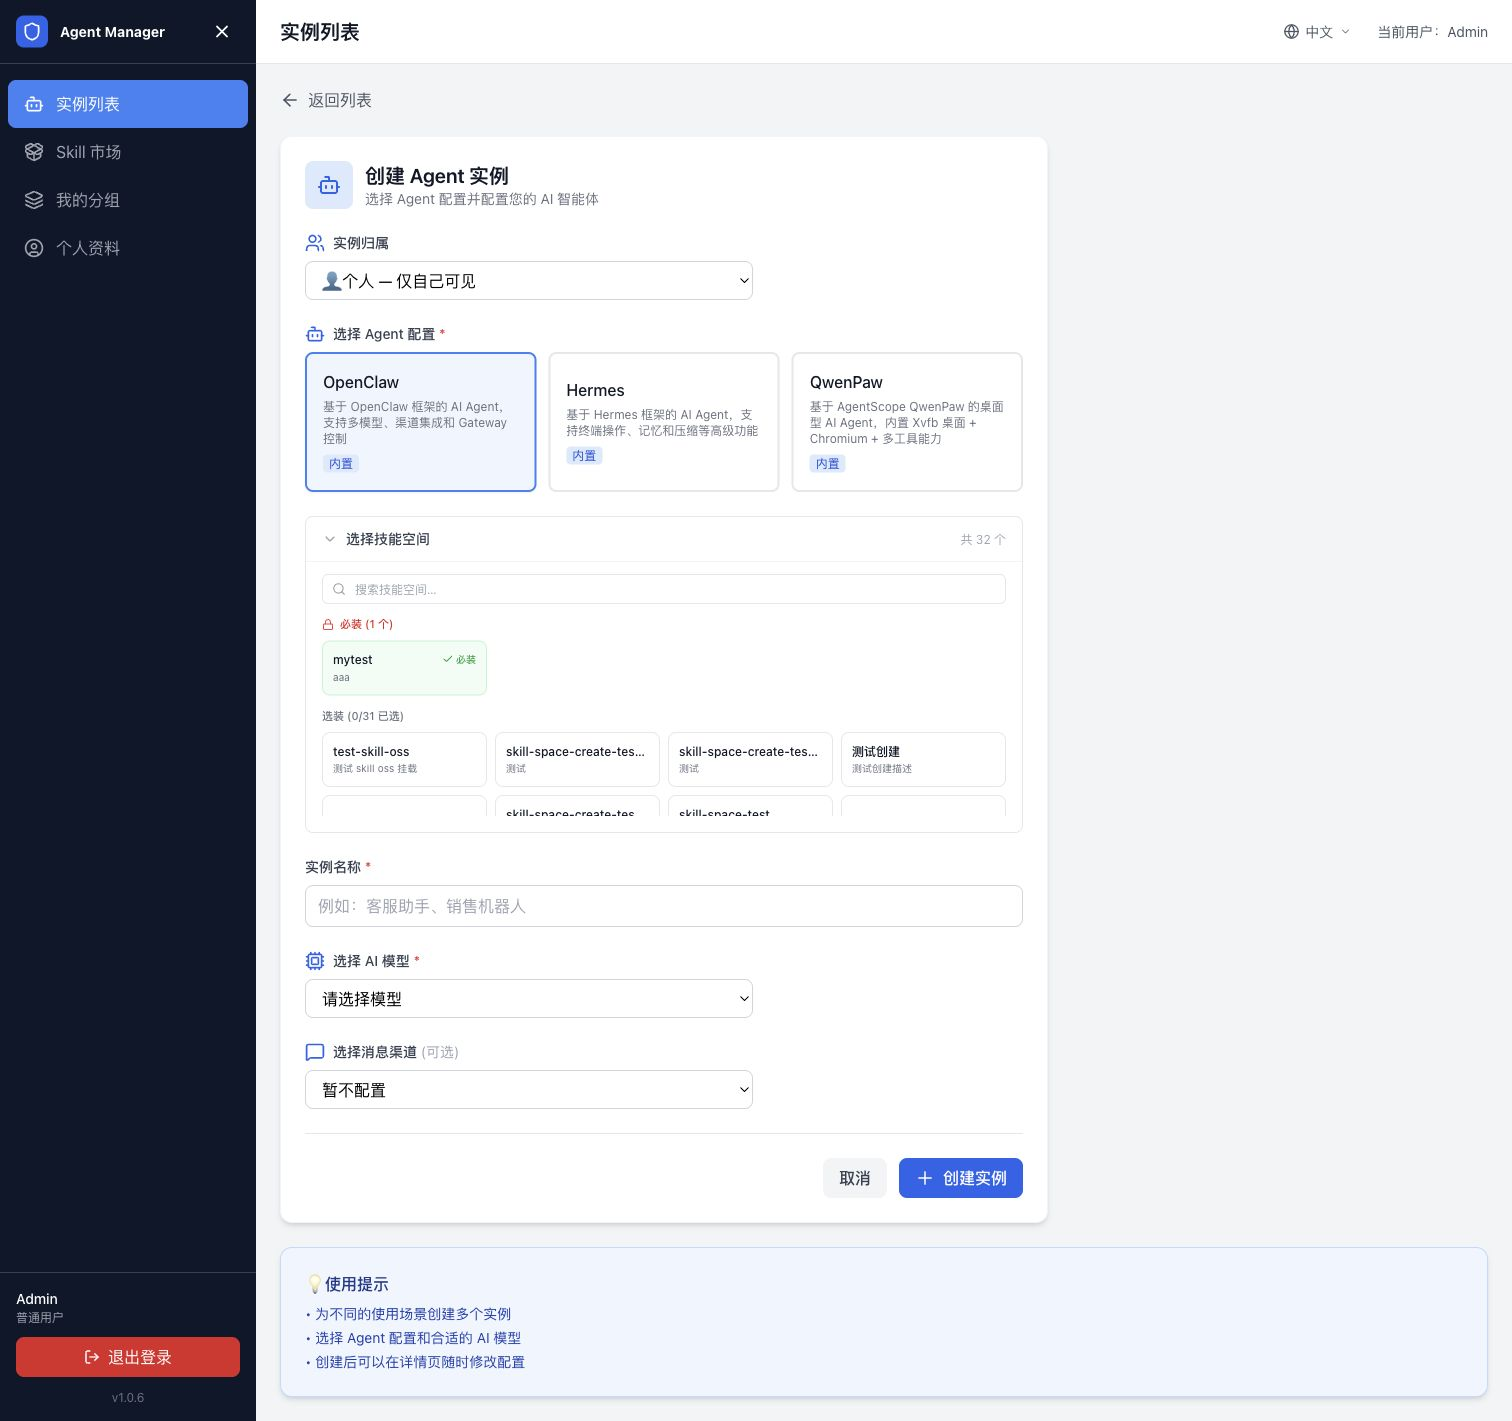
The Agent Configurations, Skills, models, and channels on the instance creation page are preconfigured by the administrator. You can select only from the available options and cannot change platform-level configurations.
Open the Agent application
Return to the Instance List and find the instance whose status is Running.
Open the instance details page.
On the instance details page, find the application access link, and then click the link or open it in a new window.
Start a conversation or run a task in the Agent application.
If the instance is still being created, wait for the status to update before you open the link. If the access link returns 502, return to the Instance List to check the instance status, and then contact the administrator to troubleshoot the sandbox and the gateway.
Upload files
If the Agent application provides a file upload entry:
Open the Agent application.
Click Upload Files and select one or more files, or drag files to the upload area.
Wait until the page indicates that the upload is complete.
Describe the files and the task to the Agent.
When you upload a large file or multiple files, wait until the upload is complete before you close the page. If a file cannot be uploaded, check the file size, network connectivity, and the running status of the instance.
Use the terminal
Some Agent Configurations provide a terminal entry. Open the Agent application, go to the terminal, wait for the connection to complete, and then run your task. The administrator decides in the Agent Configuration whether the terminal is available. If you do not see the terminal entry, do not refresh the page repeatedly. Contact the administrator to confirm.
Manage your instances
View and filter instances
In the Instance List:
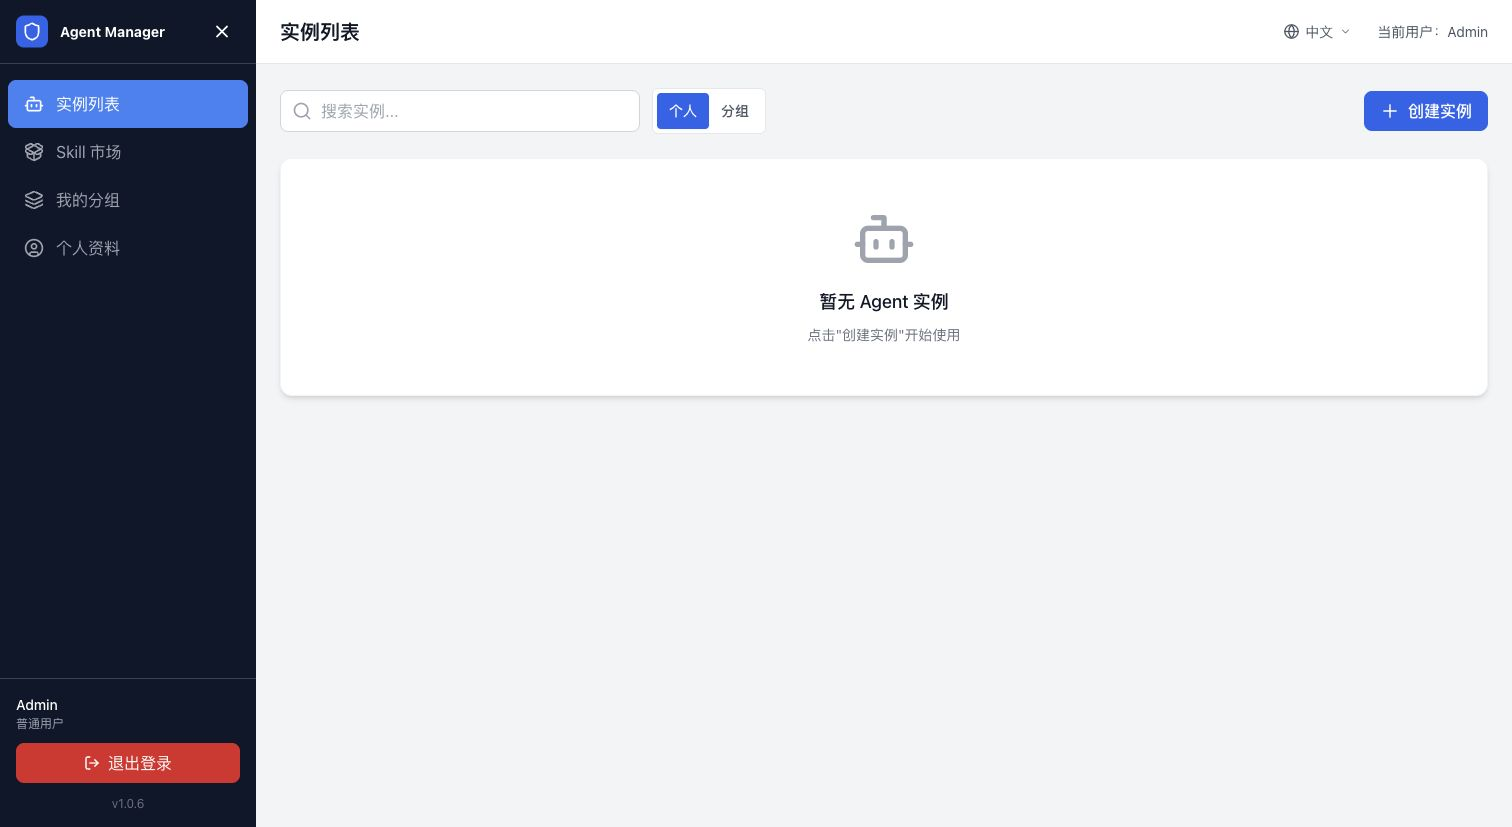
Use the search box to find an instance by name.
Select Personal to view the instances that you created.
Select Group to view the group instances that you are authorized to use.
Open the instance details page to view the status, the access link, the models, the channels, and the runtime configuration.
Start, stop, and delete an instance
You can perform the following operations based on the permissions shown on the page:
Find the target instance in the Instance List.
Select Start or Stop and wait until the status changes to Running or Stopped.
After you confirm that you no longer need the instance and the data in it, select Delete.
Stopping an instance pauses the running resources and usually does not delete the instance configuration. Deleting an instance terminates the associated sandbox and removes the instance record. Back up your data before you delete an instance.
Change the instance configuration
If the administrator enabled changes for the Agent Configuration, you can perform the following operations on the instance details page:
Change the available models, and then save the configuration.
Change the message channels and the channel parameters, and then save the configuration.
Restart the instance as prompted on the page to apply the new configuration.
If you cannot see the model or channel configuration, or the save button is unavailable, the current Agent Configuration does not allow users to make changes. Contact the administrator.
Use the Skill Marketplace
Open Skill Marketplace in the left-side navigation pane.
Search for a Skill in Official Skills or Skills Space, or filter Skills by category.
Confirm the purpose and the applicable scenarios of the Skill.
Click Install to Instance, select the target instance, and then confirm.
Return to the instance application and use the capability as described by the Skill.
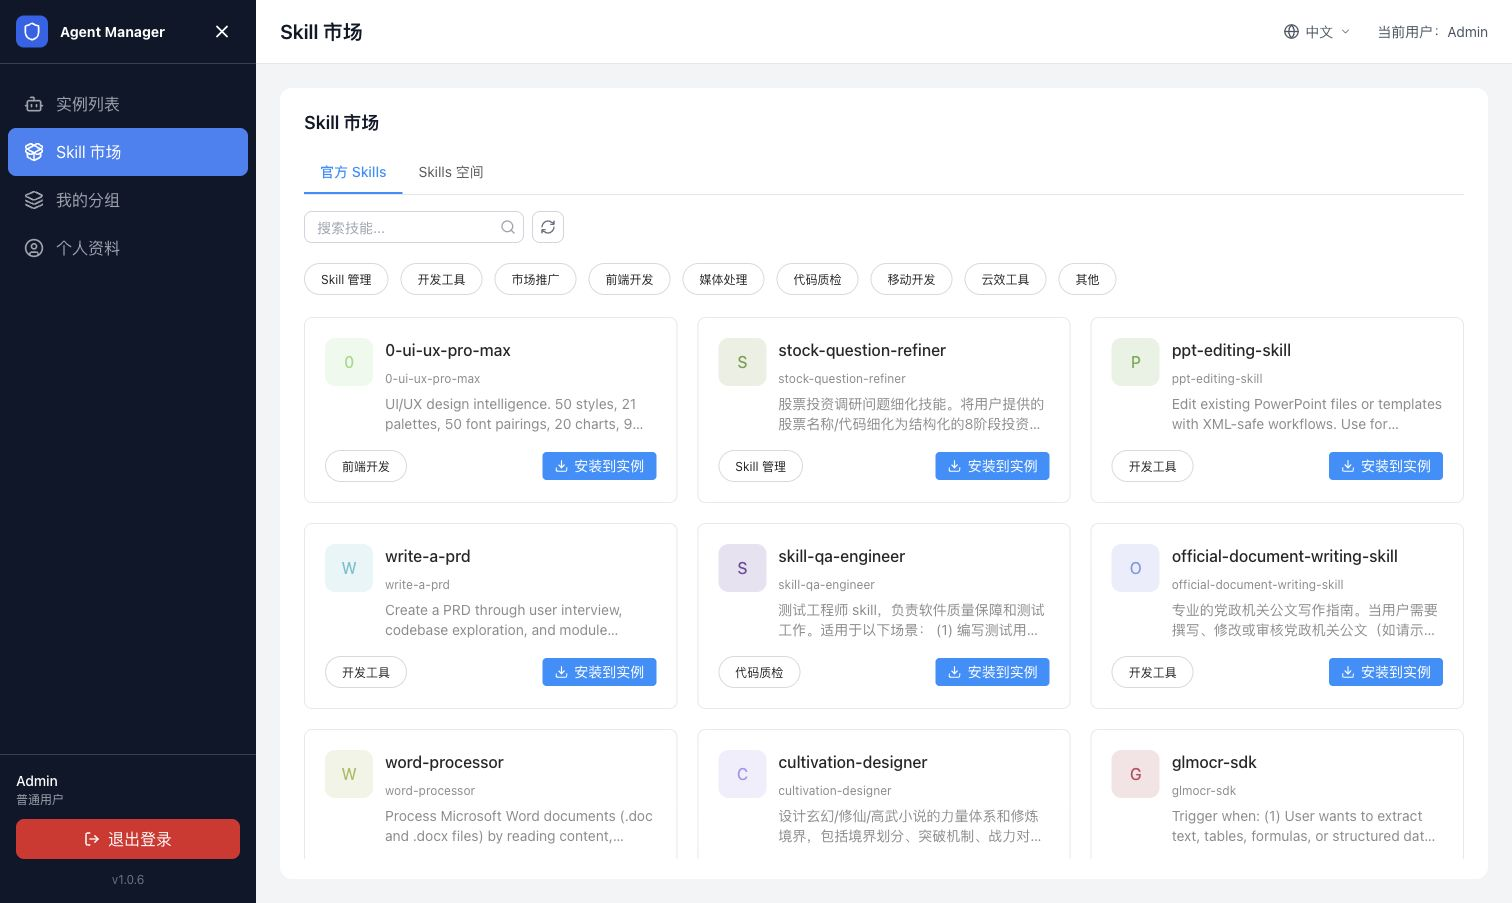
Whether a Skill can be installed to an instance depends on the instance status, the Skill requirements, and your permissions. If the installation fails, confirm that the target instance is running and then check the error message.
View your profile and usage
View your account and quota
Open Profile to view the logon email address, the account role, and the instance quota. To change your password, start the password change process from the Profile page.
View token usage
The Instance List or the Profile page may show your token usage for today and for the last 30 days. What is displayed depends on whether the administrator configured AI Gateway and usage statistics.
After the personal or group limit is reached, model calls may be throttled. Contact the administrator to confirm the limit and the gateway configuration. Do not create instances repeatedly.
Use group instances
Open My Groups to view the groups that the administrator assigned to you, the number of instances, and the usage information.
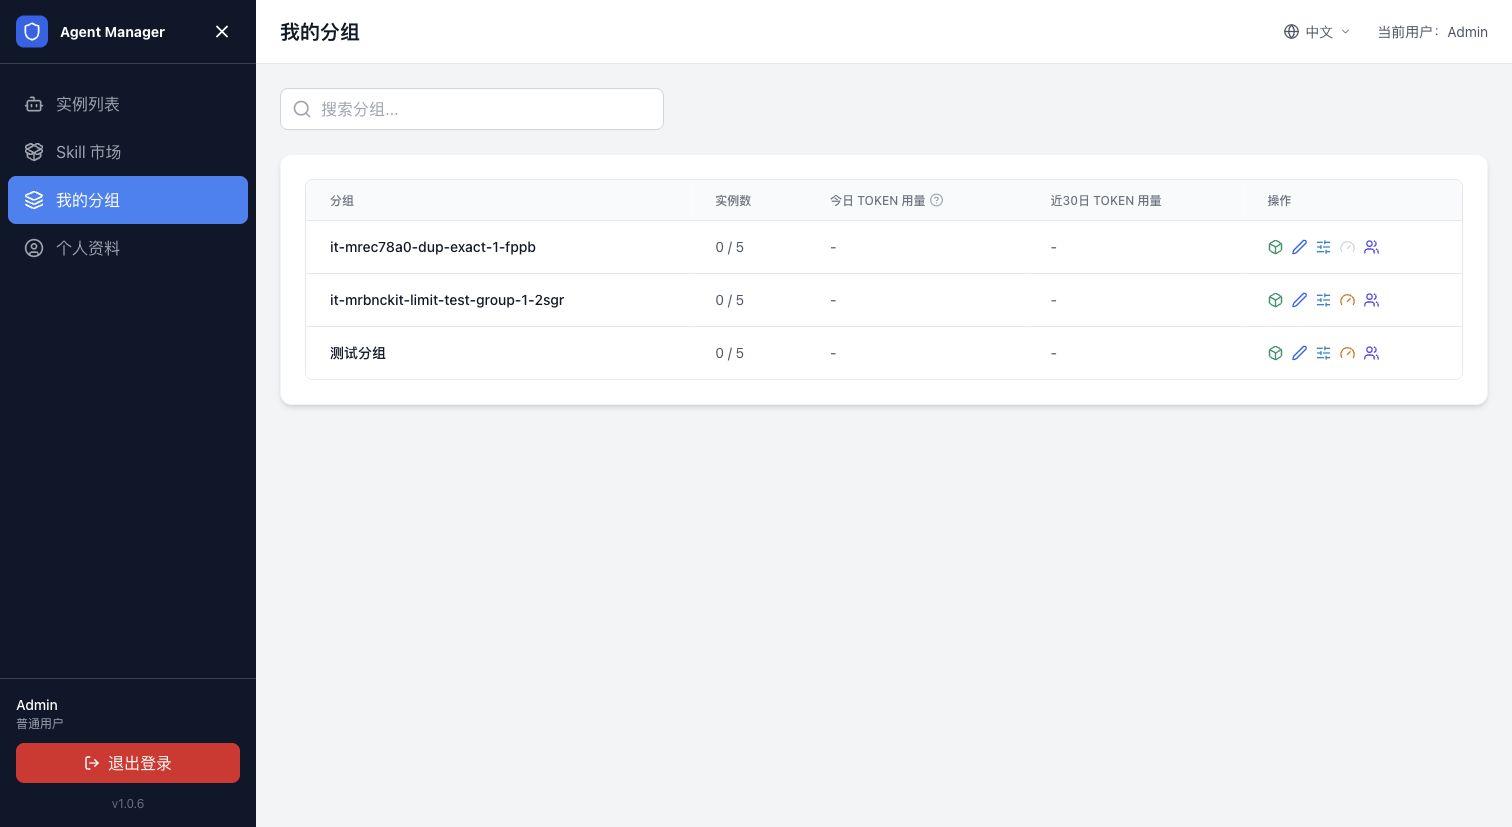
Group instances are shared by the group members. The operations that you can perform are determined by your group role and the instance permissions. If you cannot see the target group or instance, contact the group administrator to confirm your membership.
User-side FAQ
The Instance List does not appear after you log on
Make sure that you use the user entry /user instead of the administrator entry /admin. If you still cannot access the page, check whether the administrator created your account, whether the account is enabled, and whether the logon method is correct.
The Create Instance button is unavailable
Create Instance is usually unavailable because the instance quota is exhausted, or because the administrator has not configured an available Agent Configuration, model, or sandbox. Record the message on the page and contact the administrator.
An instance stays in the creating state for a long time
Do not create the instance repeatedly. Return to the Instance List, record the instance name and status, and wait for a while. If the status still does not change to Running, provide the instance ID and the message on the page to the administrator for troubleshooting.
The application access link does not open
Confirm that the instance status is Running, and then refresh the instance details page to get the latest link. If the link returns 502 or times out, or indicates that you have no permission, contact the administrator to check the sandbox, the gateway, and the access domain configuration.
The model or channel options are empty
The administrator configures the model and channel options and controls whether users can change them. Contact the administrator to confirm that the model provider, AI Gateway, and channel templates are enabled.
File upload fails
Check the file size, the file format, and network connectivity. Confirm that the instance is still running and wait until the page indicates that the upload is complete. If the upload keeps failing, record the file type, the file size, and the error message, and provide them to the administrator for troubleshooting.
Skill installation fails
Confirm that the target instance is running and that you are authorized to use the Skill. If the installation still fails, record the Skill name, the target instance, and the error message, and then contact the administrator.