Case study: Migrating data from an on-premises data center to OSS
This topic provides a case study of how an e-commerce company migrated data from an on-premises data center to OSS.
Background information
An e-commerce company uses the FastDFS distributed file system to store data in its on-premises data center. The data is approximately 300 TB in size and contains 30 million files. The company has connected its on-premises data center to an Alibaba Cloud VPC in the China (Shenzhen) region using an Express Connect circuit.
- During the migration, business operations must continue as normal without affecting customer access to data.
- After the migration, data integrity must be guaranteed to ensure a seamless business switchover.
Migration solution
- Create a bucket in the China (Shenzhen) region. Then, change the default data storage address to the address of this bucket.
- Use the built-in NGINX module of the on-premises FastDFS to export all files to be migrated into a list of HTTP URLs. These URLs must be accessible from your VPC.
The HTTP URL list is a text file in which each line contains one file URL. The URLs are separated by line breaks (\n). For more information about the format, see Migrate data from HTTP and HTTPS sources.
- Use Data Online Migration to migrate the data from the on-premises data center to OSS.
- After the migration is complete, switch the business services to OSS.
Step 1: Create a bucket and modify the storage address
- In the China (Shenzhen) region, create a bucket to store data. For more information, see Create buckets.
- Set a bucket policy to allow the company's internal employees to access this bucket. For more information, see Authorize users to access specified resources using bucket policies.
- Change the default data storage address to this bucket.
Step 2: Create a migration task
- Create a Resource Access Management (RAM) user on Alibaba Cloud and grant the RAM user permissions to create migration tasks. For more information, see Create and authorize a RAM user.
- Log on to the Data Online Migration console using the RAM user that you created.
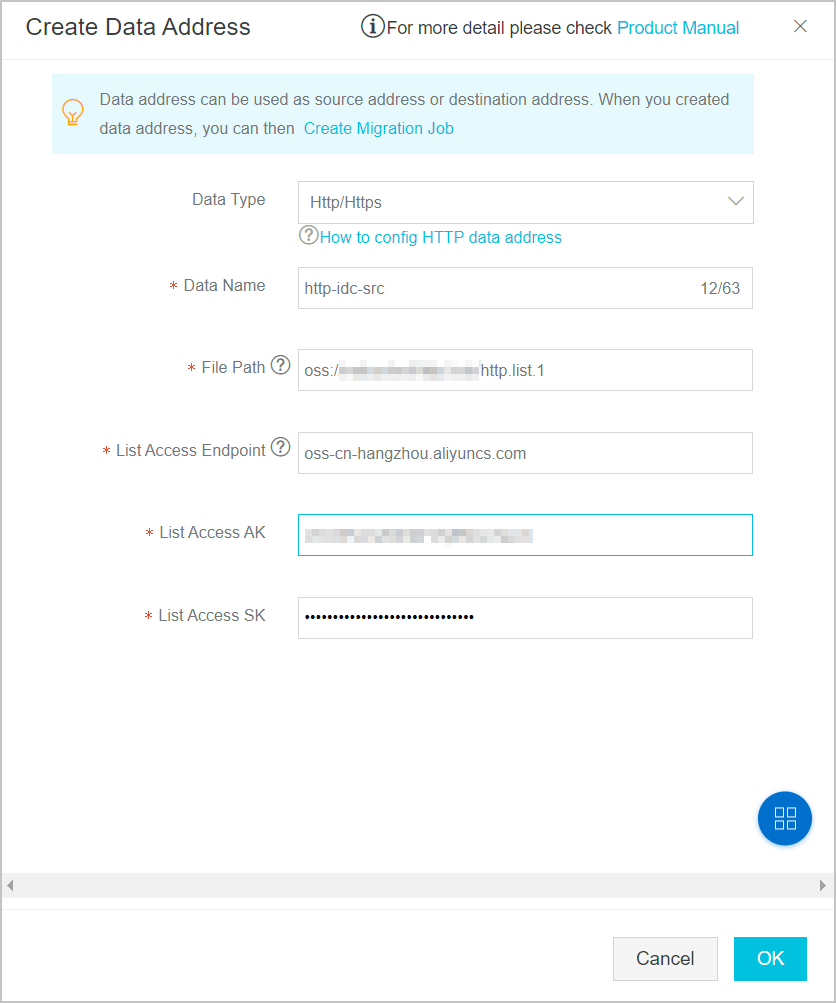
- Create an HTTP source data address. For more information, see Create a source address.Use VPCYesWhen you create the HTTP source data address, set to and specify your VPC. This is required because the migration occurs within the VPC and Data Online Migration needs to access the HTTP URL list. The configuration is shown in the following figure.
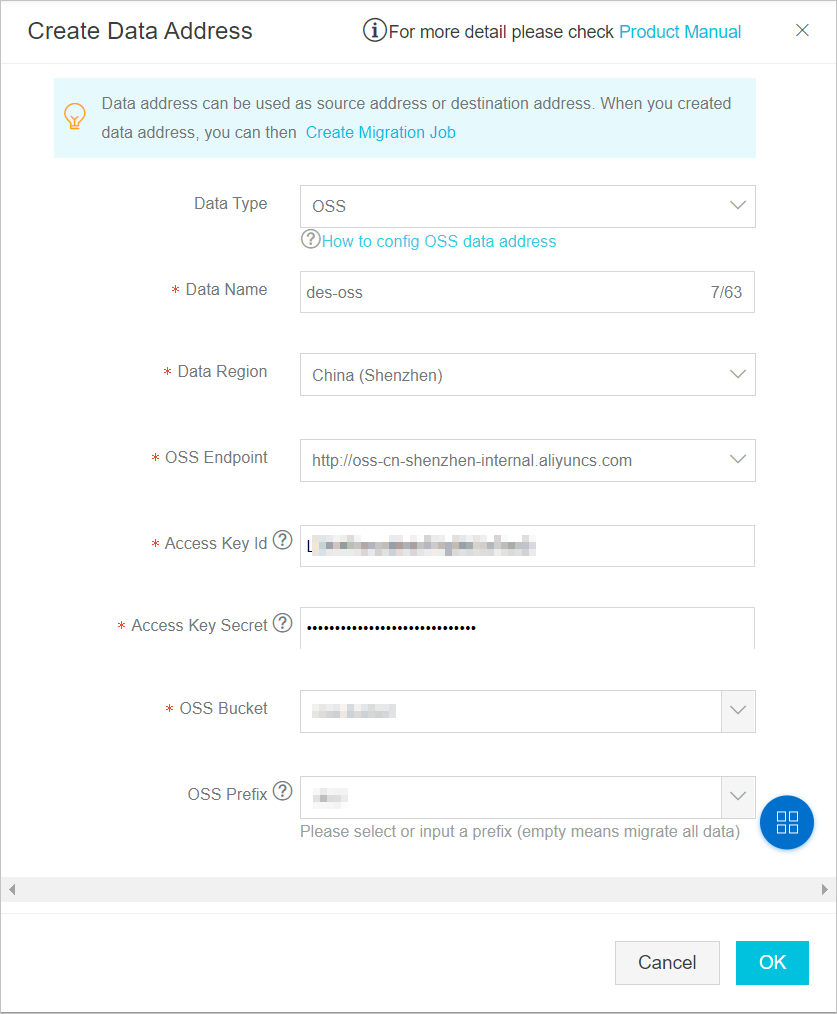
- Create an OSS destination data address. For more information, see Create a destination address.
- Create a full migration task and configure performance tuning. For more information, see Create a migration task. Note Based on the available bandwidth provided by the company, the migration process takes about two days. In practice, you should configure a reasonable rate limit based on your bandwidth usage.
- After the migration is complete, view the migration report and compare the data at the source and destination addresses to confirm that the data migration is complete. Note If a file fails to migrate, see FAQ about migration failures.
Step 3: Switch services to OSS
After the migration is complete, switch the data read source on your application servers to OSS. Subsequent data storage and management are performed in OSS.