Migrate data from Amazon S3 to OSS
Use the Data Online Migration service to migrate data from Amazon S3 to Alibaba Cloud OSS.
Considerations
When you use Online Migration Service, note the following:
-
Online Migration Service accesses source data through the source provider's public API. Service behavior depends on the provider's API implementation.
-
Migration consumes resources at both source and destination, which may affect your workloads. For mission-critical services, set a rate limit or run the task during off-peak hours.
-
The service checks files at source and destination before migration. If a same-name file exists at both locations and the task is configured to overwrite, the destination file is overwritten directly. Back up or rename files with different content to prevent data loss.
-
Online migration preserves the last modified time of source files. If a lifecycle rule is configured on the destination bucket, it may delete or transition migrated files based on their last modified time.
Migration limitations
-
You can migrate data from only one bucket at a time. You cannot migrate an entire account in a single operation.
-
Attributes are handled as follows when migrating from Amazon S3:
-
Supported attributes:
x-amz-meta-*,LastModifyTime,Content-Type,Cache-Control,Content-Encoding,Content-Disposition,Content-Language, andExpires. -
Unsupported attributes:
StorageClass,Acl, server-side encryption, and tagging.NoteThis list is not exhaustive. Migration behavior for unlisted attributes is not guaranteed. Verify results after migration completes.
-
-
Data sources incompatible with the S3 interface, such as Volcano Engine (TOS) and NetEase Cloud, may fail or produce unpredictable results. Use HTTP-based migration for these sources.
Step 1: Select a region
-
Log in to the Data Online Migration console as the RAM user you created.
-
In the top navigation bar, use the region selector in the upper-left corner to select the migration service deployment region. Choose the data source region or the geographically closest region.
Available deployment regions: China (Beijing), China (Shanghai), China (Hangzhou), China (Shenzhen), and China (Ulanqab) in mainland China, and China (Hong Kong), Singapore (Singapore), Germany (Frankfurt), and US (Virginia).
Important-
Data source addresses and migration tasks are specific to each region. Choose your region carefully.
-
Select the region of your data source. If that region is unavailable, create the migration task in the geographically closest region.
-
For cross-border migration, enable Transfer Acceleration to improve speed. Buckets with Transfer Acceleration enabled incur transfer acceleration fees. Access OSS by using Transfer Acceleration.
-
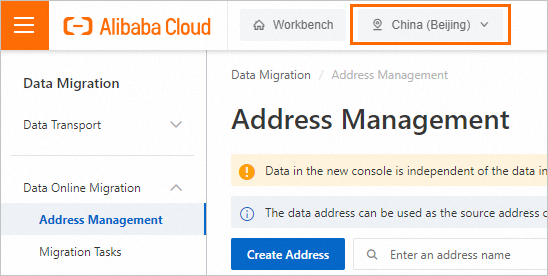
Step 2: Create a source address
-
In the left-side navigation pane, go to Data Online Migration > Address Management and click Create Address.
-
On the Create Data Address page, configure the following parameters and click OK.
Parameter
Required
Description
Name
Yes
Enter a name for the source. The name must meet the following requirements:
-
The name must be 3 to 63 characters in length.
-
The name is case-sensitive and can contain only lowercase letters, digits, hyphens (-), and underscores (_).
-
The name cannot start with a hyphen (-) or an underscore (_).
Type
Yes
Select AWS S3.
Domain name
Yes
Enter the AWS S3 service endpoint. Endpoints are listed in Amazon S3 endpoints.
AccessKeyId
Yes
Enter the IAM user access key. This key authenticates read access to the source data.
SecretAccessKey
Yes
Bucket
Yes
Enter the name of the source AWS S3 bucket.
NoteThe bucket name cannot start or end with spaces, line breaks, or tabs.
Prefix
No
Specify a prefix to migrate a subset of the data.
-
If specified, only data under that prefix is migrated. The prefix must not start with a forward slash (/) but must end with one.
-
If you omit this parameter, all data in the bucket is migrated.
Tunnel
No
Select the channel that you want to use.
Important-
This parameter is required only when you migrate data from self-managed storage to the cloud, or when you migrate data over a dedicated connection or VPN.
-
An agent is required when the destination is a local file system (LocalFs) or when migrating over a dedicated connection for services like Finance Cloud or Apsara Stack.
Agent
No
Select one or more agents.
Important-
This parameter is required only when you migrate data from self-managed storage to the cloud, or when you migrate data over a dedicated connection or VPN.
-
You can select up to 200 agents for a specified channel.
-
Step 3: Create a destination address
-
In the left-side navigation pane, go to Data Online Migration > Address Management and click Create Address.
-
In the Create Address panel, configure the following parameters and click OK.
-
The name must be 3 to 63 characters in length.
-
The name is case-sensitive and can contain only lowercase letters, digits, hyphens (-), and underscores (_).
-
The name cannot start with a hyphen (-) or an underscore (_).
-
If the destination bucket is in your current Alibaba Cloud account:
-
Authorize a role in the migration console (recommended).
-
Manual authorization (alternative).
-
-
If the destination bucket is in a different Alibaba Cloud account:
-
For example, if the source prefix is
example/src/and it contains a file named example.jpg, and you set the destination prefix toexample/dest/, the full path of the file after migration isexample/dest/example.jpg. -
If you leave this field empty, data is migrated to the root directory of the destination bucket.
-
This parameter is required only when you migrate data from self-managed storage to the cloud, or when you migrate data over a dedicated connection or VPN.
-
An agent is required when the destination is a local file system (LocalFs) or when migrating over a dedicated connection for services like Finance Cloud or Apsara Stack.
-
This parameter is required only when you migrate data from self-managed storage to the cloud, or when you migrate data over a dedicated connection or VPN.
-
You can select up to 200 agents for a specified channel.
|
Parameter |
Required |
Description |
|
Name |
Yes |
Enter a name for the destination address. The name must: |
|
Type |
Yes |
Select Alibaba OSS. |
|
Custom domain name |
No |
Specify a custom domain name for the destination. |
|
Region |
Yes |
Select the destination region, such as China (Hangzhou). |
|
RAM role |
Yes |
|
|
Bucket |
Yes |
Enter the destination bucket name in your current account. |
|
Prefix |
No |
Specify a prefix to migrate data to a specific directory. The prefix must not start with / but must end with /, such as |
|
Tunnel |
No |
Select the channel that you want to use. Important
|
|
Agent |
No |
Select one or more agents. Important
|
Step 4: Create a migration task
Concurrent migration task limit: 10 for regions in the Chinese mainland and China (Hong Kong), 5 for all other regions.
-
In the navigation pane on the left, choose Data Online Migration > Migration Tasks, and then click Create Task.
-
On the Select Address page, configure the following parameters, and then click Next.
Parameter
Required
Description
Name
Yes
Enter a name for the migration task. The name must meet the following requirements:
-
The name must be 3 to 63 characters in length.
-
The name is case-sensitive and can contain only lowercase letters, digits, hyphens (-), and underscores (_).
-
The name cannot start with a hyphen (-) or an underscore (_).
Source Address
Yes
Select a previously created source address.
Destination Address
Yes
Select a previously created destination address.
-
-
On the Task Configurations page, configure the following parameters.
Parameter
Required
Description
Basic Settings
Migration Bandwidth
No
Migration bandwidth setting.
-
Default: Uses the maximum available bandwidth. The actual migration speed depends on the file size and the number of files.
-
Specify an upper limit: Specify a bandwidth cap as prompted on the console.
Important-
Actual migration bandwidth depends on the data source, file sizes, network conditions, and destination-side throttling. The bandwidth may not reach the specified upper limit.
-
Evaluate your data source, destination, workloads, and network bandwidth before setting this value. Improper throttling may affect your business.
Files Migrated Per Second
No
Files migrated per second.
-
Default: The default number of files migrated per second.
-
Specify an upper limit: Specify an upper limit as prompted on the console.
Important-
Actual migration rate depends on the data source, file sizes, network conditions, and destination-side throttling. The rate may not reach the specified upper limit.
-
Evaluate your data source, destination, workloads, and network bandwidth before setting this value. Improper throttling may affect your business.
Overwrite Mode
Yes
How to handle files with the same name at the destination.
-
Do not overwrite: Skips migrating the file.
-
Overwrite All: The source file overwrites the destination file.
-
Overwrite based on the last modification time:
-
The destination file is overwritten if the source file's last modified time is later.
-
If the last modified times are the same, the destination file is overwritten if its Size or Content-Type differs.
-
-
The Overwrite based on the last modification time policy does not guarantee that an older file will not overwrite a newer one.
-
If you select Overwrite based on the last modification time, ensure your source data can return metadata such as last modified time, Size, and Content-Type. Otherwise, the overwrite policy may not work as expected and can lead to unintended migration results.
-
If you select Do not overwrite or Overwrite based on last modified time, the service requests object metadata from both the source and destination to perform the comparison. This incurs request fees on both the source and destination.
WarningAuditing
Migration Report
Yes
Migration report delivery method.
-
Do not push (Default): The migration report is not pushed to the destination bucket.
-
Push: Pushes the migration report to the destination bucket. For the detailed path, see Next steps.
Important-
Pushing the migration report consumes storage space in the destination bucket.
-
Migration report delivery may be delayed.
-
Each task execution record has a unique ID. The migration report is pushed only once per record. Be cautious when deleting it.
Migration Logs
Yes
Migration log delivery method.
-
Do not push (Default): The migration log is not pushed.
-
Push: Pushes the migration log to Log Service. You can view the migration log in Log Service.
-
Push only file error logs.: Pushes only logs for file migration errors to Log Service. You can view these error logs in Log Service.
If you select Push or Push only file error logs., Online Migration Service creates a project in Log Service named aliyun-oss-import-log-Alibaba Cloud account ID-current region. For example: aliyun-oss-import-log-137918634953****-cn-hangzhou.
ImportantEnsure that you complete the following actions before selecting Push or Push only file error logs.. Otherwise, the migration task may fail.
-
You have activated Log Service.
-
You have granted the required permissions on the Authorize page.
Authorize
No
This option appears only when Migration Logs is set to Push or Push only file error logs..
Click Authorize to go to the Cloud Resource Access Authorization page. The system creates a role named AliyunOSSImportSlsAuditRole and grants permissions to the role. Click Agree to Authorization to complete the authorization.
Filters
File Name
No
A filter for filenames.
You can use Include and Exclude filtering rules based on the RE2 library regular expression syntax (only a subset of expressions is supported). Examples:
-
.*\.jpg$ matches all files ending with .jpg.
-
^file.* matches all files in the root directory whose names start with file.
If the source address is configured with a prefix, for example data/to/oss/, you must use ^data/to/oss/file.* to match all files under that prefix whose names start with file.
-
.*/picture/.* matches any file within a subdirectory named picture at any level.
Important-
If you configure include rules, any file that matches at least one rule is migrated.
For example, consider two files: picture.jpg and picture.png. If you add an include rule .*\.jpg$, only picture.jpg is migrated. If you also add an include rule .*\.png$, both files are migrated.
-
If you configure exclude rules, any file that matches at least one rule is not migrated.
For example, consider two files: picture.jpg and picture.png. If you add an exclude rule .*\.jpg$, only picture.png is migrated. If you also add an exclude rule .*\.png$, neither file is migrated.
-
Exclude rules take precedence over include rules. A file is not migrated if it matches both an exclude rule and an include rule.
For example, consider the file file.txt. If you configure an exclude rule .*\.txt$ and an include rule file.*, the file file.txt is not migrated.
File Modification Time
No
A filter based on the last modified time of files.
Specify a time range to migrate only files modified within that range:
-
If you specify only a start time (for example, January 1, 2019) and no end time, only files last modified on or after January 1, 2019 are migrated.
-
If you specify only an end time (for example, January 1, 2022) and no start time, only files last modified on or before January 1, 2022 are migrated.
-
If you specify a start time of January 1, 2019 and an end time of January 1, 2022, only files last modified on or after January 1, 2019 and on or before January 1, 2022 are migrated.
Migration Settings
Retain file last modified time
Yes
Whether to preserve the last modified time of source files.
-
Retain (Default): The last modified time of a source file is preserved on the destination object.
-
Do not retain: The last modified time is not preserved.
Convert appendable objects to Normal or Multipart
No
Whether to convert Appendable objects to Normal or Multipart objects.
-
Yes: Source Appendable objects are converted to Normal or Multipart objects at the destination.
-
No: No conversion is performed. Source Appendable objects remain as Appendable objects at the destination.
Important-
This option is displayed and can be configured only if your account is on the allowlist.
-
This option is supported only for OSS destination tasks.
Specify storage class for destination objects
No
Whether to set a storage class for destination objects.
-
Specify: Migrated objects are set to the storage class that you specify. The following storage classes are available:
-
Standard
-
Infrequent Access
-
Archive
-
Cold Archive
-
Deep Cold Archive
-
-
Do not specify (Default): The storage class is not changed. Migrated objects use the default storage class of the destination bucket.
Important-
This option is displayed and can be configured only if your account is on the allowlist.
-
This option is supported only for tasks where the destination is OSS.
Task scheduling
Execution time
No
Important-
If a task is still running when its next execution is scheduled, the current run will complete, the scheduled run is skipped, and the task will execute at the next interval.
-
Concurrent migration task limit: Up to 10 in Chinese mainland and China (Hong Kong) regions, and up to 5 in other regions.
Specify when to run the migration task.
-
Immediately: Runs the task immediately.
-
At the Specified Time: Sets a daily time window for the task to run. By default, the task starts at the specified start time and pauses at the specified stop time.
-
Periodic Scheduling: Runs the task based on a specified frequency and number of executions.
-
Execution Frequency: Supported frequencies are Hourly, Daily, Weekly, Specific days of the week, and Custom. Execution frequency.
-
Number of Executions: Specifies the number of times the task runs. If not set, the task runs once by default. For the maximum number of executions, refer to the prompt on the console.
-
ImportantYou can manually start and pause the task at any time, regardless of the scheduled execution time.
-
-
Read the Online Migration Service Agreement, select the checkbox for I have understood and confirmed the compliance commitment statement, and I acknowledge my obligation and responsibility to verify the consistency of migrated data after the migration task is completed, and then click Next.
-
Review the configuration information. If it is correct, click OK and wait for the migration task to run.
Execution frequency
Execution frequency | Description | Example |
Hourly | Run the task once every hour. You can use this option with the maximum number of runs. | The current time is 8:05. The frequency is set to hourly with a maximum of 3 runs. The first run starts at the next hour, 9:00.
|
Daily | Run the task once a day. You must specify an hour (0-23) for the task to start. You can use this option with the maximum number of runs. | The current time is 8:05. The task is scheduled to run daily at 10:00, with a maximum of 5 runs. The first run starts at 10:00 today.
|
Weekly | Run the task once a week. You must specify a day of the week and an hour (0-23) for the task to start. You can use this option with the maximum number of runs. | The current time is Monday, 8:05. The task is scheduled to run every Monday at 10:00, with a maximum of 10 runs. The first run starts at 10:00 today.
|
Specific days of the week | Run the task on selected days of the week. You must specify the days and an hour (0-23) for the task to start. | The current time is Wednesday, 8:05. The task is scheduled to run on Mondays, Wednesdays, and Fridays at 10:00. The first run starts at 10:00 today.
|
Custom | Use a cron expression to define a custom schedule for the task start time. | Note A cron expression consists of six space-separated fields that define the execution schedule: second, minute, hour, day of the month, month, and day of the week. The minimum interval is 1 hour. The following cron expression examples are for reference only. For more options, use a cron expression generator.
|
Step 5: Validate data
Migration Service transfers data but does not guarantee consistency or integrity. After migration completes, validate all migrated data to ensure consistency between source and destination.
After the migration task is complete, you must verify the migrated data at the destination. You are solely responsible for any data loss and all associated consequences if you delete the source data before confirming the integrity of the destination data.