Datasets
Prerequisites
To use the dataset feature, you must contact the Dataphin team to enable the unstructured data feature for your account.
Limitations
You can create datasets only in a Basic project.
Permissions
In addition to project administrators and developers, project members with the Data Processing - Edit permission can create, edit, delete, and move datasets, acquire locks, and create new dataset versions. Members with the Data Processing - Execute permission can submit datasets within the project.
Create a dataset
In the top navigation bar of the Dataphin homepage, choose Develop > Data Development.
In the top navigation bar of the Development page, select a Project.
In the left-side navigation pane, choose Data Processing > Datasets. In the Datasets list, click the
 icon to open the New dataset tab and configure the following parameters.
Parameter
Description
Basic information
Name
Enter a name for the dataset. The name can contain any characters and must not exceed 256 characters.
Dataset type
Select a dataset type. Options are File dataset, Table dataset, or Hybrid dataset. The default type is File dataset.
If you select File dataset or Hybrid dataset, you must specify the object storage. Currently, only OSS-type data sources are supported.
If you select Table dataset or Hybrid dataset, you must configure a metadata table to describe the dataset. The metadata is stored in a PostgreSQL data source by default.
Content type
Select the content type. Options are Text, Image, Audio, and Video.
Directory
Select the directory where you want to store the dataset.
If a directory does not exist, you can create one. To create one:
Above the list of compute tasks on the left, click the
 icon to open the New folder dialog box.
In the New folder dialog box, enter a folder Name and, if necessary, Select Directory to specify a location.
Click OK.
Owner
Select an owner for the dataset. The options include all members in the current tenant. The default owner is the current user.
Subject domain (Optional)
Select the subject domain for the dataset. The options include all subject domains within the project's workspace.
Description (Optional)
Enter a description for the dataset. The description can contain any characters and must not exceed 2,000 characters.
Version configuration
Version
The version of the dataset. When you create a dataset, the default version is V1.
Description (Optional)
Enter a description for this version of the dataset. The description can contain any characters and must not exceed 2,000 characters.
File storage
NoteYou can configure file storage for a File dataset or a Hybrid dataset.
Data source
Select a data source that matches the object storage type. For example, if the object storage type is OSS, you can select from all OSS data sources (production only) in the current project.
Production path
The directory path in the production data source. This path must be unique.
ImportantIf the data source is scoped to a specific directory within a bucket, you can only select subdirectories within that directory.
Mount path
Enter a mount path. The path can contain letters, digits, underscores (_), and hyphens (-). All paths are prefixed with
/mnt/data/.Metadata storage
NoteYou can configure metadata storage for a Table dataset or a Hybrid dataset.
Data source
Select a data source that matches the metadata storage type. For example, if the metadata storage type is PostgreSQL, you can select from all PostgreSQL data sources (production only) in the current project.
Production database/schema
Select a database or schema from the chosen production data source.
Store to
Choose whether to store the metadata in a New table or an Existing table.
Table name
For a New table: Enter a name for the table. The name can contain only lowercase letters, digits, and underscores (_), must start with a lowercase letter, and must not exceed 64 characters.
For an Existing table: Select a table from the chosen data source and database/schema. You can search for the table by name.
NoteWhen you select an existing table, the system automatically populates the table schema with the fields from that table. You cannot modify the field names, data types, or field descriptions, nor can you set or remove a primary key. You also cannot define the table schema by importing from another table, editing the DDL, or adding fields manually. You can click Reload table schema to refresh the complete table schema.
Table schema
You can define the table schema in one of three ways: Import from table, Edit DDL, or Add field.
Import from table: Click Import from table. In the Add field from table dialog box, select a Schema and a Source table. Then, select one or more fields from the list and click Add.
The Schema drop-down list contains the schemas from the selected data source. If you do not select a schema, the system uses the default schema configured in the data source.
Edit DDL: Click Edit DDL. The Edit DDL dialog box displays the DDL statement for the current fields, which you can then modify.
Add field: Click Add field to add a new, empty row to the table schema, which you must configure manually.
After adding fields, you can configure the Field name, Data type, Primary key status, Is URL status, and Field description for each field.
Field name: Can contain only lowercase letters, digits, and underscores (_). It must start with a lowercase letter and must not exceed 64 characters.
Data type: Options include Text, Numeric, Datetime, boolean, json, vector, and Other.
If the data type is vector, click Vector configuration to configure the model and index for the field.
Embedding model and Output dimension: Select an enabled model of the vector type from Intelligent application management > Model configuration. The available output dimensions depend on the selected model.
Create index: Specifies whether to create an index. The default is Yes. If you select No, you cannot configure the following parameters.
Index type: Select IVFFlat or HNSW.
Similarity type: Select COSINE (cosine), L2 (Euclidean distance), or IP (inner product).
m: Enter the number of neighbors for each layer. The default value is 16. For high-accuracy scenarios, we recommend a value between 24 and 32. This parameter is available only when the index type is HNSW.
ef_construction: The number of nodes to explore during index construction. The default value is 200. For large datasets (1 million or more records), we recommend a value between 300 and 400. This parameter is available only when the index type is HNSW.
lists: The number of inverted lists (clusters). The default is 100. We recommend adjusting this value based on your data size, typically the square root of the number of records. This parameter is available only when the index type is IVFFlat.
Primary key: Only fields of numeric type and text type can be set as the primary key. Only one field in the entire table can be set as the primary key.
Is URL: Only Text type fields can be set as a URL.
Field description (Optional): Enter a description for the field. The description can contain any characters and must not exceed 1,024 characters.
After you finish the configuration, click Submit.
When you submit the dataset, the system automatically performs object and permission checks. You can view the details in the Submission details dialog box.
The object check verifies that the data source, file storage path, and target metadata table all exist. If any of these objects do not exist, the submission fails.
The permission check verifies that you have execute permission for the selected data source. If you do not have the required permission, the submission fails.
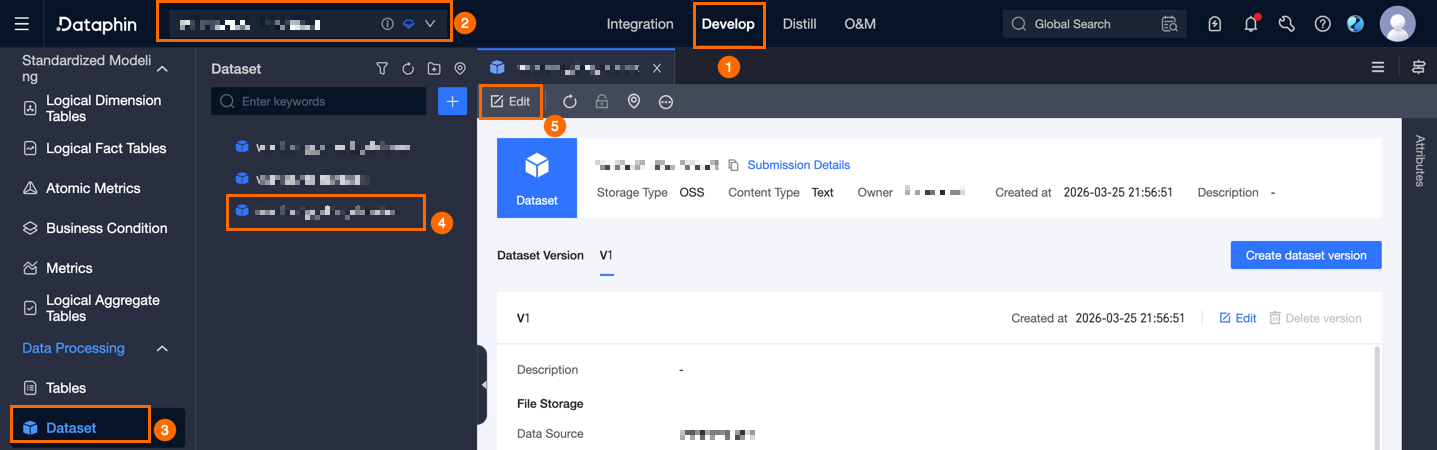
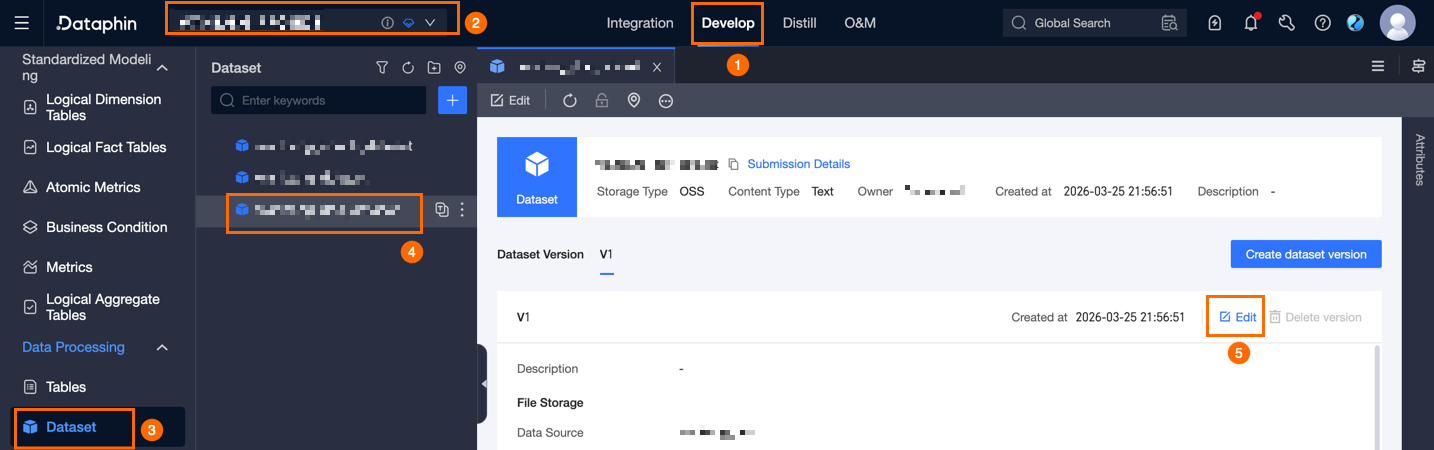
Manage datasets
In the top navigation bar of the Dataphin homepage, choose Develop > Data Development.
In the top navigation bar of the Development page, select a Project.
In the left-side navigation pane, choose Data Processing > Datasets. In the Datasets list, click a dataset to view its details. If the dataset has multiple versions, you can click different version tabs to view the information for each version. The following management operations are also available.
Actions
Description
Edit basic information
Click Edit in the top menu bar of the dataset tab to modify its basic information. You cannot change the dataset type, object storage type, metadata storage type, content type, or owner. For descriptions of other parameters, see Create a dataset.
Edit a dataset version
In the dataset version section of the dataset tab, click Edit to edit the description and mount path for that version.
Create a new dataset version
On the dataset tab, click New dataset version. You can choose to Create from latest version or Create blank version. For parameter descriptions, see Create a dataset.
Delete version
If a dataset has multiple versions, you can delete a version, but you must keep at least one. You cannot delete a version if other objects reference it.