After creating the offline script mode, you can complete data synchronization development by directly writing JSON scripts for data synchronization, providing more flexible capabilities and fine-grained configuration management for data synchronization development. This topic describes how to create an offline script mode.
Prerequisites
Datasource config is complete. You need to configure the data source and target database you need to integrate before configuring the integration task, so that you can read and write to the database during the development and configuration of the offline integration script. For details about the data sources supported by offline pipelines, see and Data Integration supported data sources.
Procedure
Step 1: Create an offline script
On the Dataphin home page, single click the Development -> Data Integration in the top menu bar.
Follow the operation guide below to enter the Create Offline Script dialog box.
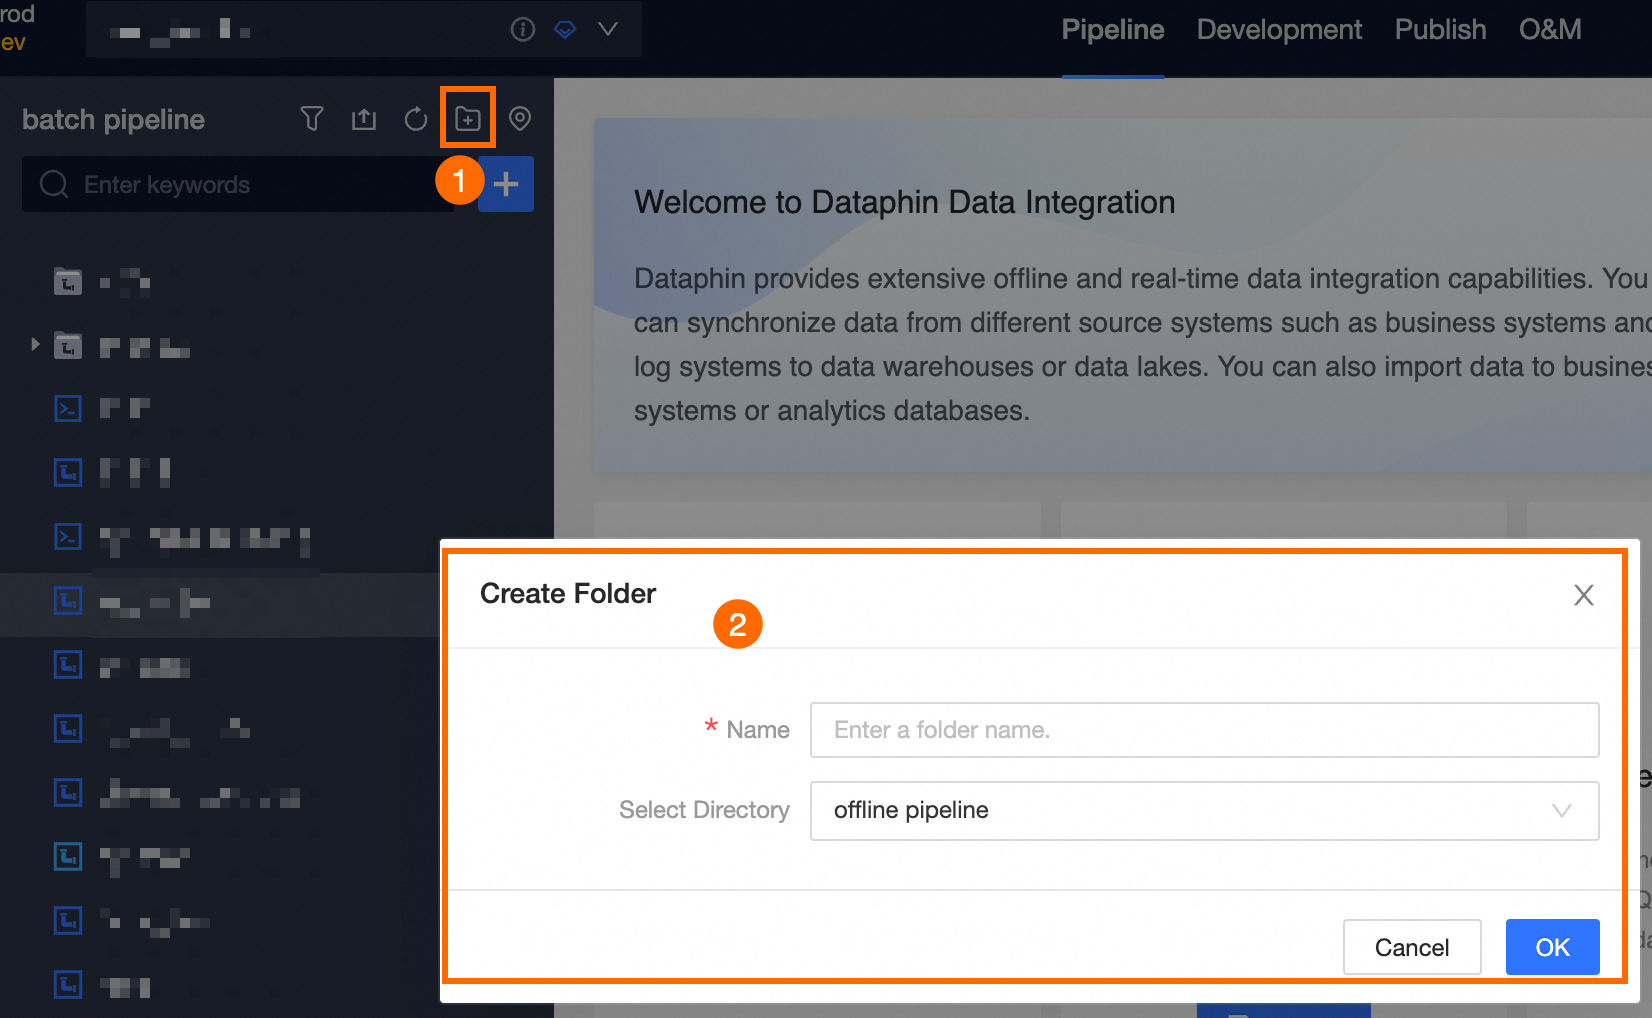
Select project (Dev-Prod mode requires selecting environment) -> single click Batch Pipeline -> single click
 New icon -> single click Offline Pipeline Script.
In the Create Offline Script dialog box, configure parameters.
Area
Parameter
Description
Basic Information
Task Name
Enter the name of the offline script. The naming convention is as follows:
All characters are supported except for vertical line (|), colon (:), question mark (?), angle brackets (<>), asterisk (*), quotation marks ("), and Roman character (v).
Cannot exceed 64 characters.
Schedule Type
Select the schedule type for the offline script. Schedule Type includes:
Recurring Task Node: Refers to tasks that need to be executed periodically.
Manual Task Node: Refers to tasks without dependencies that need to be triggered manually.
Description
Enter a brief description of the offline script, within 1000 characters.
Select Directory
The default selection is the offline pipeline. You can also create a target folder on the offline pipeline page and then select that target folder as the directory for the offline pipeline task.
Datasource Config
Source Type
Select the source data source type.
Datasource
Select the source data source. If there is no corresponding data source, single click New. For subsequent steps, see and Data Integration supported data sources.
NoteOnly data sources with read-through permission can be selected. For details on how to request, see and Request data source permission.
Target Type
Select the type of data source to which data needs to be written through.
Datasource
Select the data source to which data needs to be written through. If there is no corresponding data source, single click New. For subsequent steps, see and Data Integration supported data sources.
NoteOnly data sources with write-through permission can be selected. For details on how to request, see and Request data source permission.
Single click OK.
Step 2: Develop offline script
Offline scripts are developed using code encoding by writing JSON scripts for data synchronization, providing more flexible capabilities and fine-grained configuration. As shown below:
The maximum number of input characters is 500000 characters.

Step 3: Pipeline schedule configuration
Single click the
 button in the development canvas menu bar to configure the schedule.
On the schedule configuration page, configure the Basic Information, Schedule Configuration, Schedule Dependency, Schedule Parameters, Run Configuration of the integration pipeline. The configuration descriptions are as follows:
Basic Information: Through the basic information of the integration pipeline, you can configure the developer, operation owner, and description of the integration pipeline task. For configuration instructions, see and Configure basic information of offline integration pipeline.
Schedule Configuration: Used to define the scheduling method of the integration pipeline task in the production environment. You can configure the schedule type, schedule cycle, schedule logic, and execution of the integration pipeline task through scheduling properties. For configuration instructions, see and Configure offline pipeline schedule.
Schedule Dependency: Used to define the dependency nodes of the integration pipeline task in the scheduling task. Dataphin runs the nodes in the business process in an orderly manner through the configuration results of the scheduling dependencies of each node, ensuring the effective and timely output of business data. For configuration instructions, see and Configure offline pipeline schedule dependency.
Run Configuration: You can configure the task-level run timeout and rerun policy when the task fails for the integration pipeline task according to the business scenario, avoiding resource waste caused by long-term resource occupation of computing tasks while improving the reliability of computing task operation. For configuration instructions, see and Offline pipeline task run configuration.
Single click OK.
Step 4: Save and submit the offline integration task
Single click the
 icon at the top of the canvas to save the pipeline task.
Single click the
icon at the top of the canvas, and in the Submit Remarks dialog box, fill in the remarks information, and then single click OK And Submit.When submitting, Dataphin will perform lineage analysis and submission checks for the task. For more information, see and Integration task submission instructions.
What to do next
If your development mode is Dev-Prod mode, you need to publish the task. For more information, see Manage published tasks.
If your development mode is Basic mode, the task can participate in the production environment scheduling after successful submission. You can go to the Operation Center to view the tasks you have published. For more information, see .