Create a mirror table
Mirror tables unify streaming and offline tables in Flink computing tasks, letting you reference a single table instead of managing both separately.
Background information
When a Flink task operates in both real-time and offline modes, you must maintain separate streaming and offline tables. A mirror table maps to both, so you only need to reference the mirror table in your computing task. The system then automatically generates the corresponding real-time and offline instances.
Step 1: Create a mirror table
-
Navigate to the Dataphin home page and select Development from the top menu bar.
-
Use the operation guide shown below to access the Streaming Table dialog box.

-
In the Create Table dialog box, set the parameters as follows:
Parameter
Description
Table Type
Choose Mirror Table as the type.
Table Name
The name must meet these criteria:
-
Use English letters, digits, and underscores (_).
-
The name must not begin with a digit.
-
Must not exceed 64 characters.
Storage Directory
The default directory is Table Management. Alternatively, create and select a target folder on the Tables page as the directory for the mirror table.
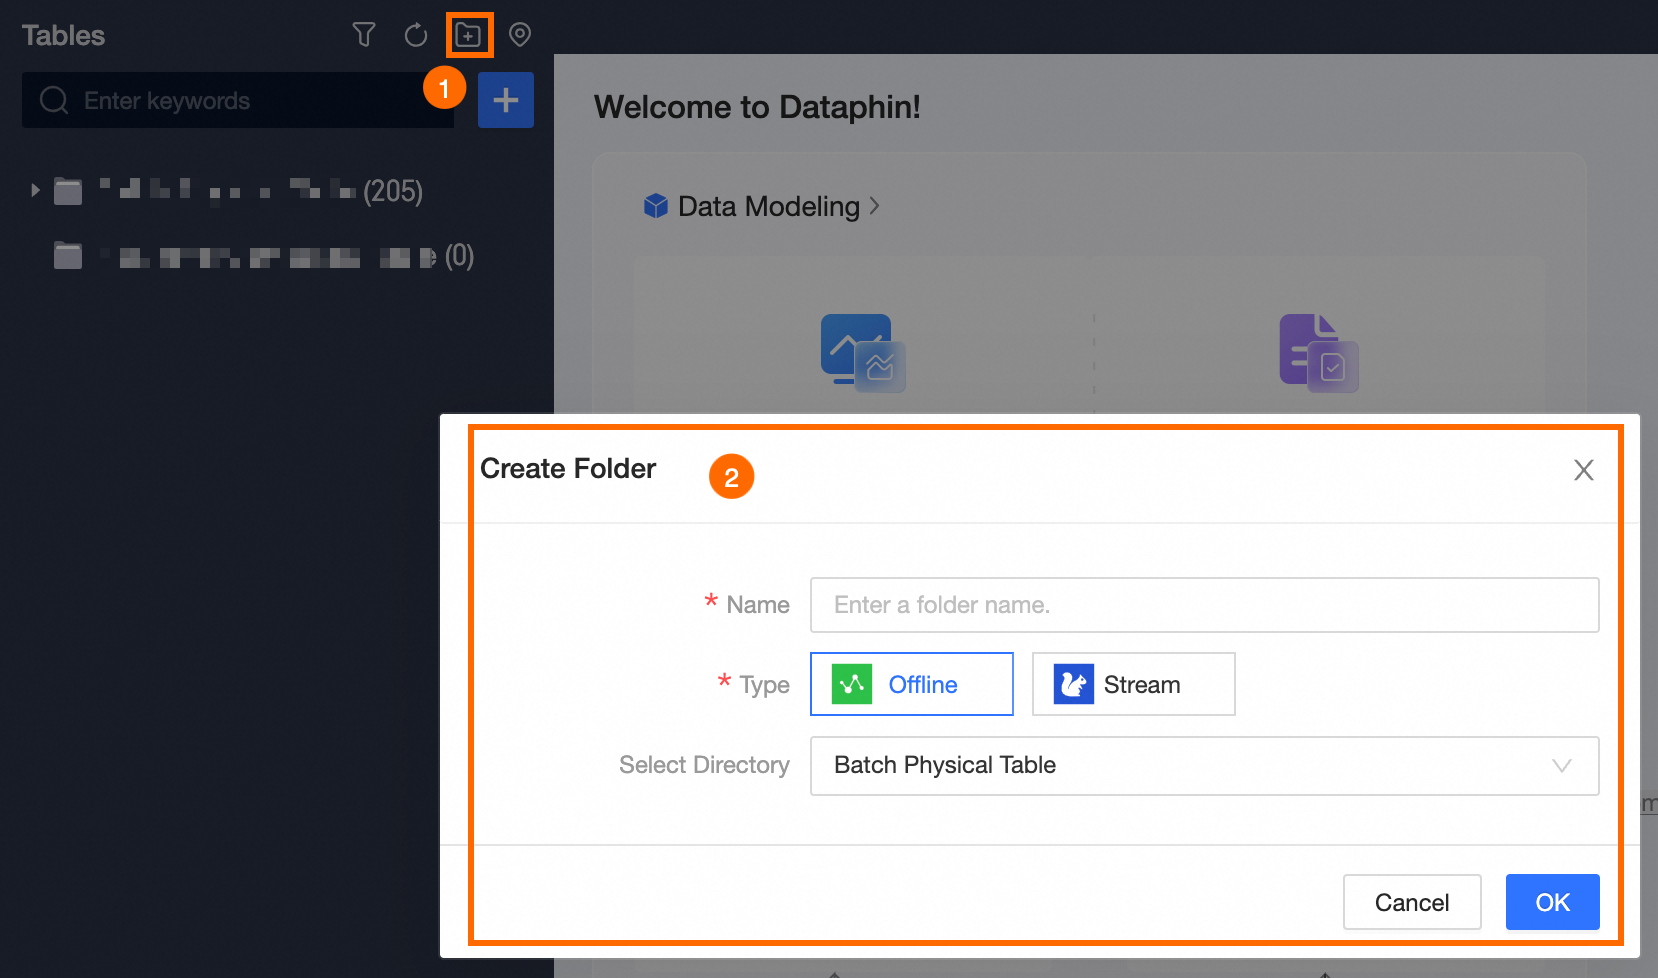
Description
Enter a description of up to 1000 characters.
-
-
Once configured, click OK.
-
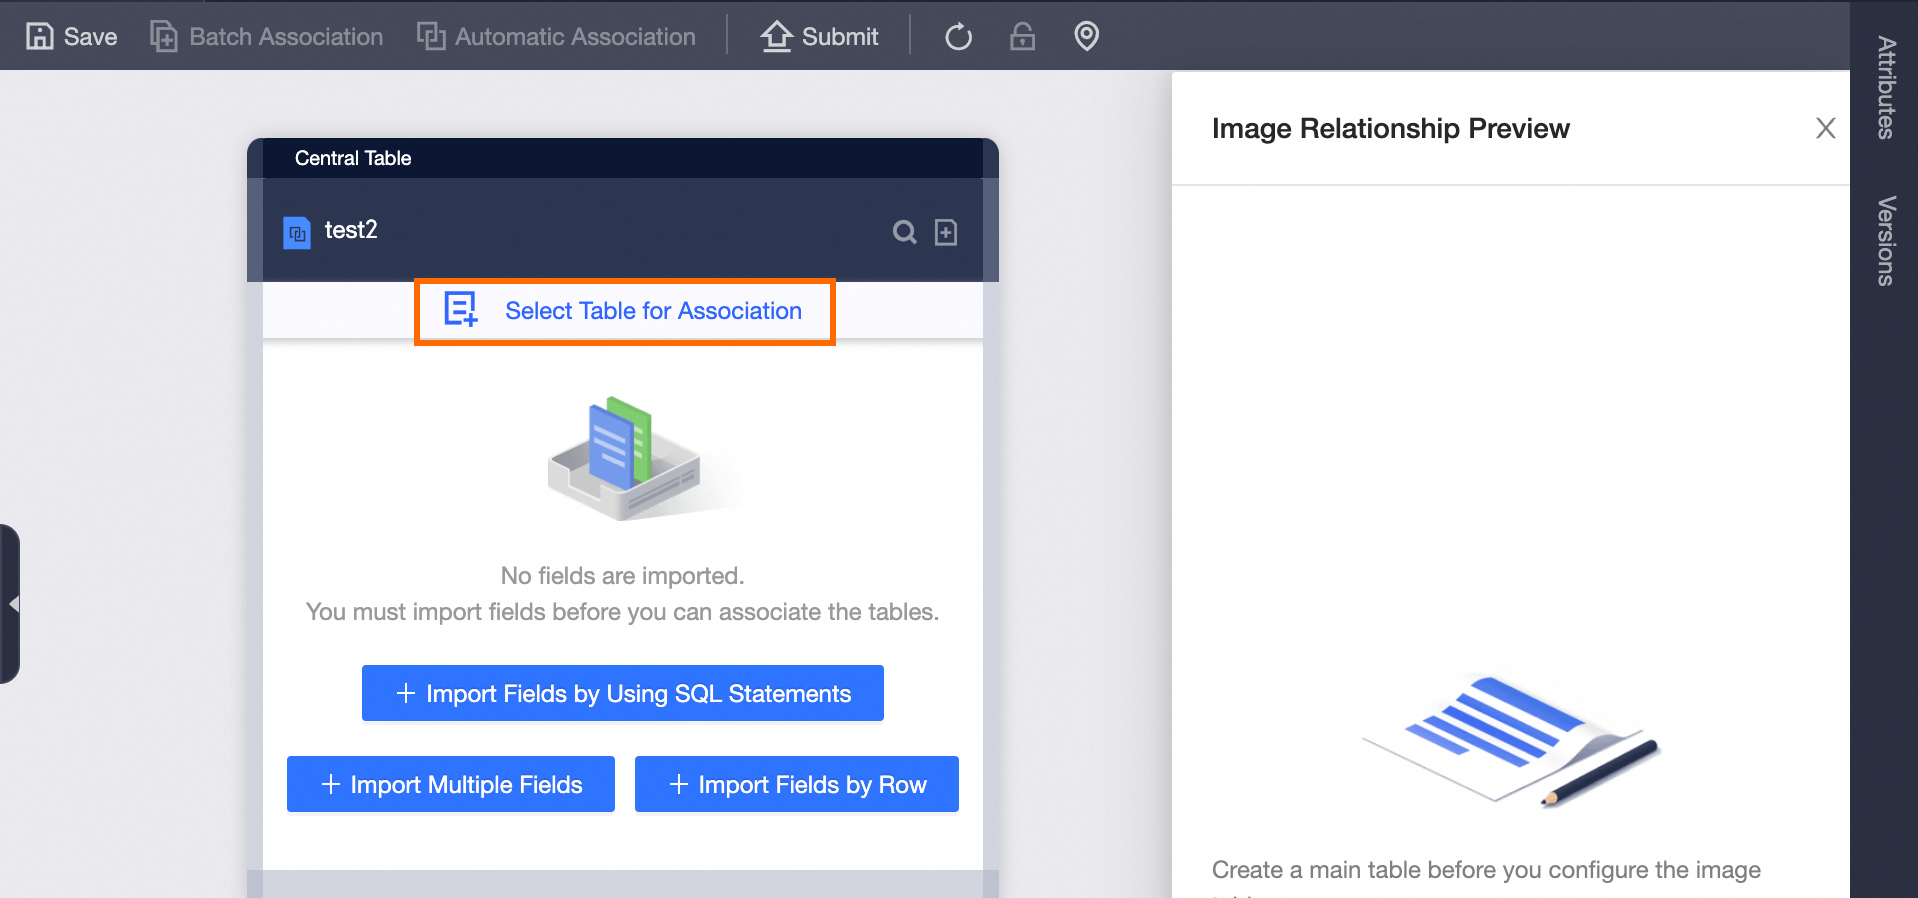
Proceed to the primary table development page and add fields.
You can add primary table fields in several ways:
-
SQL statement import fields:
-
Select SQL Import Fields.
-
In the SQL Import dialog box, click Reference Example to view code samples for importing fields. The following is an example:
create table dwi_pub_hbd_cate_mtr ( rowkey VARCHAR comment 'rowkey', stat_date VARCHAR comment 'stat_date', keymin VARCHAR comment 'keymin', PRIMARY KEY(rowkey) ) -
Confirm by clicking OK.
-
-
Batch import fields:
-
Choose Batch Import.
-
In the Batch Import dialog box, refer to the example and write the batch import code.
rowkey||VARCHAR||rowkey rowkey1||VARCHAR||rowkey1 rowkey2||VARCHAR||rowkey2 stat_date||VARCHAR||stat_date keymin||VARCHAR||keymin -
Click OK to confirm.
-
-
Single-row add fields:
-
Click Single-row Add.
-
In the Single-row Add dialog box, enter the Field Name and Description, and select the Field Type.
-
To finalize, click OK.
-
To add more fields to an existing table, click the
 icon at the top right of the primary table display box and choose the preferred method for adding fields.
 -
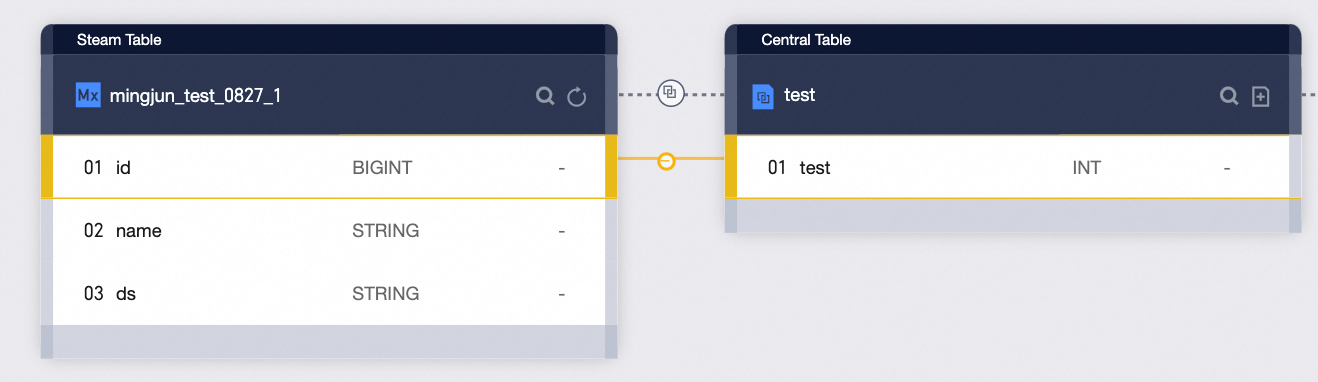
Step 2: Associate streaming tables and offline tables
-
On the primary table development page, select Select Associated Table.
-
In the Create Association dialog box, specify the associated streaming and offline tables.
Associated Table
Parameter
Description
Associated Streaming Table
Select Project
Choose the project for the associated streaming table.
Select Streaming Table
Choose the streaming table to associate.
Associated Offline Table
Select Project
Select the project for the associated offline table.
Select Offline Table
Choose the offline table to associate.
-
Confirm the association by clicking OK.
-
On the mirror table development page, click the
 icon on the connection line. In the Replace Association dialog box, update the associated streaming and offline tables.Note
After creating the file, click the
icon on the connection line. In the Replace Association dialog box, click OK to remove the associated replacement association.Associated Table
Parameter
Description
Associated Streaming Table
Select Project
Select the project for the associated streaming table.
Select Streaming Table
Select the streaming table
Associated Offline Table
Select Project
Select the project for the associated offline table.
Select Offline Table
Select the offline table
-
To finalize, click OK.
-
Next, associate fields.
You can associate fields in the following ways:
-
Manual association:
Select the corresponding fields in the streaming and offline tables, then click the related fields in the primary table to create associations, indicated by connecting lines.
To delete an association, click the
 on the connection line and in the Delete Field Association dialog box, select OK.
 -
Automatic association:
Click Automatic Association at the top of the page. The system automatically links fields with matching names across the mirror, streaming, and offline tables.
Existing associations will be overwritten by the automatic process.
-
Batch association:
-
Click Batch Association at the top of the page.
-
In the Batch Association dialog box, refer to the Reference Example and write the field association code.
Mirror Table Field, Streaming Table Field, Offline Table Field Mirror Table Field, Streaming Table Field, Offline Table Field Mirror Table Field, Streaming Table Field, Offline Table Field -
Confirm by clicking OK.
-
-
Step 3: Preview mirror relationships
The Mirror Relationship Preview panel on the right side of the page shows the mapping between streaming tables, offline tables, and mirror tables.
If the Mirror Relationship Preview panel is closed, reopen it by clicking the ![]() icon at the top right of the page.
icon at the top right of the page.
Step 4: Submit or publish the mirror table
-
Save the mirror table by clicking the
 icon at the top of the mirror table development page.
 -
To proceed, click the
 icon at the top of the page.
 -
In the Submit Remarks dialog box, enter the necessary remarks.
-
Complete the submission by clicking OK And Submit.
-
(Optional)
Publish the mirror table to the production environment if required.
Whether you need to publish depends on the project's development mode:
-
In Basic mode, a submitted mirror table is automatically deployed to the production environment.
-
In Dev-Prod mode, you must publish the mirror table to deploy it to the production environment.
-