X-Application Creation
X-Application Creation generates applications from natural language descriptions. It uses large models to create requirements documents, retrieve data, and build applications that you can publish and share.
Prerequisites
-
The X-Application Creation and DataService Studio features are required.
-
The X-Application Creation assistant is configured and enabled. Intelligent Application.
Permissions
Super administrators, system administrators, operations administrators, and custom global roles with the X-Application Creation - View permission can use X-Application Creation.
Application creation workflow
The workflow uses a large model and involves three steps:
-
Generate a requirements document: The system generates a requirements document from your description.
-
Select source data: The system retrieves relevant data, APIs, or metrics based on the requirements document.
-
Generate an application: The system generates an application from the retrieved data using a large model.
Procedure
-
In the top menu bar of the Dataphin home page, choose SuperX > X-Application Creation.
-
The X-Application Creation page lets you generate applications from data using a large model.
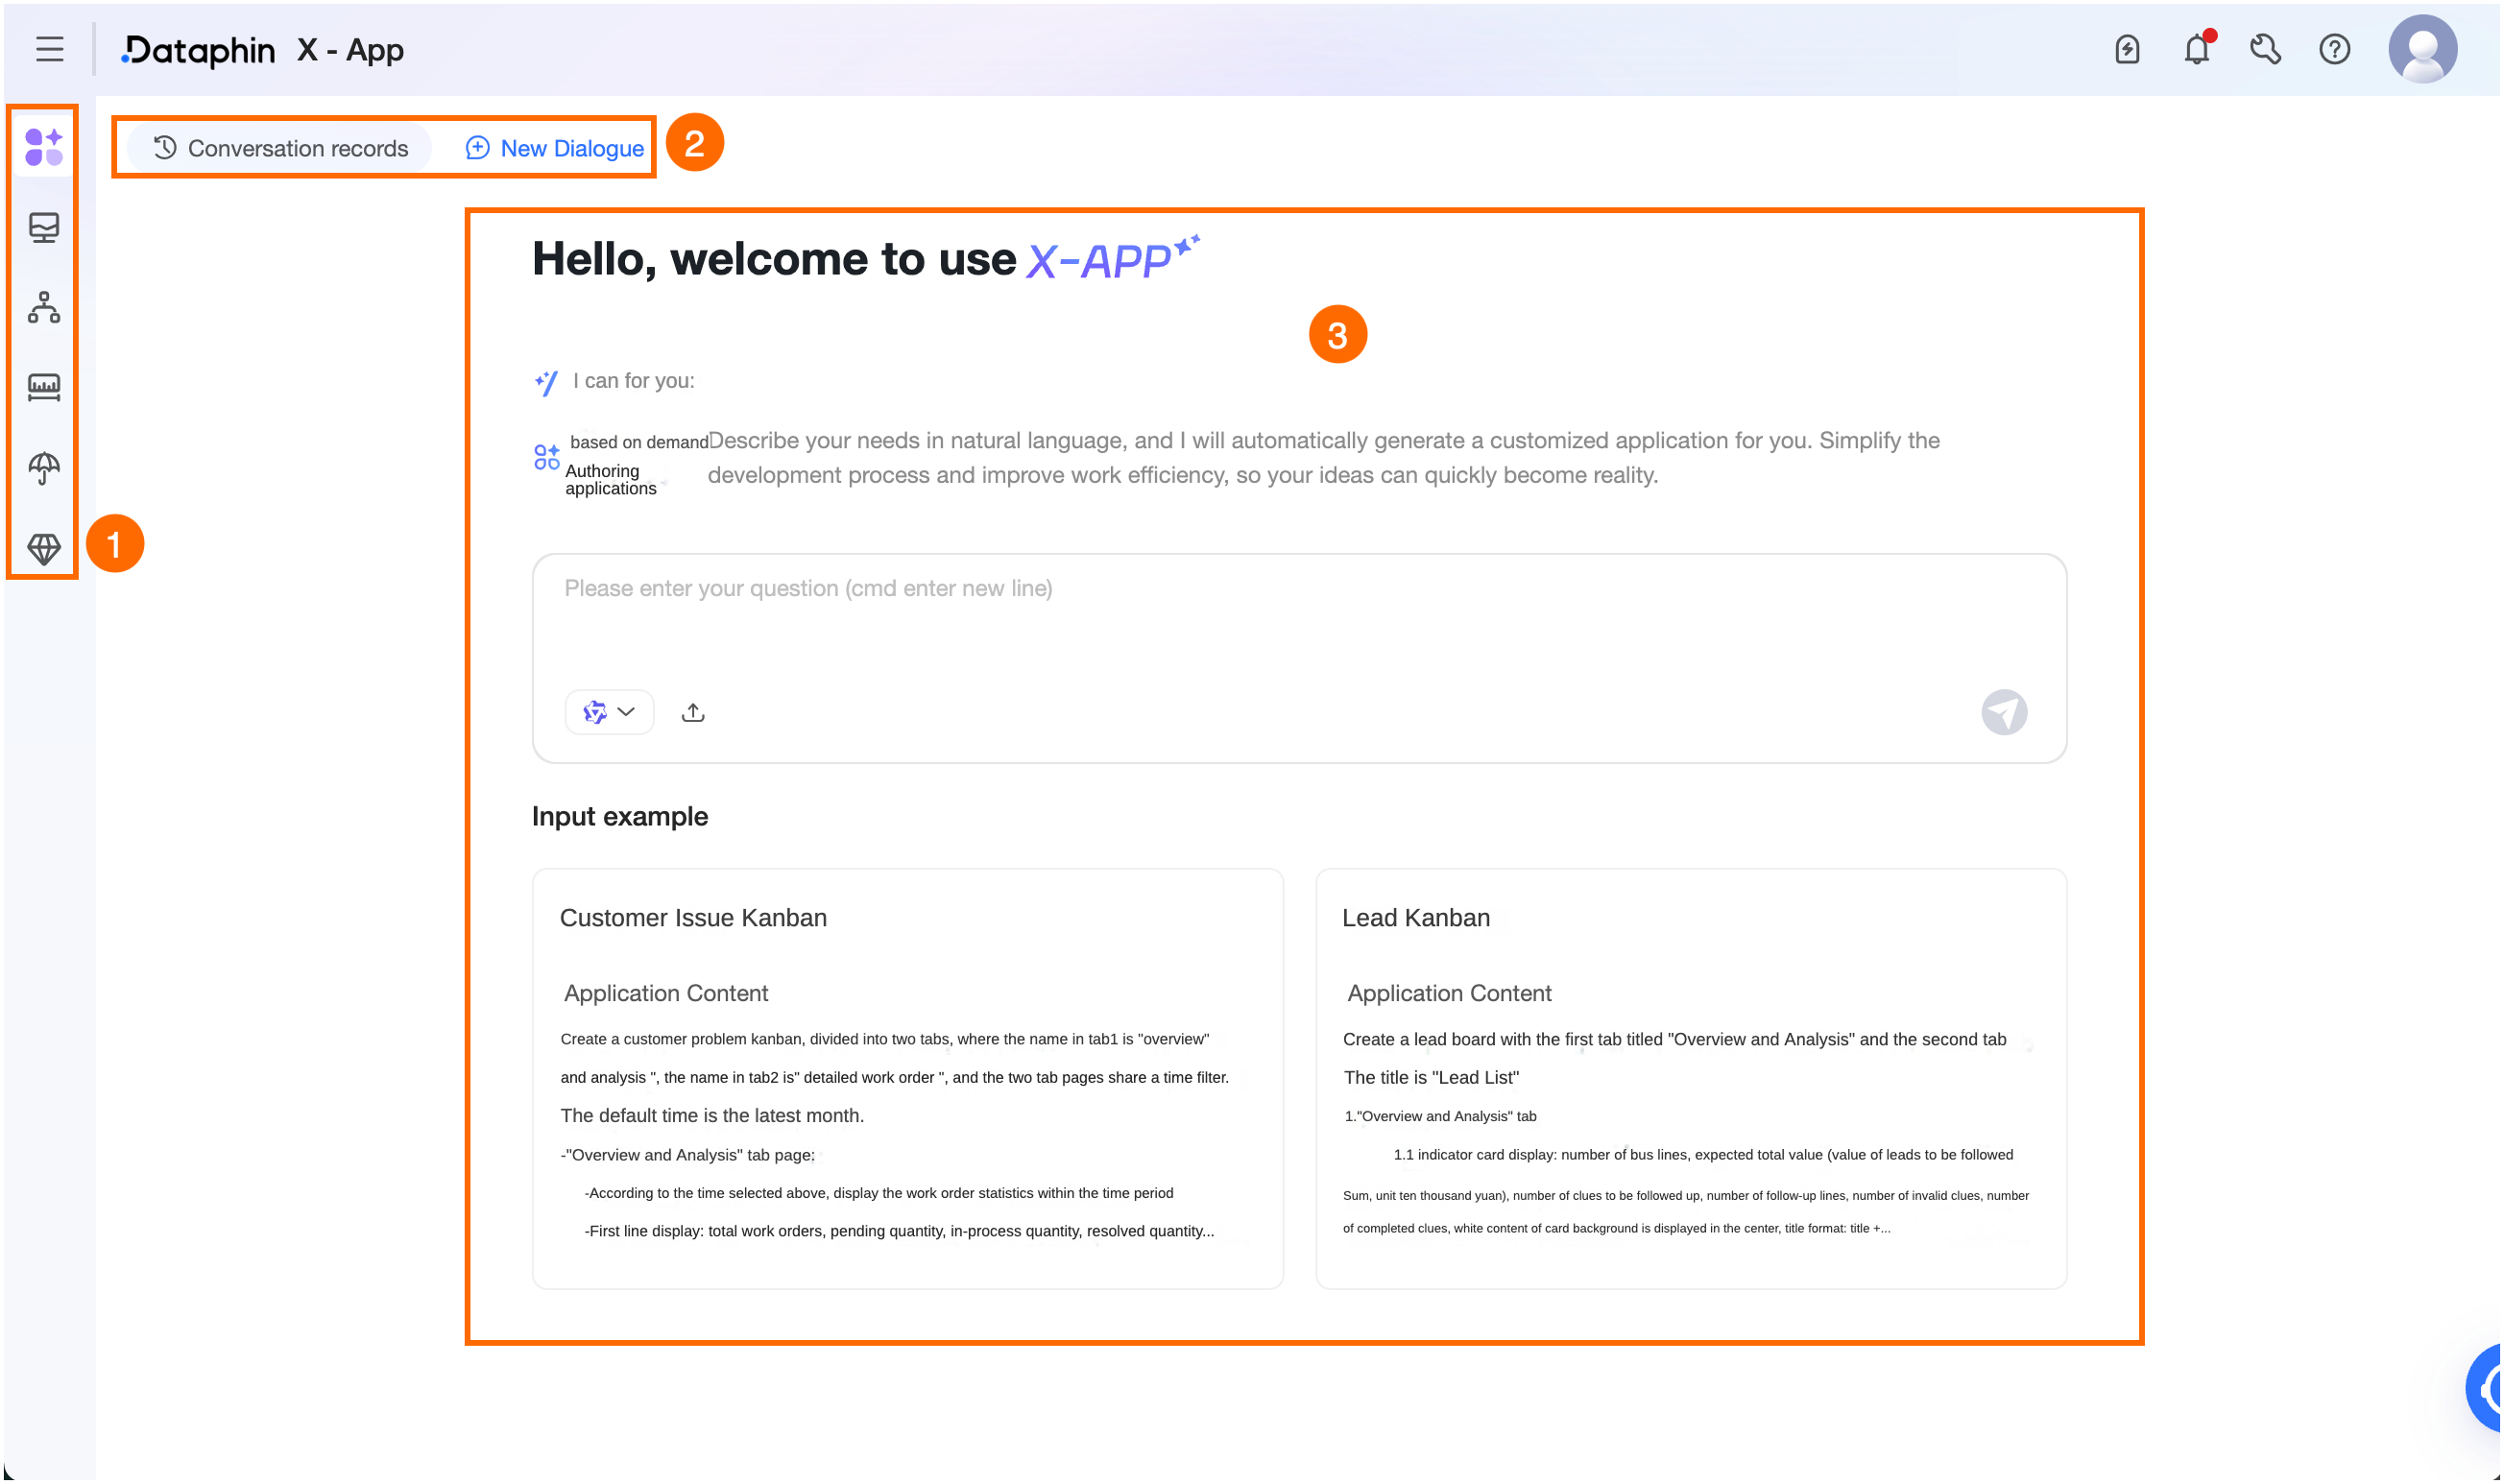
Area
Description
① Intelligent assistant
Switch between enabled intelligent applications that you have access to.
② Task records/Create task
-
Task records: Click Task records in the upper-left corner. In the Task records dialog box, view tasks in different states:
-
Search: Find task records by keyword.
-
Rename: Click the Rename icon next to a task to rename it. Maximum length: 256 characters.
-
Delete: Click the Delete icon next to a task to delete it. This also deletes any unpublished application and cannot be undone.
-
-
Create task: Click Create task to start a new task.
③ Intelligent application generation
The system selects data sources based on your description and uses a large model to generate an application.
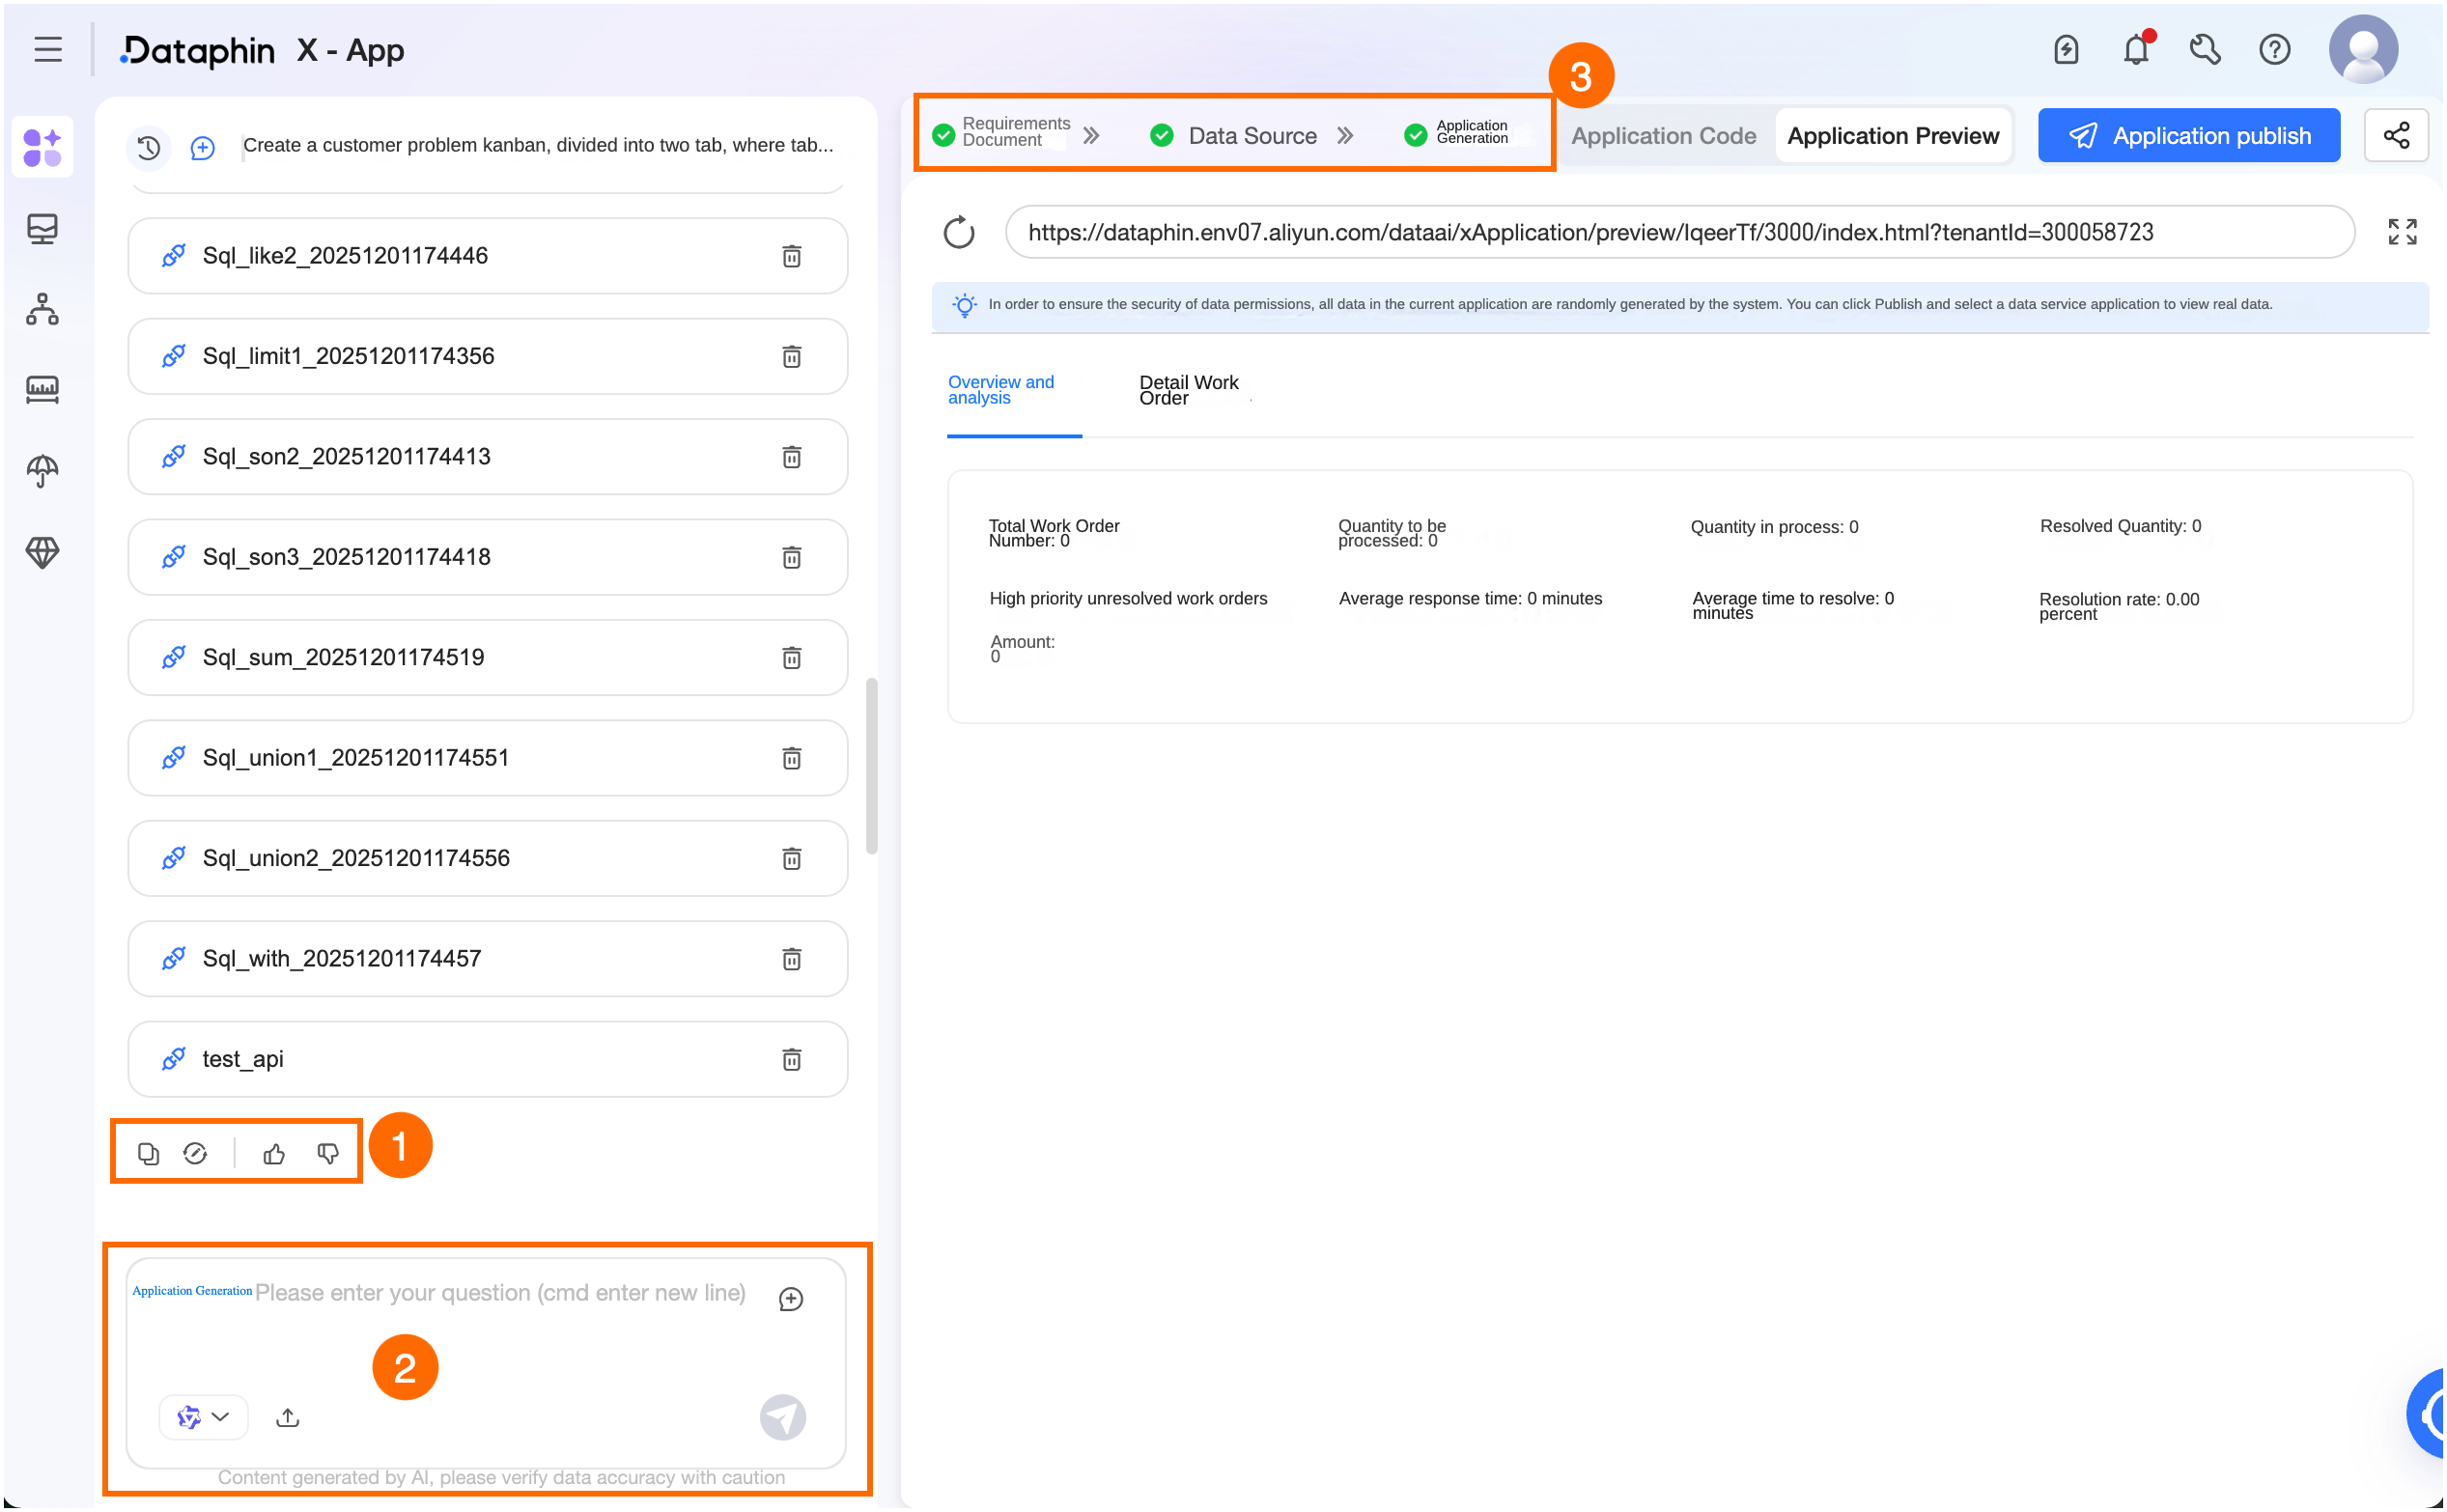
Available operations:
①
-
Copy: Copies the content of the conversation.
-
Regenerate: Generates a new response based on the current conversation history.
-
Use this result for the next step: Proceeds to the next step with the current result.
-
Like/Dislike: Rate the response or undo your rating. Clicking Dislike opens the We value your feedback dialog box where you can enter custom feedback (up to 512 characters) or select built-in options.
View feedback records in SuperX > Intelligent Application Management > Feedback Records.
②
-
Problem description: Enter a question or describe your problem in natural language. Maximum length: 2,000 characters.
-
Switch models: Switch between models configured for the current intelligent assistant.
-
Upload file: Click the Upload file icon to upload local files for context.
Supported formats: .pdf, .txt, .xlsx, and .xls. Up to 10 files per upload, 2 MB total maximum.
-
Send: Press Enter or click the send icon to submit.
-
Stop: Stops the response generation in progress.
③
-
Requirements document: A requirements document is generated from your description. Modify it to fit your scenario, or enter suggestions in the dialog box for the model to revise.
-
Source data: The system retrieves up to 50 relevant APIs based on the requirements document. If no matching APIs are found and you continue, the system generates mock data. You can view the business request parameters, common request parameters, and response parameters of each API.
You can also search for, remove, or add APIs. Asynchronous invocation APIs cannot be added.
-
Application generation: Switch between the application code and application preview views.
-
Application code: Shows the generated code files. Click a file under the File tab to view its code. Available operations:
-
Search: Search for a keyword across all files. Supports fuzzy search, case matching, and whole-word matching.
-
Download: Downloads the generated code files as a .zip package.
-
Create file/Create folder/Delete folder: Hover over a folder, click More, and select to create a file or folder. Enter a name and press Enter. To remove a folder, select Delete folder.
-
Copy path/Copy relative path/Delete file: Hover over a file, click More, and select to copy the path or relative path. To remove a file, select Delete file.
-
-
Application preview: Displays mock data before publishing, or real data from the linked DataService Studio application after publishing.
-
-
Publish application: Click Publish Application. In the Publish Application dialog box, select a DataService Studio application and click Confirm and Publish.
Note-
To create an application, click Create to go to DataService Studio > Application Management > My Applications.
-
The selected DataService Studio application must have usage permissions for all fields of the selected APIs in the Call Authentication list. To request permissions, click Request Permission in the Actions column to go to Management Center > Permission Management > DataService Studio Permissions > Request API Permissions. To request permissions for multiple APIs, click Batch Request at the bottom. In the Batch Request dialog box, select a validity period and enter a reason.
-
-
Share application: After publishing, click Share to copy the application link.
-