Create a 3D city
This topic describes two methods to create a 3D city: using official base data and using spatial construction data.
Create using official base data
Access the DataV console.
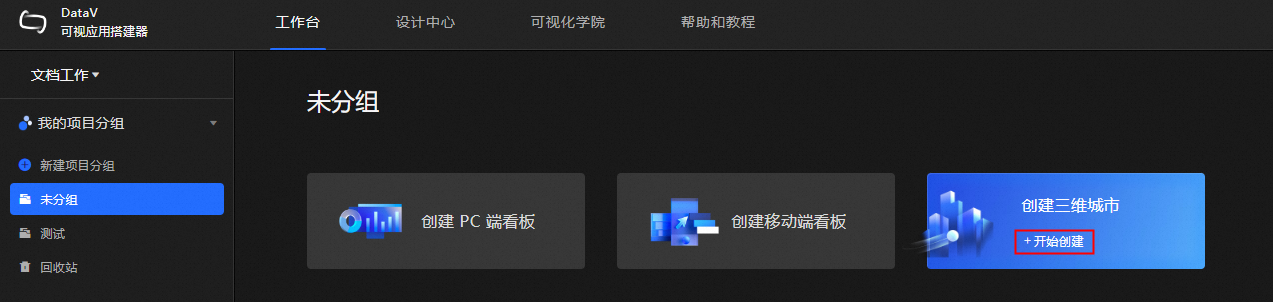
On the Workbench page, move the mouse pointer over Create 3D City and click Start Creating.
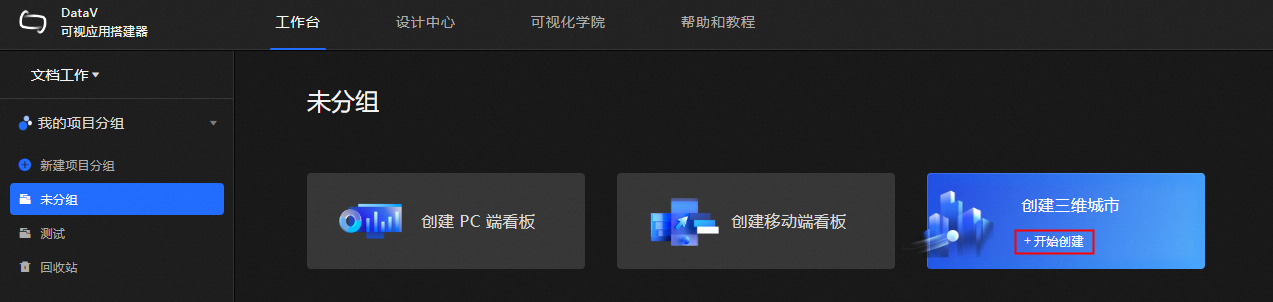
In the Create 3D City dialog box, enter a Name and click OK.
In the Select Creation Method dialog box, move the mouse pointer over Official Base Data and click Create.
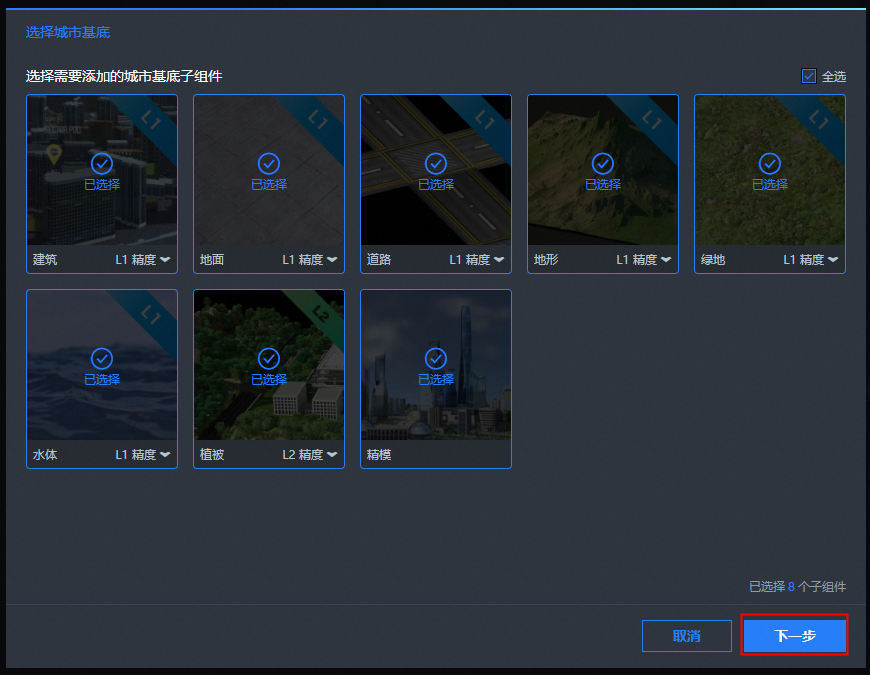
In the Select City Base dialog box, select one or more city base sub-widgets. To select all sub-widgets, you can click Select All in the upper-right corner of the dialog box.
 Note
NoteFor sub-widgets that have a precision option, you can select the required precision level from the Precision option in the lower-right corner. A higher precision level improves data accuracy but increases the data volume. Choose the precision level carefully.
After you select the sub-widgets, click Next in the lower-right corner to open the Select Scope dialog box. To cancel the creation of the 3D city, click Cancel.
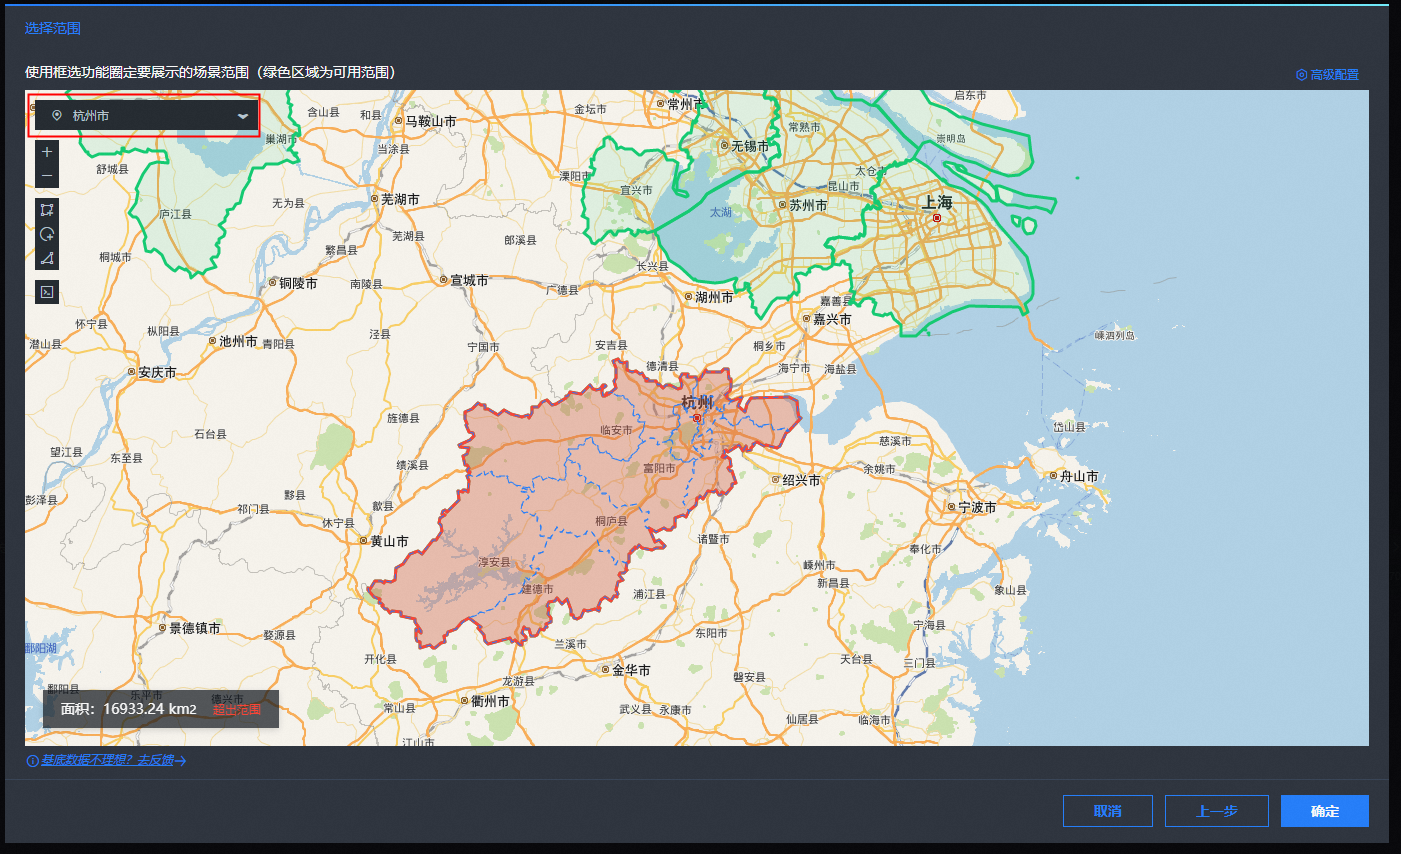
Click the city list in the upper-left corner of the dialog box and select the city that you want to display from the list of available cities. The map then navigates to that city's area.
 Note
NoteAfter the city is located, the green area indicates the selectable range. Non-green areas indicate that no city data is available, and 3D city content cannot be loaded for these areas. If you use the DataV Professional Edition, the area limit within the selectable range on the map is 49 sq km. If you use the DataV Premium Edition, there is no area limit within the selectable range.
Click the
 and
and  icons on the left side of the dialog box or scroll the mouse wheel to zoom in or out of the current map area. You can also press and hold the mouse button and drag the map to move the display area.
After you move and scale the city area map as needed, you can select the scenario scope in one of the following three ways.
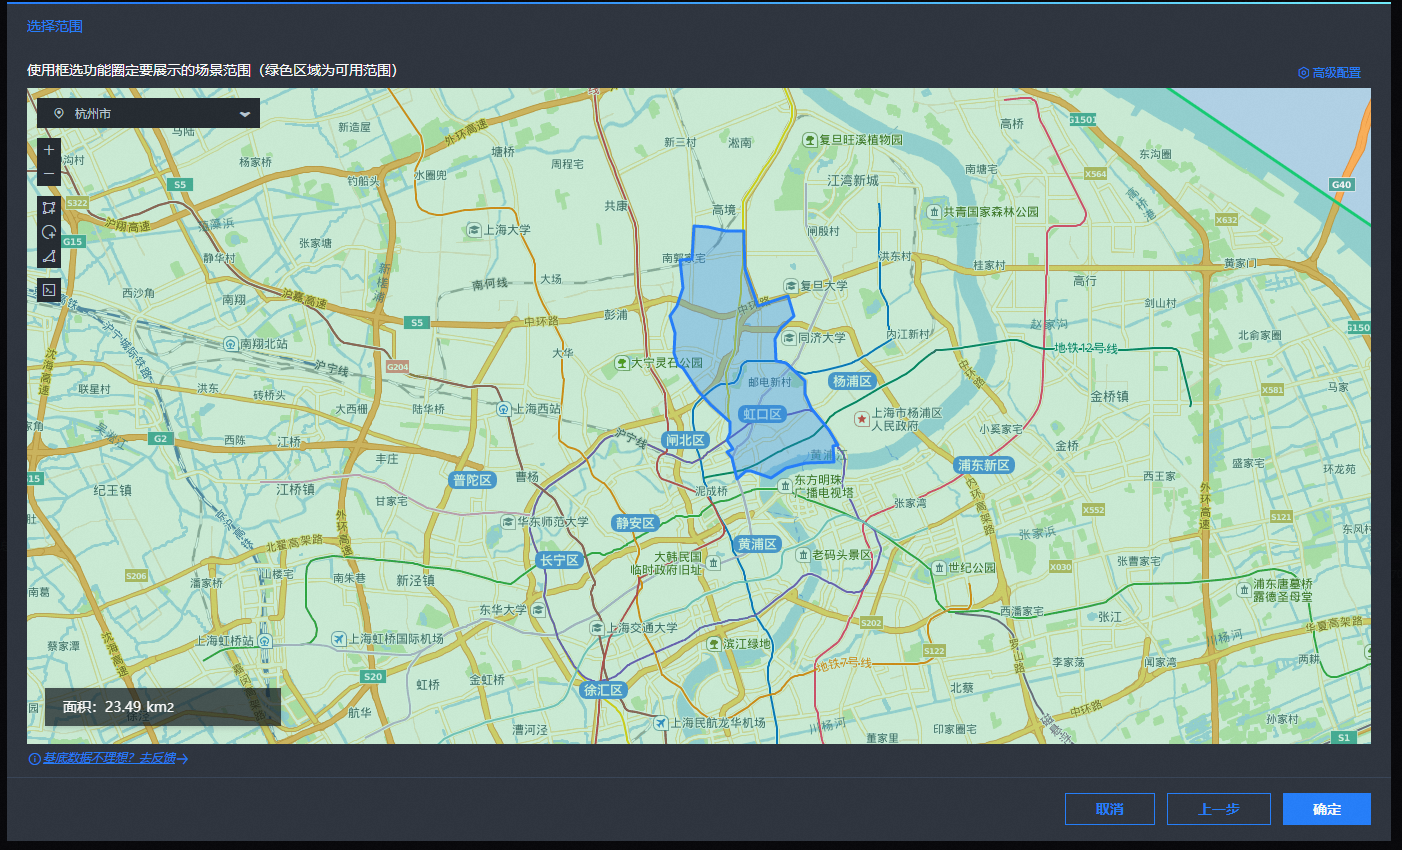
Select scope by clicking an area: Click an area to select it. If you click a prefecture-level administrative region, the map drills down to show the county-level administrative regions. You can then click a county-level administrative region to select it.
NoteA selected area that is displayed in red indicates that the selected area exceeds the version limit. A selected area within the limit is displayed in blue.
Display format for a clicked area
Display style after drilling down to a county-level region

Select scope with a selection tool: Click the Square, Circle, or Polygon tool on the left to select the scenario scope.
NoteTo complete the selection with the polygon tool, you can double-click or click an existing anchor point.
Select scope by entering data: Click
to open the scenario scope data entry box. Enter the GeoJSON format text for the desired scope area. After you click OK, the map displays the GeoJSON scope area you entered.
NoteThe scope area selected by any of these methods is displayed in the Scenario Scope Data text box. You can obtain the currently selected scope data from this text box.
To configure algorithm parameters, click Advanced Configuration in the upper-right corner of the Select Scope dialog box. In the parameter editors for the different city base sub-widgets, modify the algorithm parameters. When you are finished, click OK to save the parameter settings.
Click OK in the lower-right corner of the Select Scope dialog box to create the 3D city builder project and open the project loading page. Click Previous to return to the Select Sub-widget dialog box and change your selection of city base sub-widgets. Click Cancel to return to the Select Creation Method dialog box.
NoteFor more information about operations in the scene editor after you create a 3D city, see Scene editor overview.
 to open the scenario scope data entry box. Enter the GeoJSON format text for the desired scope area. After you click OK, the map displays the GeoJSON scope area you entered.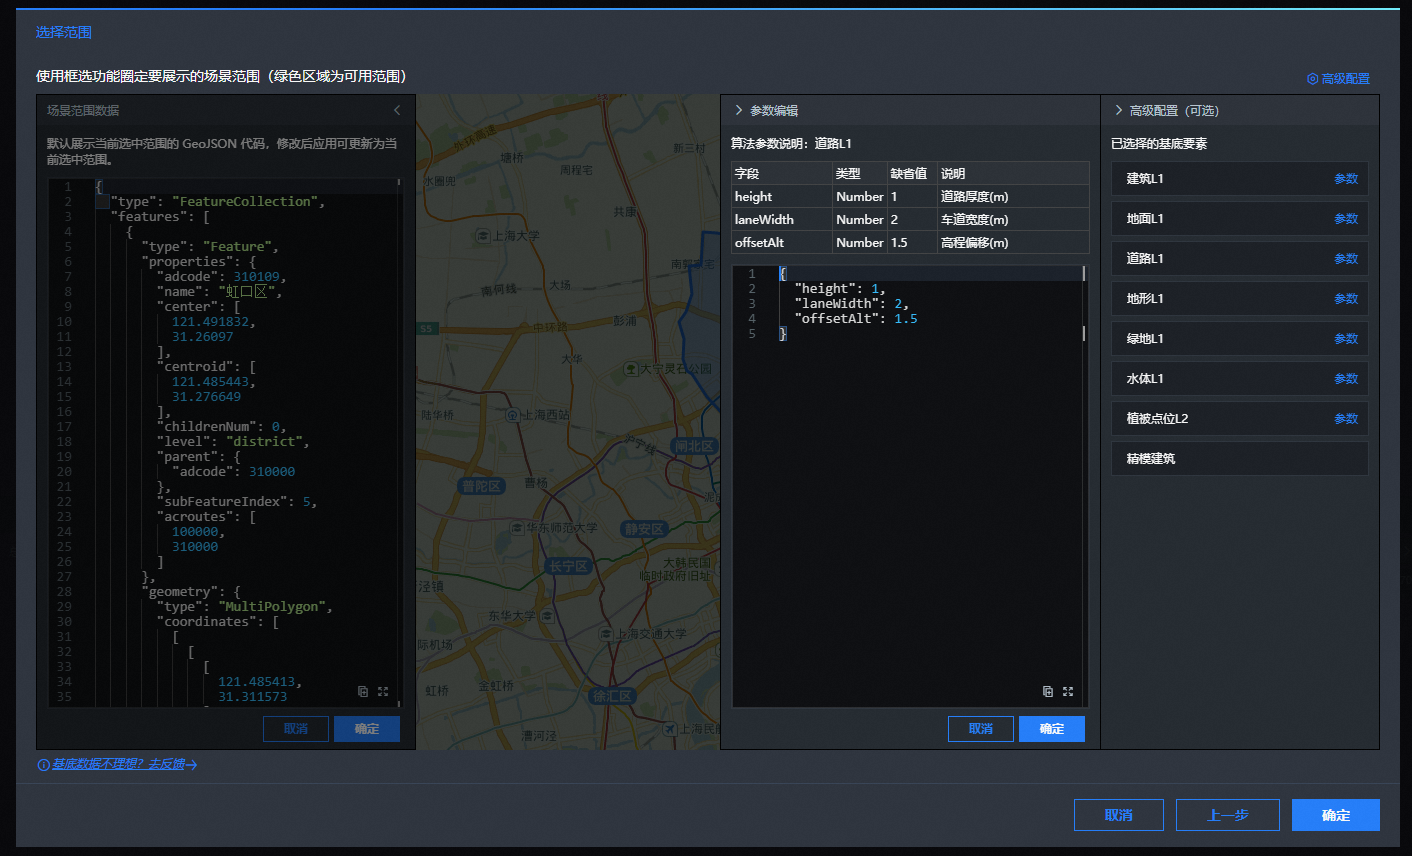
Build Data from a Space
Access the DataV console.
On the Workbench page, move the mouse pointer over Create 3D City and click Start Creating.
In the Create 3D City dialog box, enter a Name and click OK.
In the Select Creation Method dialog box, move the mouse pointer over Spatial Construction Data and click Create.
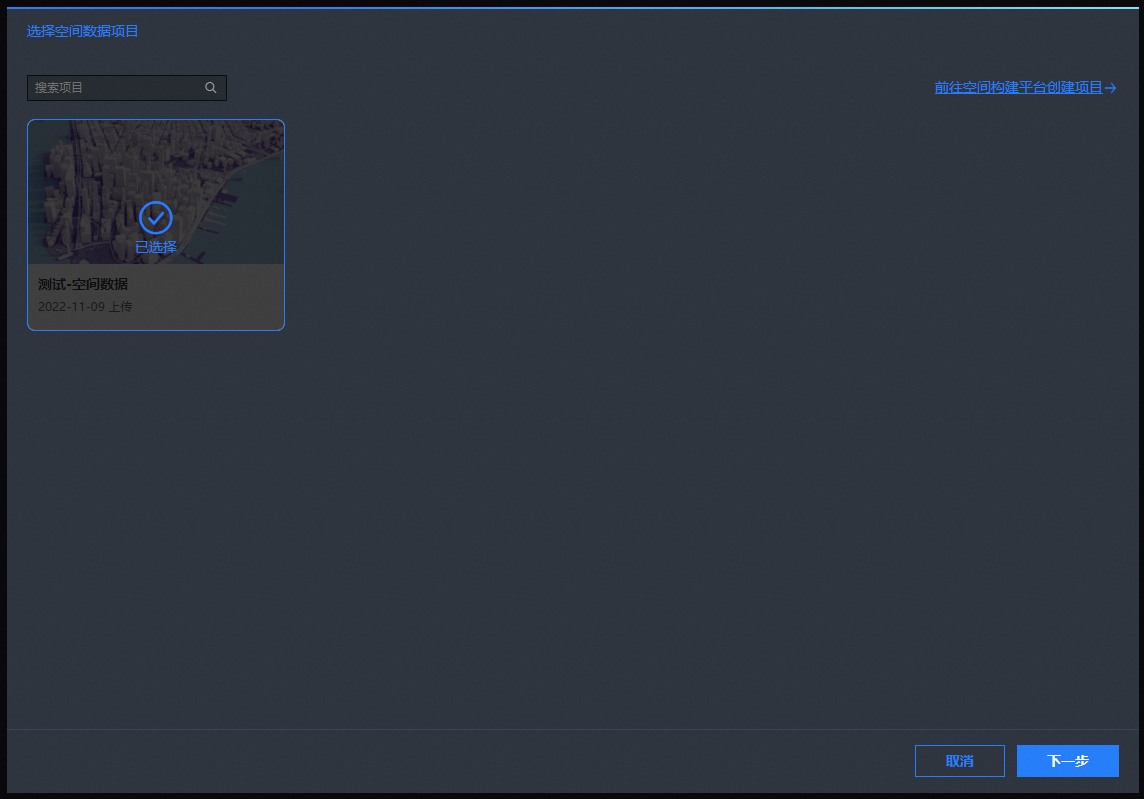
In the Select Spatial Data Project dialog box, click an existing spatial project to select it.
NoteIf many spatial data projects are listed in the Select Spatial Data Project dialog box, you can enter a project name in the search box in the upper-left corner of the Select Spatial Data Project dialog box to find and select the desired project.
If no spatial data projects exist in the Select Spatial Data Project dialog box, you can click Go to Spatial Construction Platform to Create Project in the upper-right corner. You will be redirected to the Spatial Construction Platform to create a project. For more information, see Add project base data.
After you select a spatial project, click Next at the bottom of the dialog box to open the Add Layer dialog box. To cancel the operation, click Cancel.
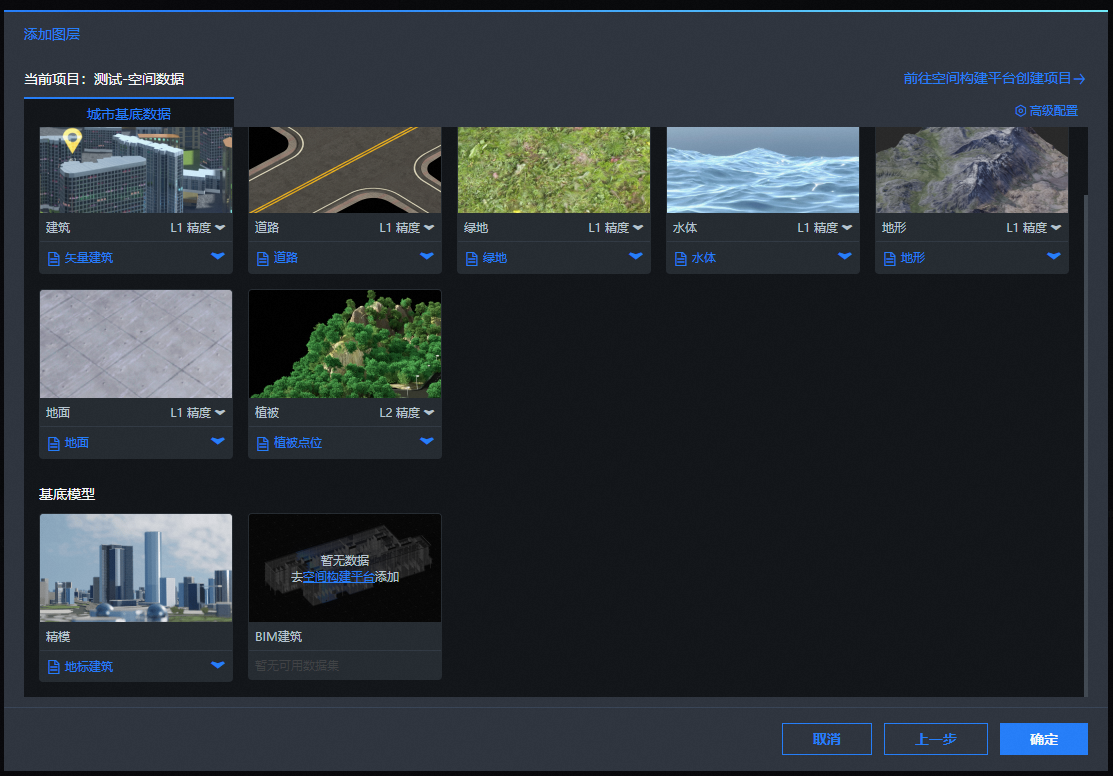
In the Add Layer dialog box, go to the City Base Data tab. You can customize the selection of Base Data and Base Model. After you select a base data class, you can use the Precision drop-down list in the lower-right corner to switch to a different data precision. You can also use the dataset drop-down list below the base data type to select a dataset.
NoteCity Base Data: Includes the spatial data for the Base Data and Base Model components of a custom spatial project. If a custom spatial project does not have the required base data, you can click Go to Spatial Construction Platform in the data section that is empty, or click Go to Spatial Construction Platform to Create Project in the upper-right corner of the Add Layer dialog box. This action opens the spatial construction platform, where you can add the required base data.
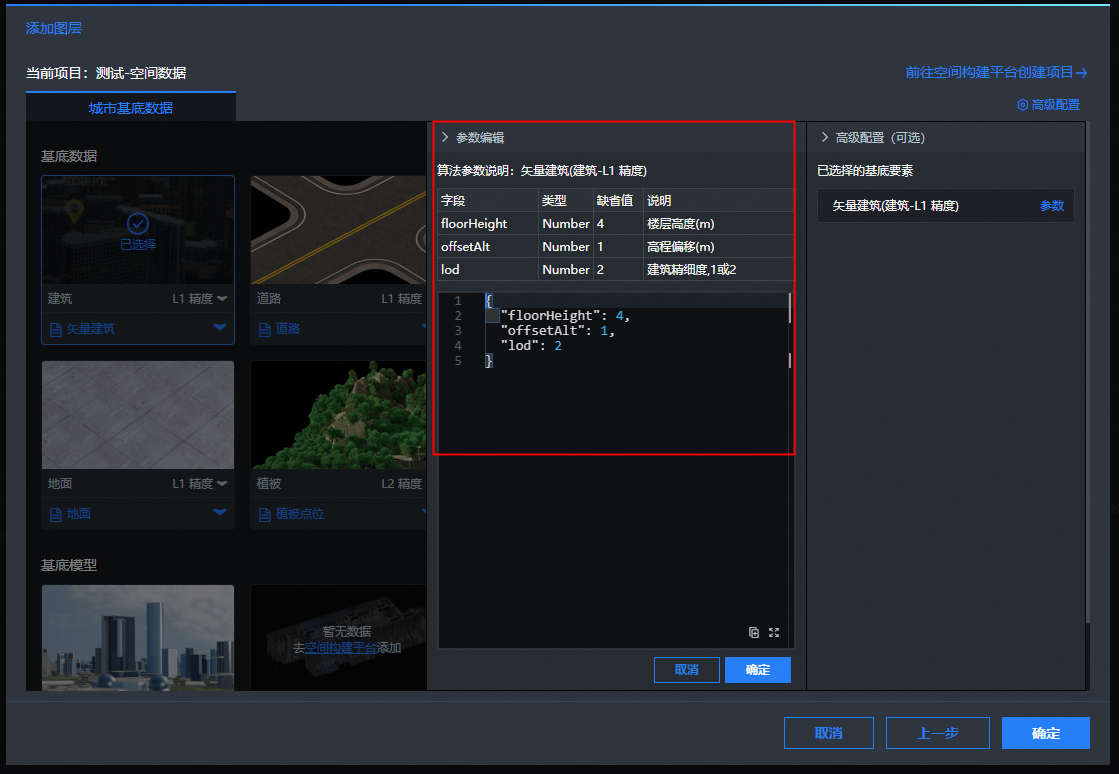
Optional: To configure algorithm parameters, click Advanced Configuration in the upper-right corner of the Add Layer dialog box. In the parameter editors, you can view or modify the algorithm parameters for the city base data and business data.
Click OK in the lower-right corner of the Add Layer dialog box to create the 3D city and go to the project loading page. Click Previous to return to the Select Spatial Data Project dialog box to reselect a project. Click Cancel to return to the Select Creation Method dialog box.
NoteFor more information about operations in the scene editor after you create a 3D city, see Scene editor overview.