Points heatmap layer (v4.x)
Configure the style, data, and interaction settings of the points heatmap layer, a sub-widget of Basic Flat Map 4.0.
Chart style
The points heatmap layer is a sub-widget of Basic Flat Map 4.0 that supports independent style, data, and interaction configurations, including heatmap color, radius, and intensity.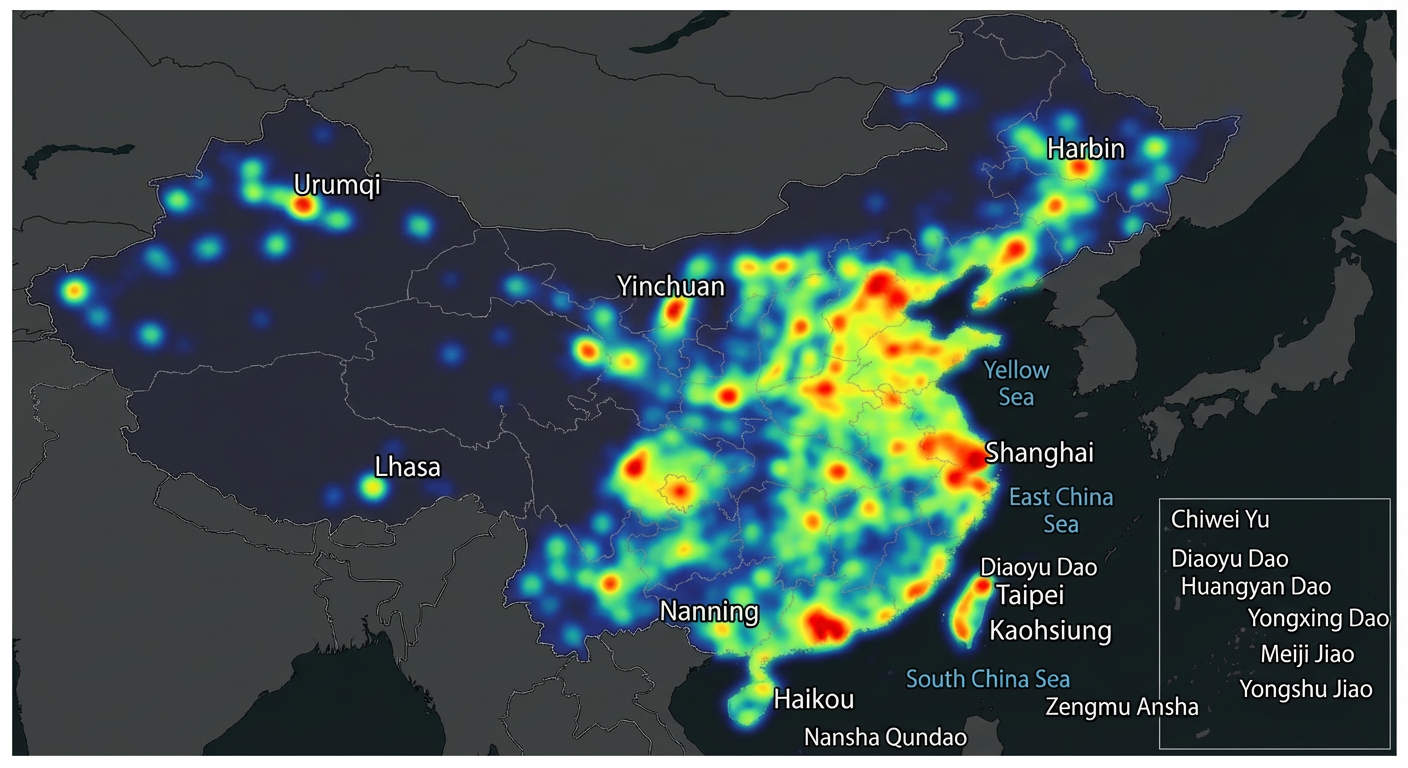
Style panel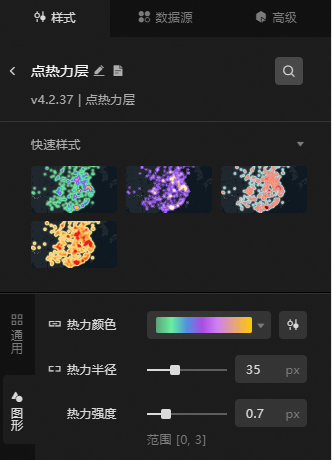
-
Search Configuration: Click the
 icon in the upper-right corner of the Style panel to search for configuration items by name. Fuzzy matching is supported. Search for a configuration item.
 -
Quick styles: Provides preset styles that you can select based on your scenario.
-
General: Configure general settings for the points heatmap layer.
Parameter
Description
Visibility level
The visibility level range within which the layer is visible.
Opacity
The opacity of the layer. Valid values: 0 to 100. Unit: %. A larger value makes the layer more opaque.
-
Graphic: Configure the graphic settings for the points heatmap layer.
Parameter
Description
Heatmap color
The color style of the heatmap points. For more information, see Use the color mapper to configure mapped color styles for different heatmap points.
Heatmap radius
The radius of the heatmap points. Drag the slider to adjust the value. Valid values: 0 to 100. Unit: px.
Heat Intensity
The intensity of the heatmap points. Valid values: 0 to 3. Unit: px.
Data Source panel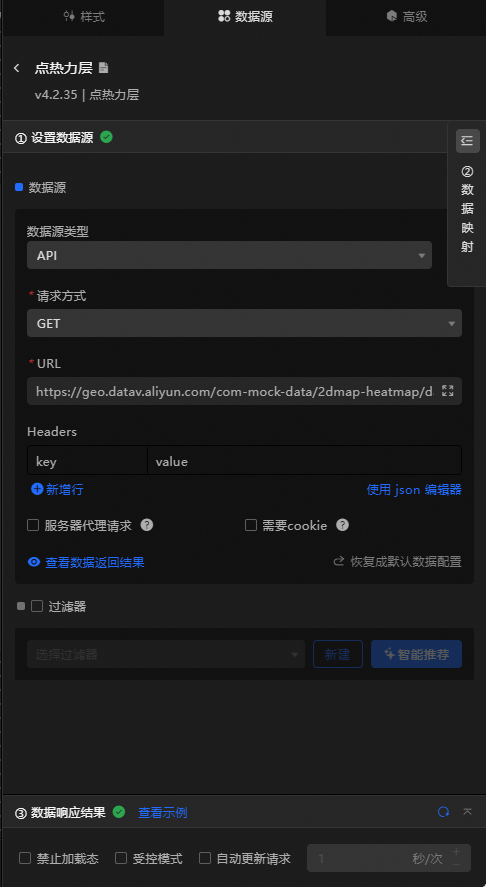
|
Field |
Description |
|
|
The longitude of a heatmap point. |
|
|
The latitude of a heatmap point. |
|
|
The weight of a heatmap point. |
|
|
(Optional) The radius mapping field of a heatmap point. |
|
Data Item Configuration |
Description |
|
Data Source |
The component's data source displays the data fields contained within the component using code editing or visual editor. You can also modify the data type to flexibly configure the component's data. |
|
Data Mapping |
When you need to customize chart field configurations, you can set different field mappings in the Data Mapping module to map these fields to the corresponding fields of the component. This allows for real-time data matching without altering the data source fields. Additionally, click the |
|
Filter |
Open the Filter to select an existing data filter or create a new one, and configure the data filter script to achieve data filtering capabilities. For more information, see manage data filters. |
|
Data Response Result |
This feature displays the component's data in real-time. When the component's data source changes, the data response result will display the latest data accordingly. In case of a delayed system response, you can click the |
|
Disable Loading State |
Check the check box to hide the loading content during component updates and data dashboard previews. Unchecking will display the loading content. The default setting is unchecked. |
|
Controlled Mode |
Check the check box to prevent data requests upon the component's initialization. Data requests will only be initiated through global variables or methods configured in the blueprint editor. Unchecking allows for automatic update requests. The default setting is unchecked. |
|
Automatic Update Request |
Check the check box to manually set the polling frequency for dynamic polling. Clearing this option disables automatic updates, requiring manual page refreshes or data request triggers through the blueprint editor and global variable events for updates. |
 icon to configure field styles individually.
 icon on the right to check the current data response result, or click the
  icon on the right to obtain the most recent data for the component. You can also click to view examples to see sample response results for the current component.
Advanced panel
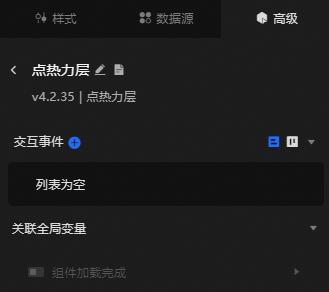
Configure interaction events or associate global variables for filter interactions between widgets. Configure widget interactions.
Blueprint interaction
-
Click the
 icon in the upper-left corner of the page to open the Blueprint page.
 -
On the Layer Node tab, add the current widget to the main canvas.
-
View the blueprint configuration parameters.
NoteClick the
icon in the anchor point area on the right to view event and action parameter tooltips.-
Events
Event
Description
When data is updated
Triggered after a data API request is returned and processed by a filter. Returns the processed JSON data. For a data example, see the Data response area on the Data Source tab in the widget's configuration pane on the right of the canvas editor.
When the data request status changes
Triggered when the data request status changes. The callback parameter is the current status. For a data example, see the Data response area on the Data Source tab in the widget's configuration pane on the right of the canvas editor.
Component Load Complete
Triggered after a data API request is returned and processed by a filter. Returns the processed JSON data. For a data example, see the Data response area on the Data Source tab in the widget's configuration pane on the right of the canvas editor.
-
Actions
Action
Description
Import data
Imports pre-processed data into the component to redraw it without requesting server-side data again. For a data example, see the Data Response Result area on the Data Source tab in the configuration panel to the right of the component in the canvas editor.
Request data
Re-requests server-side data, using data from an input data processing node or a layer node as a parameter. For example, if a points heatmap layer has its API data source configured as
https://api.test, and the data passed to the Request data action is{ id: '1'}, the final request URL ishttps://api.test?id=1.Toggle visibility
The Toggle Visibility, Show, and Hide actions do not require parameters by default. You can add animation configurations as needed. See the data example.
{
  // Animation type. Optional values: appear|fade|slideToUp. The default is fade. If left blank, there is no animation.
  "animationType": "fade",
  // Animation duration. The default is 1000 ms.
  "animationDuration": 1000,
  // Animation curve. Optional values: linear|easeInOutQuad|easeInOutExpo. The default is linear.
  "animationEasing": "linear"
}
Show
Hide
Update component configuration
Dynamically updates the component's style configuration. Click Copy configuration to clipboard in the component's Style panel to get the configuration data, then modify the style field values as needed in the data processing node on the blueprint editor's configuration page.
-
 icon in the upper-left corner of the page to open the Blueprint page.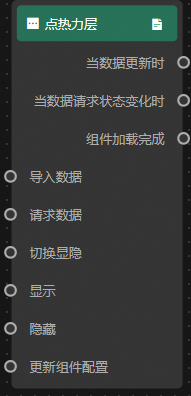
 icon in the anchor point area on the right to view event and action parameter tooltips.