Terrain
Terrain is the basemap layer in 3D City Builder. It represents procedurally generated mountains. The terrain layer supports independent style and data configurations, such as shadows, environment map intensity coefficients, and blend maps. This topic describes the configuration items for the terrain layer.
In the layer list on the left side of the scene editor, click the Terrain layer. In the configuration panel, you can configure the style and data for the Terrain layer.
If the layer list does not contain Terrain, see Add a sub-widget to add the Terrain layer.
Style panel
Terrain: Set the parameters for the terrain.
Parameter
Description
Shadow
Set the shadow style for the terrain. Turn the Receive Shadows switch on or off to control the shadow casting effect on the terrain.
Graphic: Set the parameters for the graphics.
Parameter
Description
Blend
Set the material style for the terrain blend type. This includes adjusting the UV tiling values on the x-axis and y-axis, blend parameters, and weight map style.
NoteOnly PNG or JPG images can be used as textures.
Blend Material A
Sets the material style for the terrain to Blend Type A. Configure the base color, base color map, roughness value, roughness map, metallic value, metallic map, normal map, ambient occlusion map intensity, ambient occlusion map, emissive color, and emissive map.
NoteTextures must be in PNG or JPG format.
Blend Material B
Sets the material style for the terrain to Blend Type B. Configure the base color, base color map, roughness value, roughness map, metallic value, metallic map, normal map, ambient occlusion map intensity, ambient occlusion map, emissive color, and emissive map.
NoteOnly PNG and JPG image formats are supported for textures.
Blend Material C
Sets the material style for the terrain to Blend Type C. Configure the base color, base color map, roughness value, roughness map, metallic value, metallic map, normal map, ambient occlusion map intensity, ambient occlusion map, emissive color, and emissive map.
NoteThe supported formats for textures are PNG and JPG.
Blend Material D
Sets the material style for the terrain to Blend Type D. Configure the base color, base color map, roughness value, roughness map, metallic value, metallic map, normal map, ambient occlusion map intensity, ambient occlusion map, emissive color, and emissive map.
NoteTextures support only the PNG and JPG image formats.
Data panel
Reselect Data: In the data panel, click Reselect Data to open the Select Area dialog box, where you can reselect the data range for the terrain layer. For more information, see Create a scene using official base data.
Refresh Data: Refreshes the data that has been added to the data panel.
Blueprint interaction
In the Scene Editor, click the
 icon to the right of the Terrain layer in the layer list.
Click the
 icon in the upper-left corner of the page.
On the Blueprint Editor page, click the Terrain layer in the import node bar. The configuration parameters for the terrain's blueprint editor appear on the canvas, as shown in the following figure.
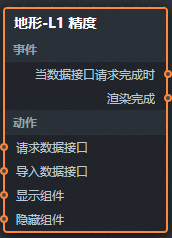
Events
Event
Description
When Data API Request Is Completed
This event is triggered after a data API request returns a response and the filter processes it. The event also returns the processed data in JSON format. For a data sample, see the Data Response area on the Data tab in the widget's configuration panel.
Rendering Completed
An event that is triggered when the terrain widget finishes rendering. Data of the object type is also returned.
Actions
Action
Description
Request Data API
Resends a request for server-side data. The data returned by the input data processing node or layer node is used as a parameter. For example, if the API data source for the terrain is set to
https://api.testand the data passed to the Request Data API action is{ id: '1'}, the final request URL ishttps://api.test?id=1.Import Data API
After processing the data into the component's drawing format, you can import and redraw the component without requesting server-side data again. For a data example, see the Data Response Result area on the Data tab in the component's right-side configuration panel in the canvas editor.
Show Widget
Shows the widget. No parameters are required.
Hide Widget
Hides the widget. No parameters are required.
FAQ
When I add a terrain child widget along with other widgets such as roads or buildings, the terrain sometimes blocks these other elements in the scene map. How can I fix this?
In the scene editor, click the terrain layer. In the data panel on the right, click Reselect Data. In the Select Area dialog box that appears, click Advanced Configuration in the upper-right corner. In the parameter editor for the terrain child widget, modify the algorithm parameters. For example, to fix an issue where the terrain blocks a building, you can adjust the radius parameter. The default value is 15 m. For terrain with greater undulation, use a larger radius value, such as 100 m. After you configure the parameter, return to the scene editor. The occlusion issue between layers is now resolved on the map.
Figure: Terrain blocking a building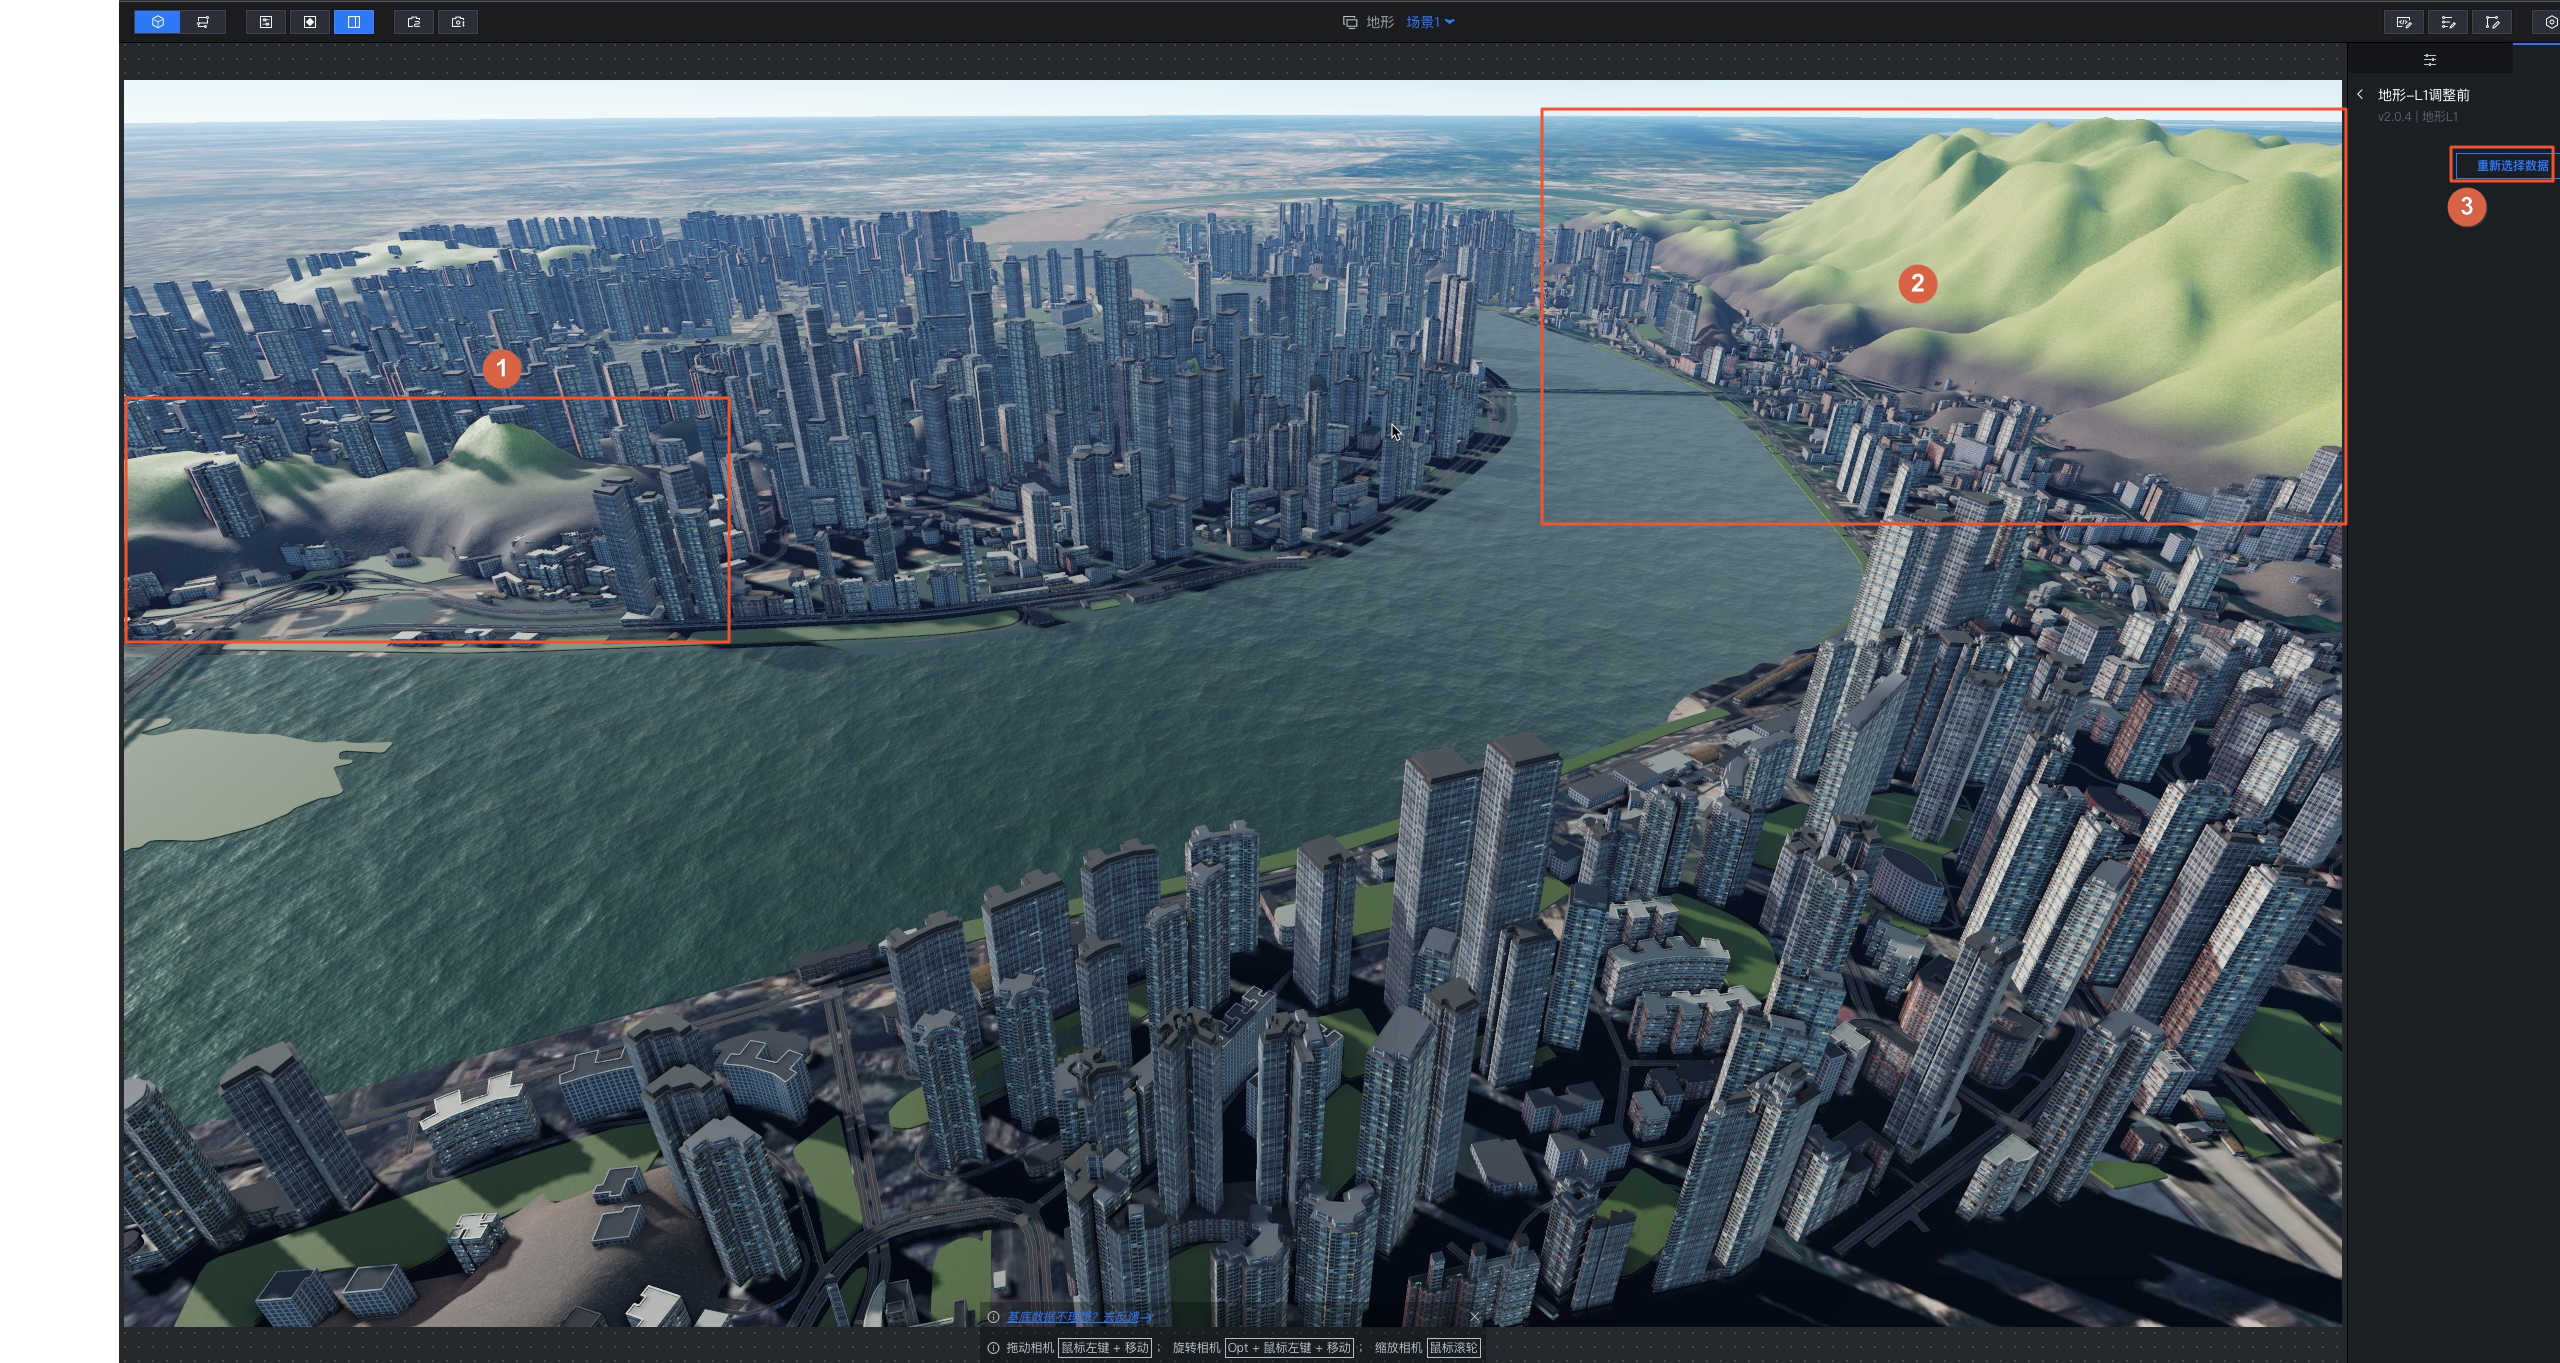 Before adjusting the terrain child widget parameters After adjusting the terrain child widget parameters Figure: Occlusion issue resolved after parameter adjustment
Currently, elements such as buildings, roads, green spaces, and water systems do not strictly match the terrain height. Therefore, you can only resolve occlusion issues caused by height mismatches by adjusting parameters.