This topic describes the layout of the DataWorks DataStudio interface and its main components: workflows and nodes.
Go to DataStudio
Log on to the DataWorks console. In the target region, click in the left-side navigation pane. Select a workspace from the drop-down list and click Go to Data Development.
In DataStudio, you can create workflows and different types of nodes. For more information, see Create a workflow and Create a node.
The UI features vary for different development tasks. See the following topics for more information about specific interfaces.
DataStudio interface overview
This figure provides an overview of the DataStudio interface.
|
Area |
Description |
|
1 |
|
|
2 |
Click the
Note
If some modules are not displayed in the left-side navigation pane, click the |
|
3 |
Shortcuts to other modules in DataStudio:
Common features of DataWorks modules: Note
This topic uses the DataStudio interface as an example to describe the following common features. These features are the same in other modules.
|
|
4 |
System configuration includes the following settings:
|
|
5 |
This area displays common shortcuts for the DataStudio editor. For a complete list, see Editor shortcuts. |
Workflow interface features
When you enter DataStudio, the data development module opens by default. You must first create a workflow to organize your data development tasks. For more information, see Create a workflow. The following figure shows the user interface (UI) for a workflow.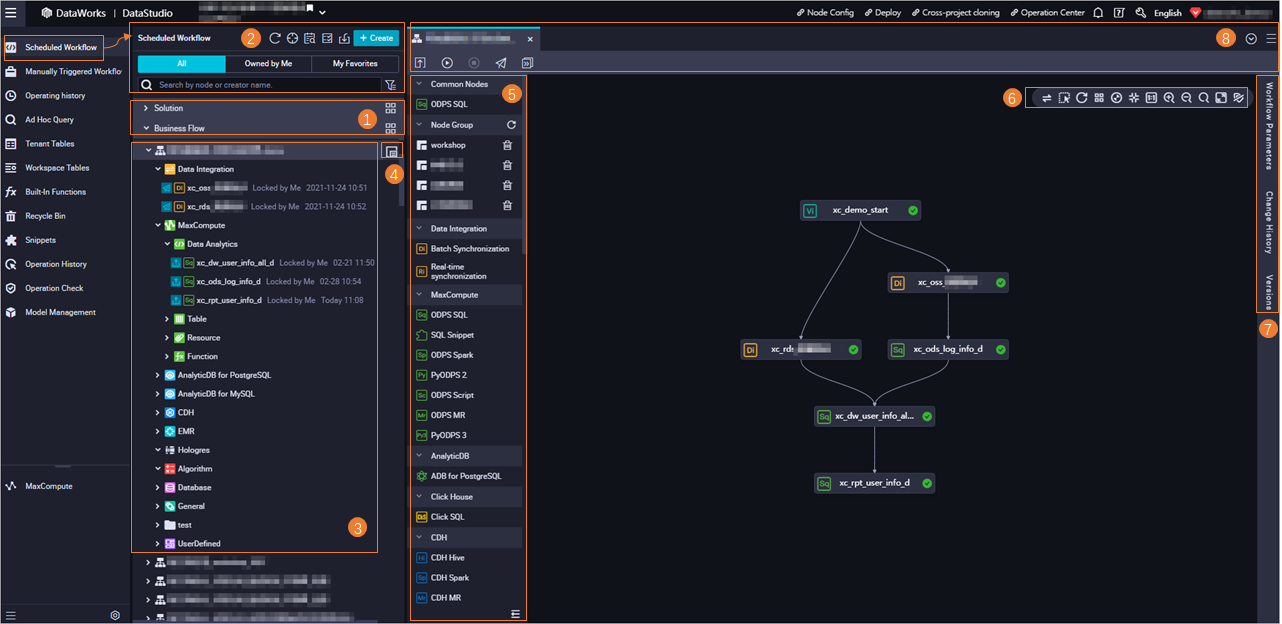
|
Area |
Description |
|
1 |
Click the |
|
2 |
Note
If you are in a new workspace, you must first create a workflow and then create nodes within it to start data development. For details, see Create a workflow. |
|
3 |
Use the directory tree to manage nodes, tables, resources, and functions in each workflow:
The icon next to a node name indicates the node status:
The time of the last edit is displayed after the node name. Double-click a workflow name to open the workflow editing page (Areas 5 to 8), where you can perform data development. |
|
4 |
Resource Group Orchestration ( |
|
5 |
|
|
6 |
Tools on the workflow canvas (1):
|
|
7 |
Tabs in the right-side pane (2):
|
|
8 |
Tools in the toolbar (3):
|
Workflow shortcut menu
Right-click a workflow to display its shortcut menu, as shown in the following figure.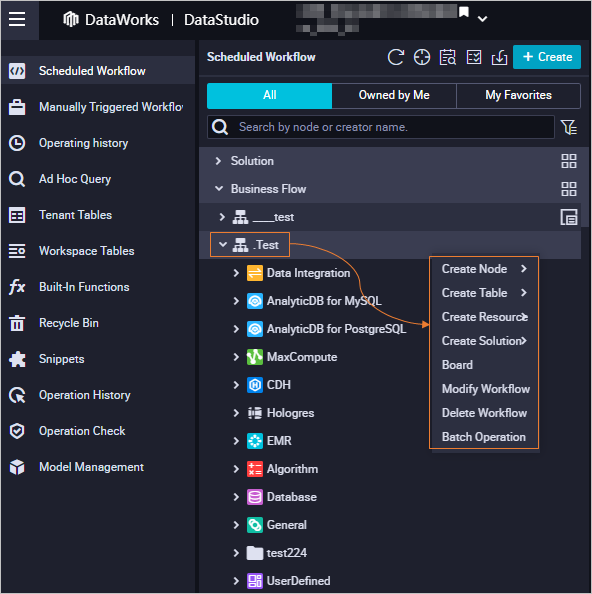
|
Feature |
Description |
|
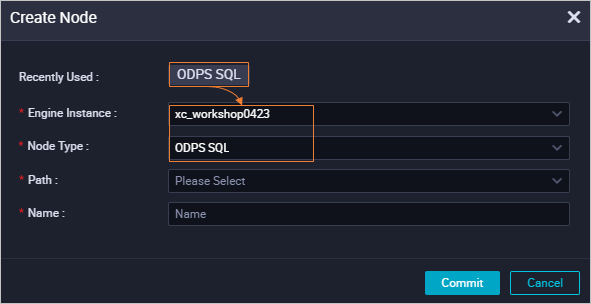
Create Node |
Creates new nodes of various types. When you create a node, the system displays recently used node types for quick access. Selecting a type automatically populates the Compute Engine Instance and Node Type fields from the last used configuration, letting you quickly recreate nodes. |
|
Create Table |
Creates new tables of various types. |
|
Create Resource |
Creates new engine resources. Note
Currently, this feature supports creating resources only for MaxCompute, CDH, and EMR engines. |
|
Create Function |
Creates new engine functions. Note
Currently, this feature supports creating functions only for MaxCompute, CDH, and EMR engines. |
|
Board |
Opens the editing canvas for the workflow. |
|
Change |
Modifies the name, owner, and description of the workflow. |
|
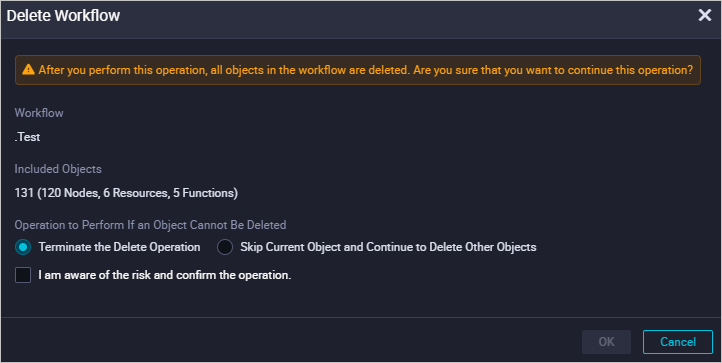
Delete Workflow |
Deletes the current workflow. Note
This action deletes all objects within the workflow. Proceed with caution. If an object cannot be deleted, you can choose one of the following strategies:
|
|
Batch-modify properties—such as owner, engine instance, and scheduling attributes—for multiple nodes, resources, and functions. You can also commit and deploy these changes to the production environment. |
DataStudio node editor features
After you create a workflow, you can create different types of DataStudio nodes based on your development requirements. For more information, see Create a development node. Different types of nodes provide similar features. This topic uses an ODPS SQL node as an example to describe the features of the node editor.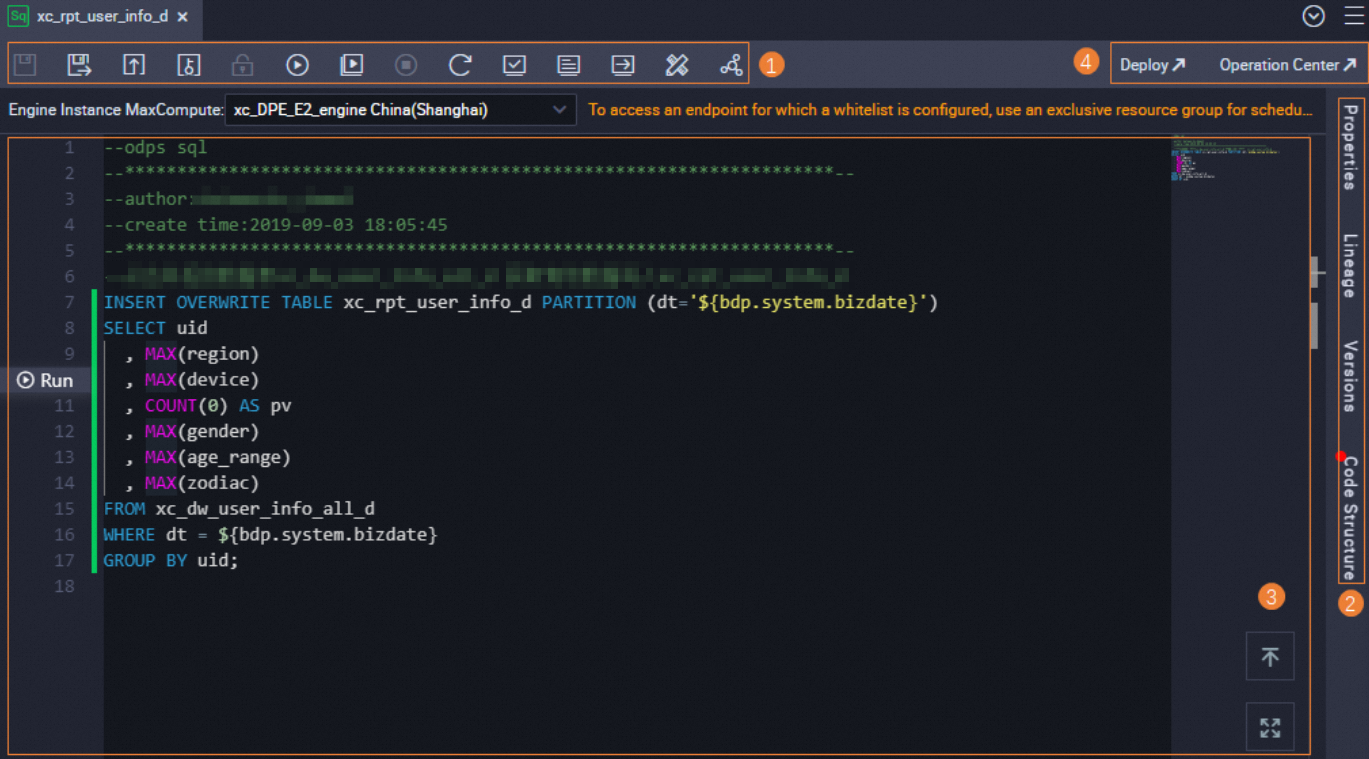
|
Area |
Description |
|
1 |
The toolbar for node development:
|
|
2 |
Scheduling Settings:
Lineage: Displays the dependencies and internal lineage between the current node and other nodes. Versions: A new version is created each time you commit or deploy a node. This panel displays the node's version history, the committer, commit time, change type, status, and remarks. The version statuses are as follows:
Structure: Visualizes the code's structure based on its SQL operators. |
|
3 |
SQL editor: Write SQL statements for your task in this editor.
|
|
4 |
Deployment and O&M operations: |
Data development node shortcut menu
Hover over the target development node and right-click to display the shortcut menu for the node. The related features are shown in the following figure.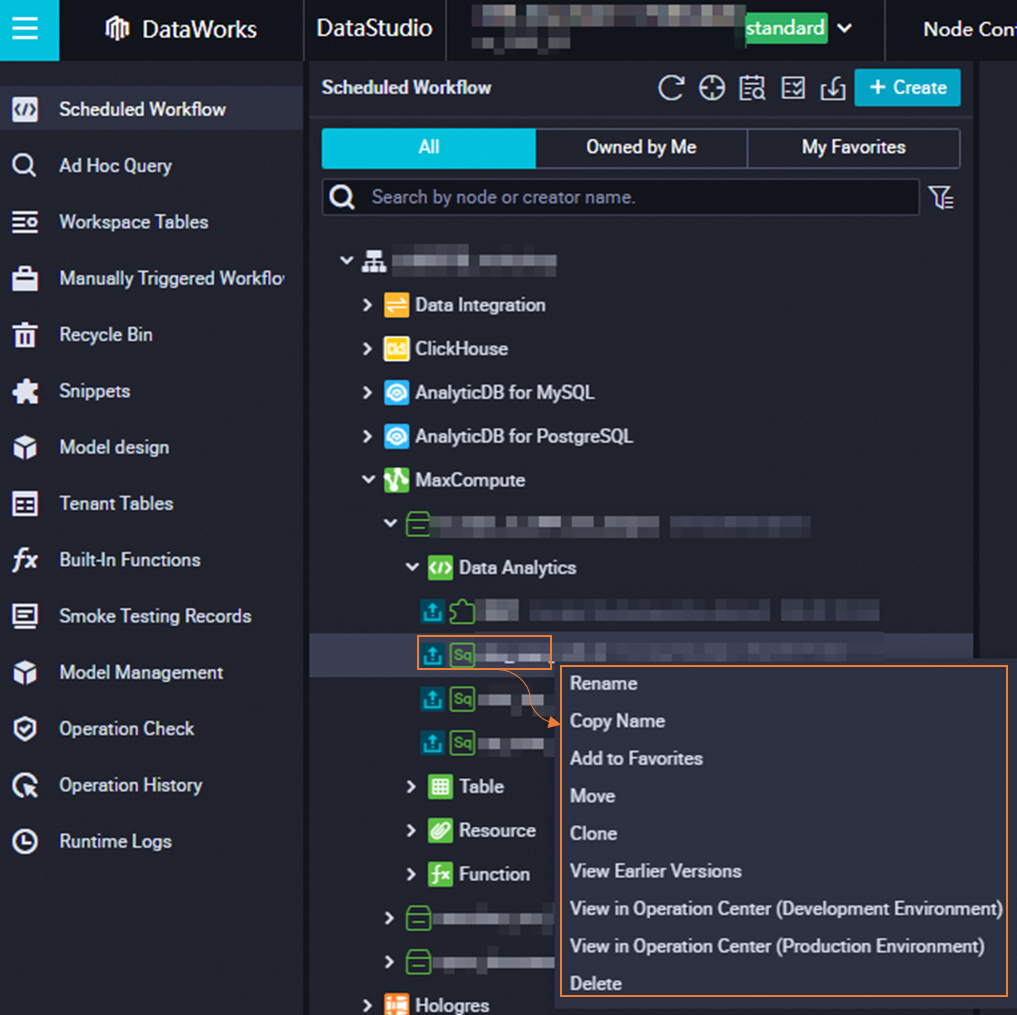
|
Feature |
Description |
|
Rename |
Changes the name of the target node. |
|
Add to Favorites |
Adds the target node to your favorites. You can view your favorite nodes by clicking My Favorites in the upper-right corner of the directory tree. To remove a node from your favorites, click Remove from Favorites in its shortcut menu. |
|
Move |
Moves the target node to another workflow directory. |
|
Clone |
Creates a copy of the target node with the same node type, owner, and resource properties. Note
In the same workflow directory, the original and cloned nodes cannot have the same name. |
|
Opens the Versions panel, which displays the node's version history. The history includes details such as the committer, commit time, change type, status, and remarks. |
|
|
Opens Operation Center to display the node's runtime information. If a node in a standard workspace is committed to both the development and production environments, you can view its runtime status for either environment in Operation Center. |
|
|
Submits the node's code for a code review. The node must pass this review before it can be deployed. |
|
|
Delete |
Deletes the target node and unlinks it from any upstream or downstream nodes. If a deleted node has been deployed to the production environment, you must use the Task Deployment page to take the node offline. For details, see Undeploy a task. |