Set up a sender address
This topic describes how to create a sender address, verify a reply-to address, and set an SMTP password.
A sender address is the "from" address that recipients see in emails you send using DirectMail. When you set up a sender address, you can also set a reply-to address to receive replies and an SMTP password to enable SMTP sending for that address.
Create a sender address
Log in to the DirectMail console.
In the left-side navigation pane, click Sender Addresses to open the Sender Addresses page.
In the upper-right corner of the page, click Create Sender Address. The Create Sender Address dialog box appears. Note: You can create up to 100 sender addresses and delete them up to 10 times per month.
DirectMail supports two methods for creating a sender address. Choose the one that best fits your business needs.
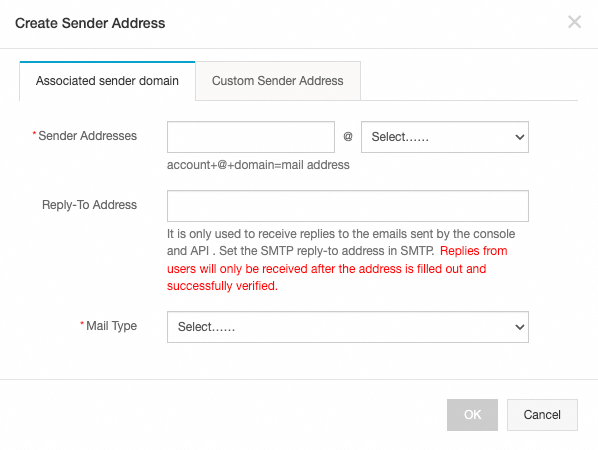
Method 1: Associate a sending domain (Recommended). This method is recommended if you have your own domain, as it helps improve your brand image and email deliverability.
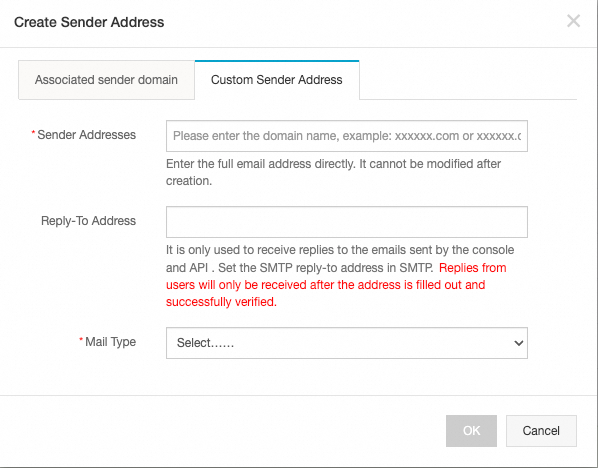
Method 2: Custom address (Not recommended). You do not need your own domain for this method. DirectMail sends emails on your behalf from a public domain. A recipient's anti-spam policy might flag this as delegated sending, which can cause the email to be routed to the spam folder or rejected.
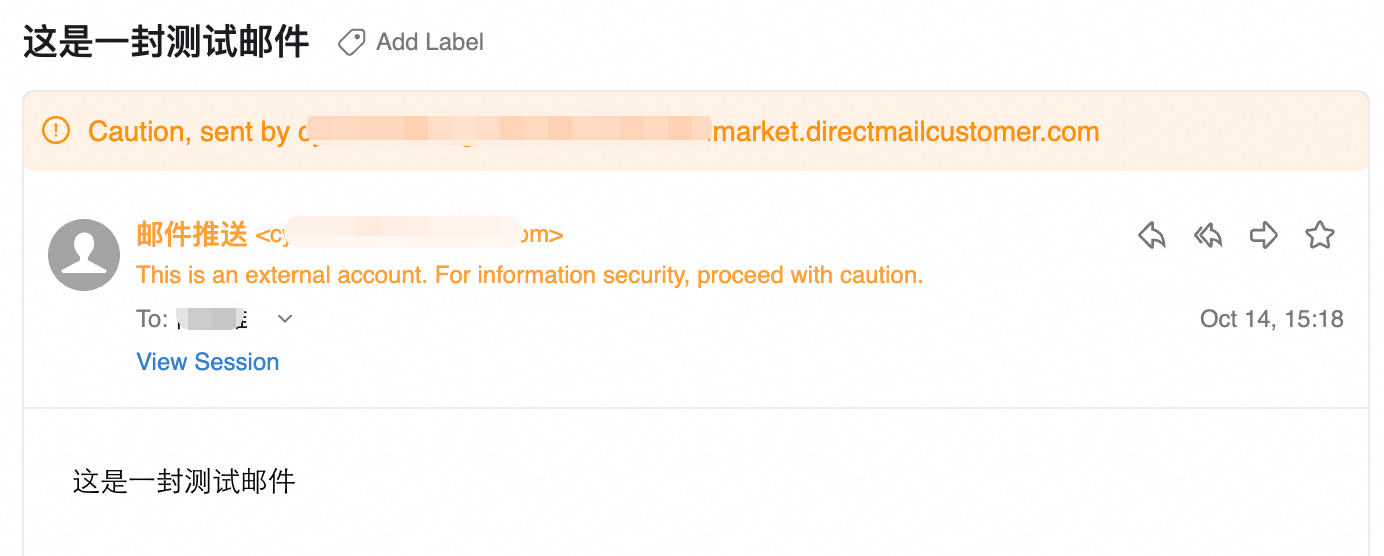
The following image shows how an email sent using this method appears in Alibaba Mail. The appearance may vary based on the recipient's email service provider and its anti-spam policy.
After you complete the configuration, click OK.
Sender address: The format is
Account + @ + Domain.Reply-to address: The address for receiving user replies. You must enter a valid email address that can receive mail. If you leave this field blank, you cannot receive user replies. This address must be verified before it can receive replies. For more information, see the next step, Verify a reply-to address.
Note: When you send an email using the SMTP API, the reply-to address configured in the console is not used automatically. You must specify the reply-to address in your API request.
Sender type: Sender addresses are categorized as Transactional Email and Batch Email.
Select transactional email or batch email based on your business needs. Different email types have different sending policies. Using the correct sender type improves your sender reputation and increases email deliverability.
Note: When you send an email from the console, you must select Batch Sender as the sender type. Otherwise, the sender address field is unavailable.
Verify a reply-to address
On the Sender Addresses page, find the address to verify in the list and click Verify Reply-to Address.
In the dialog box that appears, click Get Verification Code. A verification email is sent to your reply-to address.
Log in to the inbox for your reply-to address. Copy the verification code from the email, paste it into the dialog box, and then click OK.
A reply-to address can receive replies only after it is verified.
Note: The verification code is valid for 15 minutes. You must complete the verification within this time.

For help with the verification process, see FAQ about reply-to addresses.
Set an SMTP password
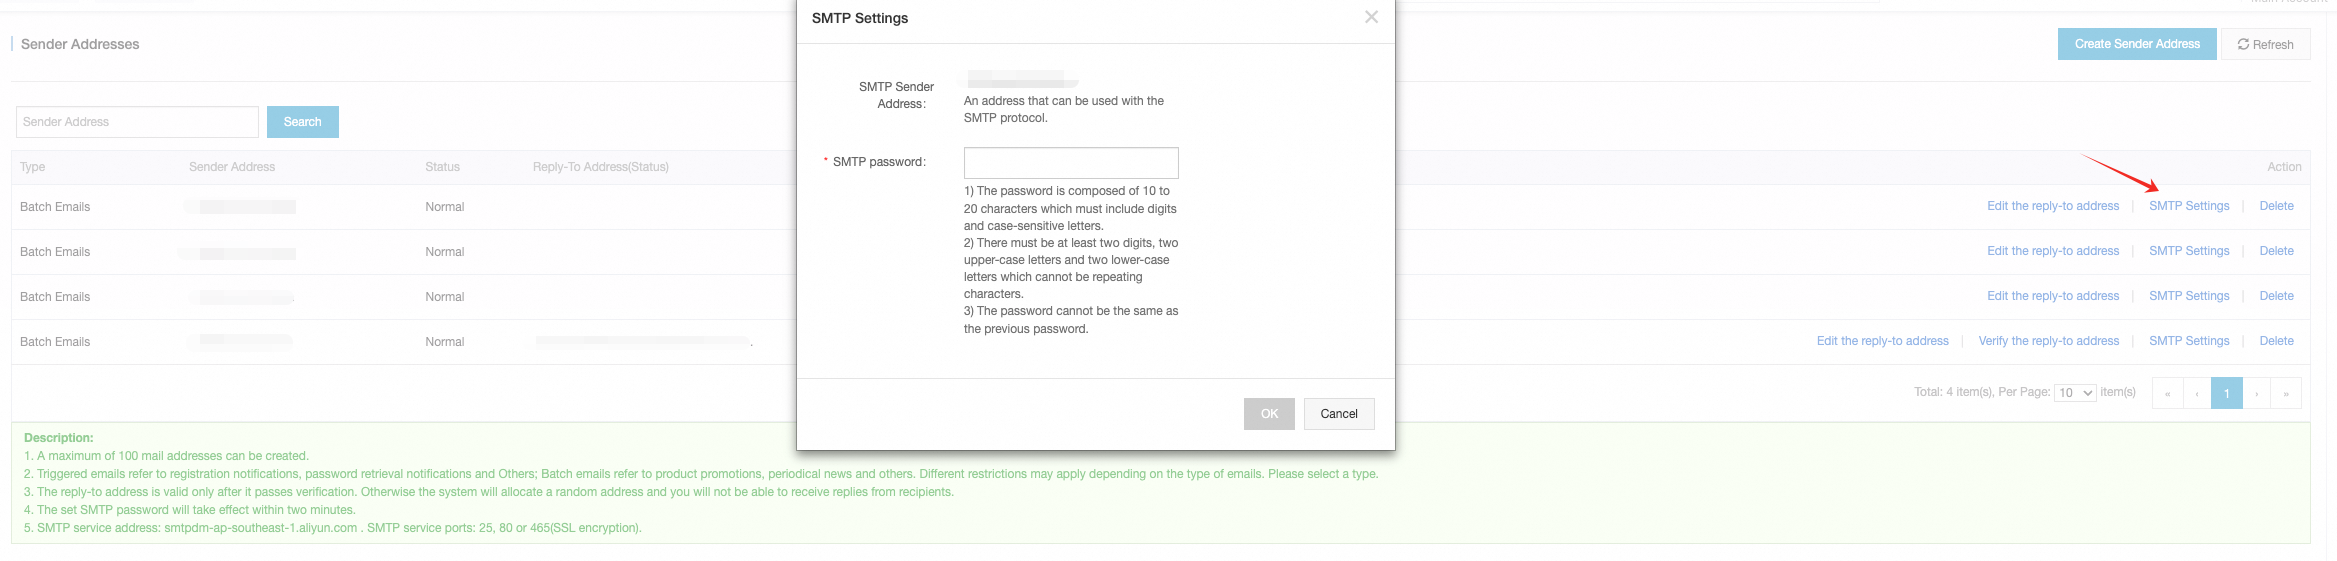
Set an SMTP password for your sender address to enable SMTP sending.
On the Sender Addresses page, find the address in the list and click Set SMTP Password. The Set SMTP Password dialog box appears.
Enter an SMTP password and click OK.
Note: You must set an SMTP password for a new sender address before you can use it to send emails via SMTP. After you create a sender address, wait 10 minutes before sending an email.