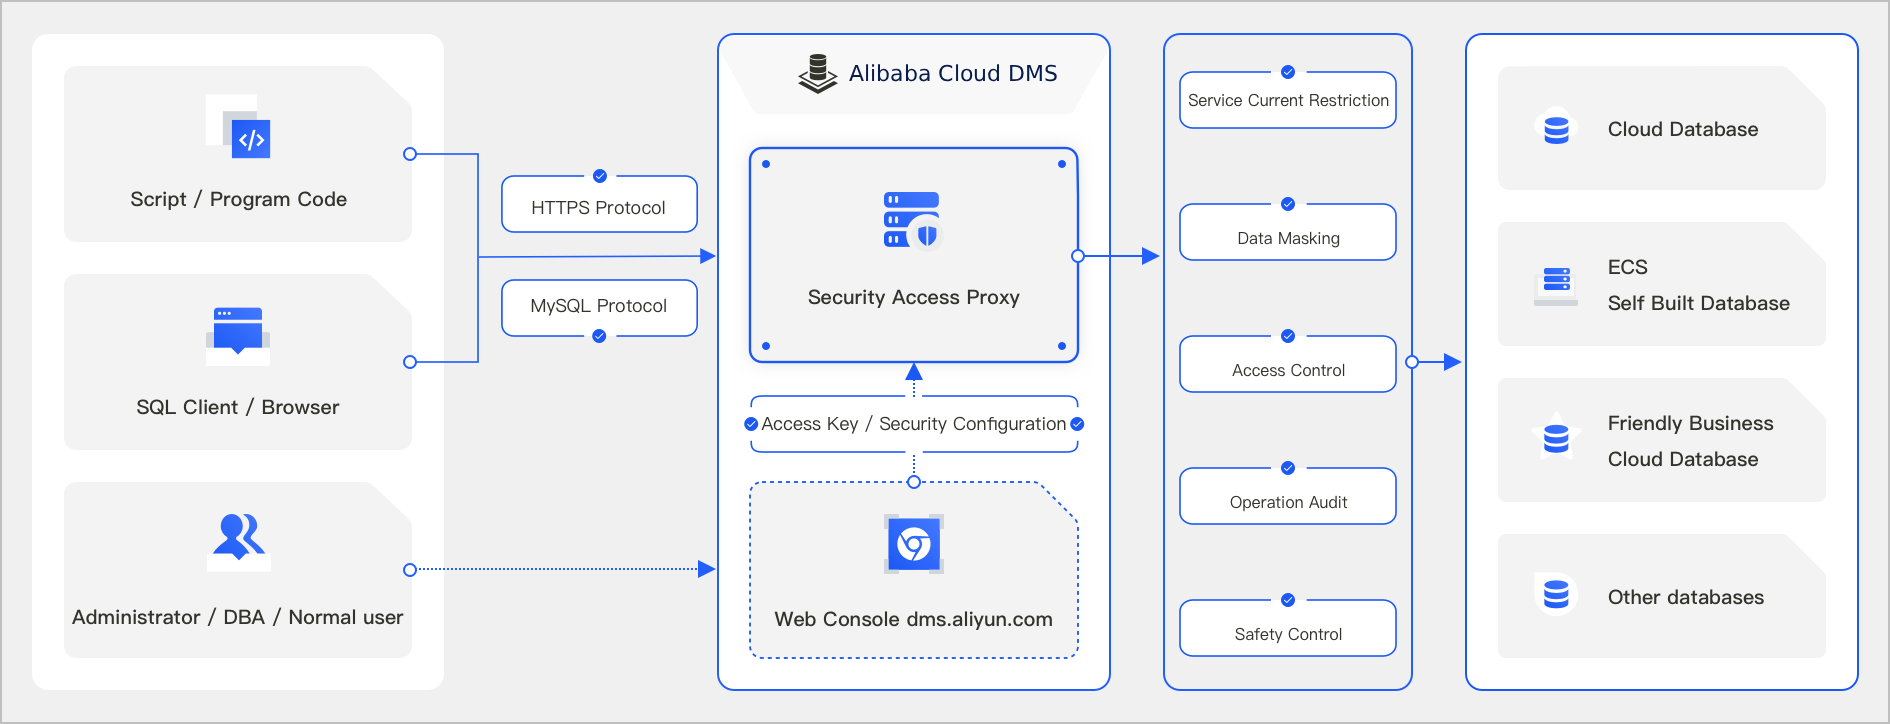
The secure access proxy feature in Data Management (DMS) enhances security when you access your databases. After you enable the secure access proxy for an instance, you can use the endpoints it generates to connect to the target instance securely over standard MySQL and HTTPS protocols. You can connect using the command line, database management tools, or your application code.
Prerequisites
Supported database types:
MySQL: ApsaraDB RDS for MySQL, PolarDB for MySQL, ApsaraDB MyBase for MySQL, PolarDB-X, AnalyticDB for MySQL, and other MySQL databases.
MariaDB: ApsaraDB RDS for MariaDB and other MariaDB databases.
The database instance is in one of the following regions: China (Hangzhou), China (Shanghai), China (Beijing), or China (Shenzhen).
NoteOn the homepage, you can hover over the target instance in the instance list on the left to view its region.
Your system role is administrator or DBA. To view your system role, see View your system role.
Overview
The secure access proxy leverages existing security rules, data permissions, and sensitive column configurations within Data Management (DMS). It offers comprehensive database security management, including security governance, access control, data masking, and operational auditing.
Procedure
Log in to DMS 5.0.
In the left-side instance list, right-click the target instance and select Secure Access Proxy.
NoteIf you are using the console in simple mode, click Database Instances in the left-side navigation pane. In the instance list, right-click the target instance, and then click Secure Access Proxy in the pop-up menu.
On the secure access proxy details page, click Enable Secure Access Proxy.
In the Enable Secure Access Proxy dialog box, enter the Database Account and Database Password, and then click Next.
In the Secure Access Proxy - Authorize dialog box, configure parameters such as Authorized Users, Use Independent Database Account, and Security Policy. The authorized users can then use the credentials generated by the secure access proxy to connect to the database instance. For more information, see Authorize users to access a database instance by using proxy endpoints.
Click Confirm.
After the proxy is enabled, you are redirected to its details page. You can view the Basic Information, which includes Enabled by, Database Account, Internal Endpoint, which supports the MySQL protocol (on port 3306 by default) and the HTTPS protocol, and Public Endpoint (disabled by default). To disable the secure access proxy, click Disable Secure Access Proxy in the upper-left corner of the page.
Related documents
After you enable the secure access proxy for an instance, you can perform the following operations:
Access the instance. For more information, see Access an instance over the MySQL protocol and Access an instance over HTTPS.
Disable the secure access proxy: On the secure access proxy details page, click Disable Secure Access Proxy in the upper-left corner.
Enable the public endpoint: If your application is not in the same VPC as the instance, or if you need to connect to the target instance from a local application, click Enable next to Enable to obtain a public endpoint.
Change the database account: Click the edit icon next to Database Account to change the account used to connect to the database instance.
You can also call API operations to enable or disable the secure access proxy for an instance.