Custom KV Template
This topic describes the features, benefits, scenarios, and user guide for custom Key-Value (KV) templates.
Feature Overview
The custom KV template is a tailored solution for structured data extraction from fixed-layout documents such as ID cards and invoices. With just one sample image, you can configure a template visually using a drag-and-drop interface to extract structured key-value pairs from documents that have the same layout. This process does not require data annotation or model training. Properly tuned templates achieve over 85% recognition accuracy. The Toolbox also includes a classifier management tool and a field type management tool. These tools enable automatic classification routing and high-accuracy recognition of multiple layouts through a single API call.
Benefits
Low cost: You can build a template with just one sample image. No annotation is needed.
Low barrier to entry: You can define templates visually using a drag-and-drop interface. No custom development is required.
High efficiency: You can configure a template in 3 to 5 minutes.
Scenarios
Few-shot cold start: This feature is ideal when you have few data samples (fewer than 20 images) and need to validate your solution quickly.
Fixed document layout: This feature is suitable for applications that process many document types, where each type has clearly identifiable fields with fixed key-value positions. Common scenarios include structured data extraction for student ID verification, marriage certificate processing, bank transfer slips, qualification verification, expense reimbursement, and business data handling.
User Guide
The following demo shows how to use a custom KV template:
The diagram below shows the four-step process to create a custom KV template.
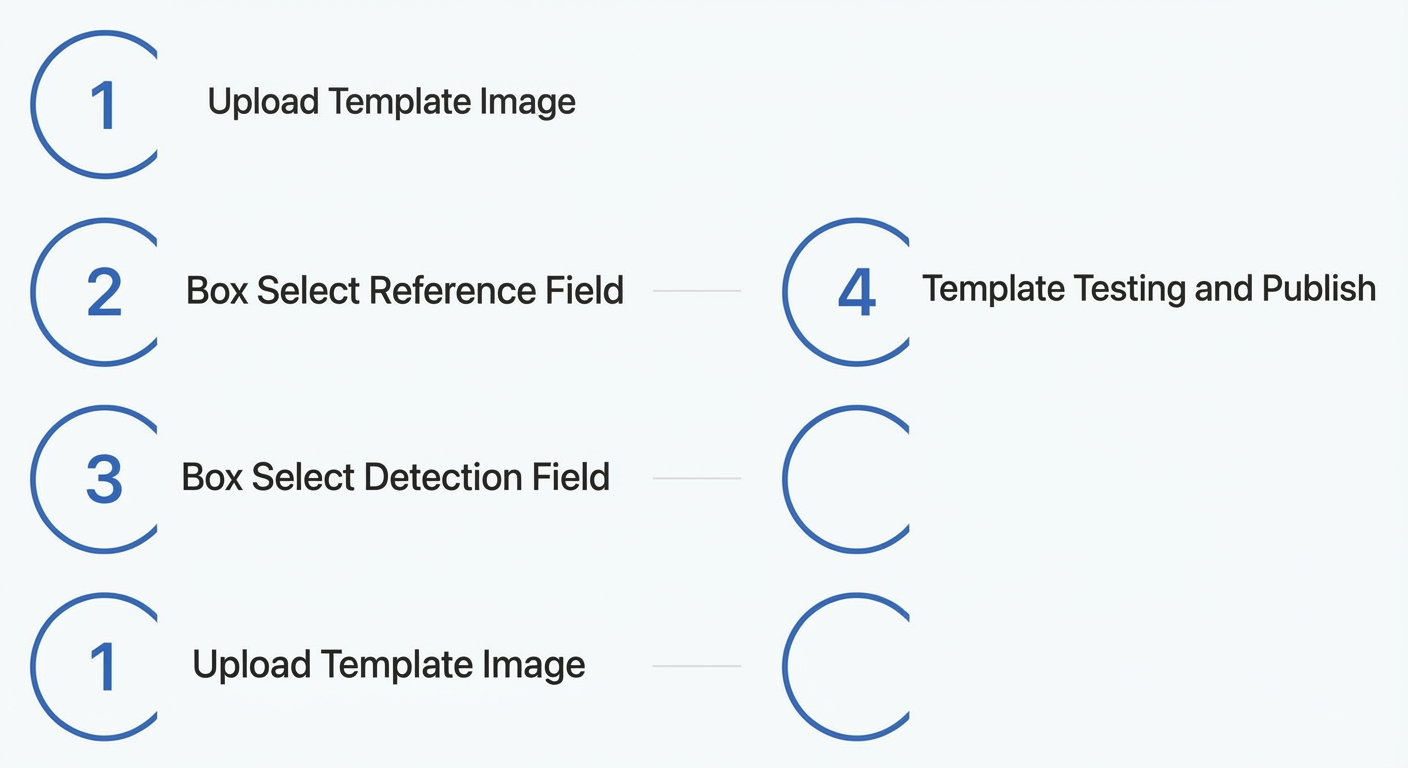
Step 1: Upload a template image
Go to the OCR Document Self-Learning Platform, locate Custom KV Template, and click Activate Now.
After the service is activated, you are redirected to the OCR Document Self-Learning Platform. Find Custom KV Template and click Create Task. On the Create Application page, set the required parameters and click Confirm.
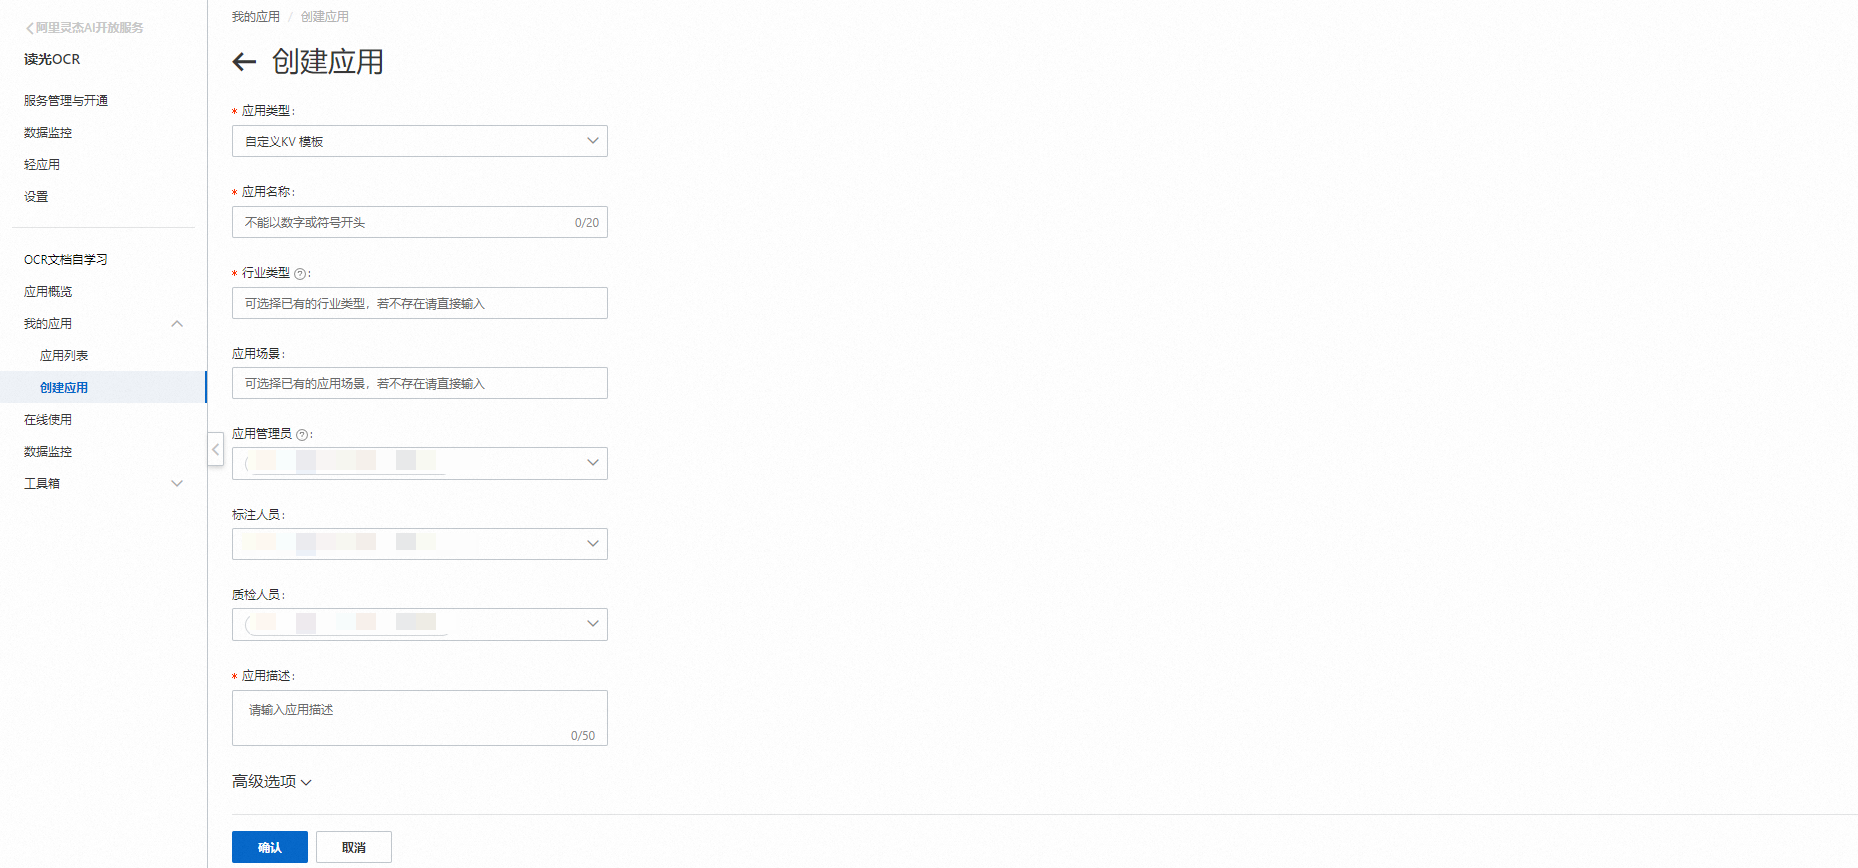
On the My Applications page, find your new application, click Enter Application, and then click Start Creating Template. On the Upload Template Image page, click Select Local File, upload a clear, non-rotated template image, configure the parameters based on your data characteristics, and click Next.
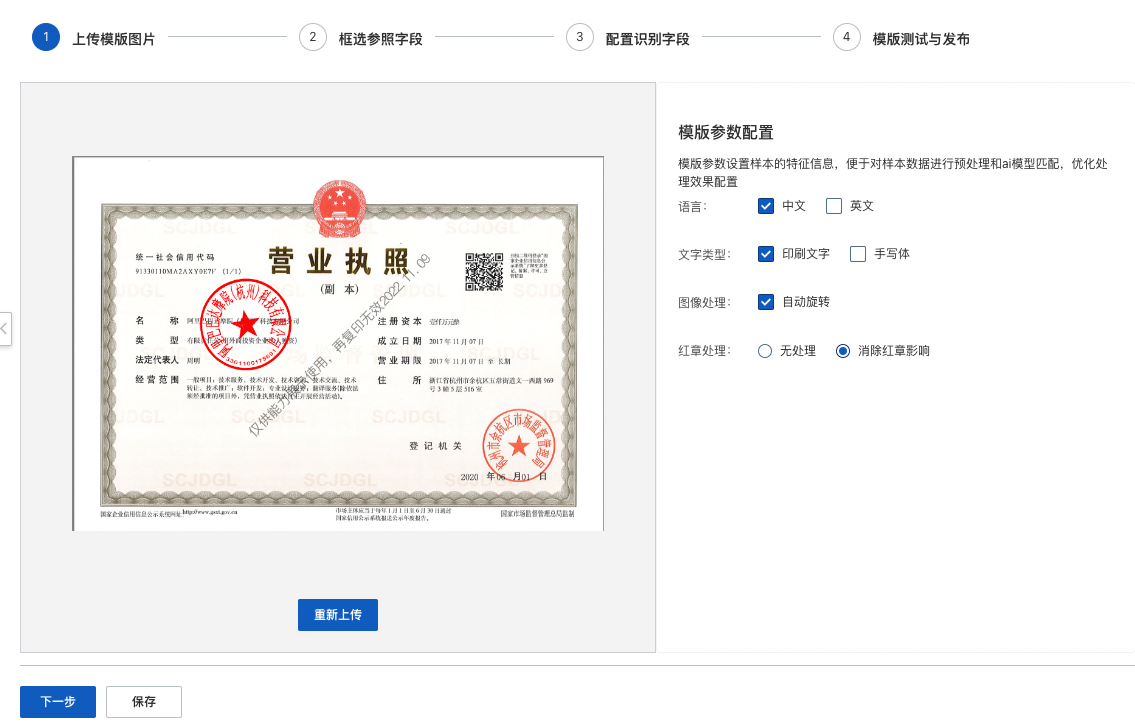
Step 2: Select reference fields
On the left toolbar, click the Select button and draw boxes around text regions in the template image where the content and position remain fixed. These regions become your reference fields.
In the reference field panel on the right, configure the parameters as needed and click Next. The parameters are described as follows:
Reference fields: These are fixed text regions used to automatically align and anchor incoming documents that have the same layout. They also affect classifier performance if a classifier is used.
Step 3: Configure recognition fields
On the recognition field configuration page, use the Select button in the left toolbar to draw a box around the areas that you want to extract.
In the right panel, enter a Field Name, verify the auto-filled Value, select a Field Type, and optionally adjust the Advanced Configuration settings to improve accuracy. Then, click Next. Parameter details:
Recognition fields: These are the regions to extract for structured output. Each field includes a required field name, value, and field type, in addition to optional advanced settings.
Field name: The public name of the field, used as the key in API responses. It must be globally unique within the template.
Value: The extracted content. The value is automatically filled after you select a region. For post-processing, such as date normalization, numeric-only amount extraction, or symbol replacement using regular expressions, you can use the field type and advanced configuration settings. These rules are applied when the API is called.
Step 4: Test and publish the template
After selecting all reference and recognition fields, test your template by clicking Select Local File and uploading an image with the same layout. If the results are satisfactory, click Publish Template and Start API Calls. Click the Re-upload button to test multiple samples, or go back to refine your settings.
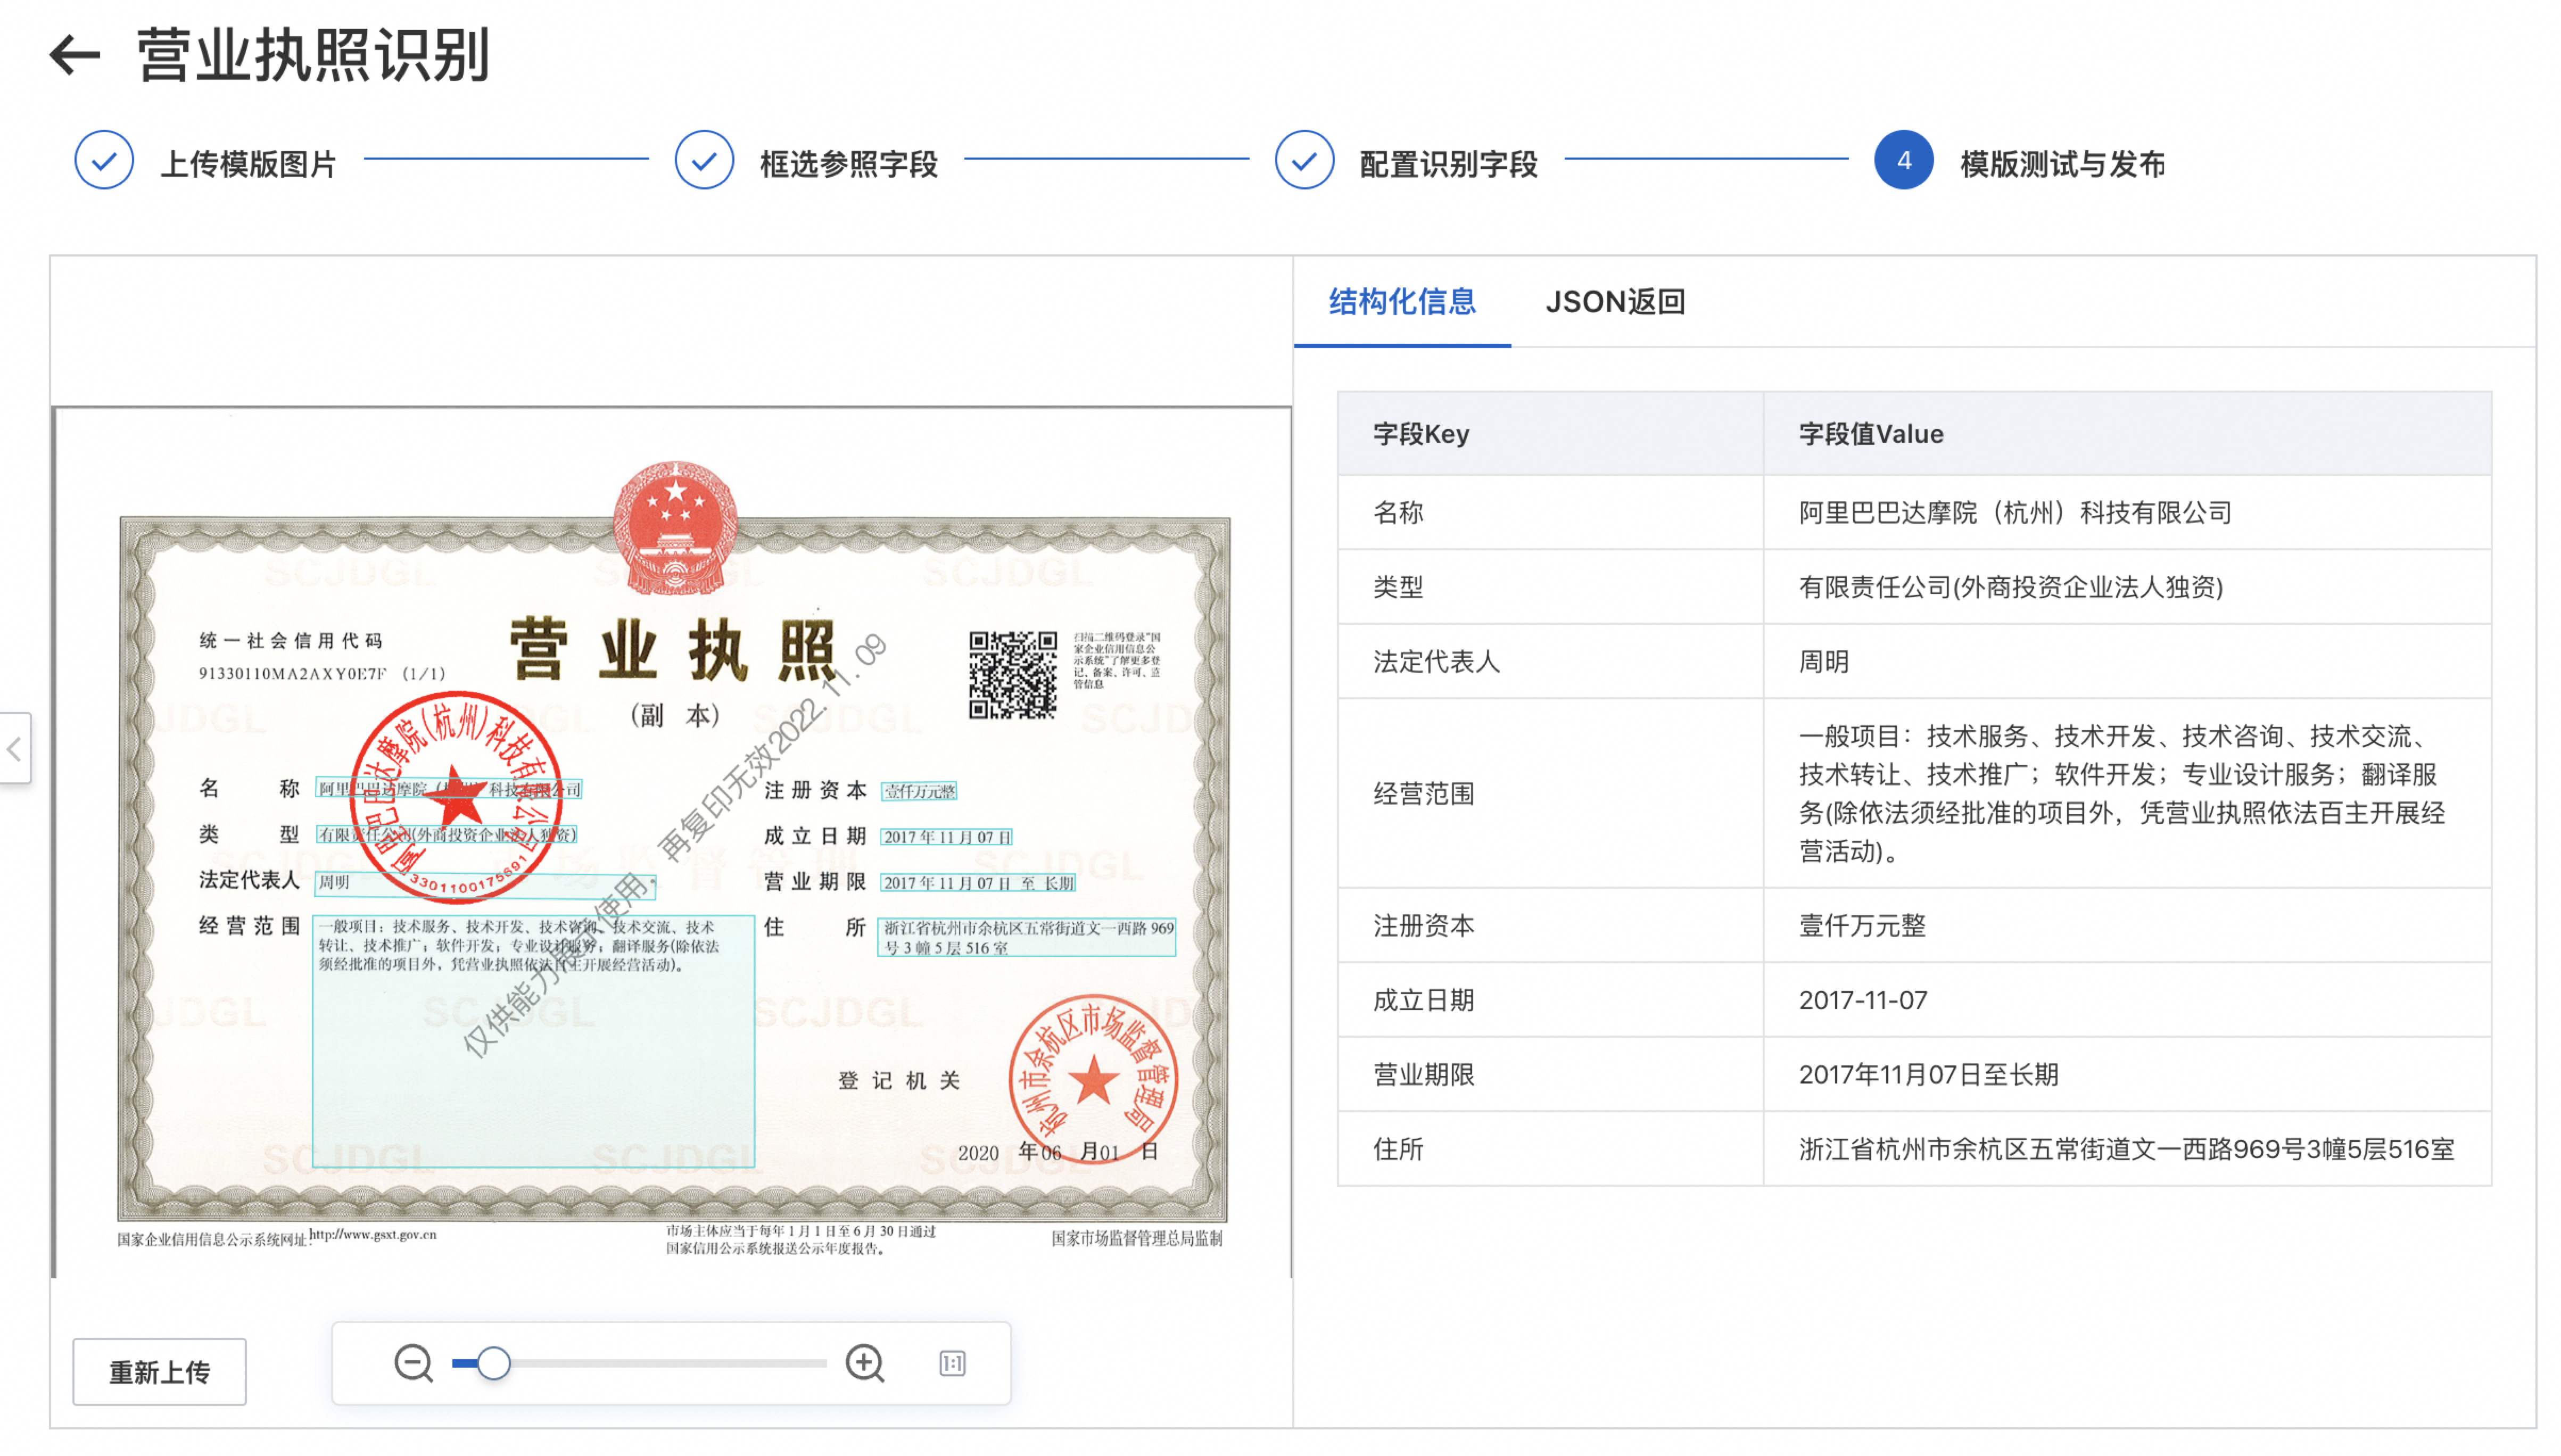
Template Tuning and Management
Template tuning tips
-
What if a test image fails to match the template?
Verify that the test image uses the same layout as the template.
Adjust or replace reference fields to improve matching accuracy.
-
What if the recognition results are incomplete?
Enlarge the recognition field box to cover the entire possible text area.
Check the field type. For example, switch from text to number if digits are misread as letters.
Review the advanced configuration settings.
-
What if the recognition fields return incorrect values?
Verify the field type. Switching from a generic type to a numeric type may improve precision.
Review the advanced configuration settings.
-
What if the bounding boxes are offset?
Check that the reference and recognition fields meet the selection requirements.
Verify that the template image meets the quality guidelines.
Template management
After you publish a template, you can go to the project overview page to view template details and usage metrics. Published templates support both API calls and online use.
You must activate the Custom KV Template service before you can configure templates.
Only published templates can be called or used online. Usage data is displayed in the dashboard. Both API calls and online use incur charges. For more information, see OCR Document Self-Learning Billing.
Related links
OCR Document Self-Learning: Console
Custom KV Template Developer Guide: Online Debugging, API Reference, SDK Documentation