Import structure and data
Background information
You can use OceanBase Developer Center (ODC) to import the structure and data of database objects in batches.
ODC import tasks allow you to import the structure and data of database objects, only the data, or only the structure.
Import structure and data: Imports both the definition statements and the data of the database objects.
Import data only: Imports only the data of table or view objects.
Import structure only: Imports only the definition statements of the database objects.
Import file formats
The ODC import tool supports ZIP compressed files for batch and single-table imports, SQL files for batch imports, and CSV files for single-table imports.
A ZIP compressed file is an archive file that ends with .zip. When you create an import task and select ZIP Compressed File for Import Content, you must also set Data Format to CSV Format or SQL Format to specify the format of the data in the compressed file.
For batch imports, you can use SQL files. An SQL file ends with .sql and contains statements that can be directly executed in a database, such as SELECT, INSERT, UPDATE, DELETE, CREATE, and DROP.
For single-table imports, you can use CSV files. A CSV file is a data file that ends with .csv or .txt and supports custom delimiters.
Notes
The web version of ODC limits the size of uploaded files to 2 GB after compression. You cannot upload files larger than this limit. To import large amounts of data, use the OBLOADER data import tool.
A maximum of five import tasks can run in parallel. Subsequent tasks are placed in a queue to wait for execution.
Files involved in an import task are retained for 14 days by default.
For data sources of OceanBase Database V4.0.0 and earlier, you can improve the import speed by configuring the sys tenant account and password. ODC calculates the optimal parallel policy based on partition locations. For objects other than tables and views, ODC needs to use the sys tenant to query and determine partition locations in OceanBase Database V4.0.0 and earlier.
For data sources of OceanBase Database versions later than V4.0.0, you do not need to configure the sys tenant account and password. ODC can query and determine partition locations through the views of the business tenant.
Create an import task
Example: Batch import the structure and data of the employee and salary tables from a local disk to the odc_test database.
Item |
Example Value |
Data Source |
mysql4.2.0 |
Database Name |
odc_test |
Table Name |
employee, salary |
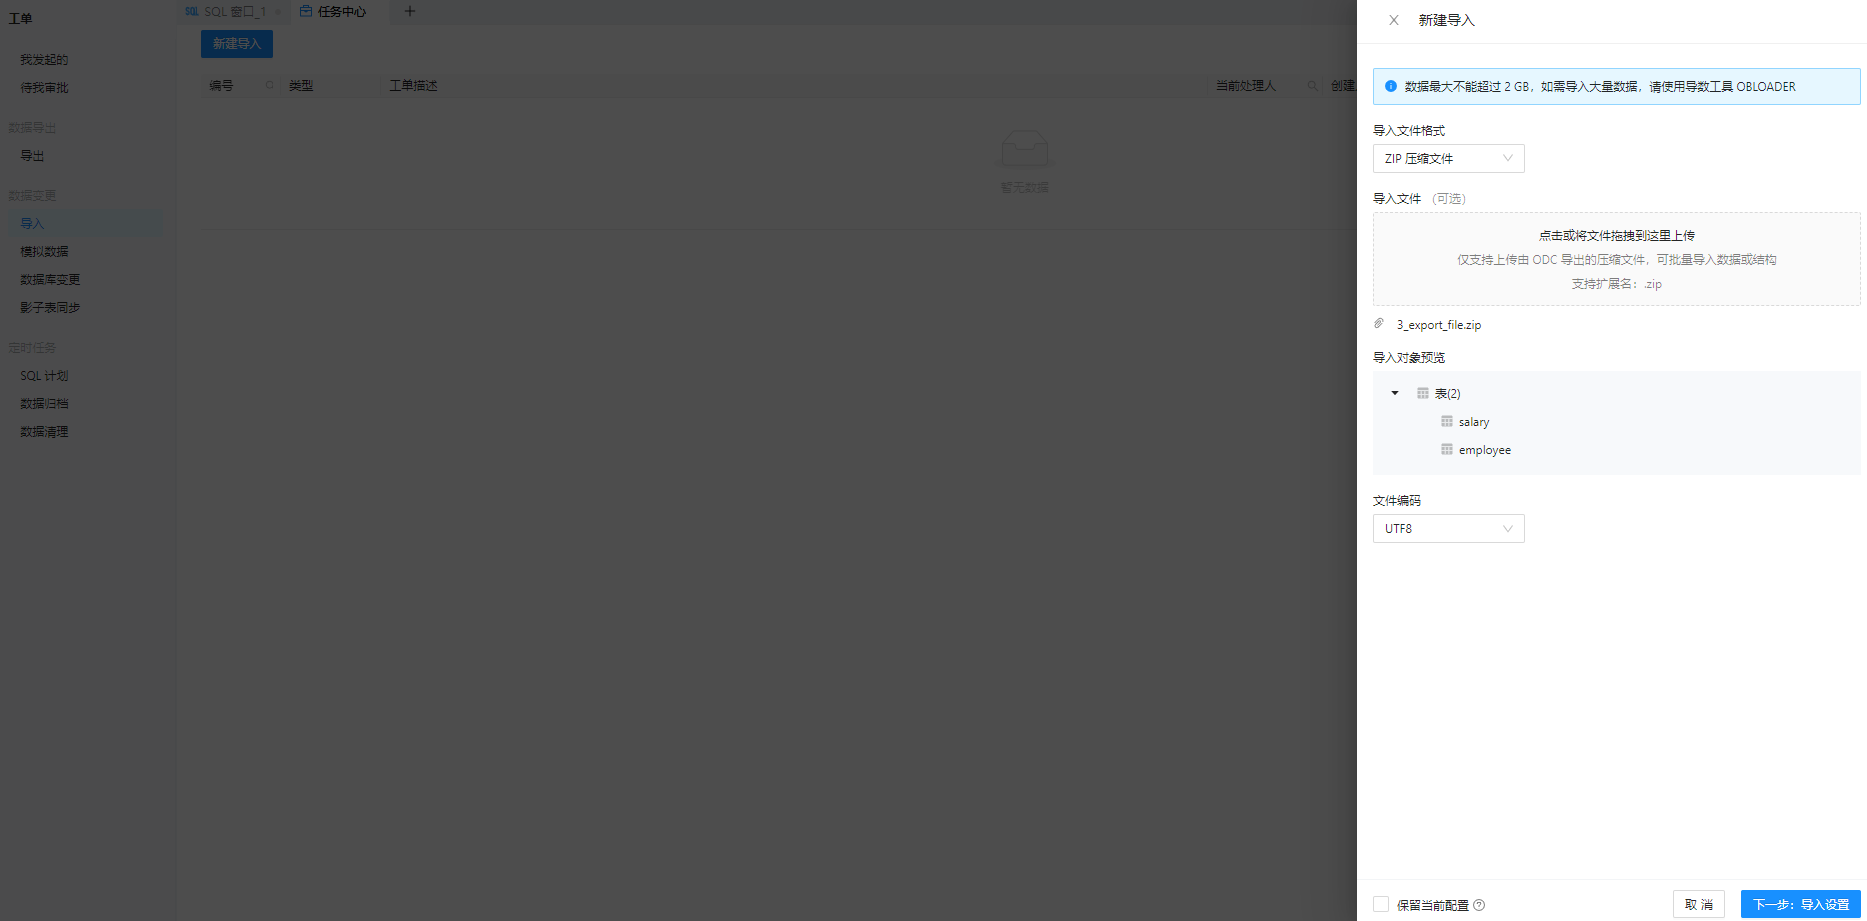
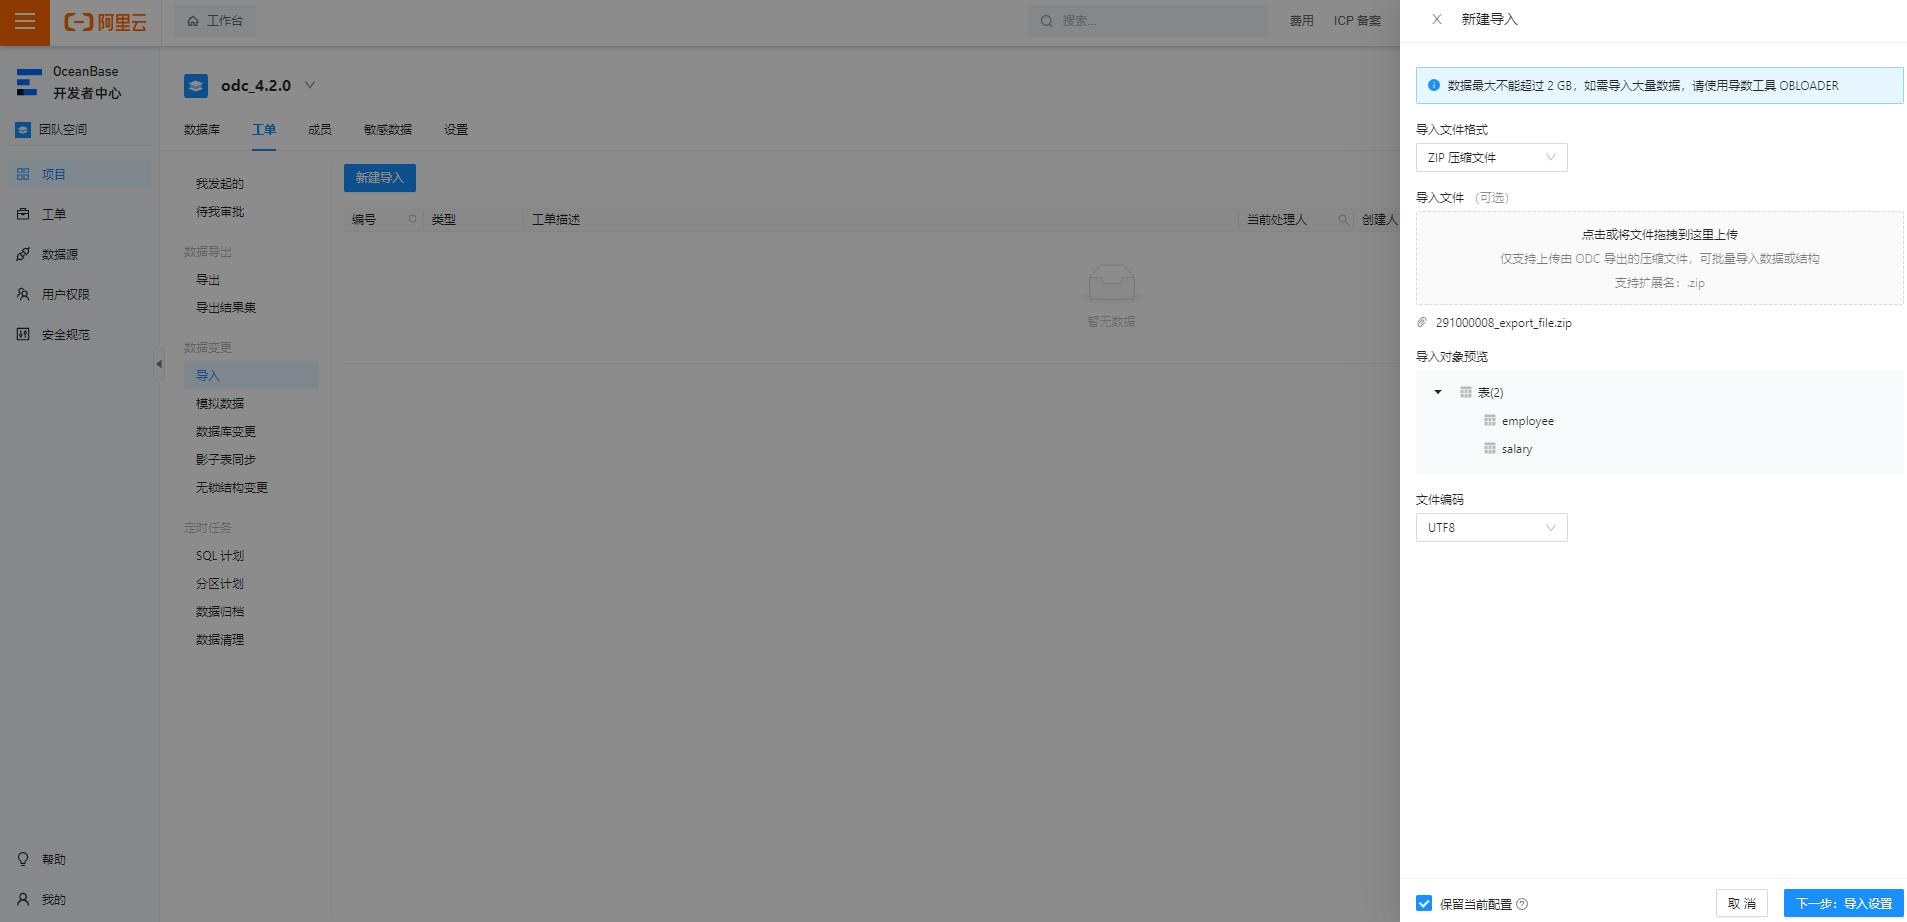
On the Tickets tab, click Import > Create Import.

In the task panel that appears, select an import file format.
 Note
NoteODC supports batch import of CSV files, SQL files, and ZIP compressed files.
When Import File Format is set to CSV File, you can skip the header row.
When Import File Format is set to ZIP Compressed File, you can import single or multiple tables and skip existing structures.
Upload the import file.
Click the file pool to open File Explorer and select the file to import. You can also drag the file into the file pool to upload it. The format of the uploaded file must match the selected import file format. ZIP compressed files must end with .zip, SQL files must end with .sql, and CSV files must end with .csv.
Select the file encoding.
ODC supports encoding formats such as ASCII, ISO-8859-1, GB2312, GBK, GB18030, Unicode (UTF-8), Unicode (UTF-16), Unicode (UTF-32), and BIG5.
Go to the import settings panel.
Click Next: Import Settings to configure settings for the imported file.
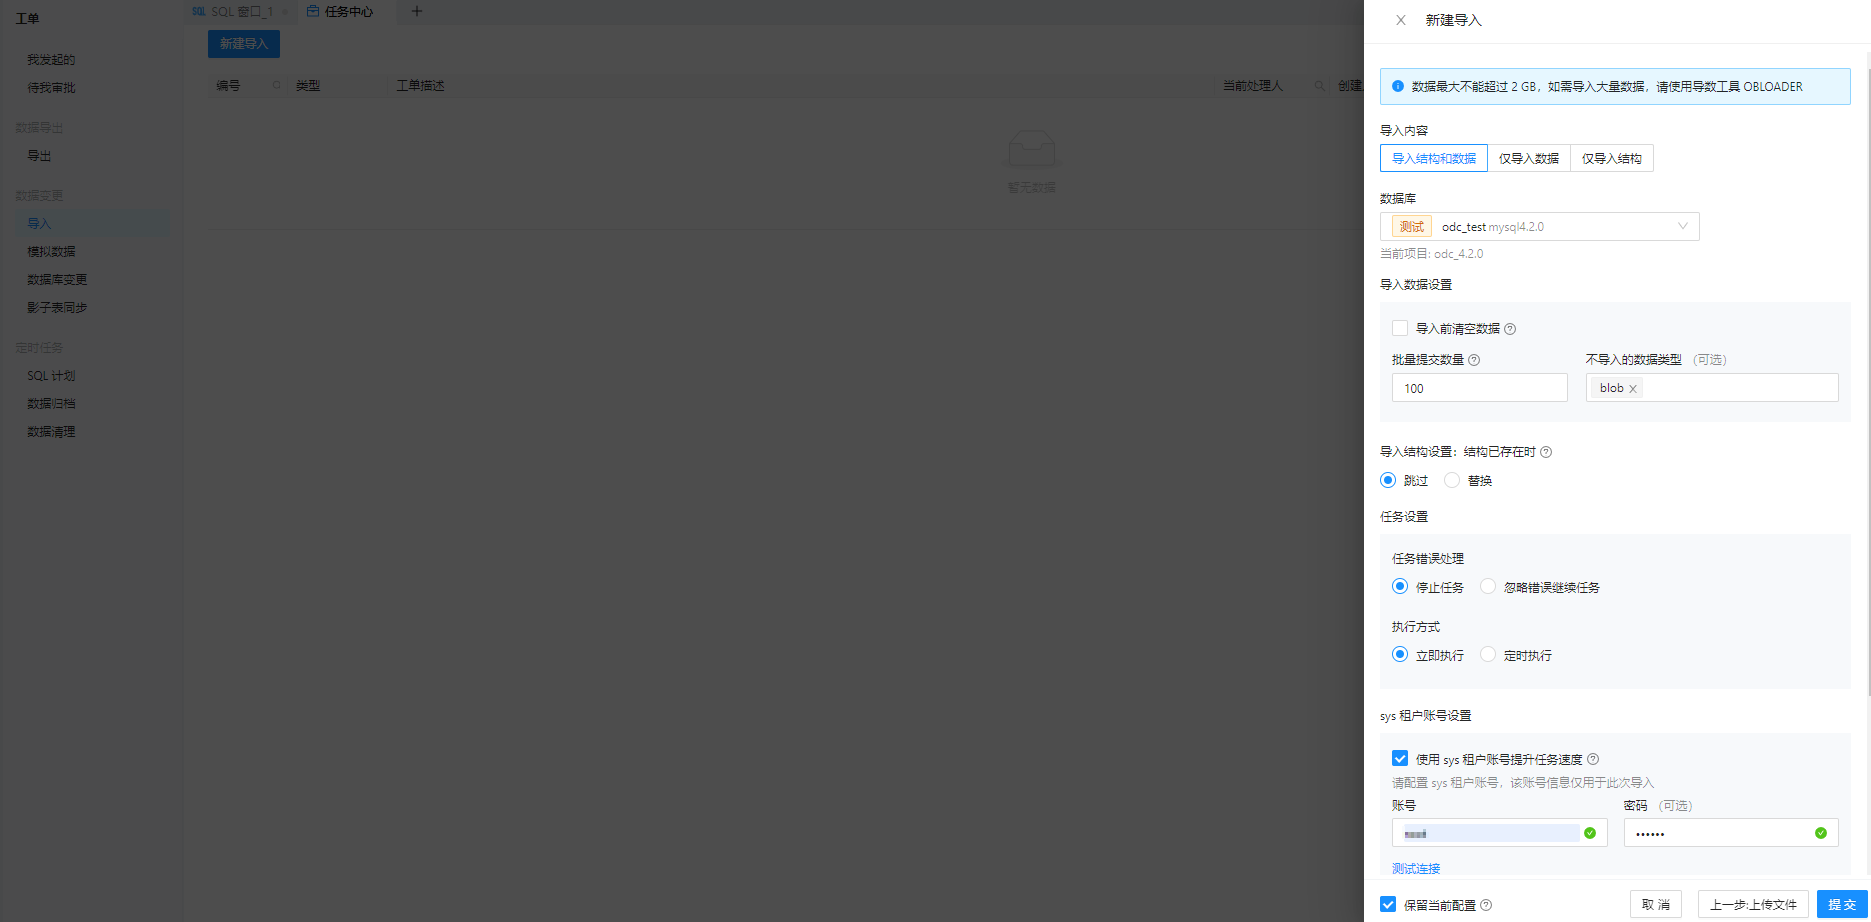
Select the import content.
 Note
NoteYou must specify this item when Import Format is set to ZIP Compressed File.
ODC supports three import methods: Import Data Only, Import Structure Only, and Import Structure and Data. Importing the structure means importing the definition statements of the objects.
Select the database.
Select the database where the imported objects will reside. The name of the data source for the target database is also displayed.
Configure data import settings.
When the import format is ZIP Compressed File and the import content is not Import Structure Only, you must configure the data import settings. This section includes the following settings:
Clear data before import: If you select this option, the original data in the target object is cleared before the new data is imported.
Batch Commit Size: Click the Advanced button next to the Data Import Settings tab and specify this item in the list that appears. By specifying a batch commit size, a
COMMITcommand is added after the specified number of data rows are imported.Data types to skip (Optional): You can specify data types to skip during the import. The skippable data types vary between MySQL and Oracle. You can select multiple types.
Configure structure import settings.
You cannot specify this item when the import content is Import Data Only. Select the action to take if the object structure already exists. If you select Skip, the import process skips the structure definition statements in the import file and directly imports the data. This action retains the original data in the object. If you select Replace, the process executes the structure definition statements in the import file to recreate and replace the original object. This action clears the original data from the object.
Configure task error handling and the execution method.
ODC provides two error handling methods: Stop Task and Ignore Error and Continue. Select the desired method on the Task Error Handling tab.
You can select Execute Immediately or Scheduled Execution.
Save the current configuration.
After you specify all the information, you can select Save current configuration in the lower-left corner of the panel to save the current data and structure file configurations.
Generate the import task.
After you specify all the information, click the Submit button in the lower-right corner of the panel to generate the import task.
View the import task.
After the task is generated, the Task Hub panel automatically appears. You can view the task information in the Task Hub.
View import tasks
Task list
The task list displays tasks from the last 48 hours.
A maximum of three import tasks can run in parallel. Subsequent tasks are placed in a queue to wait for execution.
After an import task is generated, the ticket panel automatically appears. In the import list, you can view the task approval status, task information, and task logs.

The import task list contains the following information:
Item |
Description |
ID |
The ID of the import task. |
Type |
Displays the task type specified when the task was created. |
Ticket Description |
Displays the description entered when the task was initiated. |
Current Handler |
The approver. Click the search icon |
Creator |
The user who created the import task. Click the search icon |
Creation Time |
Displays the date and time when the task was generated. |
Status |
Displays the current status of the task. The available management operations vary based on the status. |
Actions |
Click View to go to the task details page to view the task details and task logs of the target task. |


Task information
As shown in the preceding figure, click View in the import task list.
The task details panel for the target task appears. Click the Task Information tab to view basic information, import file information, and import object information.
Item
Description
Basic Task Information
Displays information such as the execution status, task ID, database, task type, risk level, execution method, creator, and creation time.
Import File Information
Displays information specified when the import task was created, such as the import file format, import file, file encoding, data format, and task error handling.
Import Object Information
Displays the data import completion status for the objects that you selected for the task. This includes the object name, object type, actual processed count, and data processing status.
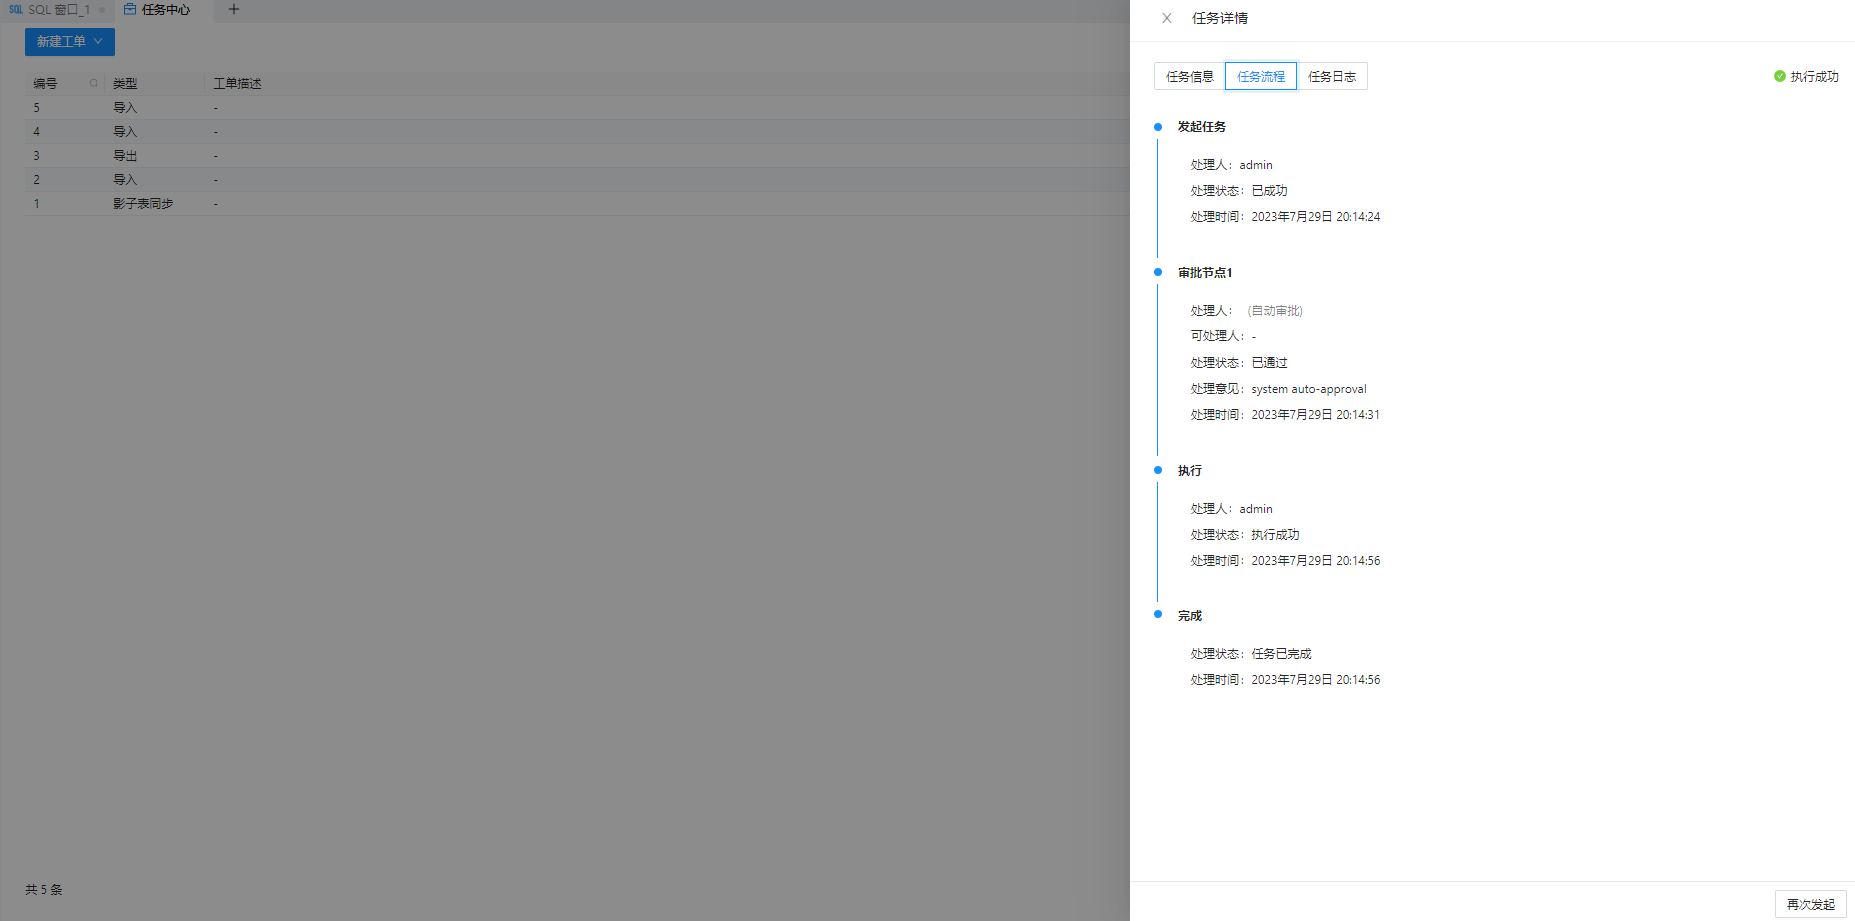
Task flow
In the task details panel of the target task, click the Task Flow tab to view information such as the task initiation, approval, and execution status.
Task logs
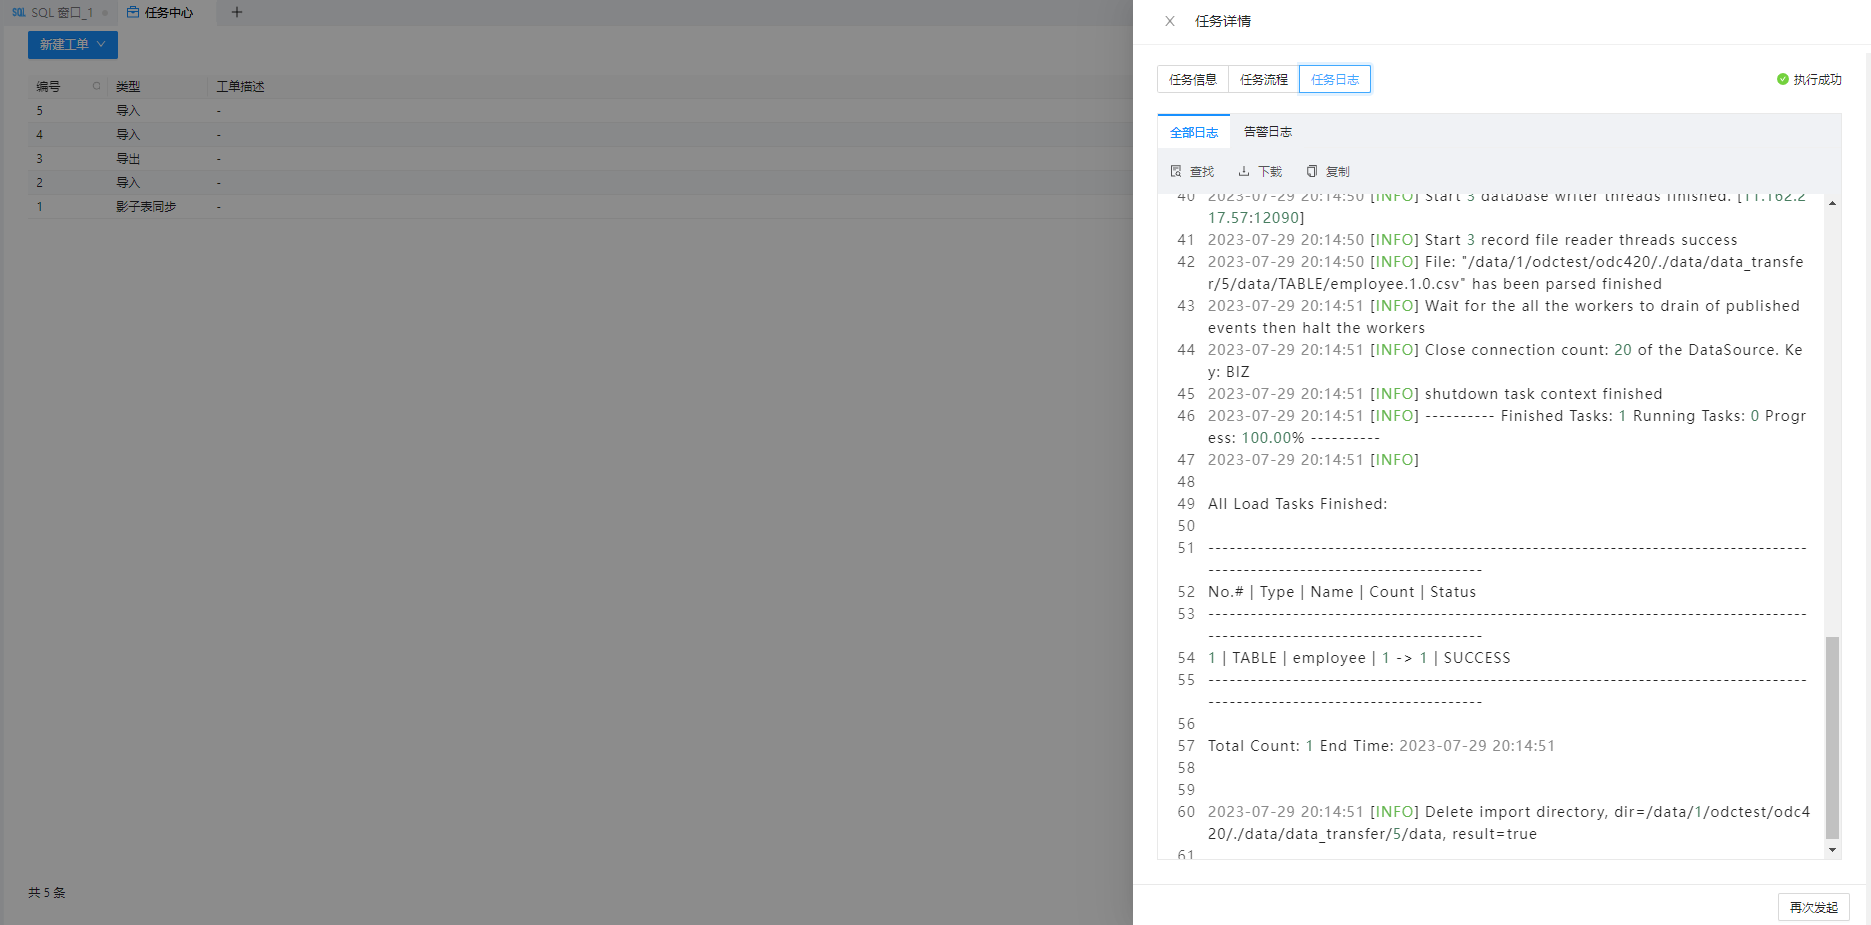
In the task details panel of the target task, click the Task Logs tab to view all logs and alert logs for the task.
Item |
Description |
All Logs |
All Logs displays all log information for the task, including INFO, ERROR, and WARN logs. |
Alert Logs |
Alert Logs displays only the ERROR and WARN logs for the task. If a task fails, you can view the error message in the alert logs. |
The toolbar also provides the following function buttons:
Function |
Description |
Find |
Click this button to find log information. |
Download |
Click this button to download the log information. |
Copy |
Click this button to copy the log information. |