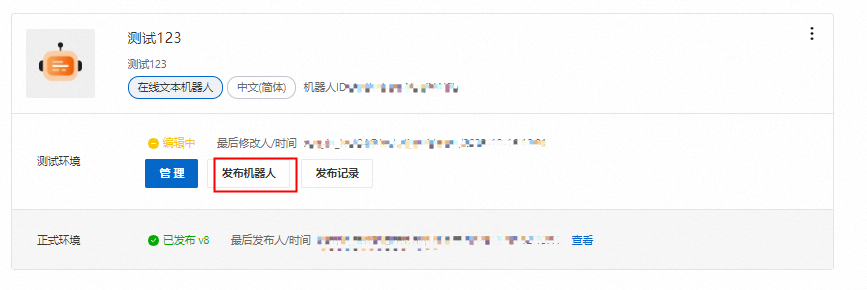
Quick start
You can use Chatbot to create chatbots.
Step 1: Create a chatbot
Log on to the Alibaba Cloud Intelligent Service console. You can open the Chatbot workspace in two ways:
Method 1: On the home page, click Manage next to Chatbot to open the workspace management page.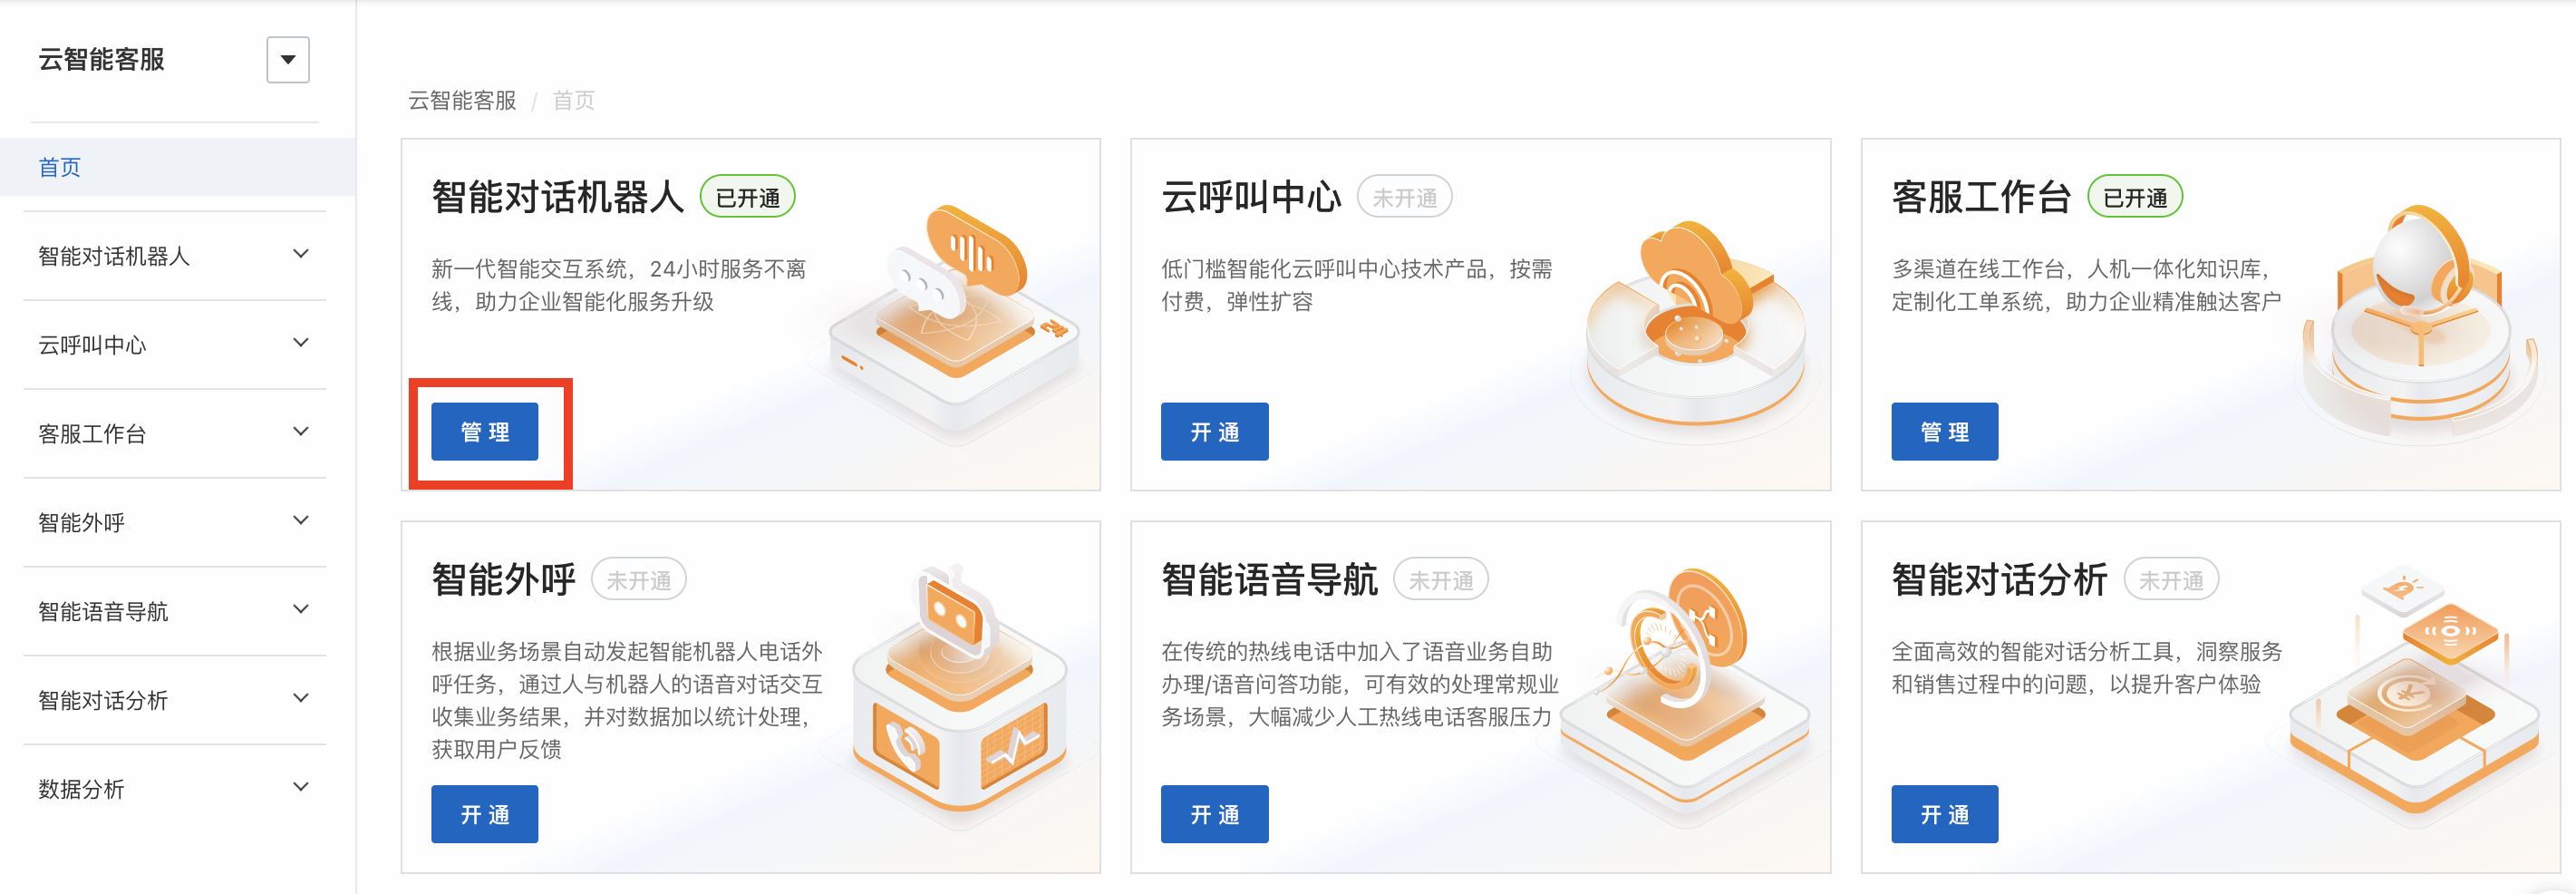
Method 2: In the navigation pane on the left, expand Chatbot and click Workspace Management to open the workspace management page.
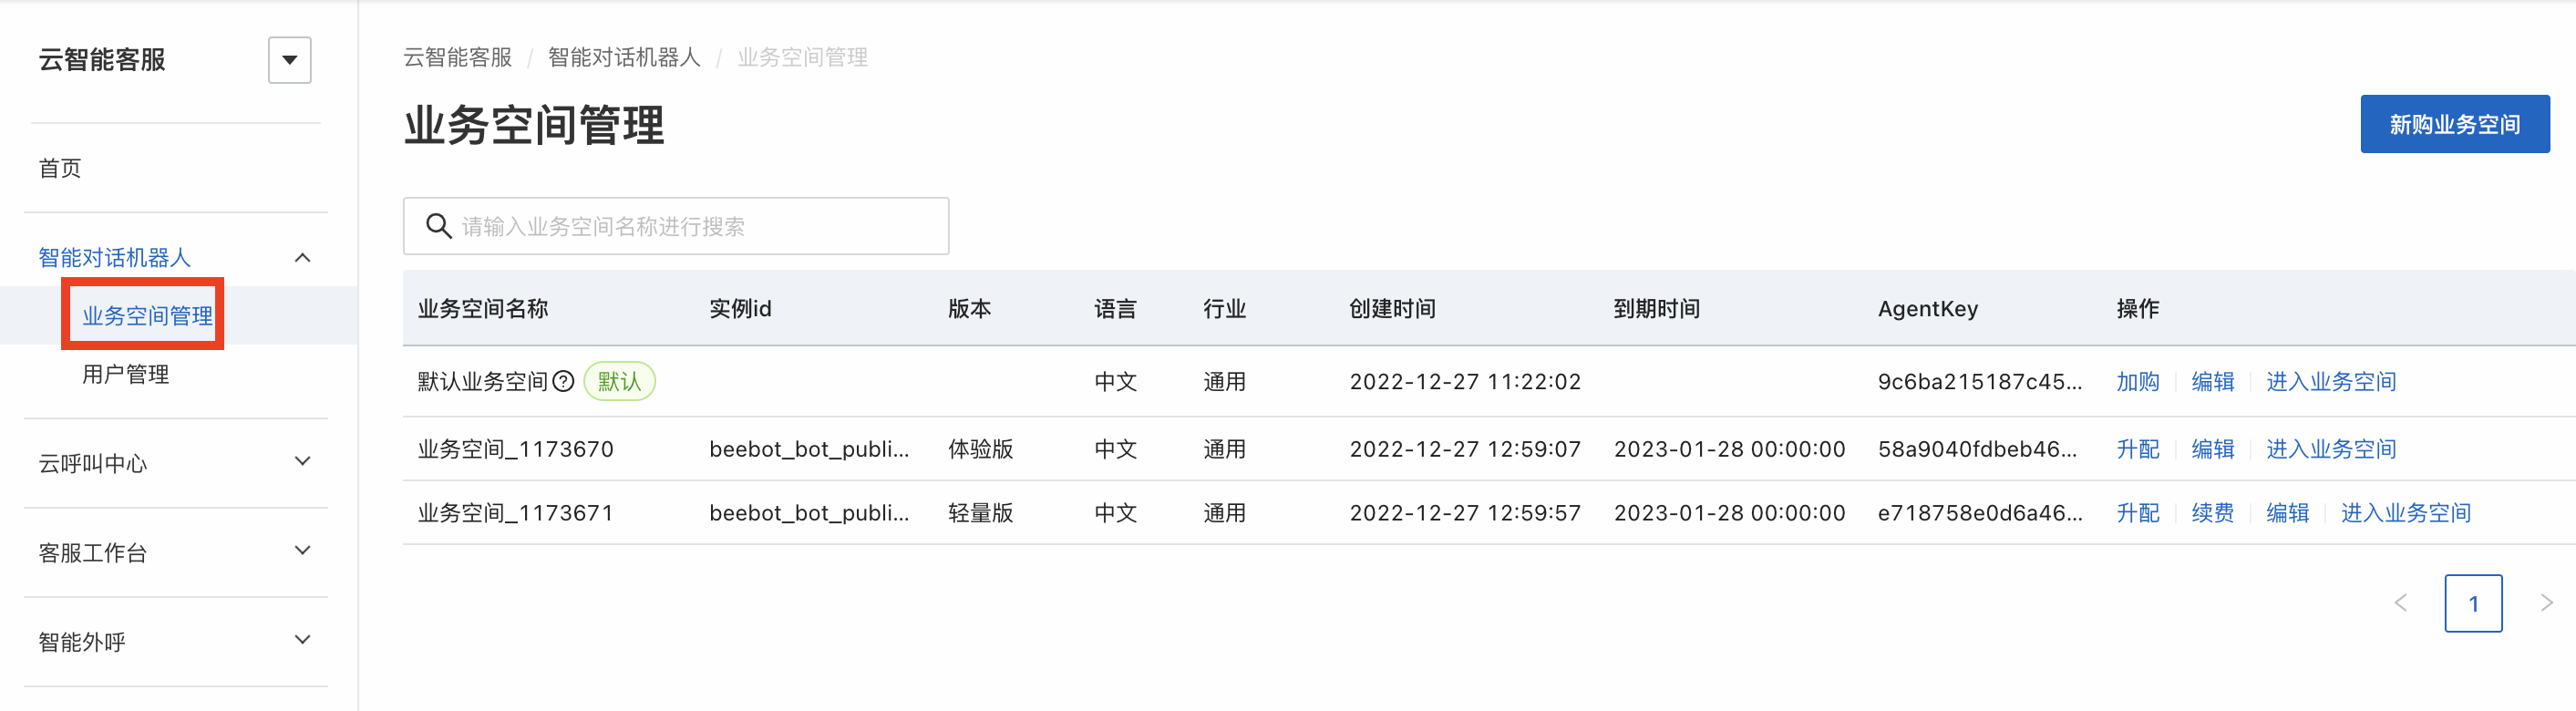
On the workspace management page, locate the workspace you want to manage and click Enter Workspace in the last column to open the Chatbot workspace.
On this page, you can view the Overview page to learn about the product configuration process or watch the tutorials.
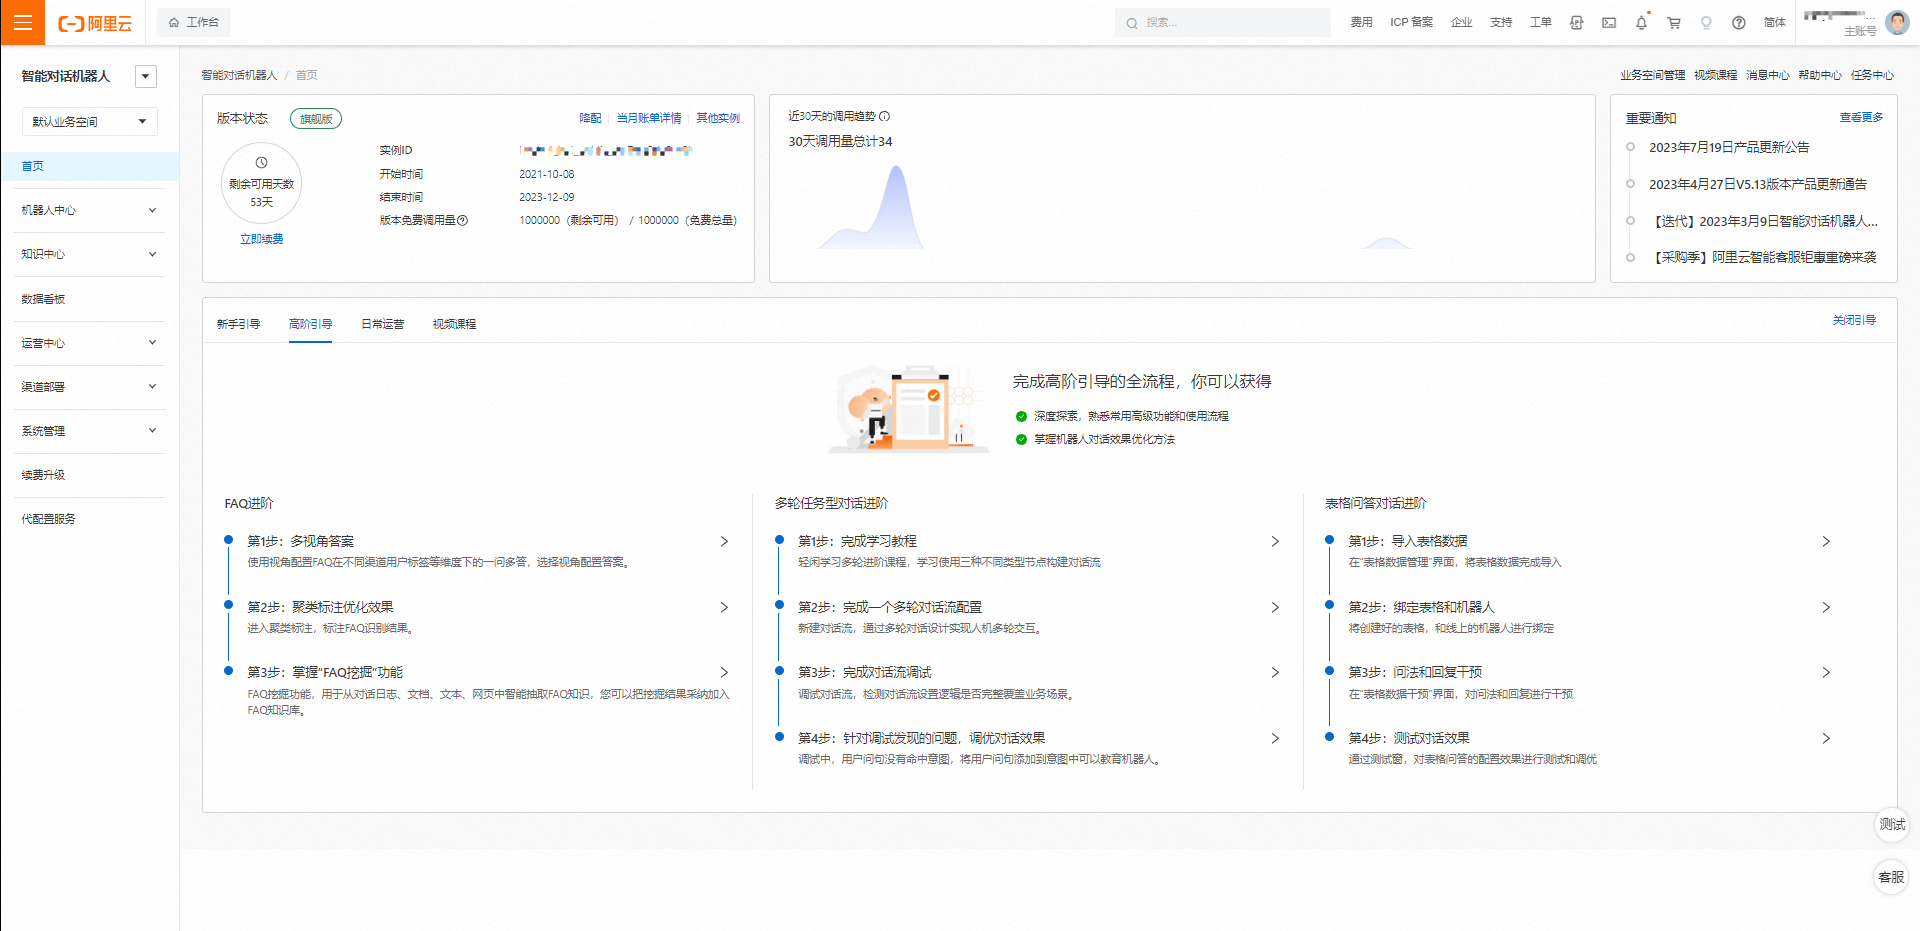 Then, choose the Chatbots > Bot Management menu item to create a new chatbot.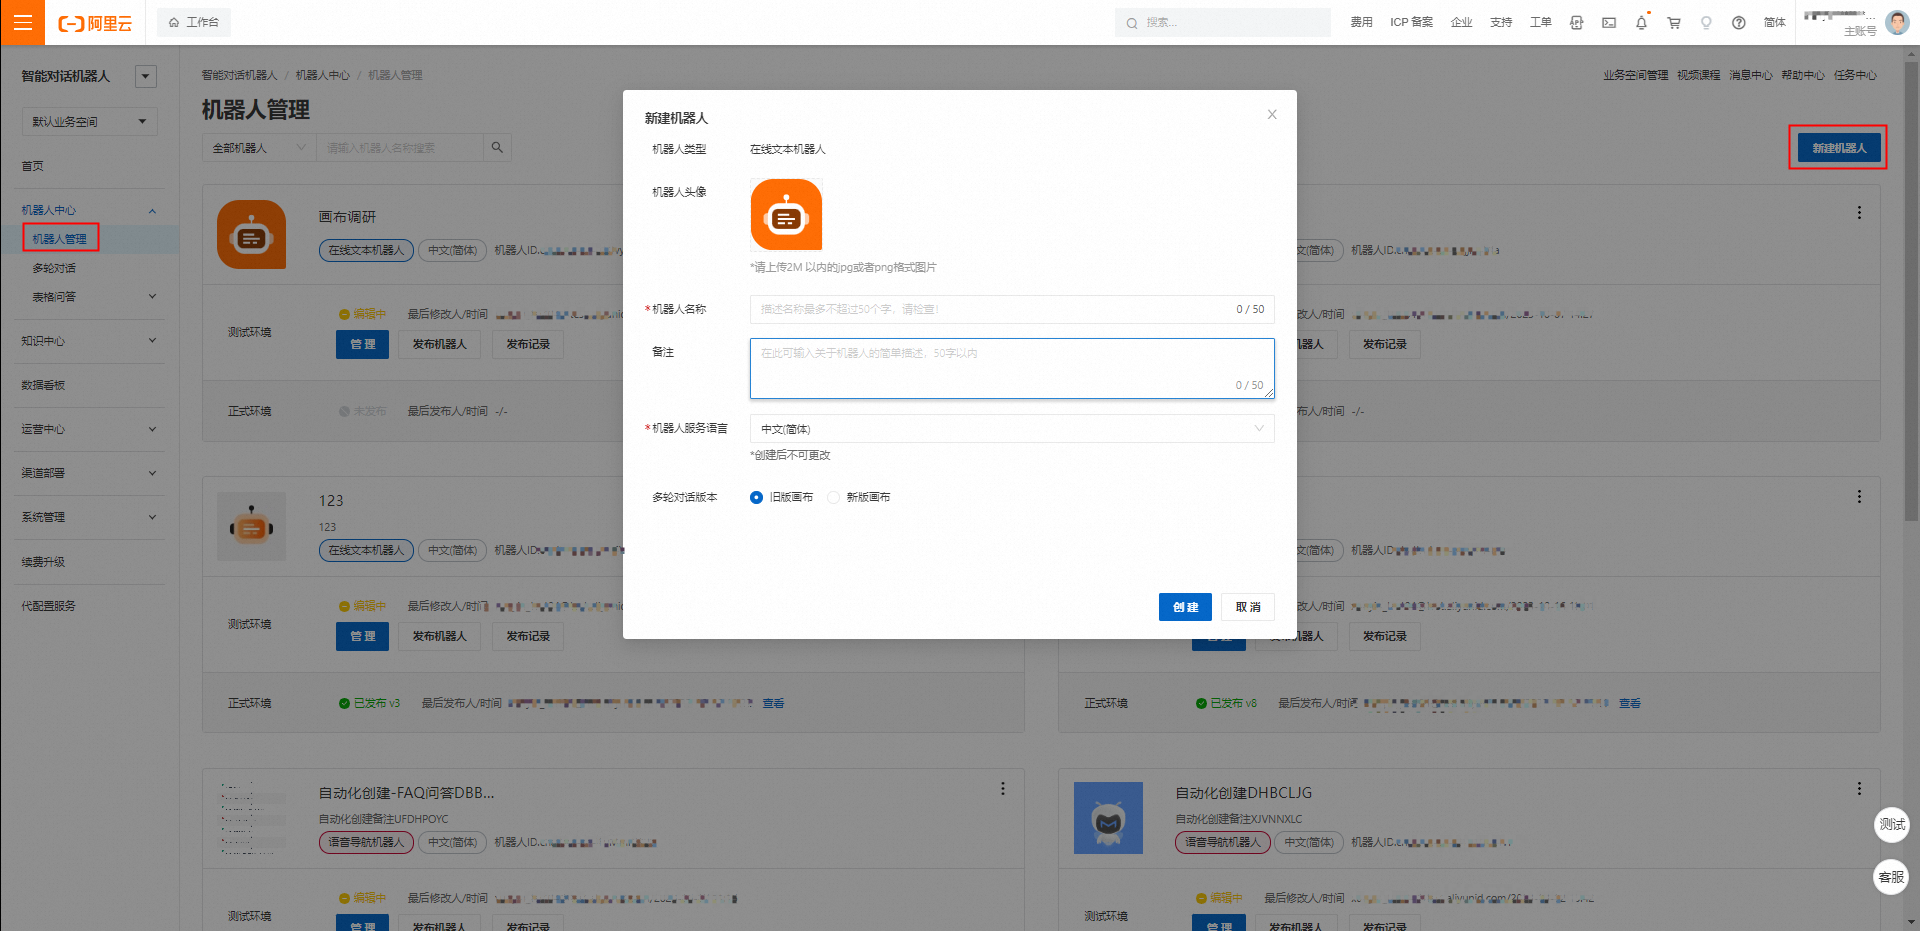
After you create the chatbot, go to the Bot Management page and click Manage to open the chatbot configuration page.
Step 2: Configure a knowledge base for the new chatbot
On the chatbot configuration page, you can configure the question and answer (Q&A) capabilities of the chatbot. These capabilities include attaching FAQ categories, managing conversation flows, enabling small talk, and configuring Q&A policies. To access these settings, go to the Bot Management menu, select a chatbot, and click Manage to open the chatbot configuration page.
Attach FAQ categories: Attach knowledge in a question-and-answer format. This allows the chatbot to handle single-turn Q&A.
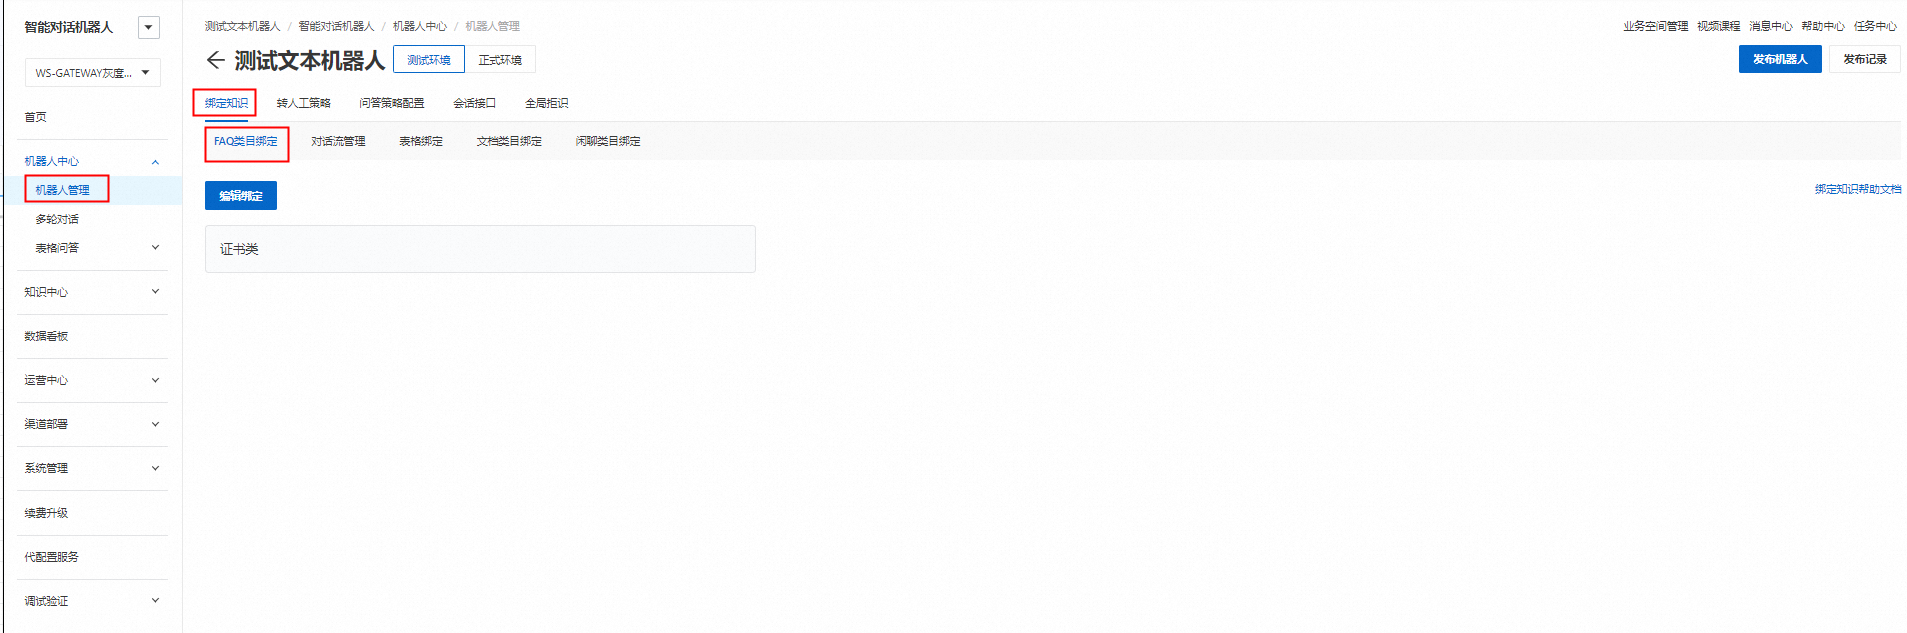
Manage conversation flows: Configure task-based or flow-based conversations. This allows the chatbot to handle multi-turn conversations and guide the session according to a preset flow.

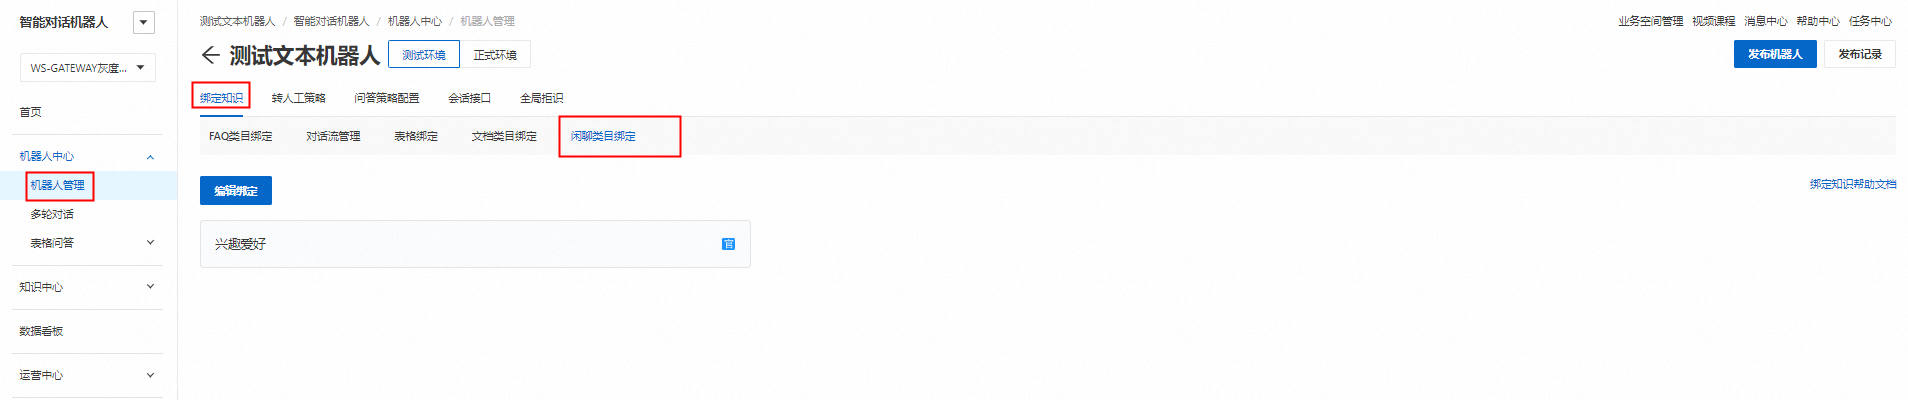
Small talk: Use pre-built small talk packages to enable your chatbot to engage in casual conversations with users.
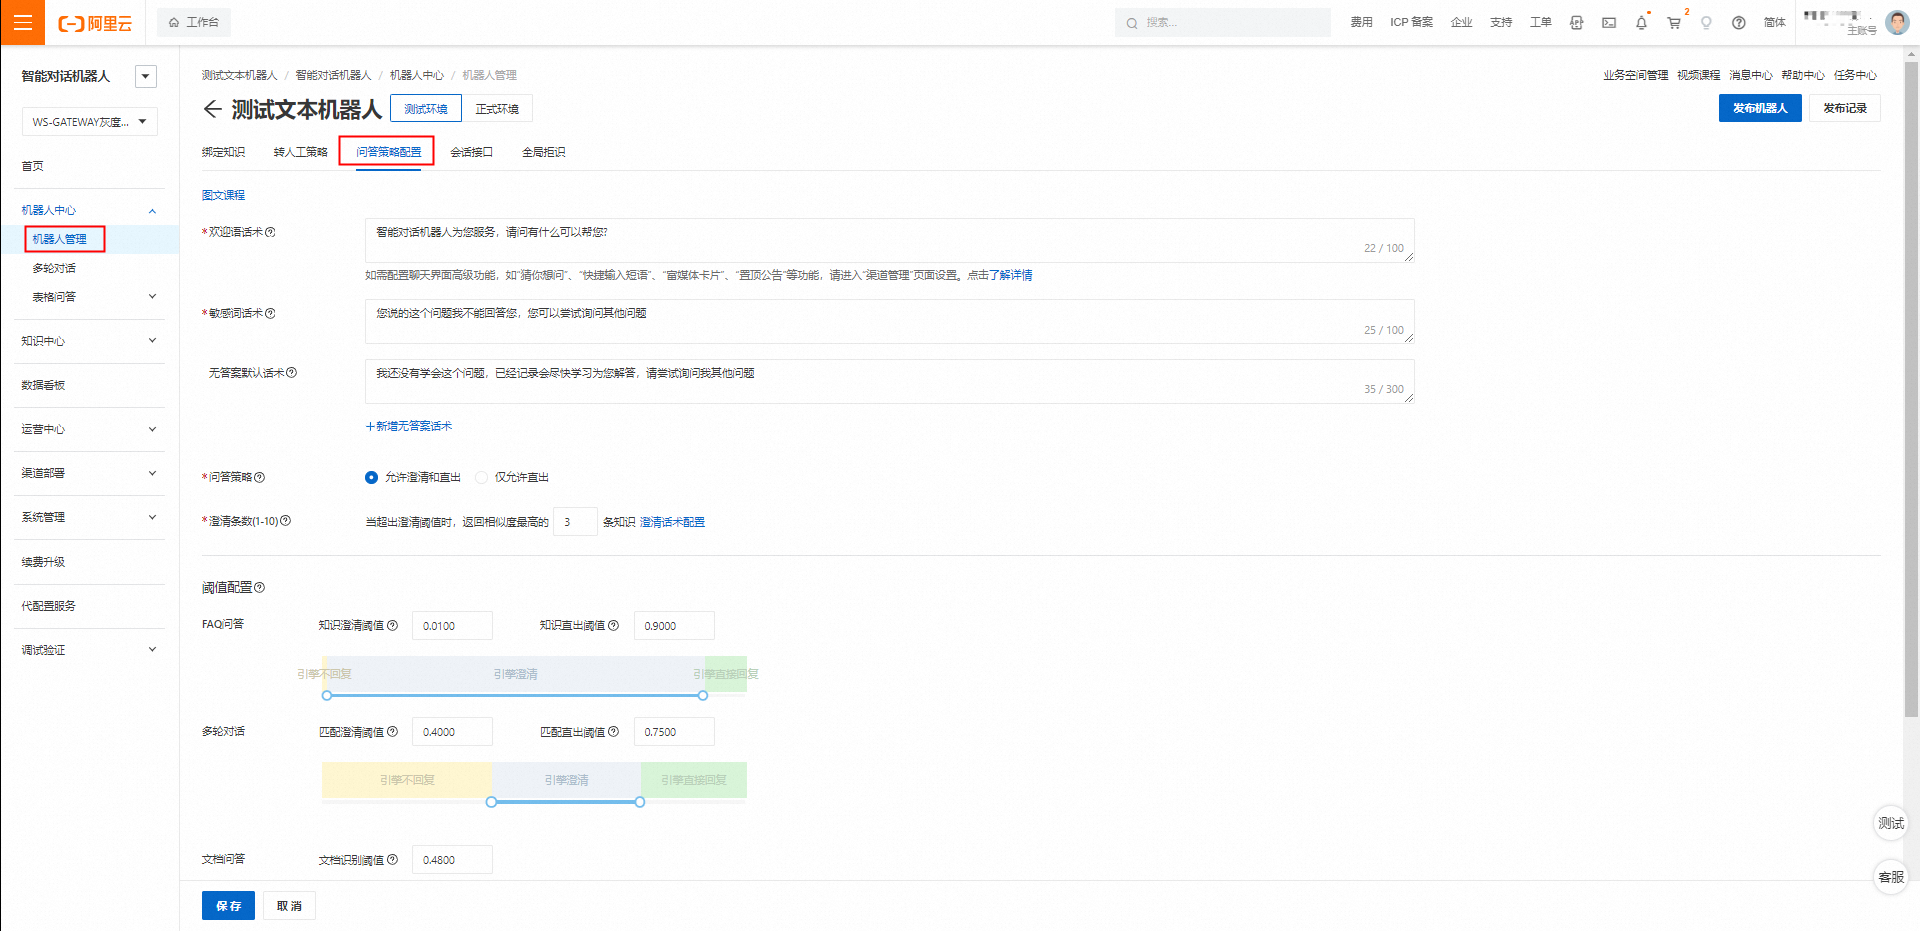
Configure Q&A policies: Configure various Q&A policies for the chatbot, such as welcome messages, sensitive words, default responses for unanswered questions, and the number of recommended Q&A pairs. The following table describes these features.

Feature |
Description |
Welcome message |
The first message the chatbot sends when a conversation starts. |
Sensitive word message |
The default reply when a user's question triggers a sensitive word. |
Default no-answer message |
The default message when the chatbot cannot find an answer to a user's question. |
Number of clarification items (1–10) |
The maximum number of knowledge items to return for clarification. |
Question and Answer Policy |
The chatbot matches a user's question with content in the knowledge base and provides an answer based on the similarity score. Direct answer then clarify: If at least one match has a similarity score above the direct answer threshold, the chatbot provides the single knowledge point with the highest score. If all matches are below the direct answer threshold but at least one is above the clarification threshold, the chatbot provides the top n knowledge points with the highest scores. Direct answer only: If at least one match has a similarity score above the direct answer threshold, the chatbot provides the single knowledge point with the highest score. |
Threshold configuration |
The conversation engine threshold settings affect how the algorithm engine determines the threshold for providing an answer. Questions with a similarity score below the calculated threshold will not be triggered. |
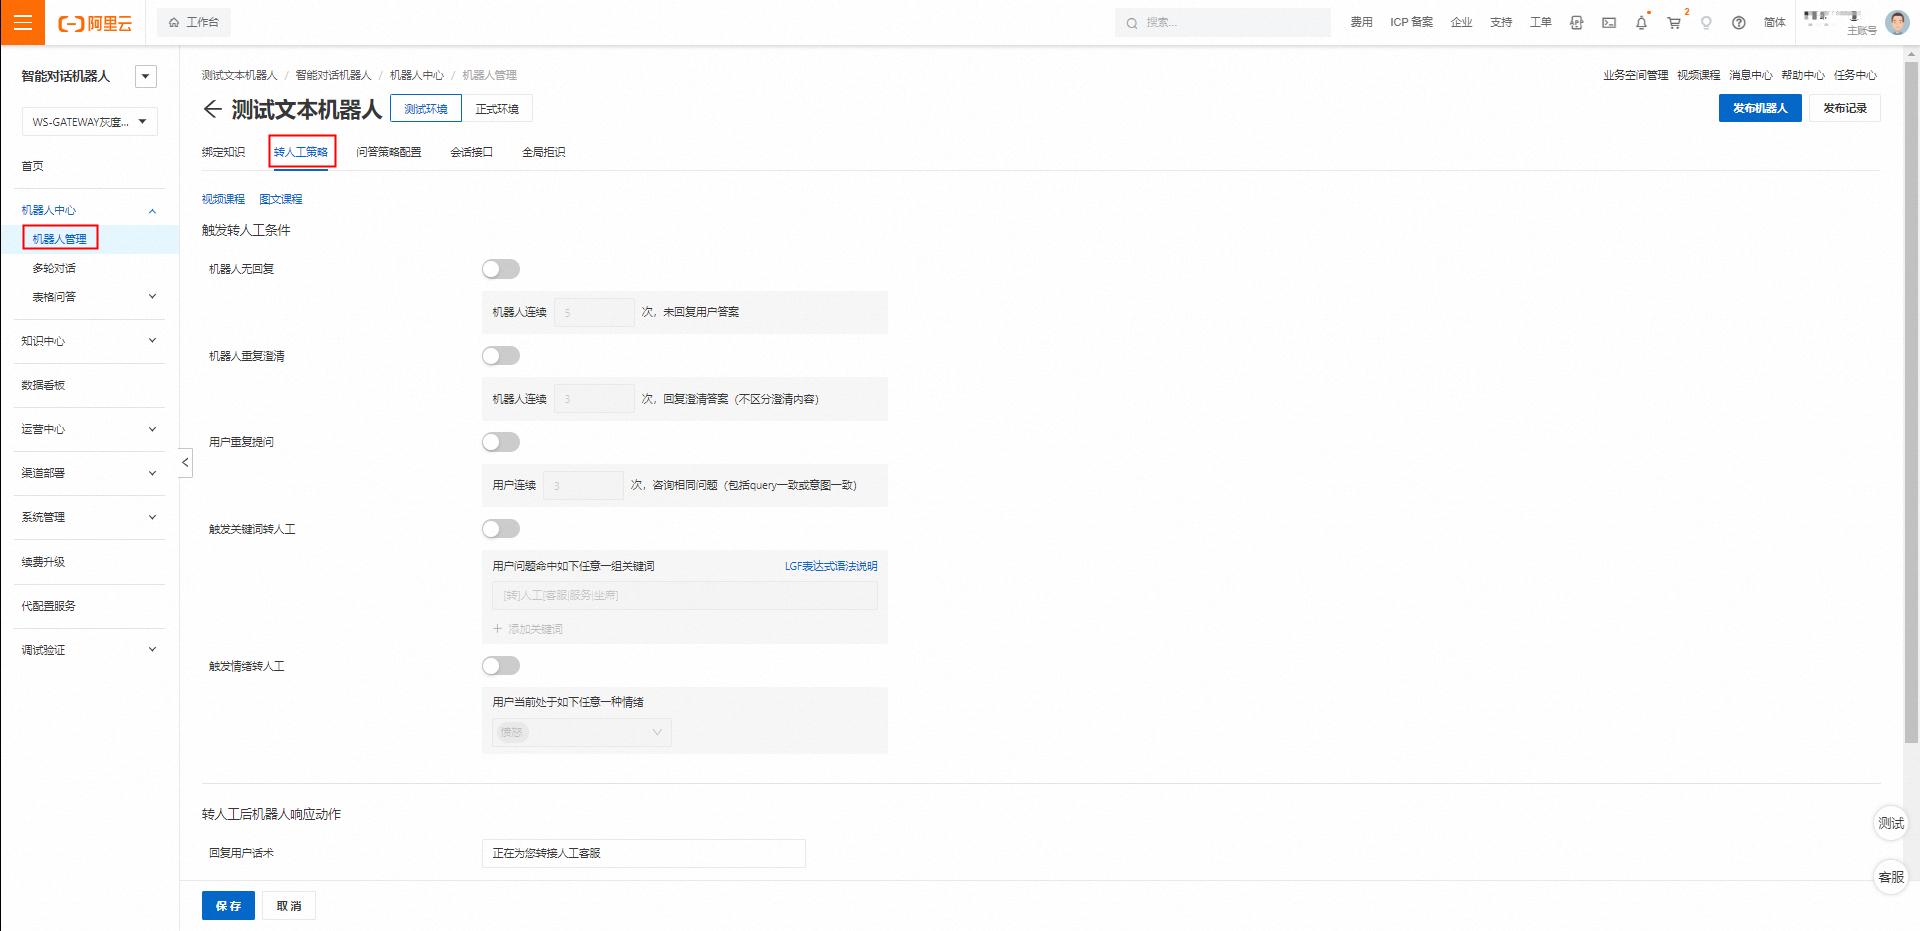
Transfer to agent policy:
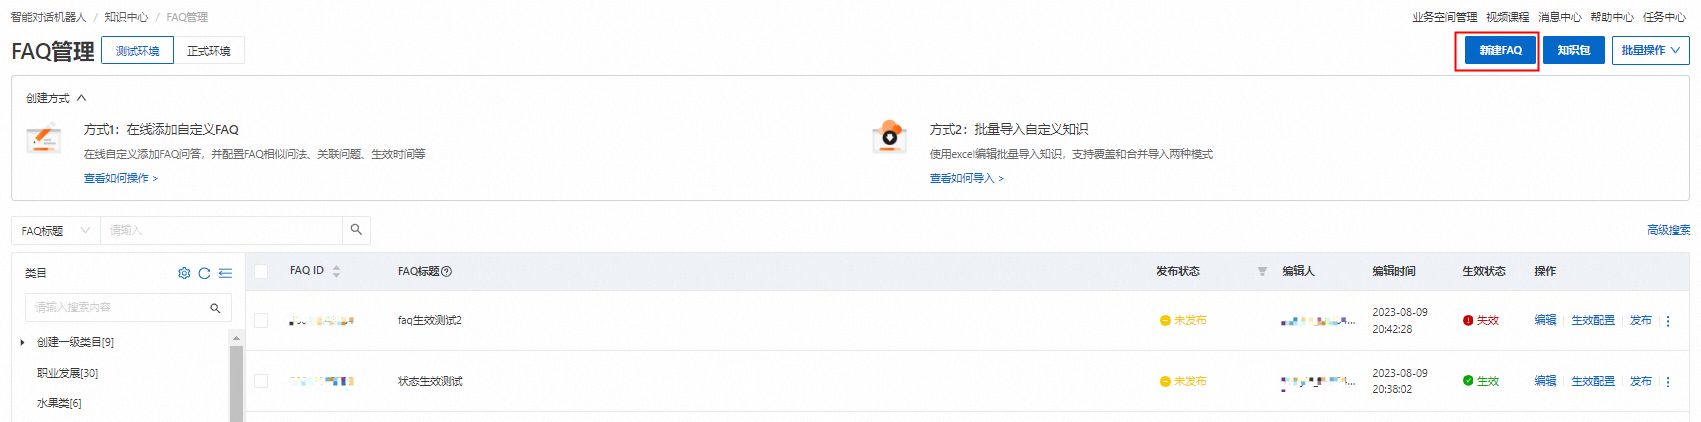
Create new knowledge in the FAQ base
You can upload FAQs in a batch or add them one by one. For more information, see FAQ management.
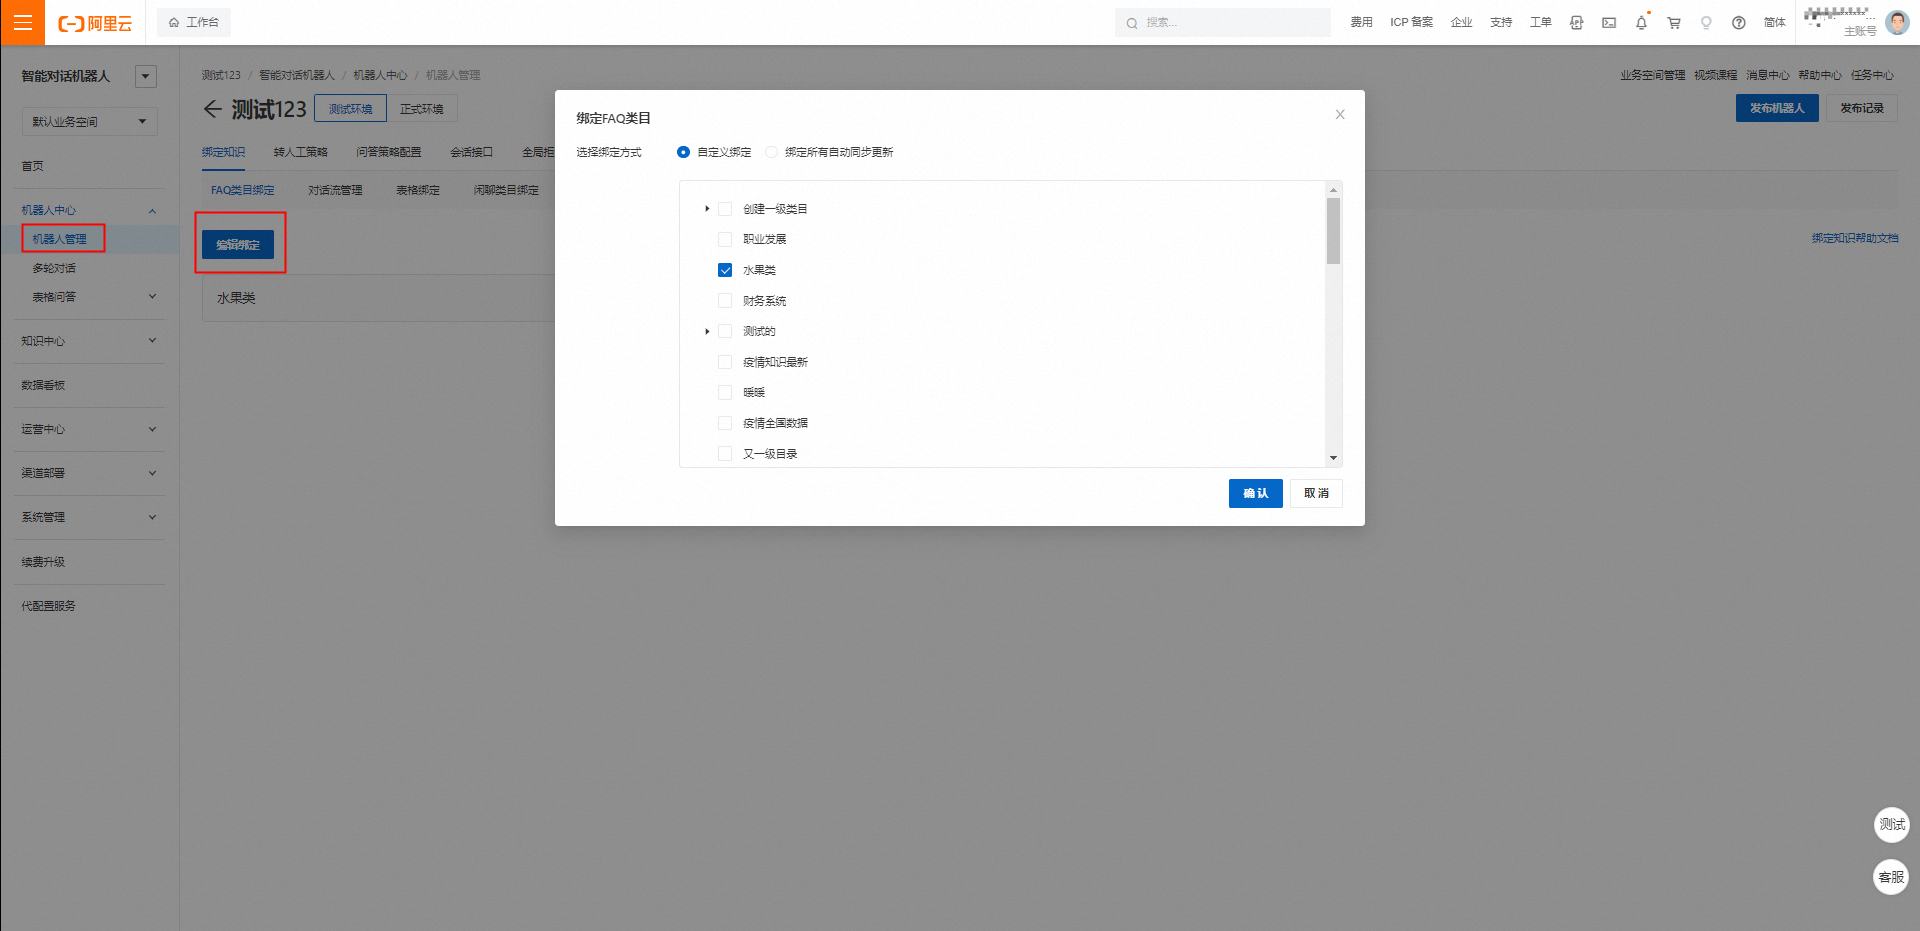
Attach FAQ categories to the chatbot instance. Select the knowledge categories from the FAQ base that you want to attach and click Save.
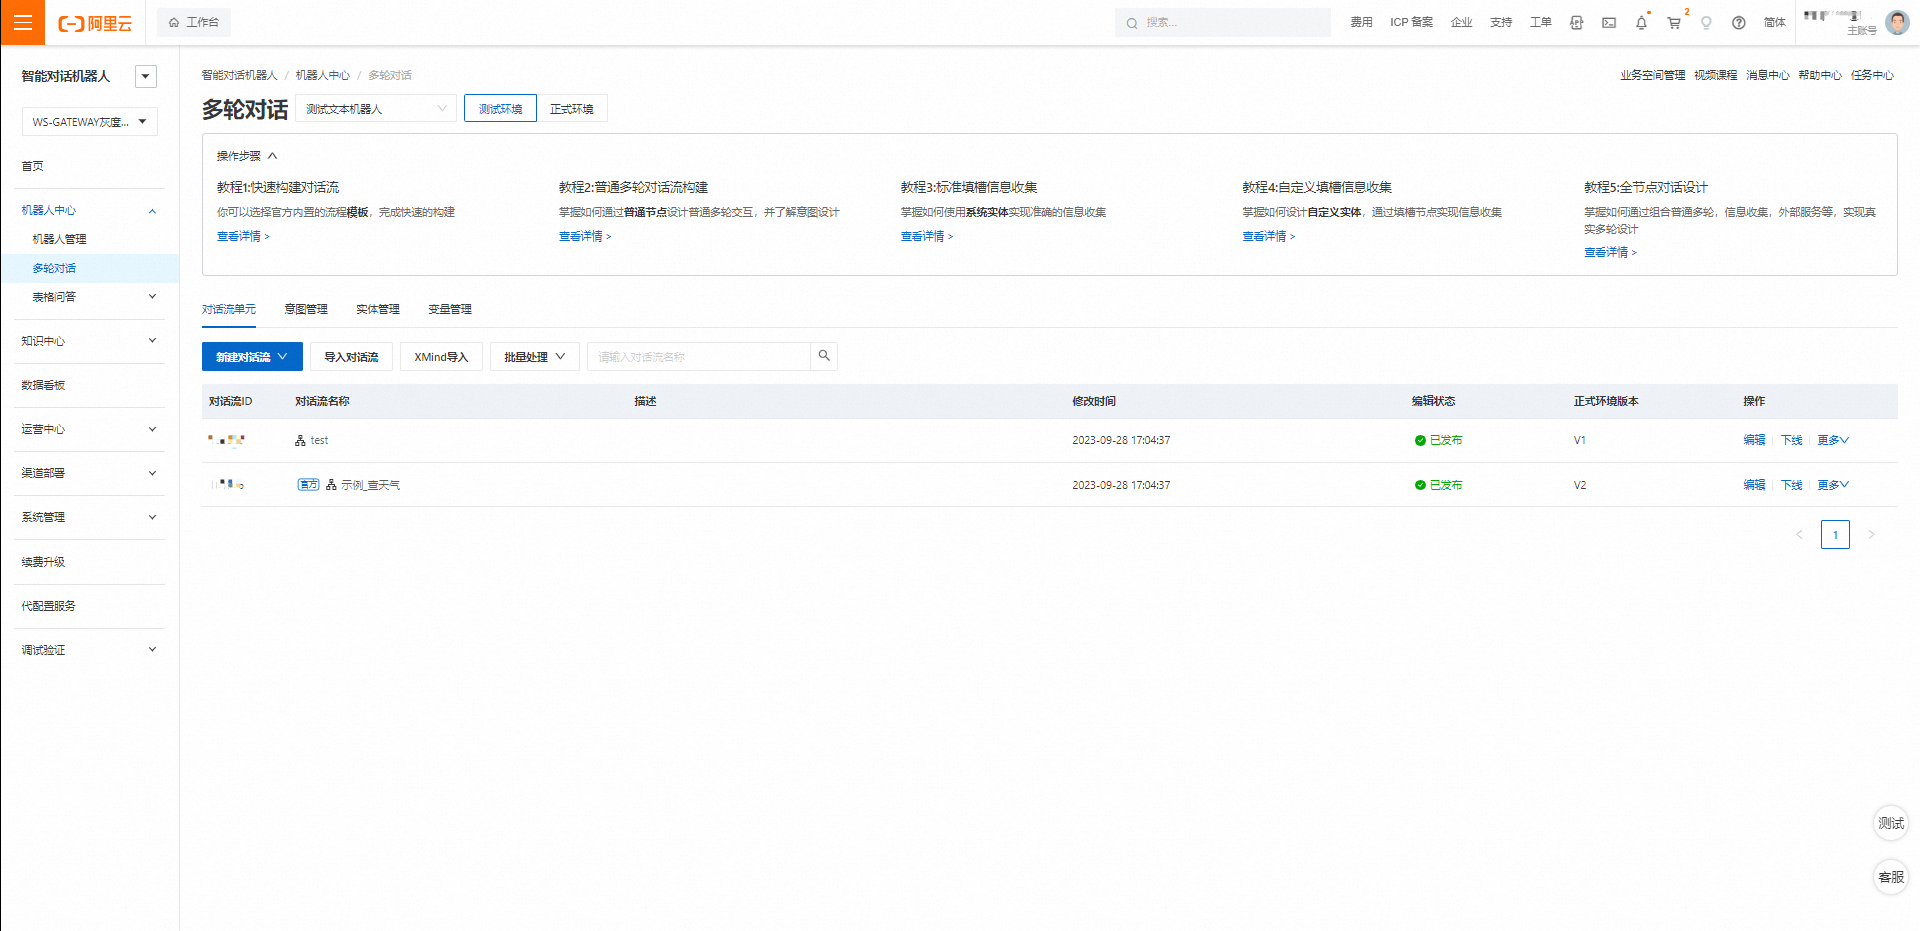
Configure a conversation flow for the chatbot
The chatbot configuration page provides an entry point for managing multi-turn conversations. Click Go to Multi-turn Conversation to open the configuration page for multi-turn conversations. For more information, see Dialog Studio (New Canvas).

Configure small talk packages for the chatbot instance
Each chatbot instance has a small talk management feature that you can enable or disable as needed. Two plugins are provided: the System-preset Small Talk plugin and the Custom Small Talk plugin.
System-preset Small Talk: Chatbot has analyzed a large amount of data to create tens of thousands of small talk entries. This supports simple small talk in general scenarios and allows users to interact with the chatbot. Click the Enable button on the System-preset Small Talk plugin to enable this feature. To disable it, click the Pause button.
Custom Small Talk: Chatbot provides 18 common small talk subjects. Because user expressions related to these subjects are automatically matched, the administrator does not need to maintain additional questions. The administrator can edit the chatbot's answers for a specific subject. Each subject supports one or more answers, and the chatbot randomly selects one to use in its reply.
Step 3: Test window
You can use the global test window to test the chatbot after configuration.
Click the floating test window button on the right side of the page to open the test window.
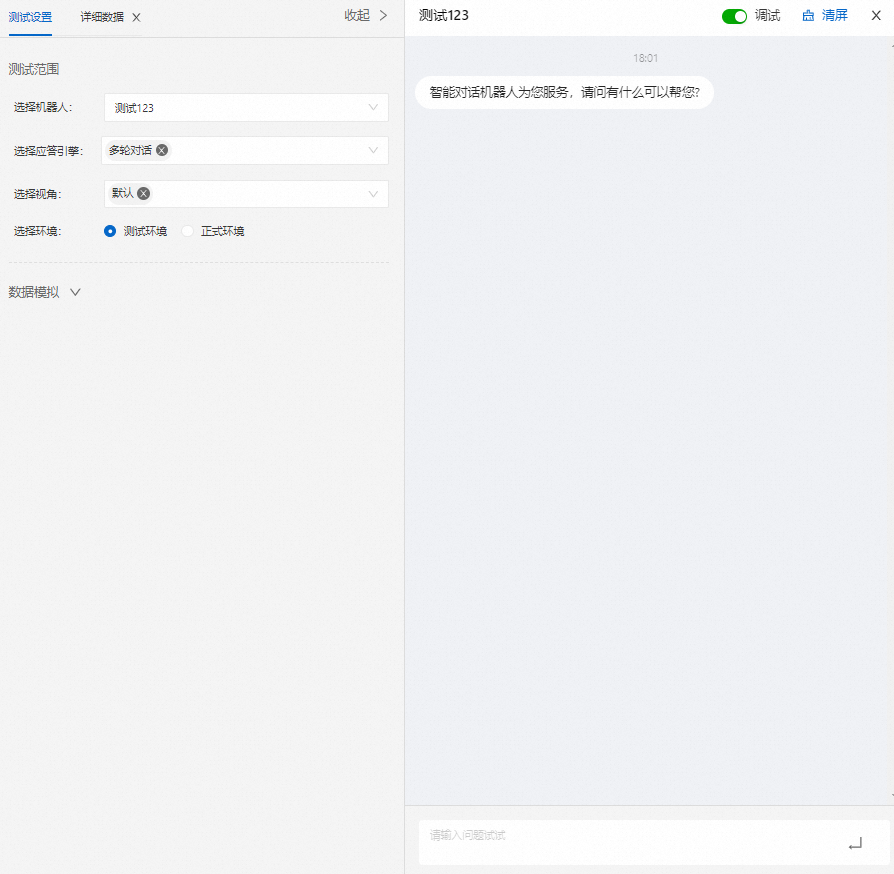
In the drop-down lists, select the chatbot to test, the perspective, the environment (usually the staging environment), and the acknowledgement engine.
Click the Settings button in the test window to open the following dialog box:
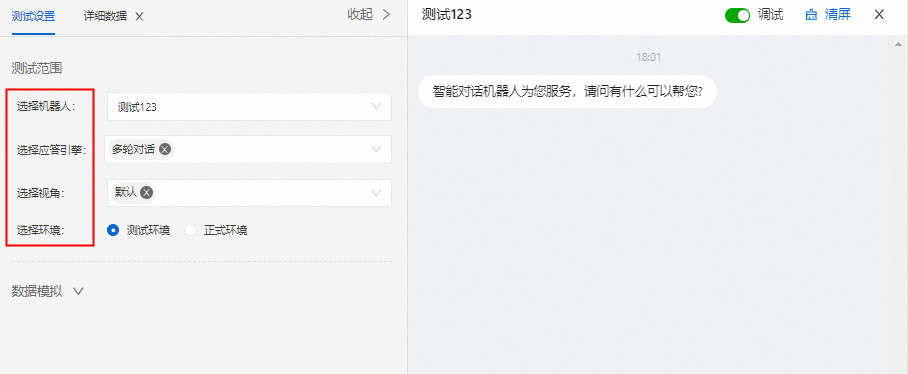
Enter a question in the test window to start testing.
Step 4: Publish the chatbot
After you test the chatbot in the test window, publish it to make it available in the production environment.