Purchasing Power Tags
Purchasing power tags use imported or reported user behavior and order details data to generate statistical tag values, such as cumulative purchase amount, number of purchases, number of orders, and average, maximum, or minimum order amount over a specified period.
Create a purchasing power tag
Purchasing power tags require user behavior tables and order details tables. For data requirements, see Data Table Requirements. To import data from these tables, see User Behavior and Order details. To report and store order event data, see Event Hub.
Steps:
-
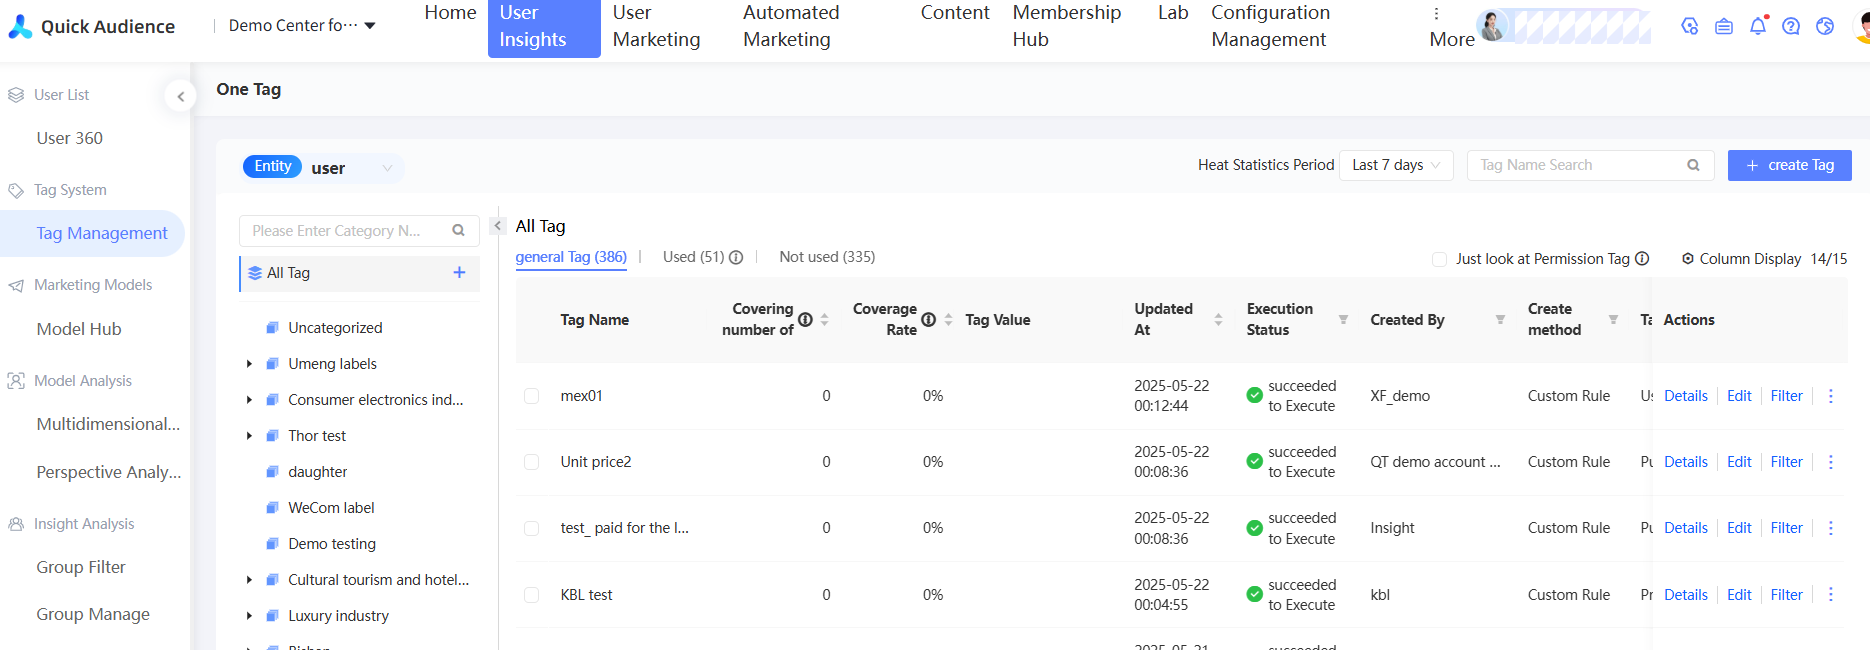
Choose Workspace> User Insight > User Tags > Tag Management.
-
Click New Tag in the upper-right corner.
-
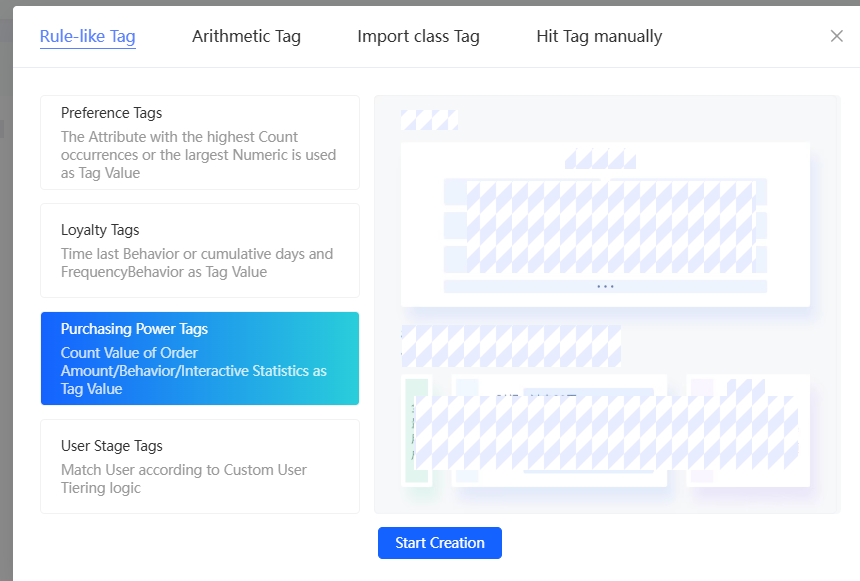
In the dialog box that appears, select Purchasing Power Tag and click OK.
-
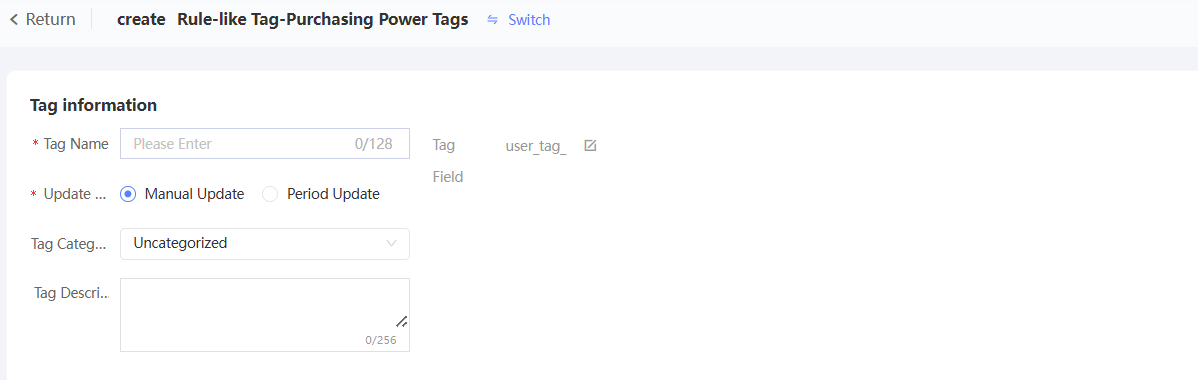
Configure the parameters in the Basic Information section.
-
Enter a tag name. Click the
 icon next to the tag field to customize the tag field name. The prefix is fixed to "user_tag_". If you do not customize the tag field name, the system will generate a field name based on the tag name.
 -
Set whether tags are manually updated or automatically updated on a periodic basis. The periodic basis supports daily, weekly, and monthly.
-
Select a tag category. The default category is Unclassified.
-
Enter a tag description.
-
-
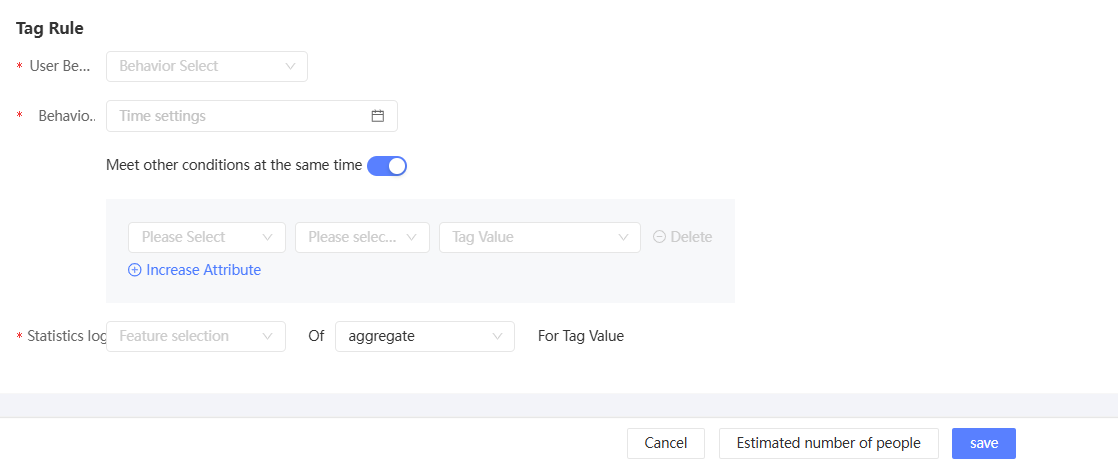
Configure tag rules.
-
Select a user behavior. To create a tag based on user behavior, select a behavior type under the Interaction Behavior category. To create a tag based on order details, select a behavior type under the Order Behavior category.
If the selected behavior has multiple data sources, select a source table. If the selected behavior has only one data source, the source table is automatically determined.
-
Set the behavior time. Multiple methods are available. For more information, see Time-based.
When you create a tag based on order details, the table may contain multiple time fields. Select the corresponding order time field before setting the behavior time.
NoteIf the behavior time is set to a non-specific time, the time range is refreshed based on the update time each time the tag is recalculated. If the behavior time is set to a specific time, the result remains unchanged unless the underlying behavior or order records change.
-
Optionally, set additional limits. For example, require that the order is placed at least once to prevent a result of 0.
Click Add Attribute to add a condition. You can specify up to 10 conditions. Multiple conditions are evaluated with an AND relationship.
-
Set the statistical logic: select the calculation object (amount, number of items, or times), select the calculation method (sum, maximum, minimum, or average), and use the result as the tag value.
-
-
After you complete the settings, click Estimate Number of Tags at the bottom of the page. The estimated total number of tags and the coverage rate of each tag value appear on the right side.

-
Click Save. The custom tag is created.
The new tag is added to the tag list in the Executing state. You can use the tag after its status changes to Executing. For more information, see Tag Management.