Guide to configuring push certificates for iOS
This topic describes how to obtain an Apple Push Notification service (APNs) certificate.
Before you can use the iOS push feature, you must obtain a push certificate as described in this topic and upload it to the Mobile Push console.
Obtain a CSR file
CSR is an abbreviation for Certificate Signing Request. When you request a digital certificate, a Cryptographic Service Provider (CSP) generates a private key and a CSR file. You must submit the CSR file to a certification authority (CA). The CA uses the private key of its root certificate to sign the file and generate a public key certificate. This is the certificate that is issued to you.
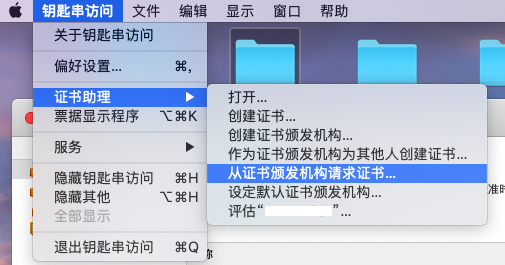
1. On your Mac, open the Keychain Access application. In the menu bar, choose Keychain Access > Certificate Assistant > Request a Certificate From a Certificate Authority.
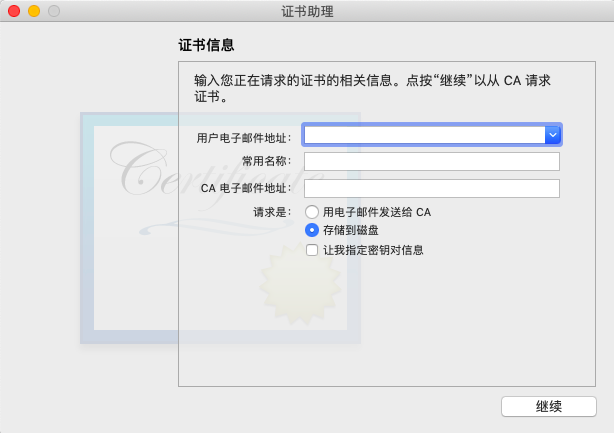
2. In the Certificate Information window, enter your email address, select Saved to disk, and then click Continue to save the CSR file to your local machine.
Create an App ID
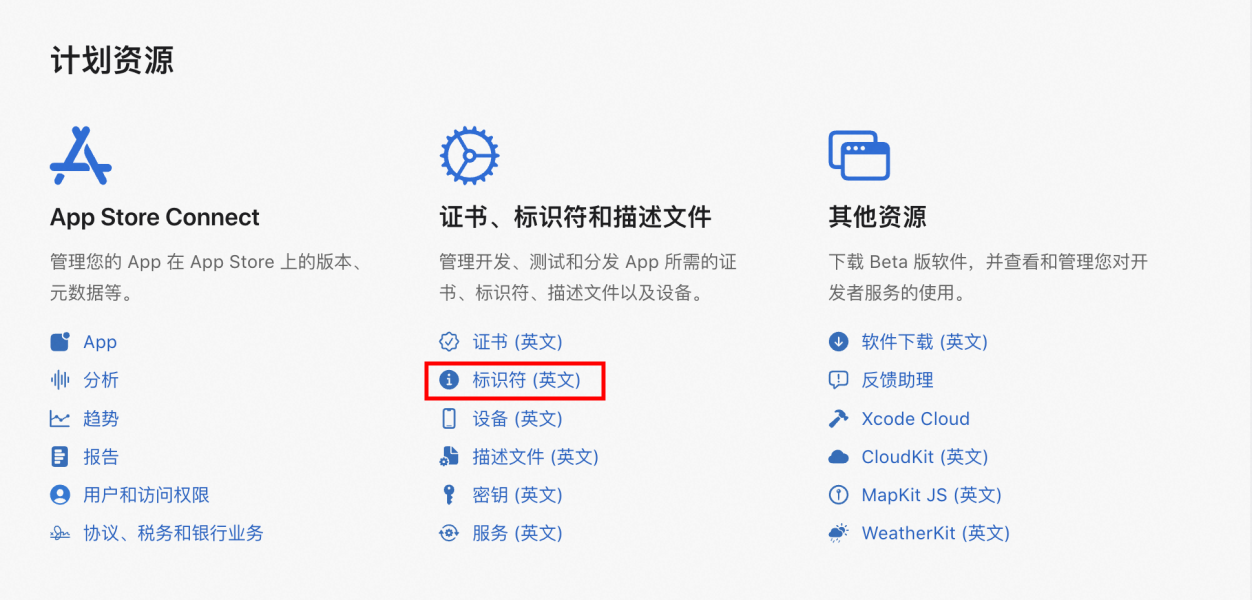
1. Log on to the Apple Member Center. Click the identifiers icon to go to the Certificates, Identifiers & Profiles page.
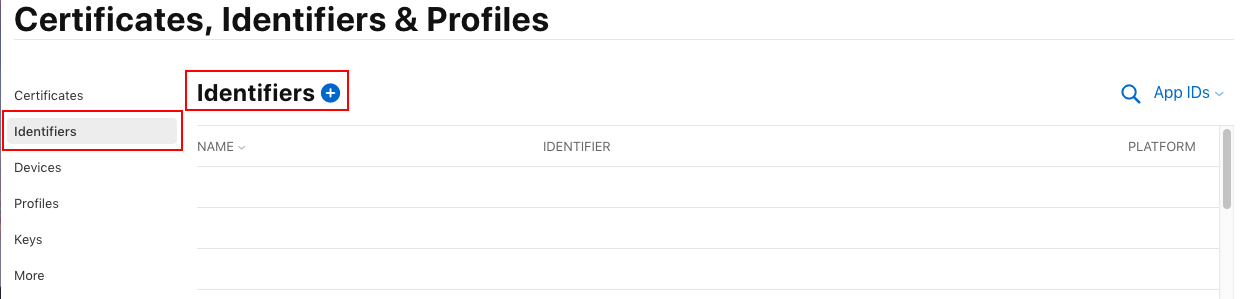
2. Select Identifiers, and then click + on the right.
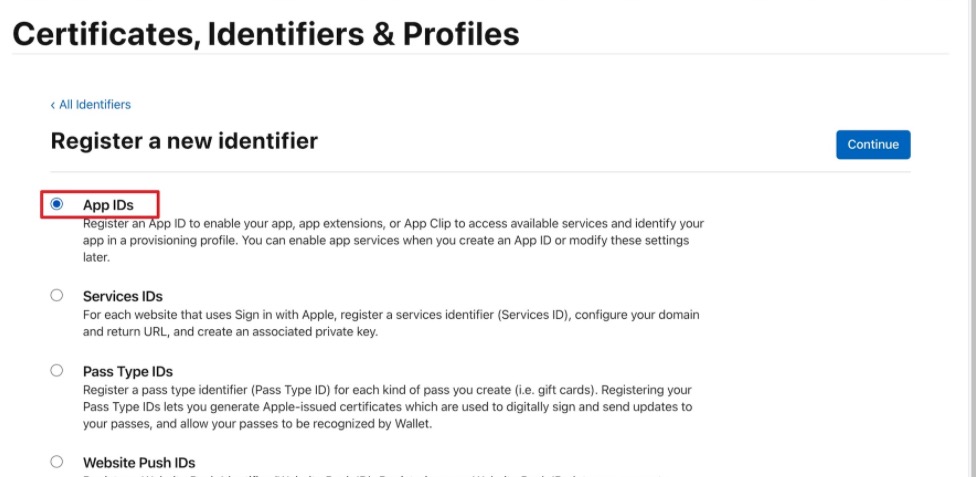
3. Select App IDs, and then click Continue.
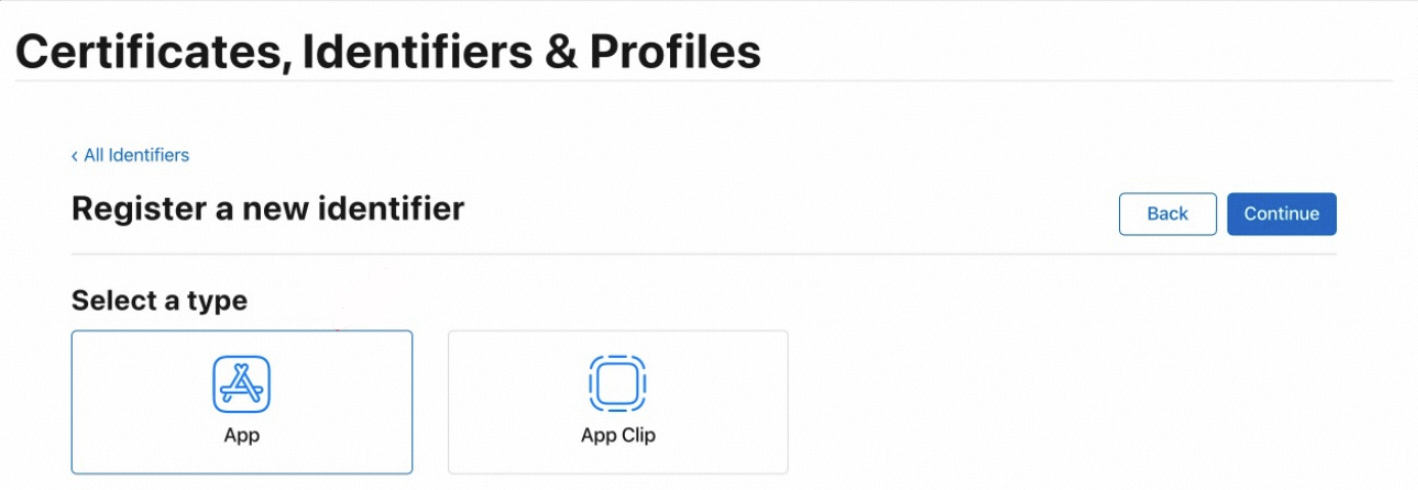
4. Select App, and then click Continue.
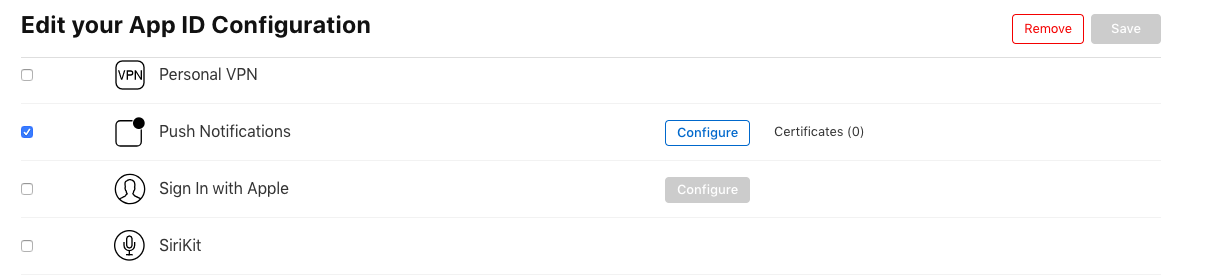
5. Configure the Bundle ID and other information. Scroll down the page, select the Push Notifications checkbox to enable the remote push service, and then click Continue.
Figure 1. Configure the Bundle ID and other information
Description: Enter a description for the App ID for easy identification.
Bundle ID: Set a Bundle ID that matches the one in your project. Do not use a wildcard character (*).
Figure 2. Enable the remote push service
Create a push certificate
1. Click the App ID that you created to go to the Edit your App ID Configuration page.
2. Scroll down the page and click Configure to the right of Push Notifications.
3. In the Development section, click Create Certificate to configure the push certificate.
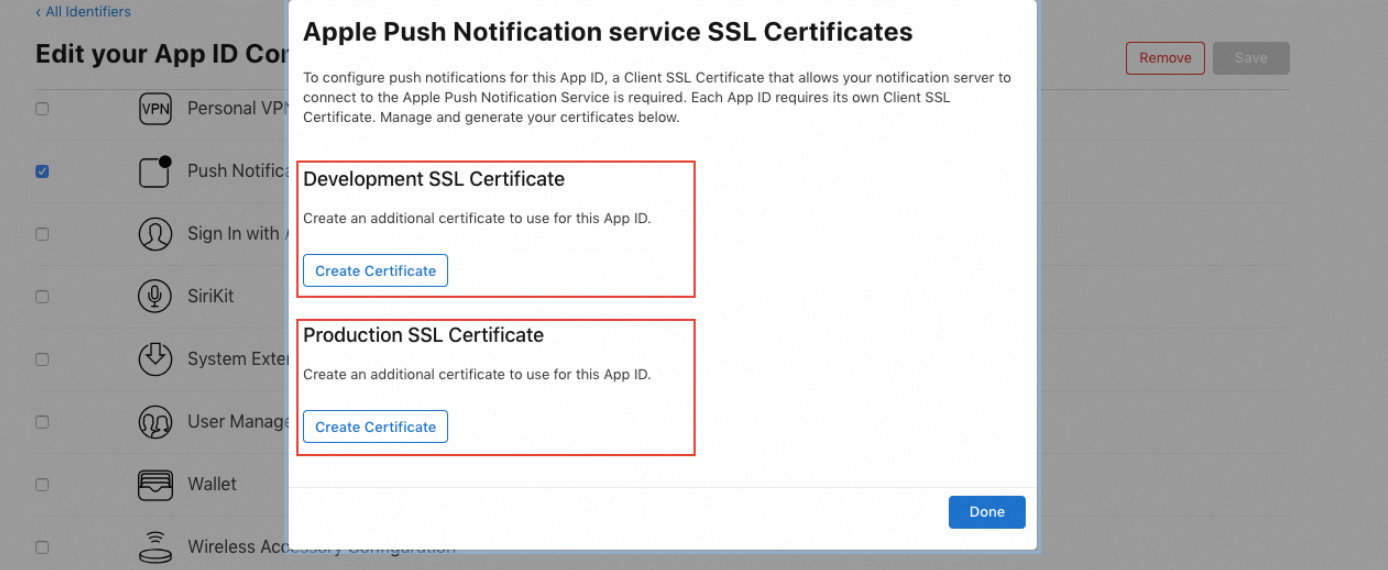
Development SSL Certificate: The push certificate for the development environment.
Production SSL Certificate: The push certificate for the production environment.
4. Click Choose File and upload the CSR file that you obtained.
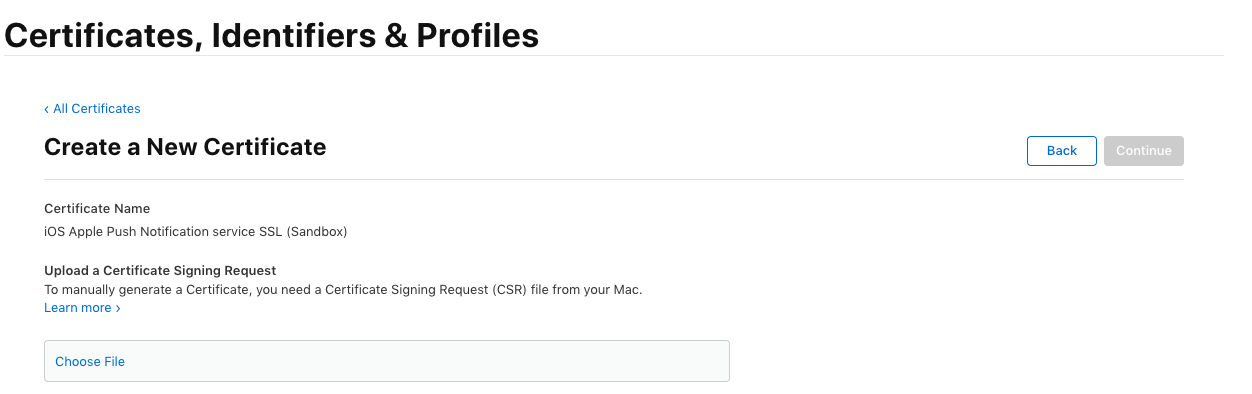
5. Click Continue to generate the push certificate for the development environment.
6. Click Download to download the development certificate to your local machine.
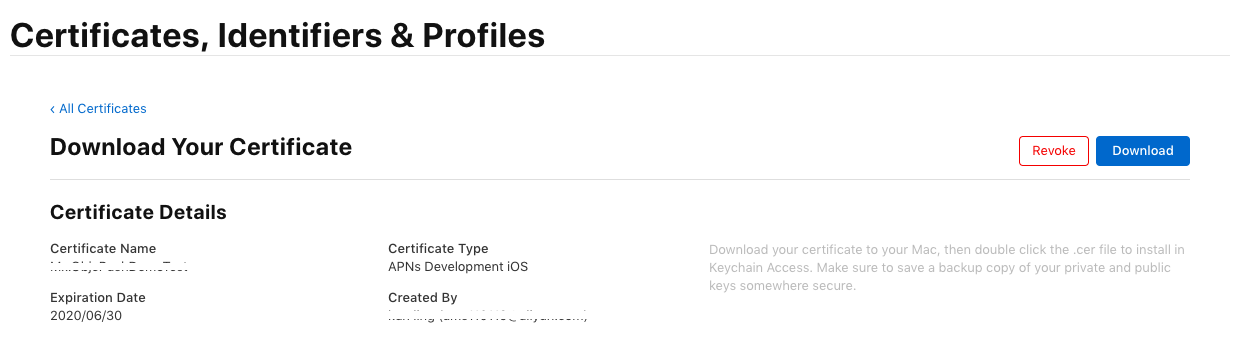
7. Repeat Steps 1 to 6 to generate and download the production certificate.
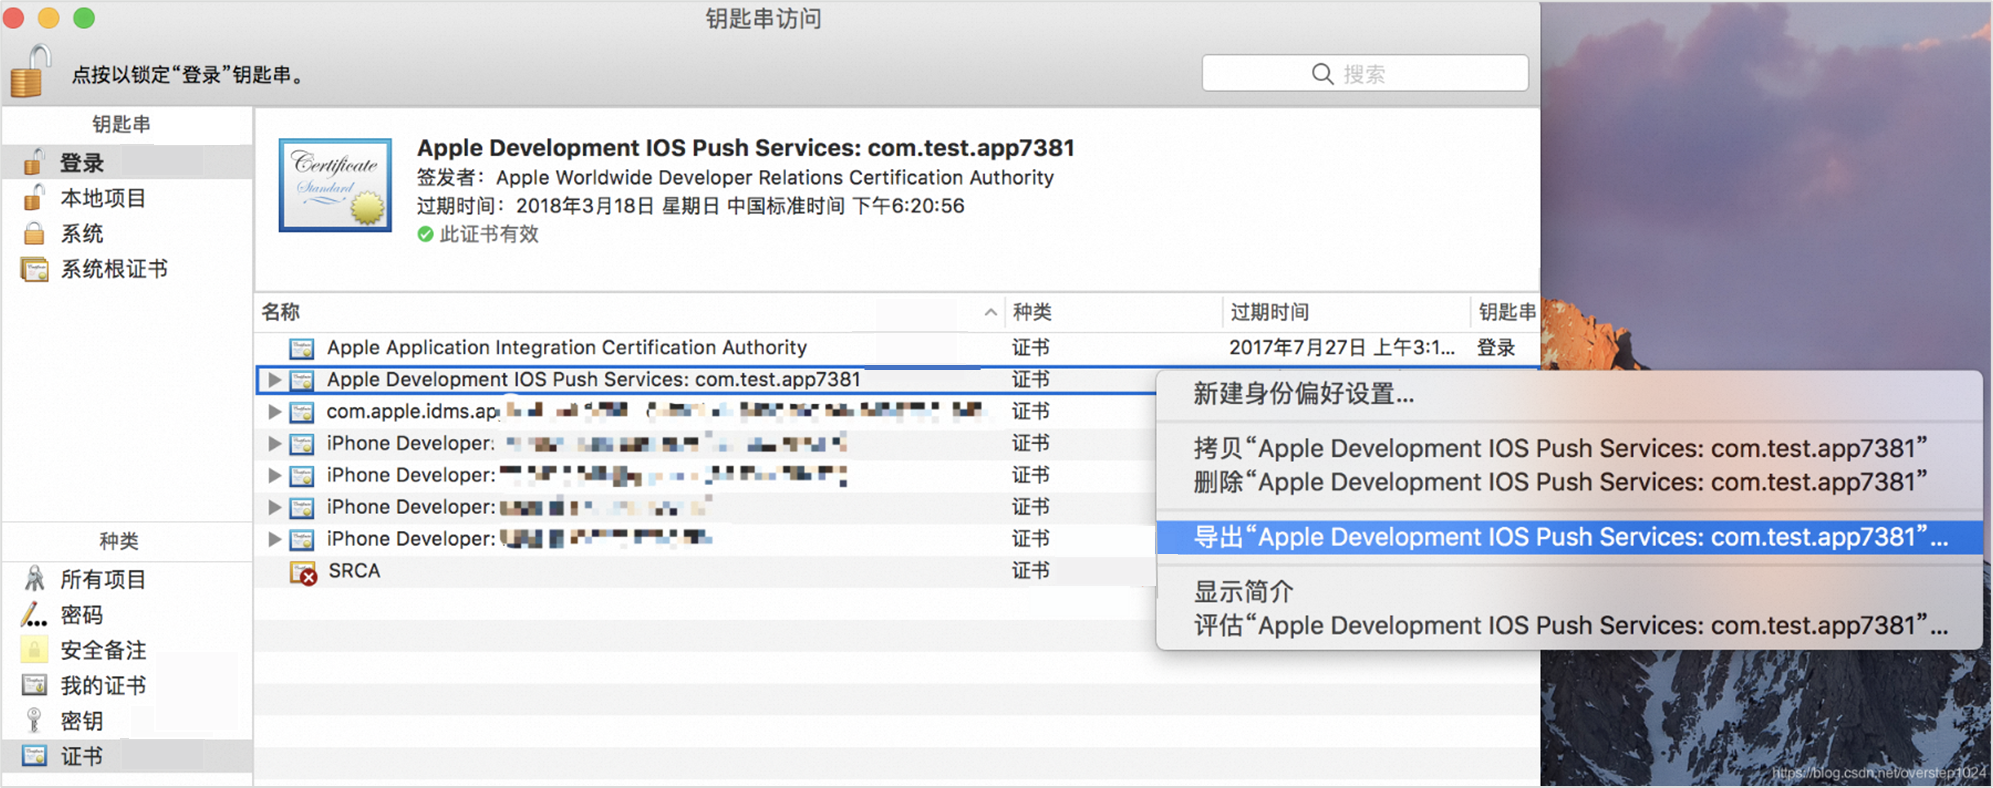
8. Double-click the downloaded development and production certificates to import them into Keychain Access.
9. On your Mac, open the Keychain Access application and choose login > Certificates. Right-click the development and production certificates separately and export them as .p12 files.
When you save the .p12 file, you must set a password. This password is required when you upload the certificate to the Mobile Push console.
Upload the certificate to the Mobile Push console
After you obtain the iOS push certificate, upload it to the Mobile Push console. For more information, see Configure a push certificate.
Certificate validation
SmartPush is a test program for iOS remote push notifications.
It is an APNs utility and a debugging app for iOS push notifications on macOS.