Configure the data validity period feature
When a TSDB instance reaches its storage limit, it cannot accept new data. The data validity period feature automatically deletes data that has been stored longer than a configured period, keeping your instance within its storage capacity.
Enable the data validity period feature
Log on to the TSDB console.
In the upper-left corner, select the region of your instance.
On the Instances page, click Manage in the Actions column for your instance.
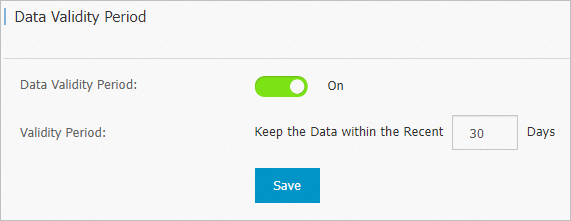
In the left-side navigation pane, select Time Series Data Management > Data Validity Period.
On the Data Validity Period page, turn on the Data Validity Period switch.
Specify a validity period, then click Save.
 Warning
Data stored beyond the validity period is automatically deleted. Back up your data before enabling this feature to prevent data loss.
NoteThe feature takes effect immediately after you click Save.
Disable the data validity period feature
Log on to the TSDB console.
In the upper-left corner, select the region of your instance.
On the Instances page, click Manage in the Actions column for your instance.
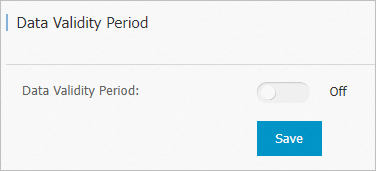
In the left-side navigation pane, select Time Series Data Management > Data Validity Period.
On the Data Validity Period page, turn off the Data Validity Period switch, then click Save.
 Note
NoteThe feature is disabled immediately after you click Save.