Manage data sync tasks with tags
After you create a data sync task, you can use tags to manage the task and quickly find it. This topic describes how to manage data sync tasks with tags.
Limits
You can add a maximum of four tags to each data sync task.
The total number of tags for all data sync tasks cannot exceed 100.
Tag names must be unique within Data Transmission Service.
You can only view and manage the tags created by your account.
Open the Manage Tags dialog box
Log on to the OceanBase console .
In the navigation pane on the left, click Data Transmission Service > Data Synchronization.
Open the Manage Tags dialog box.
There are two ways to open the Manage Tags dialog box.
From the tag edit icon of a task
On the Data Synchronization page, find the task to which you want to add a tag.
Hover over the task and click the tag edit icon that appears.

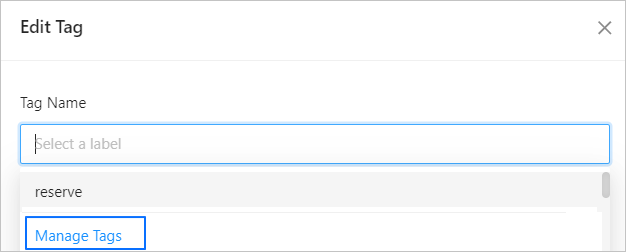
In the Edit Tag dialog box, click the tag name text box.
In the drop-down list, click Manage Tags.
From the tag drop-down list on the sync task list page
On the Data Synchronization page, click Tags in the upper-right corner.
In the drop-down list, click Manage Tags.

Create a tag
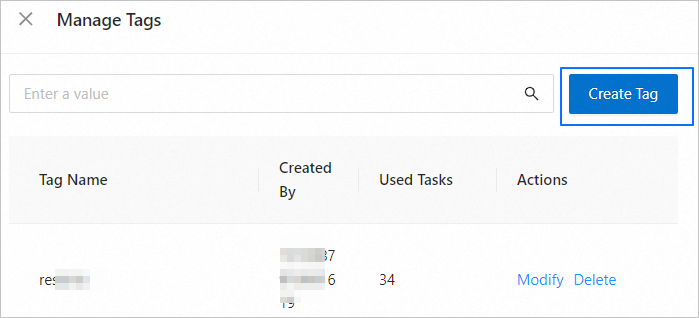
In the Manage Tags dialog box, click New Tag.
In the New Tag dialog box, enter a Tag Name.
ImportantThe tag name must be 1 to 20 characters long and cannot contain spaces.
Click OK.
Modify a tag
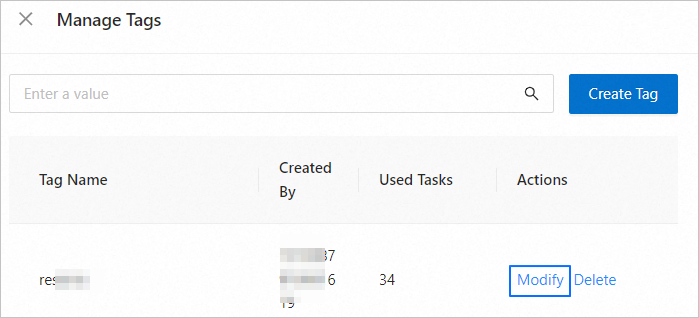
In the Manage Tags dialog box, click Edit next to the tag that you want to modify.
In the Modify Tag dialog box, enter a new name for the tag.
ImportantThe tag name must be 1 to 20 characters long and cannot contain spaces.
Click OK.
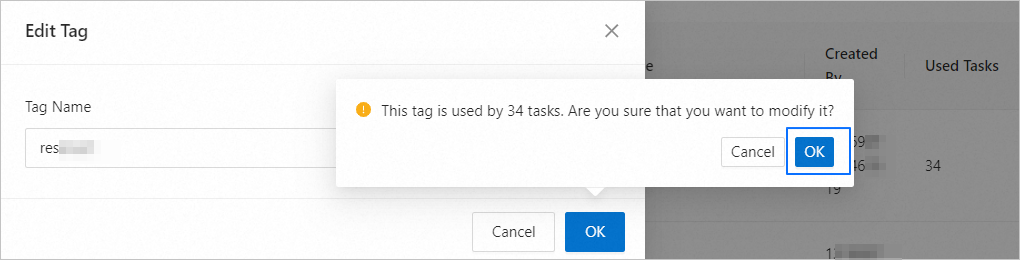
If the tag is not in use by any task, it is modified immediately.
If the tag is in use, a dialog box appears that shows the number of tasks using it. Click OK to confirm the change.

Delete a tag
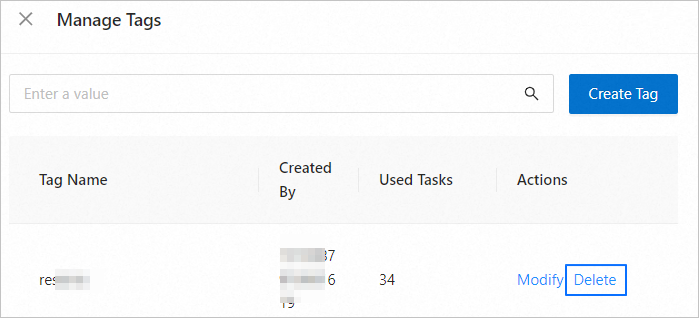
In the Manage Tags dialog box, click Delete next to the tag that you want to delete.
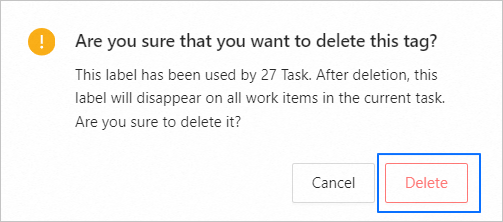
(Optional) If a tag is in use, a confirmation dialog box appears. Review the information in the dialog box and click Delete.
NoteIf the tag is not in use by any task, you do not need to perform this step.
After you delete a tag, it is removed from all tasks that use it. Proceed with caution.
Remove a tag from a task
On the Data Synchronization page, find the desired task.
Hover over the task and click the tag edit icon that appears.
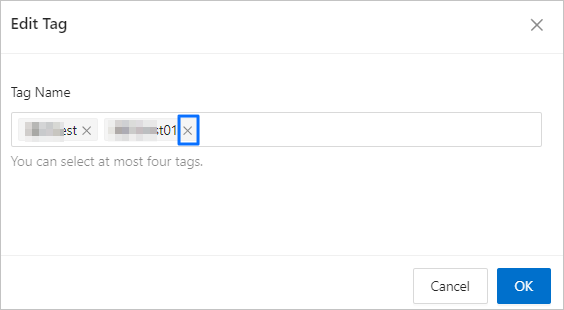
In the Edit Tag dialog box, click the delete icon next to the tag that you want to remove.
Click OK.