Uninstall defective system patches when a Windows ECS instance fails to start or features malfunction after an update.
Symptom
After you install system updates on a Windows ECS instance, the instance fails to start or specific Windows features malfunction, such as failed driver installations or abnormal Key Management Service (KMS) behavior.
Cause
A defective system patch can prevent the operating system from starting or cause Windows features to malfunction.
Solution
Choose a method based on whether the instance can start.
The instance can start
Uninstall patches from Windows Update
-
Connect to the ECS instance.
See Use Workbench to connect to a Windows instance using RDP.
-
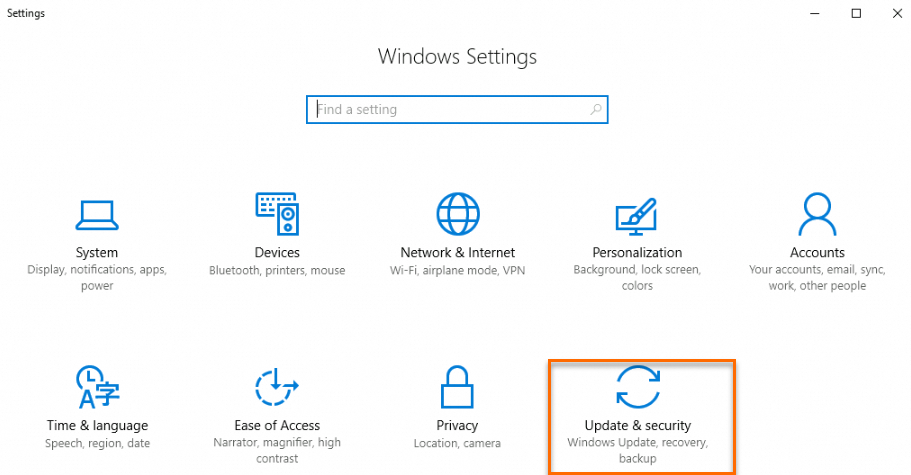
Click the Start menu, and then click Set.

-
On Windows Settings, click Update & security.
-
On Update status, click Update history.

-
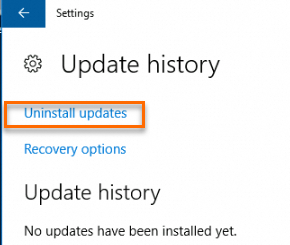
On Update History, click Uninstall updates.
-
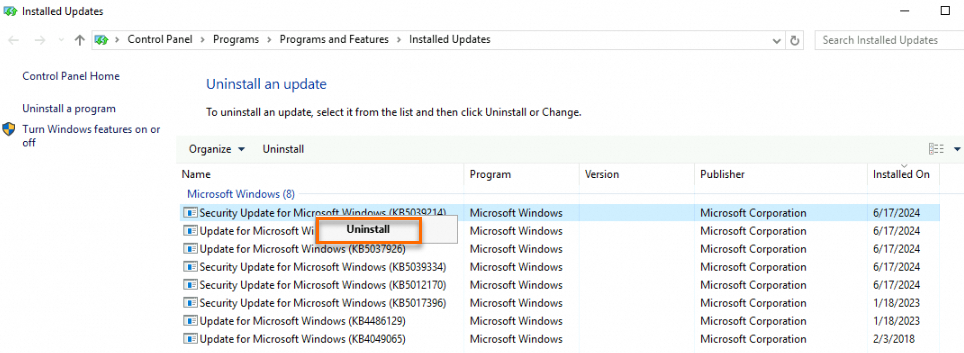
Right-click the target update (for example, KB5029250), click Uninstall, and follow the on-screen instructions.
Uninstall patches with PowerShell
-
Connect to the ECS instance.
See Use Workbench to connect to a Windows instance using RDP.
-
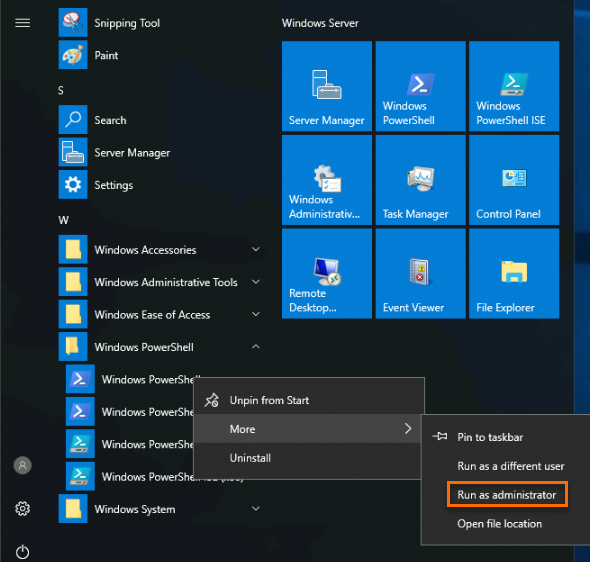
Run Windows PowerShell as an administrator.

-
Find the package that corresponds to the patch.
$package = Get-WindowsPackage -Online | Where-Object {$_.PackageName -match 'KB5029250'} -
Uninstall the package.
$package | Remove-WindowsPackage -Online
The instance fails to start
If the instance fails to start, attach a repair disk to it, then uninstall the defective patch. The following steps assume the repair disk is attached as drive D and you want to uninstall KB5029250.
-
Run a diagnostic for the operating system startup failure.
-
Go to the ECS console - Troubleshooting page. Select a region and a resource group.
-
In the Instance Start/Stop Abnormality card, click Initiate Diagnosis. In the Create Diagnostic Task dialog box, select the instance ID to diagnose and a time range, then click Initiate Diagnosis.
NoteThe instance must be in the Stopped state. See Stop an instance.
After the diagnostic completes, the instance enters the Running or Repairing state.
-
-
Connect to the faulty instance.
On the Diagnostic Result page, click VNC Connection. Enter the Administrator username and password from the diagnostic report to log on to the ECS instance with the repair disk attached. See Connect to an instance by using VNC.
-
Run Windows PowerShell as an administrator.
-
Find the package that corresponds to the patch.
$package = Get-WindowsPackage -Path D:\ | Where-Object {$_.PackageName -match 'KB5029250'} -
Uninstall the package.
$package | Remove-WindowsPackage -Path D:\ -
On the Instance page, move the pointer over the Fixing state that corresponds to the instance and click Detach Repair Disk.
-
Restart the instance for the changes to take effect.
See Restart an instance.
-
Connect to the ECS instance. If the connection succeeds, the issue is resolved.
