Clone a cloud disk (Public Preview)
Clone a cloud disk to create a new disk with identical data in the same zone. Set the capacity, type, and encryption of the cloned disk as needed. Attach it to an ECS instance for data replication or horizontal scaling.
The system loads data to the new disk automatically. You can attach and use the disk immediately, but read latency increases until loading completes. For zero-impact performance, create disks through (Public Preview) Snapshot prefetch instead.
Use cases
Production cloning: Clone a production disk to create an isolated environment for version upgrades, data migrations, or other high-risk changes.
Data verification: Clone a disk and attach it to a test instance to verify data integrity and availability without affecting the source disk.
Billing
Cloning itself is free, but the new disk is billed under standard pricing. Depending on the disk type, charges may include capacity fees, provisioned performance fees, and burst performance fees. Burst fees apply only after a burst occurs; all other fees start at creation, whether or not the disk is attached to an instance.
Limitations
Source disk limits:
Type: Only ESSD series disks can be used as clone sources.
Zone-redundant disks (Regional ESSDs) can only be cloned to ESSD zone-redundant disks.
Local-redundant disks (ESSD AutoPL, ESSD, and ESSD Entry) can only be cloned to local-redundant disks.
Status: The source disk must meet one of these conditions.
The disk is In Use. The instance must be Running or Stopped and not hibernating.
The disk is Unattached but has a prior attachment record.
A disk with the
acs:ecs:lastAttachedInstancetag has a prior attachment record.
Concurrency and frequency limits: You can only create one clone from the same source disk at a time.
Unsupported scenarios: You cannot clone a disk during a resize or a specification change.
Target disk limits:
Type: The cloned disk must be an ESSD series disk.
Feature restrictions: Cloned disks do not support re-initialization.
Disk category: Cloned disks are data disks. System disks can only be created with an instance.
Billing method restrictions: The cloned cloud disk only supports the pay-as-you-go billing method.
Dedicated block storage cluster restrictions: You cannot clone a disk into a dedicated block storage cluster.
Step 1: Clone and attach a cloud disk
Go to ECS console - Block Storage - Cloud Disks. In the top-left corner, select the region and resource group for the target resource.
Find the disk that you want to clone. In the Actions column, choose choose
 > clone.
 On the Clone Disk page, configure the parameters below. Confirm the configuration and fees, then complete the purchase. You must mount a file system to use the data disk.
Parameter
Description
Attach
Select Attach to ECS Instance.
If you select Unattached, you must manually attach the disk to an instance after creation.
ECS Instance
Select the target ECS instance from the drop-down list.
If you select the same Linux instance as the source disk, the UUID conflict between the two disks may cause boot mount failures. Log in to the instance to modify the UUID of the cloud disk.
Billing Method
Pay-as-you-go: This option is available for both subscription and pay-as-you-go ECS instances. The cloned cloud disk only supports the pay-as-you-go billing method.
Cloud Disk
Select the disk type and set the capacity:
Size: Must be equal to or greater than the source disk capacity.
If a source disk is 2 TiB or smaller and uses the MBR partition scheme, and you want the new disk to be larger than 2 TiB, you must convert the source disk's partition scheme to GPT before cloning.
Performance
Performance Level: Available for ESSD disks only. The level depends on the capacity.
Enable Performance Provision: Available for ESSD AutoPL disks and ESSD PL-X disks (invitation-only) only.
Enable Performance Burst: Available for ESSD AutoPL disks only. Enabled by default.
Encryption: Enable encryption to protect data automatically during use.
If the source disk is encrypted, encryption cannot be disabled. You can change the encryption key.
Step 2: Mount the file system
Make sure the disk is attached to an instance and the instance is Running before you proceed.
Linux
After a data disk is attached to an instance, you must mount a file system to use it. Two methods are available:
Mount via console (recommended): Use Cloud Assistant in the console to initialize and mount the file system. This method is convenient and does not require you to run commands manually.
Mount via Commands: Log in to the instance and run commands manually. This method offers more control and is broadly applicable.
Mount via Console
On the success page, click Partition and Format.
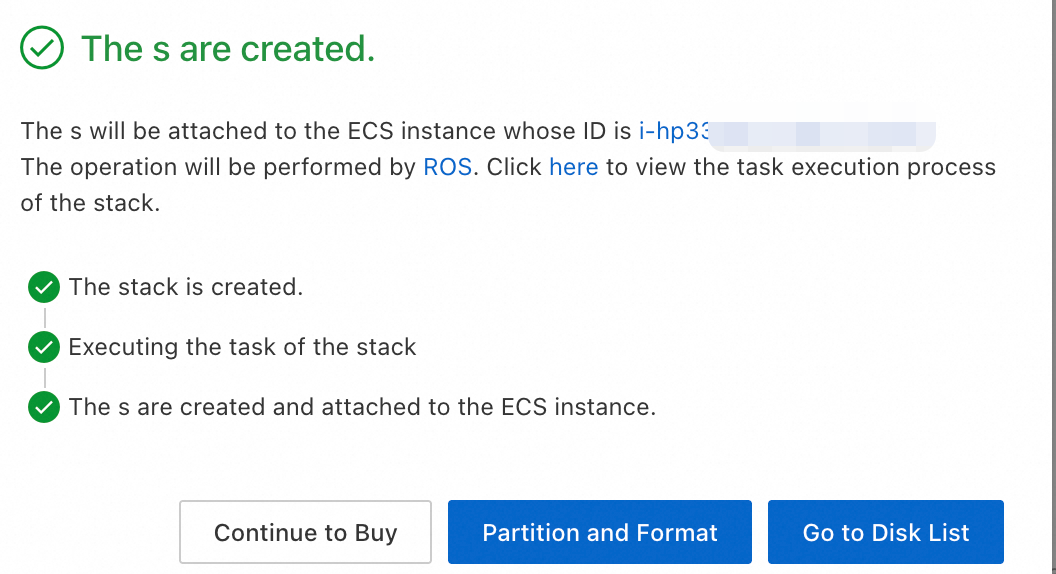
If you closed this page, or the disk uses subscription billing, go to the instance details page, click the Block Storage tab, and access these options again.
On the initialization page, verify the disk information and click Initialize Now.
On the check disk status page, configure the mount point and click Manually Mount.
If Cloud Assistant is not authorized, follow the on-screen instructions to grant authorization.
If the page displays a message indicating that Cloud Assistant failed to query or execute the command or that Cloud Assistant is not installed, mount via commands.
Parameter
Description
Mount point
Enter a unique, empty path starting with
/. If the directory is not empty, existing files become inaccessible and your workloads may be affected.(Conditional) Extend the partition and file system.
If the cloned disk is larger than the source, extend the partition and file system to use the full capacity.
In the Unassigned section, click Scale Out the Last Partition and File System.
If no snapshot exists, a risk confirmation dialog appears. Create a snapshot first, then click Extend Partitions and File Systems.
In the Partitions and file systems extension performed via Cloud Assistant, click Execute Now. When the system confirms success, click Close.
When the page shows that The disk check is complete and the disk can be used as expected, mounting is done.
This mount is temporary and does not survive reboots. To persist it, log in to the instance and configure automatic partition mounting on system startup.
From the command line
Log in to the ECS instance.
Go to ECS console - Instances. In the top-left corner, select the region and resource group for the target resource.
Go to the details page of the target instance. Click Remote Connection and select Connect via Workbench. Follow the on-screen prompts to log in and open the terminal page.
Run the
sudo lsblk -fcommand to find the device name of the target cloud disk. You will need this name to mount the file system.$ sudo lsblk -f NAME FSTYPE LABEL UUID MOUNTPOINT vda └─vda1 ext4 root 33b46ac5-7482-4aa5-8de0-60ab4c3a4c78 / vdb └─vdb1 ext4 f1645951-134f-4677-b5f4-c65c71f8f86d vdc xfs 3d7a3861-da22-484e-bbf4-b09375894b4fIf the device has partitions, the target device name is the partition name. In the example, the data disk is
vdb, and the target device name isvdb1.If the device has no partitions, the target device name is the same as the device name. In the example, the data disk is
vdc, and the target device name isvdc.
Create and mount a directory.
sudo mkdir <mount_directory> && sudo mount /dev/<target_device_name> <mount_directory>Parameter
Description
<target_device_name>Replace this with the target device name you obtained in Step 2.
<mount_directory>Customize the
<mount_directory>. It must be an empty path that starts with a forward slash (/) and must be unique.ImportantIf the directory is not empty, its original contents will be hidden, which may affect your services. Evaluate the impact before proceeding.
For example, to mount the target device
vdc1to a new directory named/data, run the commandsudo mkdir /data && sudo mount /dev/vdc1 /data.Verify that the file system is mounted.
Run the
sudo lsblkcommand. If a mount point is listed for the target device in theMOUNTPOINTcolumn, the file system is mounted successfully.ImportantThe file system is temporarily mounted and will be unmounted after the instance restarts. To ensure your data remains accessible after a restart, we recommend that you configure automatic partition mounting on system startup.
(Required in some cases) Resize the partition and file system.
If the new cloud disk is larger than the source disk, you must also resize the partition and file system to use the additional capacity.
Windows
Log in to the ECS instance.
Go to ECS console - Instances. In the top-left corner, select the region and resource group for the target resource.
Go to the details page of the target instance. Click Remote Connection and select Connect via Workbench. Select Terminal Connection as the connection method, enter your username and password, and log in to the graphical terminal page.
On the Windows Server desktop, right-click the
 icon and then click Disk Management.
In the Disk Management window, find the target data disk that is in the offline state.
If the data disk is already online and its partition status is Healthy, no further action is required. You can use the disk directly.
Right-click the target disk and select Online.
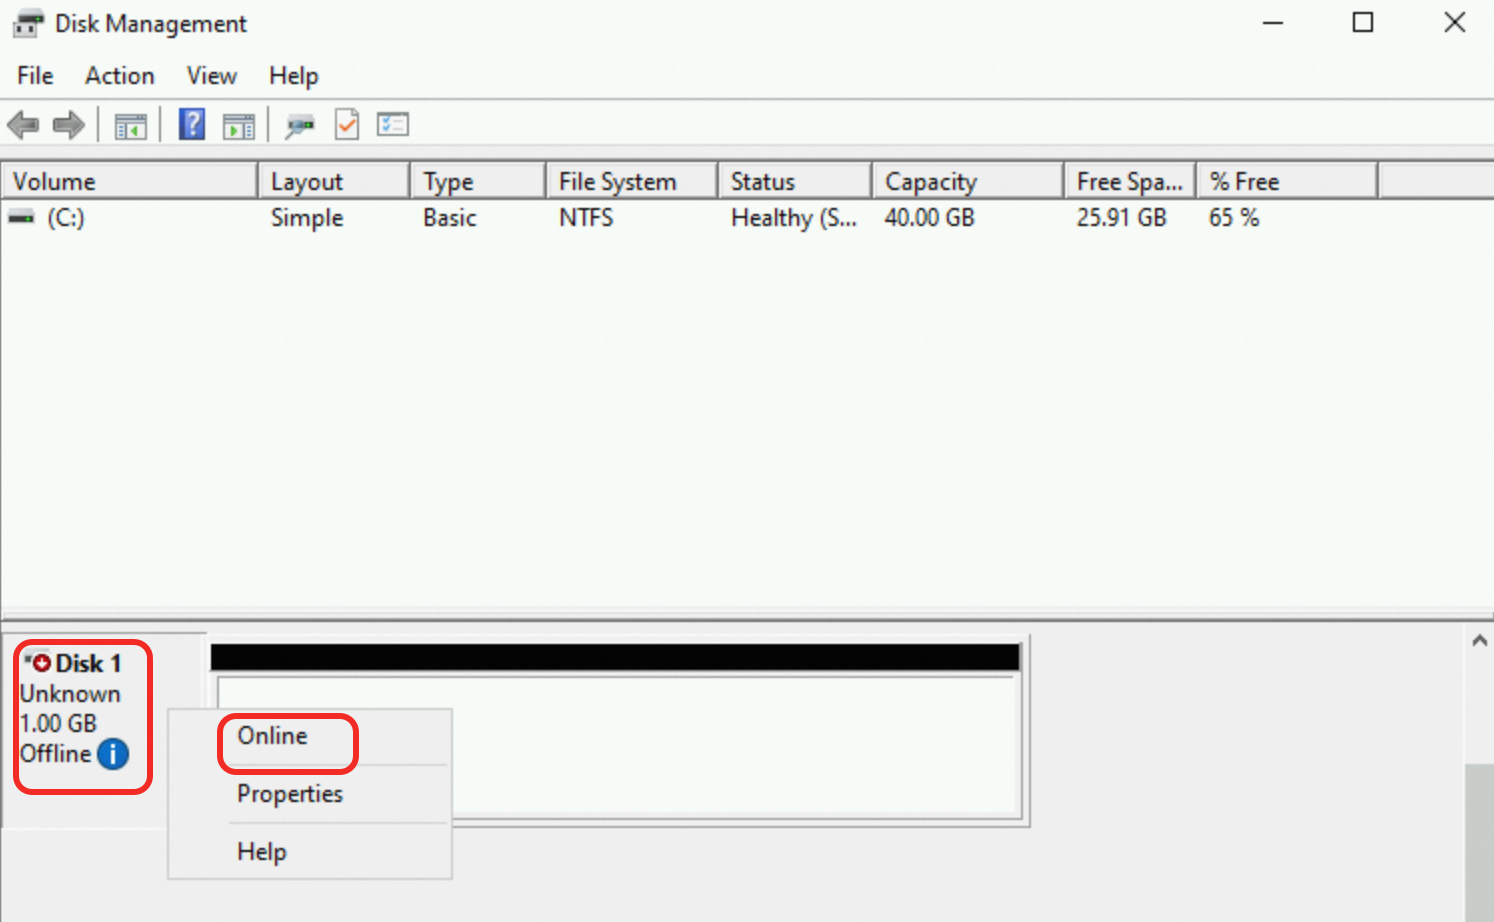
After the disk is brought online, the target partition's status changes to Healthy, which indicates that the cloud disk is ready for use.
(Required in some cases) Resize the partition and file system.
If the new cloud disk is larger than the source disk, you must also resize the partition and file system to use the additional capacity.
FAQ
How to re-access Cloud Assistant options?
This feature is available by invitation only and is supported only for specific customers and scenarios.
On the instance details page, go to the Block Storage tab and enable the Cloud Assistant Check.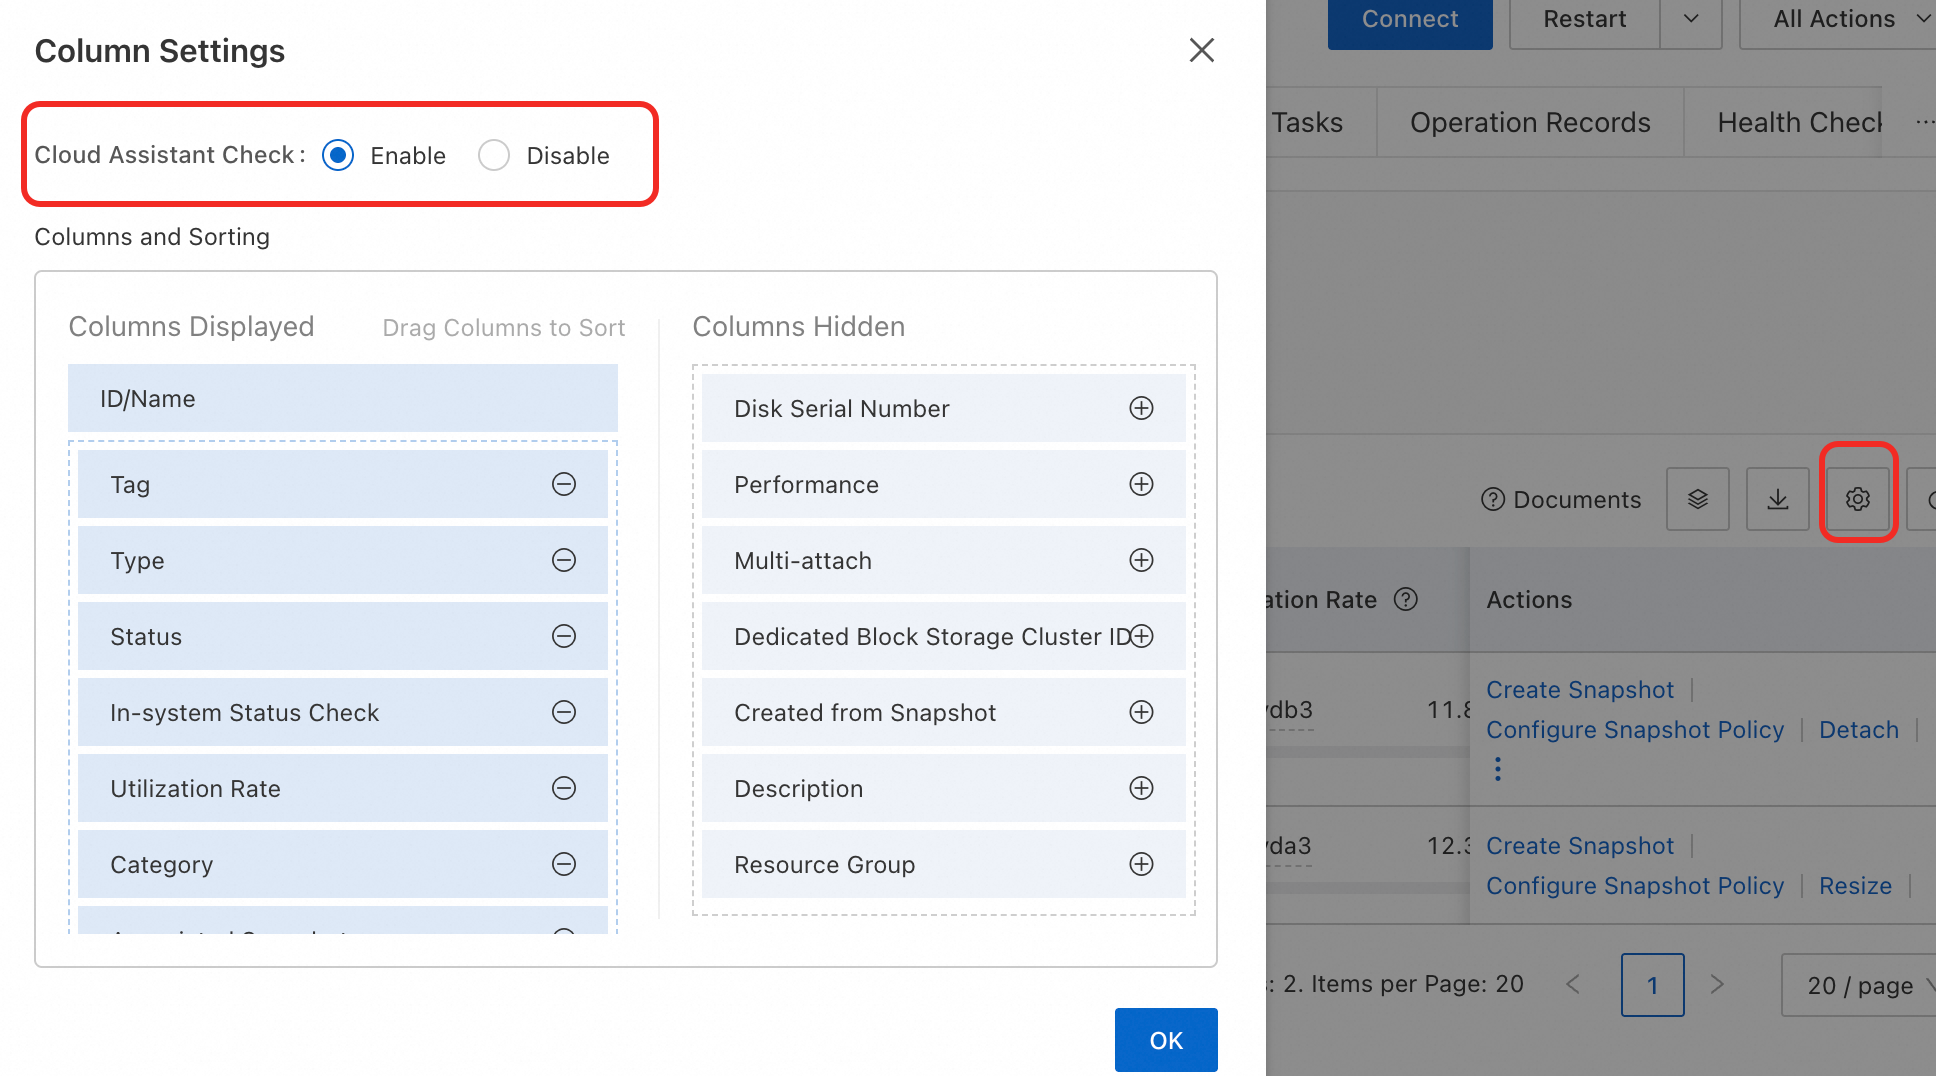
Click the 1/3 Checks Passed text under In-system Status Check for the target cloud disk, and then click Mount File System to open the page.
How do I find the source disk of a cloned disk?
Go to ECS console - Block Storage - Cloud Disks. In the top-left corner, select the region and resource group for the target resource.
Find the cloned disk. Hover over Cloned Disk in the Type column to see the source disk ID.