Deploy Qwen3 with one click: a new zero-code experience
Qwen3 has officially open-sourced eight models that have quickly gained significant global attention due to their excellent performance and wide range of application scenarios. This document uses the Qwen3-8B model as an example to demonstrate the deployment process.
This open-source release includes two Mixture-of-Experts (MoE) models: Qwen3-235B-A22B (over 235 billion total parameters, over 22 billion active parameters) and Qwen3-30B-A3B (30 billion total parameters, 3 billion active parameters), and six Dense models: Qwen3-32B, Qwen3-14B, Qwen3-8B, Qwen3-4B, Qwen3-1.7B, and Qwen3-0.6B. These models demonstrate highly competitive results in benchmarks for code, math, and general capabilities.
Qwen3 supports both thinking and non-thinking modes, making it suitable for different types of problems. It supports 119 languages and dialects.
The FunctionAI serverless AI development platform, powered by Alibaba Cloud Function Compute (FC), now offers two deployment methods for the Qwen3 series models: model service and application template. After deployment, you can chat with the model.
Model list
Deployment methods:
vLLM: A large model inference acceleration framework that optimizes memory utilization and throughput. It is suitable for high-concurrency scenarios.
SGLang: Supports complex LLM programs, such as multi-turn conversation, planning, tool calling, and structured output. It improves the flexibility and performance of multi-GPU nodes through the coordinated design of its frontend language and backend runtime.
Model | Deployment method | Minimum configuration |
Qwen3-0.6B | vLLM/SGLang/Ollama | Advanced GPU instance |
Qwen3-0.6B-FP8 | vLLM/SGLang/Ollama | Advanced GPU instance |
Qwen3-1.7B | vLLM/SGLang/Ollama | Advanced GPU instance |
Qwen3-1.7B-FP8 | vLLM/SGLang/Ollama | Advanced GPU instance |
Qwen3-4B | vLLM/SGLang/Ollama | Advanced GPU instance |
Qwen3-4B-FP8 | vLLM/SGLang/Ollama | Advanced GPU instance |
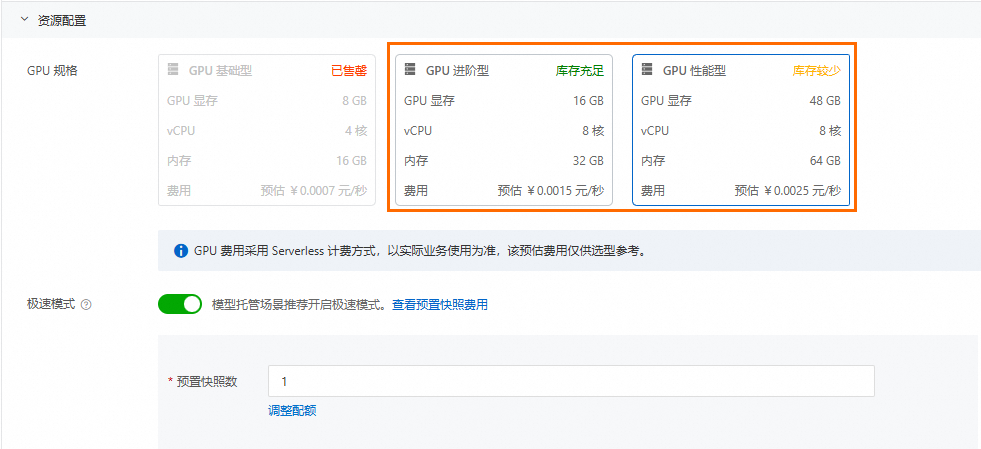
Qwen3-8B | vLLM/SGLang/Ollama | GPU Compute-Optimized Instance |
Qwen3-8B-FP8 | vLLM/SGLang/Ollama | Compute-optimized GPU instance |
Qwen3-14B | vLLM/SGLang/Ollama | Compute-optimized GPU instance |
Qwen3-14B-FP8 | vLLM/SGLang/Ollama | Compute-optimized GPU instance |
Billing
The model service in this tutorial is a GPU function created in Function Compute. You are billed for resources based on the instance specification multiplied by the execution duration. If there are no requests, you are only charged for the provisioned snapshot in Express mode. You can claim the Function Compute trial quota to cover resource costs. Usage that exceeds the trial quota is automatically billed on a pay-as-you-go basis. For more information about billing, see Billing overview.
When this project is deployed, a startup snapshot is provisioned. You will incur charges for this snapshot even when the service is not in use. To avoid unexpected charges, delete the project promptly when it is no longer needed.

Deploy using an application template
1. Create a project
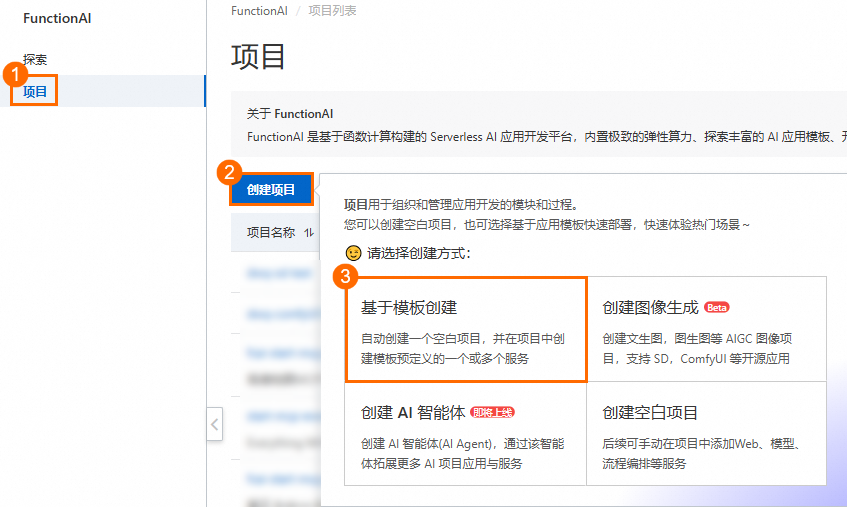
Log on to the Function Compute 3.0 console. In the navigation pane on the left, click Function AI. On the Function AI page, click Project in the navigation bar. Then, click Create Project and select Create from Template.
If Function Compute 3.0 is displayed in the upper-left corner, you are using the 3.0 console.
2. Deploy the project from a template
In the search bar, enter
Qwen3and search. Click Build an AI Chat Assistant with Qwen3. On the Template Details page, click Deploy Now.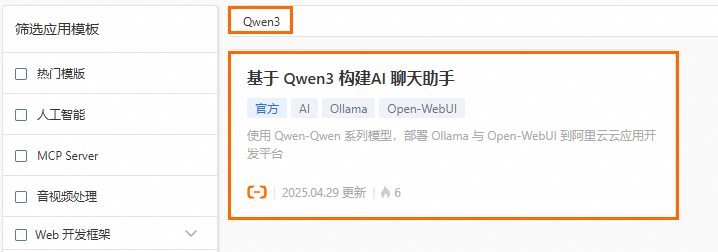
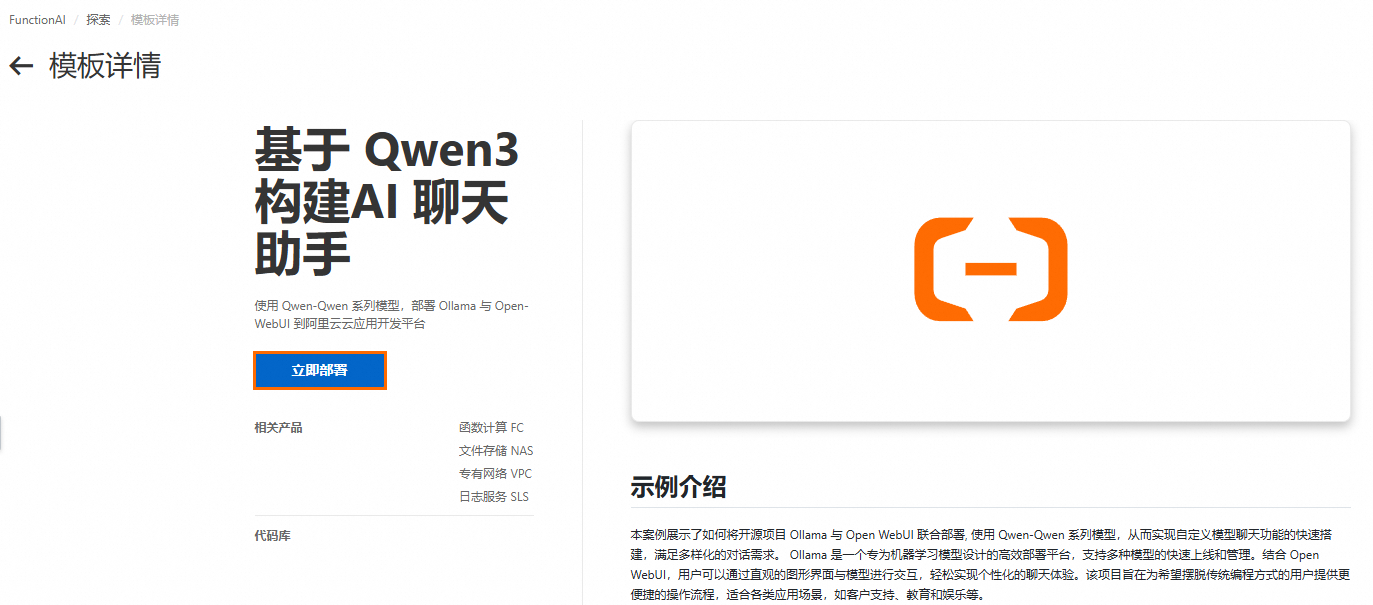
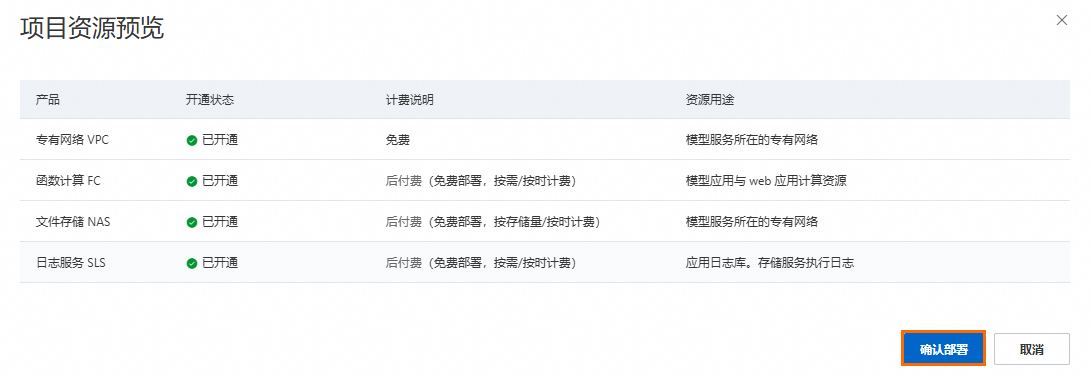
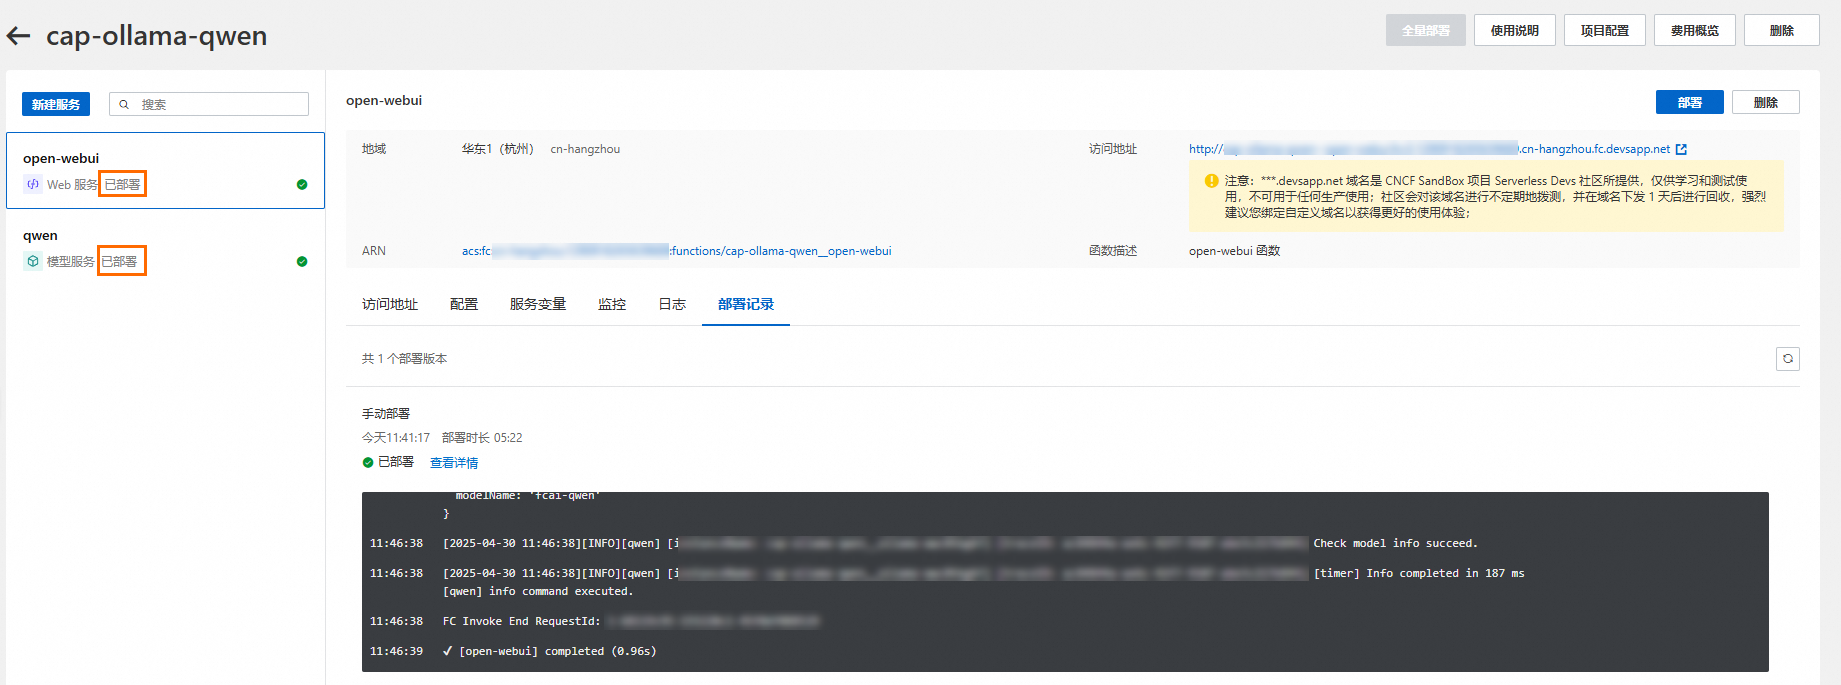
Select a Region and click Deploy Project. In the Project Resource Preview dialog box, you can view the related billable items. For more information, see Billing. Click Confirm Deployment. The deployment takes about 10 minutes. A status of Deployed indicates a successful deployment.
NoteIf a deployment error or model pull failure occurs, it may be because the GPU resources in the current region are insufficient. If this happens, try deploying in a different region.

3. Verify the application
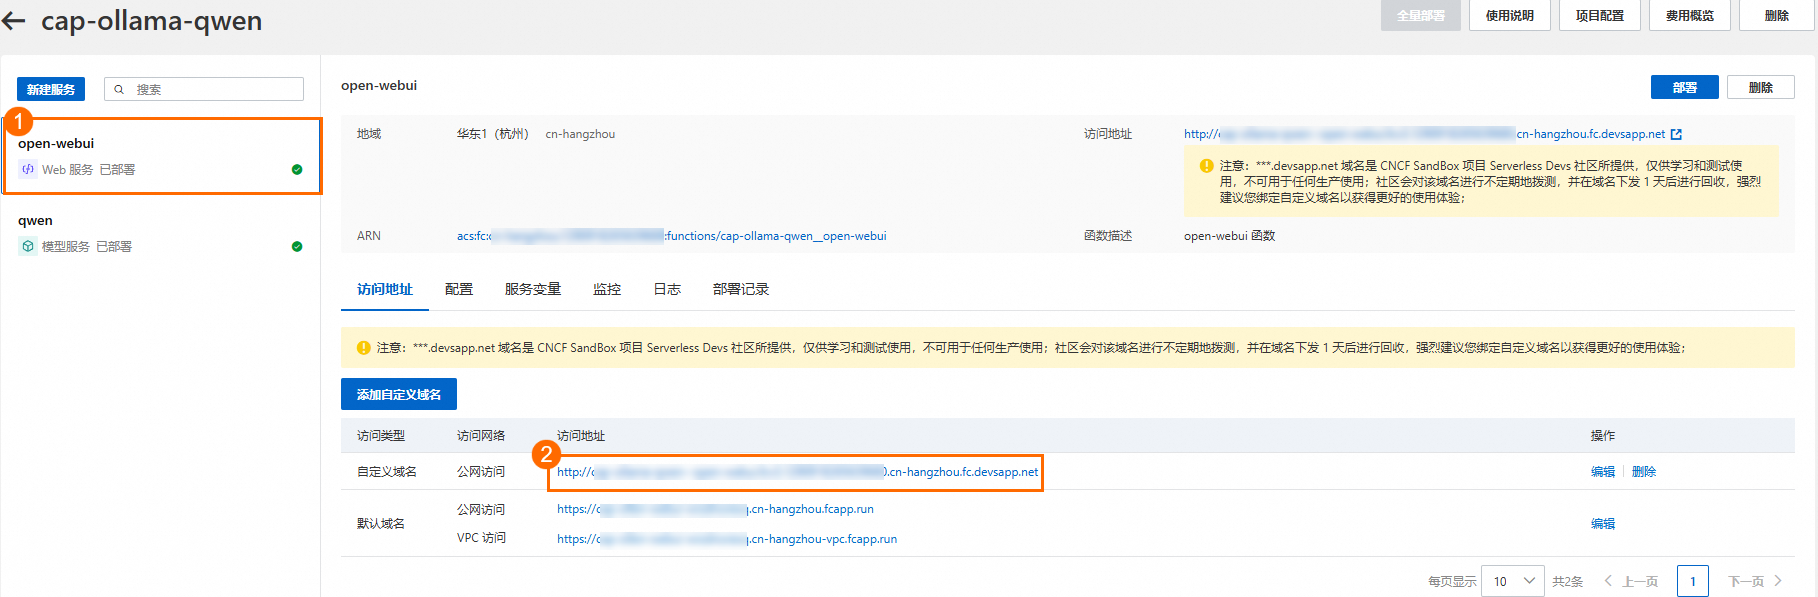
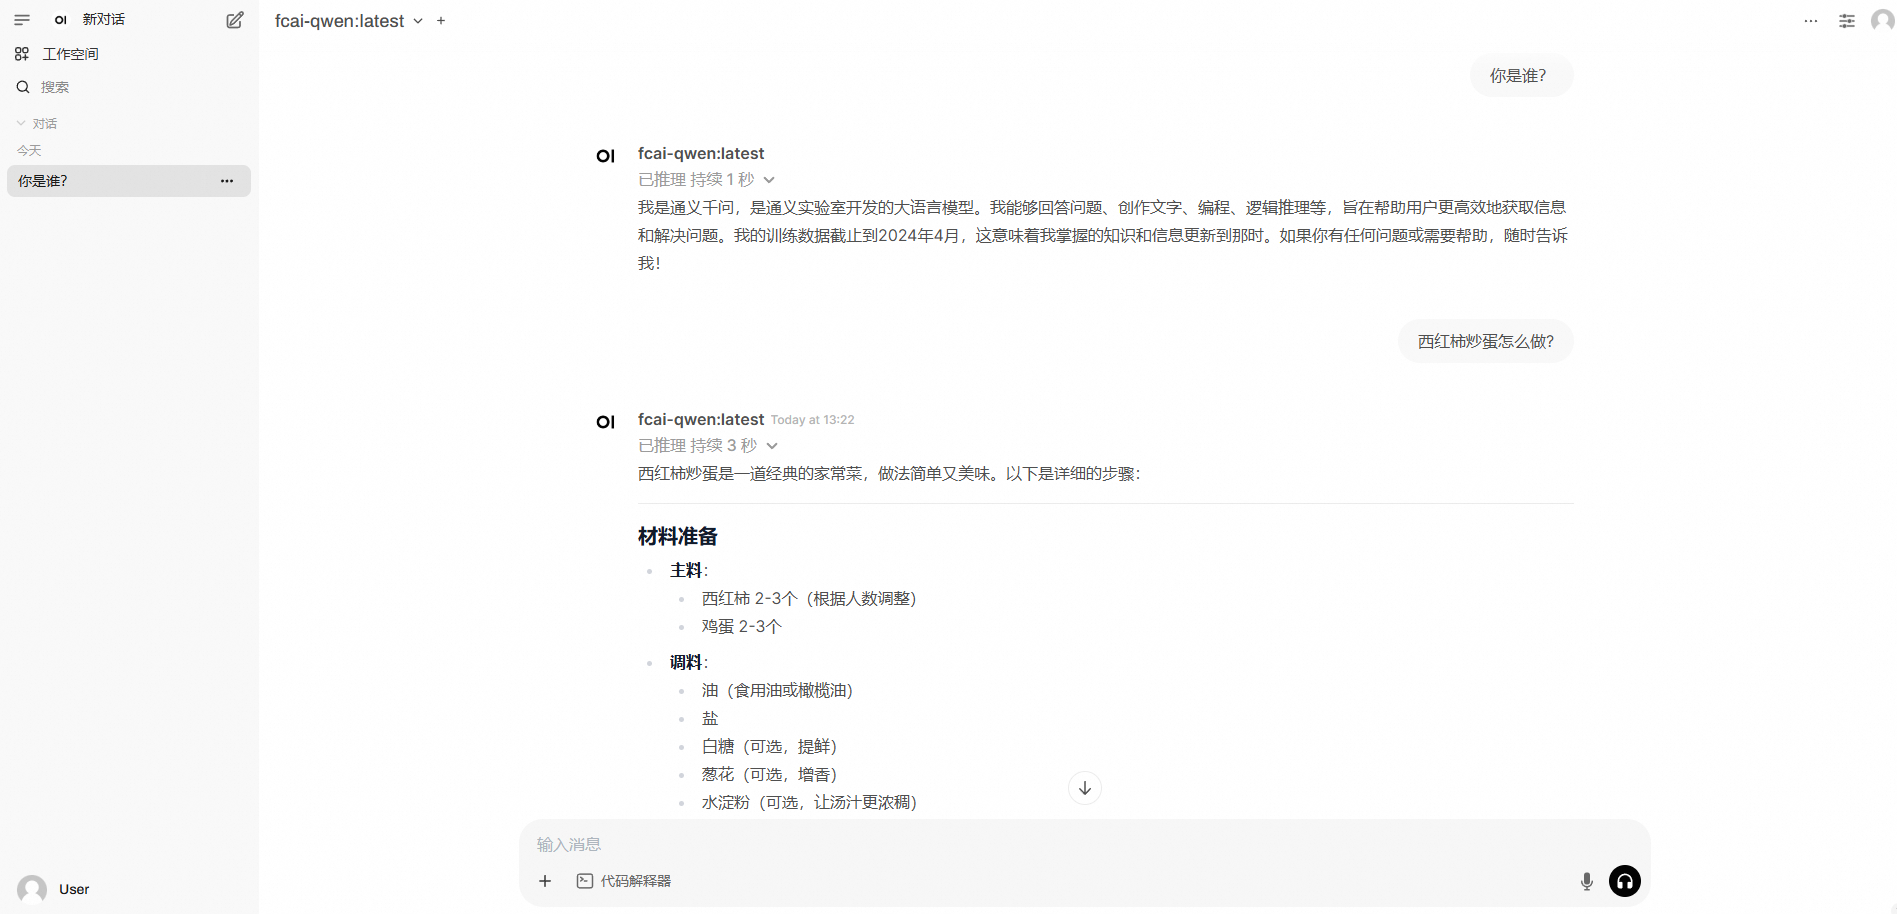
After the deployment is complete, click the Open-WebUI service. Then, click the Public Endpoint of the custom domain name to access the application.
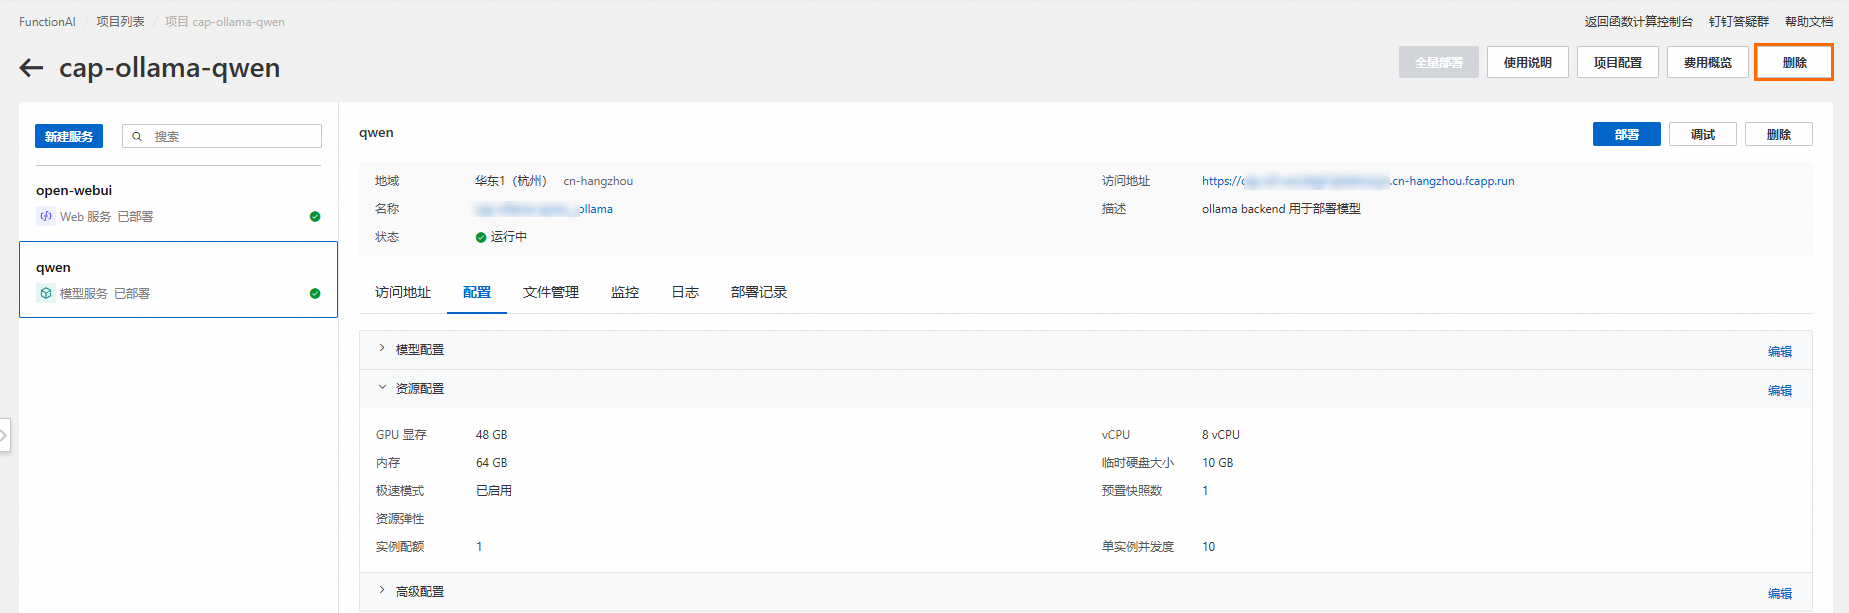
Delete the project
. A confirmation dialog box appears.
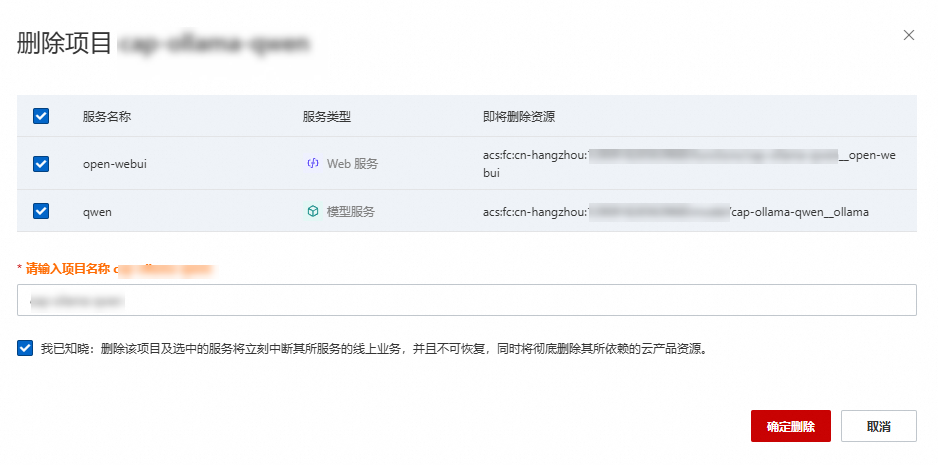
The resources to be deleted are displayed. By default,
Function AIdeletes all services in the project. To keep a resource, clear the checkbox next to that service. Only the services with selected checkboxes will be deleted.Select the checkbox next to I understand that deleting this project and the selected services will immediately interrupt their online business, is irreversible, and will permanently delete all dependent cloud resources. Then, click Confirm Deletion.