Integration sequence diagram
Updated at:
This topic describes the integration sequence diagram for the ID Verification solution.
Mobile SDK integration
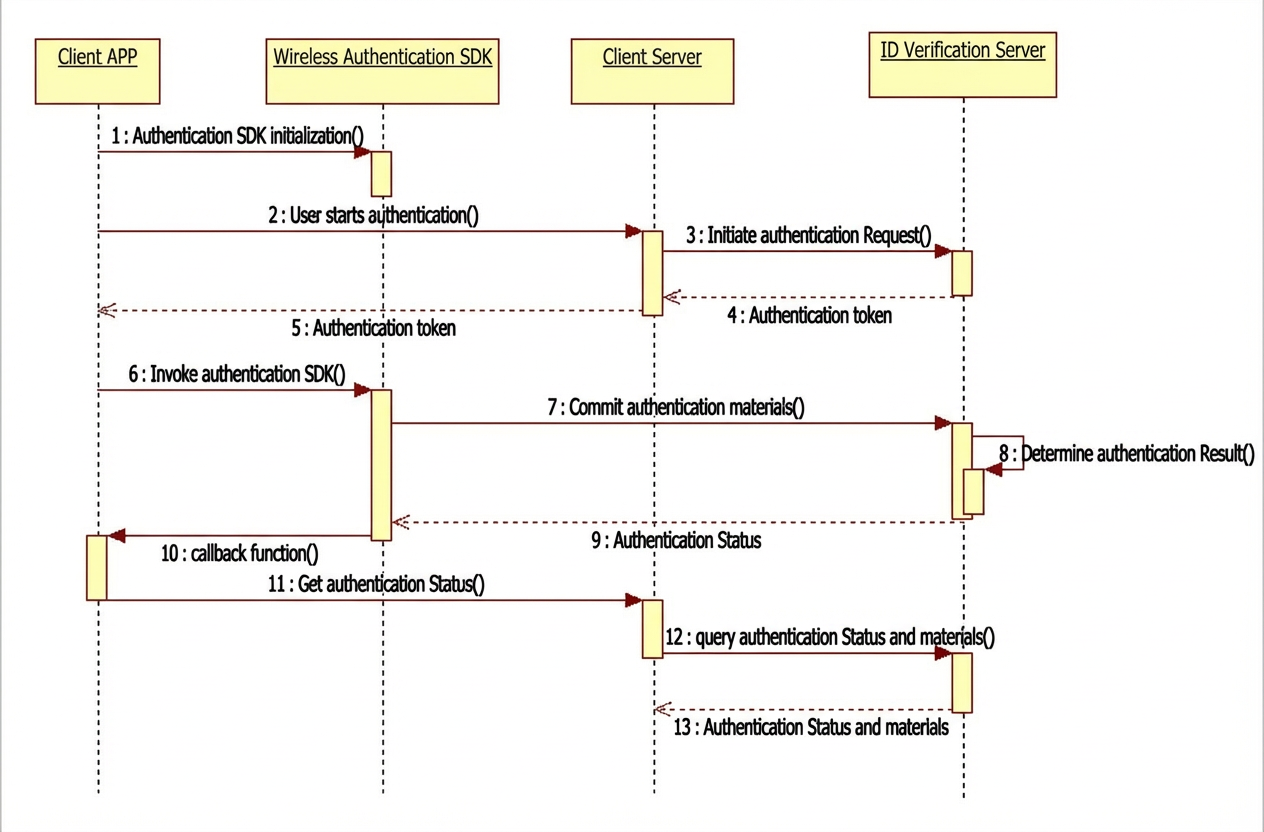
The sequence diagram shows the following steps:
- Step 1: The client integrates the mobile authentication software development kit (SDK) into the mobile app and initializes the SDK.
- Step 2: The user starts the authentication process in the client app.
- Step 3–Step 5: The client server calls the authentication request API to retrieve a token from the ID Verification server. Depending on the authentication solution, you can also submit materials in advance through this API. The server then returns the token to the client app.
- Step 6: The client app starts the authentication SDK. The user begins the authentication process and performs different actions depending on the authentication solution, such as liveness detection or taking photos of the front and back of an ID card.
- Step 7: After the user completes the required actions, the mobile SDK submits the data to the ID Verification server.
- Step 8: The ID Verification server uses its decision logic to determine the authentication result.
- Step 9–Step 10: The ID Verification server sends the authentication result to the mobile SDK through a callback. The mobile SDK then passes the result to the client app through another callback.
- Step 11–Step 13: After the client app receives the authentication result callback, the client server calls an API to retrieve the final authentication status and materials from the ID Verification server.Note The authentication status returned to the client can be tampered with. For security, the client server must call the API to retrieve the final, trusted status from the ID Verification server. Use this trusted status to make business decisions.
Server-side only integration
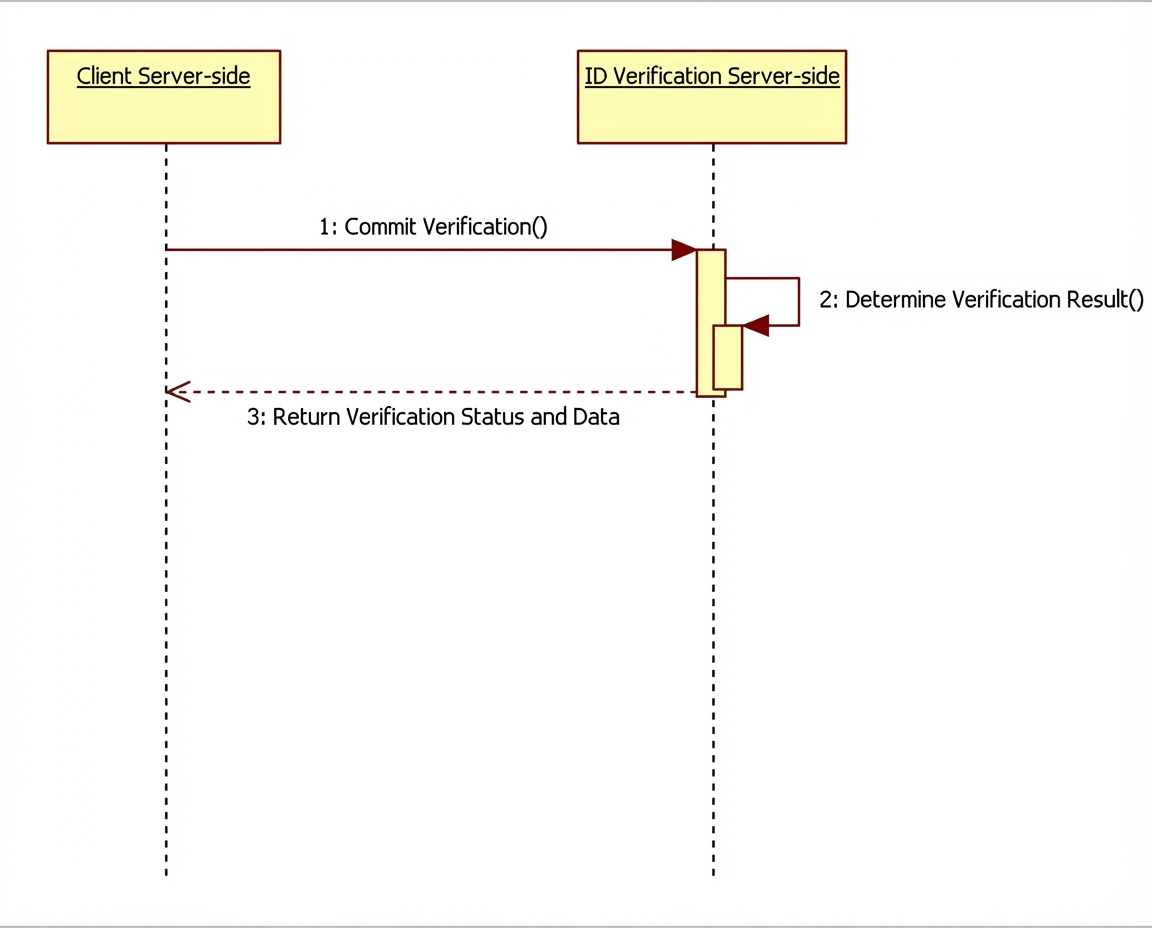
The sequence diagram shows the following steps:
- Step 1: The client server initiates an authentication request. It submits materials such as the user's name, ID number, a portrait photo, and optionally, photos of the front and back of the ID card.
- Step 2–Step 3: The ID Verification server uses its decision logic to determine the authentication result. It then synchronously returns the authentication status and materials.
Is this page helpful?