This article describes how to connect an on-premises Active Directory (AD) to IDaaS as an outbound identity provider. This allows you to synchronize organizations and accounts from IDaaS to AD and lets users sign in to IDaaS or applications with their AD credentials.
Active Directory basics
Active Directory is a core directory service in the Microsoft Windows Server operating system that provides centralized identity authentication, authorization, and directory management for enterprise network environments. By using the network endpoint feature, you can synchronize AD data and perform delegated authentication without exposing public ports.
Connect to AD
Step 1: Connect to AD
Log on to the IDaaS console, select the target IDaaS instance, and click Console in the Actions column.
Go to . Find AD in the list and click Add.

In the Bind AD panel, configure the following parameters.
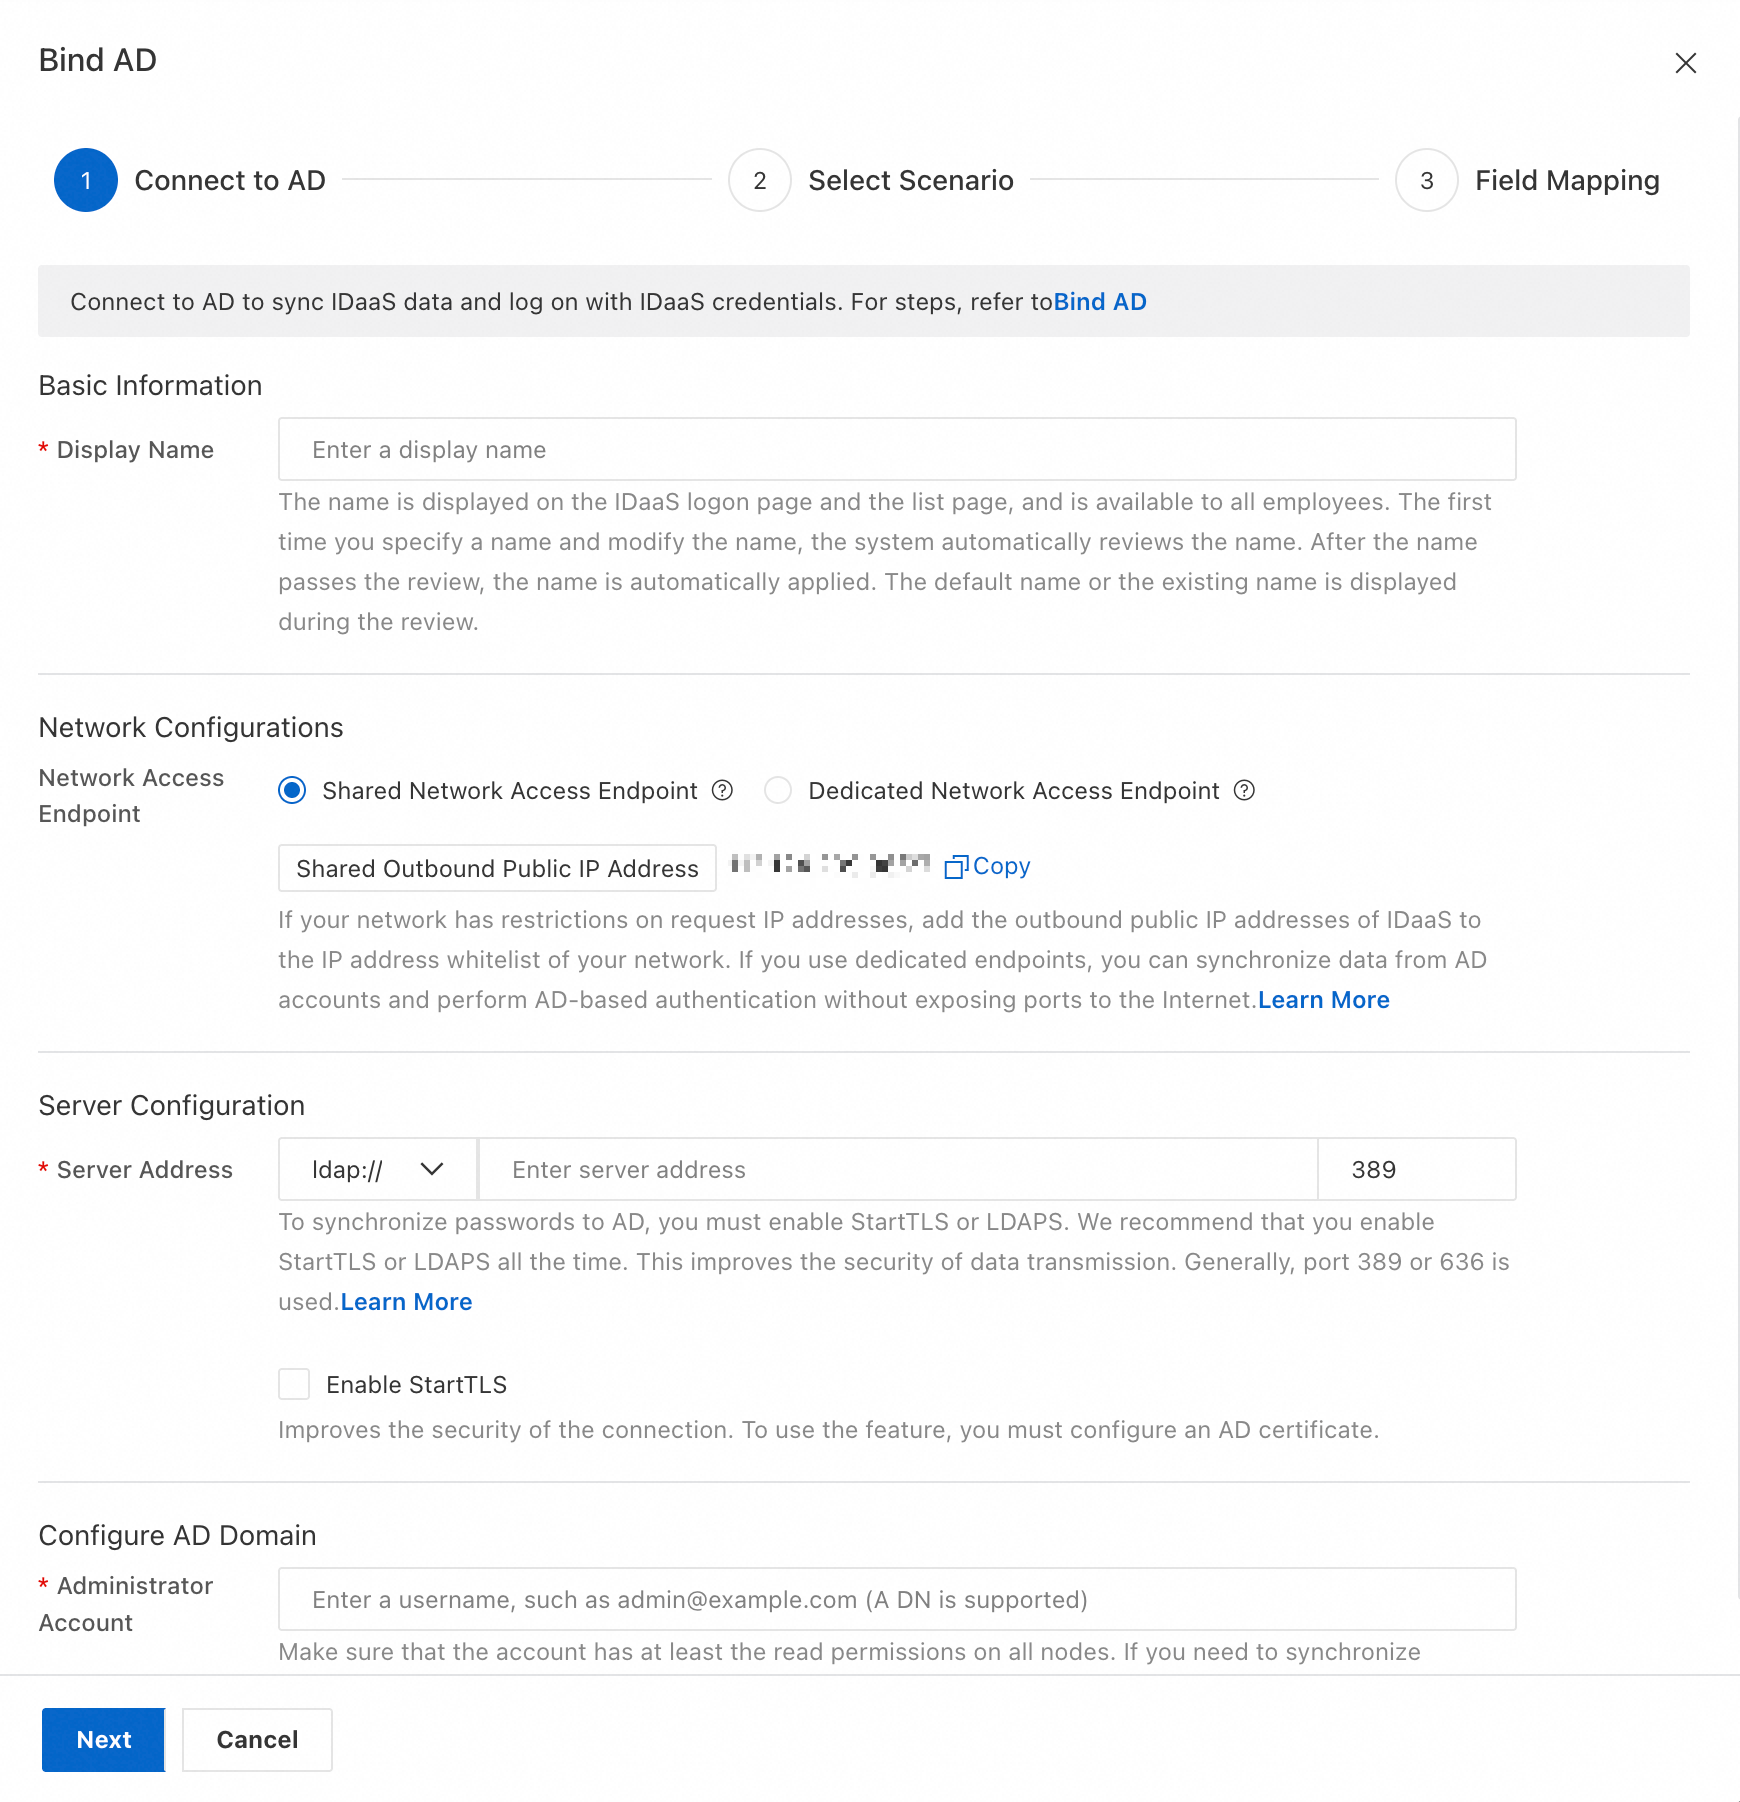
Display Name: The name displayed to users when they sign in to or use IDaaS.
Network Access Endpoint: If you want to allow requests only from IDaaS, configure an IP allowlist on your server. Shared endpoints use shared, fixed public egress IP addresses. Dedicated endpoints use dedicated, custom private and public egress IP addresses. With a dedicated endpoint, IDaaS can access your Alibaba Cloud VPC over a private network, which lets you access your AD without opening public ports. For more information, see Network endpoints.
Server address: The address of your AD server. AD typically uses port 389, for example, 127.0.0.1:389. When LDAPS or StartTLS is enabled, port 636 is typically used.
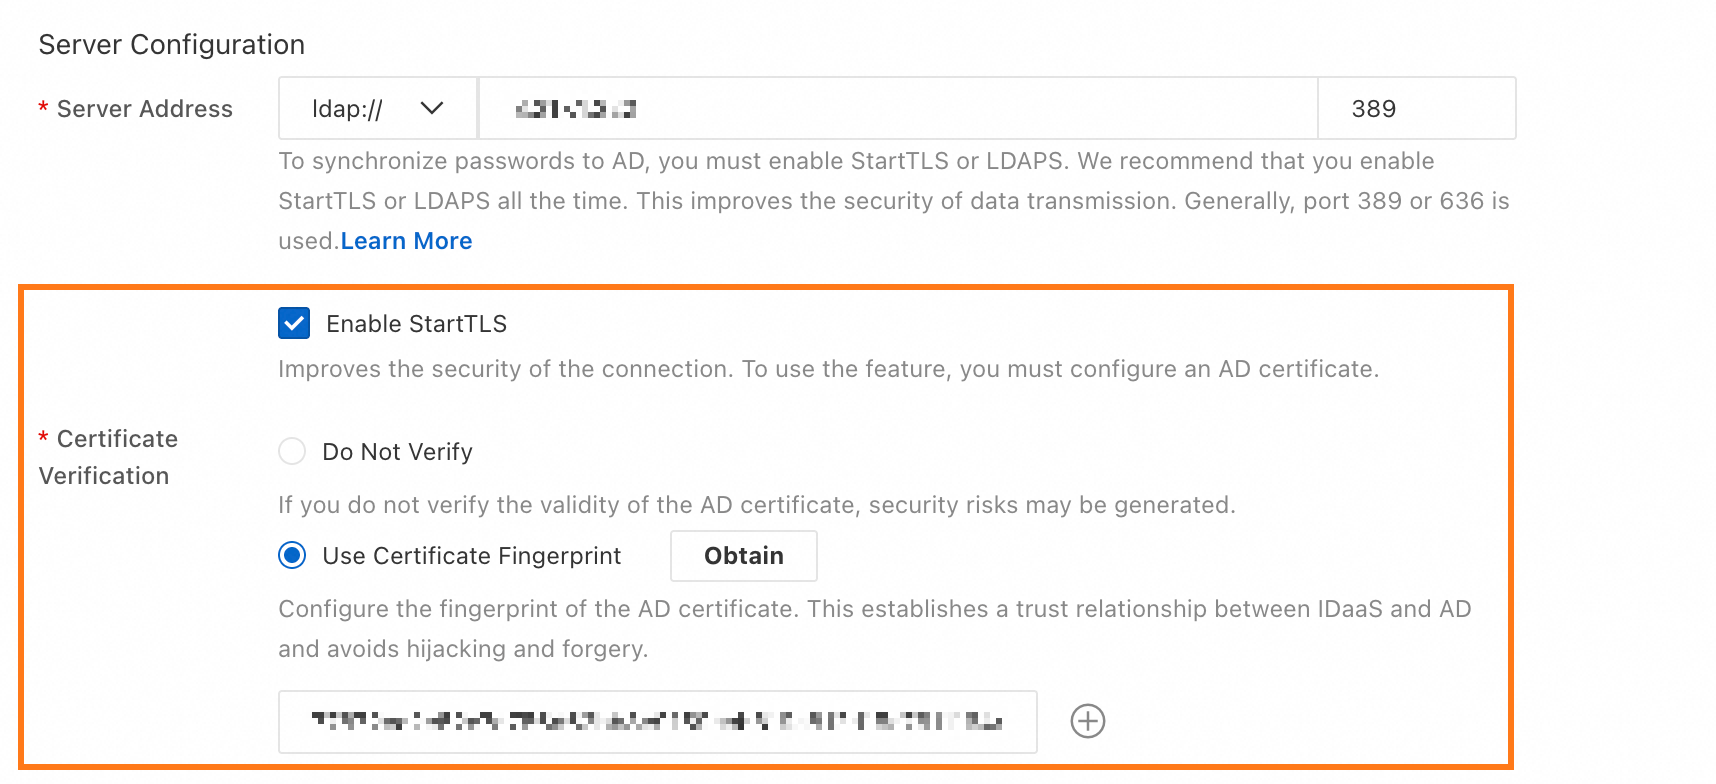
Enable StartTLS: We highly recommend enabling this option to significantly improve connection security. To learn how to enable it, see AD security configuration.
Administrator Account: IDaaS uses this AD administrator account to read AD information for data synchronization and delegated authentication. This account must have at least read permissions. Both User Principal Name (UPN) format (example@example.com) and Distinguished Name (DN) format (cn=admin,ou=Engineering,dc=example,dc=com) are supported.
Administrator Password: The password for the administrator account.
After you confirm the information, click Next.
Step 2: Select Scenario
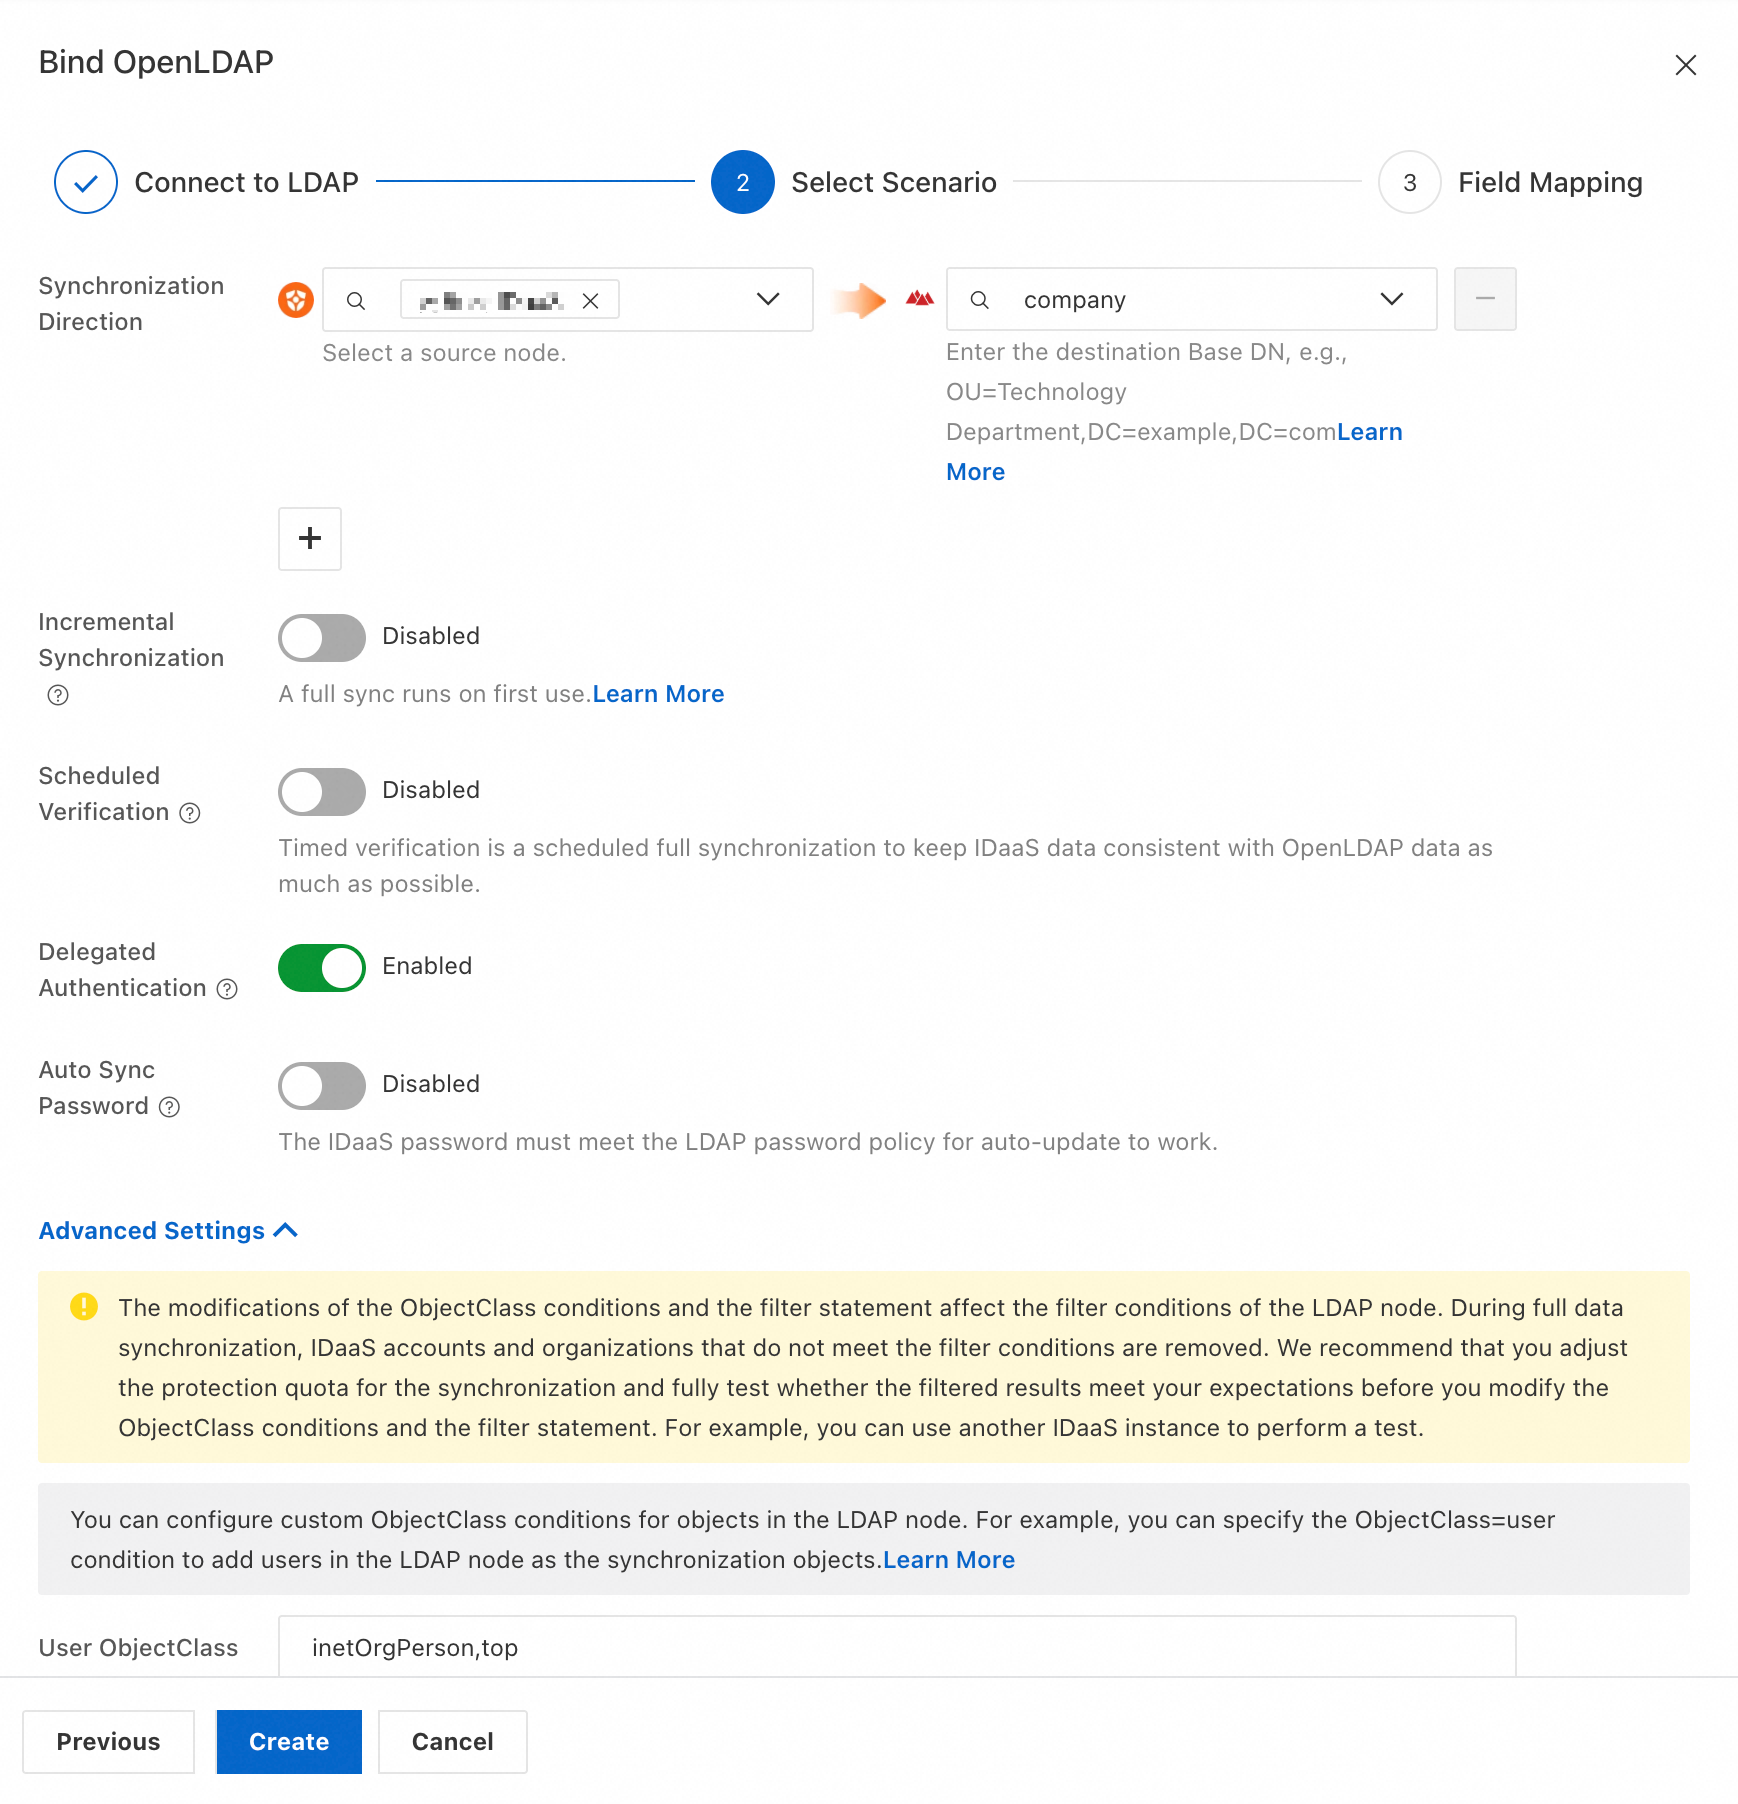
On the Select Scenario page, select the features you want to enable for AD.
Basic configuration
Synchronization Direction:
Data is synchronized from the selected IDaaS source node to the specified AD target node. The Source Node must be an IDaaS node, and the target node must be the DN of an AD node. The DN of the AD root node is typically dc=example,dc=com (your domain).
Incremental Provisioning:
Pushes data changes from IDaaS to AD as they occur.
Scheduled Verification:
Performs a scheduled full synchronization to ensure data consistency between IDaaS and AD.
Delegated Authentication:
Allows users to sign in to IDaaS using their AD account credentials.
Auto Sync Password:
To synchronize passwords to AD, you must enable StartTLS or LDAPS. A user's IDaaS password must also meet the AD password policy requirements; otherwise, it cannot be updated automatically.
Advanced configuration
User ObjectClass, Organization ObjectClass:
Use the
ObjectClassattribute to define which object types represent users or organizations. For example, objects in query results whereObjectClass=userare treated as users. You typically do not need to change this setting.User RDN, Organization RDN:
If you have customized the Relative Distinguished Name (RDN) of objects in your AD, you can specify the RDN attribute here. For example, when IDaaS synchronizes an account to AD, it can use
ouas the RDN for an organization.User Sign-in ID:
When a user signs in to IDaaS using delegated AD authentication, IDaaS uses these attributes to look up the user in AD and verify the password. If the password is correct, IDaaS allows the user to sign in. You can separate multiple attributes with a comma, which creates an OR relationship, meaning the user can sign in with any of the specified attributes. Ensure that these attributes map to the same AD user to prevent sign-in failures.
Step 3: Field Mapping
Configure Field Mapping to link existing AD accounts with IDaaS accounts. You can also use field mapping to populate AD attributes with data from IDaaS account fields, such as using an IDaaS account's mobile number as the AD username. To use a field as a Mapping Identifier, you must enable it manually for a specific field, such as the Mobile Phone Number field shown in the figure.

After you finish the configuration, clicking Save and Push triggers a full data synchronization from the IDaaS source node to the AD target node. To save the configuration without synchronizing, click Save Only.
For more information about field mapping, see Field mapping.
AD security configuration
By default, LDAP transmits data in plaintext, which exposes data to interception. Using LDAPS or StartTLS significantly improves the security of data transmission. After you configure a certificate in AD, you can use LDAPS or StartTLS in IDaaS. We strongly recommend enabling one of these options.
In Server Manager, complete the certificate configuration by installing roles, promoting the server to a domain controller, and adding a certificate. Use SHA256 for the signature algorithm.
After configuring the certificate, you can retrieve the certificate fingerprint directly in IDaaS. This establishes a trust relationship between IDaaS and the AD certificate, reducing the risk of forged certificate attacks.
To quickly verify that the certificate fingerprint shown in the AD interface matches the one retrieved by IDaaS, run the following command:
openssl s_client -connect server_host:port | openssl x509 -noout -pubkey | openssl pkey -pubin -outform DER | openssl dgst -sha256AD-specific configurations
objectClass
In AD, an objectClass is a collection of attributes, and every object must have an objectClass. You can use objectClass to define an object as a user, organization, or computer. For example, you can find the user shown in the figure below by using the filter statements objectclass=person or objectclass=user. You can view the objectClass in the Properties of an AD object.
Logon identity
When a user uses AD delegated authentication to log on to IDaaS, IDaaS uses these attributes to look up the user in AD and verify their password. If the password is correct, the user is allowed to log on.
Common attributes used for logon include userPrincipalName, sAMAccountName, mobile number, email, and employee ID. You can define these attributes during creation or in the delegated authentication settings. If you use multiple attributes, ensure they are unique and map to the same AD user; otherwise, delegated authentication will fail.
AD synchronization configuration
Base DN
The Base DN specifies the starting point in the AD tree for synchronization. IDaaS limits queries and data synchronization to this node and its sub-trees. You can set the Base DN of the target node in the Synchronization Direction settings.
The DN format is ou=some-ou,dc=example,dc=com. The root node's DN is typically dc=example,dc=com (your domain). You can also view a node's DN directly in the AD Administrative Center, as shown in the figure.
A node's Base DN changes if the node is moved. IDaaS uses the node's objectGUID to track the target node. If the Base DN changes, IDaaS detects a mismatch with the stored objectGUID and blocks synchronization. To resume, you must reconfigure the target node.
Incremental synchronization
When user or organization data in IDaaS changes, IDaaS pushes the changes to AD provided the object is within the configured synchronization scope.