This document describes how to use workforce identity federation to set up enterprise single sign-on (SSO) for Google Cloud Platform (GCP). It covers the entire OIDC-based process, including configuring a workforce identity pool, integrating an external identity provider (IdP), generating temporary credentials, and managing IAM permissions. This approach lets your enterprise users securely access GCP resources without needing separate Google accounts.
Procedure
Step 1: Configure an OIDC application in IDaaS
-
Create an OIDC application.
-
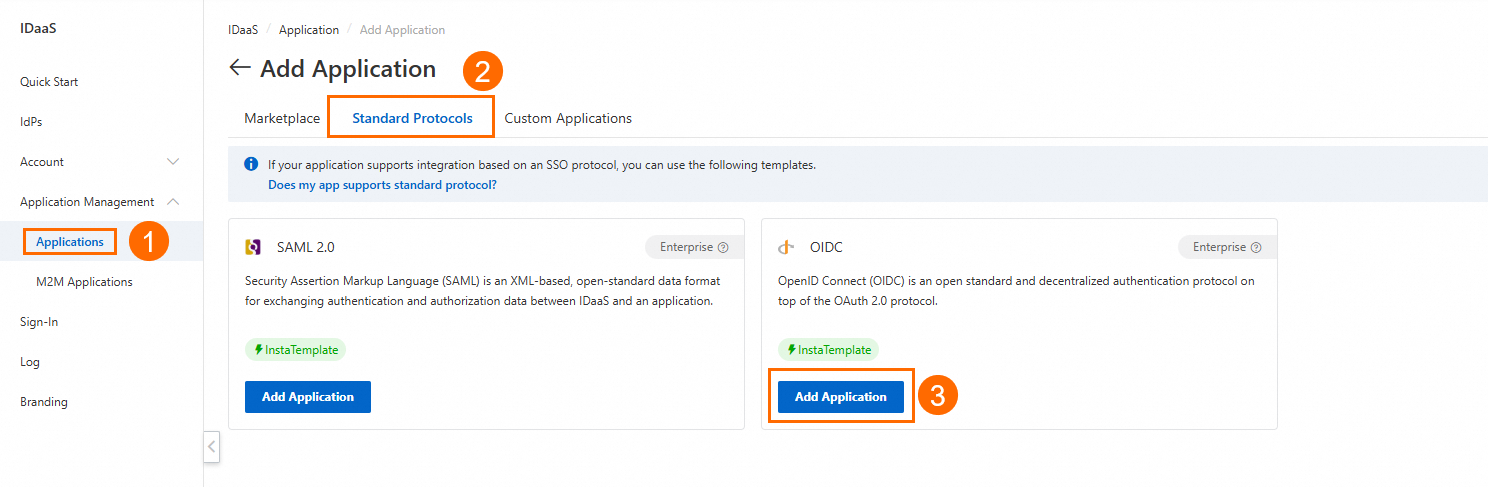
Log on to the IDaaS console, select the target IDaaS instance, and in the Console column, click Console.
-
Navigate to , and add an OIDC application.
-
-
Get configuration parameters.
-
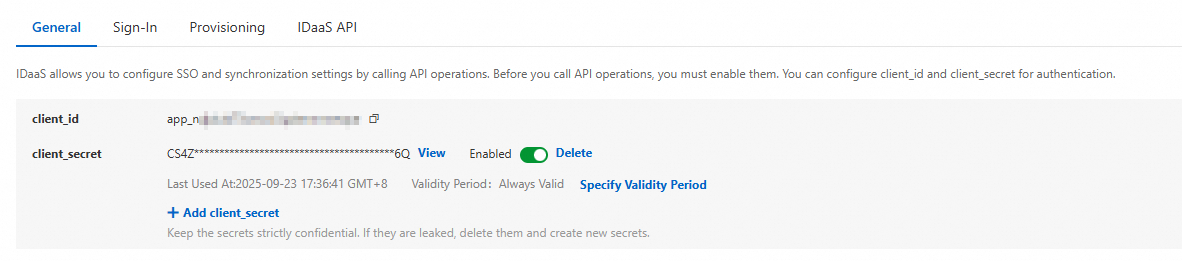
On the OIDC application details page, get the client_id and client_secret from the General tab.
-
On the tab, get the Issuer URL from the Application Settings section.

-
-
After you complete the GCP configuration, return to this page to enter the following parameters.
-
Redirect URIs. To set up console access, add the following redirect URI.

https://auth.cloud.google/signin-callback/locations/global/workforcePools/WORKFORCE_POOL_ID/providers/WORKFORCE_PROVIDER_IDNoteReplace the following placeholders:
-
WORKFORCE_POOL_ID: The ID of your workforce identity pool.
-
WORKFORCE_PROVIDER_ID: The ID of the provider that you created for the workforce identity pool.
-
-
IDaaS Sign-In URL. After adding an identity provider in GCP, a sign-in URL is generated. You can add this URL to your IDaaS application to let users sign in to the GCP console with one click by using their enterprise identities.

-
In the IDaaS application, expand Show Advanced Settings. For SSO Implemented By, select IDaaS & Application. Copy the sign-in URL from GCP and paste it into the IDaaS Sign-In URL field.
-
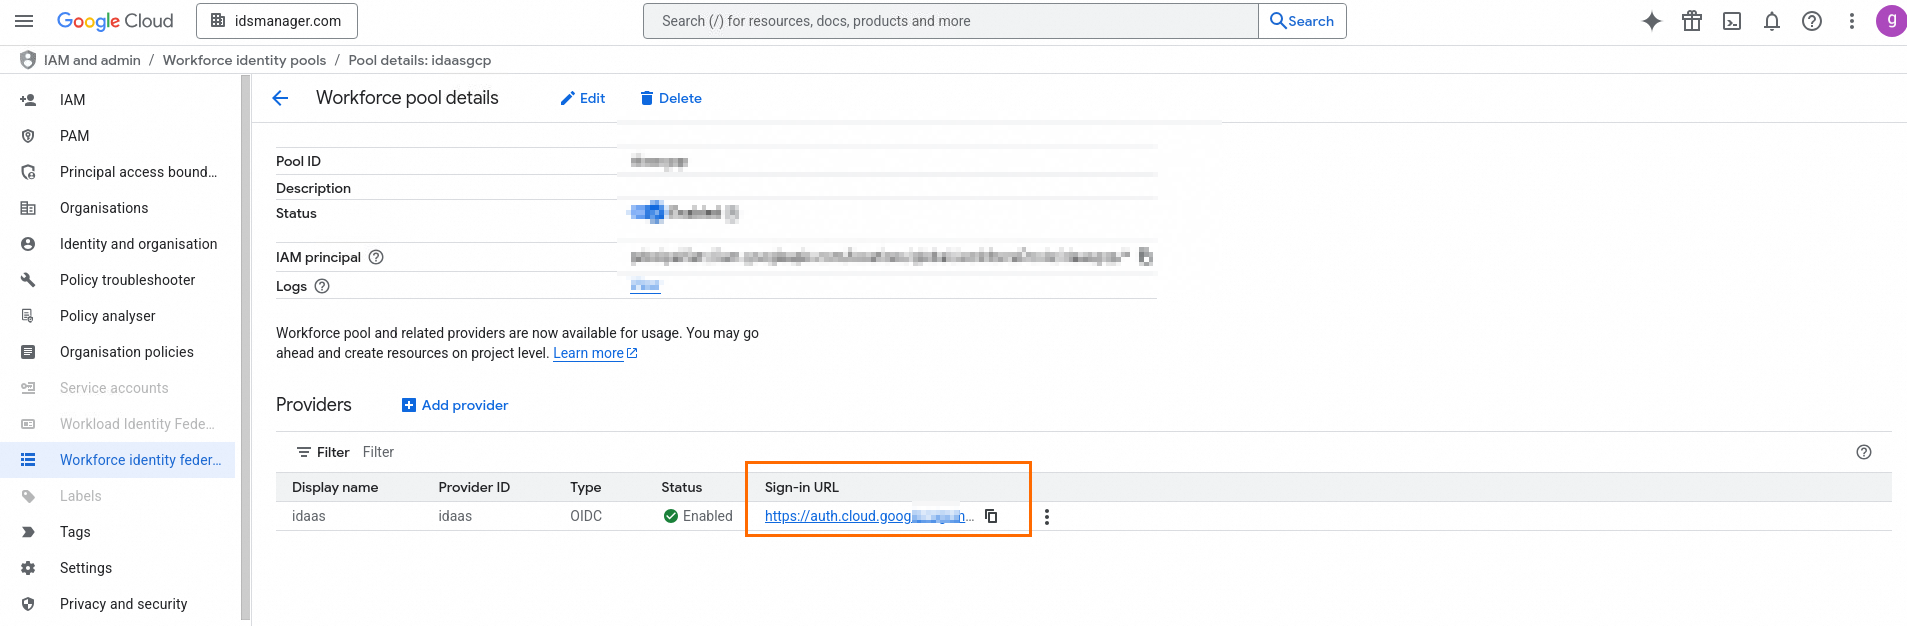
After adding an identity provider in GCP, you can find the sign-in URL in the workforce identity pool you created, under Sign-in URL.

-
-
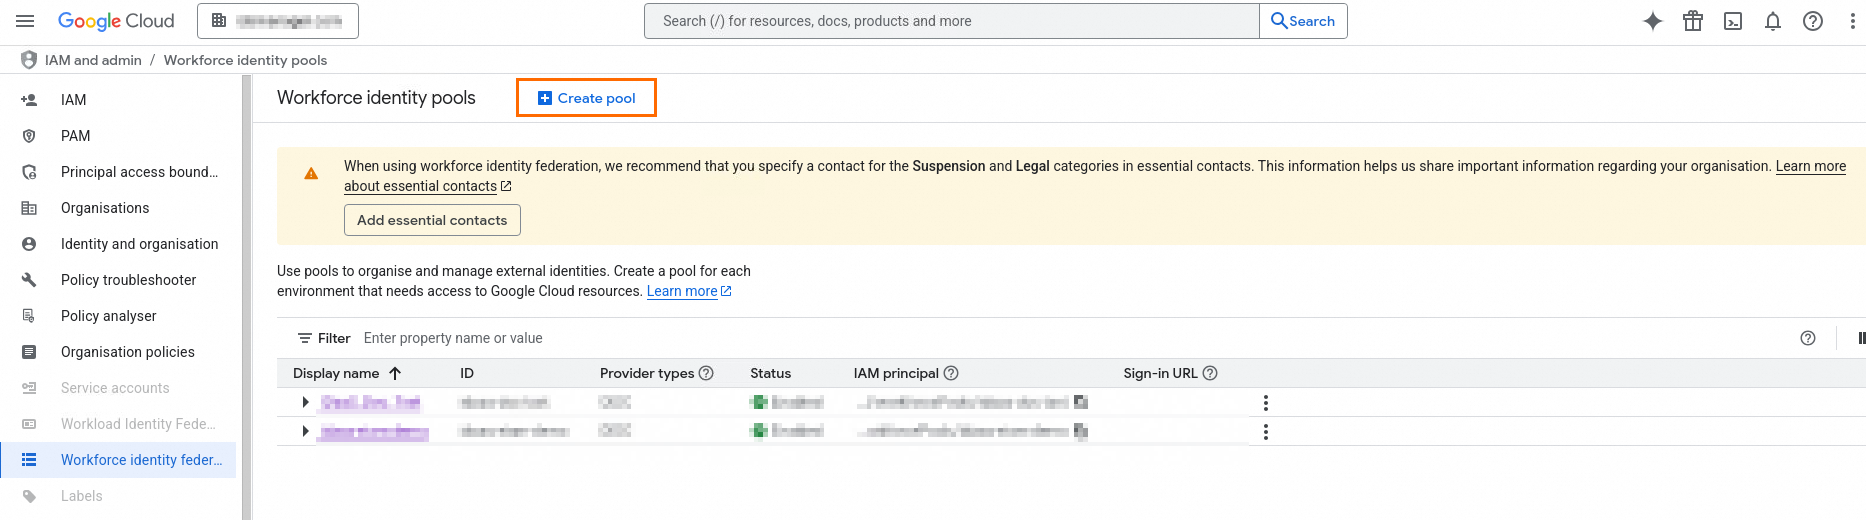
Step 2: Create a workforce identity pool
-
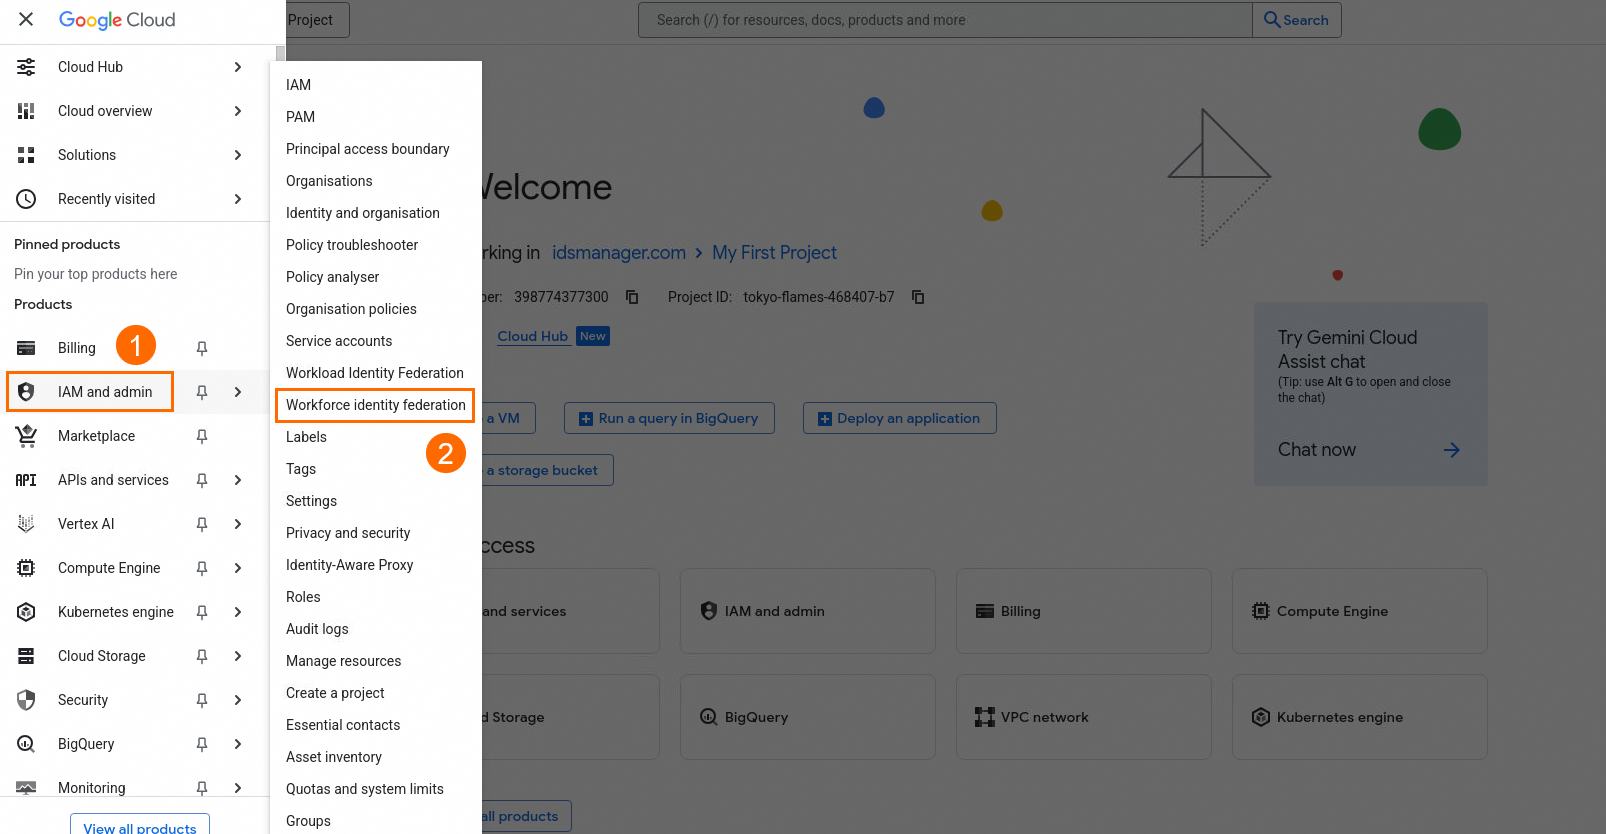
Log on to the Google Cloud console. In the left-side navigation pane, click .
-
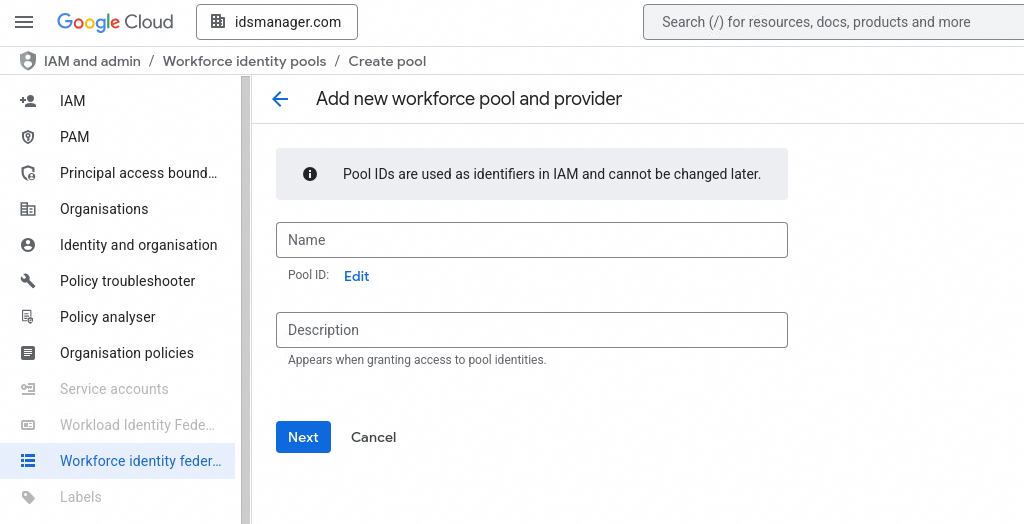
On the Workforce identity pool page, click Create Pool. The Add new workforce pool and provider page opens.
-
Configure the basic information for the identity pool.
-
In the Name field, enter a name for the identity pool.
-
(Optional) In the Description field, enter a description of the pool's purpose, such as
federated identity authentication for the XX service. -
When finished, click Next. Pool creation can take up to two minutes.
-
-
In the Select an Authentication Protocol section, choose a protocol type from the drop-down list:
-
OpenID Connect (OIDC)
-
SAML
NoteThis document uses OpenID Connect (OIDC) as an example. Select the protocol that meets your needs.
-
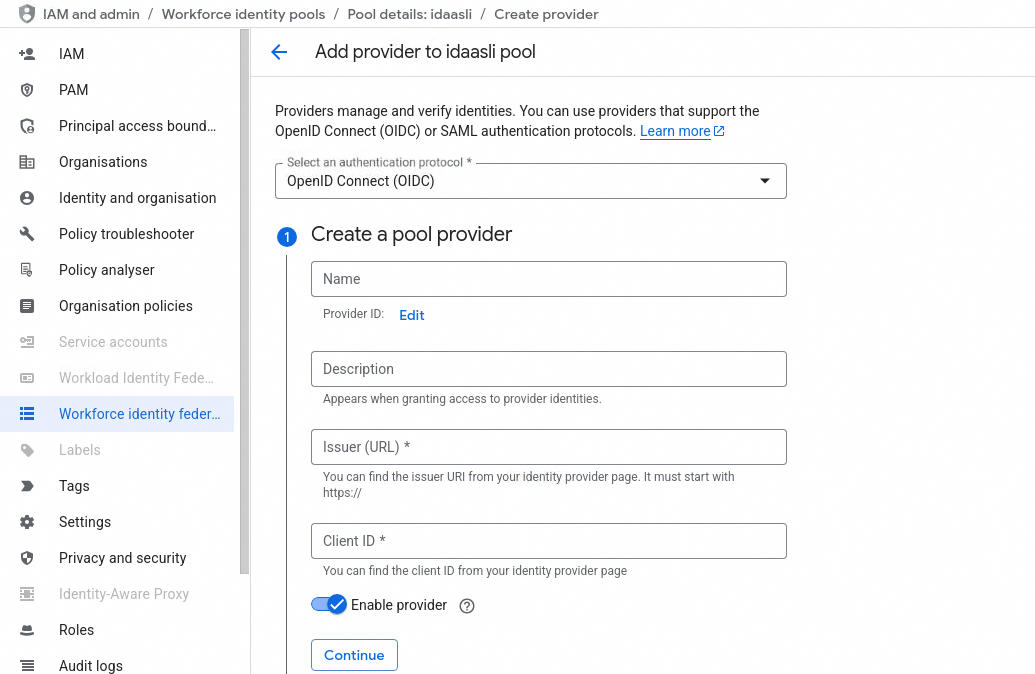
Step 3: Configure the identity provider
-
Create a pool provider.
Parameter
Description
Name
A display name for the identity provider.
Provider ID
A unique ID for this provider within the pool.
Description
Describes the authorization scenario. This text appears when you grant access to a third-party identity.
Issuer
The Issuer URL from the OIDC application that you configured in IDaaS.
Client ID
The OIDC application's unique identifier (client_id), used to establish trust with the identity provider.
-
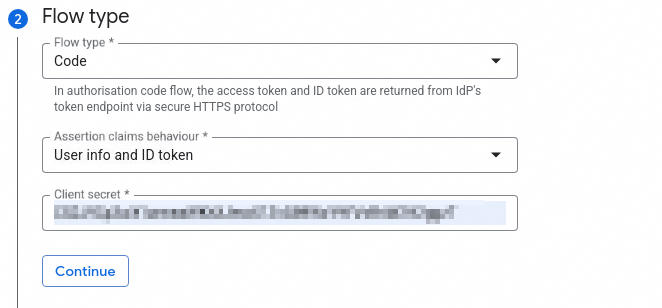
Flow type.
Parameter
Description
Flow type
Select code.
Assertion claims behavior
Select one of the following options:
-
User info and ID token
-
ID token only
Client secret
The client_secret of the OIDC application.
-
-
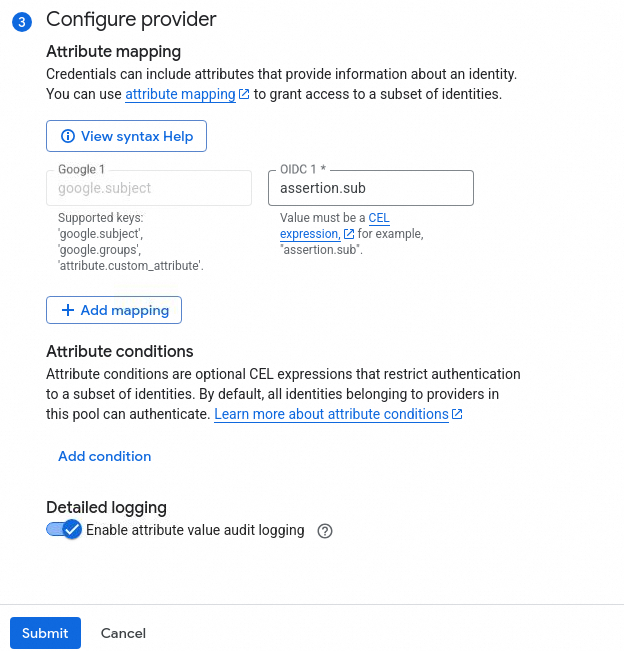
Configure the provider.
-
When you configure attribute mapping, you must specify the IdP's subject field (such as
assertion.sub) in the OIDC configuration, or use a CEL expression that returns a string. -
After completing the configuration, click Submit. Wait for the identity provider to be created.
-

Step 4: Grant IAM permissions
-
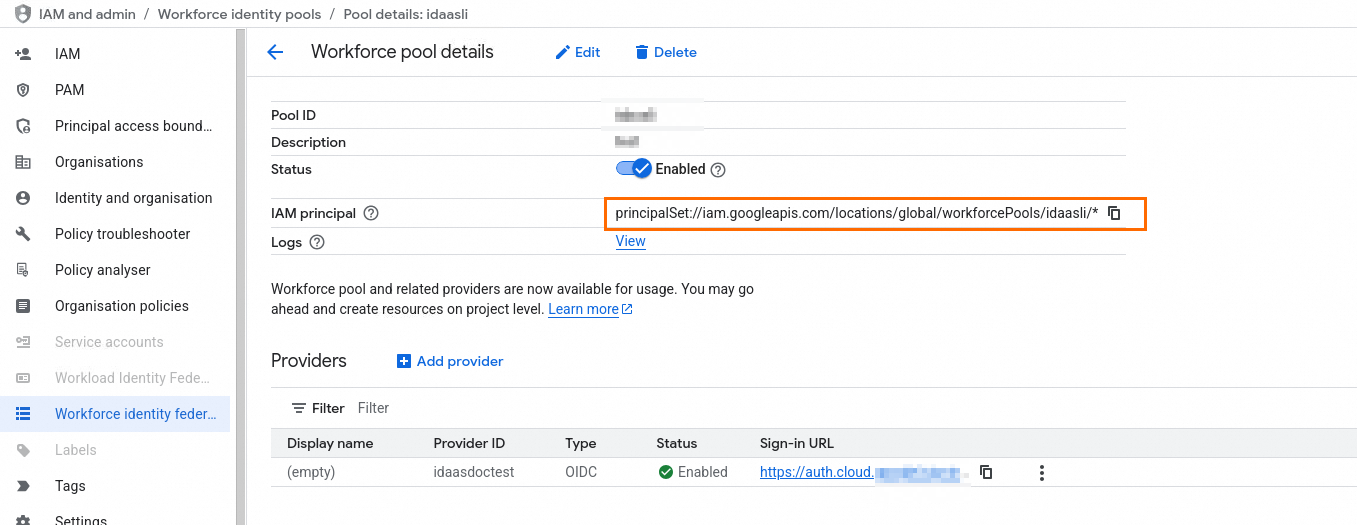
Go to the details page of your workforce identity pool and copy the IAM principal.
-
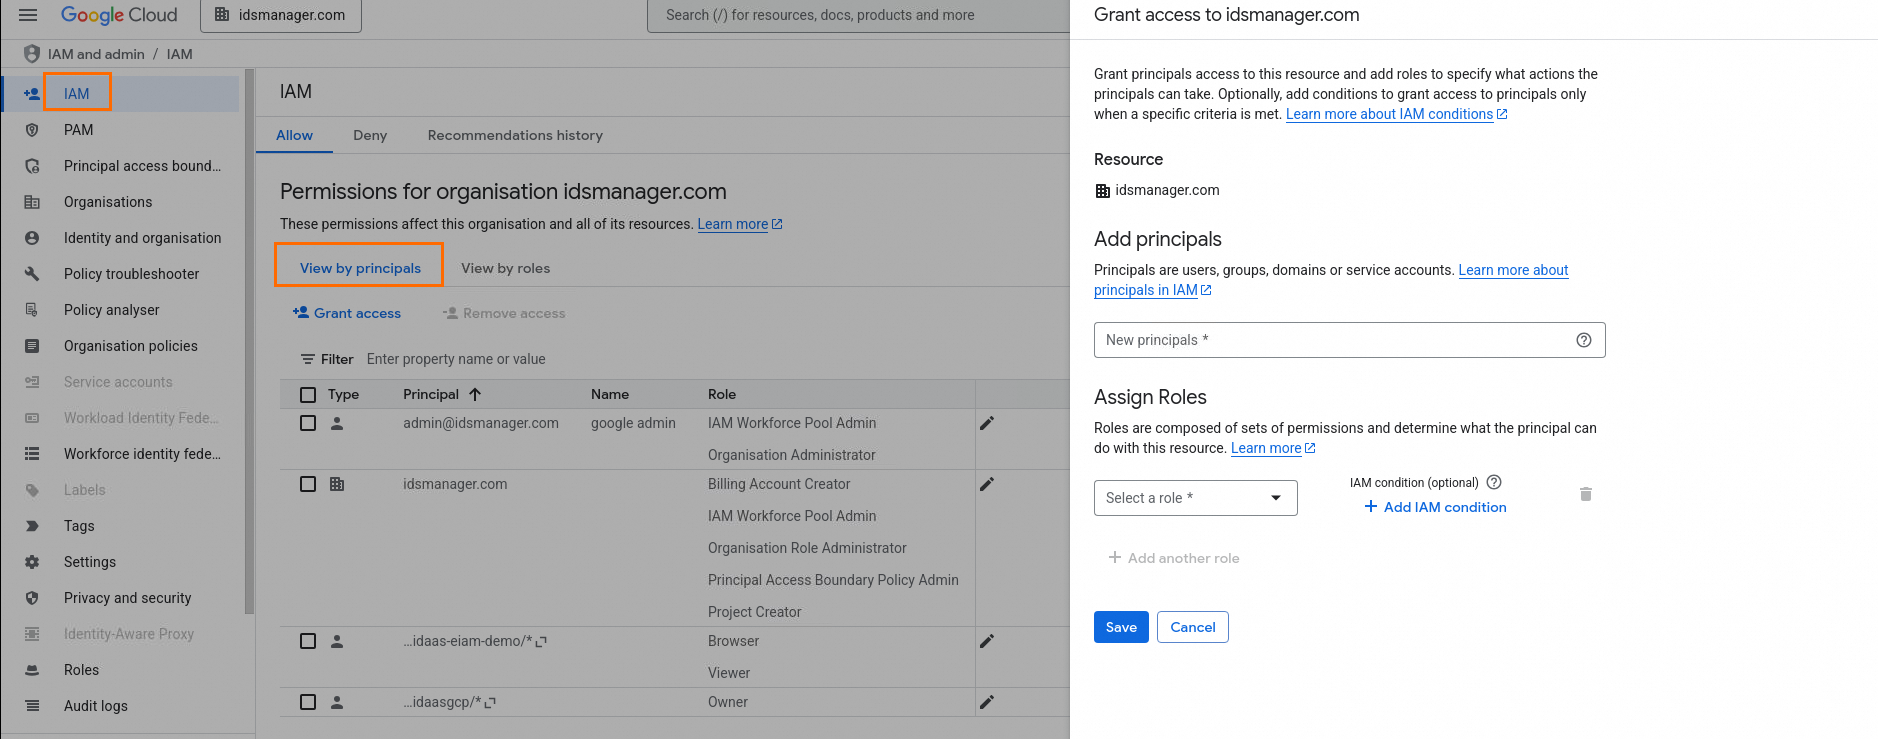
In the left-side navigation pane, go to the IAM page and click grant access.
-
Add principal. Paste the IAM principal.
-
Assign roles. Assign appropriate roles based on your needs, and then click Save.
-
Step 5: Verify SSO
-
Verify from IDaaS.
After configuring SSO, you can sign in from the IDaaS user portal.
-
Log on to the IDaaS user portal.
-
Click the OIDC application that you created.
-
You are automatically redirected to the Google Cloud console.
-
-
Verify from GCP.
-
In the left-side navigation pane, click .
-
Open the details page of the workforce identity pool that you created, and in the Providers section, click the Sign-in URL.
-
You will be redirected to the IDaaS sign-in page. After you sign in, you can access the Google Cloud console.
-

