This topic describes how to configure and use WebAuthn authentication in IDaaS EIAM to provide a more secure and convenient passwordless sign-in experience. It covers key benefits and configuration steps to help administrators quickly integrate WebAuthn into their organization's identity infrastructure.
Overview
WebAuthn is a core component of the FIDO2 standard. It enables a best-in-class, hardware-backed passwordless sign-in experience for websites. It leverages the native device encryption and biometric capabilities of your PC for website authentication.
You can use two types of authenticators:
A cross-platform authenticator is an external security key, such as a YubiKey, that can be used across multiple devices.
A platform authenticator is a built-in authentication capability of the device you are using, such as Mac Touch ID or Windows Hello.
For more information, see the WebAuthn Guide (external link). Most modern browsers support WebAuthn. Check your browser's compatibility here (external link).
Sign-in demonstration
Sign in securely with just your username—no password required. See how it works below:

Authenticator registration
Users must register an authenticator with their account before using it to sign in.
Each user who wants to use WebAuthn for sign-in must first go to the My Account page. Navigate to Security Information > WebAuthn authenticator, click Manage, and then register a new authenticator in the management panel.

The registration process takes about a minute. After clicking Register Authenticator, follow the on-screen instructions from your browser to complete the setup.
After registration, users can use any enabled authenticator for sign-in. Users can also manage their registered authenticators.
Administrators cannot manage user authenticators at this time. Each user must complete the registration and management process individually.
Sign-in scenarios
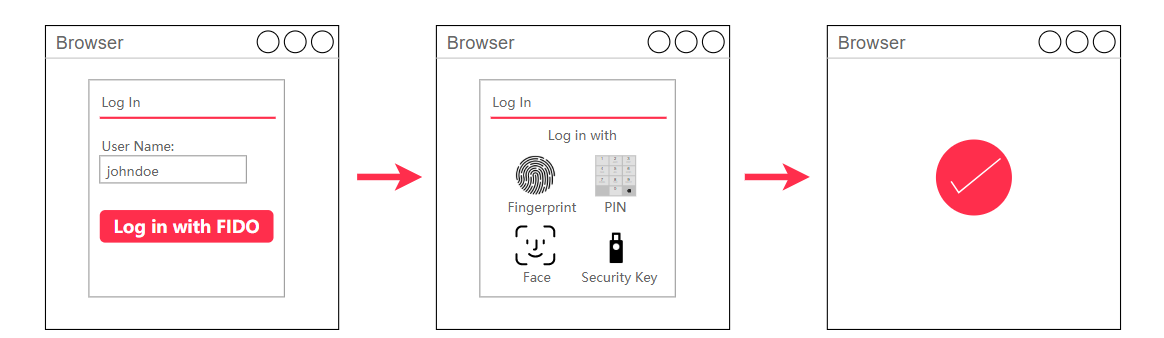
Scenario 1: passwordless sign-in
A common and convenient use for WebAuthn is to replace password-based sign-in.
Users go to the IDaaS sign-in page, enter their username, and choose a WebAuthn method to verify their identity. After successful verification, they sign in to the application. This flow works for all web applications. The process is illustrated below:
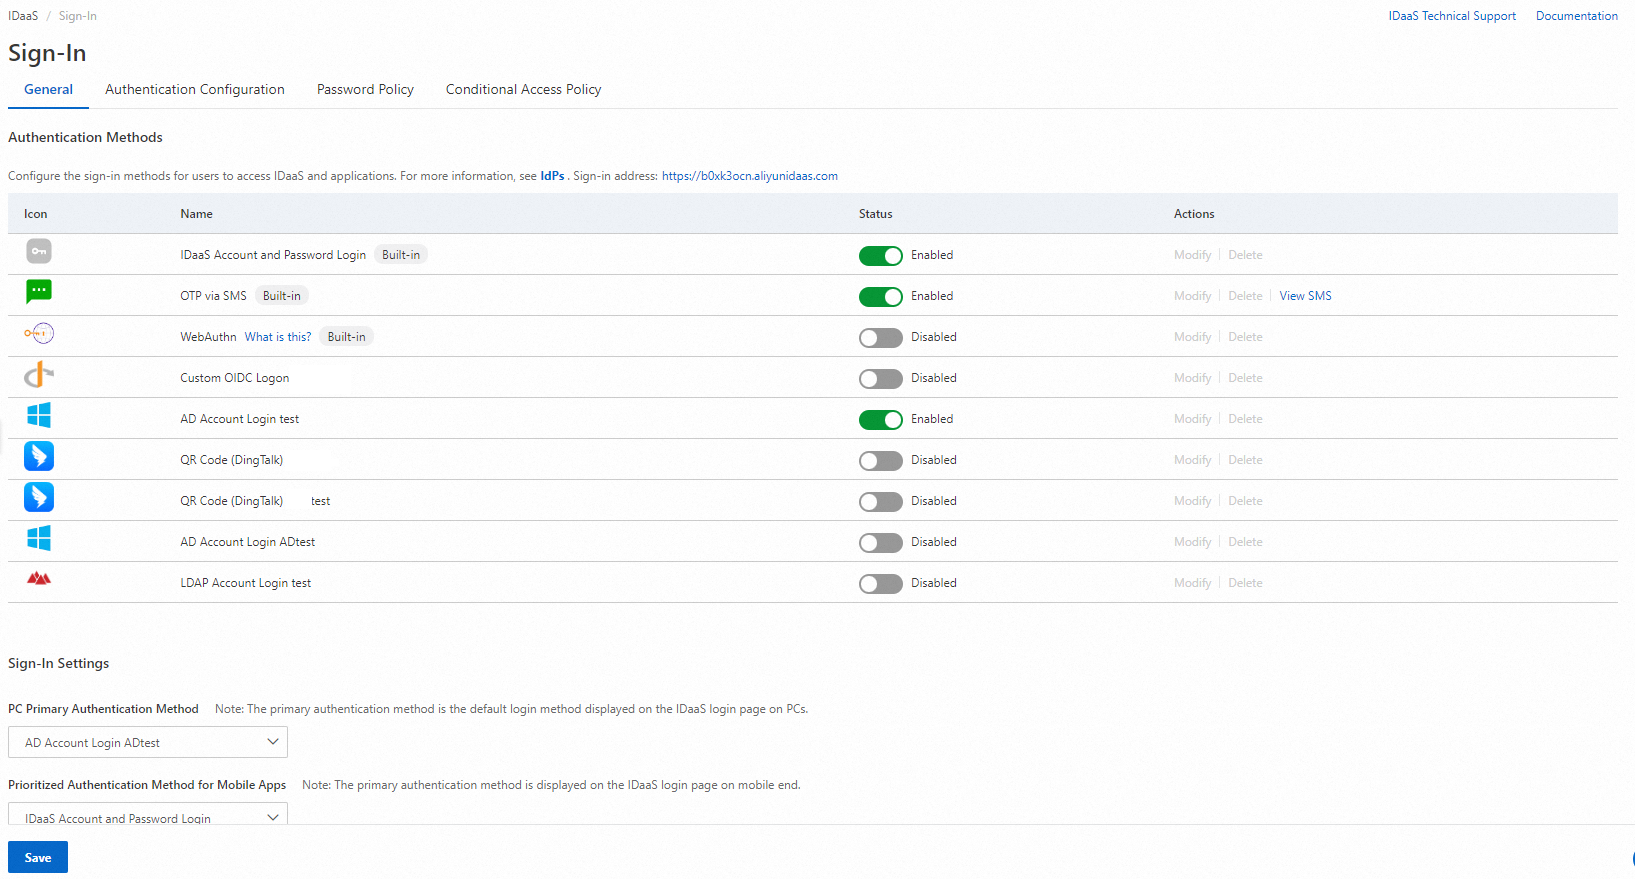
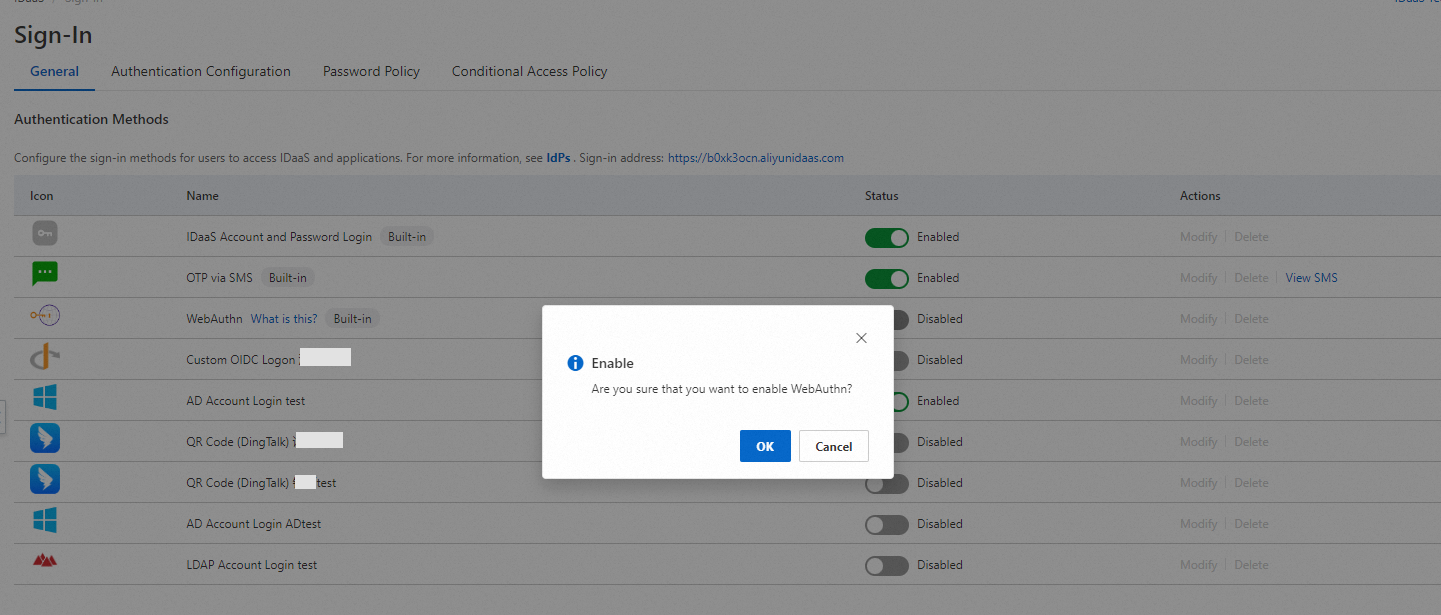
IDaaS administrators can find the WebAuthn option on the General tab of the Login menu. This option is disabled by default. Enable it to use this feature.
Once enabled, the WebAuthn sign-in option appears on the sign-in page. Users can select this option to sign in, as shown in the example below using Mac Touch ID for authentication.
IDaaS retrieves the registered authenticator information for the specified account. If no authenticator is registered for the account, IDaaS displays an error and the user cannot proceed.
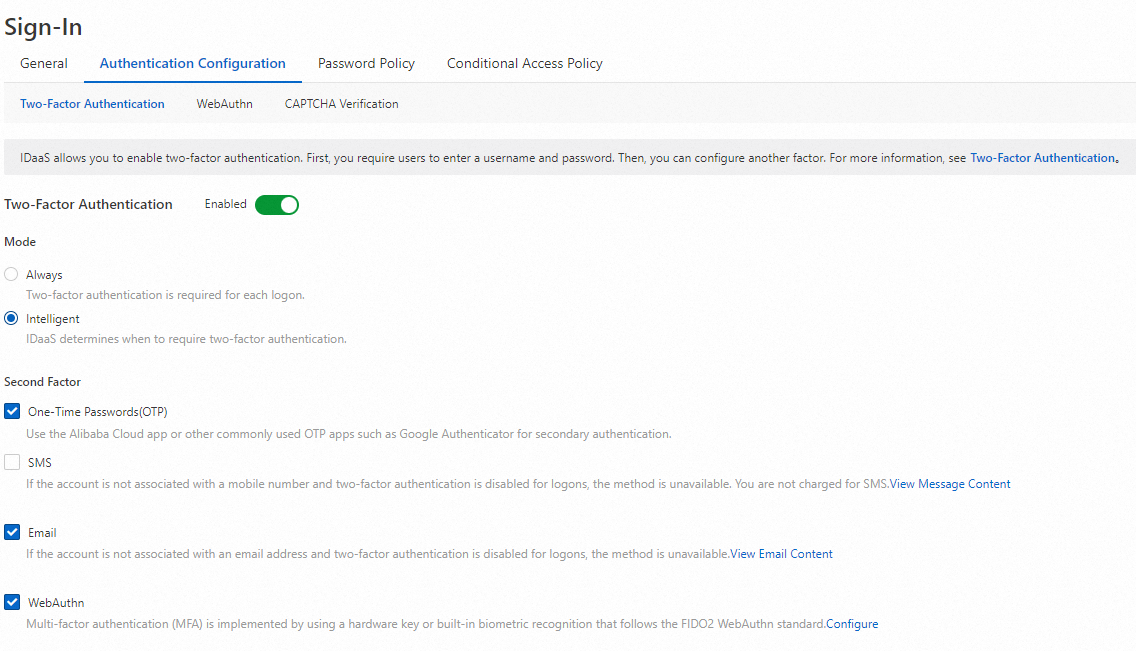
Scenario 2: MFA
WebAuthn can also be used as a highly secure factor for MFA.
Users enter their username and password as usual. If MFA is enabled, they enter the MFA flow, where they can choose to use a WebAuthn authenticator for secure sign-in. The process is illustrated below:

IDaaS administrators can go to the 2nd Authentication tab in the Login menu. Select the WebAuthn checkbox and click Save. Make sure that MFA is enabled.
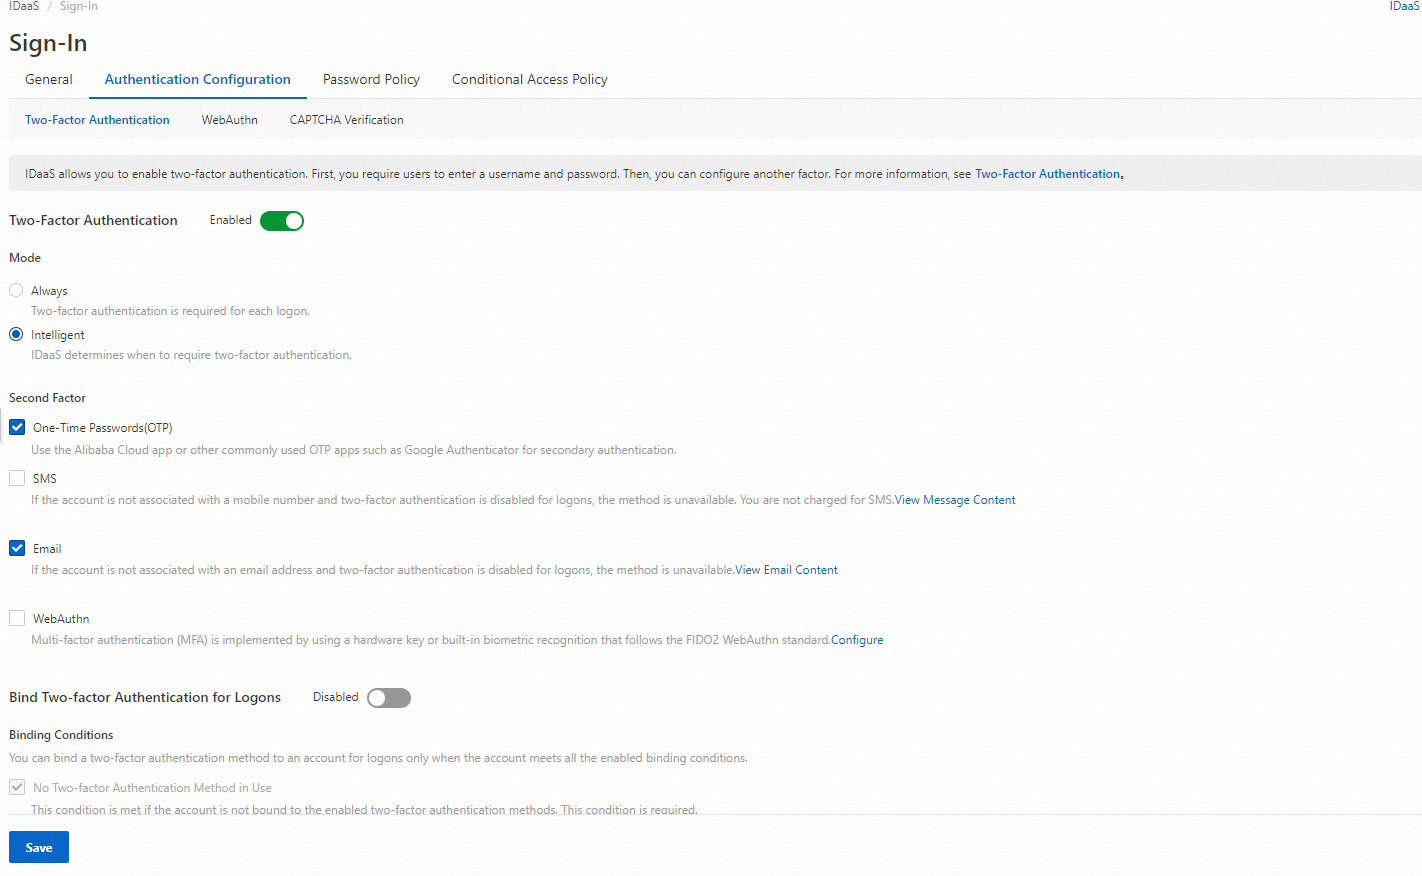
Once enabled, users proceed to the MFA page after they sign in. If a user has registered a WebAuthn authenticator, they can select it for fast and secure identity verification, as shown in the example below using Mac Touch ID for authentication.