The WeCom integration synchronizes your WeCom Contacts with your enterprise's user management system and enables single sign-on (SSO) through WeCom.
|
Applicable edition |
dedicated edition |
Create out-of-scope users
A site administrator can configure and manage the WeCom integration in . To create users outside the WeCom synchronization scope, select the Support built-in users option.
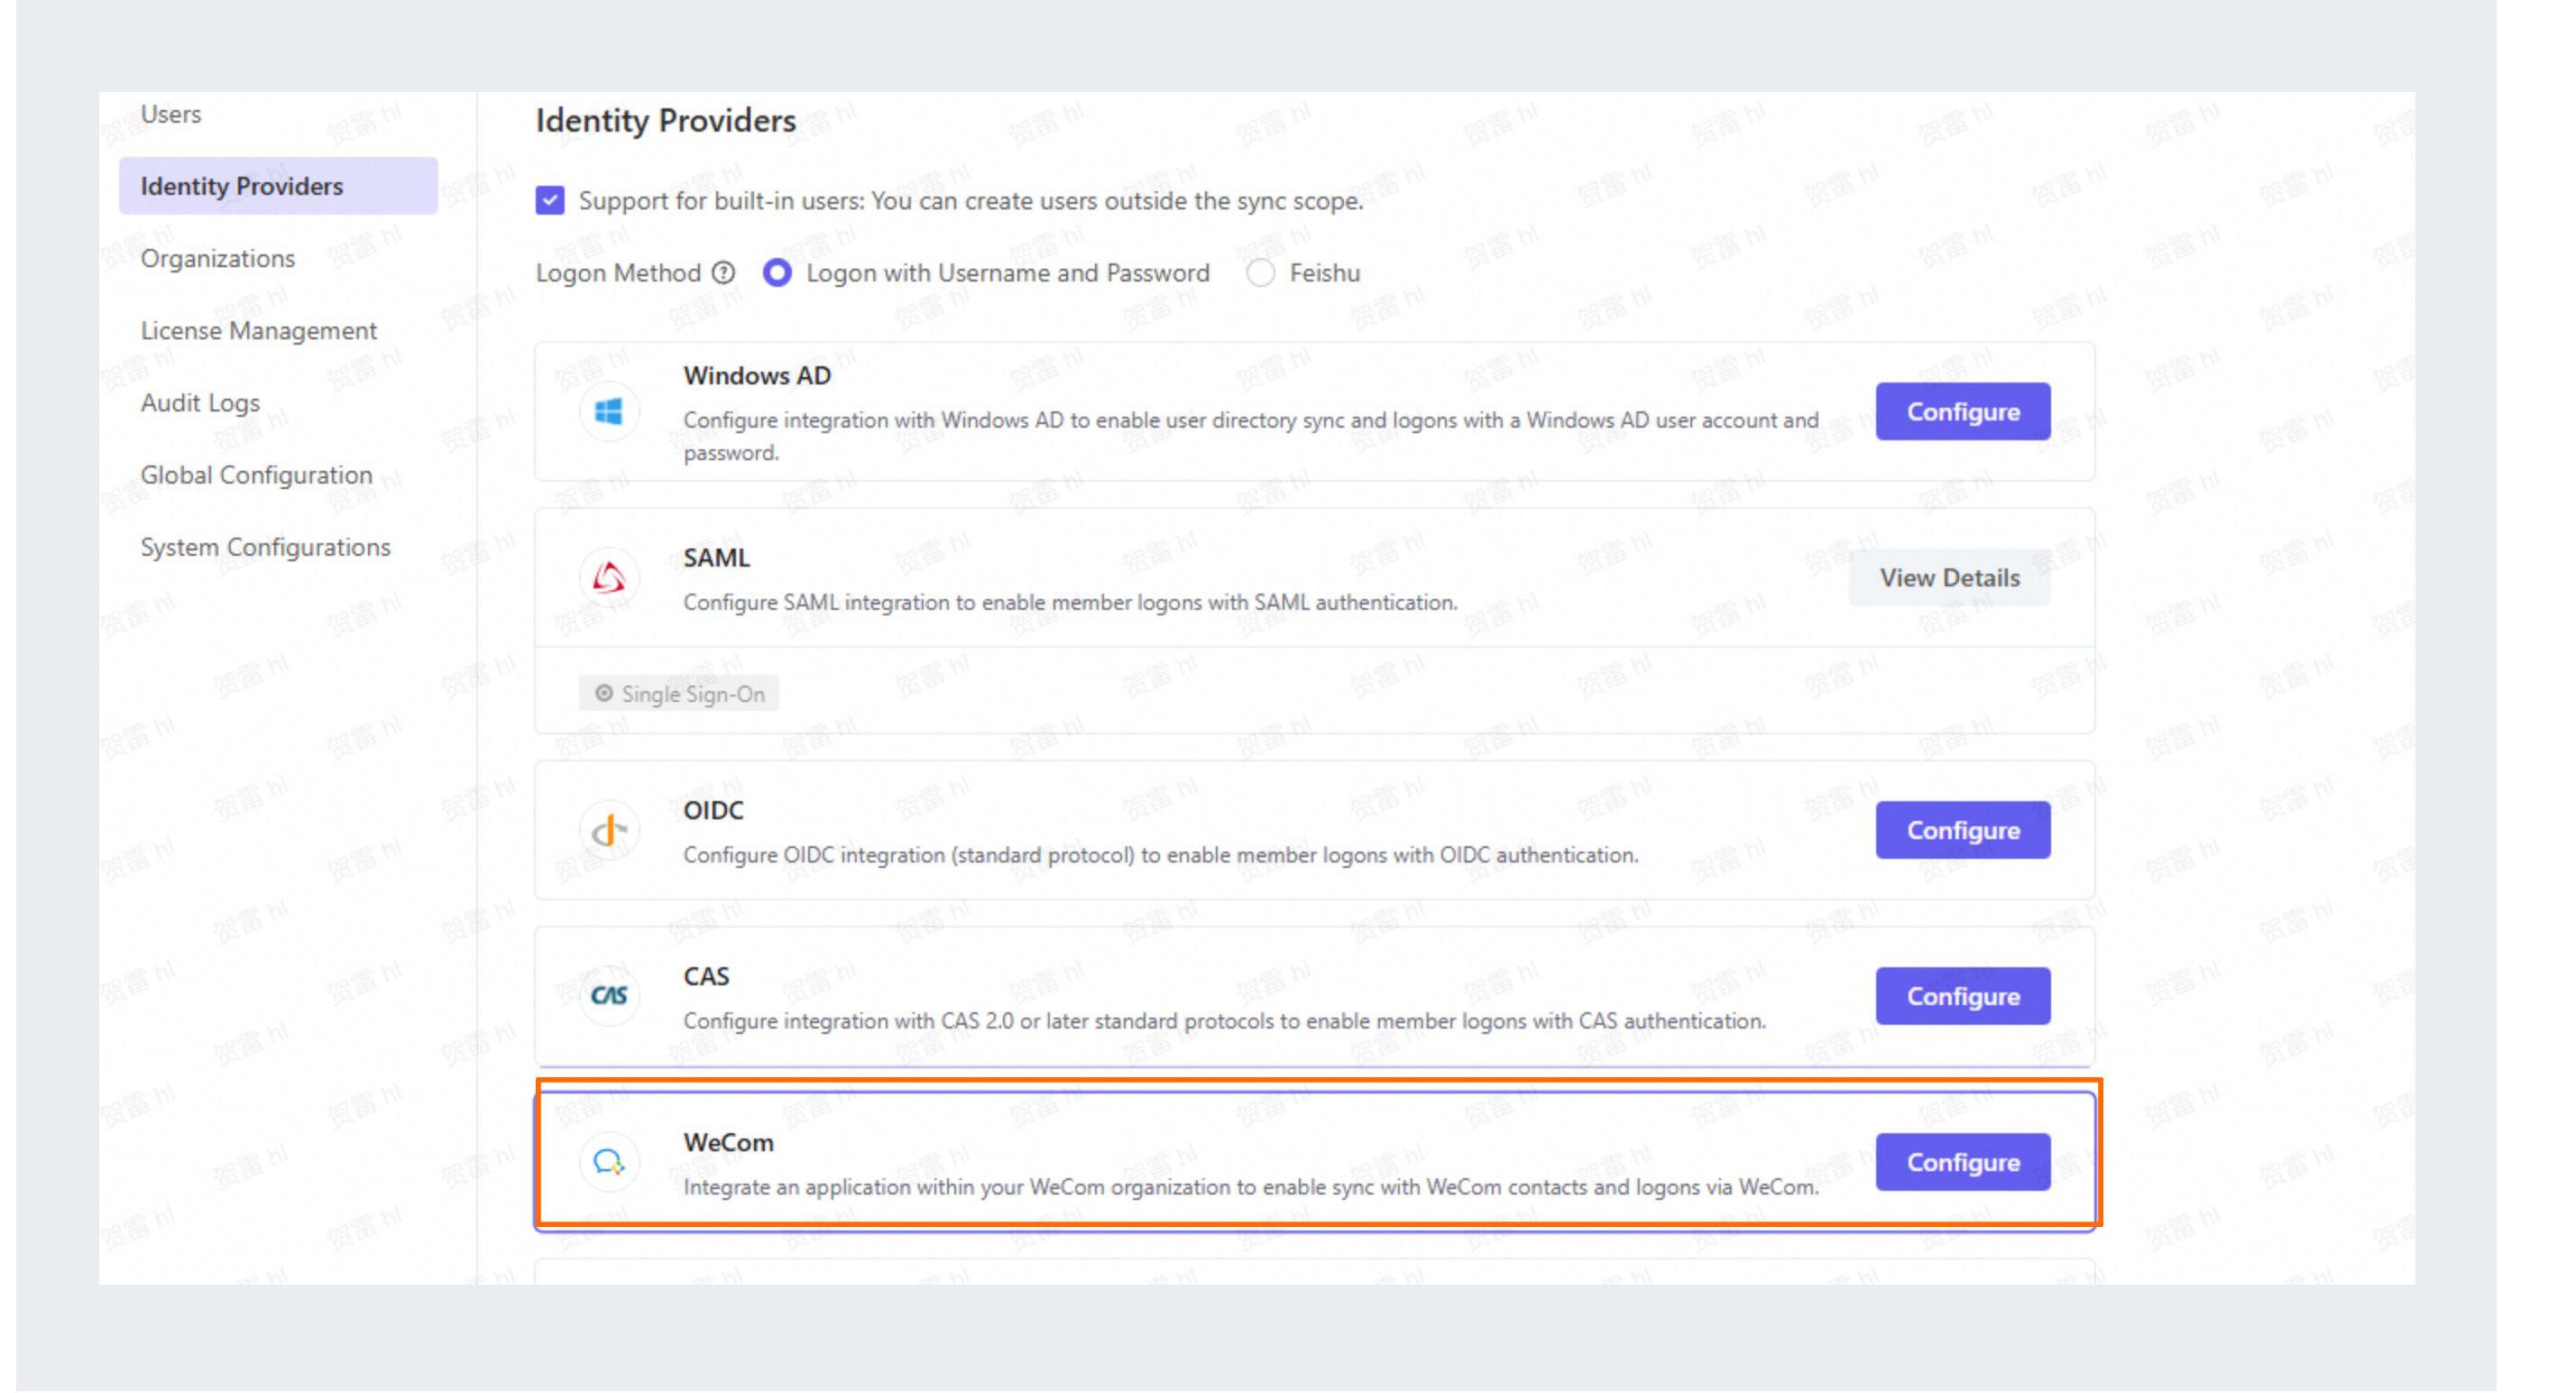
Configure WeCom integration
Step 1: Configure an internal application
-
Create an internal application in the WeCom admin console. For instructions, see the WeCom documentation on how to create a self-built enterprise application. Fill out the application form as instructed, and then click OK.
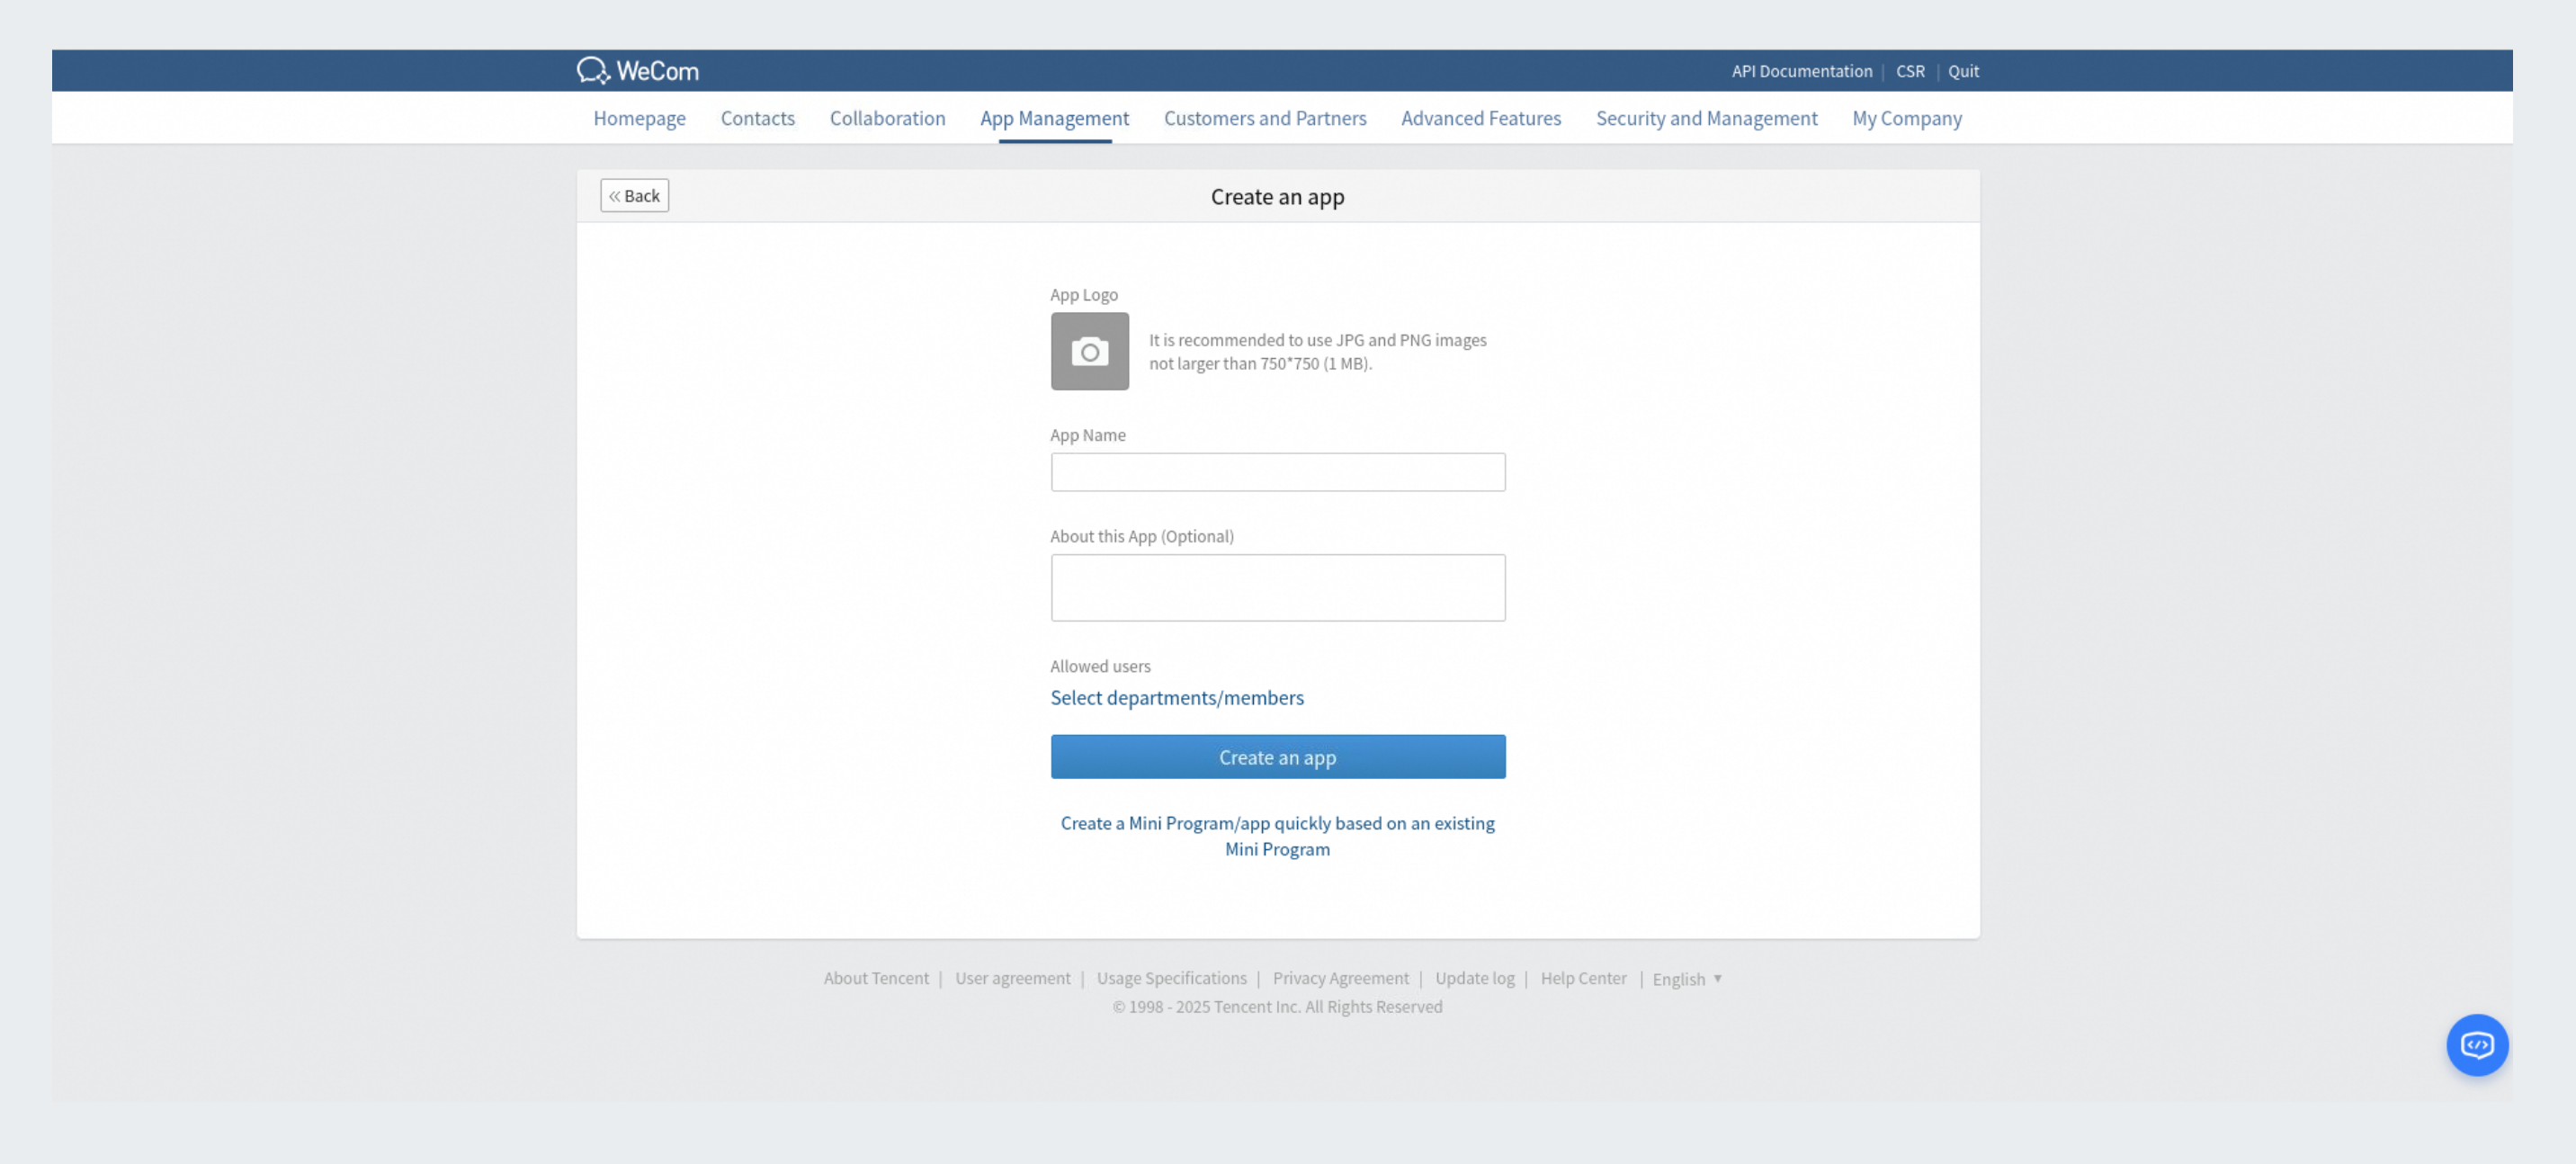
Application Icon: Select an icon for your application.
-
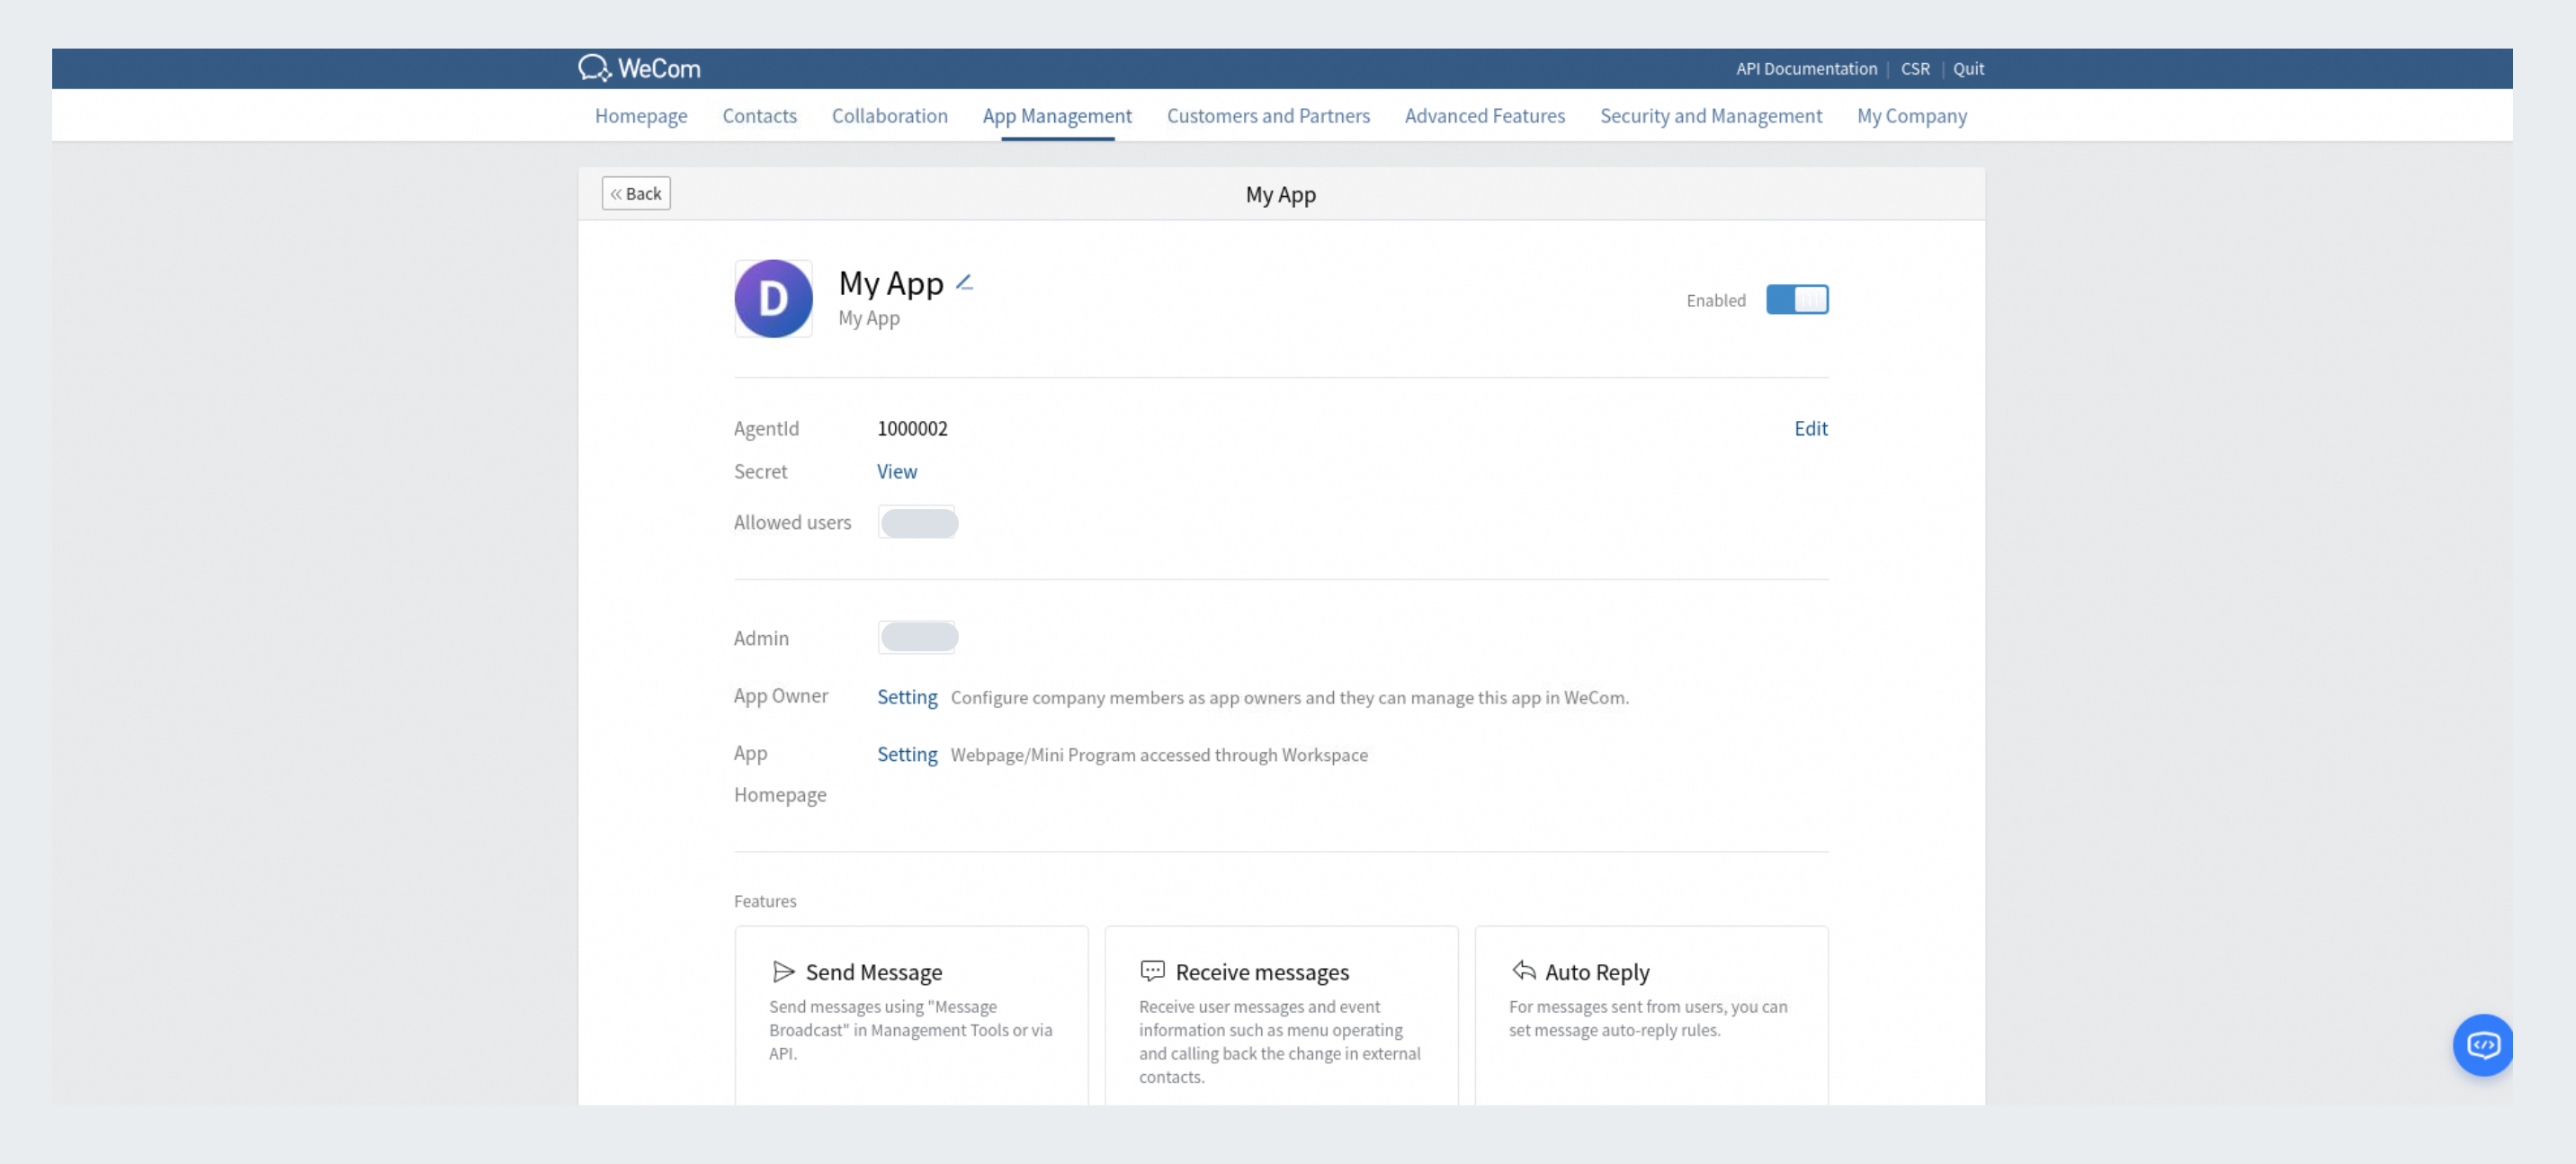
After creating the application, you can find the AgentId and Secret on the Application Details page.
-
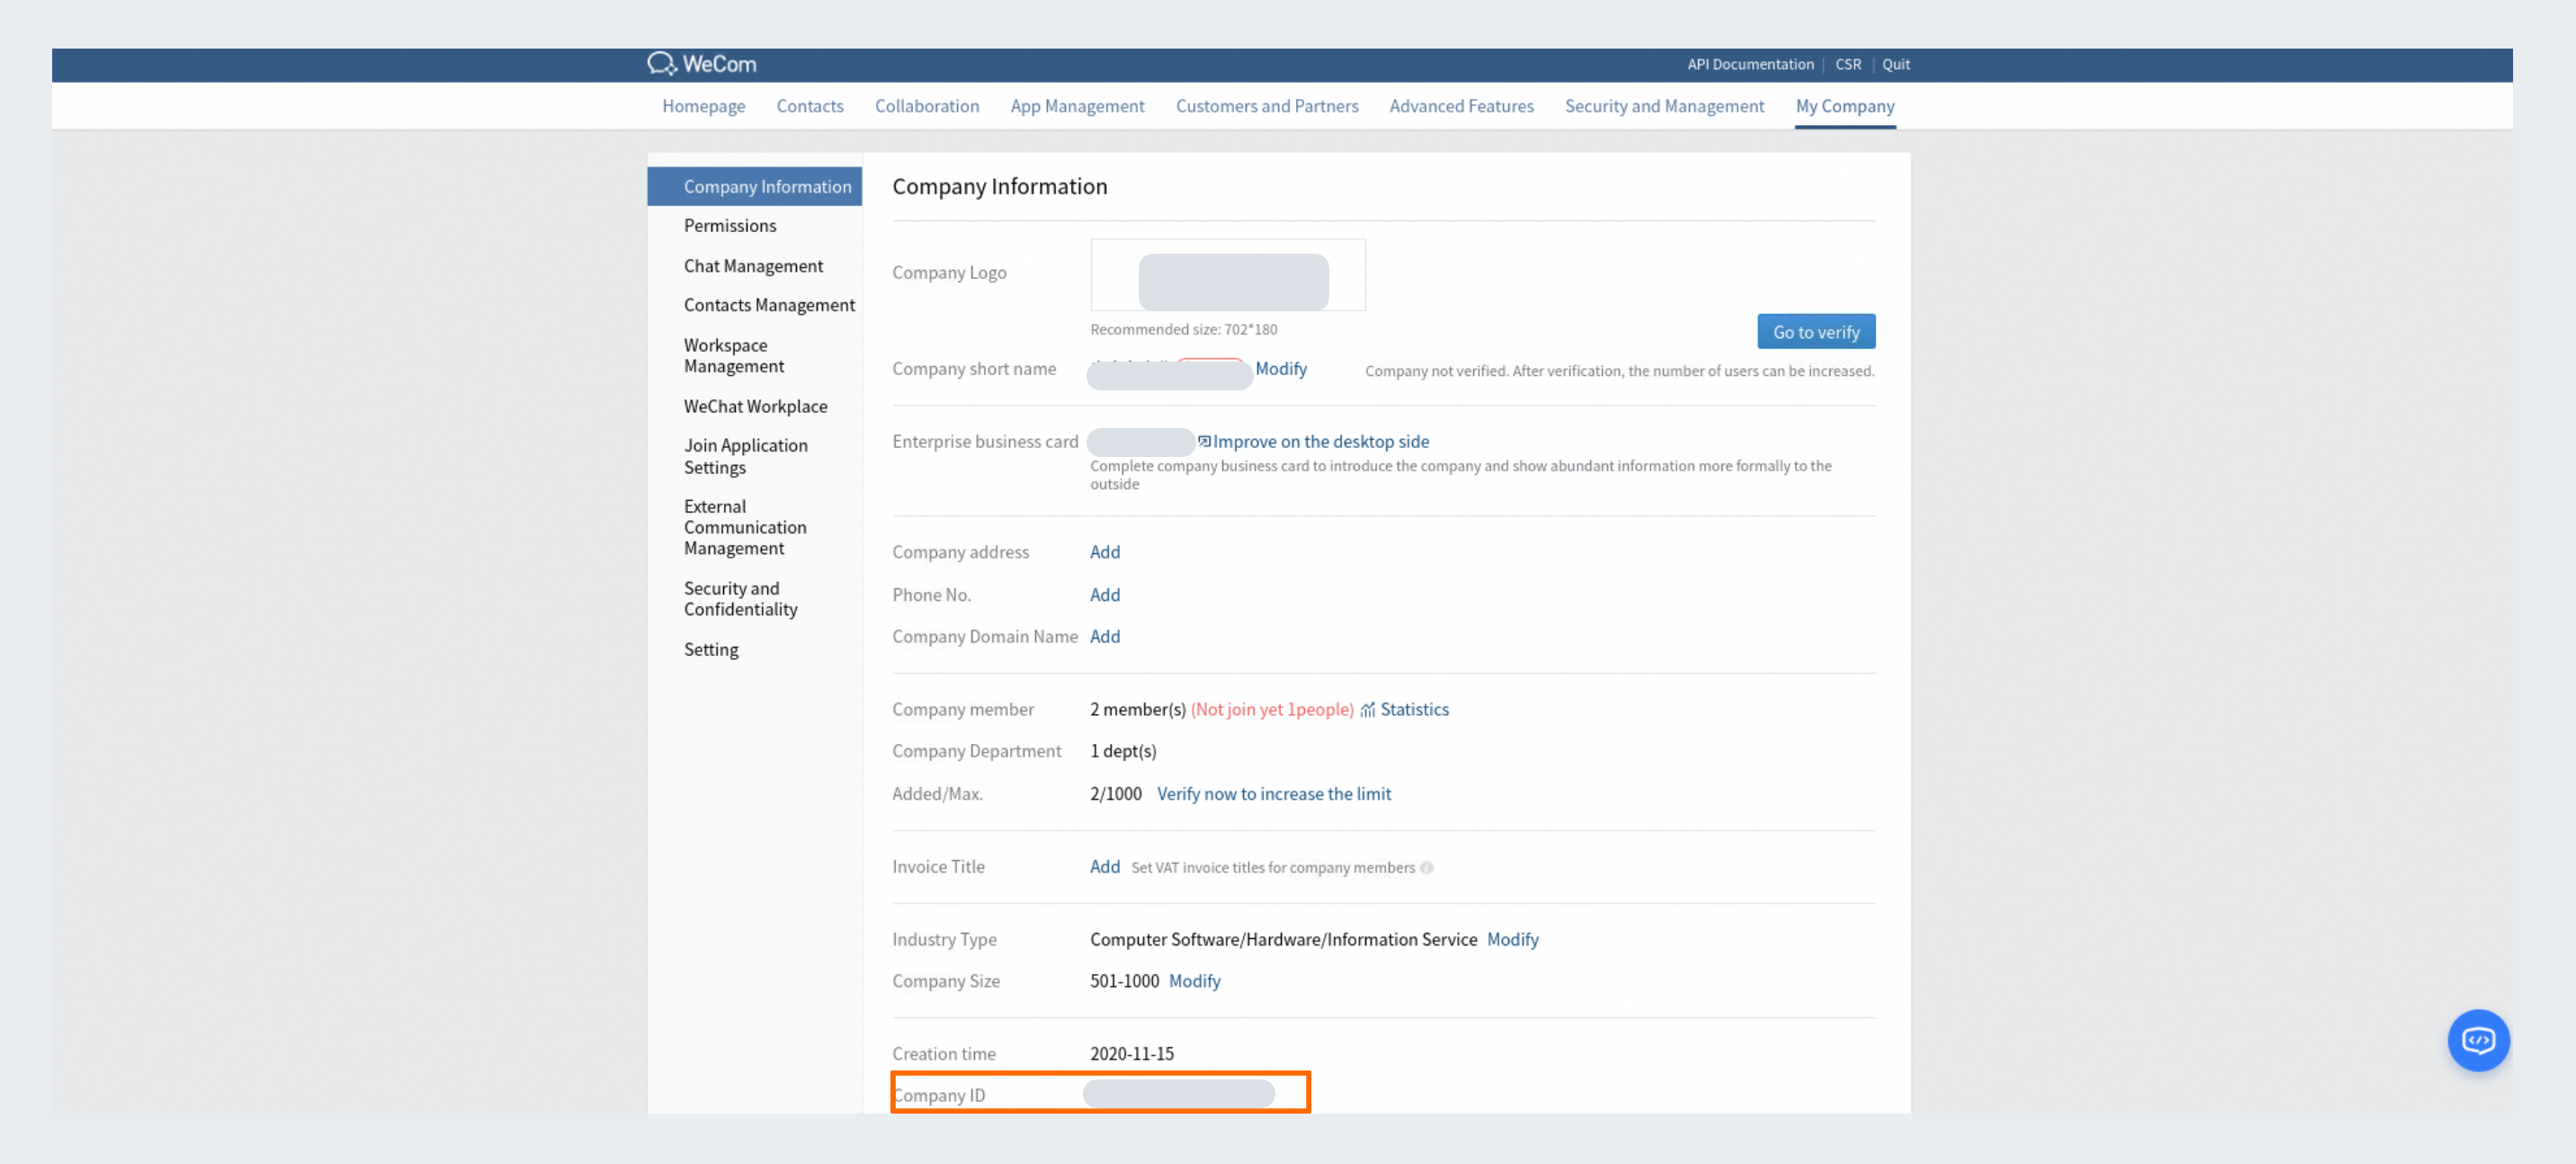
Find your CorpId on the My Corp page.
-
Paste the AgentId, Secret, and CorpId into the corresponding fields:
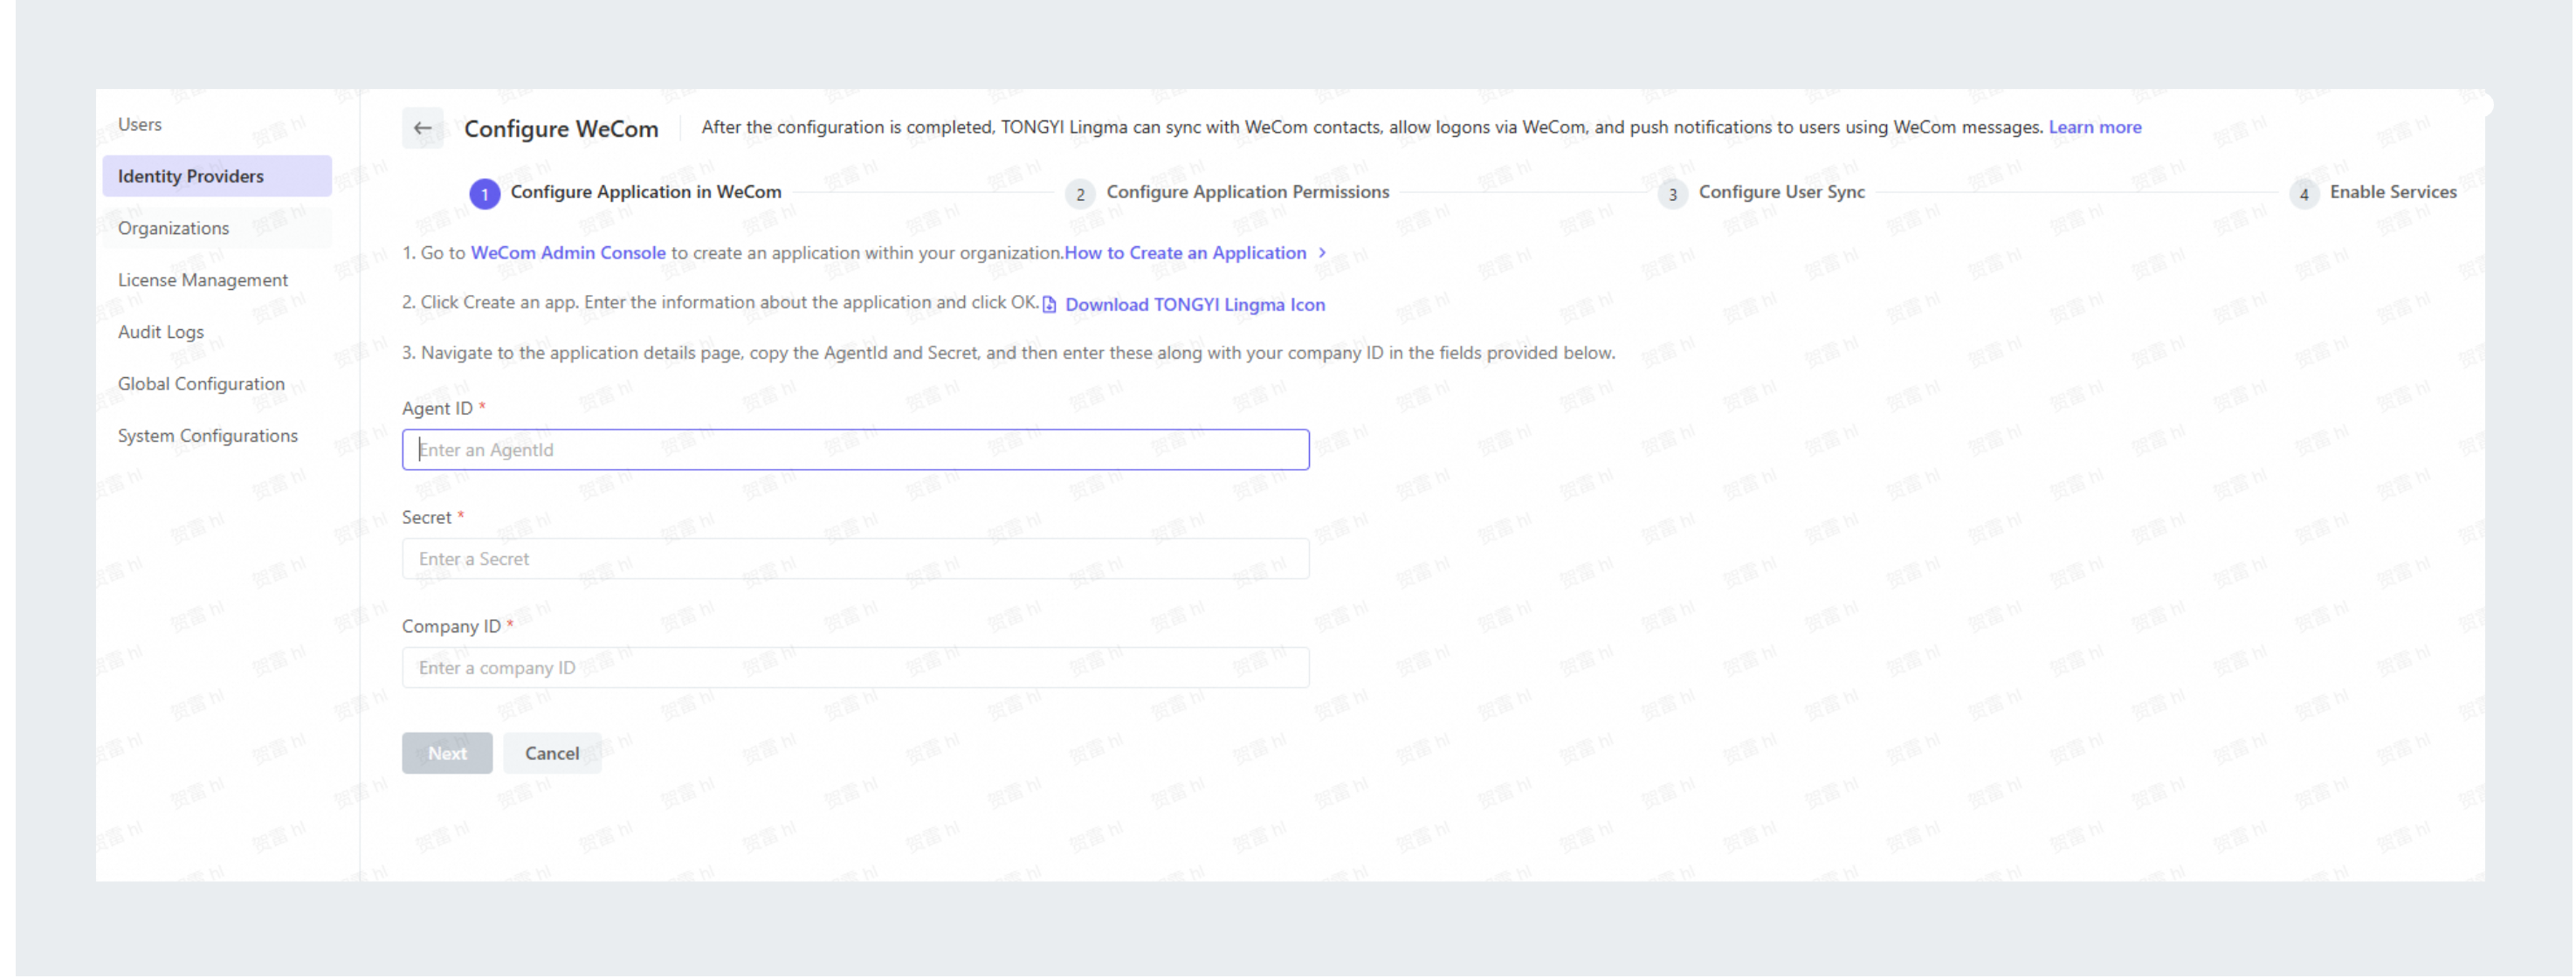
After you enter the application information, click Next.
Step 2: Configure application permissions
Qoder CN requires authorization from WeCom to synchronize WeCom Contacts and enable login through WeCom. To grant this authorization, you must configure a trusted domain name and a trusted IP address.
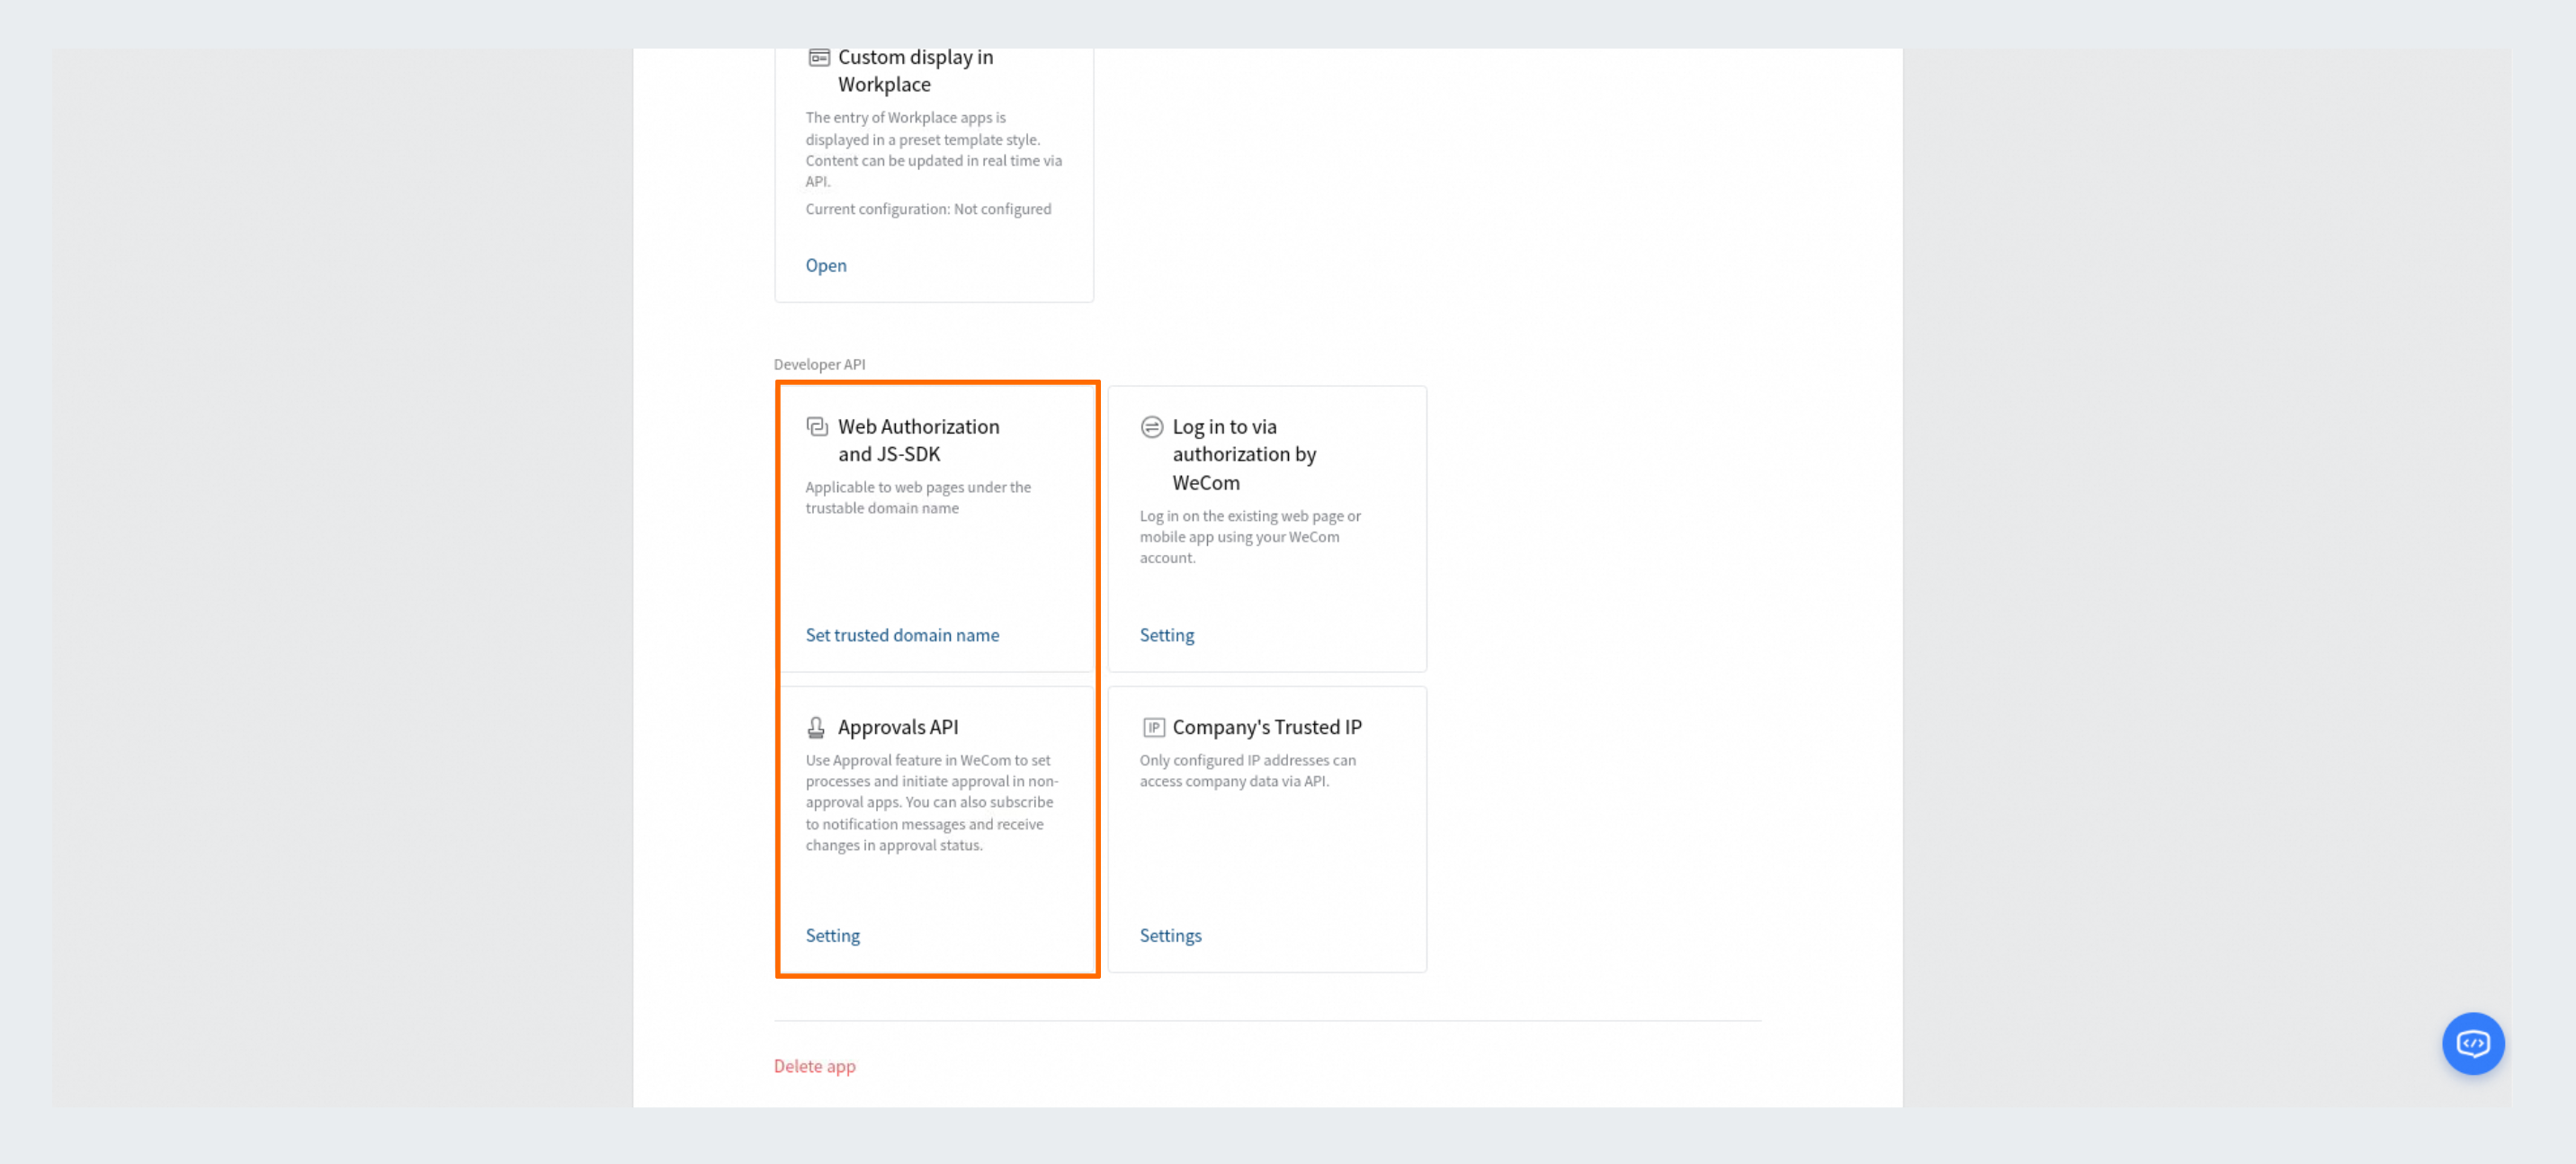
In the WeCom admin console, go to the Developer API section on your application's details page to configure trust settings:
You must configure the trusted domain name before you can configure the trusted IP address. You can copy the trusted domain name from the WeCom configuration page in Qoder CN:
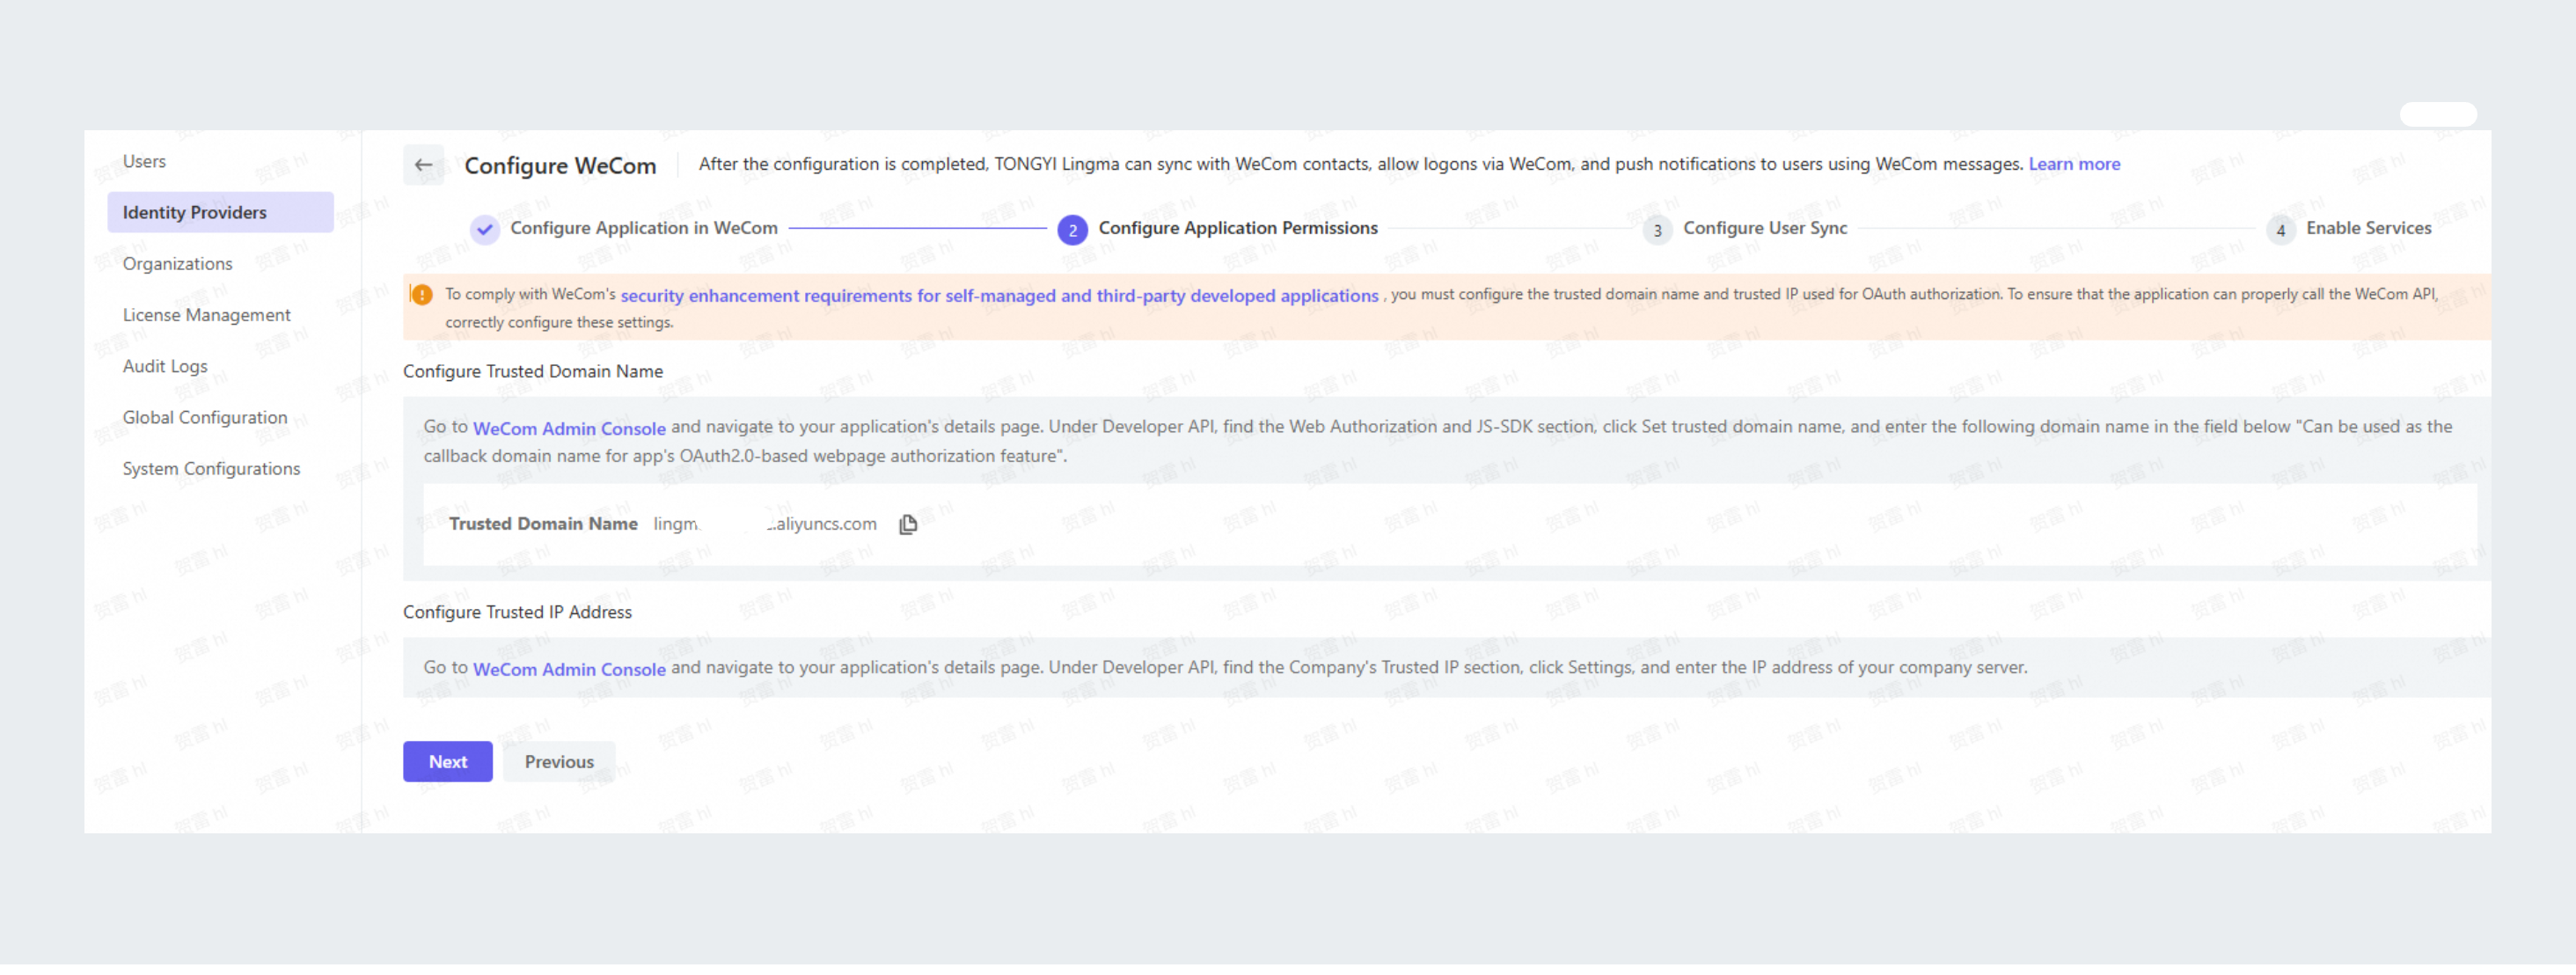
To obtain the trusted IP address for your enterprise, contact technical support.
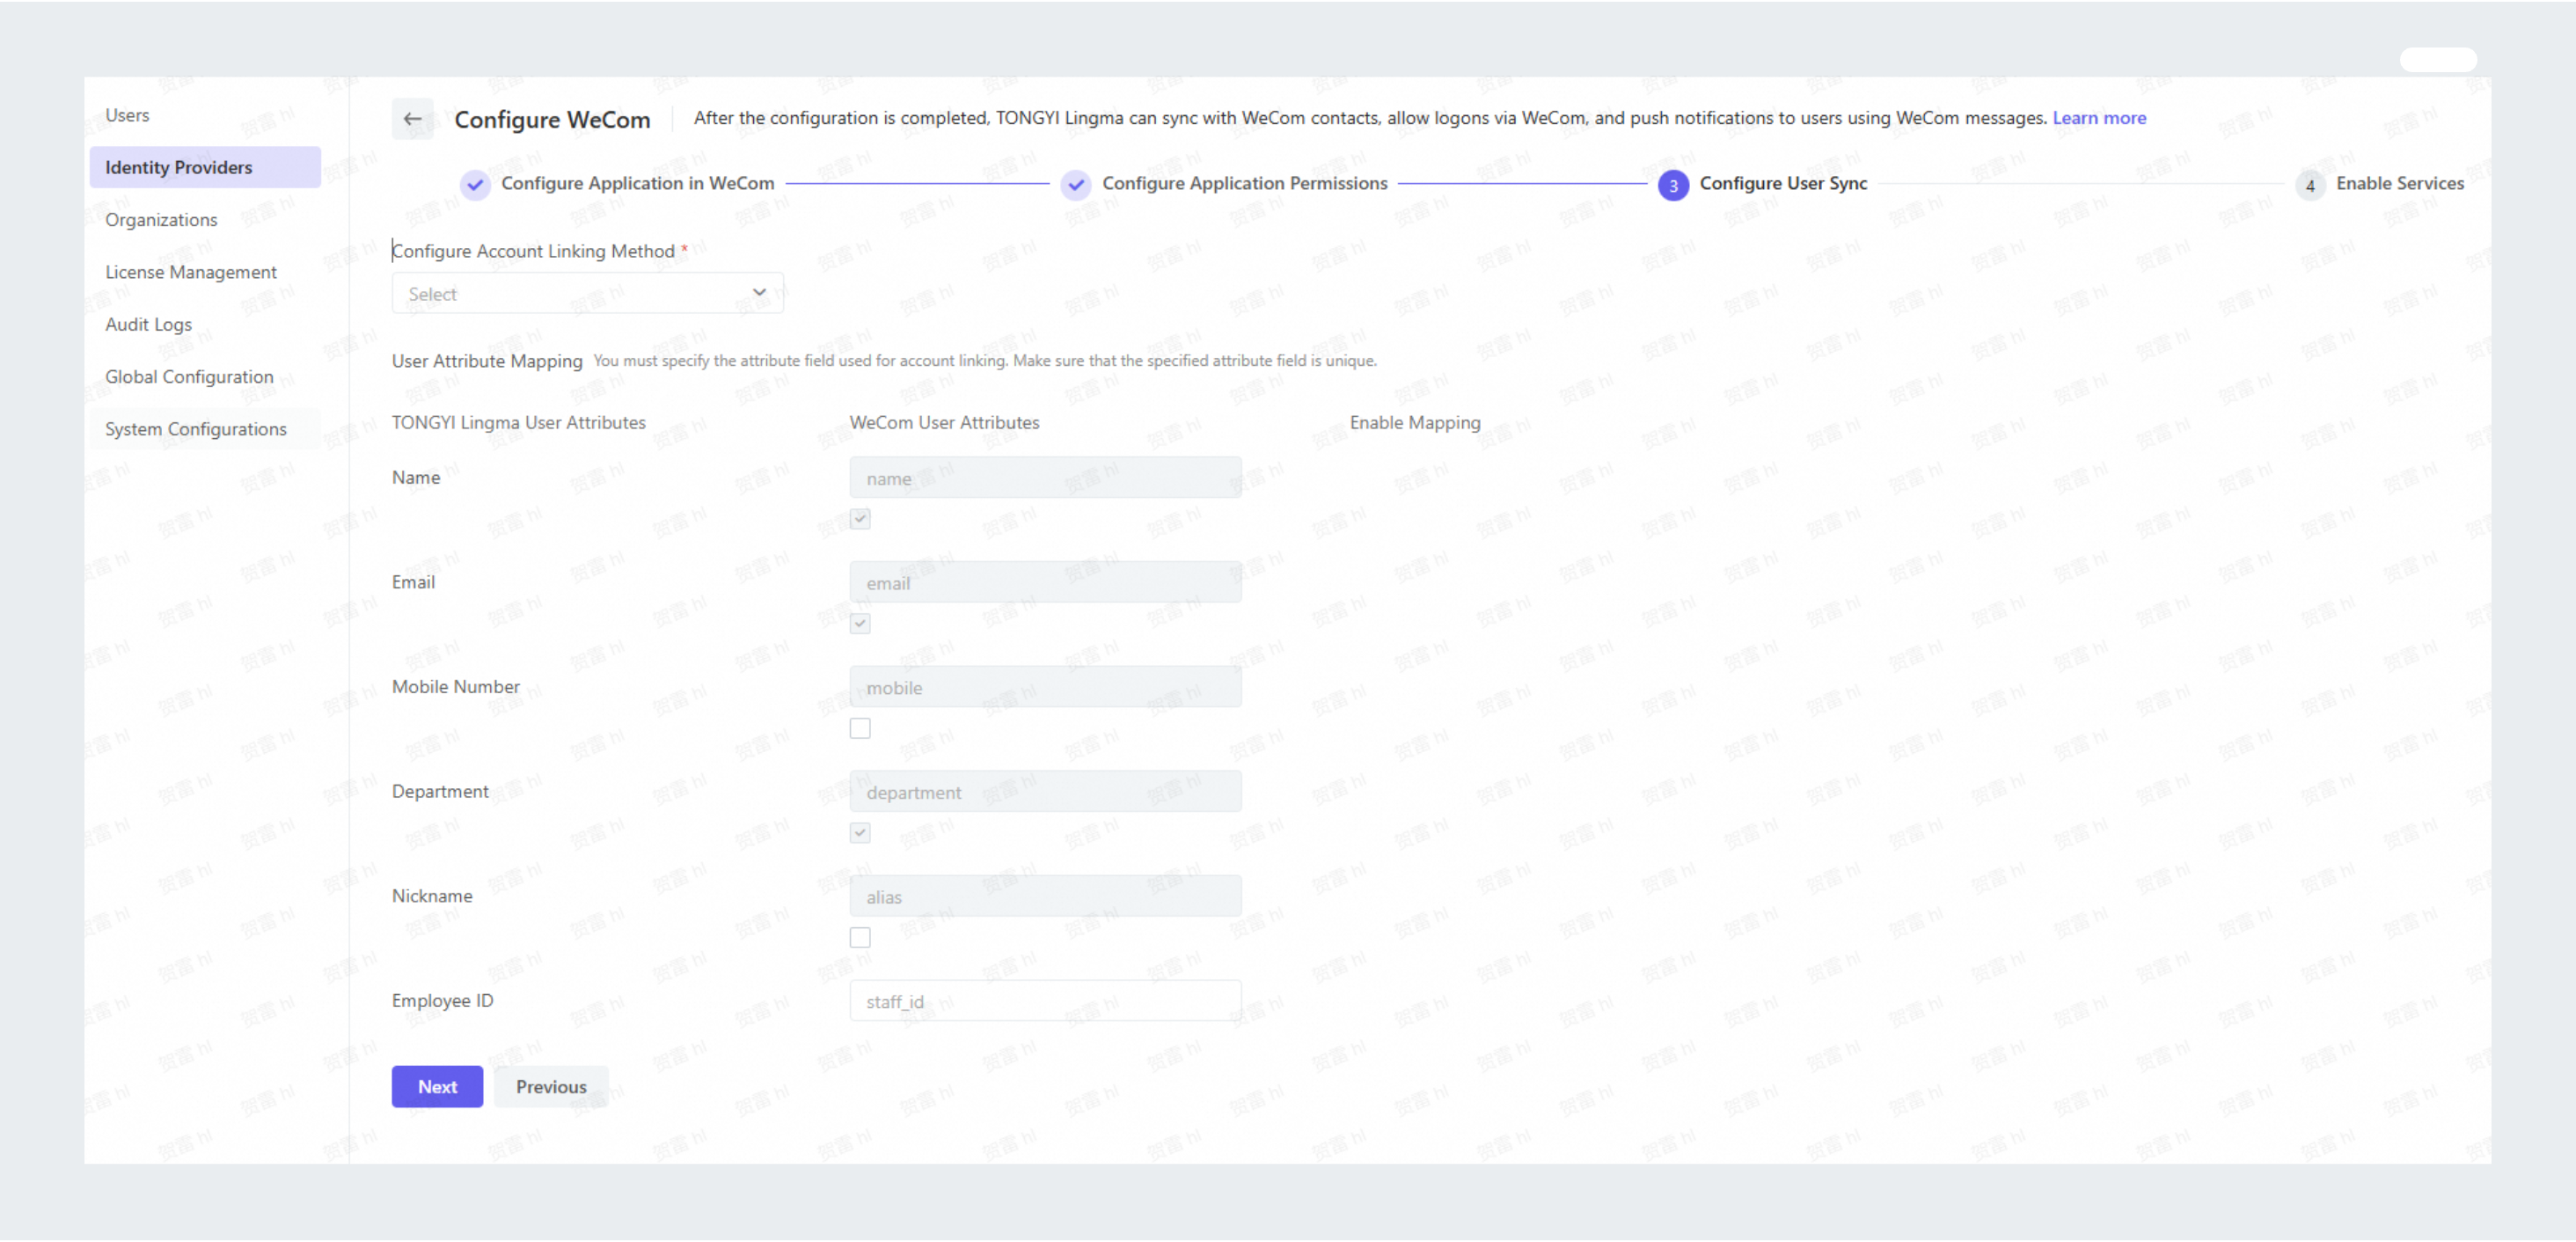
Step 3: Configure data synchronization and mapping
Account binding method: Users with the same login account on Qoder CN and in WeCom Contacts are automatically bound together according to the synchronization policy.
Based on the field mappings shown in the figure below and your synchronization policy, Qoder CN automatically maps and synchronizes user information from WeCom to Qoder CN. After you confirm the settings, click Next.
Step 4: Enable WeCom integration services
Two services are available:
-
User and organization synchronization: When enabled, this service keeps the Qoder CN user directory synchronized with your WeCom Contacts. We recommend that you confirm the visibility scope of the application in WeCom.
-
Single sign-on: When enabled, the Qoder CN login page displays an option that redirects users to the WeCom login page to sign in to Qoder CN.
By default, both services are disabled during the initial setup. If you save the WeCom integration configuration without enabling these services, you can enable them later from the WeCom integration details page.
If you choose to enable a service, you must complete the following configuration steps. These steps also apply when you modify the configuration of an enabled service.
Enable user and organization synchronization
You can configure user and organization synchronization for WeCom only if this feature is not already enabled for another third-party integration in Qoder CN. You can set rules for synchronization time, user difference handling, and organization difference handling.

-
Synchronization time: The default setting is manual synchronization. You can switch between manual synchronization and scheduled synchronization.
-
Manual synchronization: A site administrator must initiate the synchronization process by clicking Run Manual Sync on the WeCom integration details page after data changes.
NoteWe recommend waiting at least one hour between manual synchronization operations.
-
Scheduled synchronization: You can configure a schedule to run synchronization daily (at a specific time), weekly (on a specific day and time), monthly (on a specific day and time), or at set intervals. If you set up a scheduled synchronization, we recommend running a manual synchronization once after you save the configuration to ensure that data is promptly synchronized to Qoder CN.
-
-
User difference handling: By default, extra accounts in Qoder CN are ignored, and new Qoder CN accounts are created and linked to WeCom accounts within the synchronization scope. You can modify this behavior as needed:
-
For Qoder CN accounts without a matching WeCom account - Ignore: When a Qoder CN account does not have a matching WeCom account, Qoder CN does not delete the account.
-
For Qoder CN accounts without a matching WeCom account - Delete the Qoder CN account: When a Qoder CN account does not have a matching WeCom account, Qoder CN deletes the account.
-
For WeCom accounts without a matching Qoder CN account - Ignore: When a WeCom account does not have a matching Qoder CN account, Qoder CN does not create a new account.
-
For WeCom accounts without a matching Qoder CN account - Create and link a new Qoder CN account: When a WeCom account does not have a matching Qoder CN account, Qoder CN creates a new account in Qoder CN and links it to the WeCom account, based on the account binding and attribute mapping rules.
-
-
Organization difference handling: By default, extra department nodes in Qoder CN are ignored, and new Qoder CN departments are created and linked to department nodes in the WeCom synchronization scope. You can modify this behavior as needed:
-
For Qoder CN departments without a matching WeCom department - Ignore: When a Qoder CN department does not have a matching WeCom department, Qoder CN does not delete the department node.
-
For Qoder CN departments without a matching WeCom department - Delete the Qoder CN department: When a Qoder CN department does not have a matching WeCom department, Qoder CN deletes the department node.
-
For WeCom departments without a matching Qoder CN department - Ignore: When a WeCom department does not have a matching Qoder CN department, Qoder CN does not create a new department node.
-
For WeCom departments without a matching Qoder CN department - Create and link a new Qoder CN department: When a WeCom department does not have a matching Qoder CN department, Qoder CN creates a department node and links it to the WeCom department node.
-
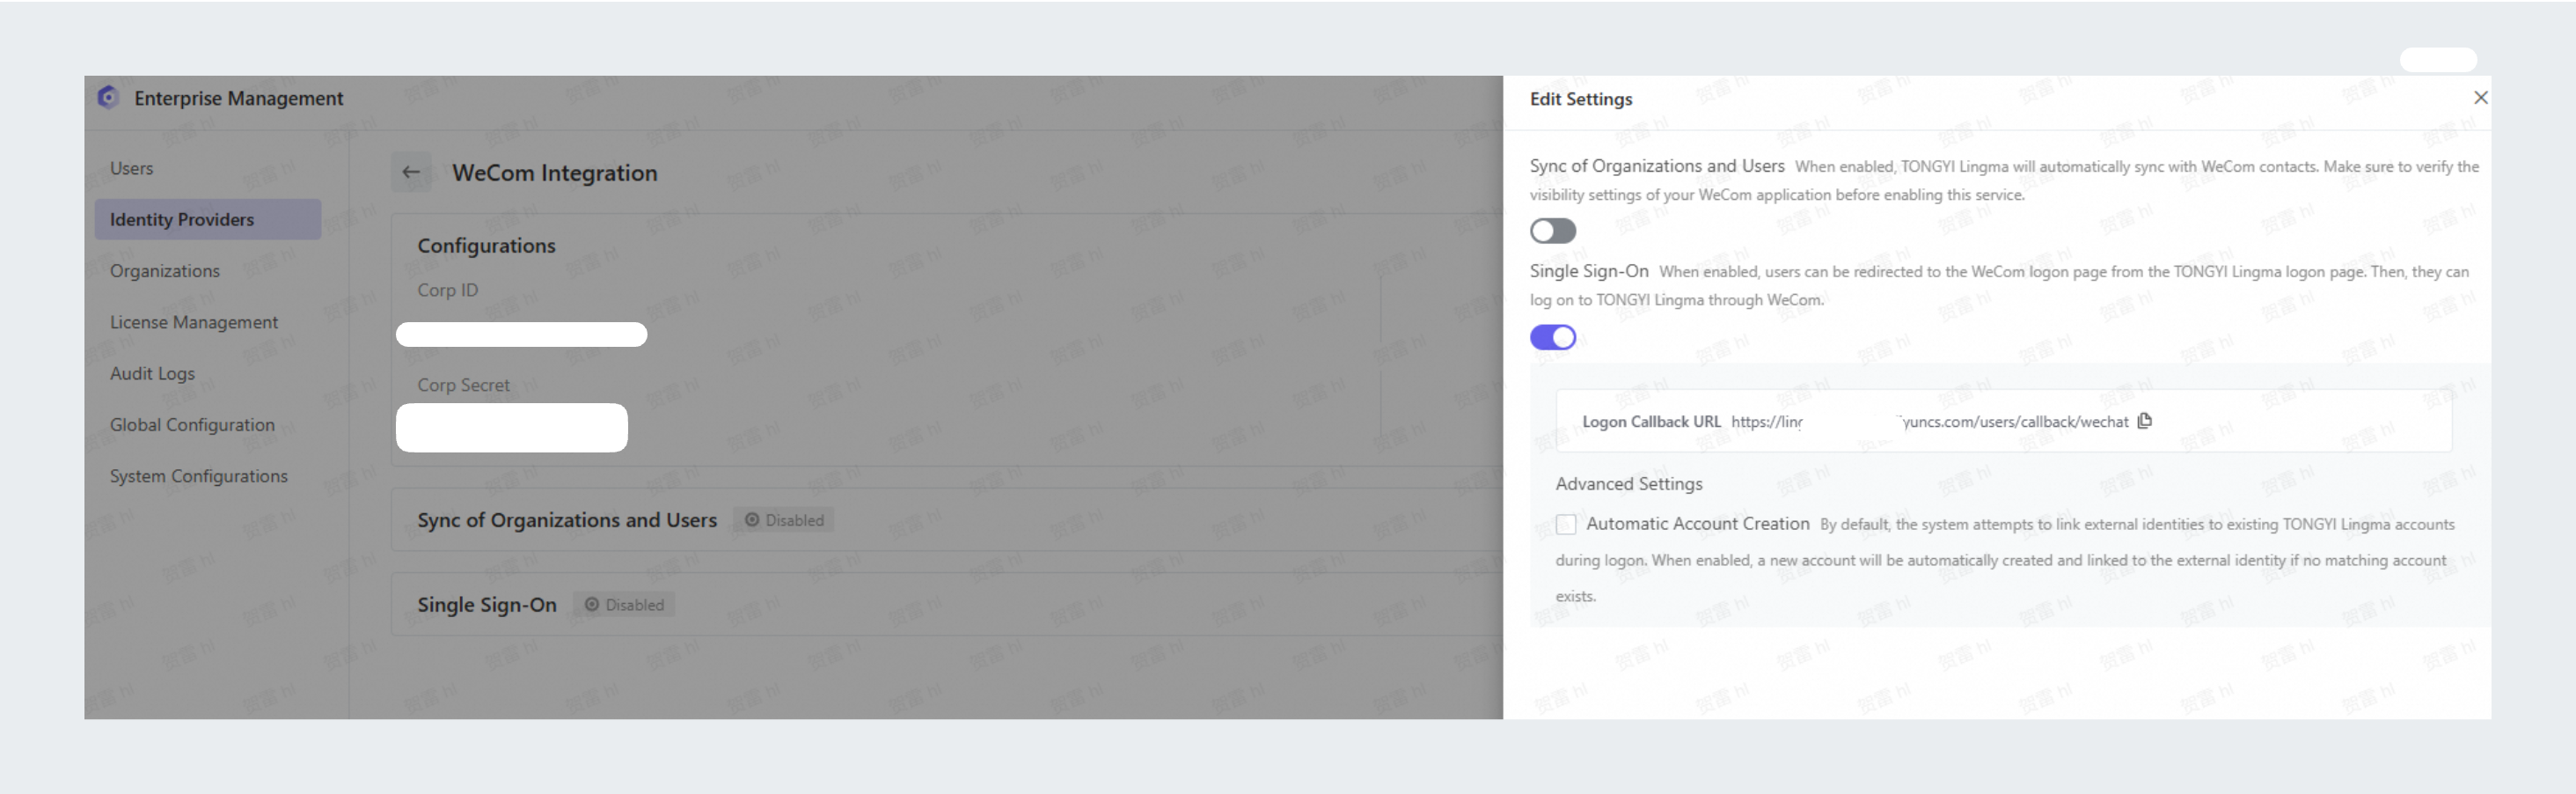
Enable single sign-on
After enabling the single sign-on toggle, you must configure the callback URL. Copy the Qoder CN callback URL and paste it into the authorization callback domain field in your WeCom application settings. You can find this field under . This completes the single sign-on configuration.
Sign in with WeCom
After enabling single sign-on, the Qoder CN login page displays a WeCom login option. Users with linked accounts can click this option to sign in to Qoder CN with their WeCom account.
View user and organization sync results
If user and organization synchronization is enabled, you can view the latest synchronization status on the WeCom integration details page. The status can be: Not yet synchronized, Succeeded, Failed, or Partially Succeeded.
Modify or disable WeCom integration services
On the WeCom integration details page, a modify service configuration button appears for each enabled service. Click this button to modify the service settings or disable the service:
-
Disable user and organization synchronization:
-
This does not remove the binding between Qoder CN and WeCom accounts.
-
User and organization synchronization from WeCom Contacts will no longer run.
-
-
Disable single sign-on:
-
This does not remove the binding between Qoder CN and WeCom accounts.
-
Logging in to Qoder CN with a WeCom account is not supported. To log in to Qoder CN, use the username and password for your Qoder CN account.
-
Remove WeCom integration
On the WeCom integration details page, you can click the remove integration button. After confirmation, this removes the WeCom integration. This action has the following effects:
-
This action removes all bindings between Qoder CN accounts and WeCom accounts. However, it does not affect user and organization data that has already been synchronized.
-
Logging in to Qoder CN with WeCom is not supported. If you need to log in to Qoder CN, you can use the username and password for Qoder CN.