Migrate log data from Simple Log Service to MaxCompute
Synchronize LogHub data from Simple Log Service (SLS) to MaxCompute by using DataWorks Data Integration.
Scenarios
Data Integration supports synchronizing data from a LogHub data source to MaxCompute in the following scenarios:
Within the same Alibaba Cloud account
Across Alibaba Cloud accounts
Across regions
Between Alibaba Cloud public cloud and Alibaba Finance Cloud
Prerequisites
Before you begin, make sure that you have:
A DataWorks workspace bound to your MaxCompute project
An SLS project with a Logstore that contains the log data to synchronize
An exclusive resource group for Data Integration
The AccessKey ID and AccessKey secret for the account that owns the SLS project
Cross-account access setup
Skip this section if the SLS project and the DataWorks workspace belong to the same Alibaba Cloud account.
To synchronize LogHub data from Account A to a MaxCompute data source in Account B, Account B creates the synchronization task in Data Integration. Account B then adds a LogHub data source using credentials from Account A.
Two methods are available for providing Account A credentials:
Method 1: Use the root account AccessKey pair
Use the AccessKey ID and AccessKey secret of Account A to add the LogHub data source. This grants Account B access to all SLS projects under Account A.
Method 2: Use a RAM user AccessKey pair
Use the AccessKey ID and AccessKey secret of a RAM user (for example, RAM User A1) under Account A. This method allows you to restrict access to specific SLS projects.
Grant full access
Attach the AliyunLogFullAccess and AliyunLogReadOnlyAccess system policies to RAM User A1. For more information, see Create a RAM user and authorize the RAM user to access Simple Log Service.
These system policies grant access to all SLS projects under Account A.
Grant project-level access
To restrict access to specific SLS projects, attach a custom policy. Log on to the RAM console with Account A. In the left-side navigation pane, choose Permissions > Policies, and click Create Policy.
For more information about custom permissions, see RAM overview and Overview.
The following example policy grants access only to project_name1 and project_name2:
{
    "Version": "1",
    "Statement": [
        {
            "Action": [
                "log:Get*",
                "log:List*",
                "log:CreateConsumerGroup",
                "log:UpdateConsumerGroup",
                "log:DeleteConsumerGroup",
                "log:ListConsumerGroup",
                "log:ConsumerGroupUpdateCheckPoint",
                "log:ConsumerGroupHeartBeat",
                "log:GetConsumerGroupCheckPoint"
            ],
            "Resource": [
                "acs:log:*:*:project/project_name1",
                "acs:log:*:*:project/project_name1/*",
                "acs:log:*:*:project/project_name2",
                "acs:log:*:*:project/project_name2/*"
            ],
            "Effect": "Allow"
        }
    ]
}
Step 1: Add a LogHub data source
Log on to the DataWorks console. In the top navigation bar, select the desired region. In the left-side navigation pane, choose Data Integration > Data Integration. Select the desired workspace from the drop-down list and click Go to Data Integration.
In the left-side navigation pane, click Data Source.
On the Data source page, click Add Data Source.
In the Add Data Source dialog box, click LogHub.
In the Add LogHub Data Source dialog box, configure the following parameters.
Parameter Description Data Source Name The data source name. Can contain only letters, digits, and underscores (_). Must start with a letter. Data Source Description The data source description. Cannot exceed 80 characters. LogHub Endpoint The SLS project endpoint URL, in http://example.comformat. For available endpoints, see Endpoints.Project The SLS project name. AccessKey ID The AccessKey ID of the Alibaba Cloud account used to connect to the SLS project. Copy this value from the AccessKey Pair page. AccessKey Secret The AccessKey secret of the Alibaba Cloud account used to connect to the SLS project. Find the resource group that you want to use and click Test Network Connectivity in the Connection Status (Production Environment) column.
After the connectivity test succeeds, click Complete.
Step 2: Create a batch synchronization task
On the Data Source page, click the
 icon in the upper-left corner and choose All Products > DataStudio.
On the DataStudio page, move the pointer over the
 icon and select Create Workflow.
In the Create Workflow dialog box, configure the Workflow Name and Description parameters, and click Create.
Click the workflow name in the Scheduled Workflow pane, right-click Data Integration, and choose Create Node > Offline synchronization.
In the Create Node dialog box, configure the Name parameter and select a path from the Path drop-down list.
Click Confirm to open the configuration tab of the batch synchronization task.
Step 3: Configure the synchronization task
Data Integration provides two ways to configure a batch synchronization task:
| Mode | Best for | Description |
|---|---|---|
| Codeless UI | Simple field mappings, quick setup | Visual wizard that guides you through source, destination, field mapping, and scheduling configuration |
| Code editor | Custom transformations, version control | JSON-based configuration with full control over reader and writer plugin parameters |
Option A: Codeless UI
In the Configure Network Connections and Resource Group step, configure the source and destination.
Parameter Description Source Select LogHub. Data Source Name Select the LogHub data source that you added. Resource Group Select the exclusive resource group for Data Integration. Destination Select MaxCompute. Data Source Name Select the MaxCompute data source that you added. 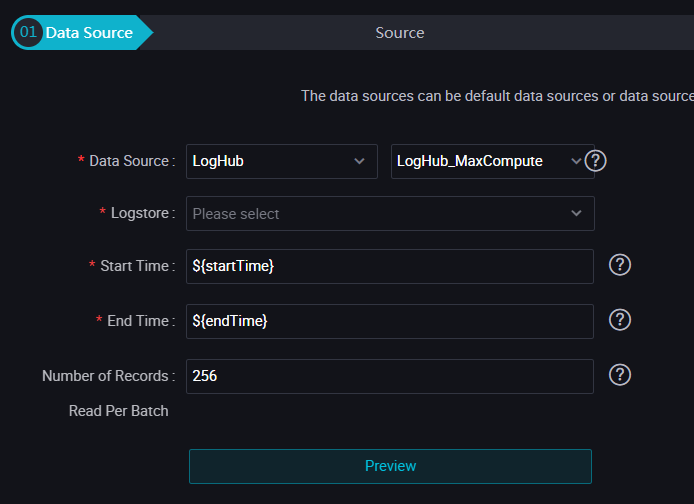
Test the network connectivity between the exclusive resource group and both the source and destination. After the test succeeds, click Next.
Configure the source Logstore and destination table settings.
Click Data preview to view sample data. The preview shows only a small number of LogHub records. The displayed data may differ from the actual data to synchronize because of the start time and end time that you specified.
Source parameters
Parameter Description Logstore The Logstore to read data from. Log start time The start time of data consumption. Defines the left boundary of a left-closed, right-open time range. Format: yyyyMMddHHmmss. Example:20180111013000. Supports DataWorks scheduling parameters.Log end time The end time of data consumption. Defines the right boundary of a left-closed, right-open time range. Format: yyyyMMddHHmmss. Example:20180111013010. Supports DataWorks scheduling parameters.Number of batches The number of data records to read at a time. Default value: 256. In the Field Mapping section, configure mappings between source fields and destination fields.
In the Channel Control section, configure Synchronization rate and Policy for Dirty Data Records.
In the right-side navigation pane, click Properties. Configure settings such as rerun properties, a resource group for scheduling, and ancestor tasks.
When configuring ancestor tasks, select Add Root Node.
Verify all settings and click the
 icon in the top toolbar.
Run the batch synchronization task. Run once Click the
 icon in the top toolbar. Run on a schedule
Click the Properties tab in the right-side navigation pane and configure time properties such as the scheduling cycle.
Click the
 and icons in the top toolbar in sequence to commit the task to the scheduling system. The scheduling system runs the task periodically starting from the next day based on the configured properties.
Specify values for any custom parameters before running the task.
 and
and  icons in the top toolbar in sequence to commit the task to the scheduling system. The scheduling system runs the task periodically starting from the next day based on the configured properties.
Option B: Code editor
On the configuration tab of the batch synchronization task, click the Conversion script icon in the top toolbar.
In the Tips message, click OK to switch to the code editor.
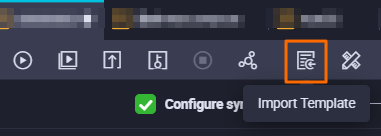
Click the Import Template icon in the top toolbar.
In the Import Template dialog box, configure the Source type, Data source, Target type, and Data source parameters, and click Confirmation.
Modify the JSON configuration based on your requirements. The following example shows a complete configuration:
Code editor parameters
Section Parameter Description Default reader datasourceLogHub data source name. Must match the name of the added data source. - reader logstoreLogstore name to read data from. - reader beginDateTimeStart time of data consumption. Left-closed, right-open boundary. - reader endDateTimeEnd time of data consumption. Left-closed, right-open boundary. - reader batchSizeNumber of records to read at a time. 256 reader columnSource fields to synchronize. Supports column names, constants, variables, and functions. - writer datasourceMaxCompute data source name. Must match the name of the added data source. - writer tableDestination table name. - writer truncateWhether to clear the destination table before writing. - writer partitionPartition information for the destination table. - writer columnList of destination column names to write to. - setting mbpsMaximum transmission rate in MB/s. - setting concurrentMaximum number of parallel threads. - { "type": "job", "version": "1.0", "configuration": { "reader": { "plugin": "loghub", "parameter": { "datasource": "loghub_lzz", // LogHub data source name. Must match the data source you added. "logstore": "logstore-ut2", // Logstore name to read data from. "beginDateTime": "${startTime}", // Start time (left-closed, right-open). "endDateTime": "${endTime}", // End time (left-closed, right-open). "batchSize": 256, // Records per read. Default: 256. "splitPk": "", "column": [ // Source fields to synchronize. "key1", "key2", "key3" ] } }, "writer": { "plugin": "odps", "parameter": { "datasource": "odps_source", // MaxCompute data source name. Must match the data source you added. "table": "test", // Destination table name. "truncate": true, // Whether to clear the destination table before writing. "partition": "", // Partition information for the destination table. "column": [ // Destination columns to write to. "key1", "key2", "key3" ] } }, "setting": { "speed": { "mbps": 8, // Maximum transmission rate (MB/s). "concurrent": 7 // Maximum number of parallel threads. } } } }