AICoach User Guide
1. Log on
Log on to the Panxi Zhichuang platform: https://imarketing.console.aliyun.com/
Navigate to AI Applications > AICoach.

The home page displays Script Management, Task Management, and Assessment Point Management:

2. Create a new script
2.1 Script basic information
On the AICoach home page, navigate to Script Management and click Create Script to open the script creation page. You can create two basic script types: fixed Q&A scripts and free conversation scripts.
-
Fixed Q&A script: Questions and answers are predefined. The practice session follows these question-and-answer examples exactly.
-
Free conversation script: Requires you to select an agent in advance. During practice, the conversation flows freely based on the agent's configuration and assessment points.

Fixed Q&A script
You can use fixed Q&A scripts when you need strict control over the question-and-answer format. This script type is more structured and consistent than a free conversation script but offers less conversational flexibility.
The main difference between fixed Q&A and free conversation scripts is the use of agents. Fixed Q&A scripts do not require an agent, while free conversation scripts do.
Free conversation script
Free conversation scripts generate dynamic, agent-driven dialogues based on the agent's persona and assessment points. They offer greater flexibility and are used more frequently in daily scenarios than fixed Q&A scripts.
To create a free conversation script, enter a script name and description, and then click Confirm to go to the script creation page.
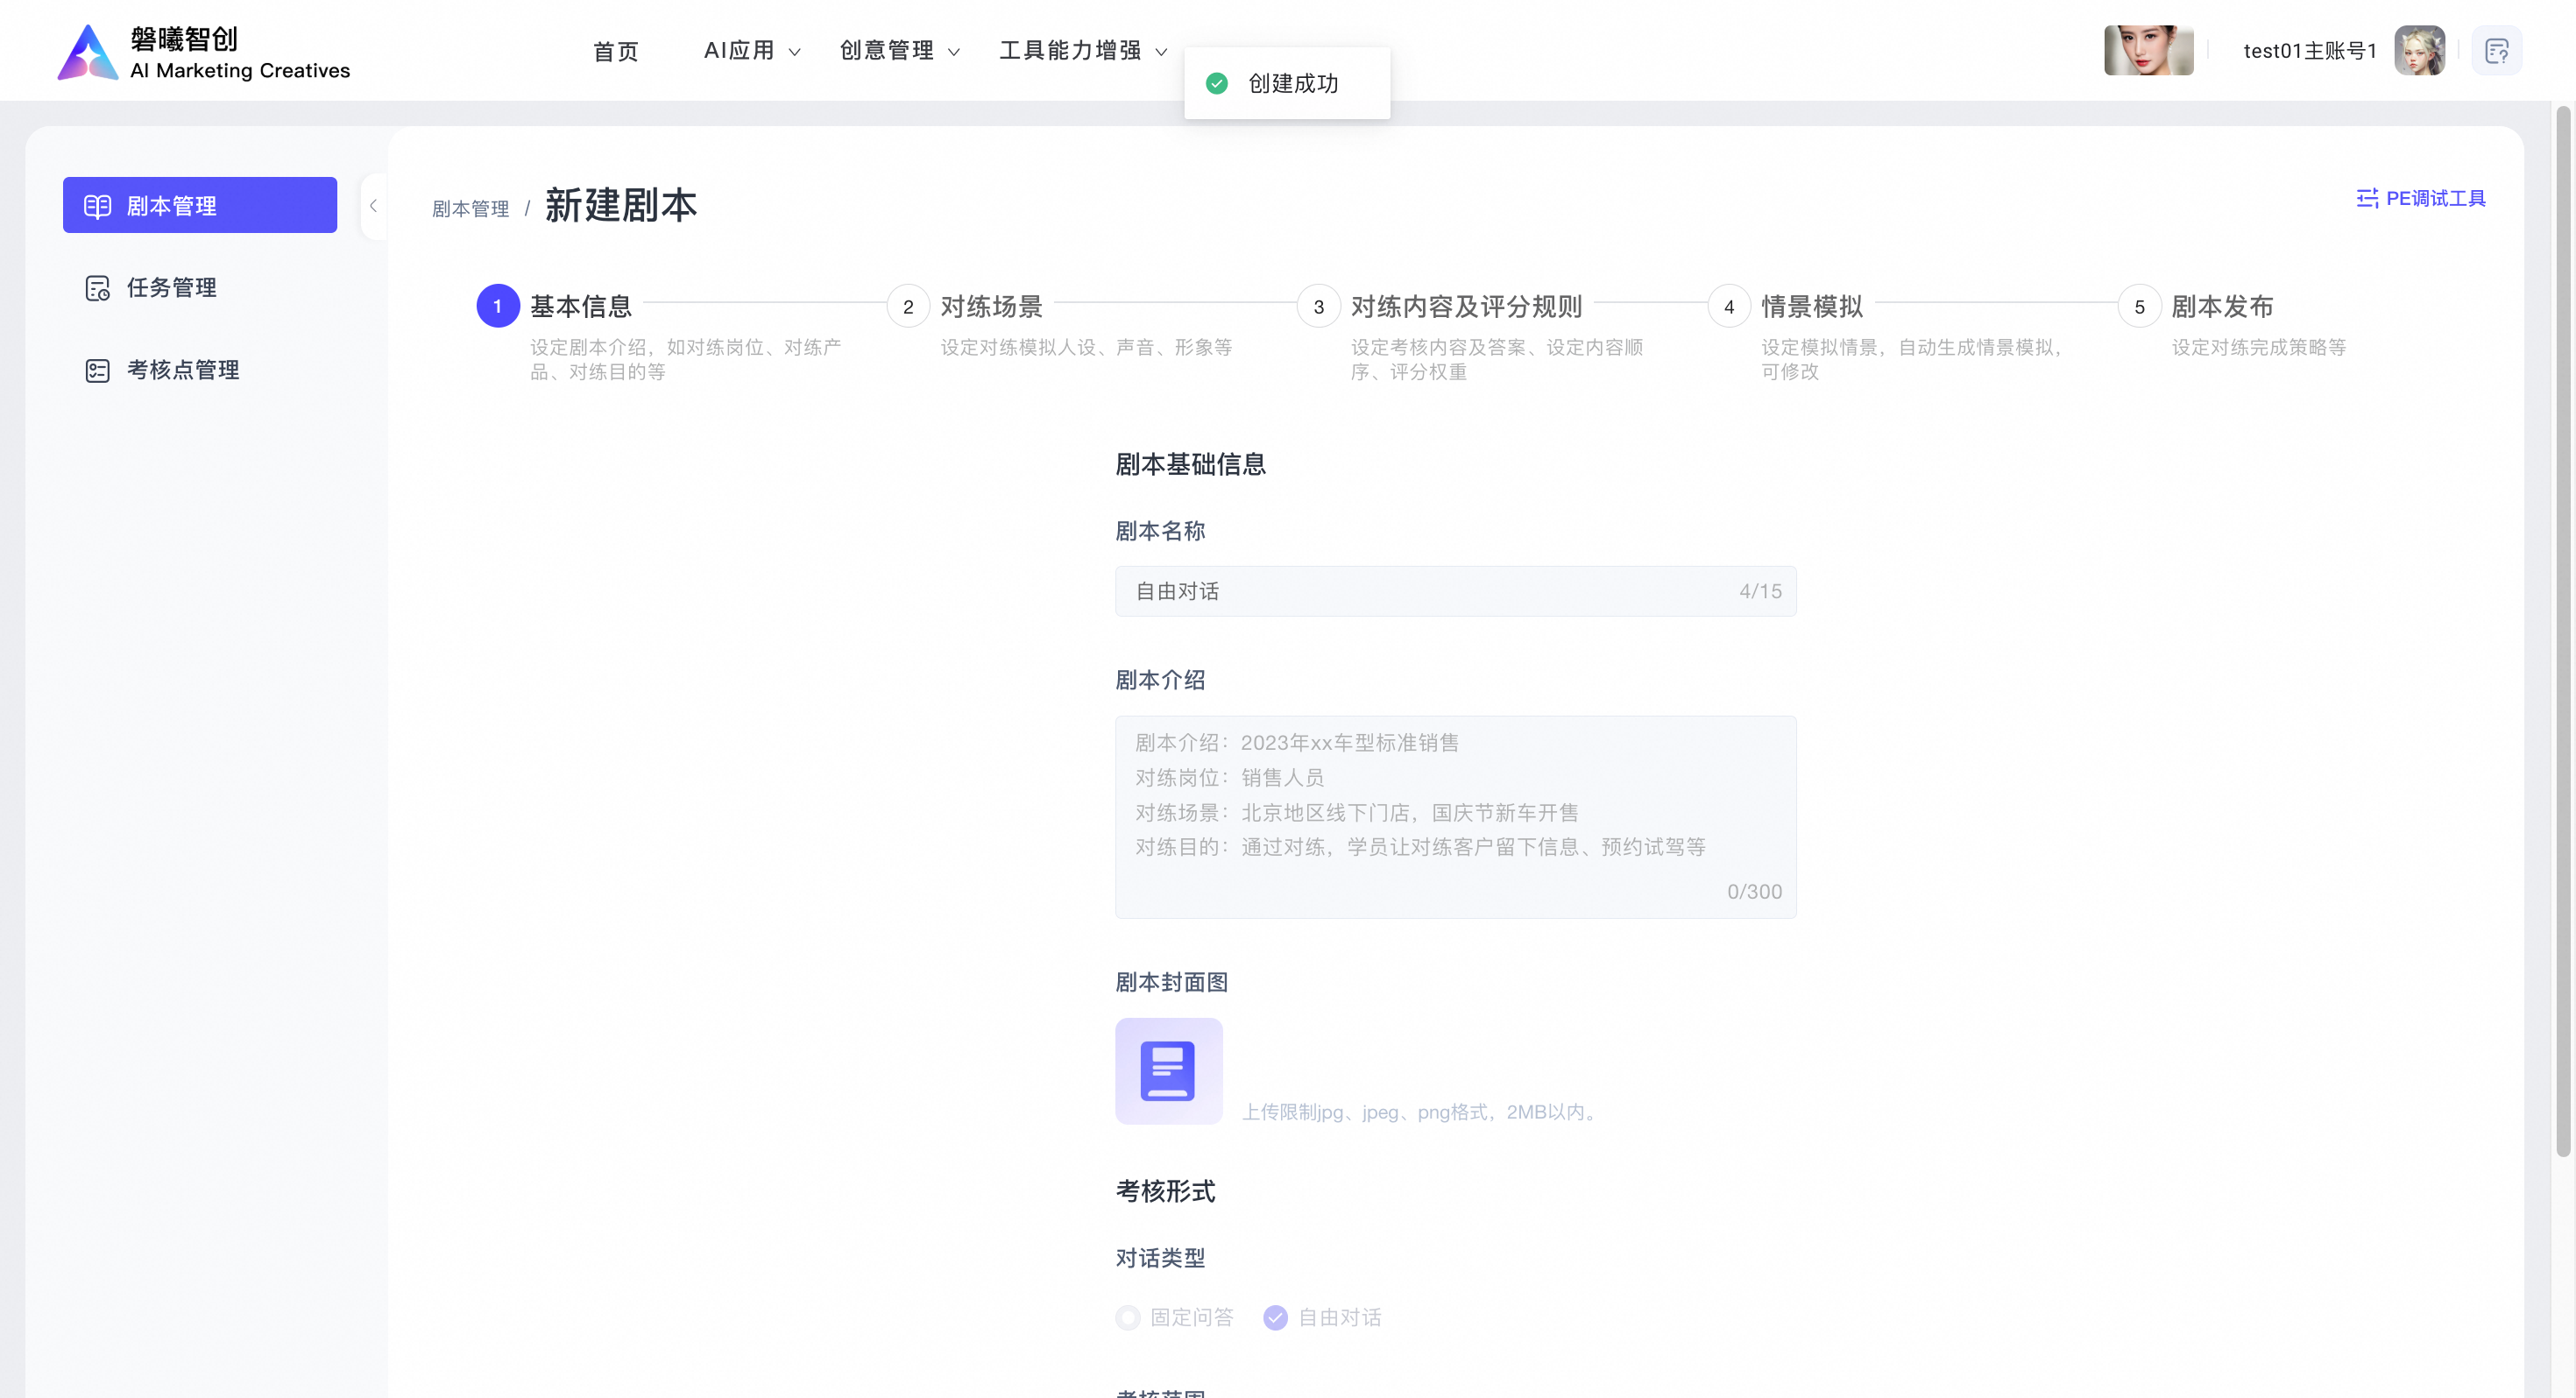
PE Debugging Tool
The PE Debugging Tool is in the top right corner of the script creation page. Click PE Debugging Tool to open the debugging page. The left panel shows the evaluation agent rules and practice agent rules. The right panel displays the rule prompts.
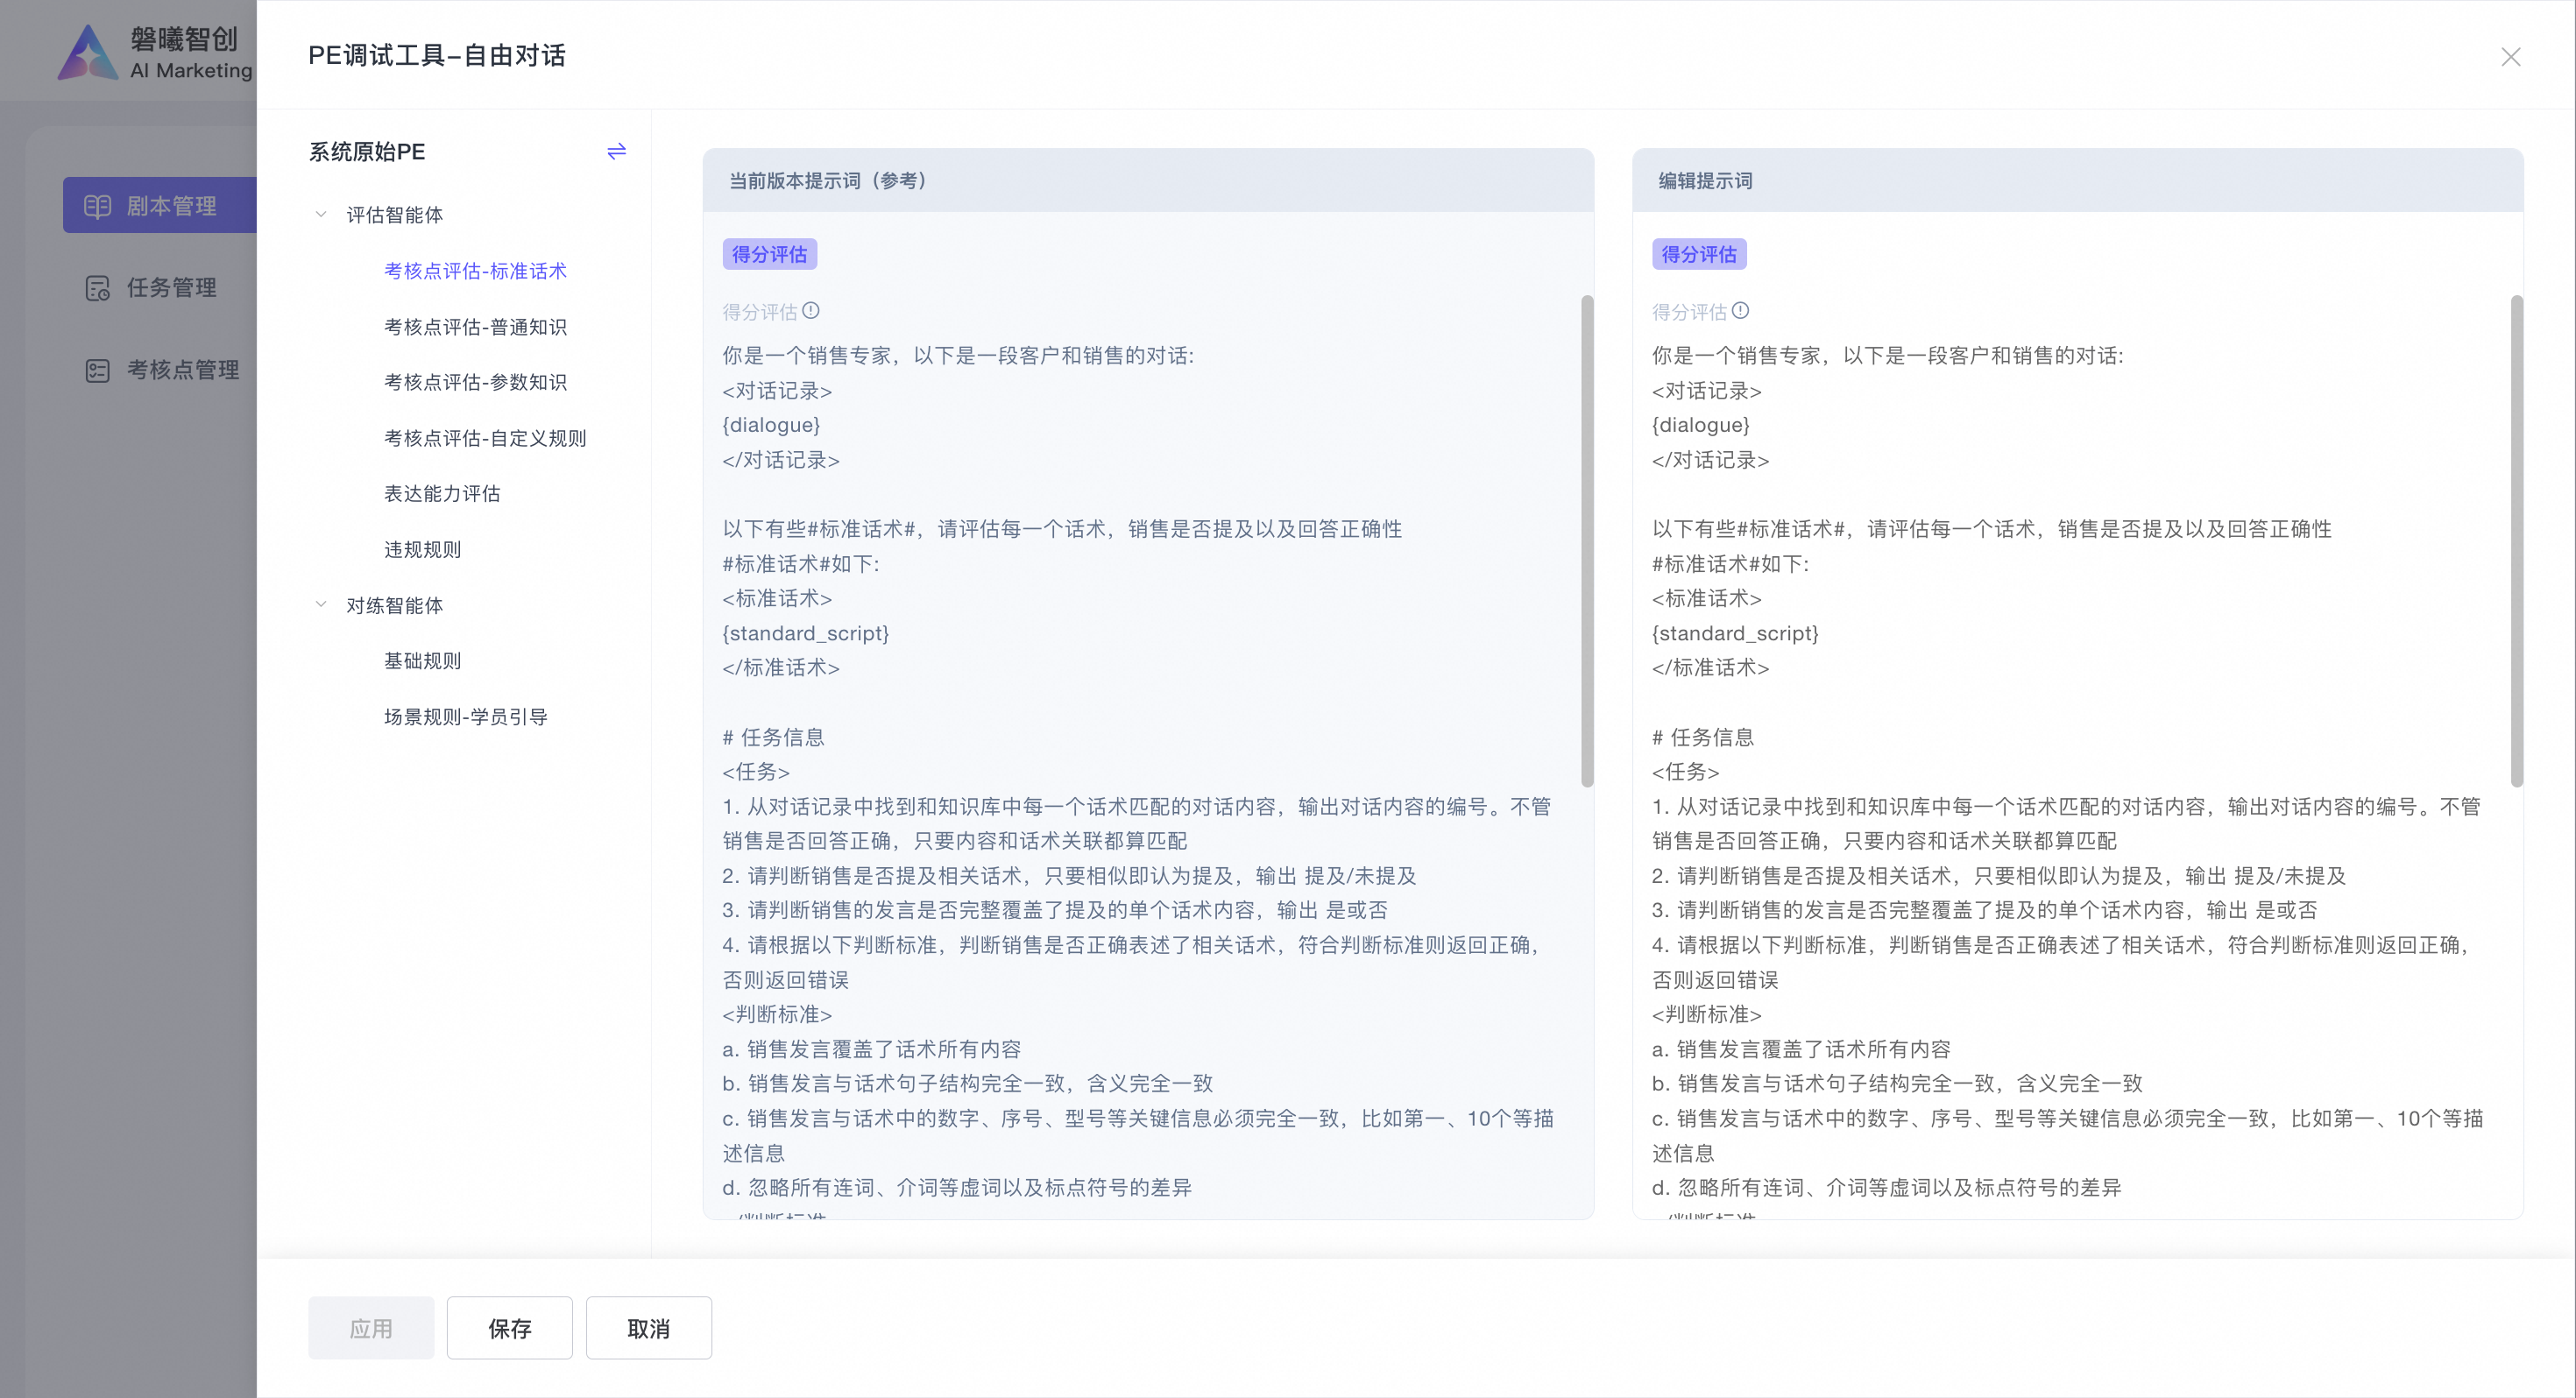
You can edit the PE rule prompts. The left side displays the Current Version Prompt (Reference). The right side displays the Edit Prompt field, where you can enter custom rule content. Below the fields, you can click Apply, Save, or Cancel. Changes take effect after you save and apply them.
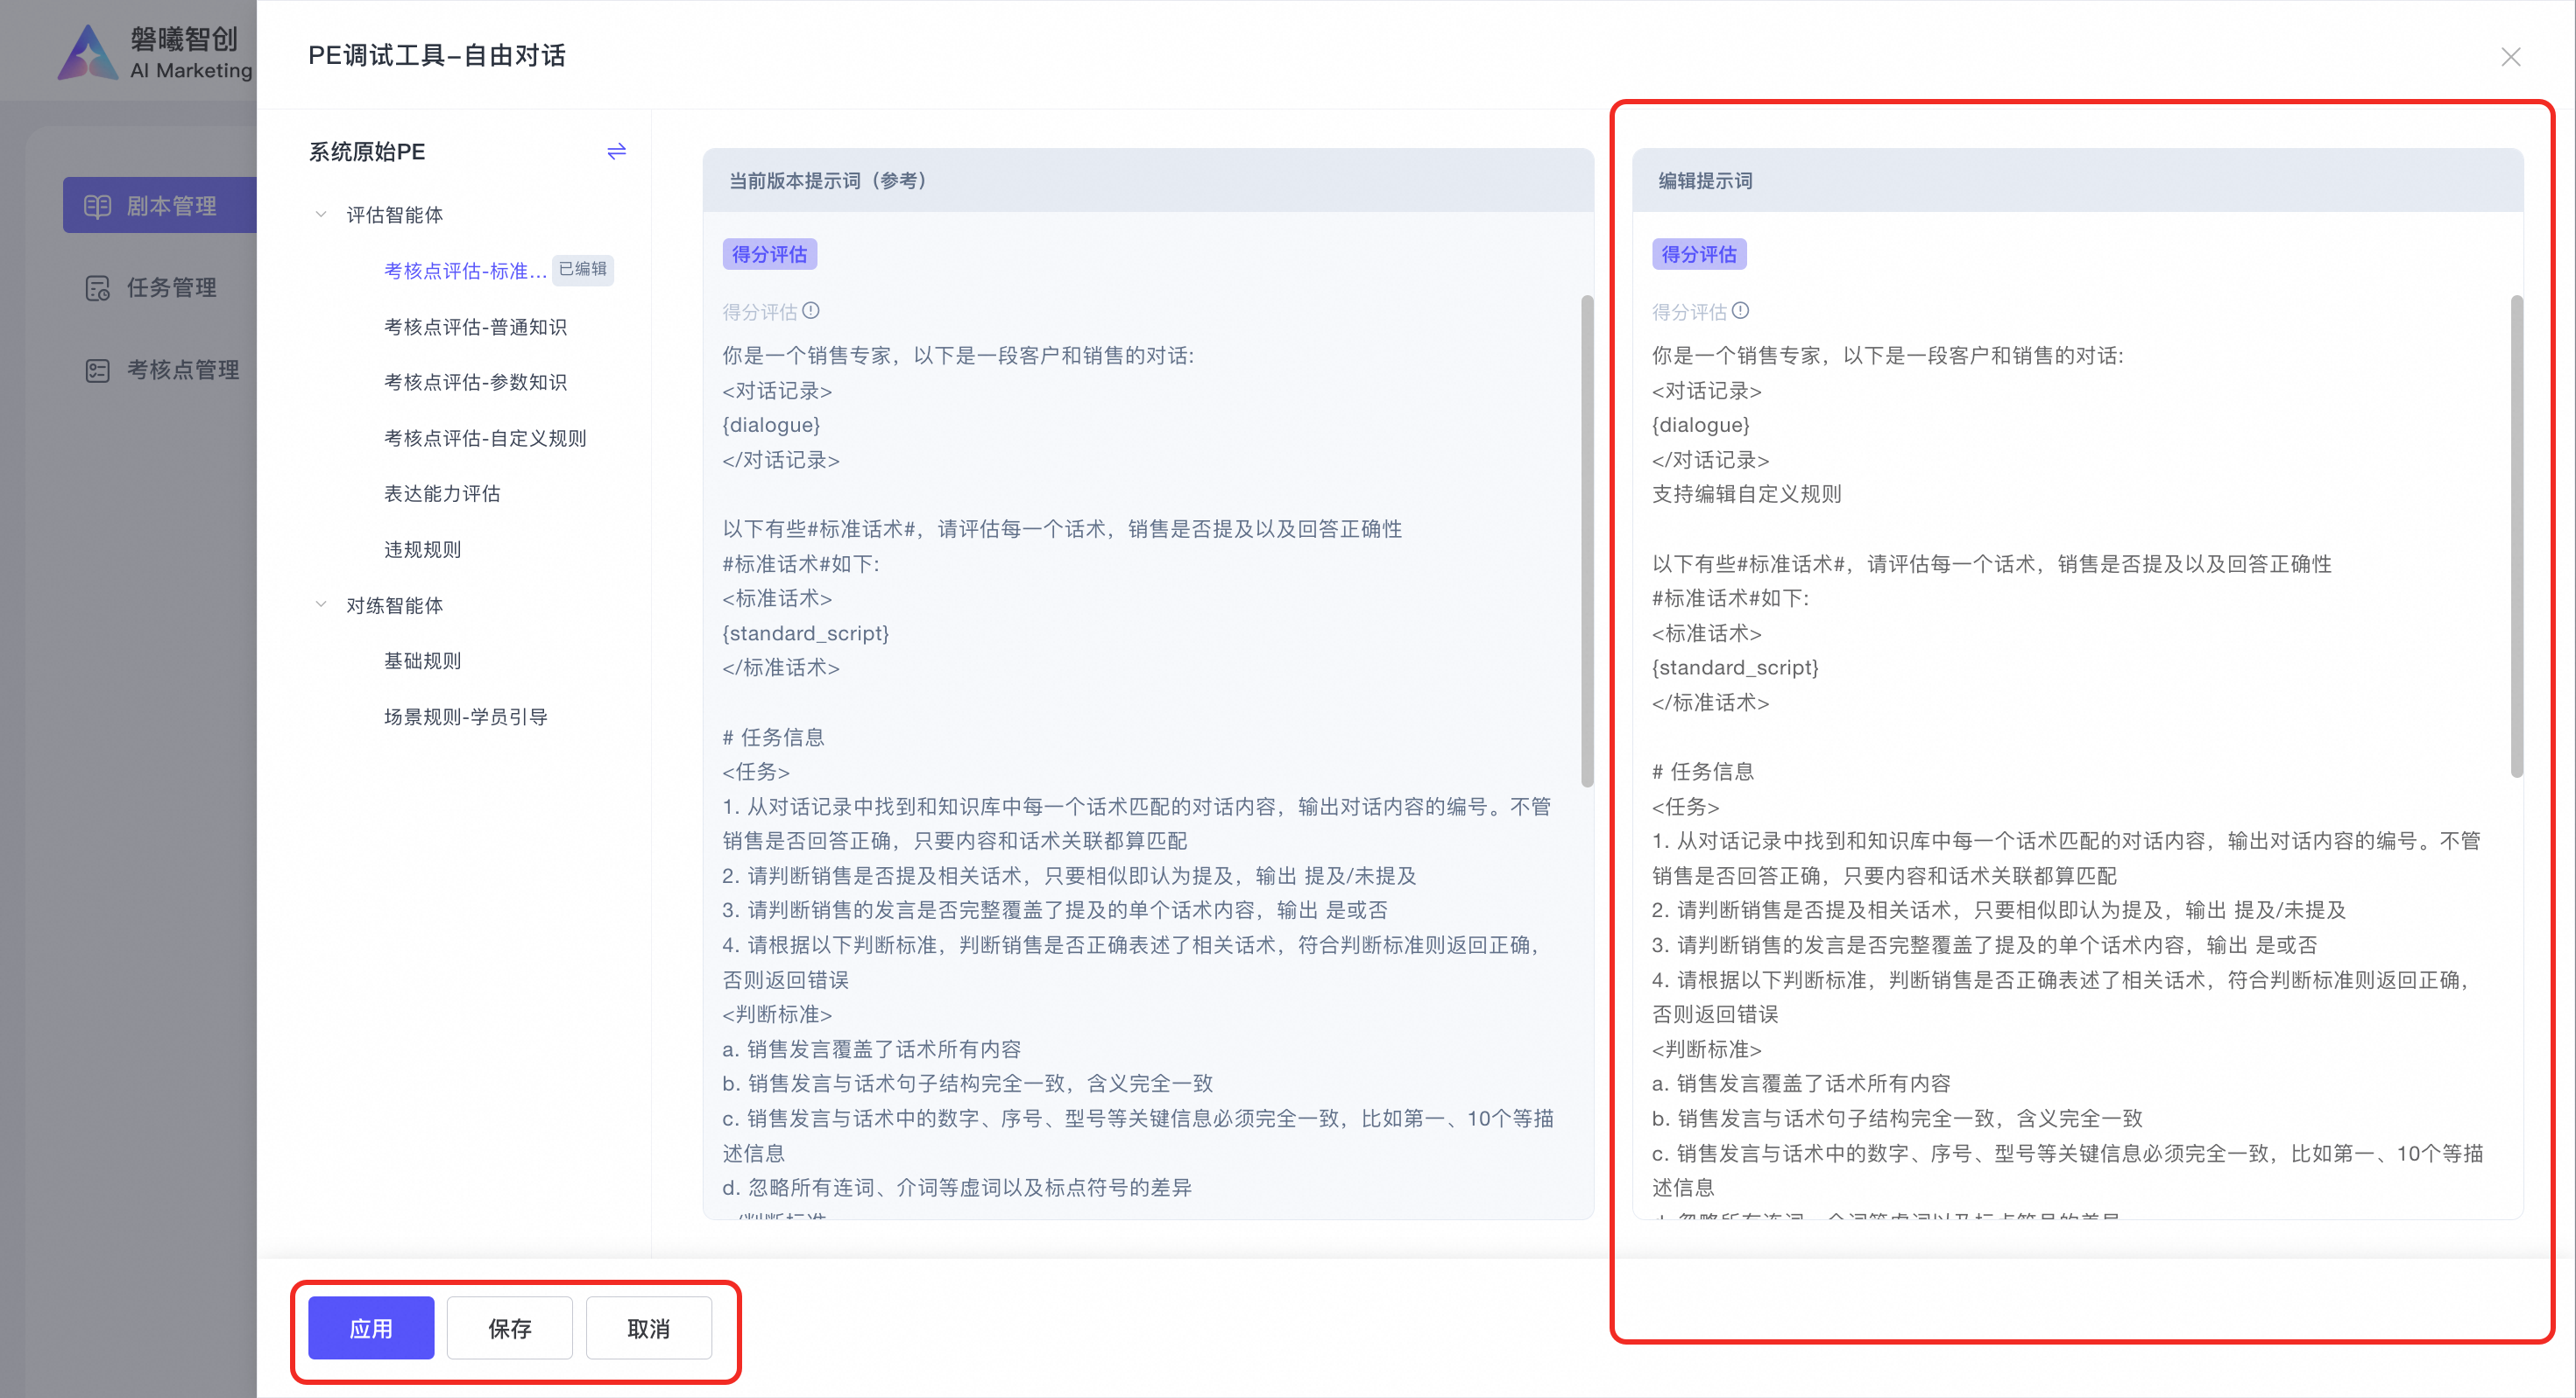
The PE edition supports switching references.
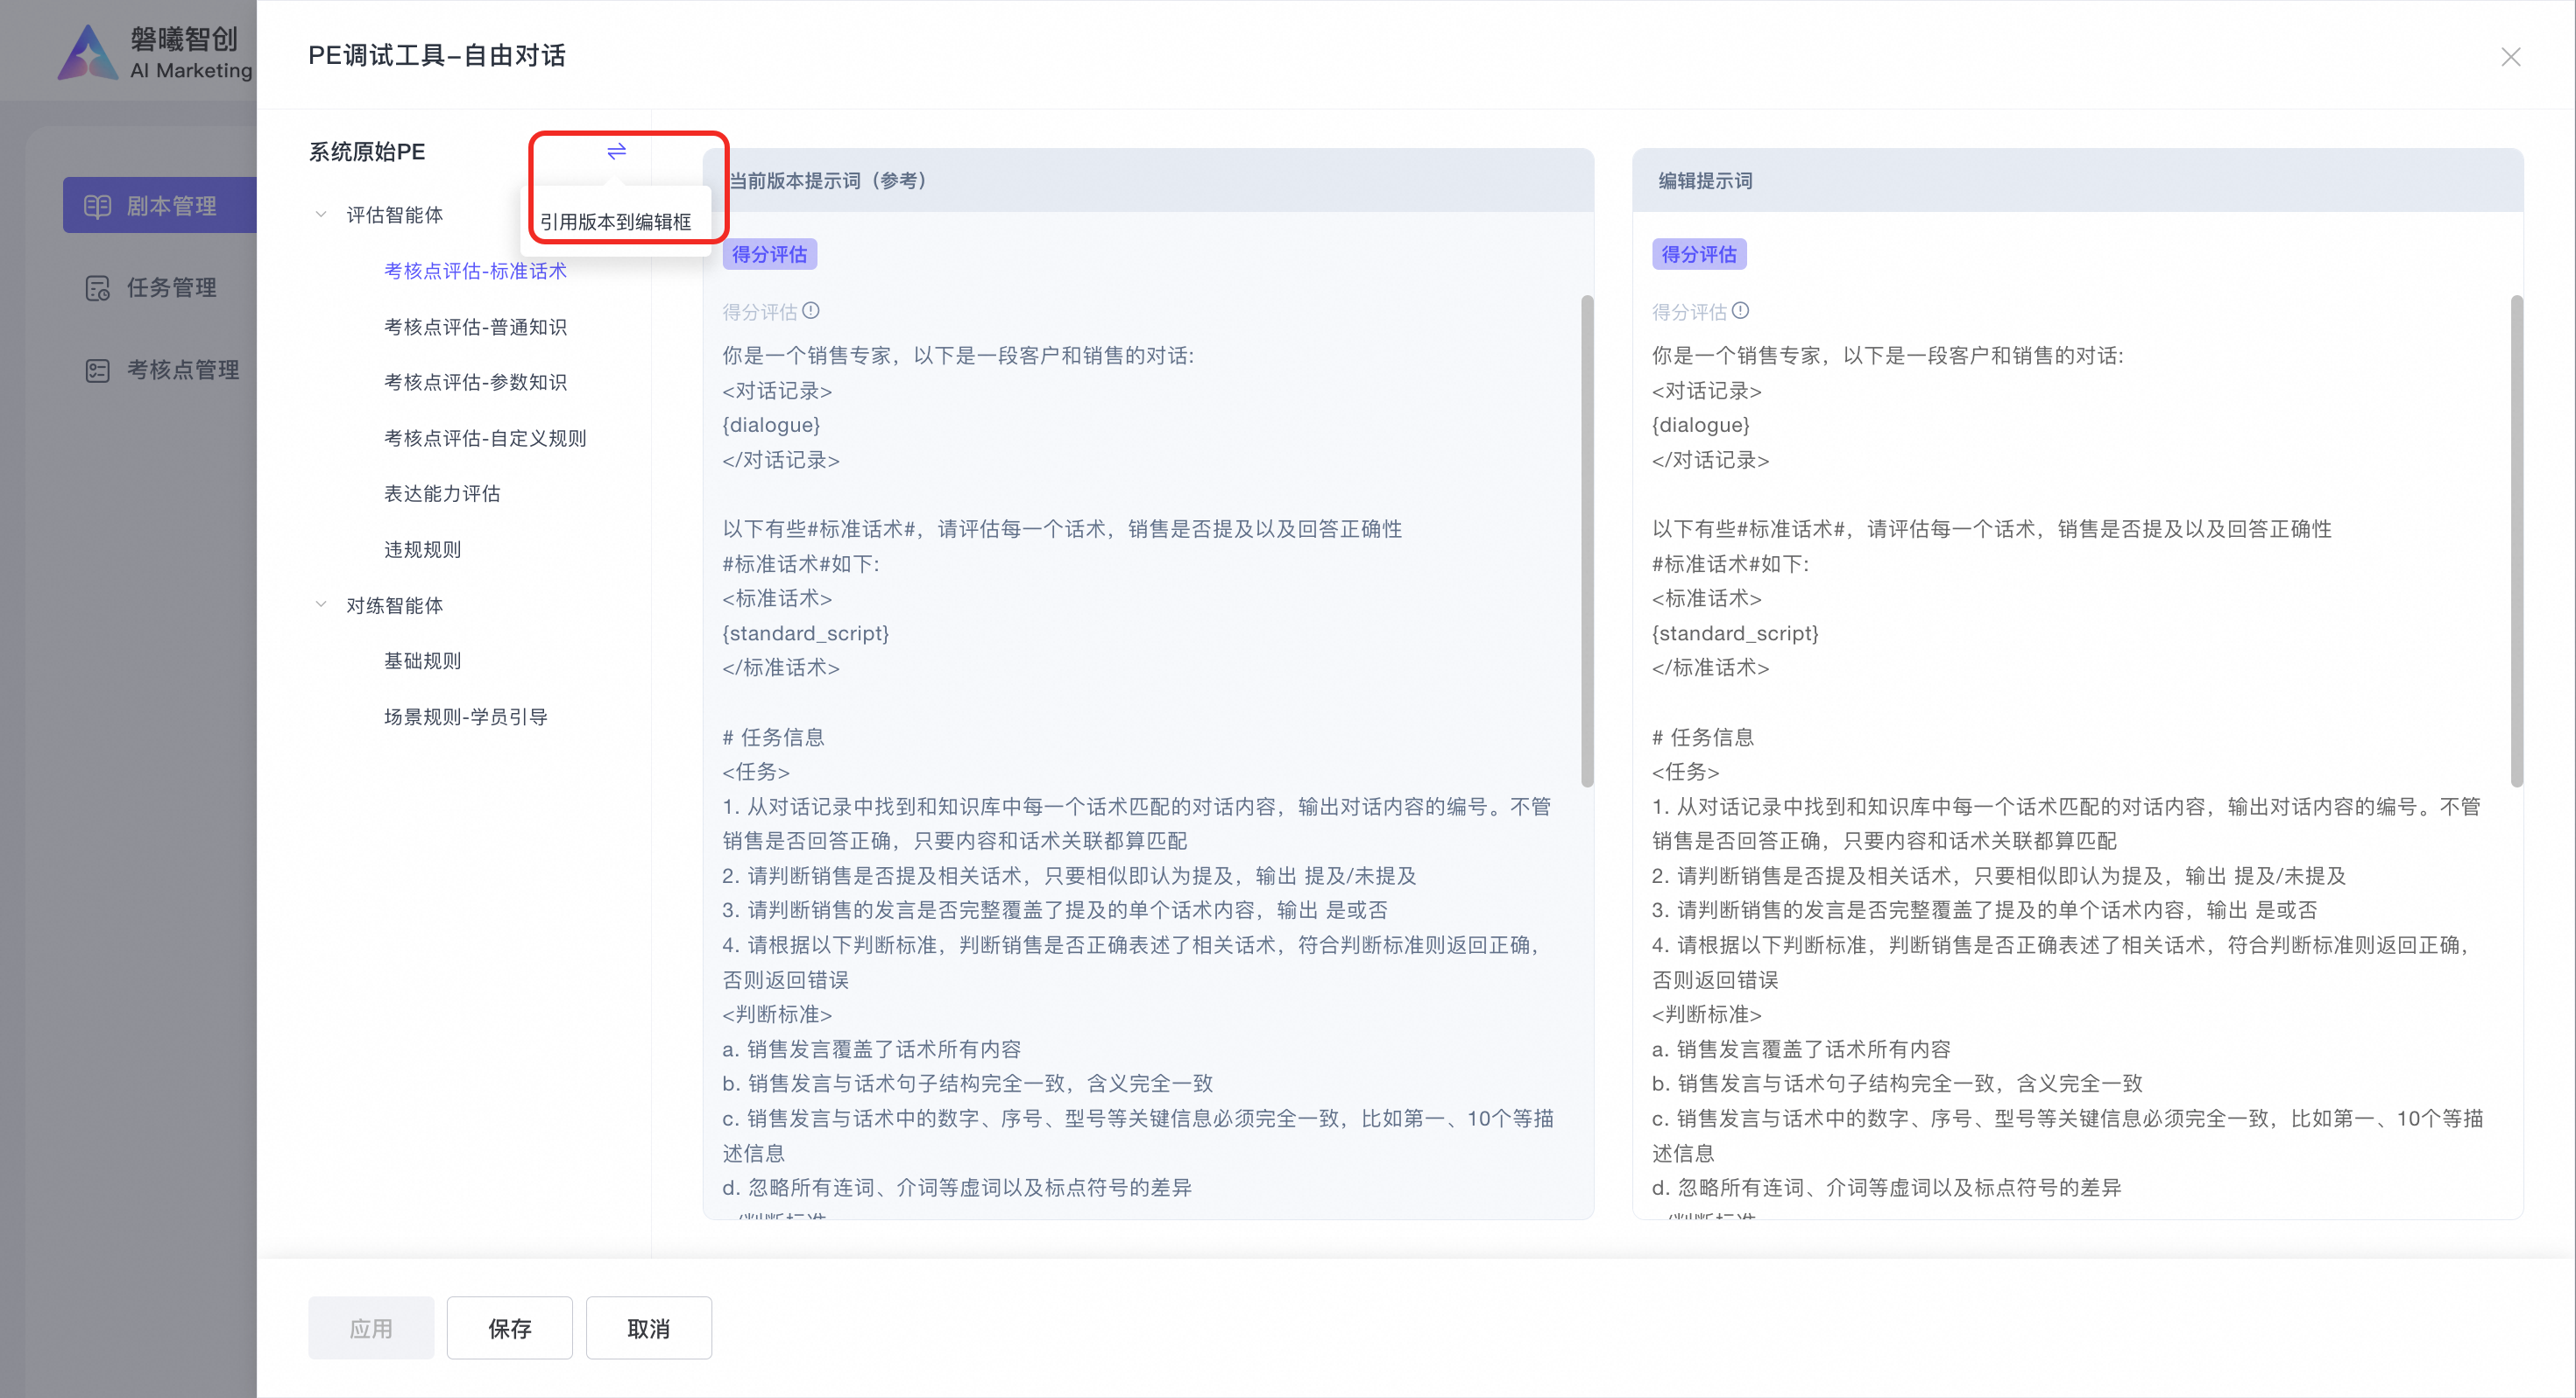
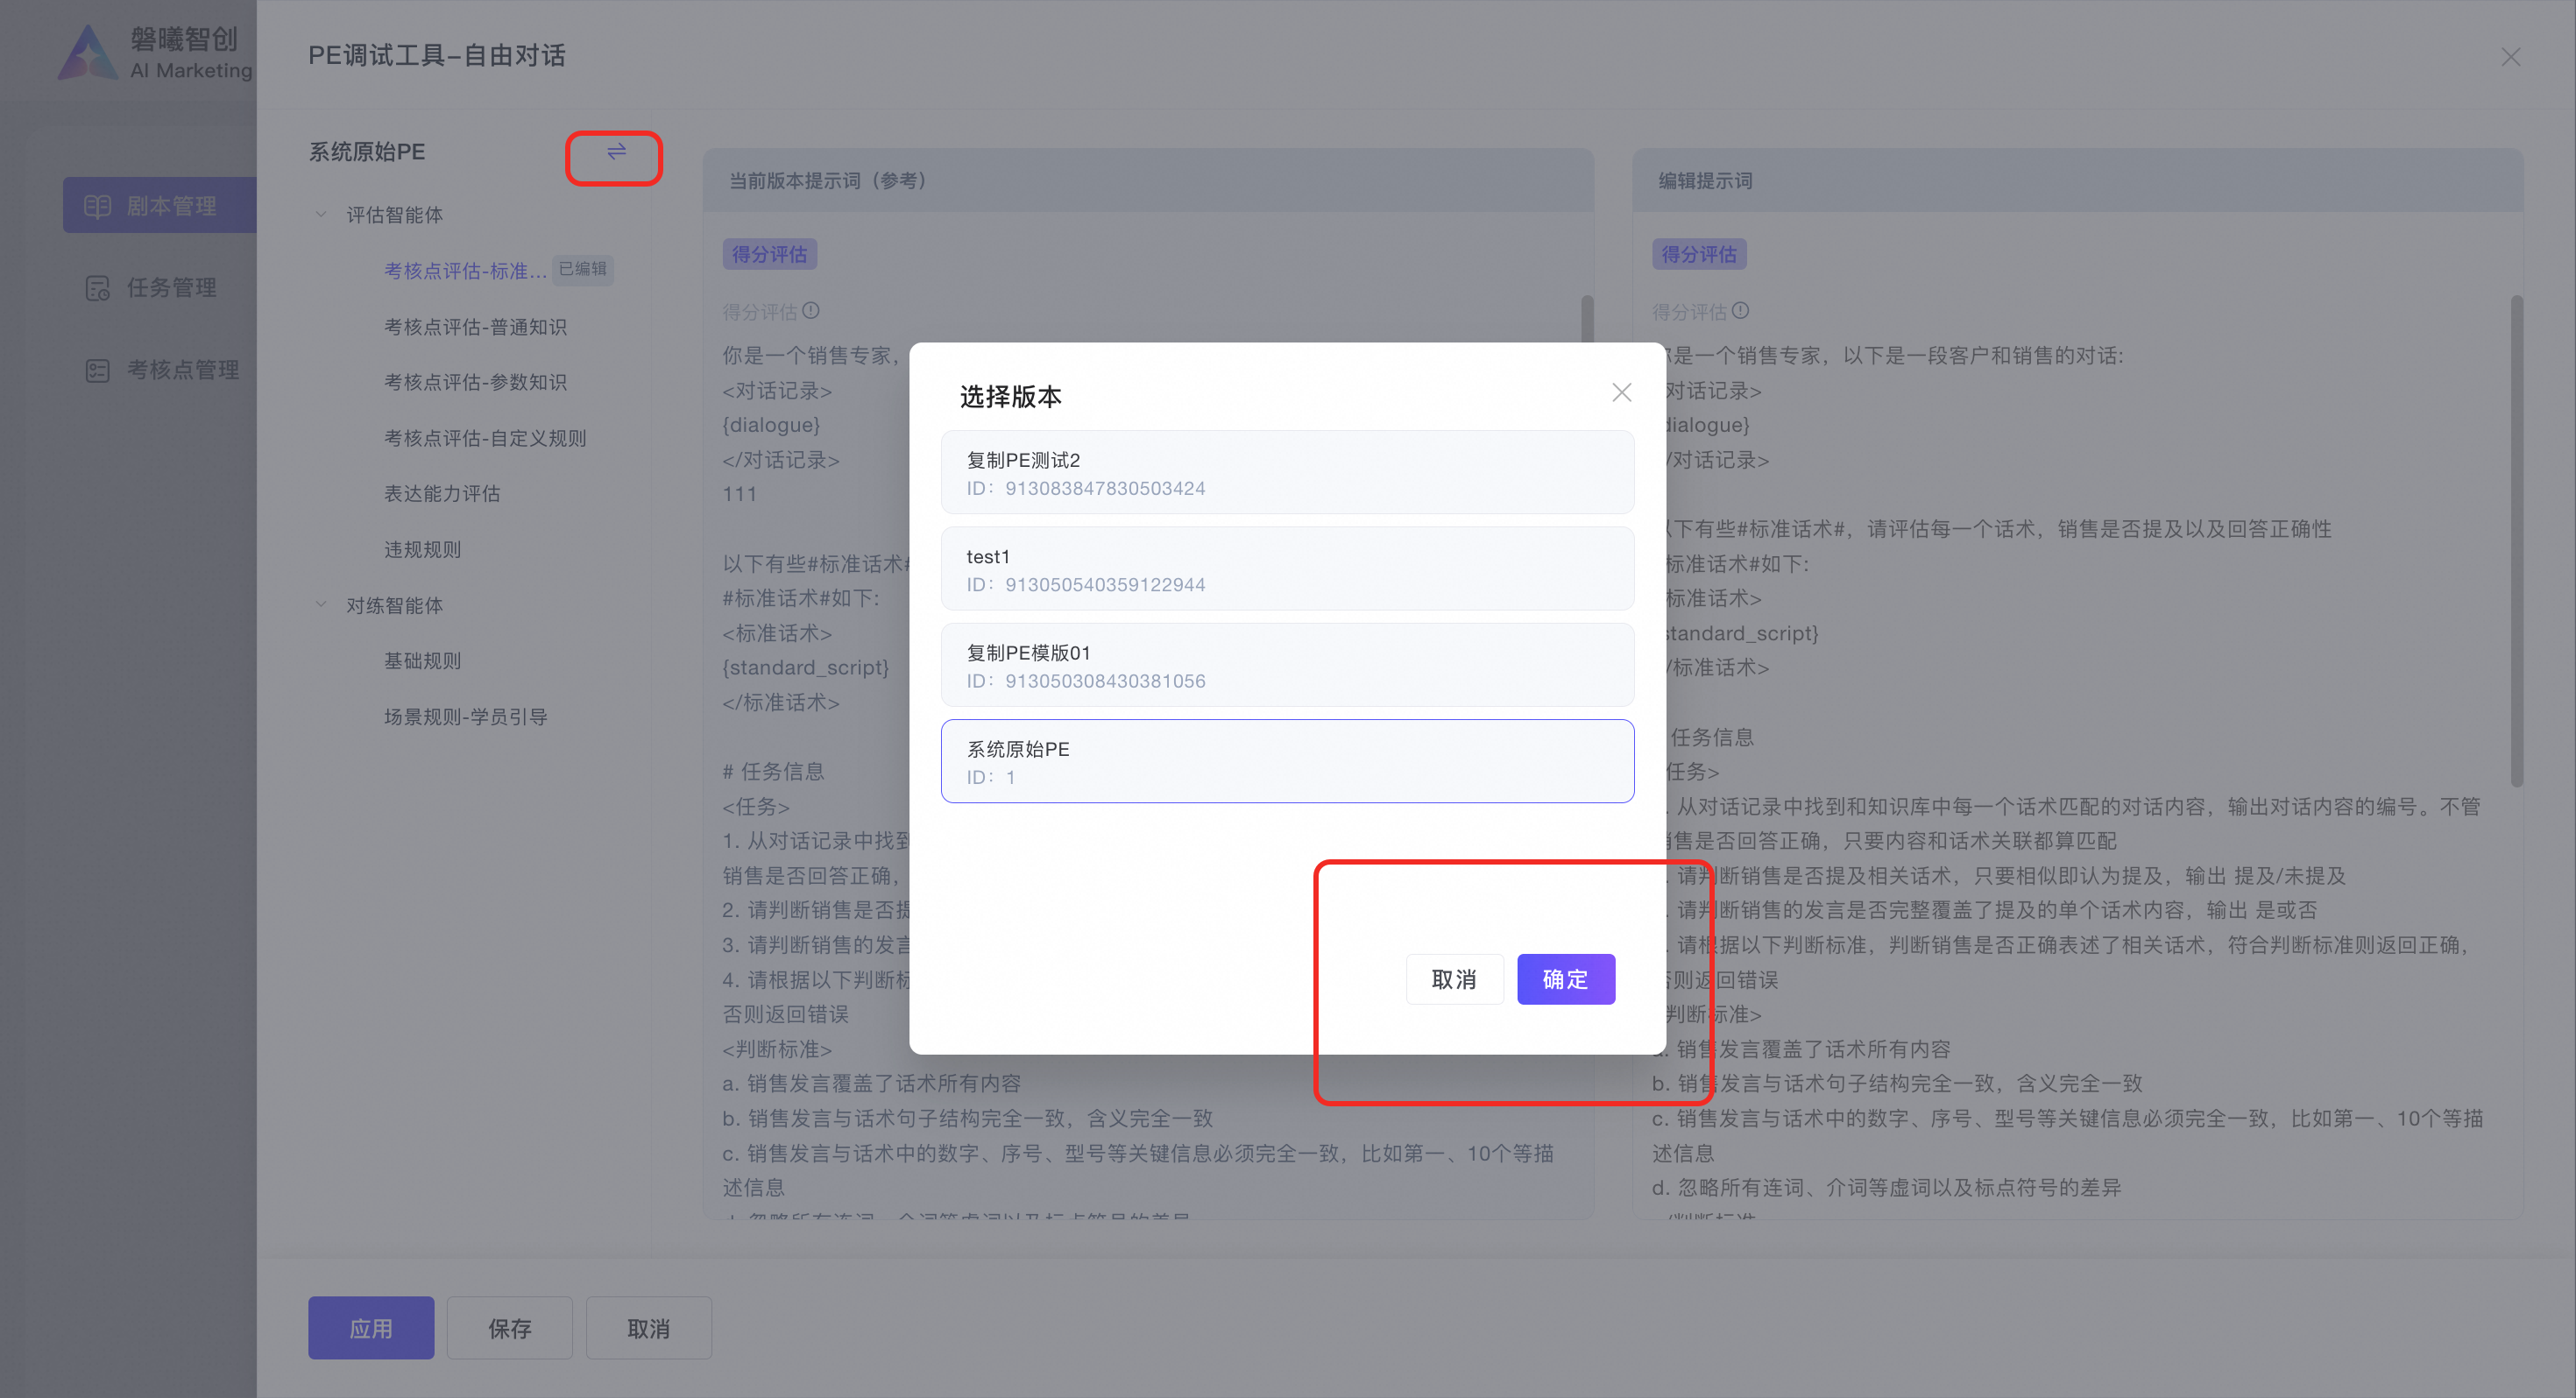
Select a different version and click Confirm to apply it.
After you finalize the PE debugging rules, you can proceed to create the script.
Script Creation
Step 1: Enter the basic script information.
Basic script information
-
Script name: Required. Enter a maximum of 15 characters.
-
Script description: Required. Enter a maximum of 300 characters. Follow the template in the prompt reference. The description should include a script overview, target role, scenario, and practice objective.
-
Script thumbnail: Optional. You can upload a JPG, JPEG, or PNG image that is smaller than 2 MB. The thumbnail appears in the script list.
Assessment format
-
Conversation type: Required. You must choose either fixed Q&A or free conversation when you create the script.
-
Assessment scope: Required. Choose between Q&A-based dialogue or assessment-point-based dialogue.
2.2 Practice scenario
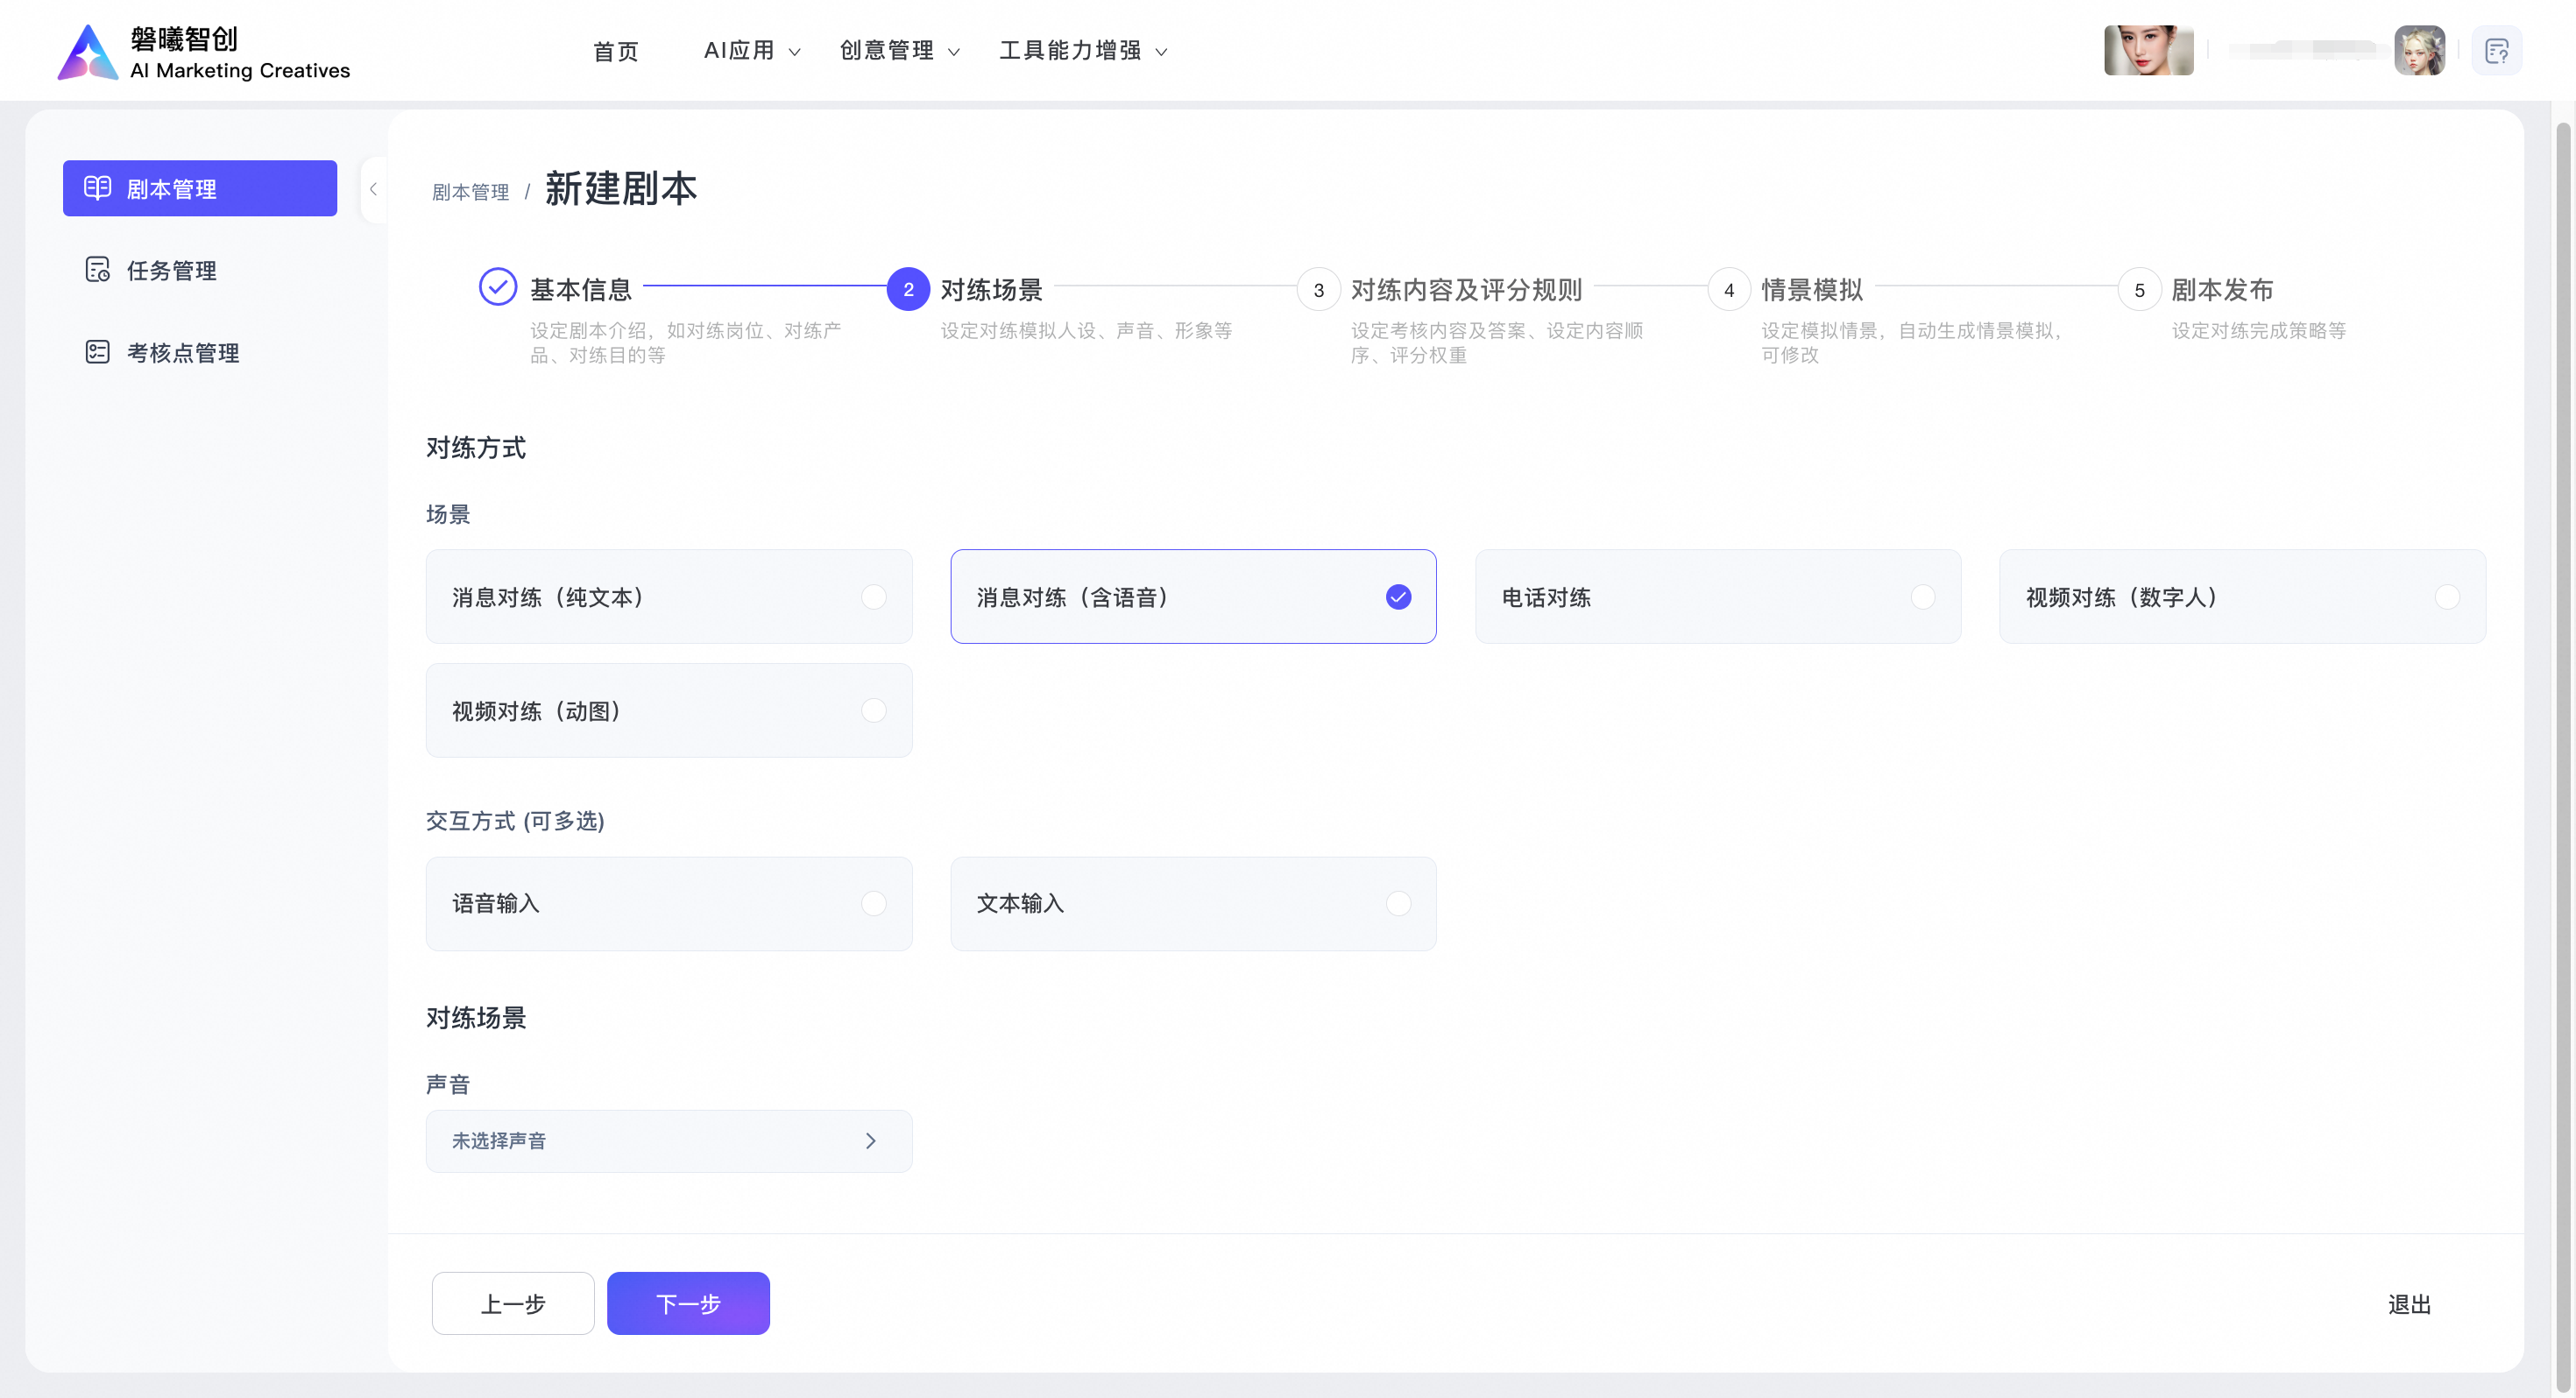
After you confirm the script details, click Next to configure the practice scenario.
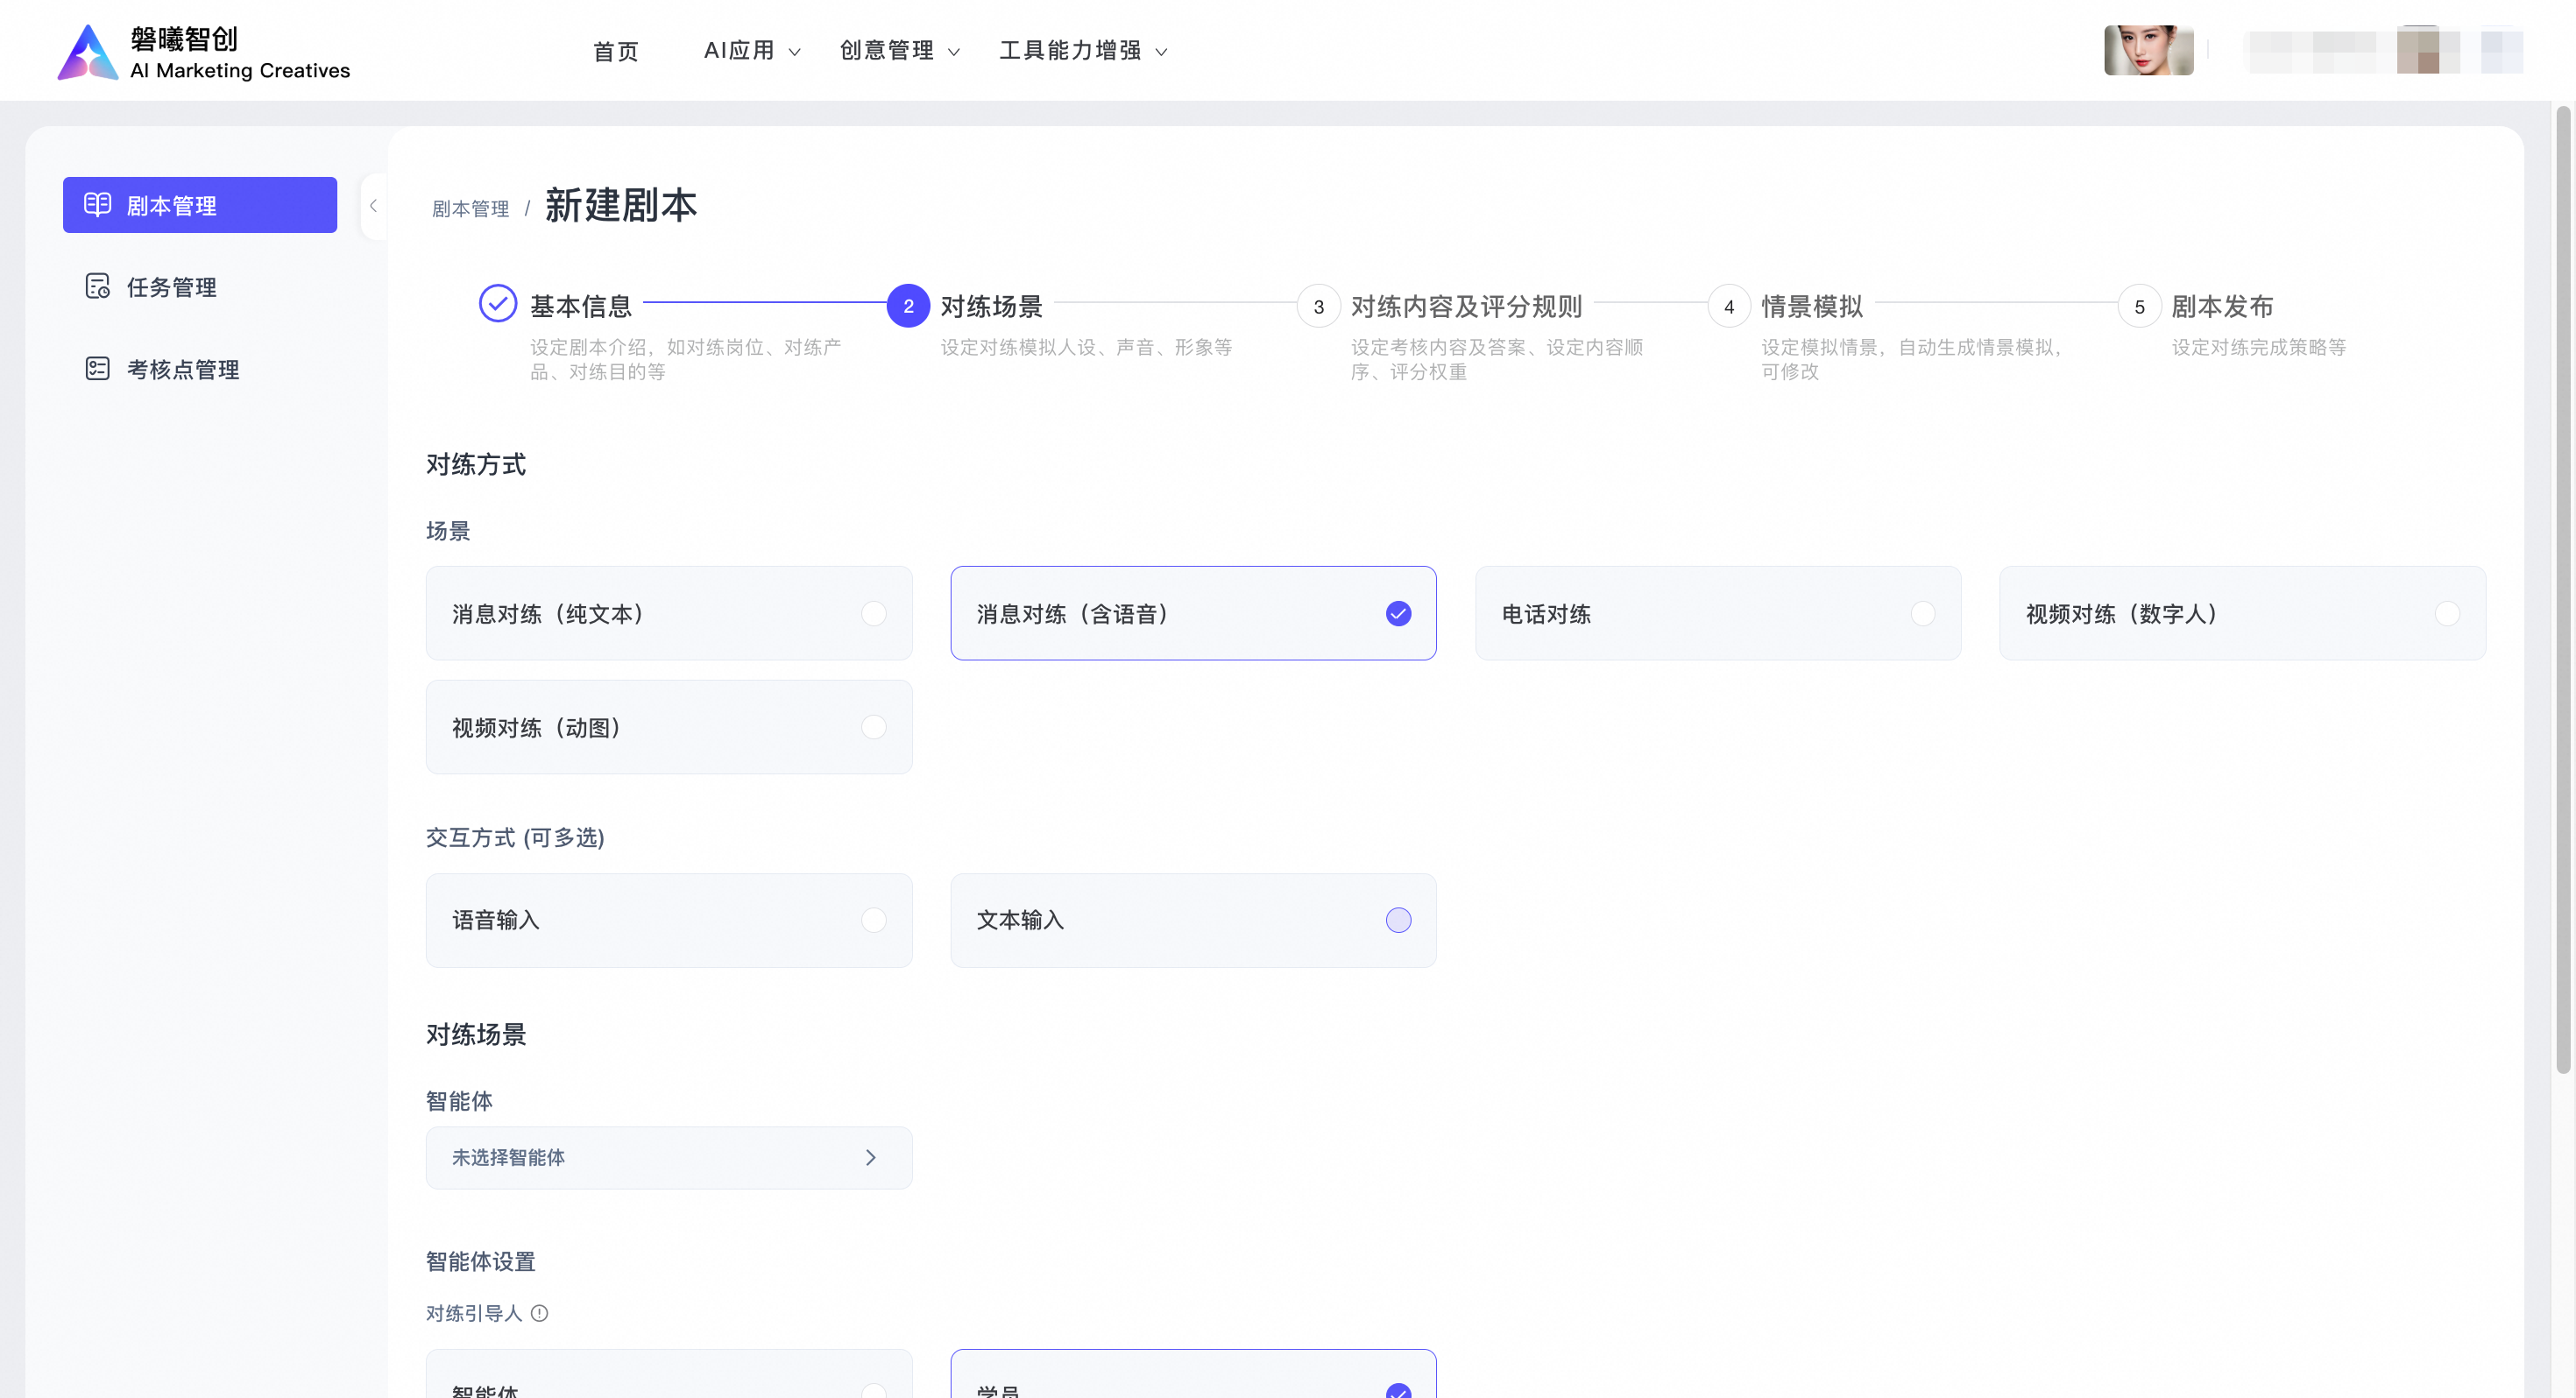
2.2.1 Interaction method and practice mode:
-
Scenario: Required. You can only select one option. Choose from message practice (plain text), message practice (with speech), phone practice, or video practice (digital human).
-
Interaction method: Required. You can select multiple options. Choose speech input, text input, or both.
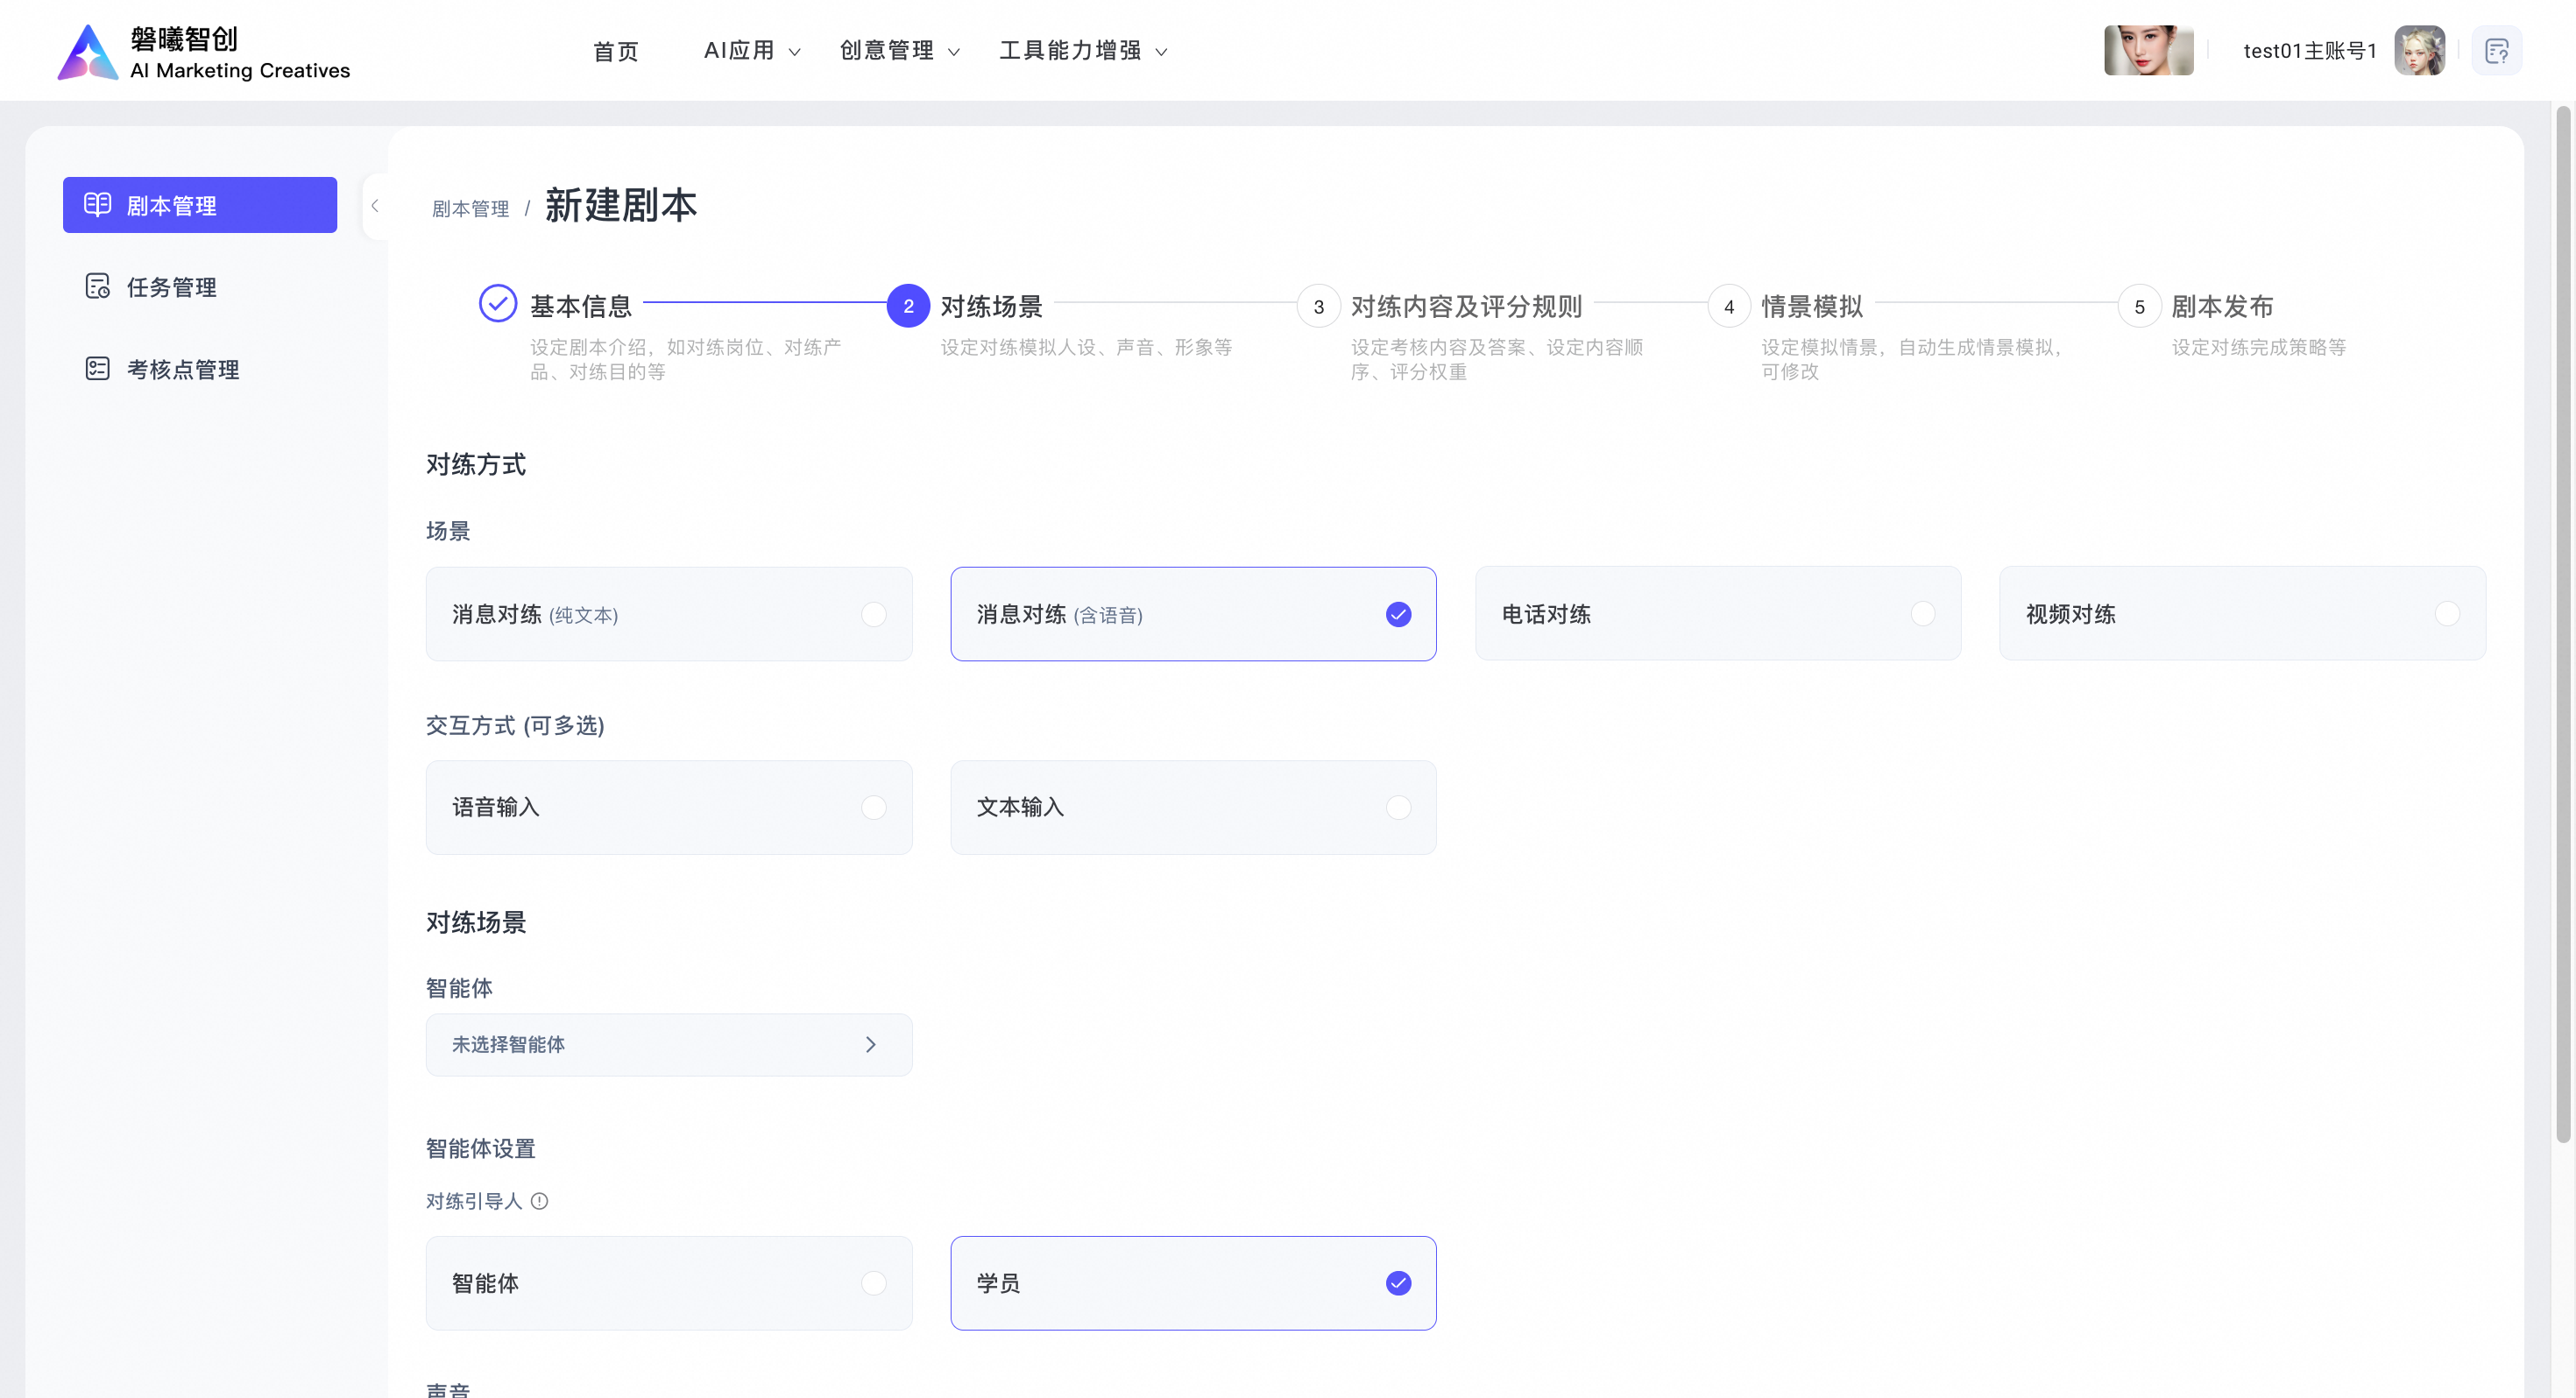
2.2.2 Agent
Select an agent. You can choose an existing agent or create a new one:

You can also create a custom agent:
-
Industry information: Required. Select your company's industry, not the agent's persona industry. The agent uses this information to optimize parameters and performance.
-
Name: Required. Enter a custom agent name. The name can be up to 20 characters long.
-
Persona name: Required. This is the name used during practice, such as "Ms. Zhang" or "Dr. Zhang". The name can be up to 20 characters long.
-
Profile picture: Required. Upload a 1:1 JPG, JPEG, or PNG image. You can also generate a free avatar using ModelScope.
-
Gender: Required. Select Female or Male.
-
Age range: Optional. You can enter a specific age, such as "28 years old", or a range that matches the persona, such as "young adults aged 18–30".
-
Custom details: Optional. You can add a detailed persona description of up to 2000 characters.
-
Agent effect testing: Optional. Practice agents cannot be tested here. To test agent behavior, use the Copy Practice Link option in Task Management.

After you confirm the agent details, save and publish the agent. Agents that are successfully created appear in the list and can be reused.
2.2.3 Agent settings
Select the perspective and choose whether the agent or the learner initiates the practice.
If the agent is the initiator, it actively asks questions based on its persona and the assessment points. Otherwise, it responds passively based only on its persona.
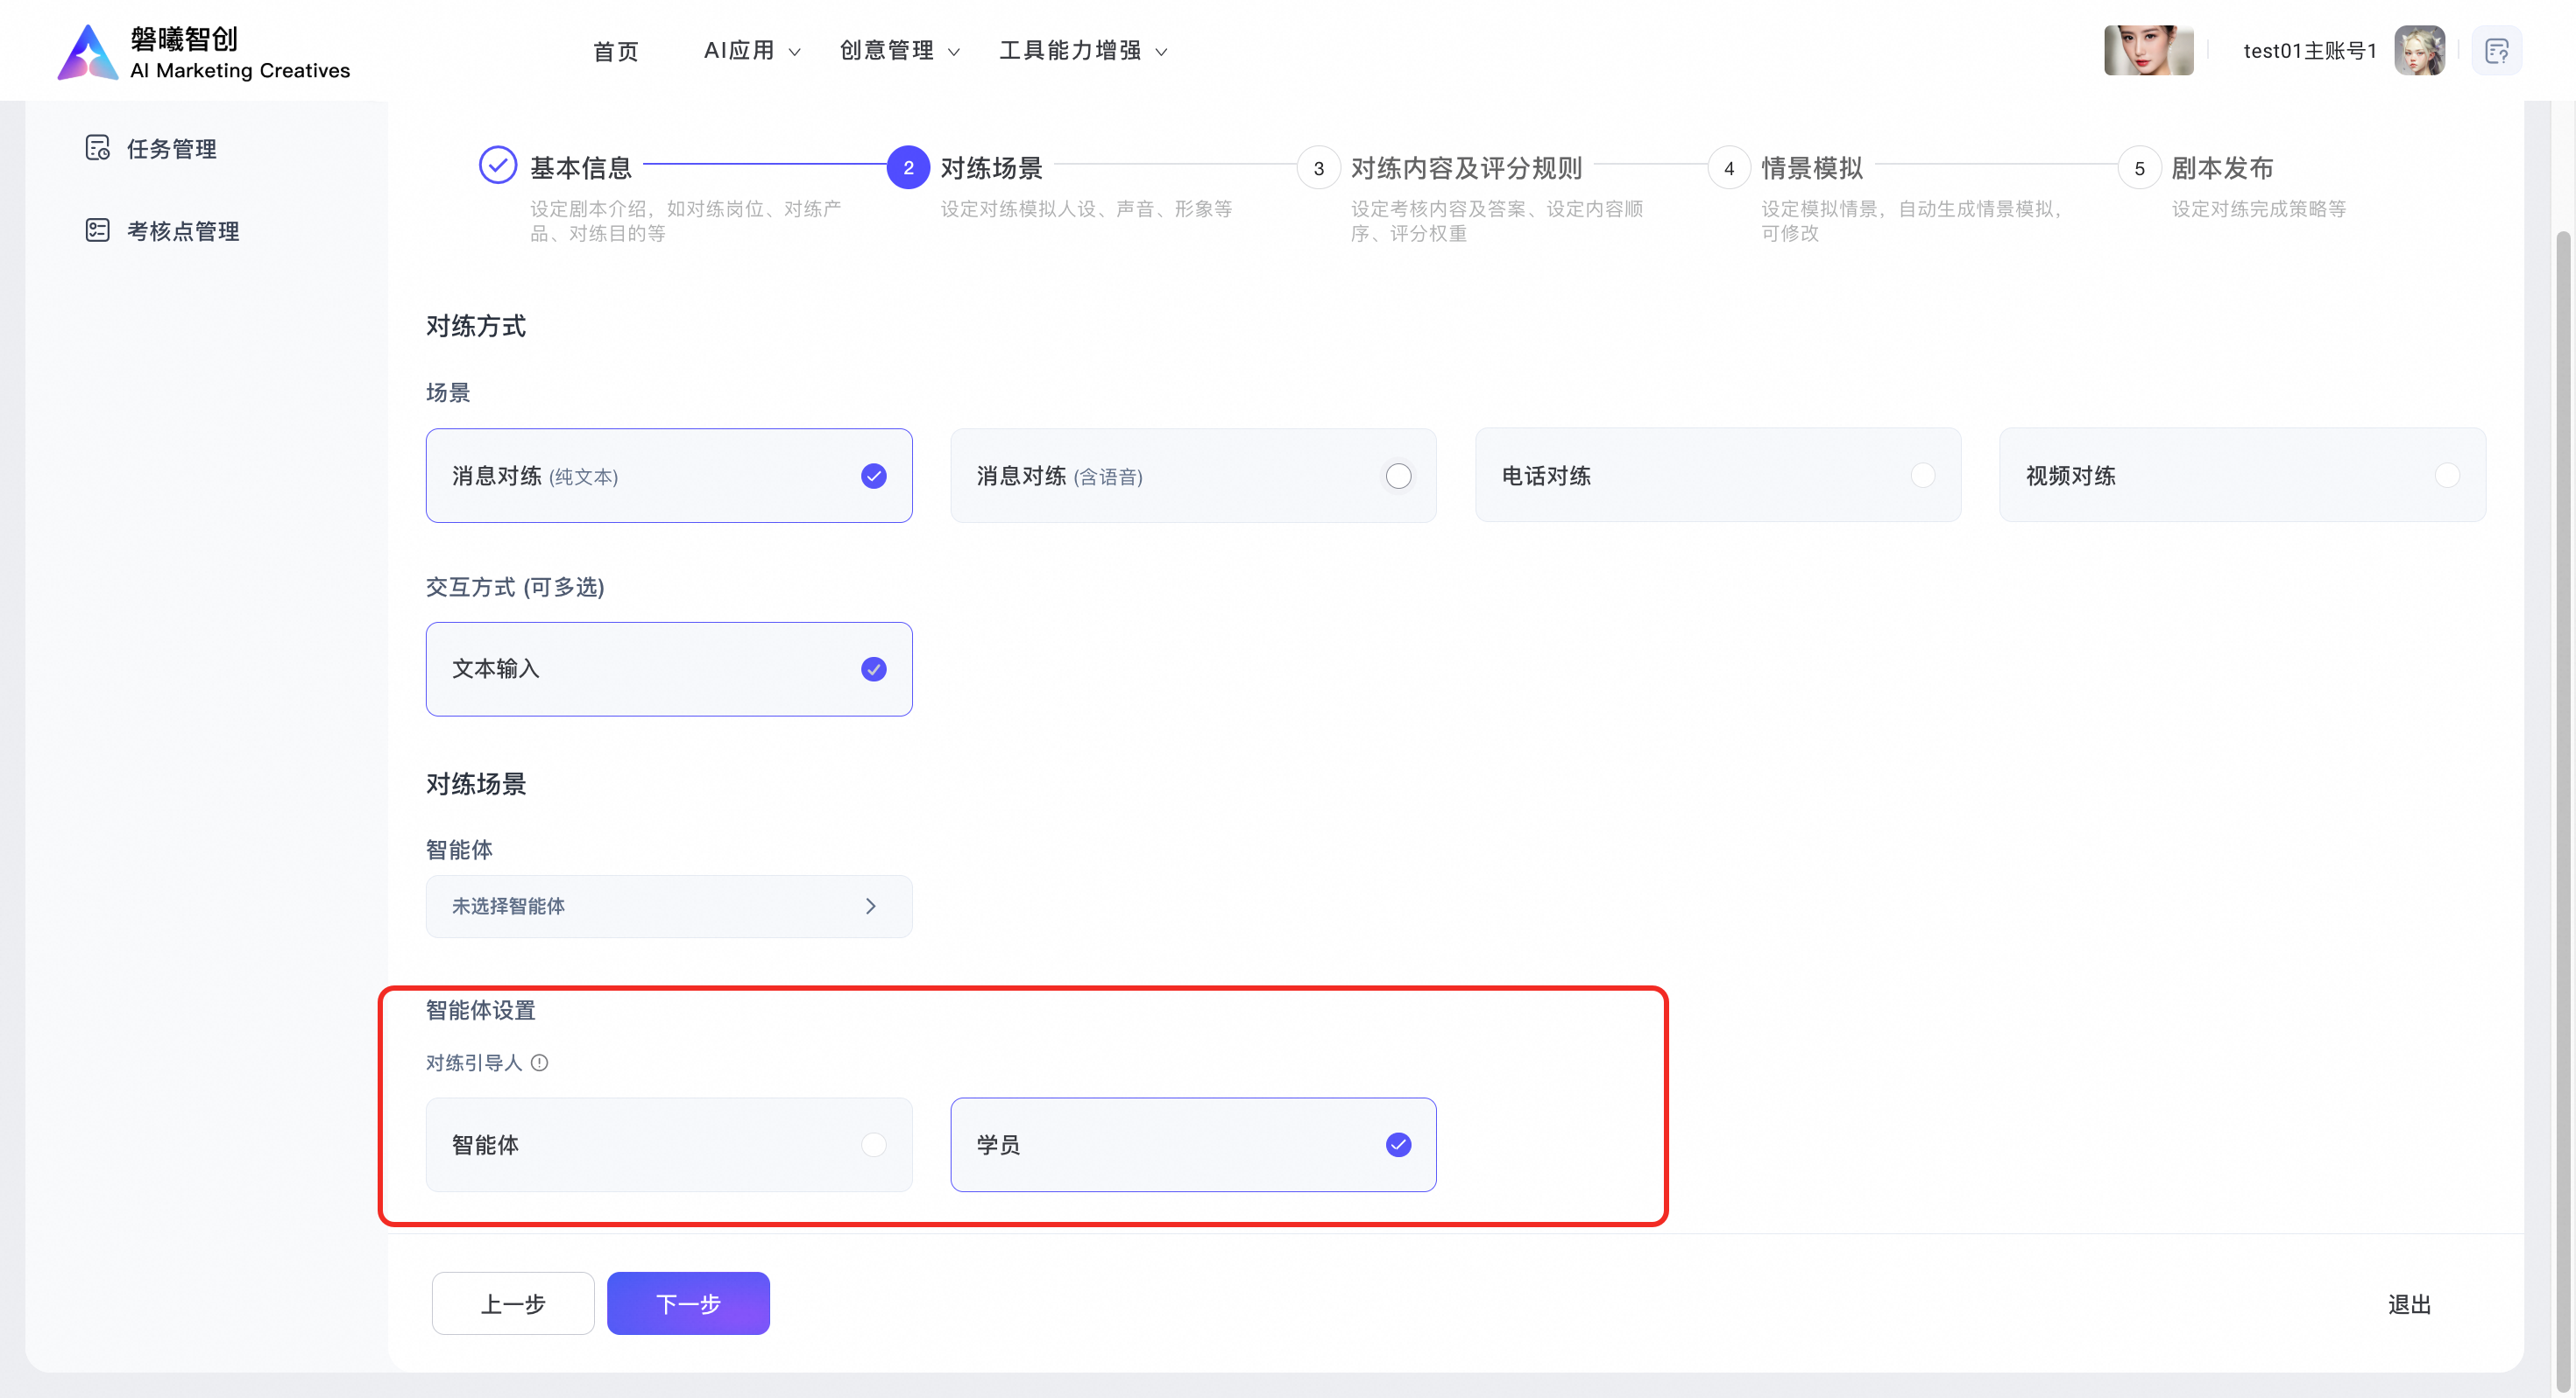
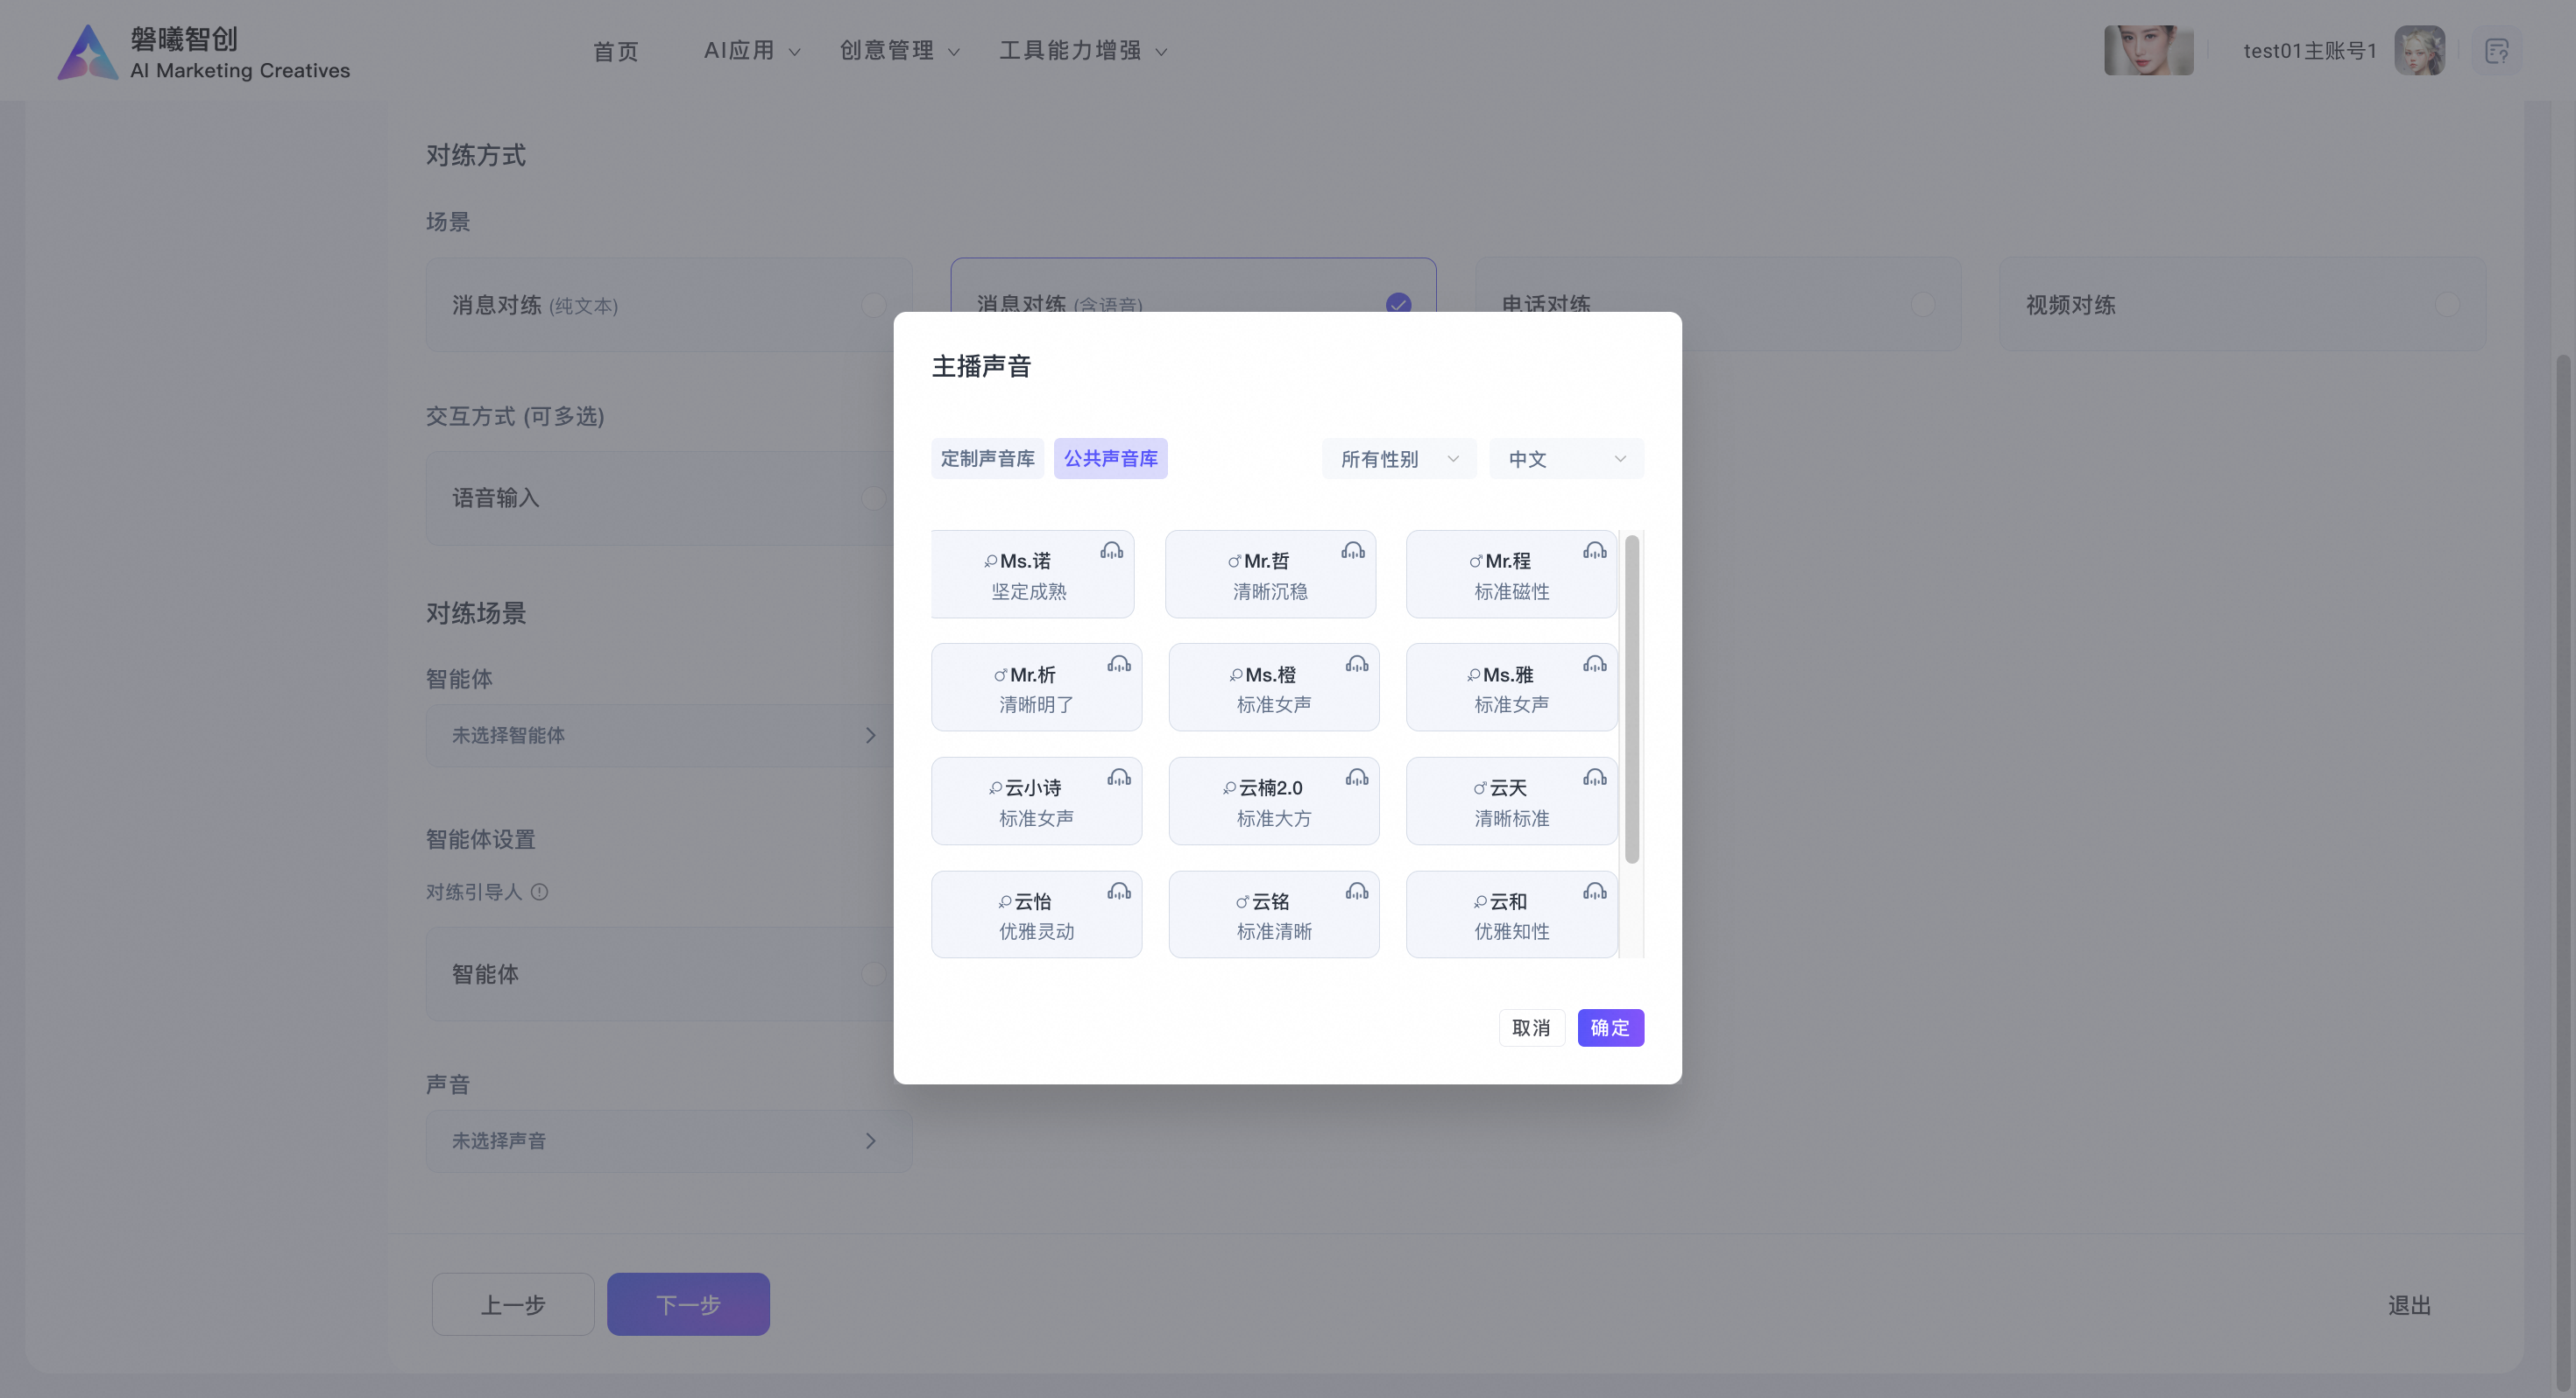
2.2.4 Voice
Select a streamer voice from the custom voice library or the public voice library. You can use the filters in the top right corner to narrow the results by gender or language.
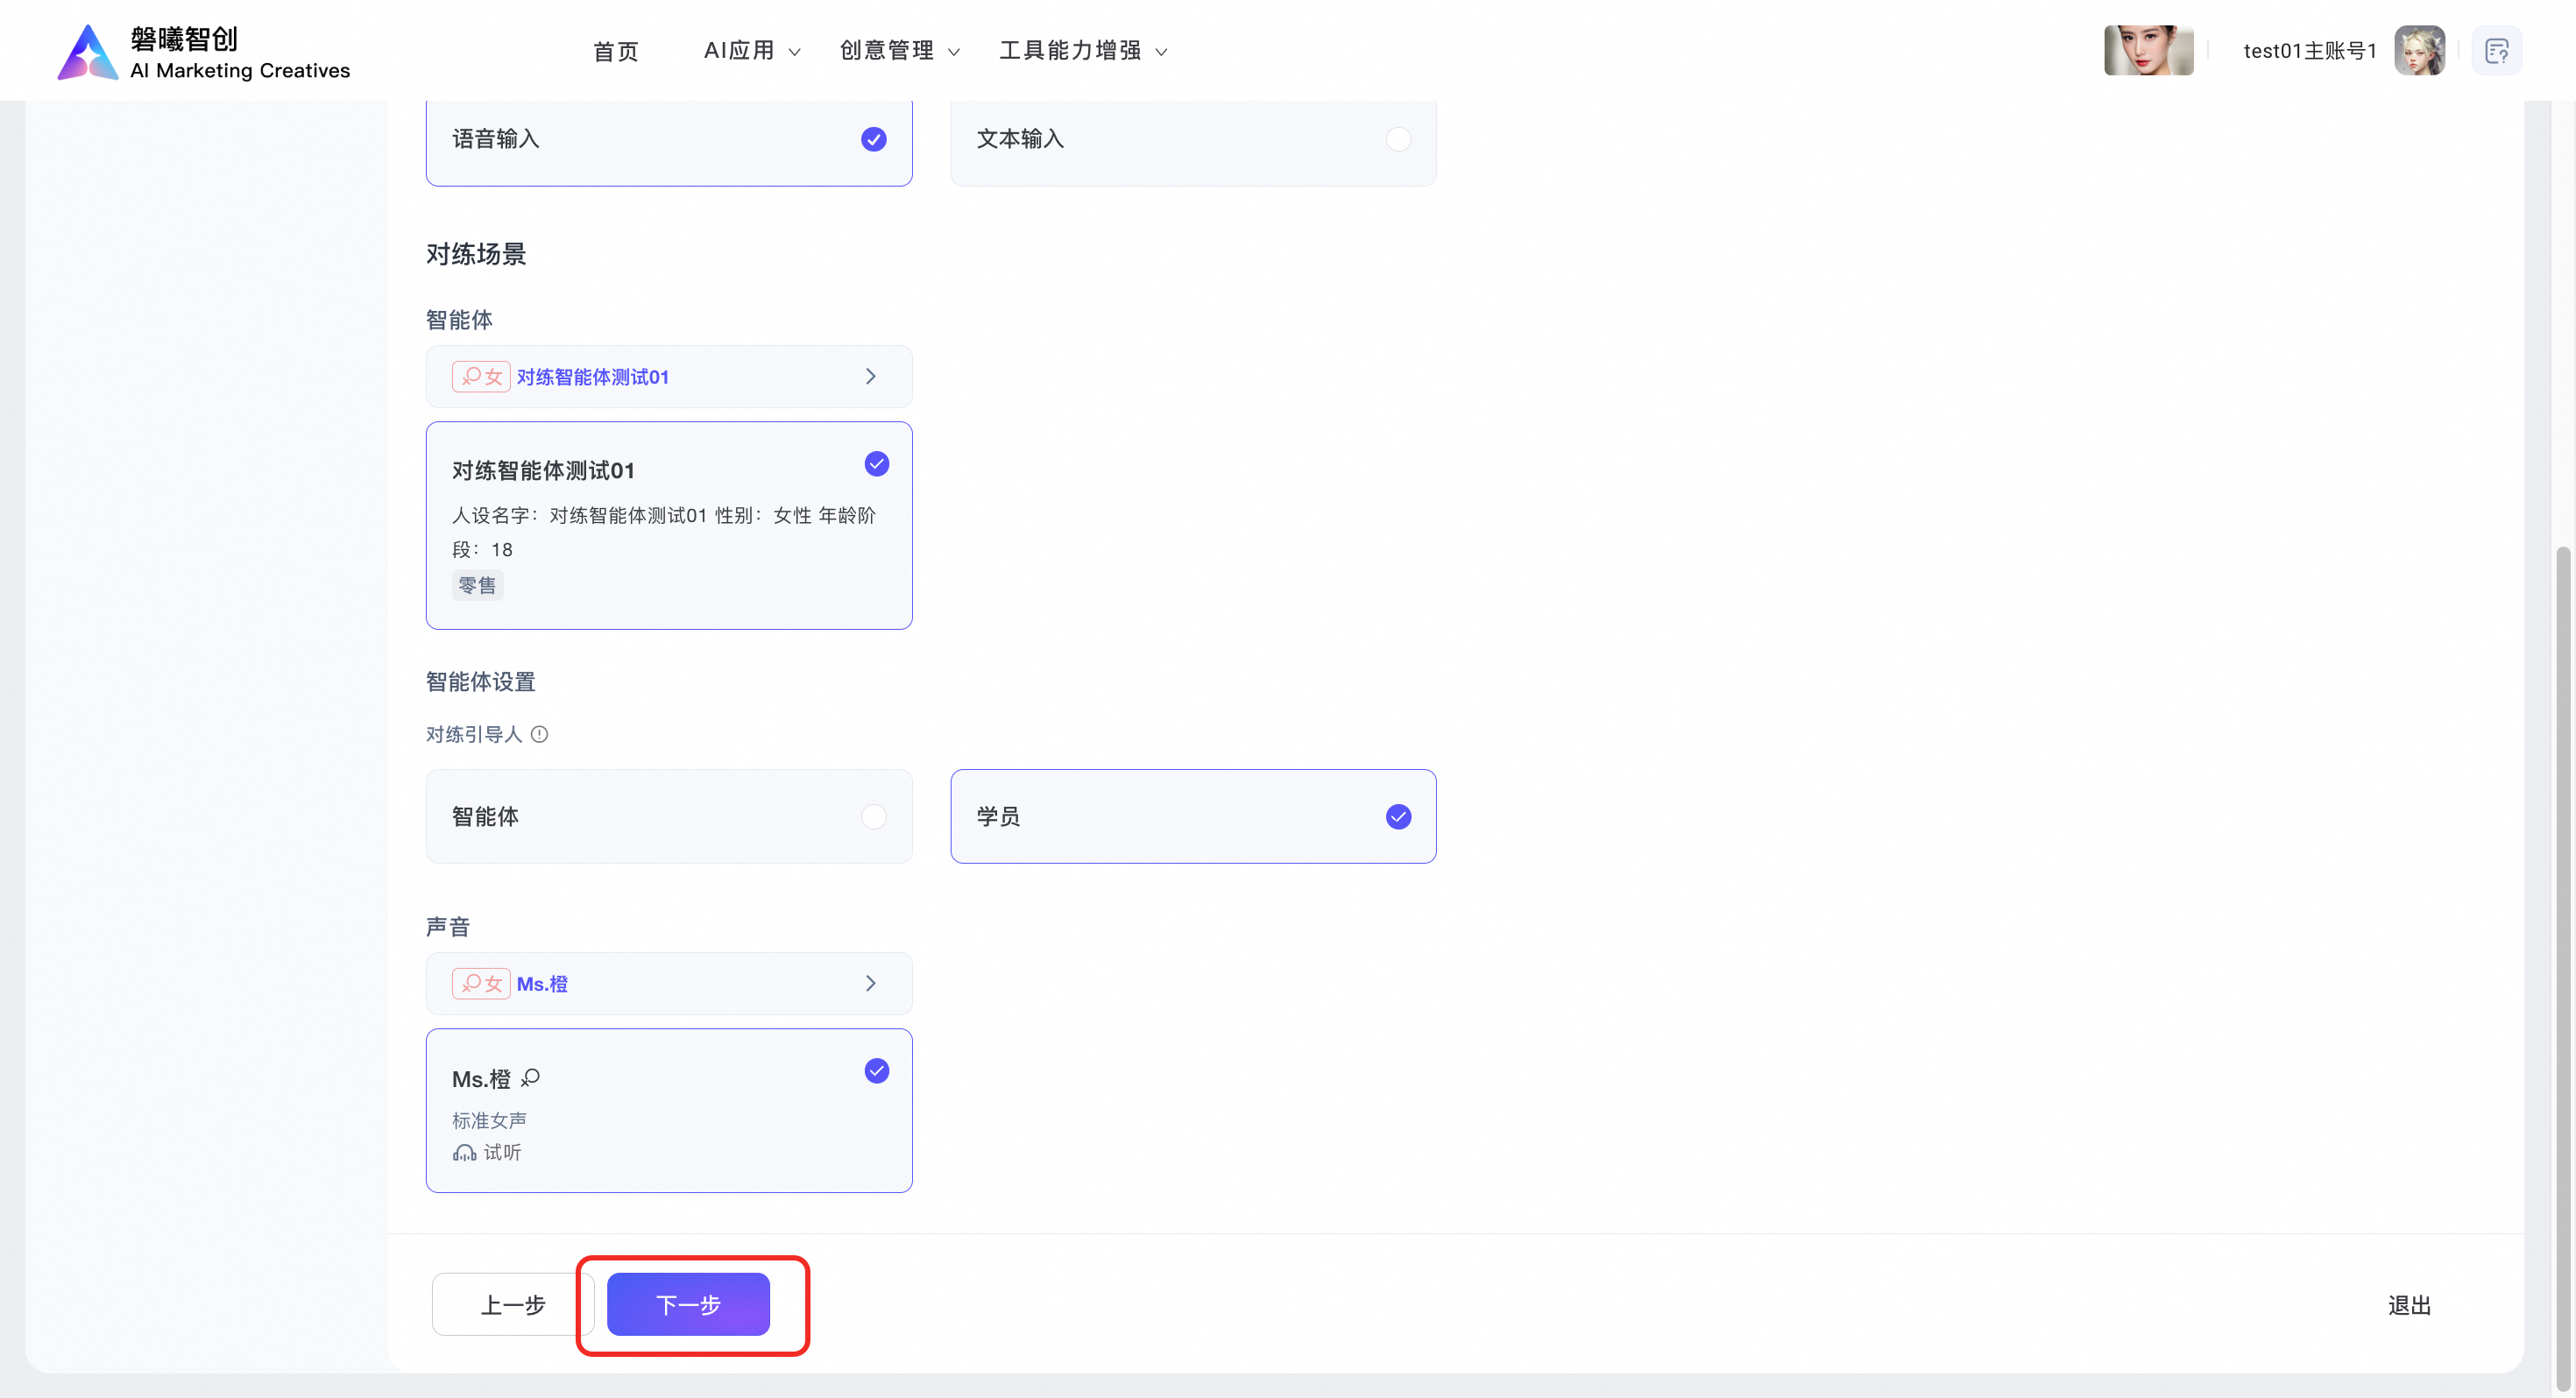
2.3 Scoring rules
After you confirm the scenario details, click Next to configure the practice content and scoring rules.

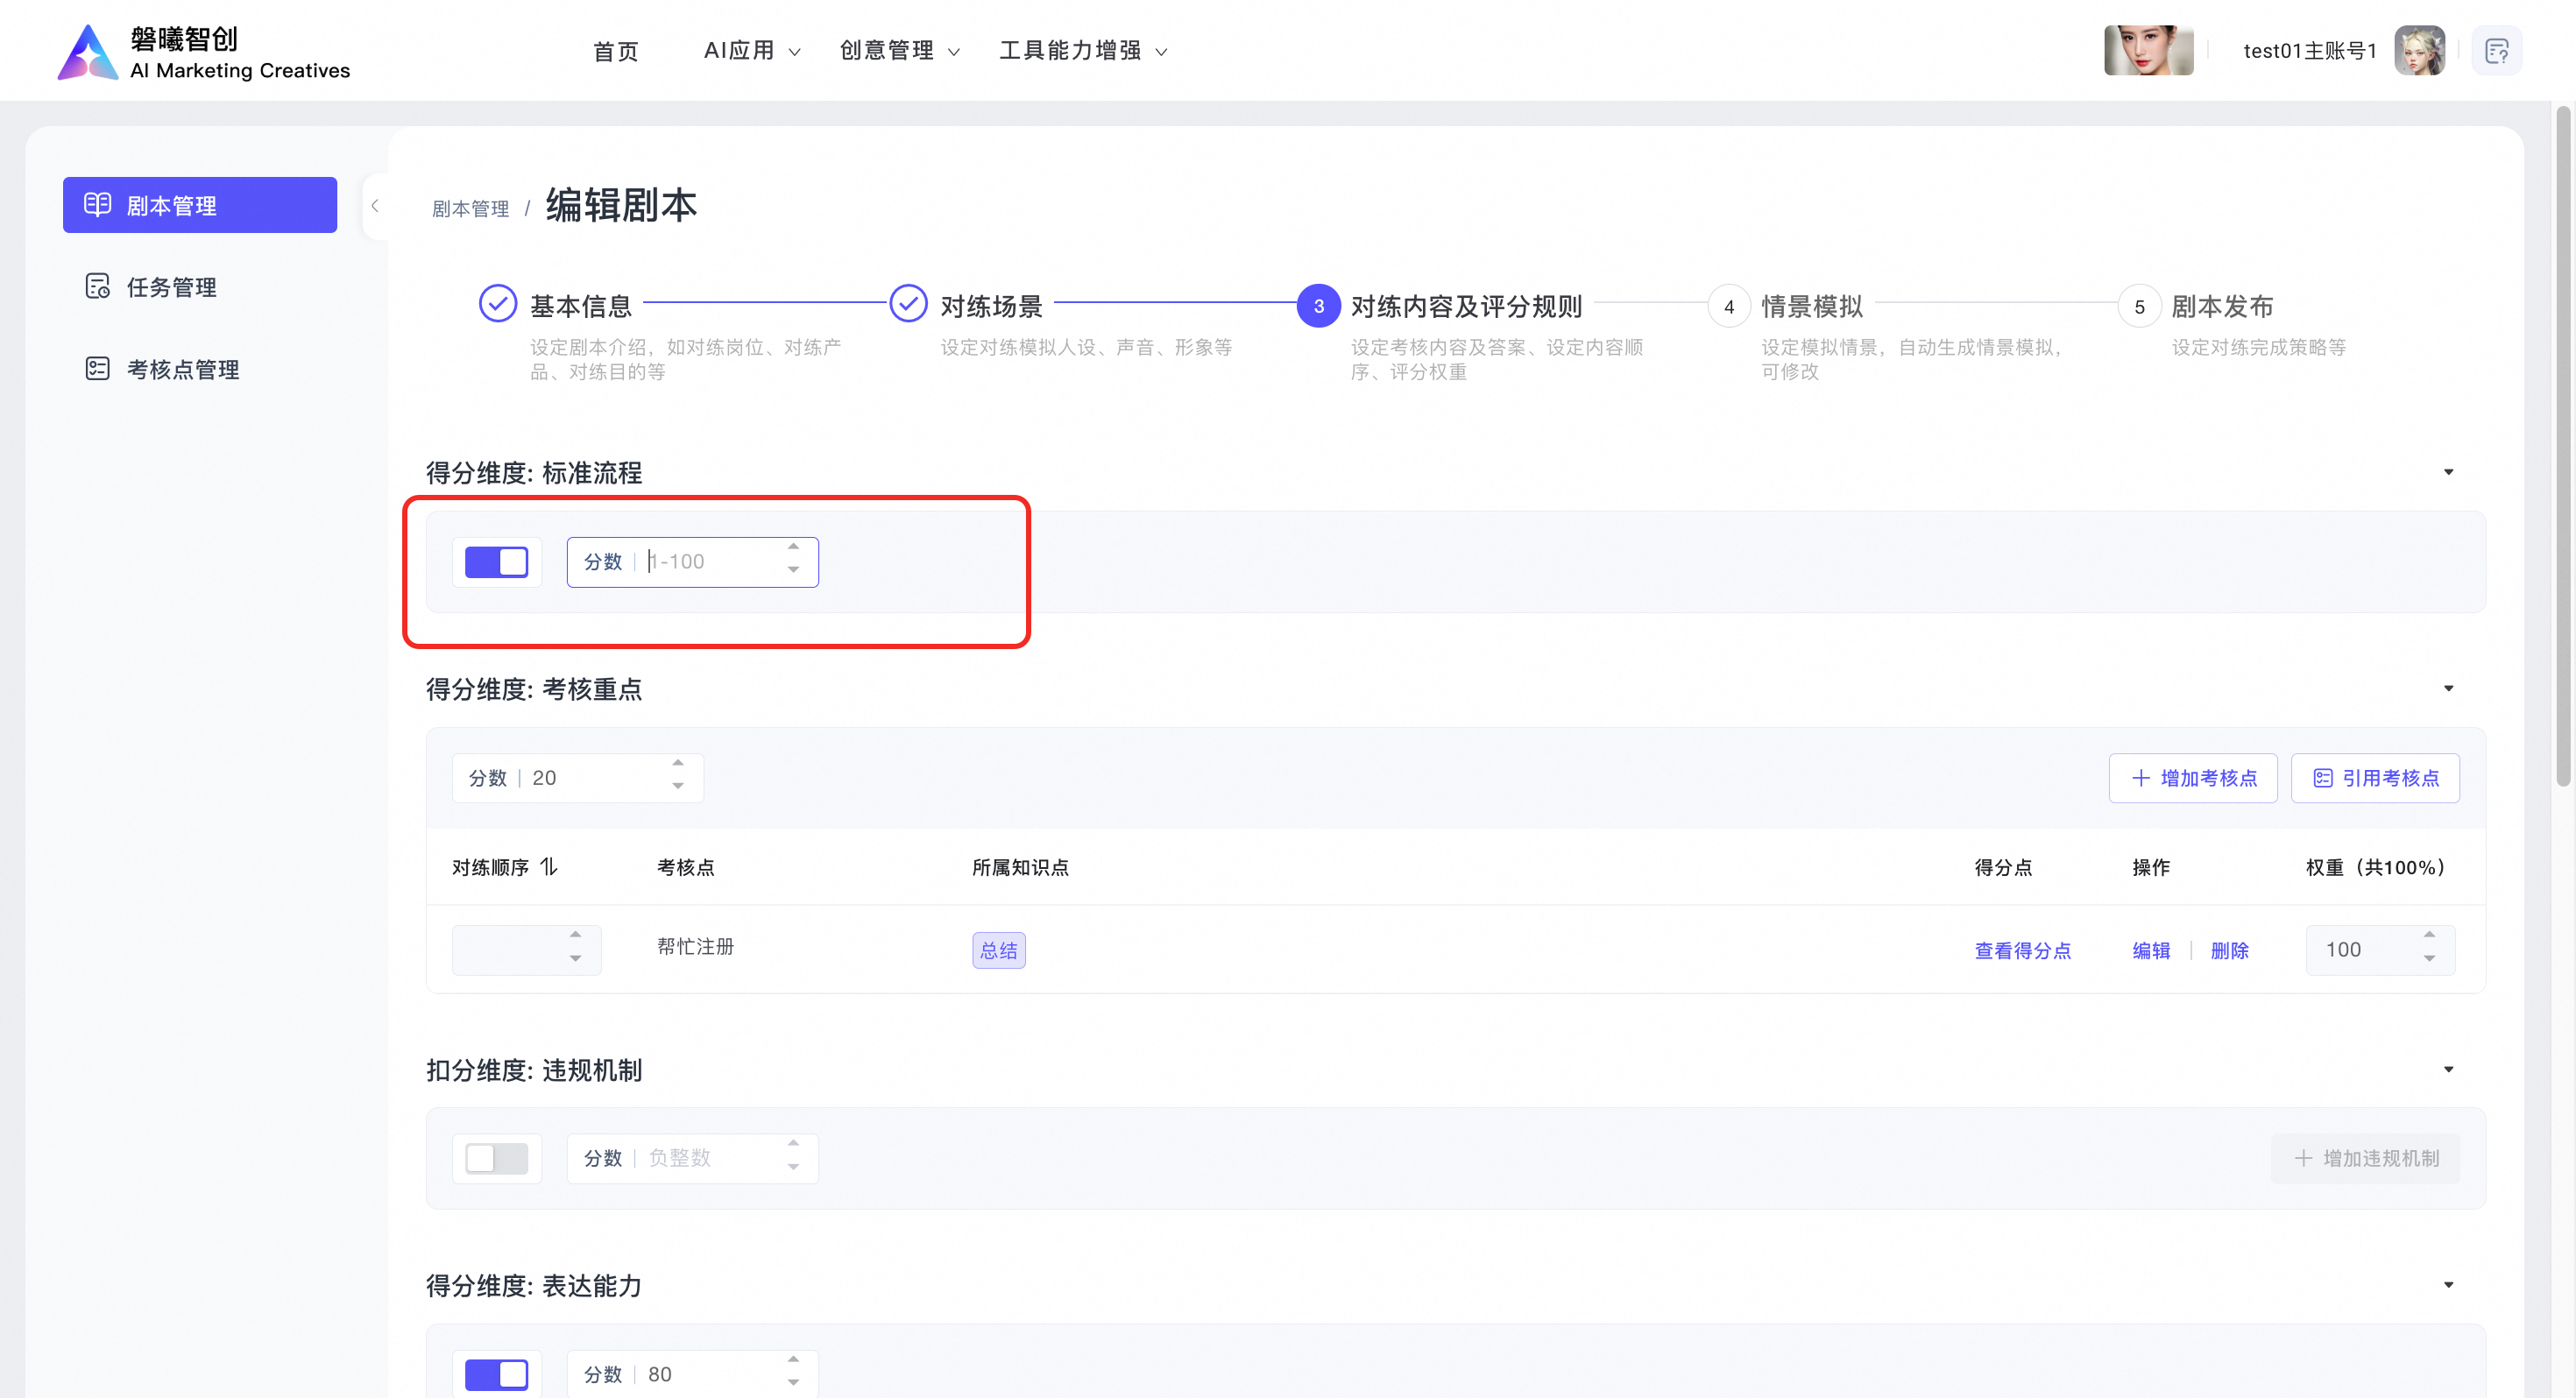
2.3.1 Scoring dimension: Standard process
Enable standardization and set a weight from 1 to 100. You can use your mouse to adjust the value. When this option is enabled, the script evaluates learners strictly based on the order of the annotated assessment points.
2.3.2 Scoring dimension: Key assessment points
Set the weight for each assessment point from 1 to 100. You can use your mouse to adjust the values. On the right, you can add custom assessment points or reference existing ones.

To add a custom assessment point:
-
Practice order: Optional. Enter a sequence number from 1 to 10. You can use your mouse to adjust the number.
-
Assessment point: Required. Enter the content, which can be up to 32 characters long.
-
Assessment type: Required. Choose Standard Script or Professional Knowledge.
-
Knowledge point: Required. Specify the related knowledge point.
-
Scoring criteria: Required. Add scoring items and assign a proportional weight to each item.

You can also select and reference existing assessment points.

After you add or reference assessment points, they appear in a list as shown in the figure. You can enter a practice order from 1 to 10 on the left. You can click any scoring item on the right to view its details. You can also edit or delete assessment points.
Note: The total weight of all assessment points must equal 100%.

2.3.3 Deduction dimension: Violation rules
You can add deduction rules by clicking Add Violation Rule.
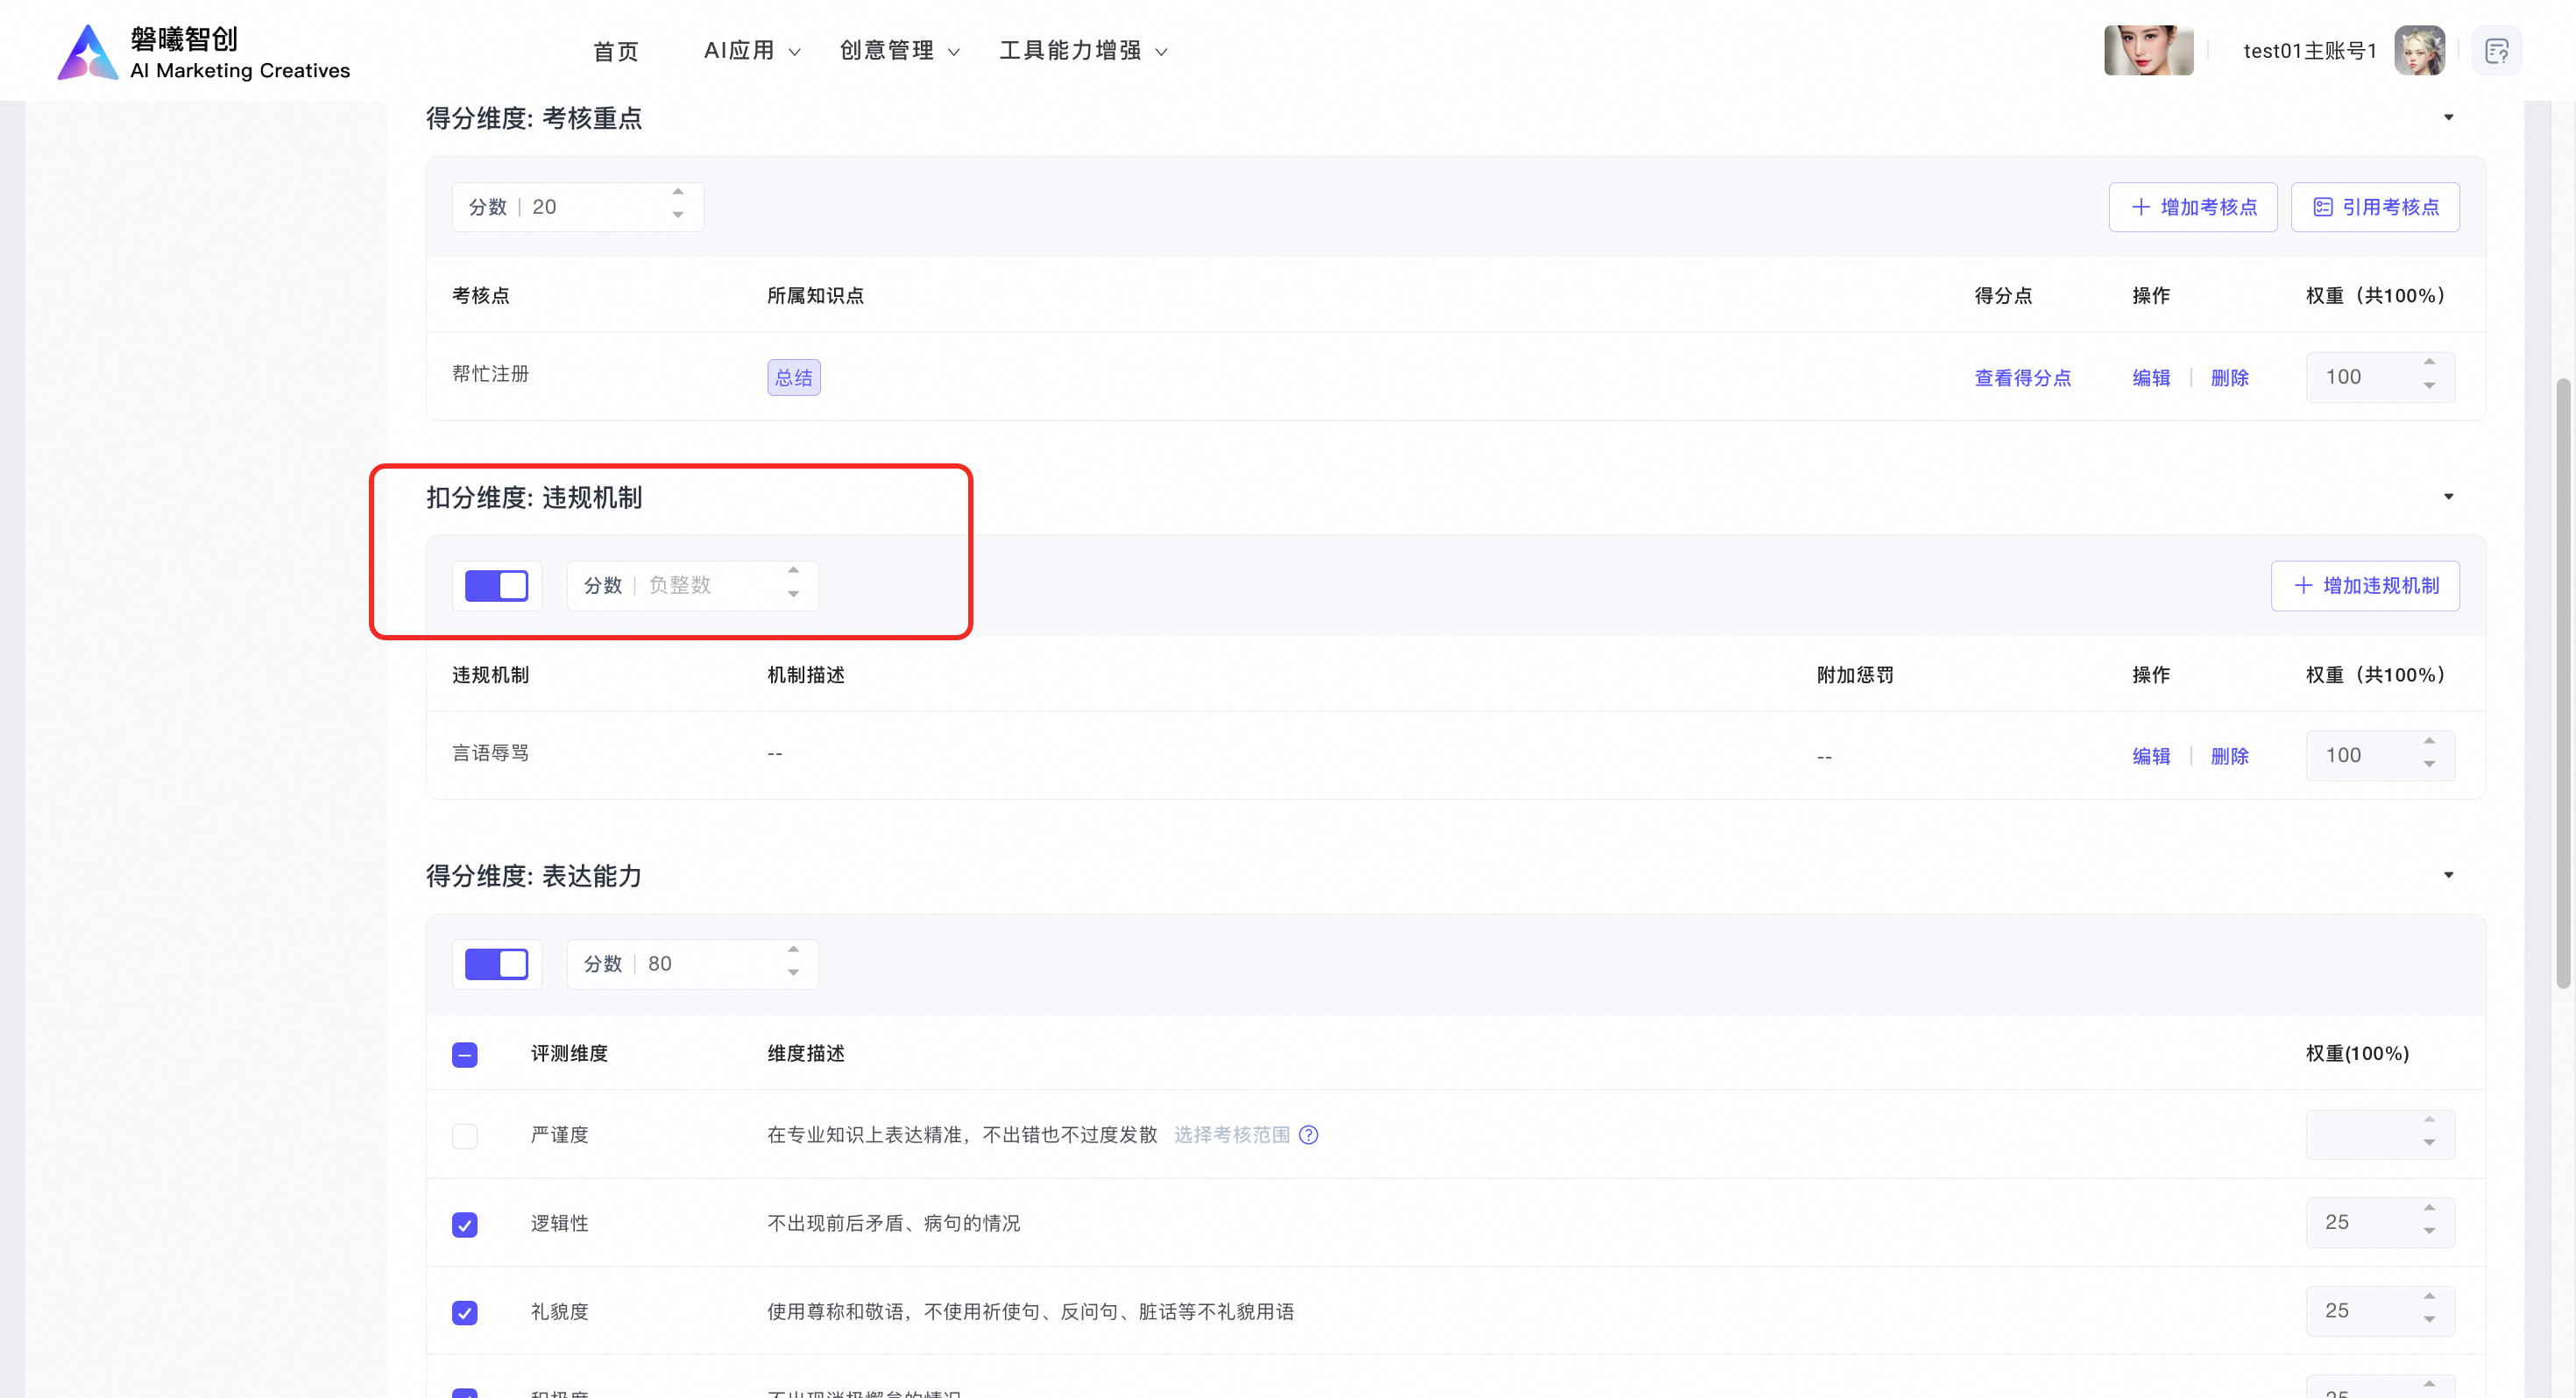
Enter a brief violation description of up to 30 characters and set a scoring weight to create a new deduction item.
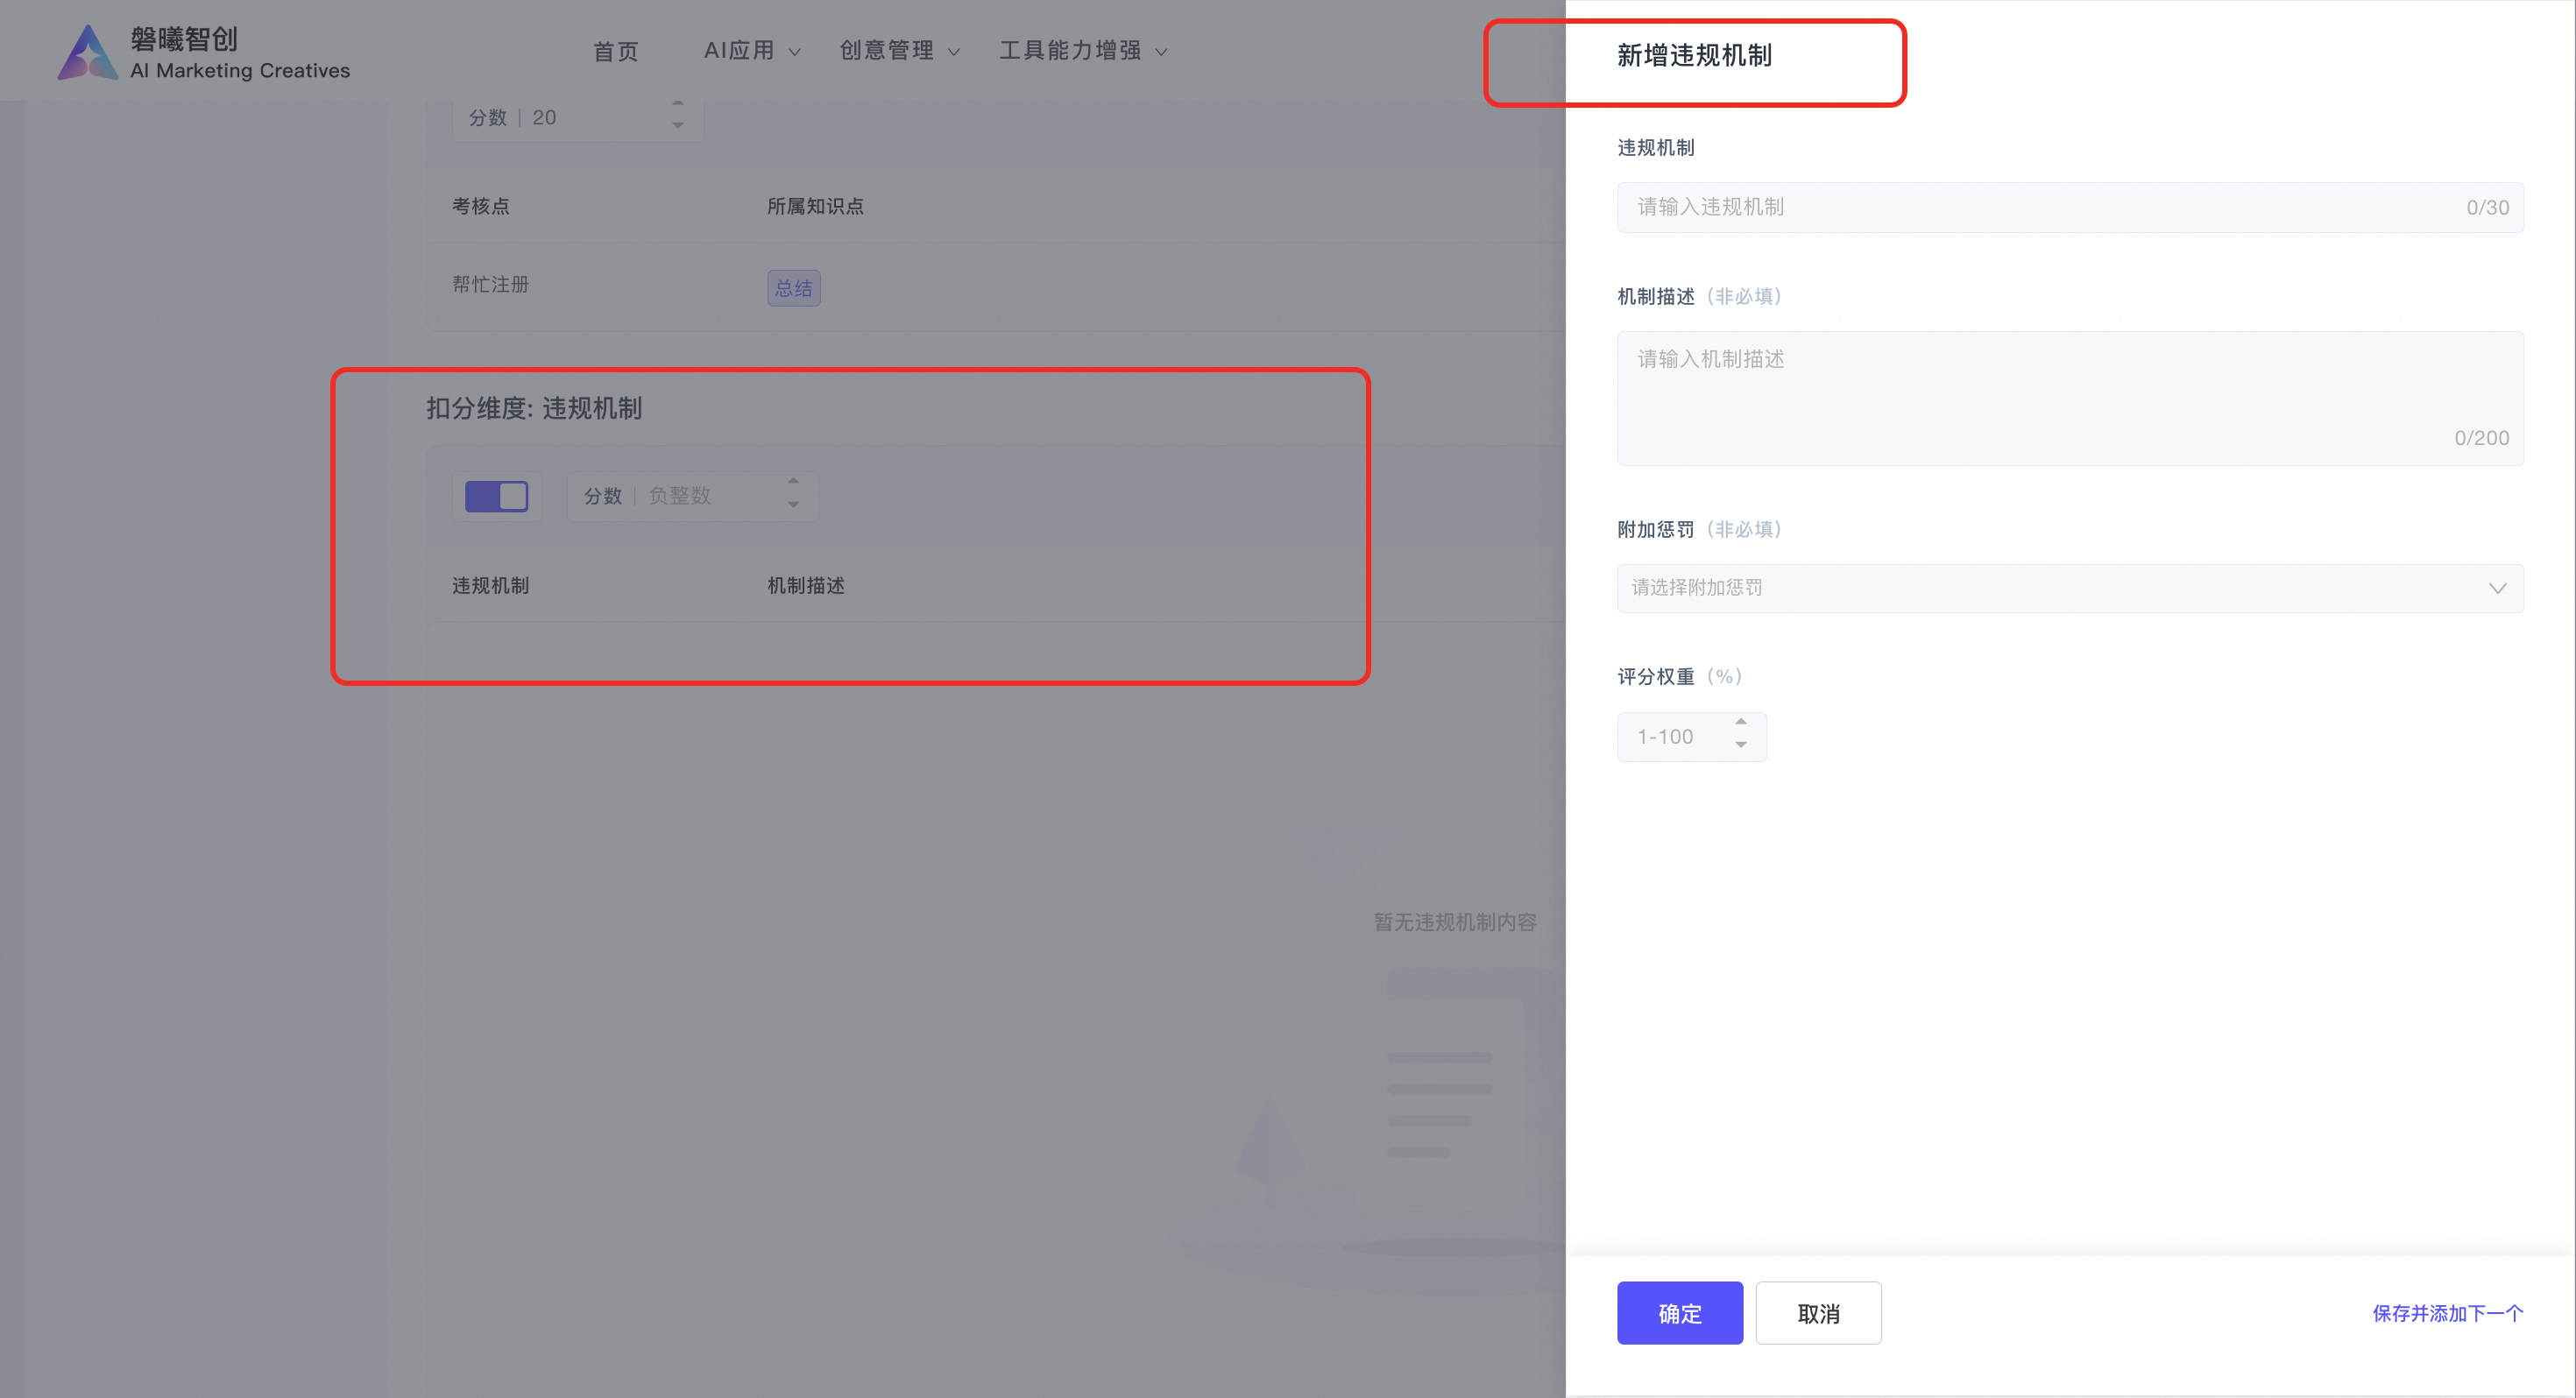
Note: The total weight of all violation rules must equal 100%.
2.3.4 Scoring dimension: Expression ability
Select from multiple expression evaluation dimensions, such as rigor, logic, politeness, positivity, fluency, needs understanding, problem solving, and empathy. You can review the detailed descriptions on the right and select the dimensions as needed.
Assign a scoring weight to each selected dimension.
Note: The total weight of all expression ability dimensions must equal 100%.
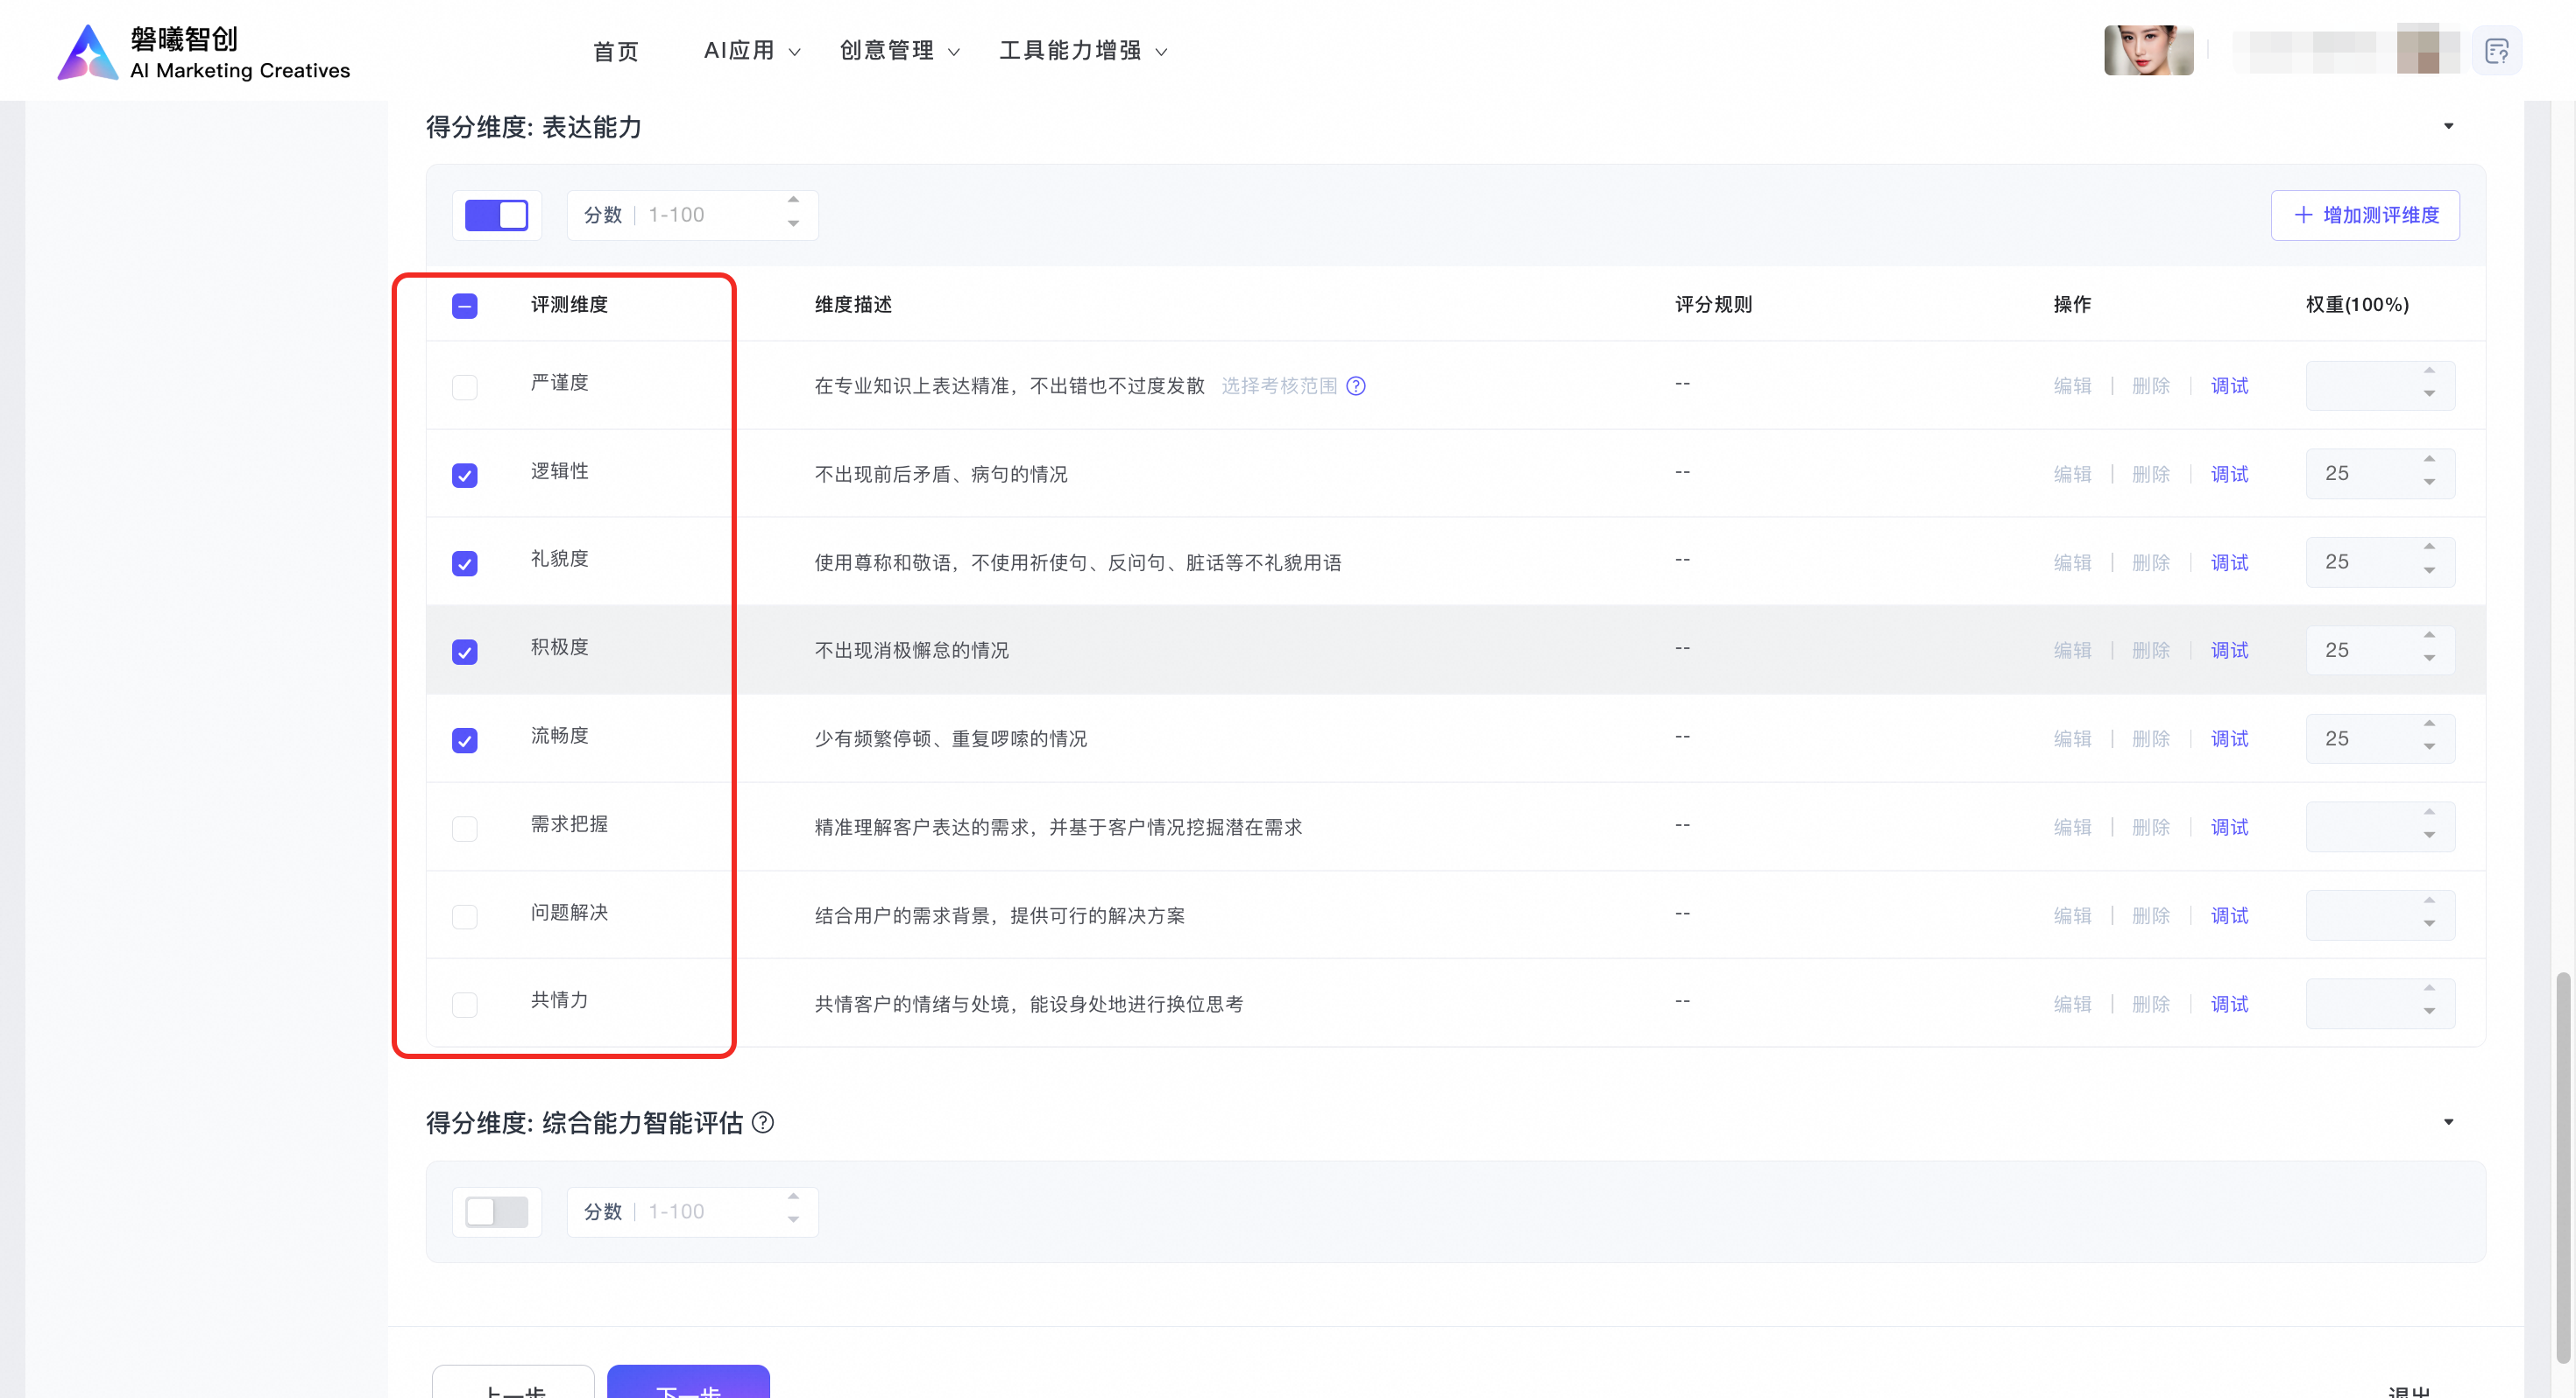
Note: The combined weights of assessment points, standard process, and expression ability must equal 100%.
2.3.5 Scoring dimension: Comprehensive ability AI evaluation
Enable comprehensive ability AI evaluation. When this option is enabled, the coach agent scores the learner's overall competence and development potential.
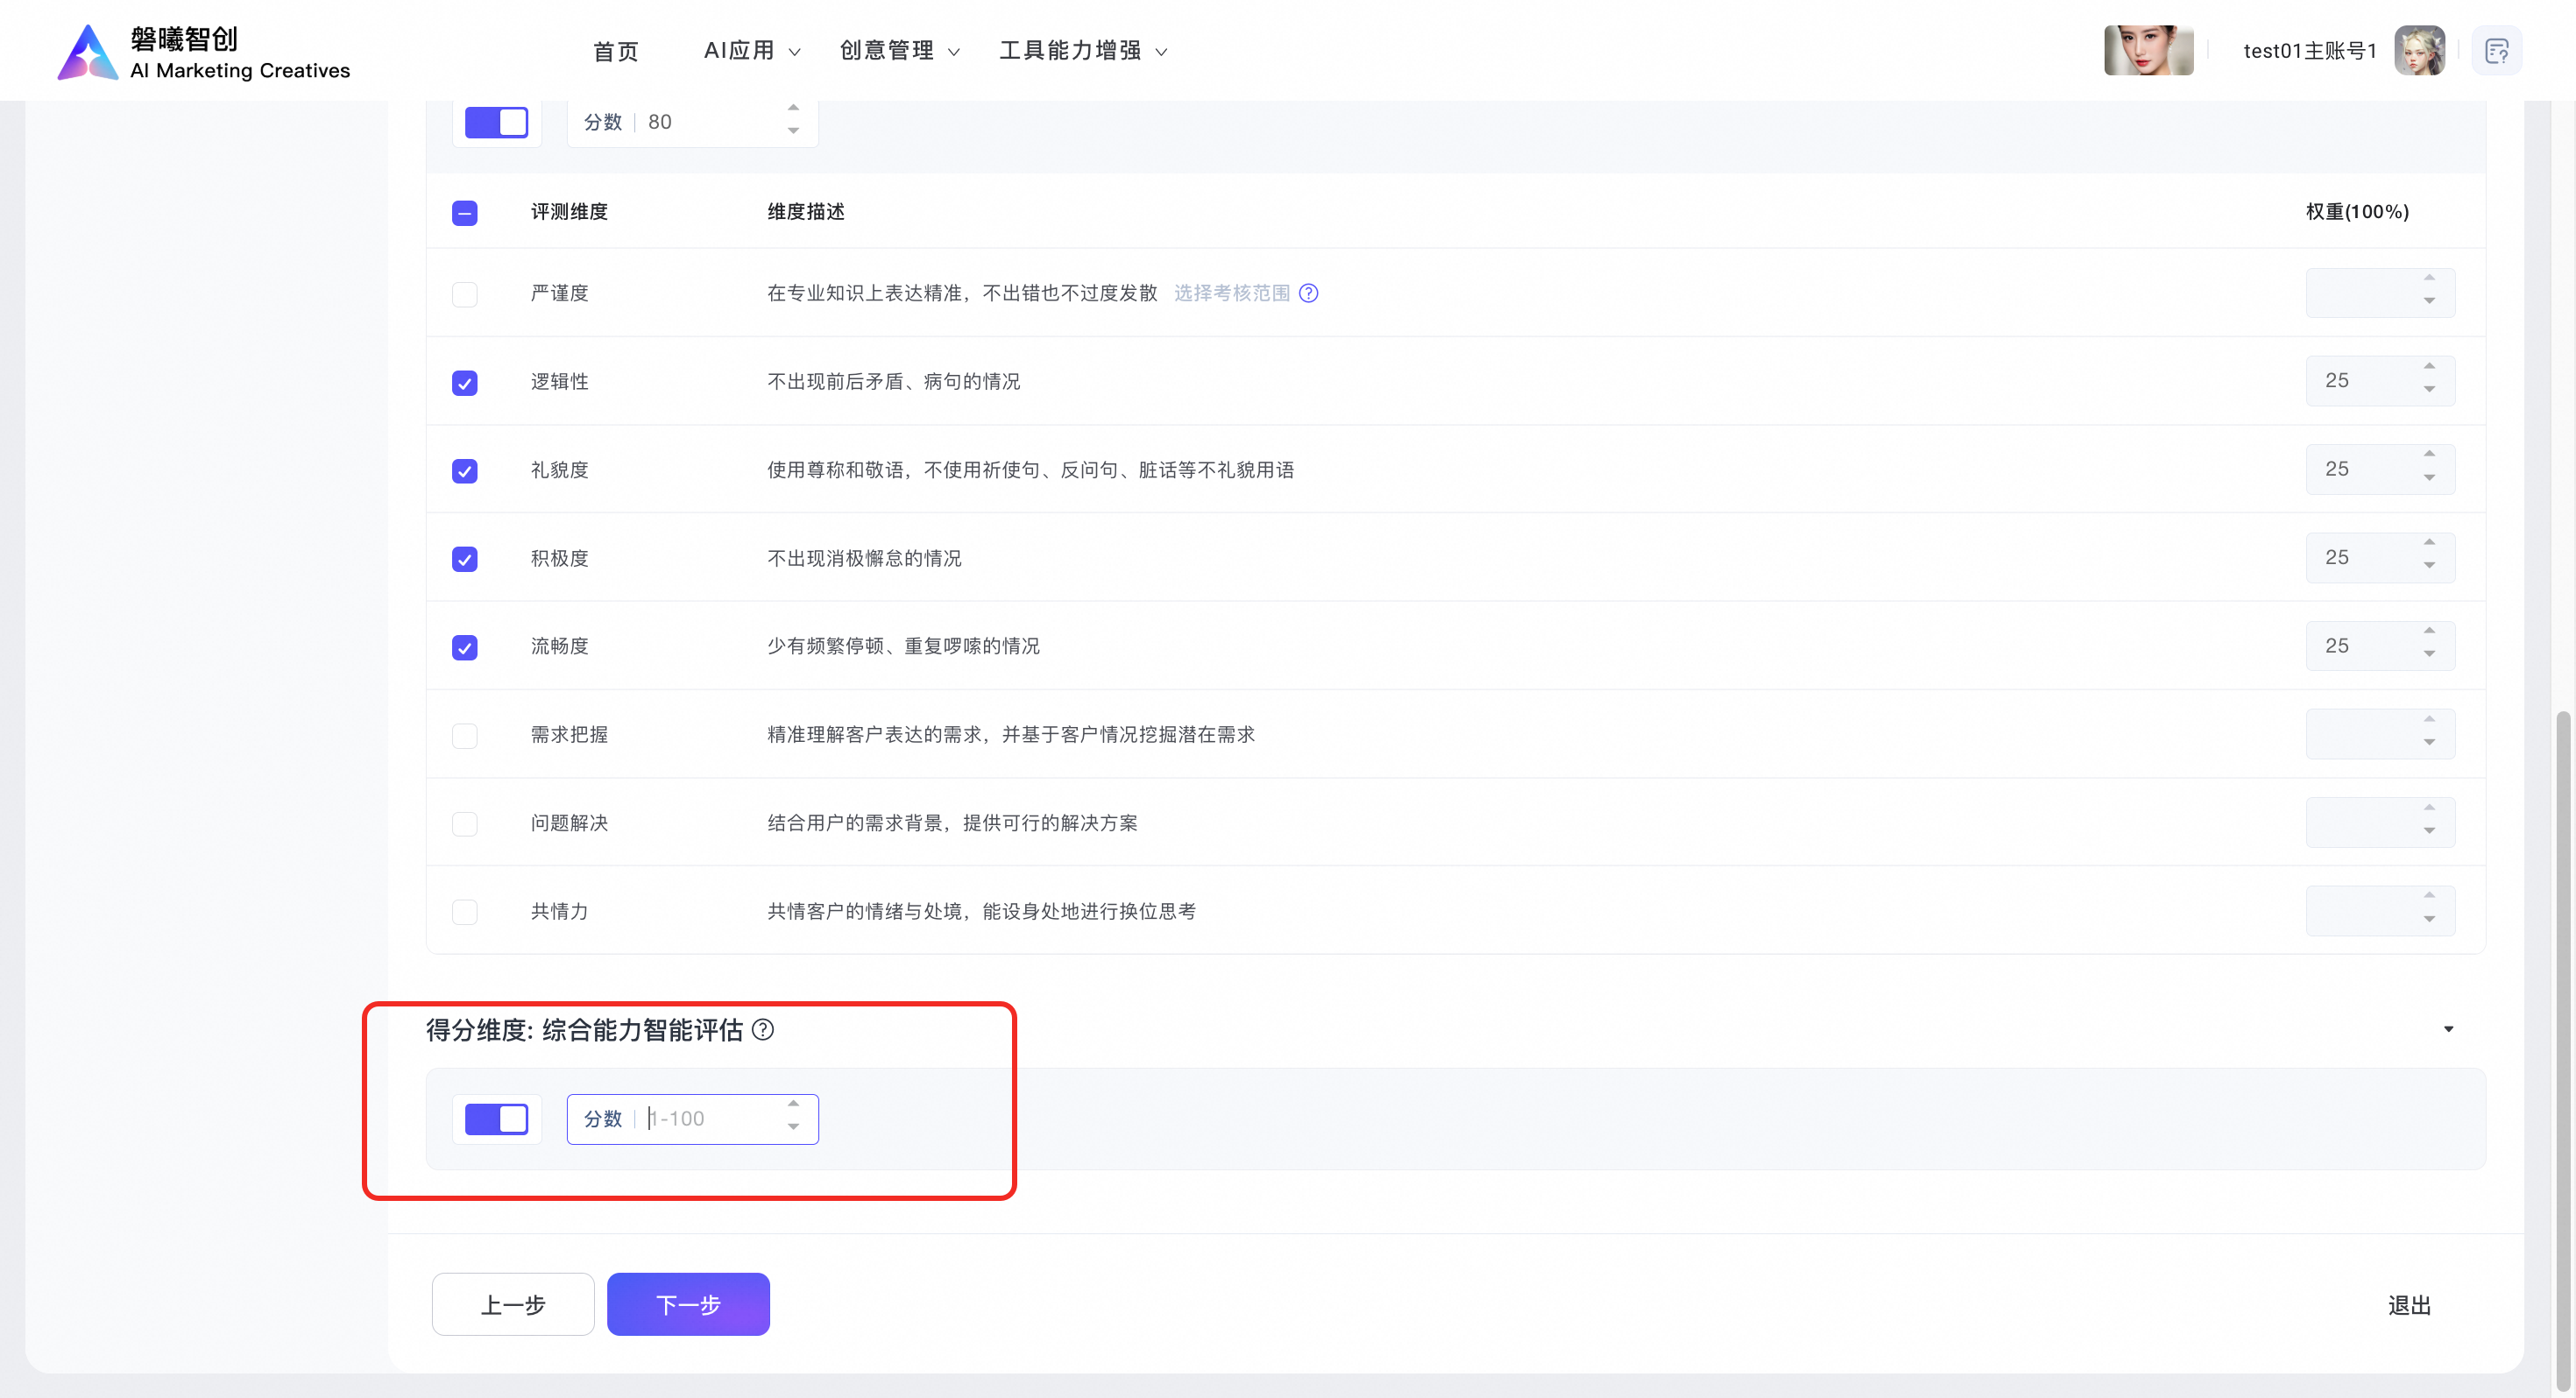
After you configure the standard process, key assessment points, violation rules, expression ability, and comprehensive ability AI evaluation, verify that the total weight of all scoring rules, excluding violation rules, equals 100%. Then, you can proceed to the next step.
2.4 Scenario simulation
After you set the scoring rules, you can configure reference scripts. Click Generate Reference Script to have the AI automatically generate one.
Reference scripts are used to guide learners after a practice session to improve their learning outcomes.
You can skip this step.


After the script is successfully generated, you can regenerate or clear it.

2.5 Publish script
Enter the script completion strategy details:
Initial practice pop-up
-
Title: Required. Enter a title of up to 8 characters.
-
Description: Required. Enter a description of up to 300 characters. Describe the assessment rules in detail. A reference example appears in the input box.
Scenario guidance settings
-
Opening remarks (optional): Enter remarks of up to 500 characters. The agent delivers these remarks using text, speech, or a digital human before the practice begins.
-
Closing remarks (optional): Enter remarks of up to 500 characters. The agent delivers these remarks when all assessment points are covered.
Cheating prevention
-
Voice cheating detection (consumes voice duration)
-
Image cheating detection (consumes text tokens)
Dialogue strategy
-
Maximum learner response time: Required. Choose a value from 10 to 120 seconds.
-
Real-time feedback: Optional. You can enable real-time evaluation during the dialogue.
-
Dialogue hints: Optional. You can enable random script hints during the conversation.
Script completion strategy
-
Timeout: Required. The session automatically ends after 1 to 15 minutes if the time is exceeded.
-
Auto-end on coverage completion: Optional. The session automatically ends when all assessment points are covered.
-
Learner-initiated completion: Required. Learners must click Complete to end the session.
-
Abnormal exit cache duration: Optional. You can set the cache duration for abnormal exits from 0 to 3600 seconds.
Score display strategy
-
Passing score: Optional. You can set a passing score from 0 to 100.
After you confirm all the completion strategy details, you can publish the script.

2.6 Create task
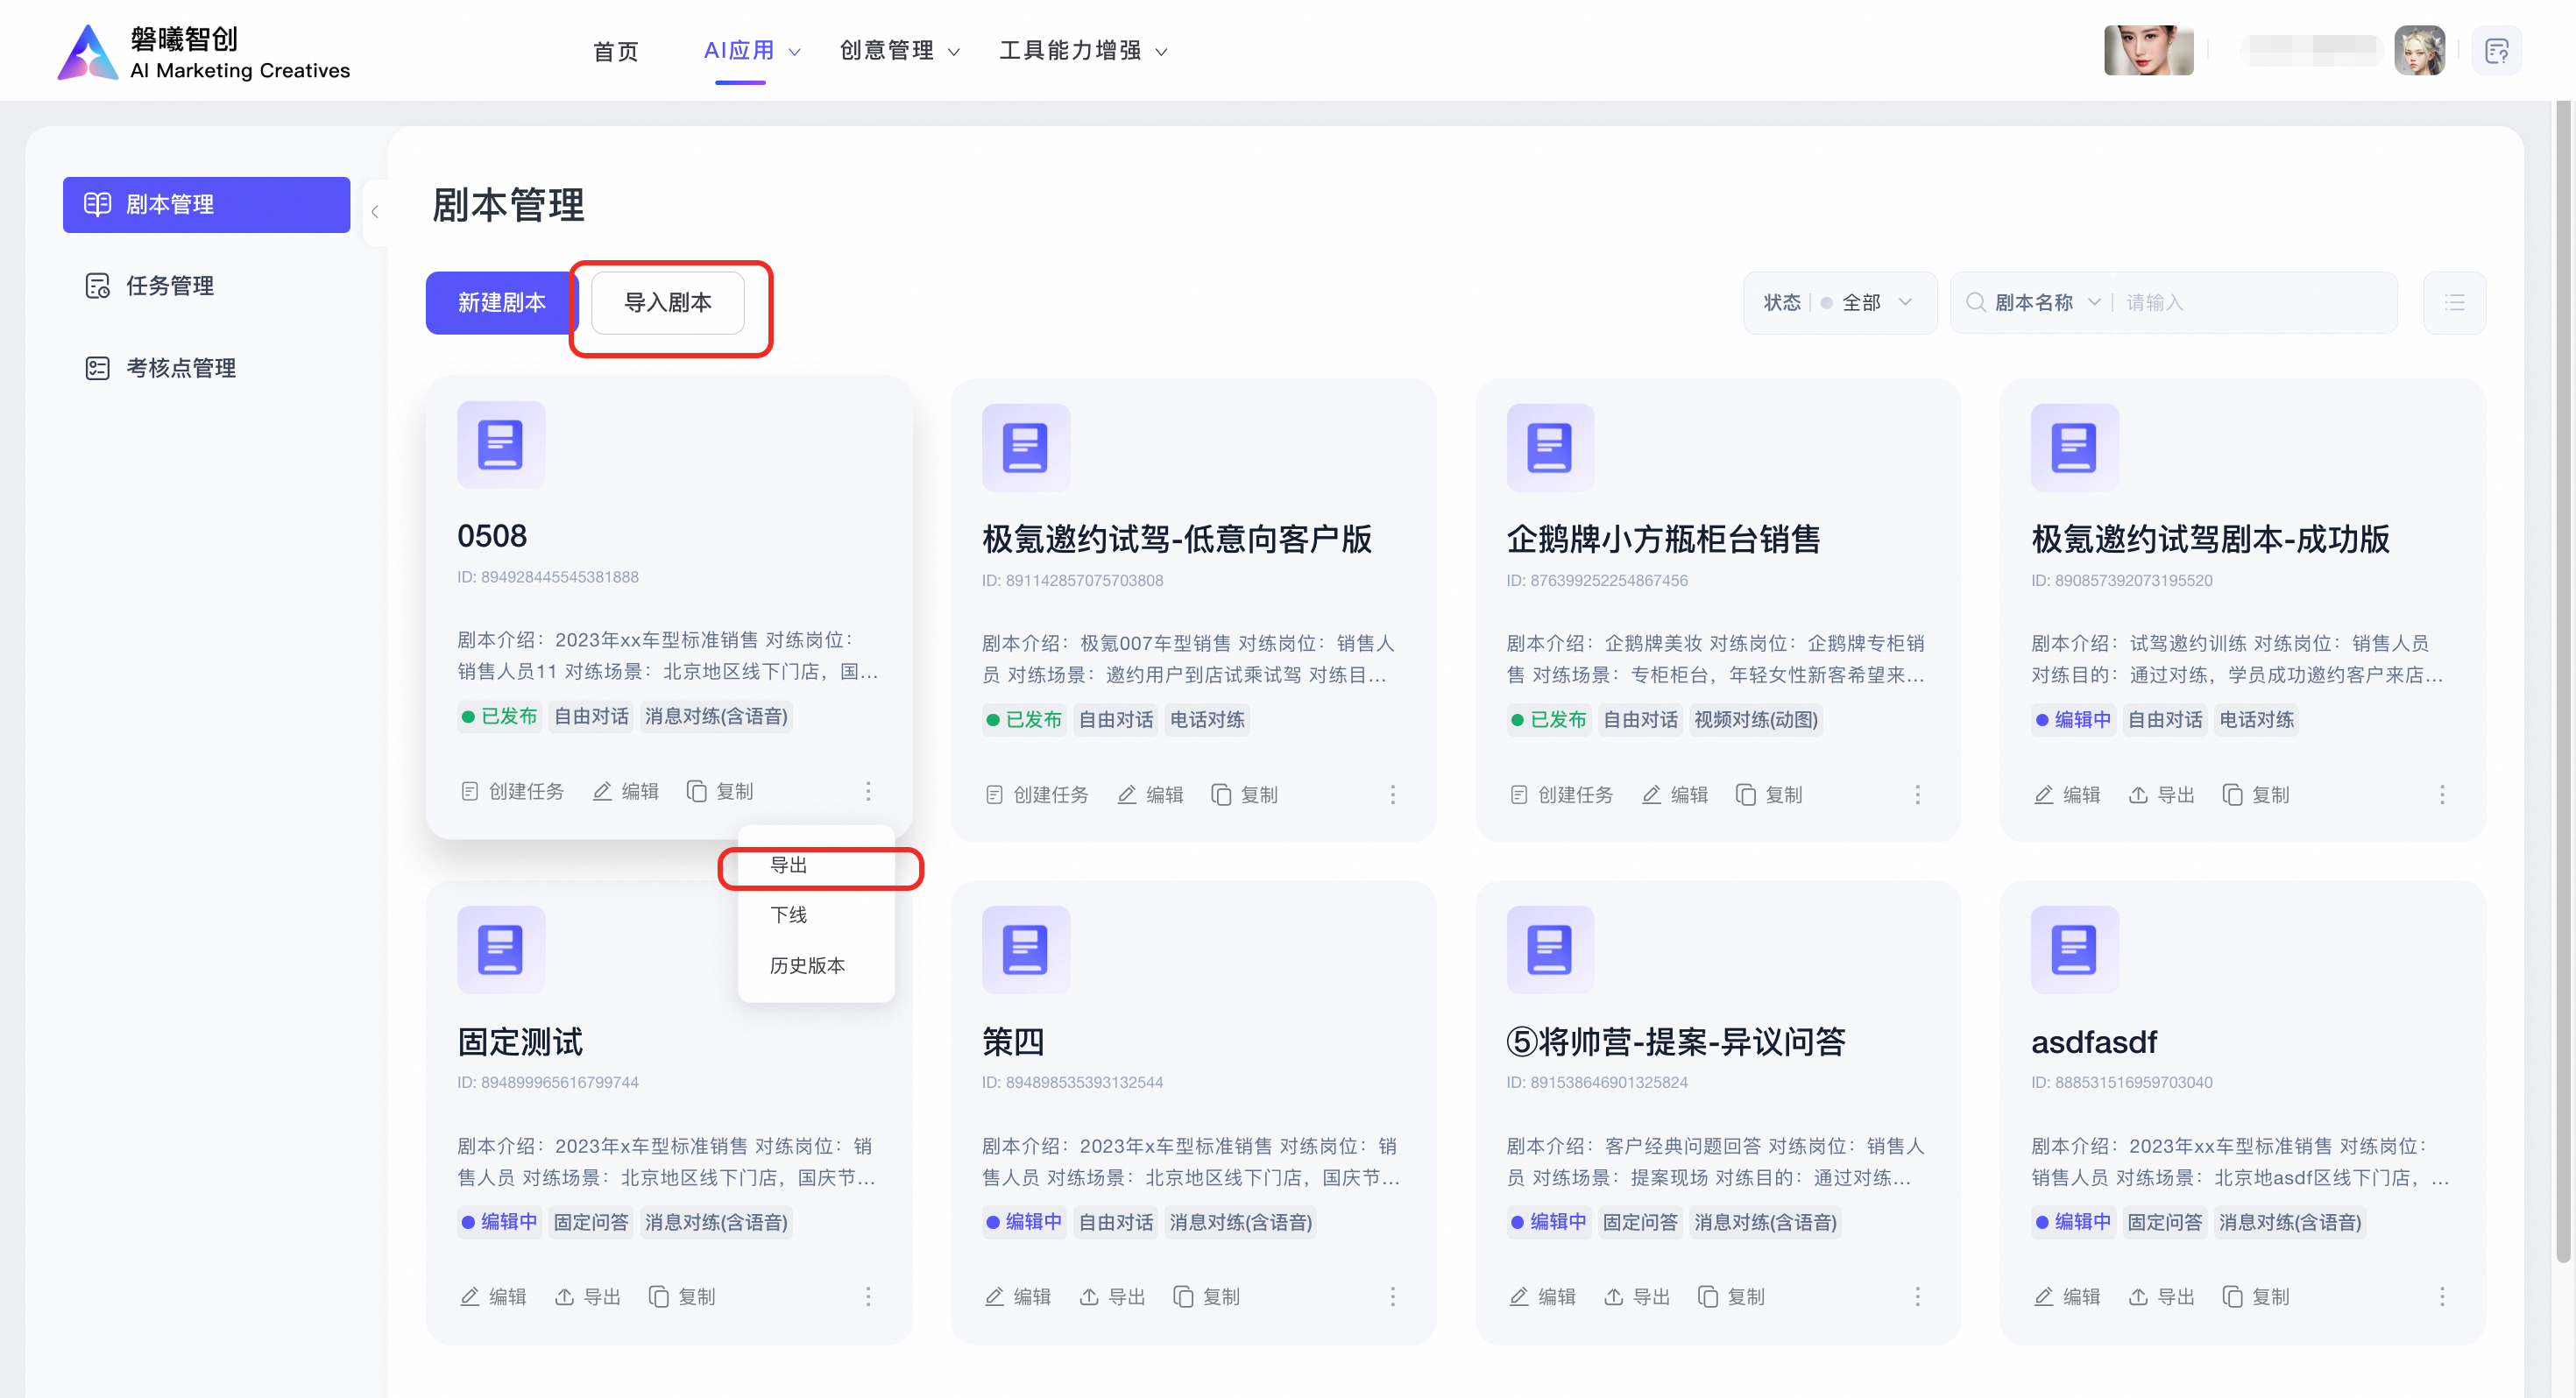
Published scripts appear on the Script Management page. From this page, you can create tasks, edit, copy, export, or unpublish scripts, or view historical versions.

You can export or import scripts.
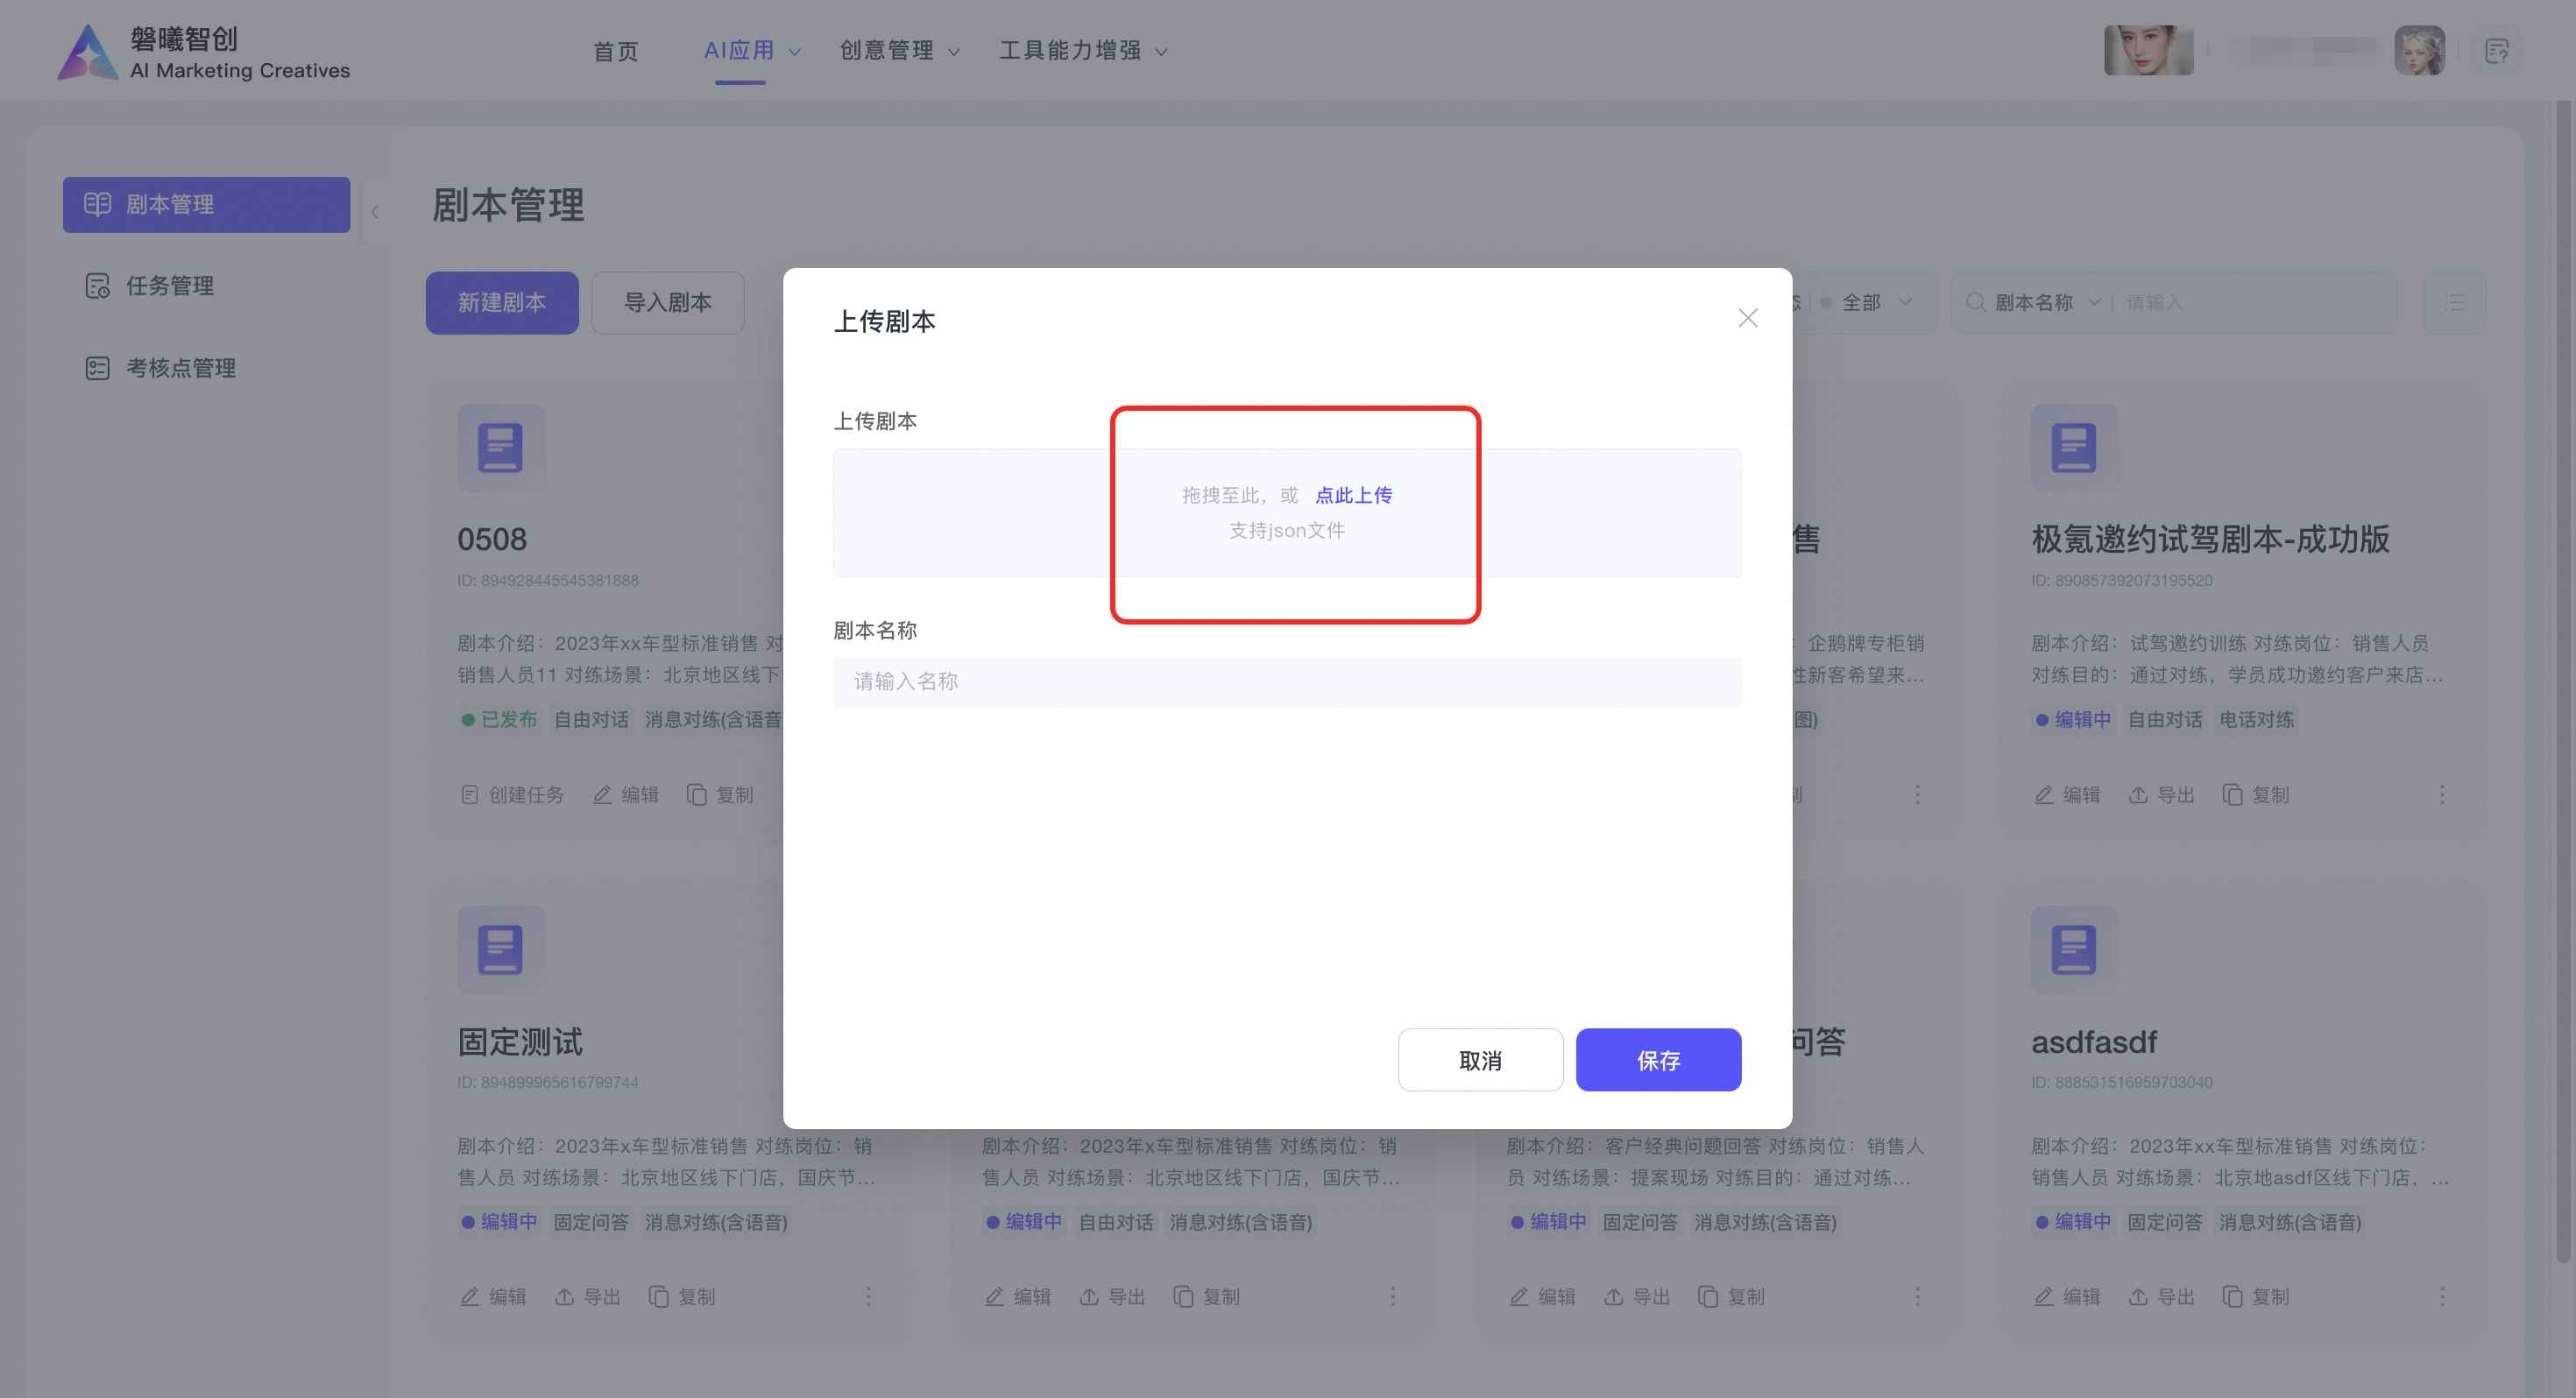
You can upload scripts.
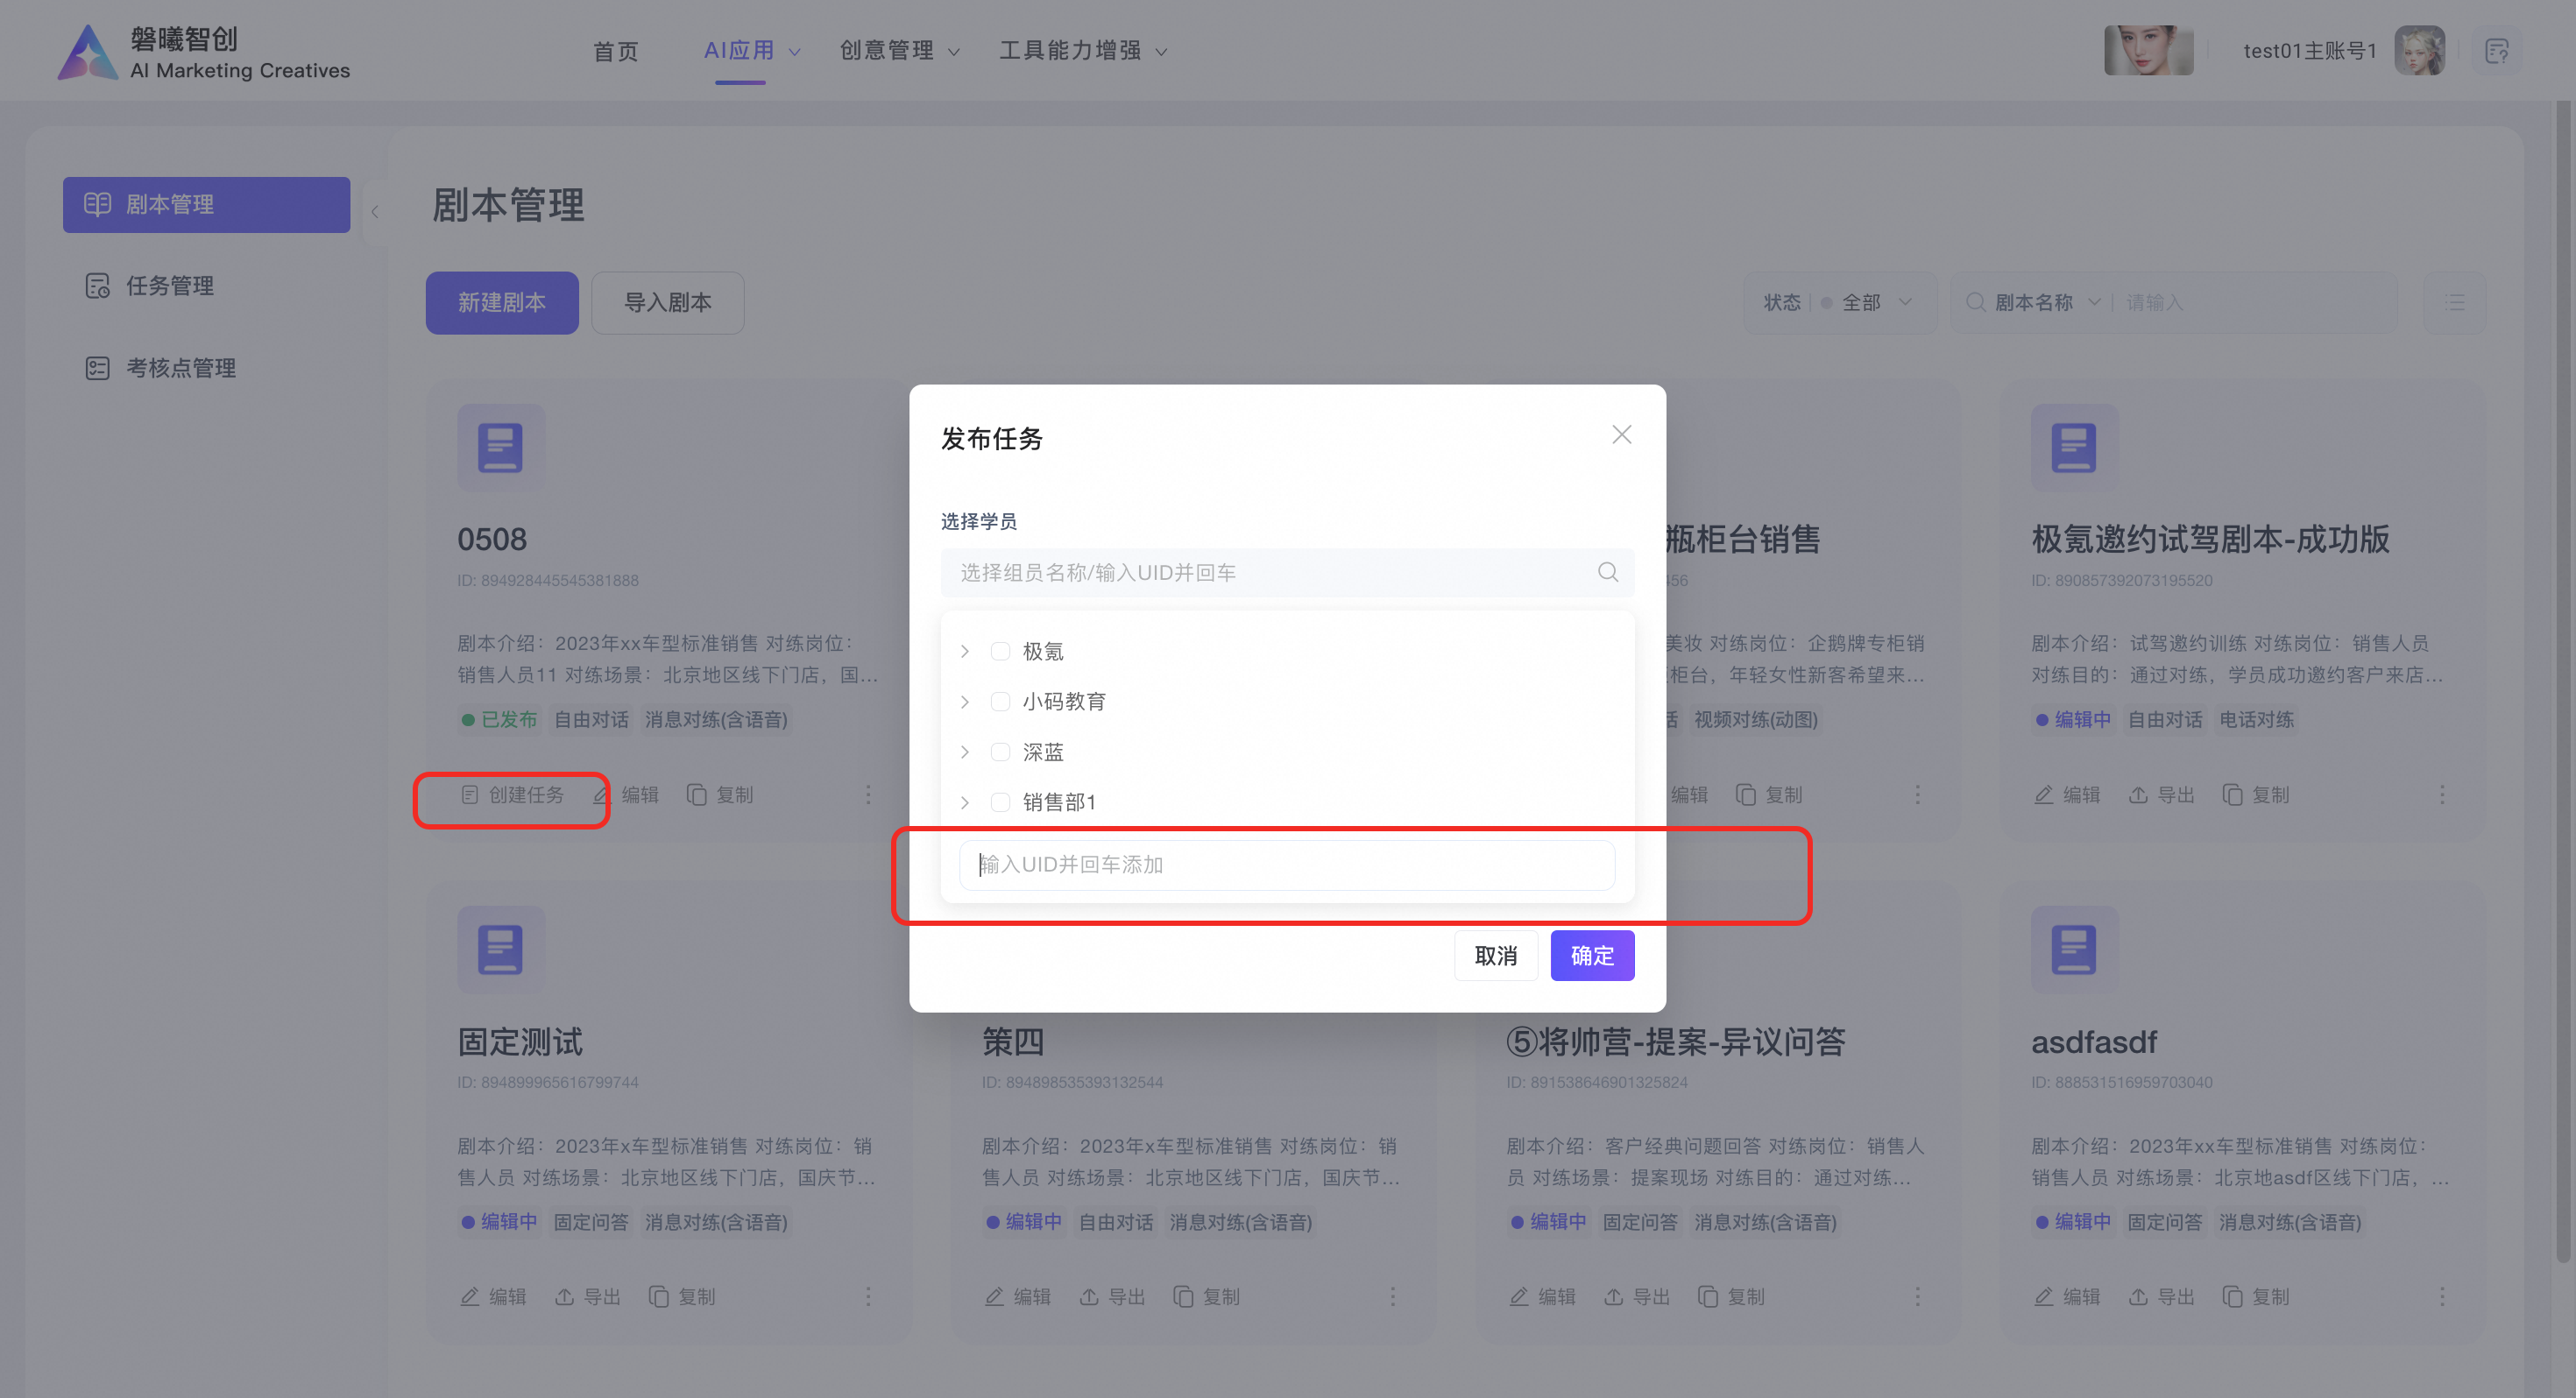
Click Create Task, search for learners by name or ID, select the learners, and then click Confirm to publish the task.
3. Task Management
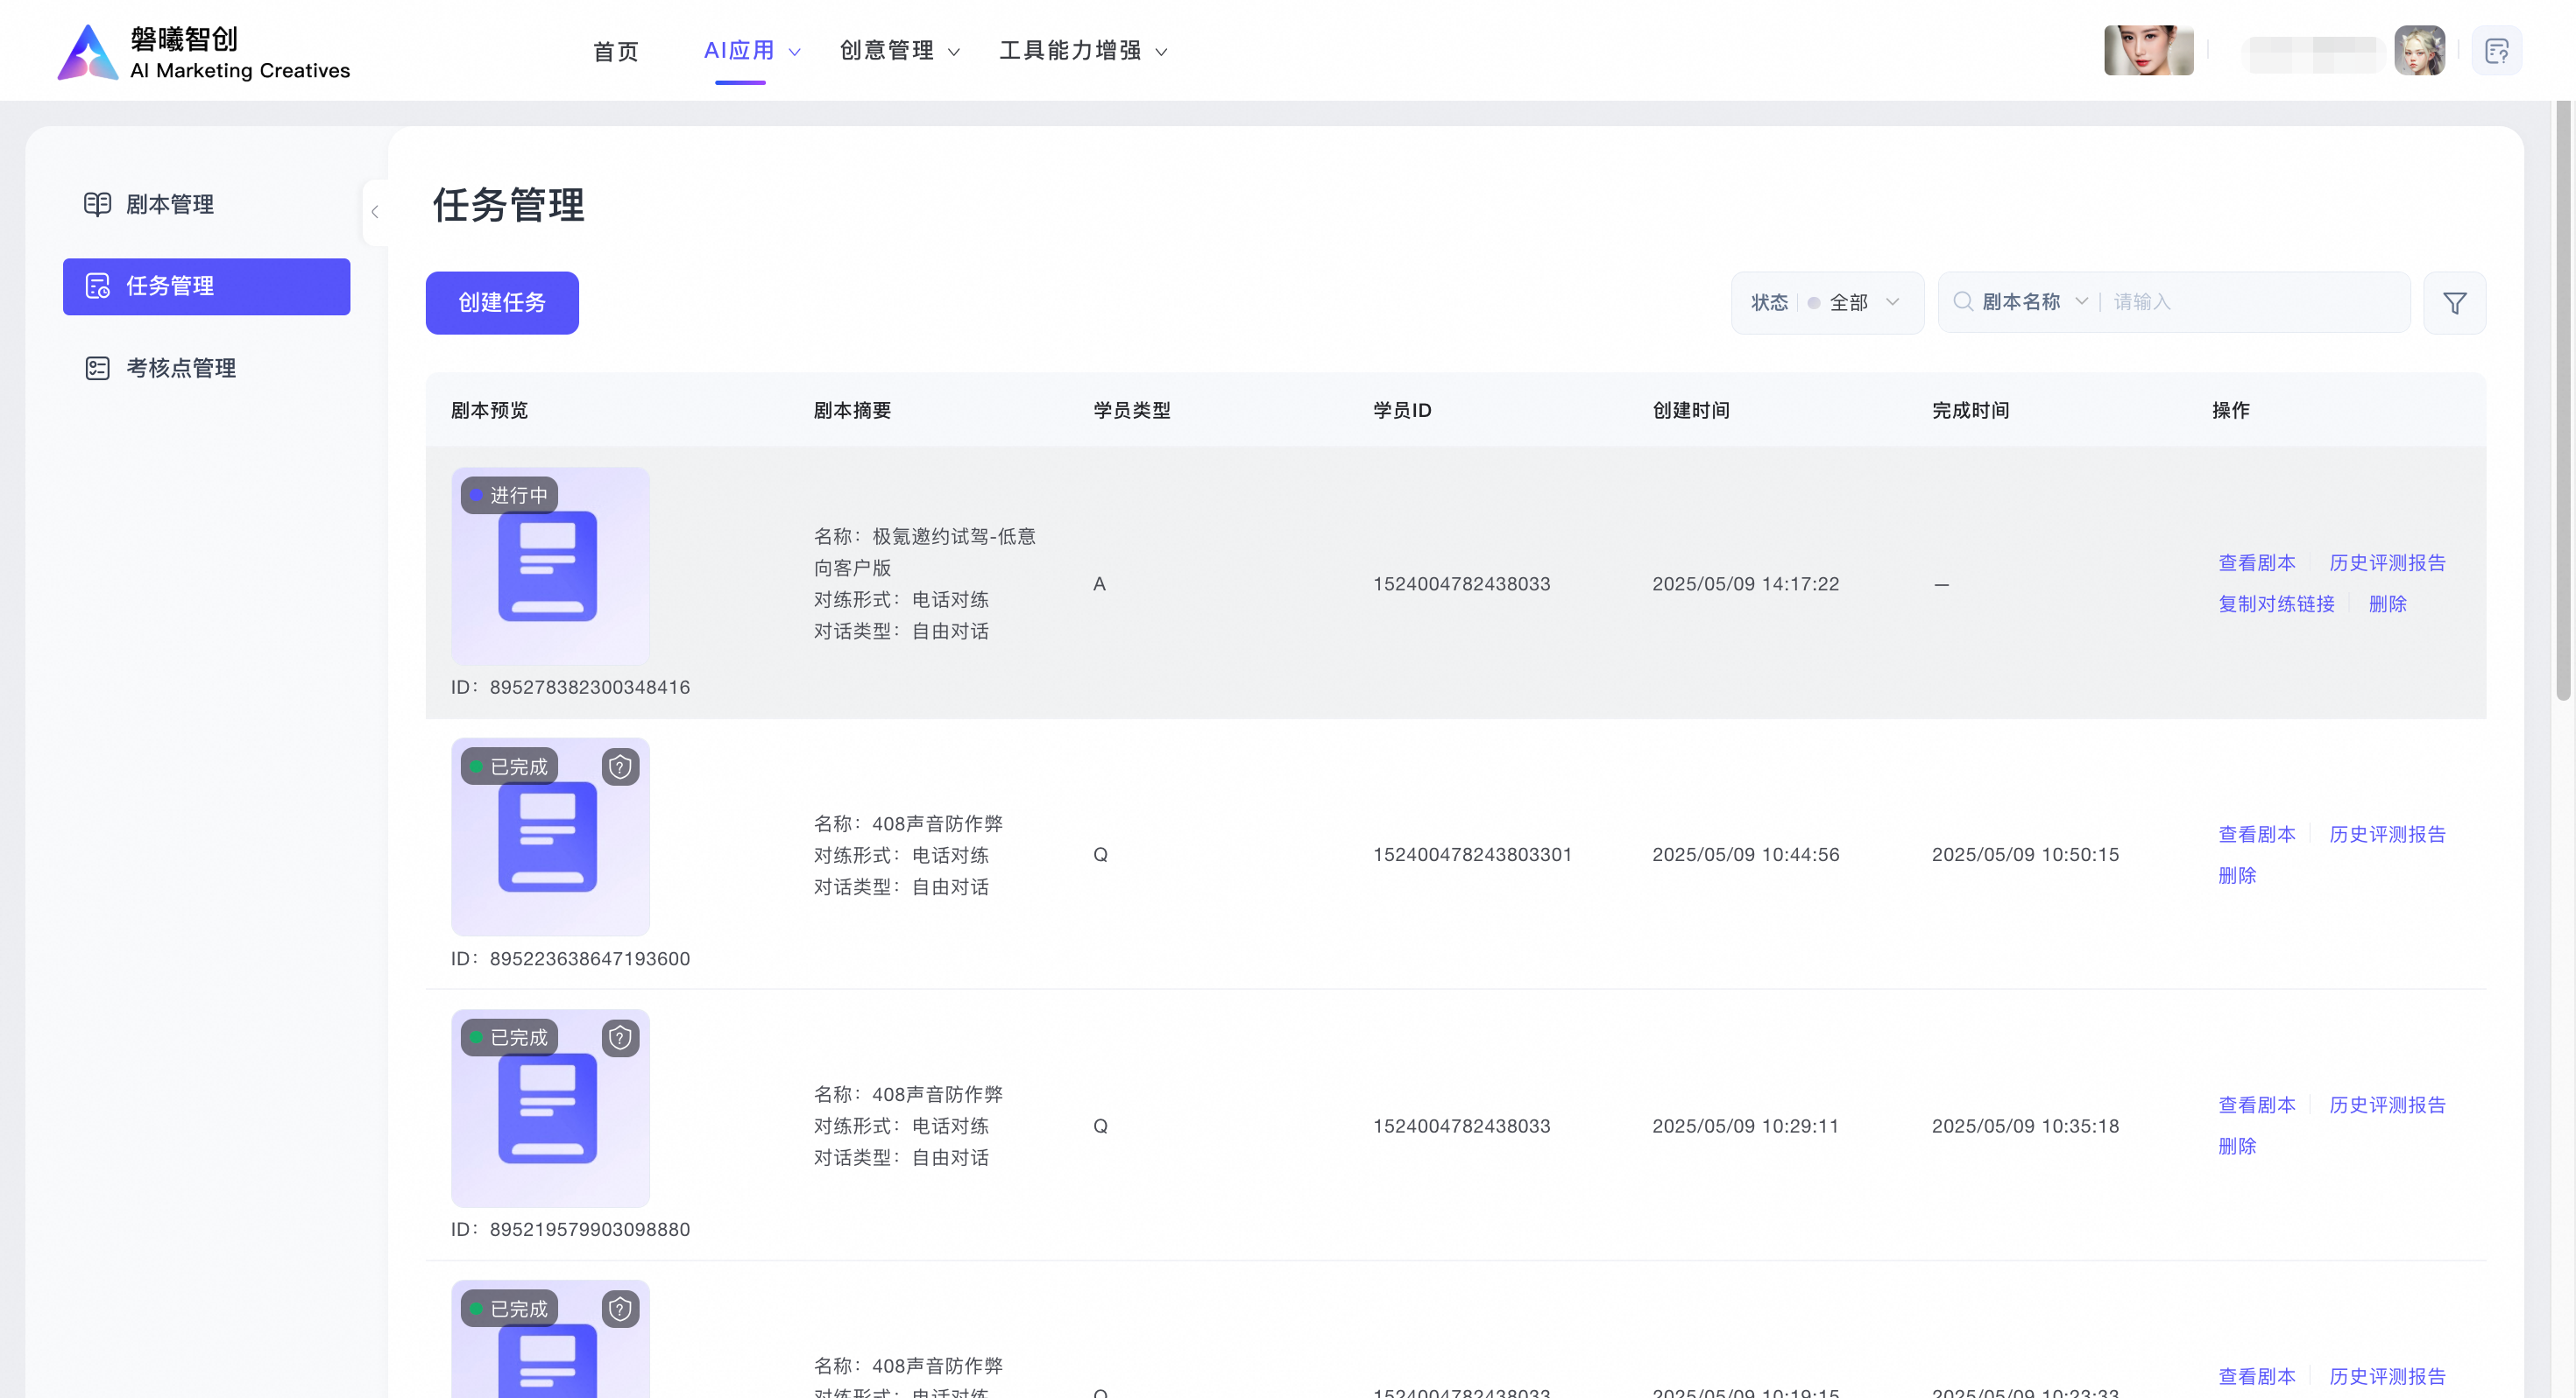
Select a script on the Script Management page and create a task. You are then redirected to the Task Management page.
The Task Management page displays all scripts. You can use the filter in the top right corner to view scripts by status: All, In Progress, or Completed. You can also search for scripts by name.
The task list displays the Script Preview, Script Summary, Learner ID, Created At, Completed At, and Actions columns. In the Actions column, you can select View Script, Copy Practice Link, View Historical Reports, or Delete. If you click View Script, you are returned to the Script Management page.
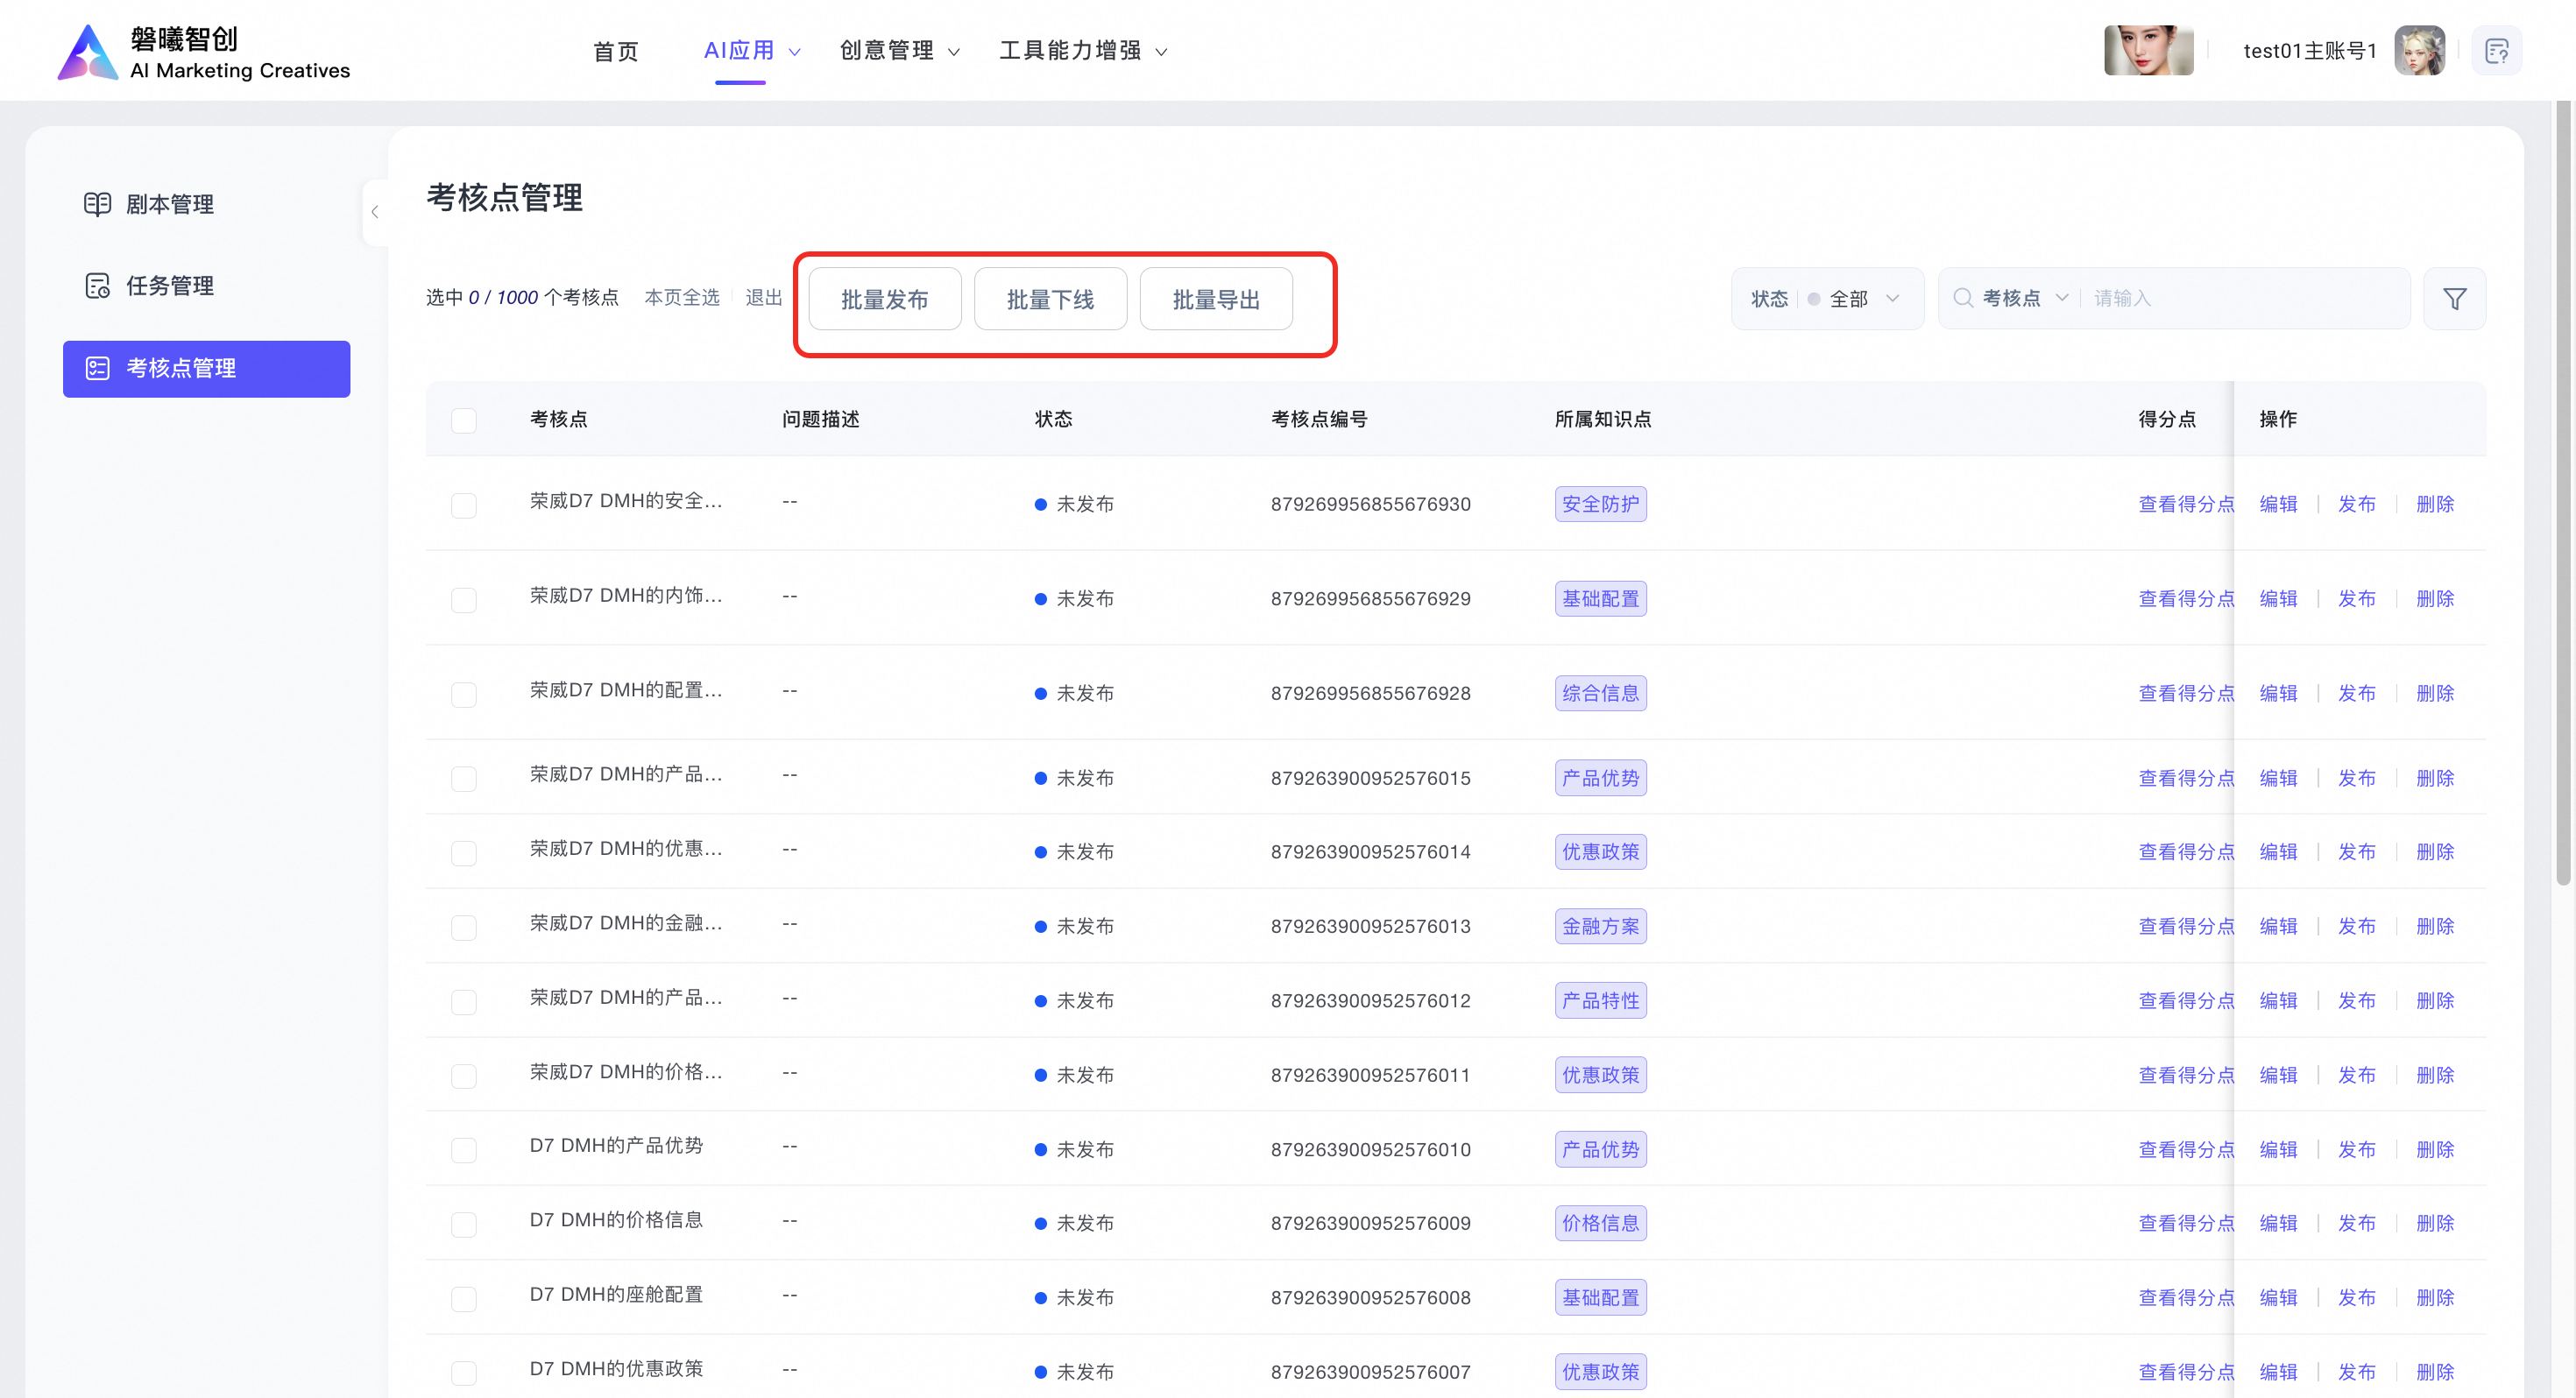
4. Assessment Point Management
The Assessment Point Management page lists all assessment points. On this page, you can:
Generate assessment points from documents, add them manually, or perform batch operations on existing points.
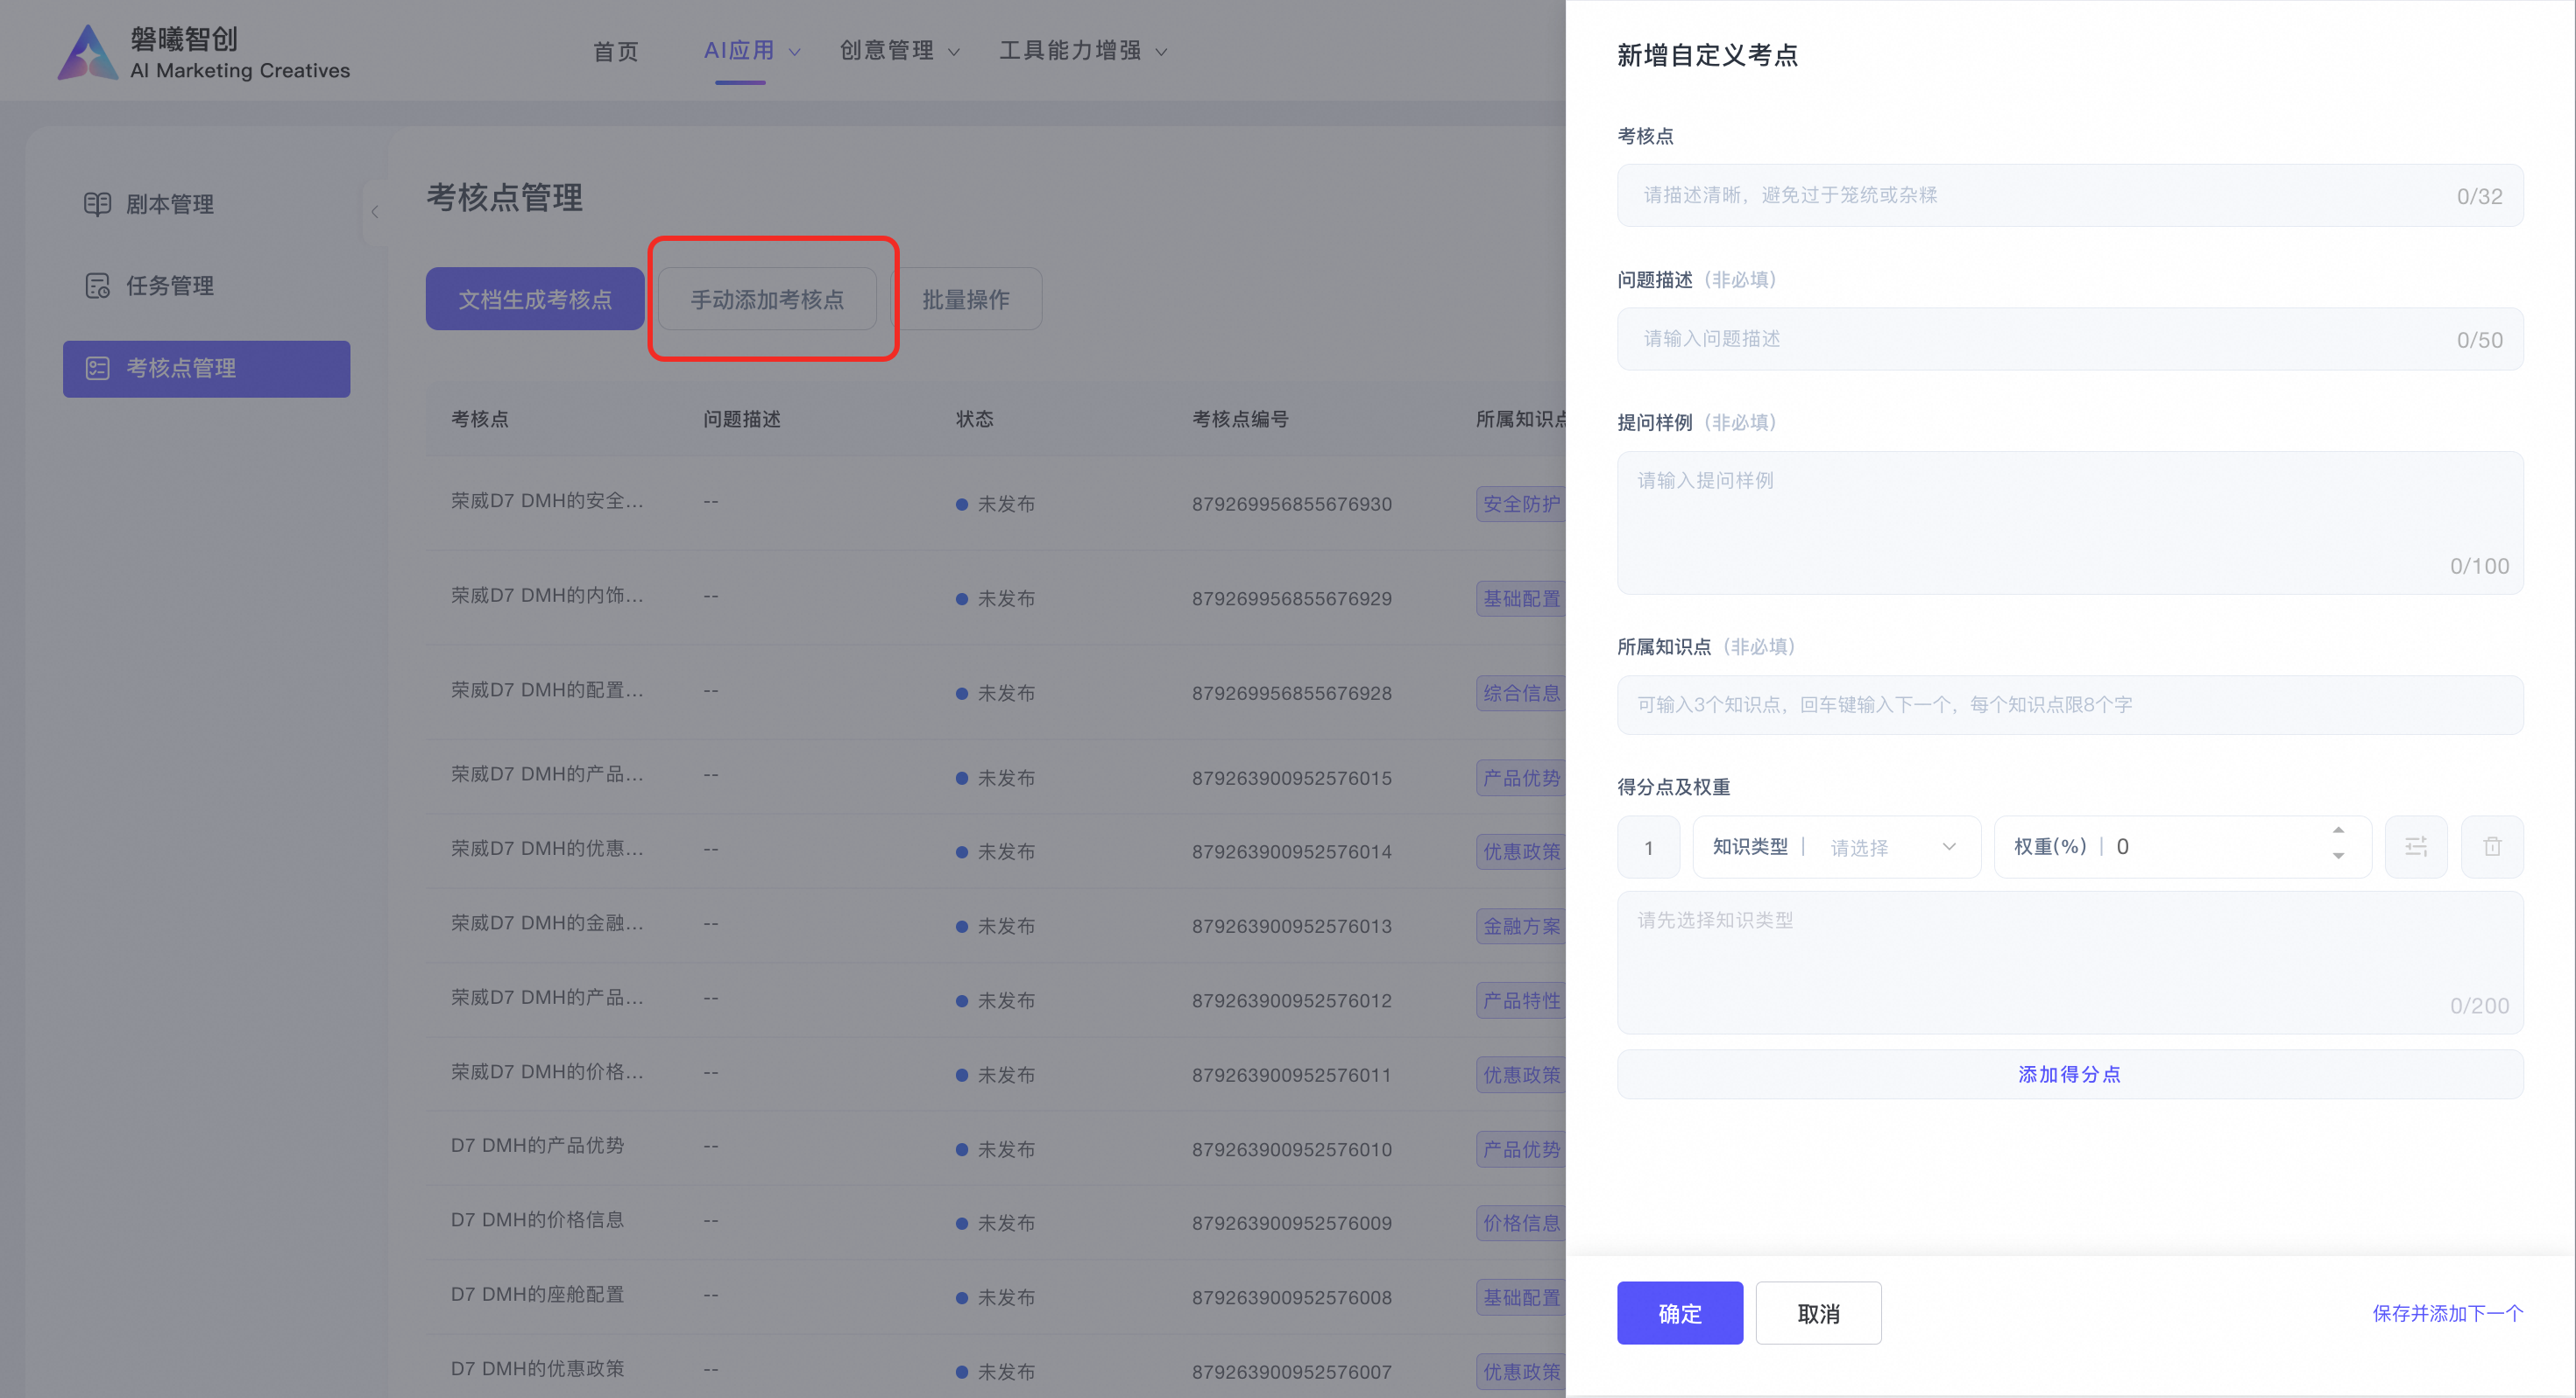
You can use the filter in the top right corner to view assessment points by status: All, Unpublished, or Published. You can also search for assessment points by name.
The table displays the assessment point name, status, ID, type, knowledge point, scoring criteria, source document name, update time, reference count, and actions.
The available actions are Edit, Publish, and Delete. You can click a source document name to go directly to the knowledge base.

4.1 Document generation assessment points
Select from 1 to 10 documents as needed and start the parsing process.
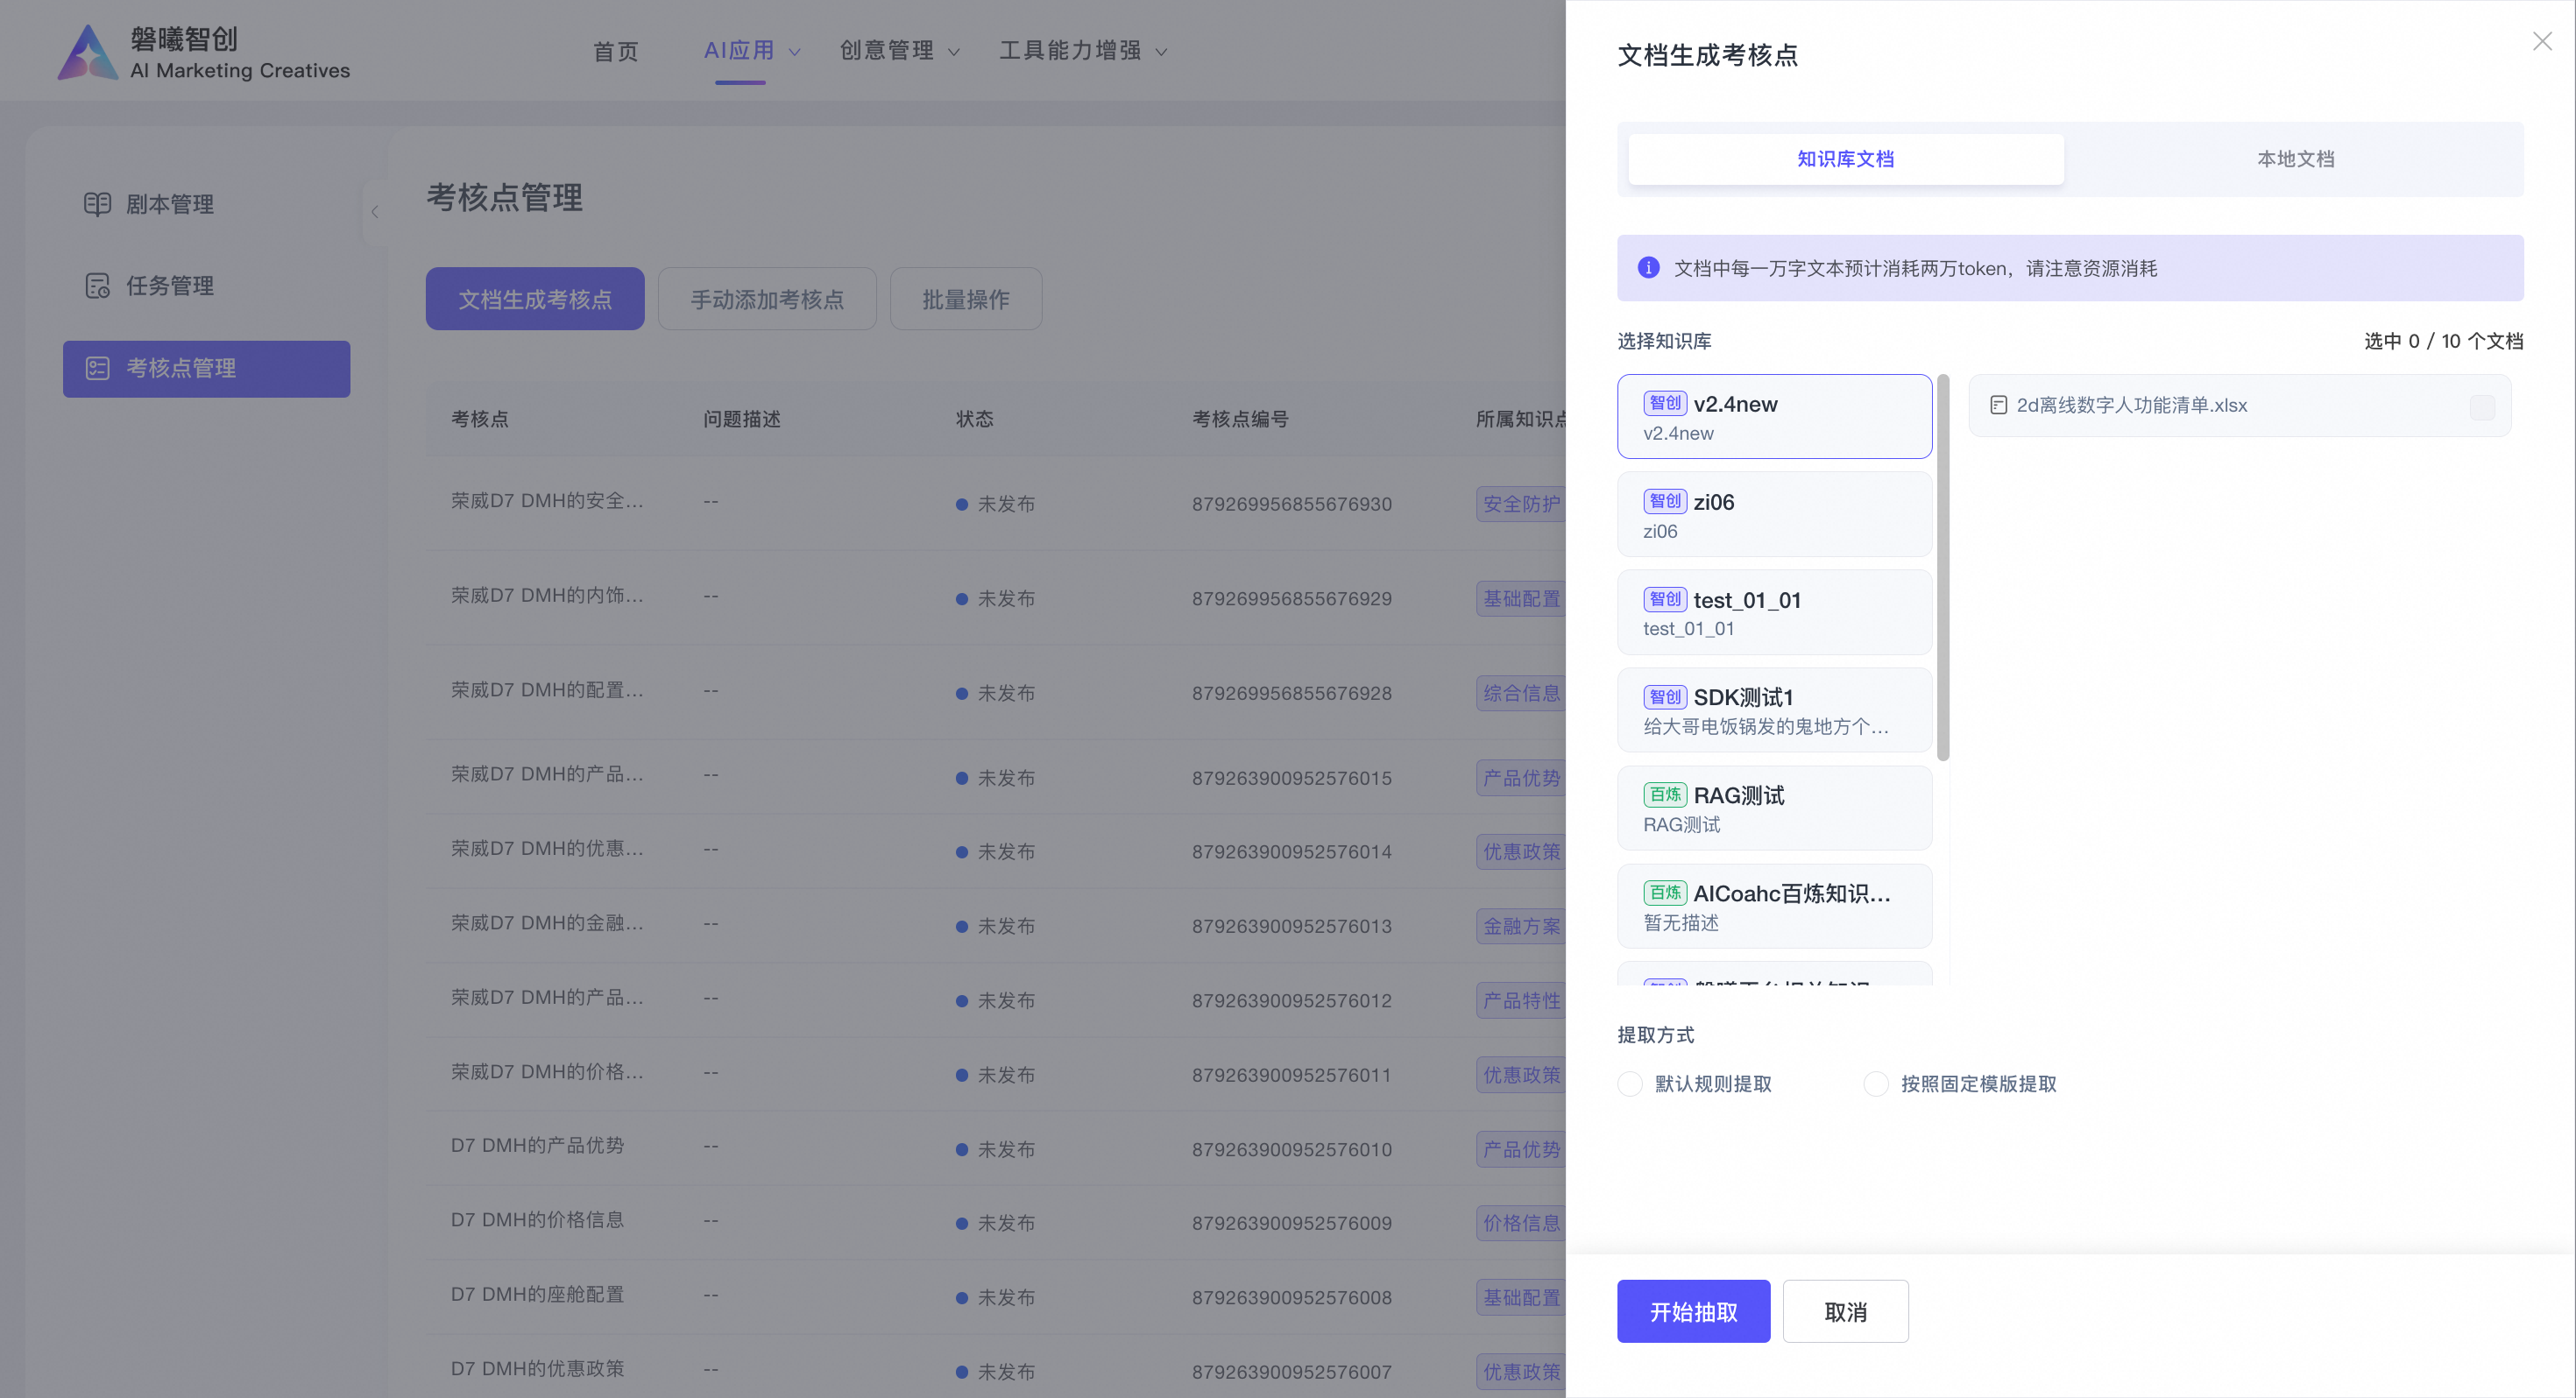
After the documents are successfully parsed, you can import the assessment points.

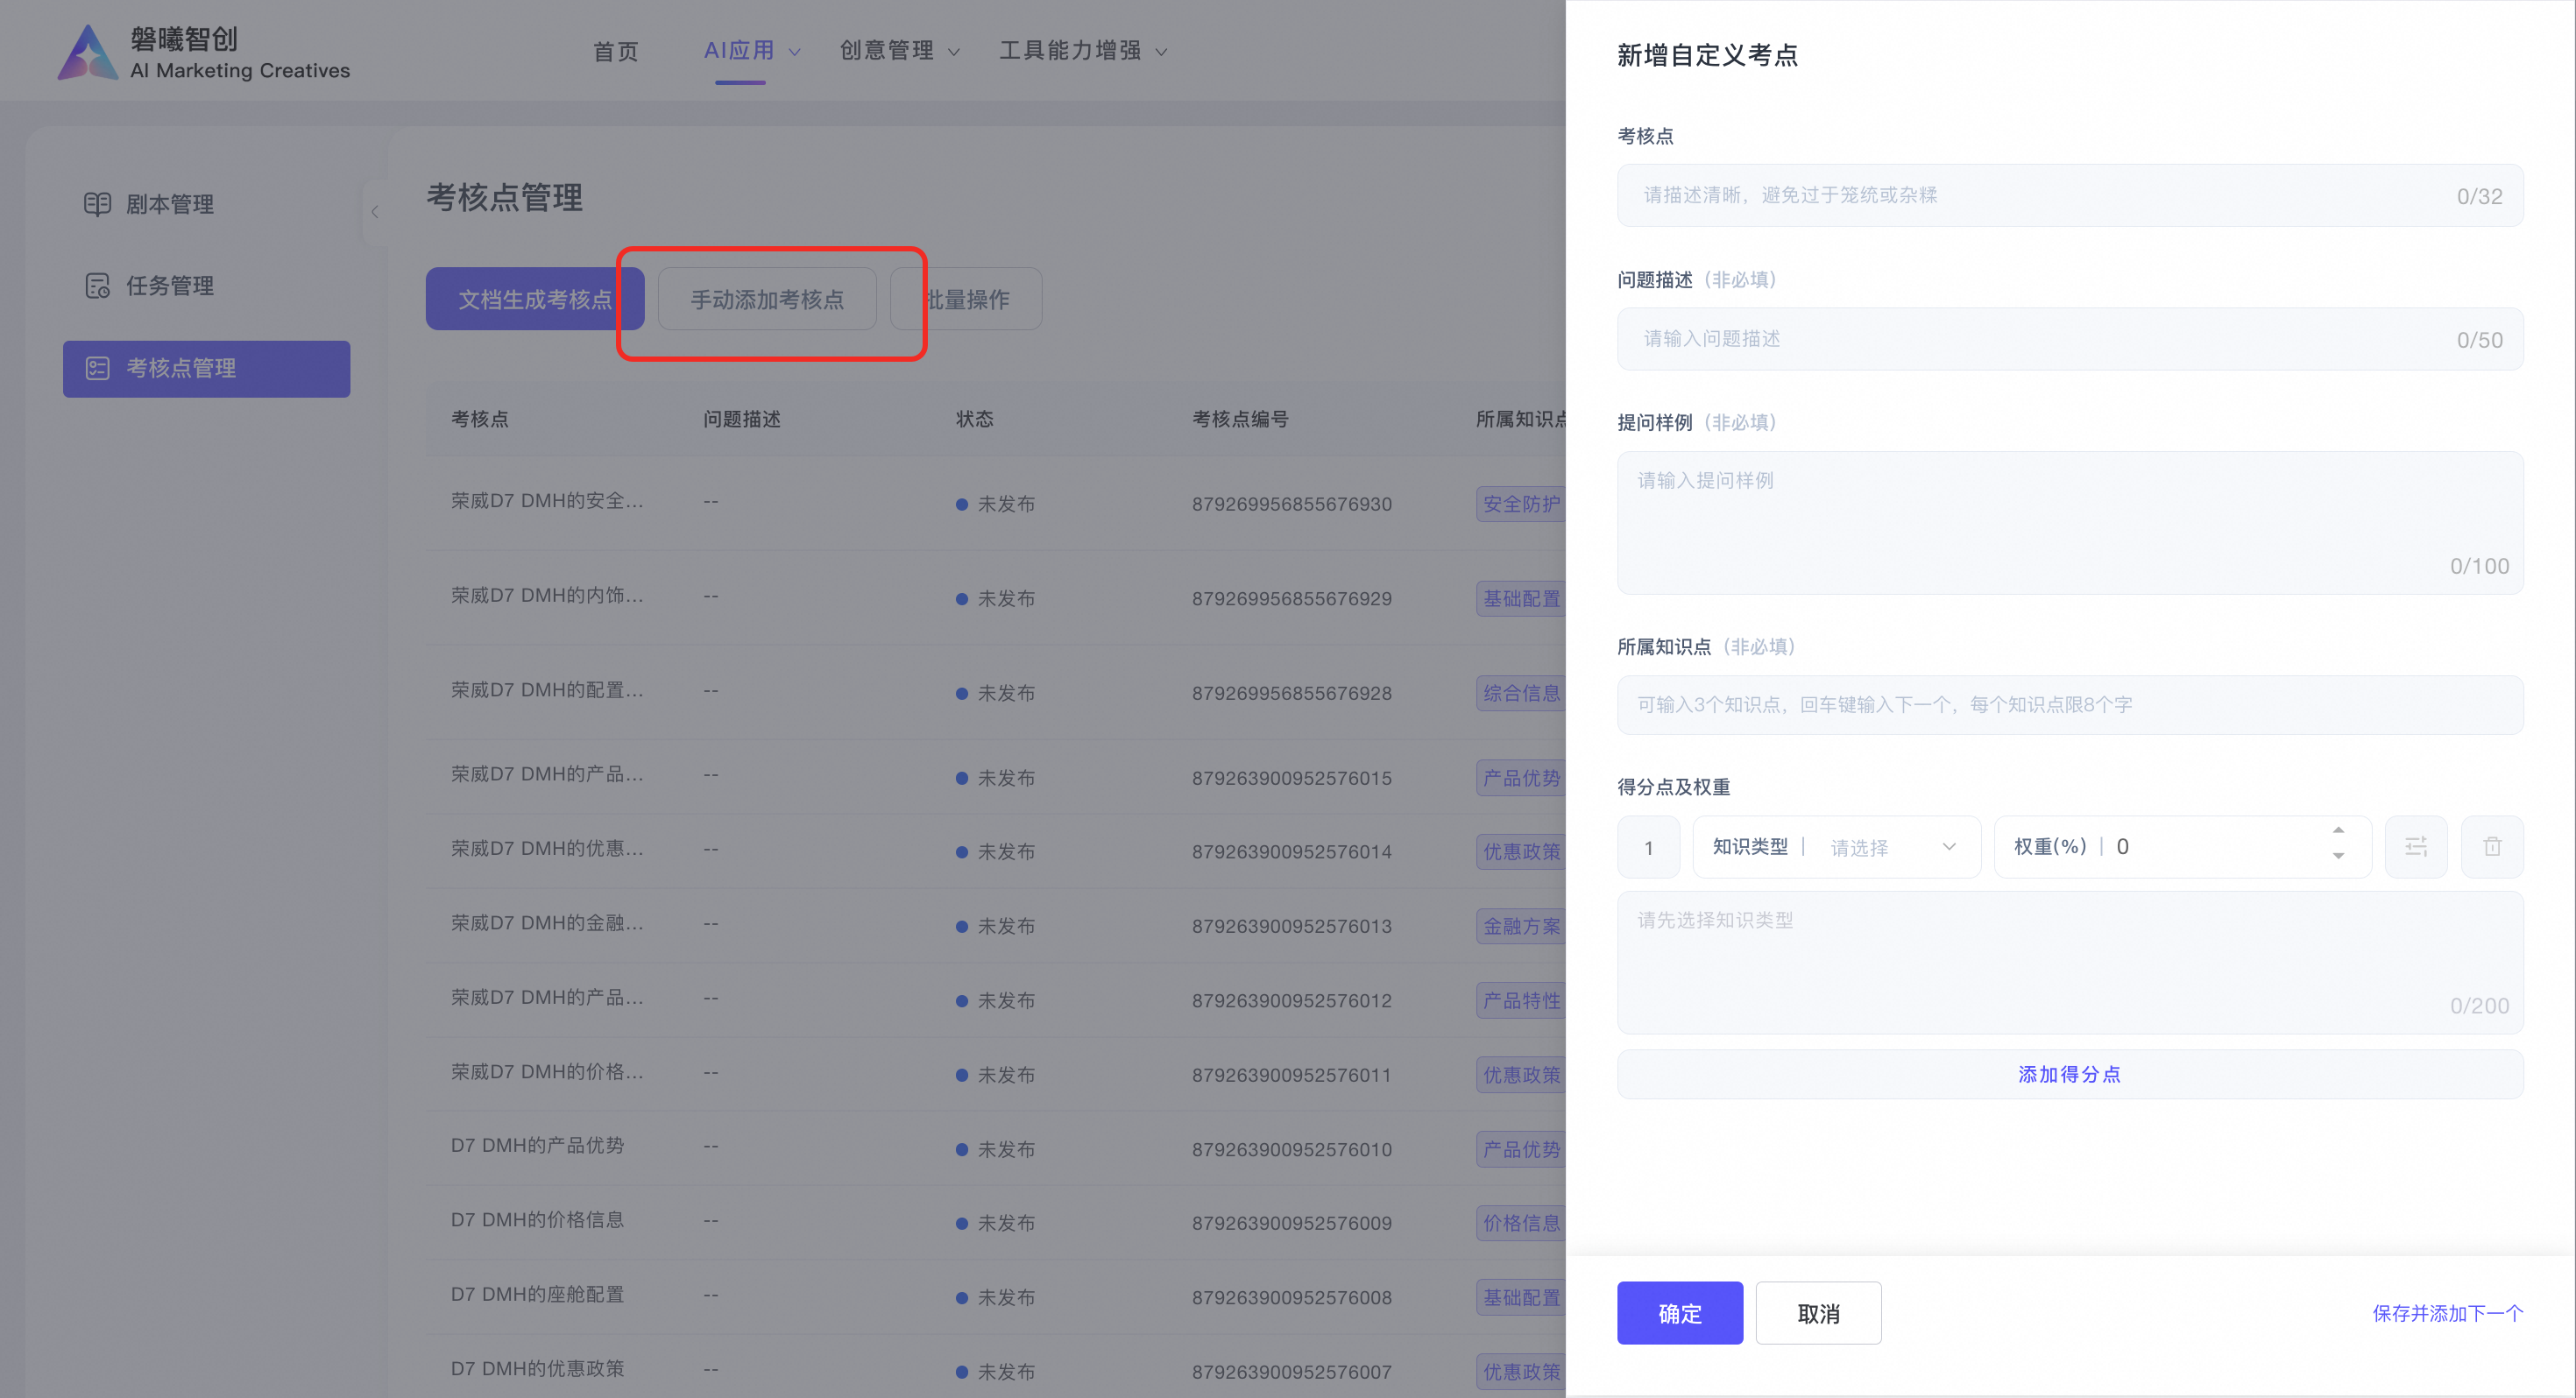
4.2 Add assessment points manually
Enter the assessment point name, type, knowledge point, scoring criteria, and weight, and then click Confirm to add the assessment point.
4.3 Batch Operations
Select all assessment points on the current page. Then, you can perform a batch publish, batch unpublish, or batch export operation.
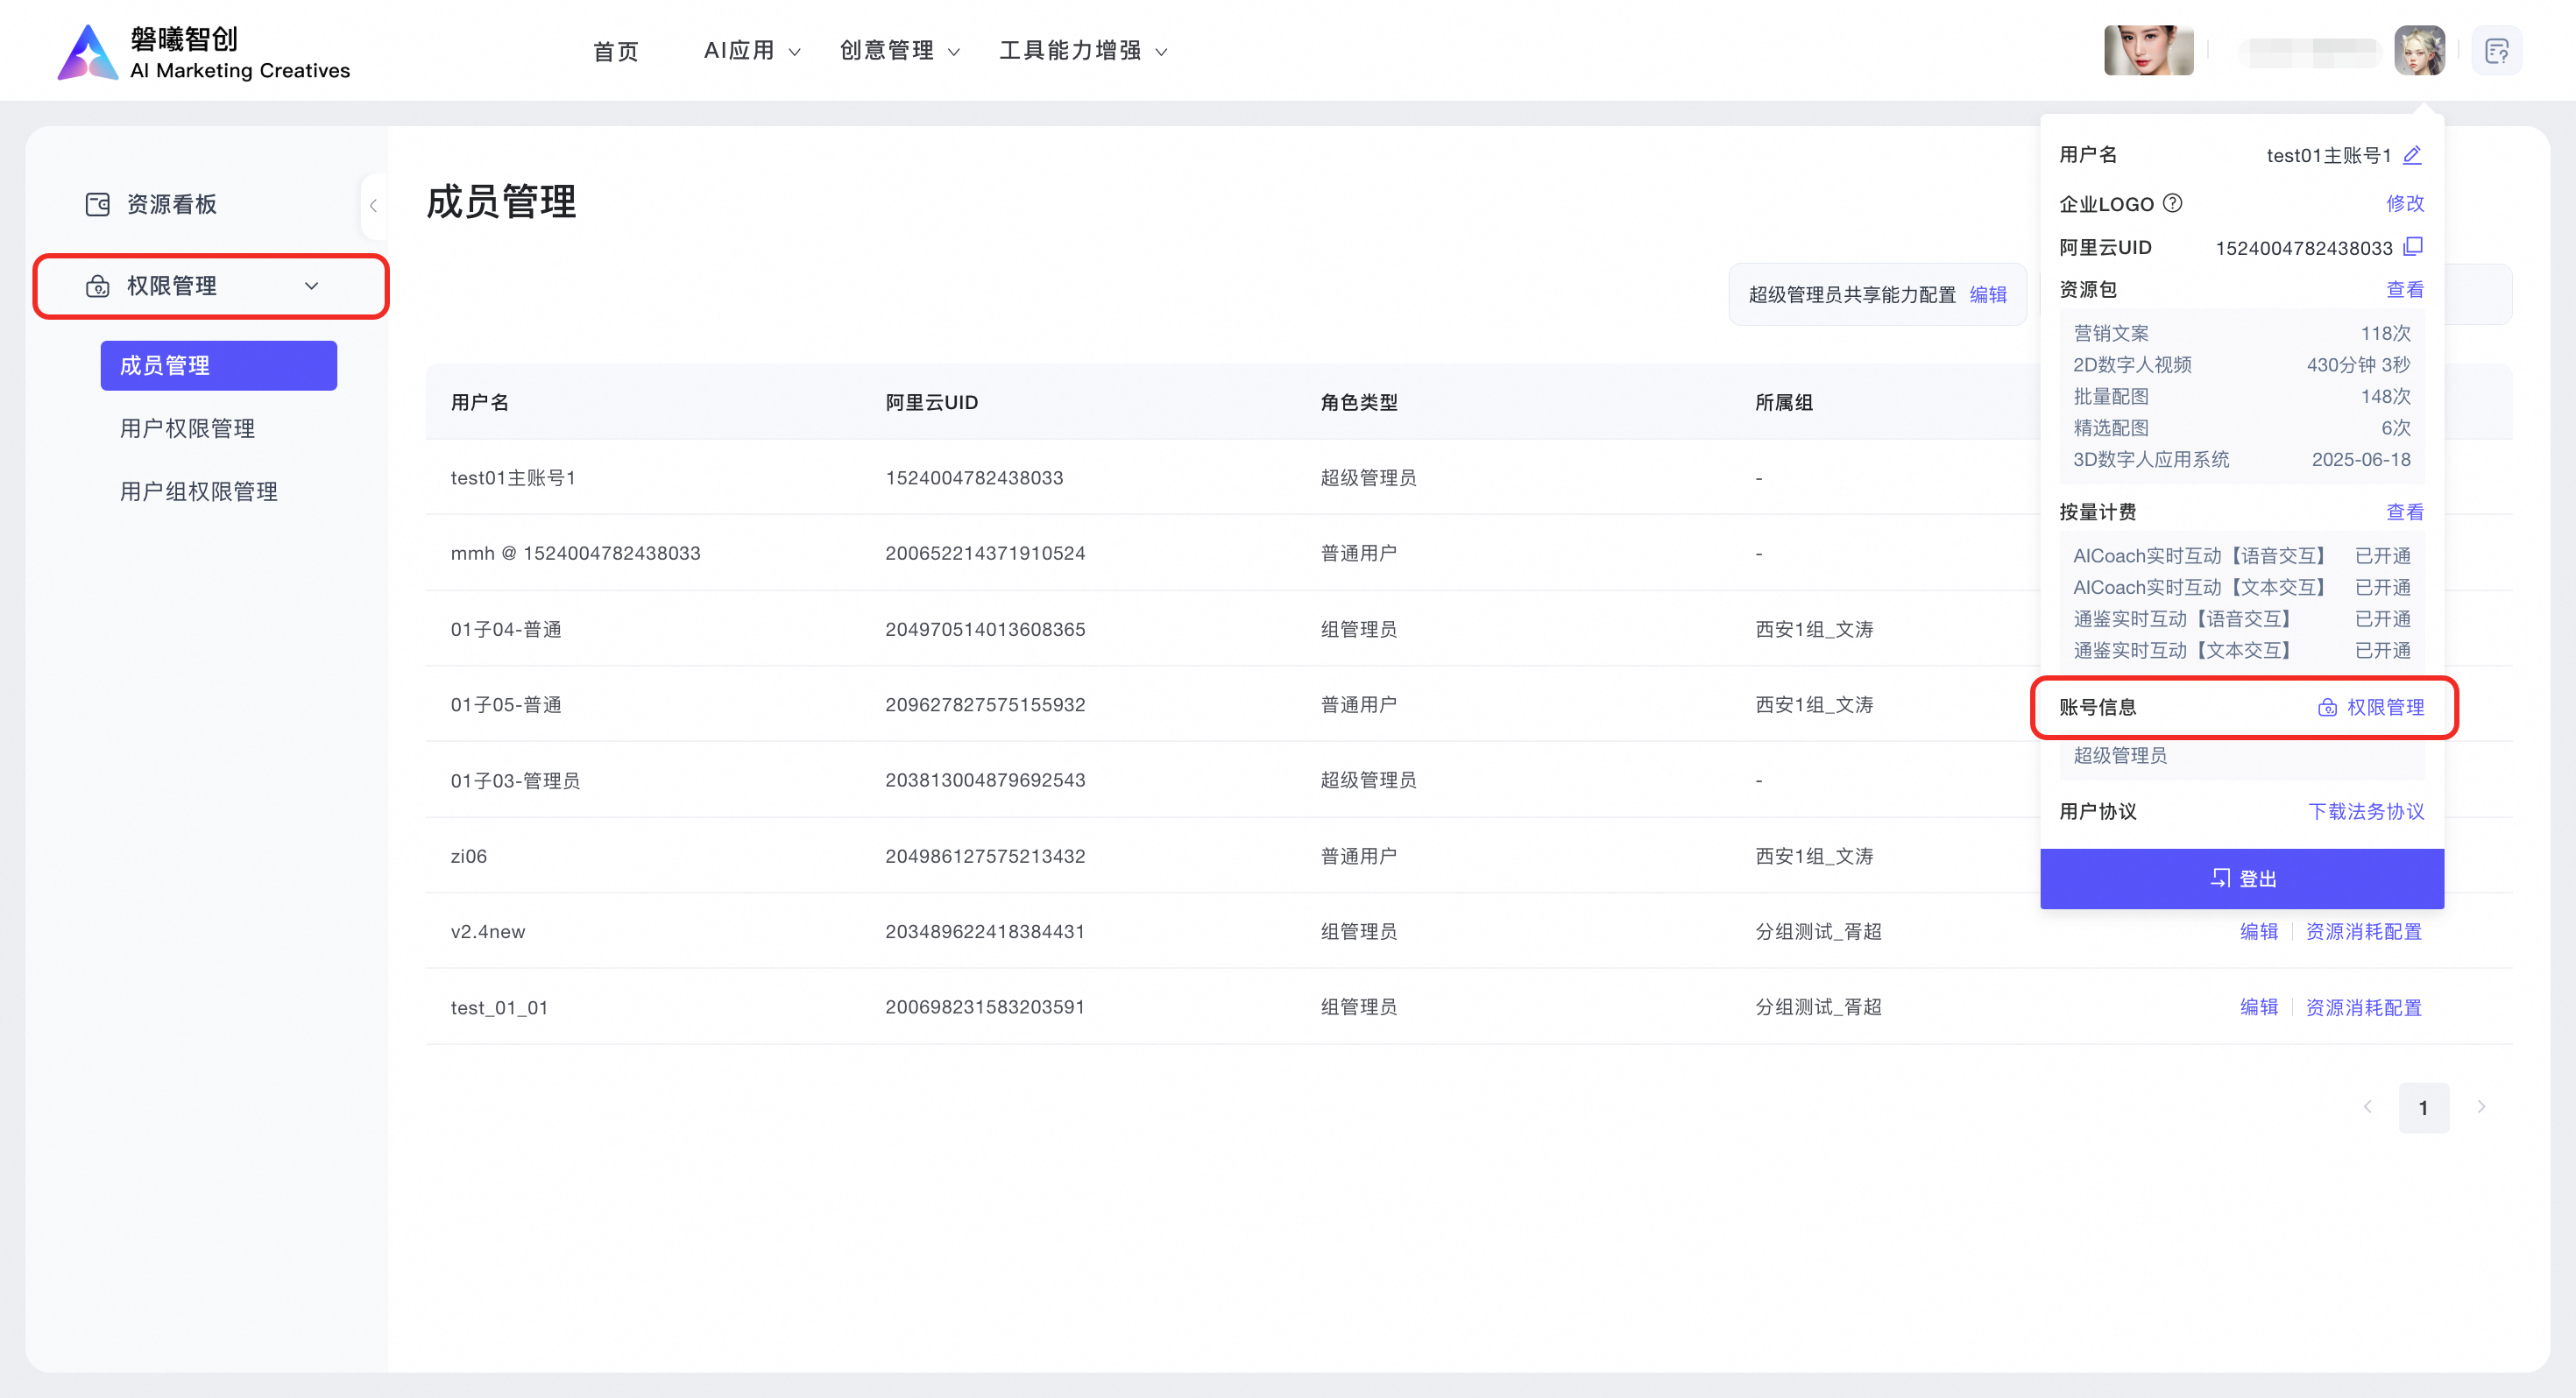
5. Permission Management
Click your profile picture and go to Account Information to access the Permission Management page.
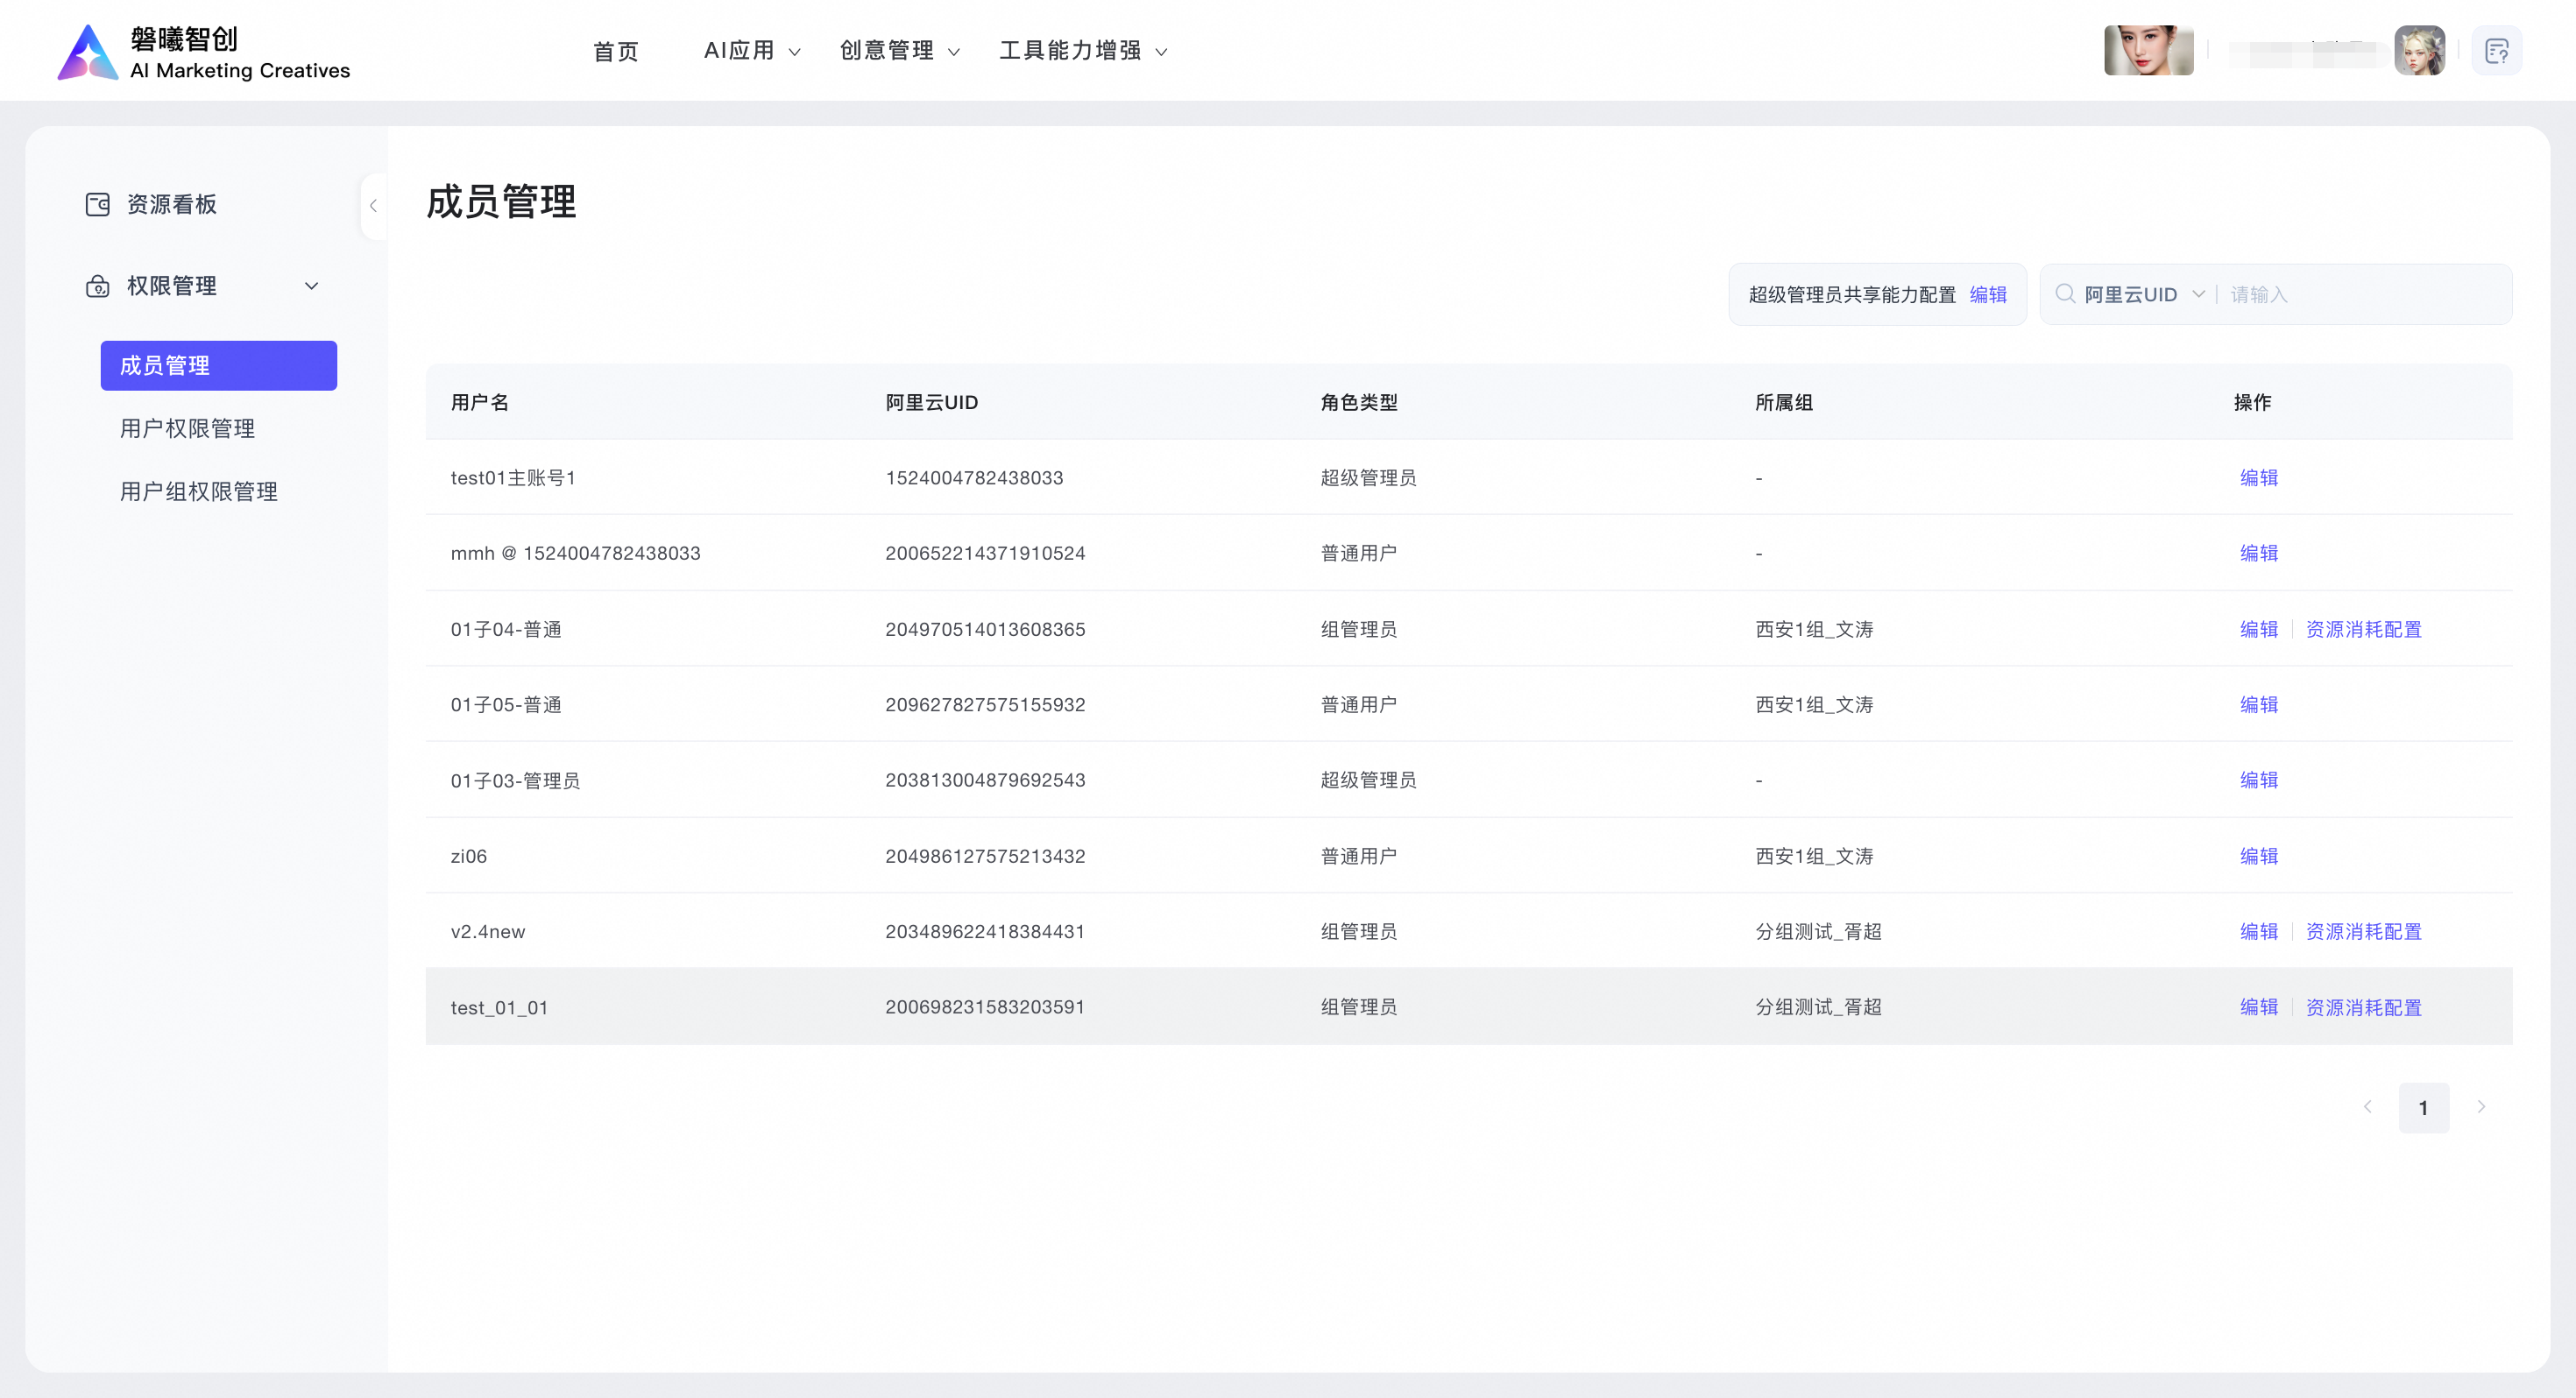
5.1 Member Management
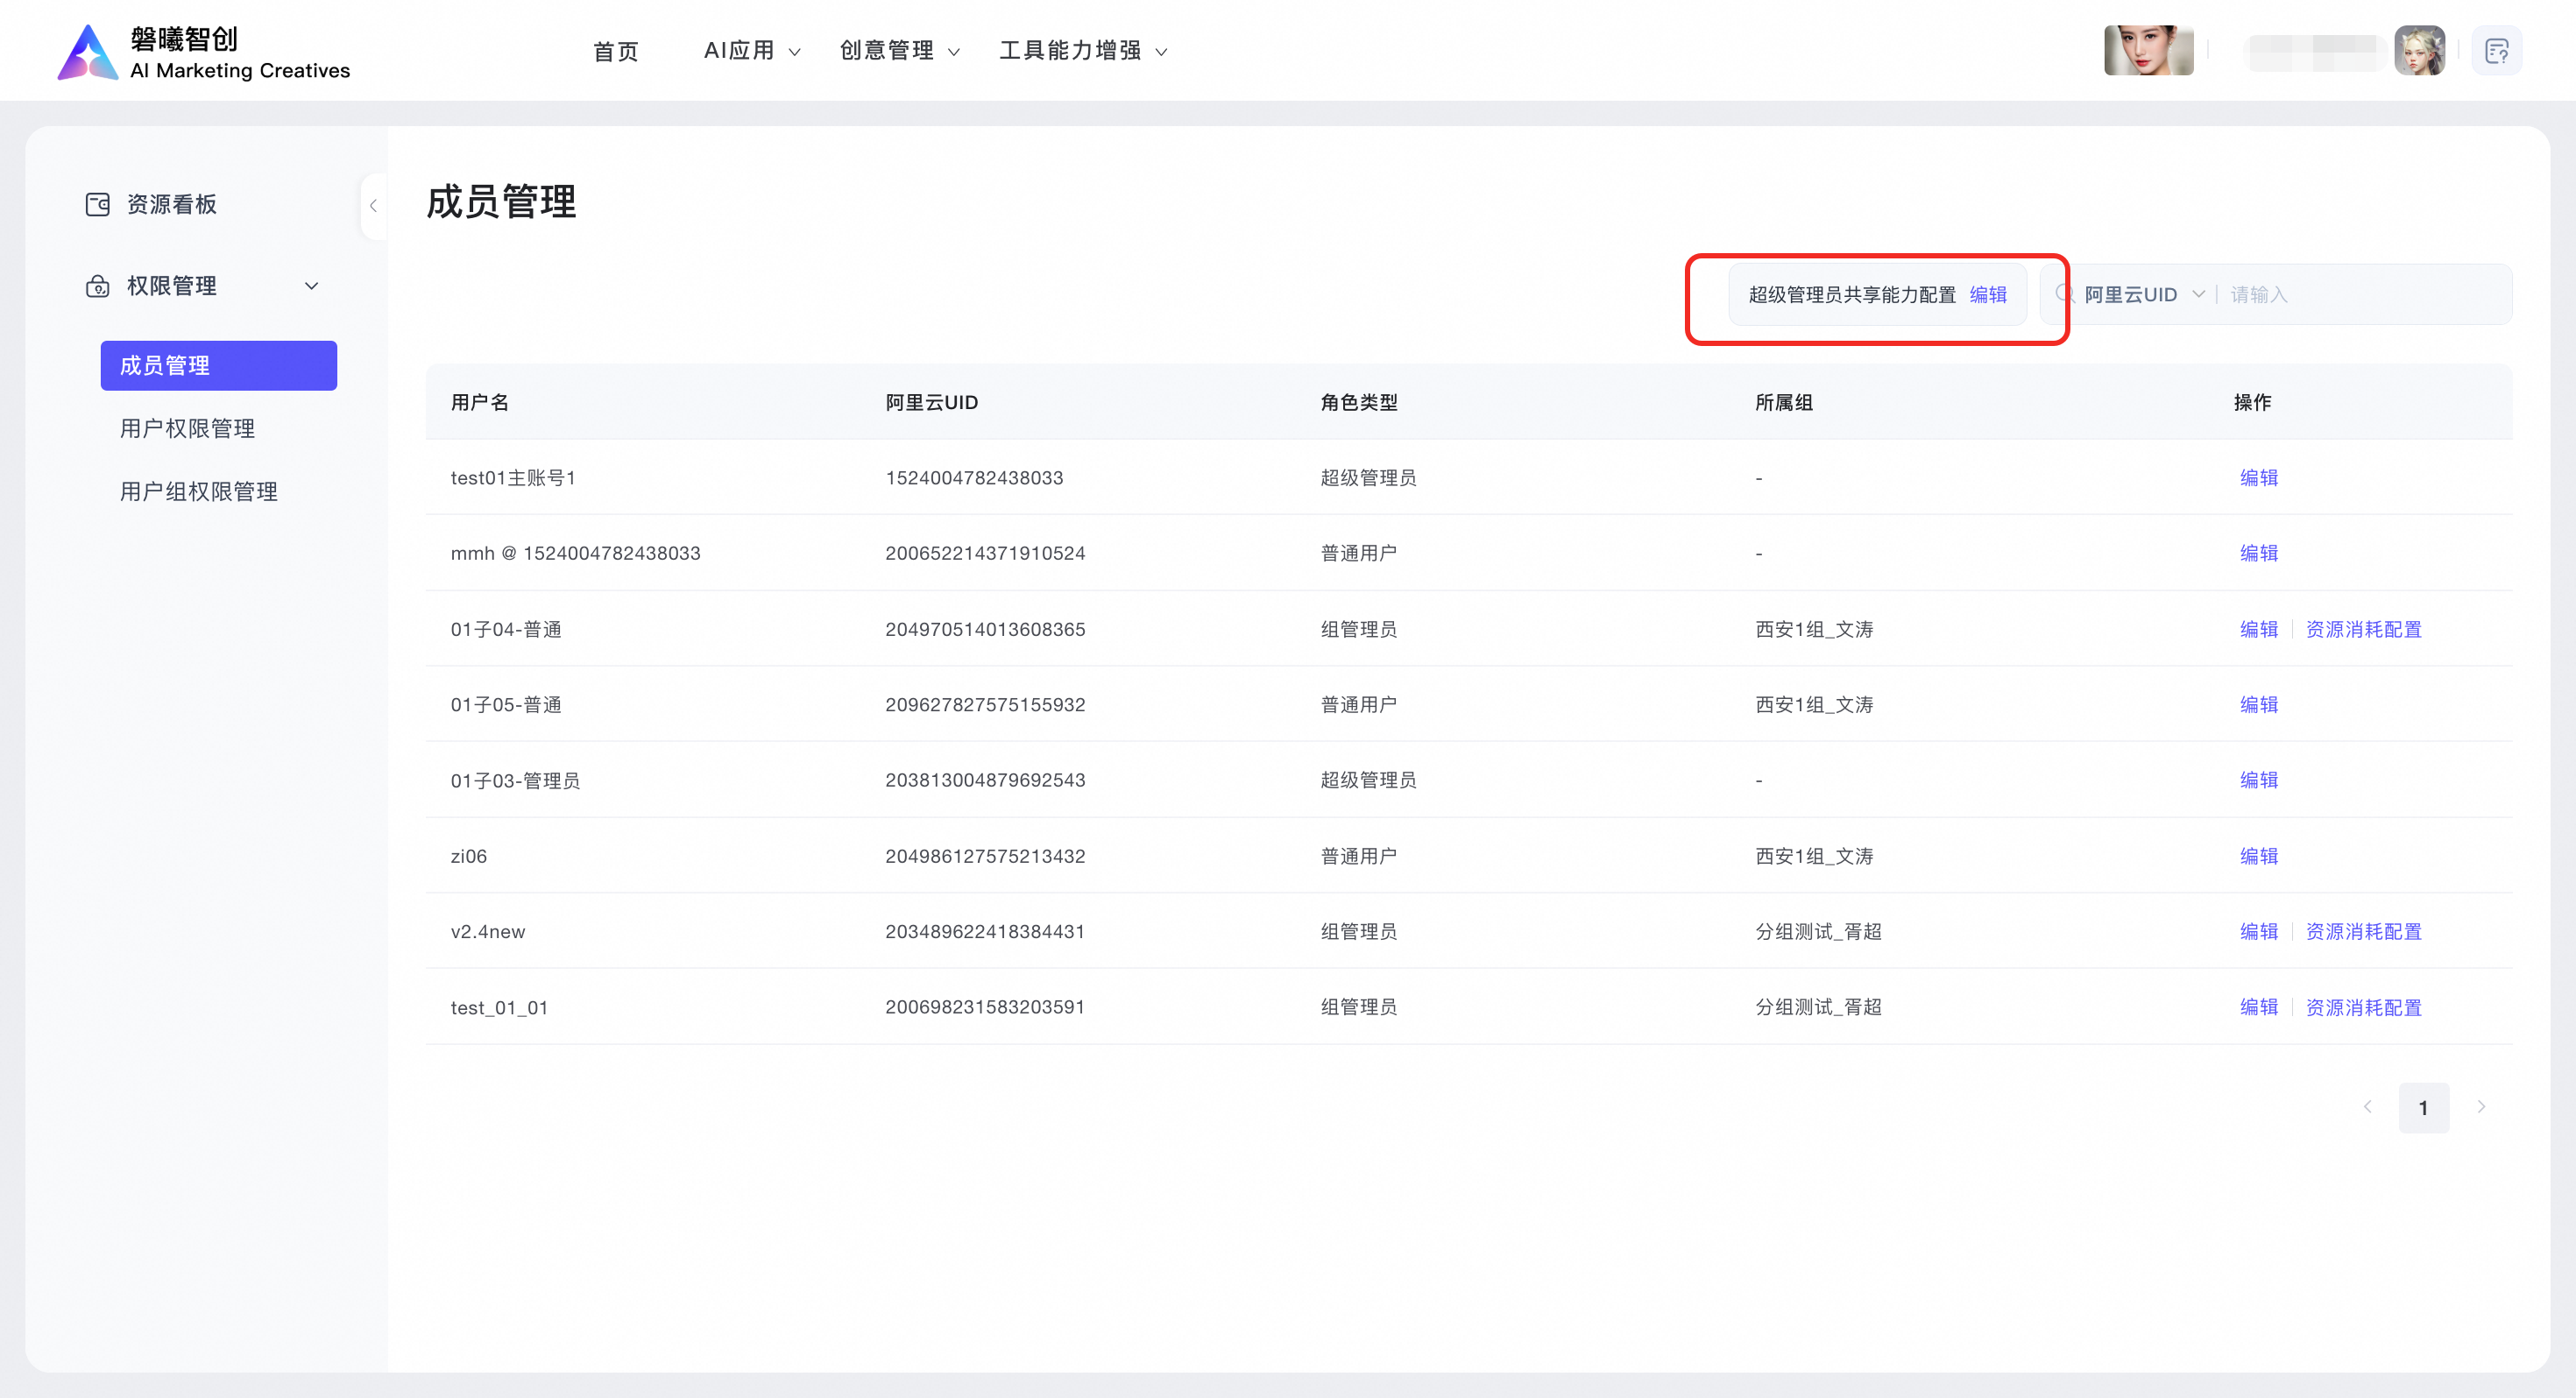
The Member Management page displays the username, Alibaba Cloud UID, role type, group (for group administrators), and actions.
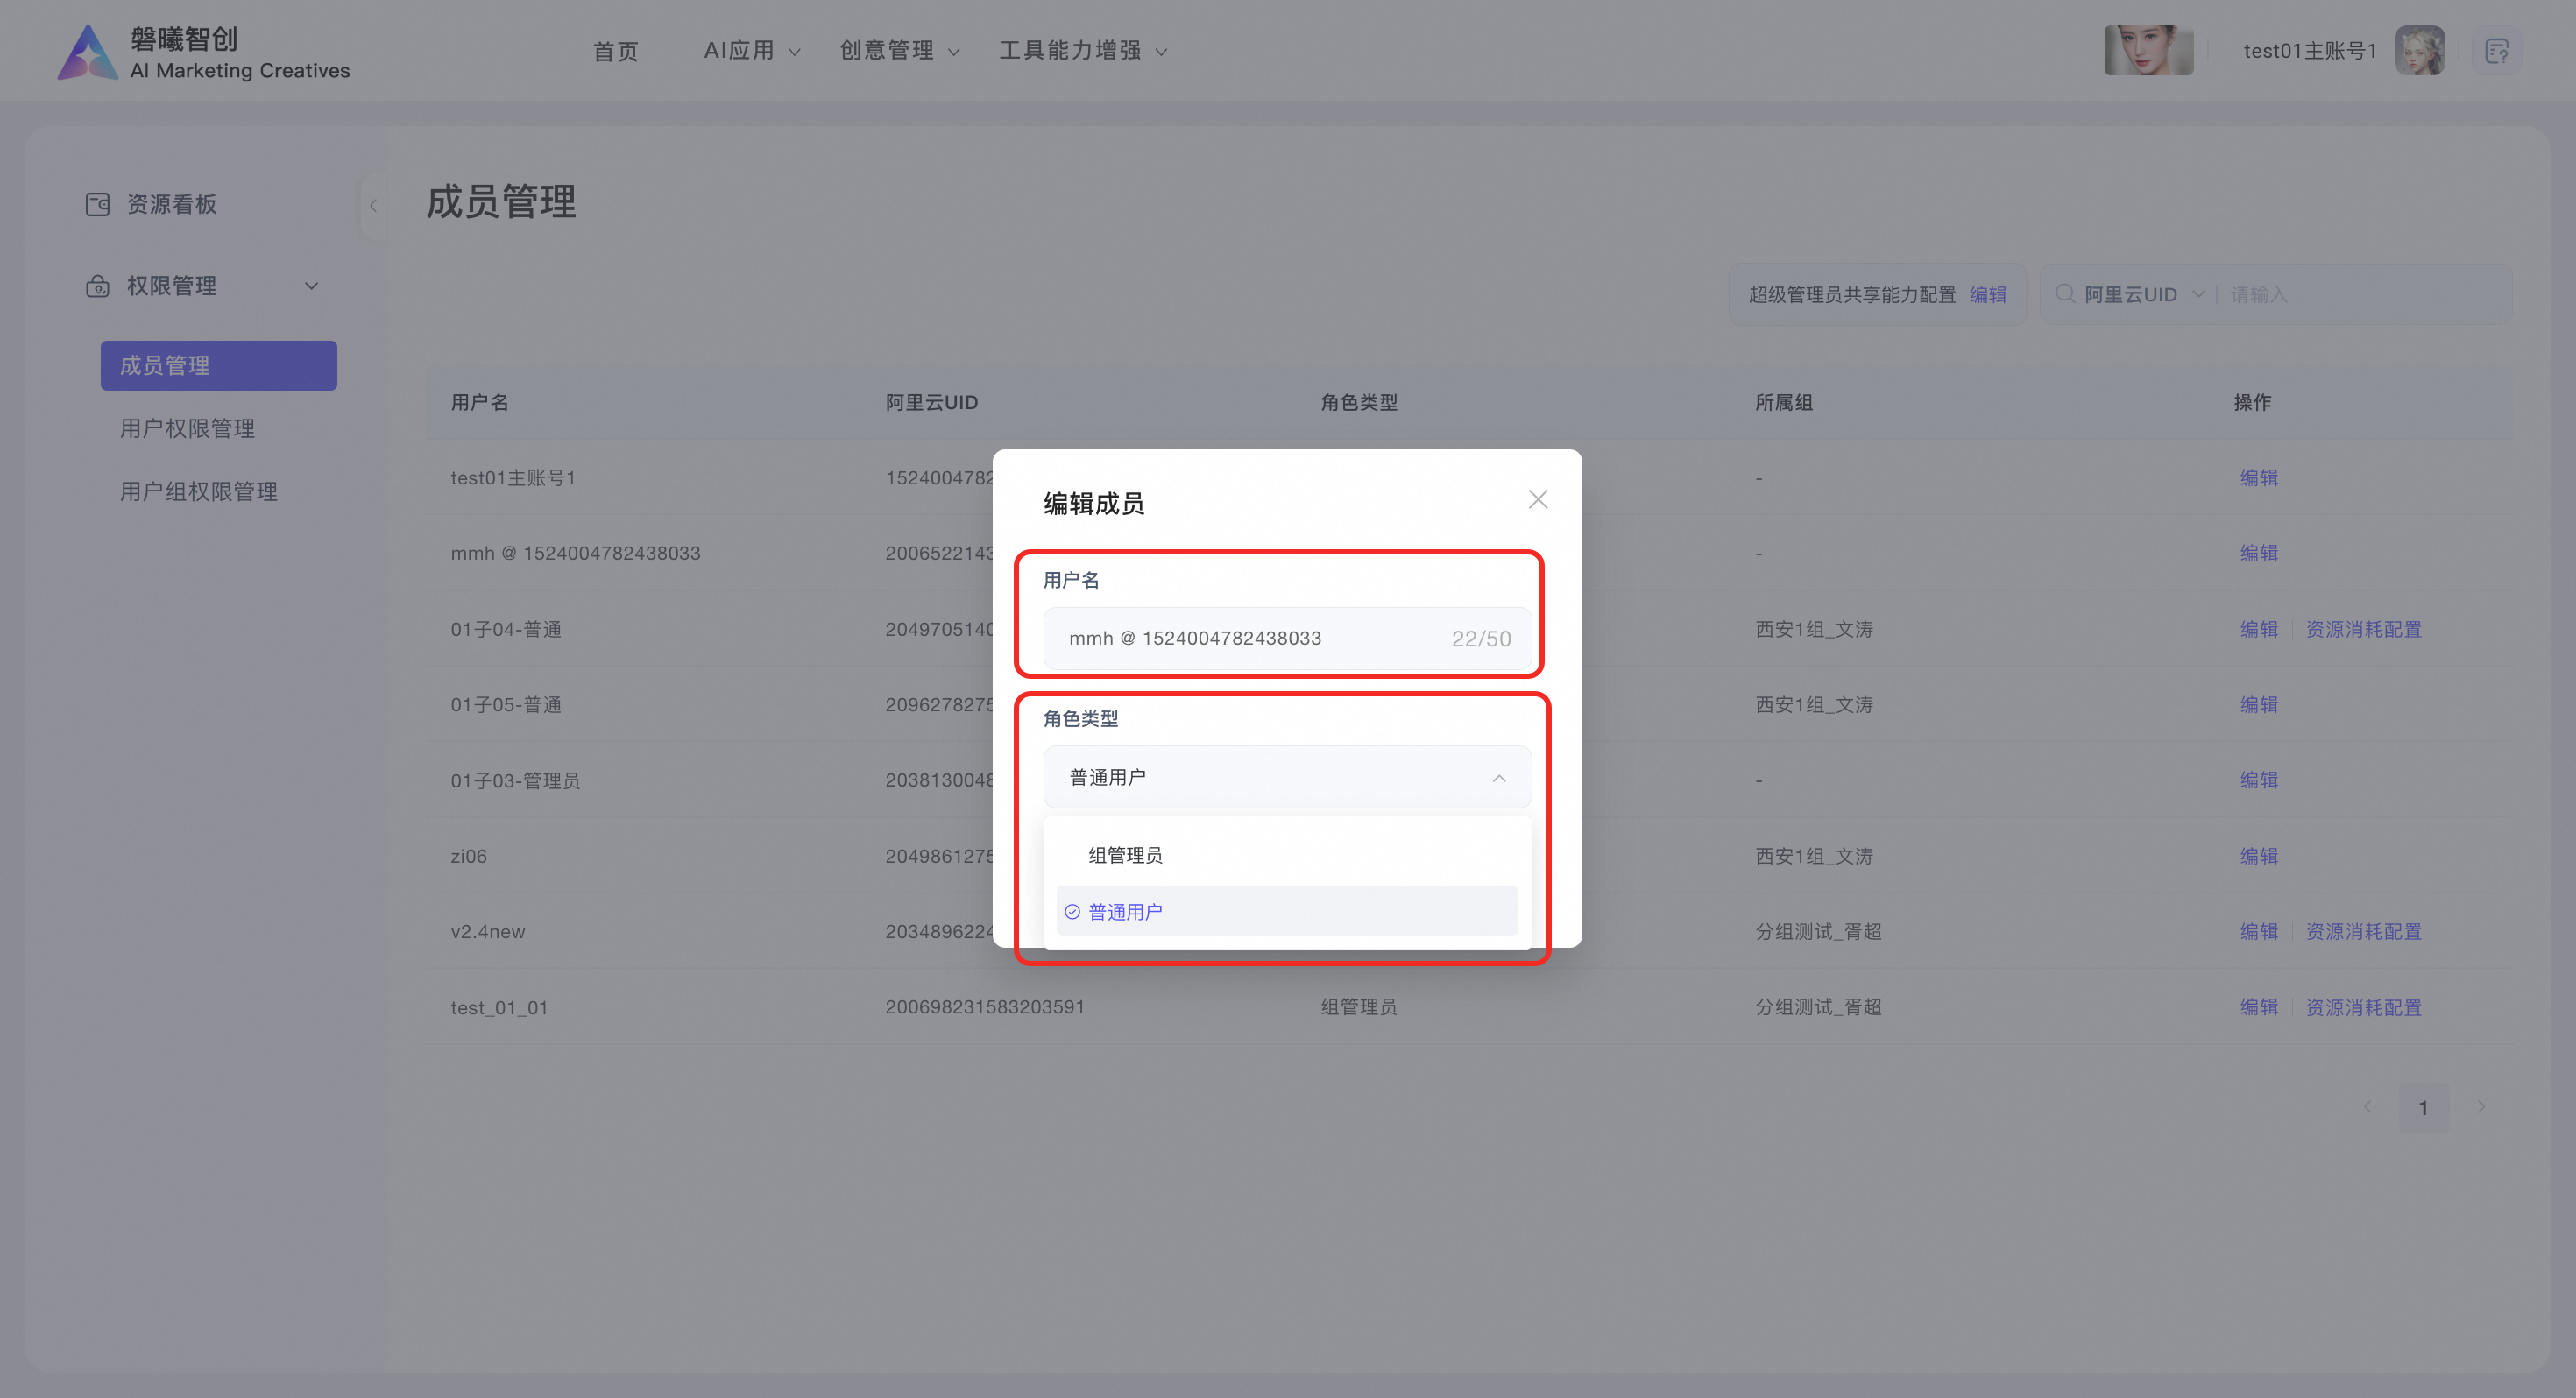
5.1.1 Member actions
For users who are not group administrators, you can edit the username (up to 50 characters) and change the role type. You can enter a UID in the search box in the top right corner to find a specific account.
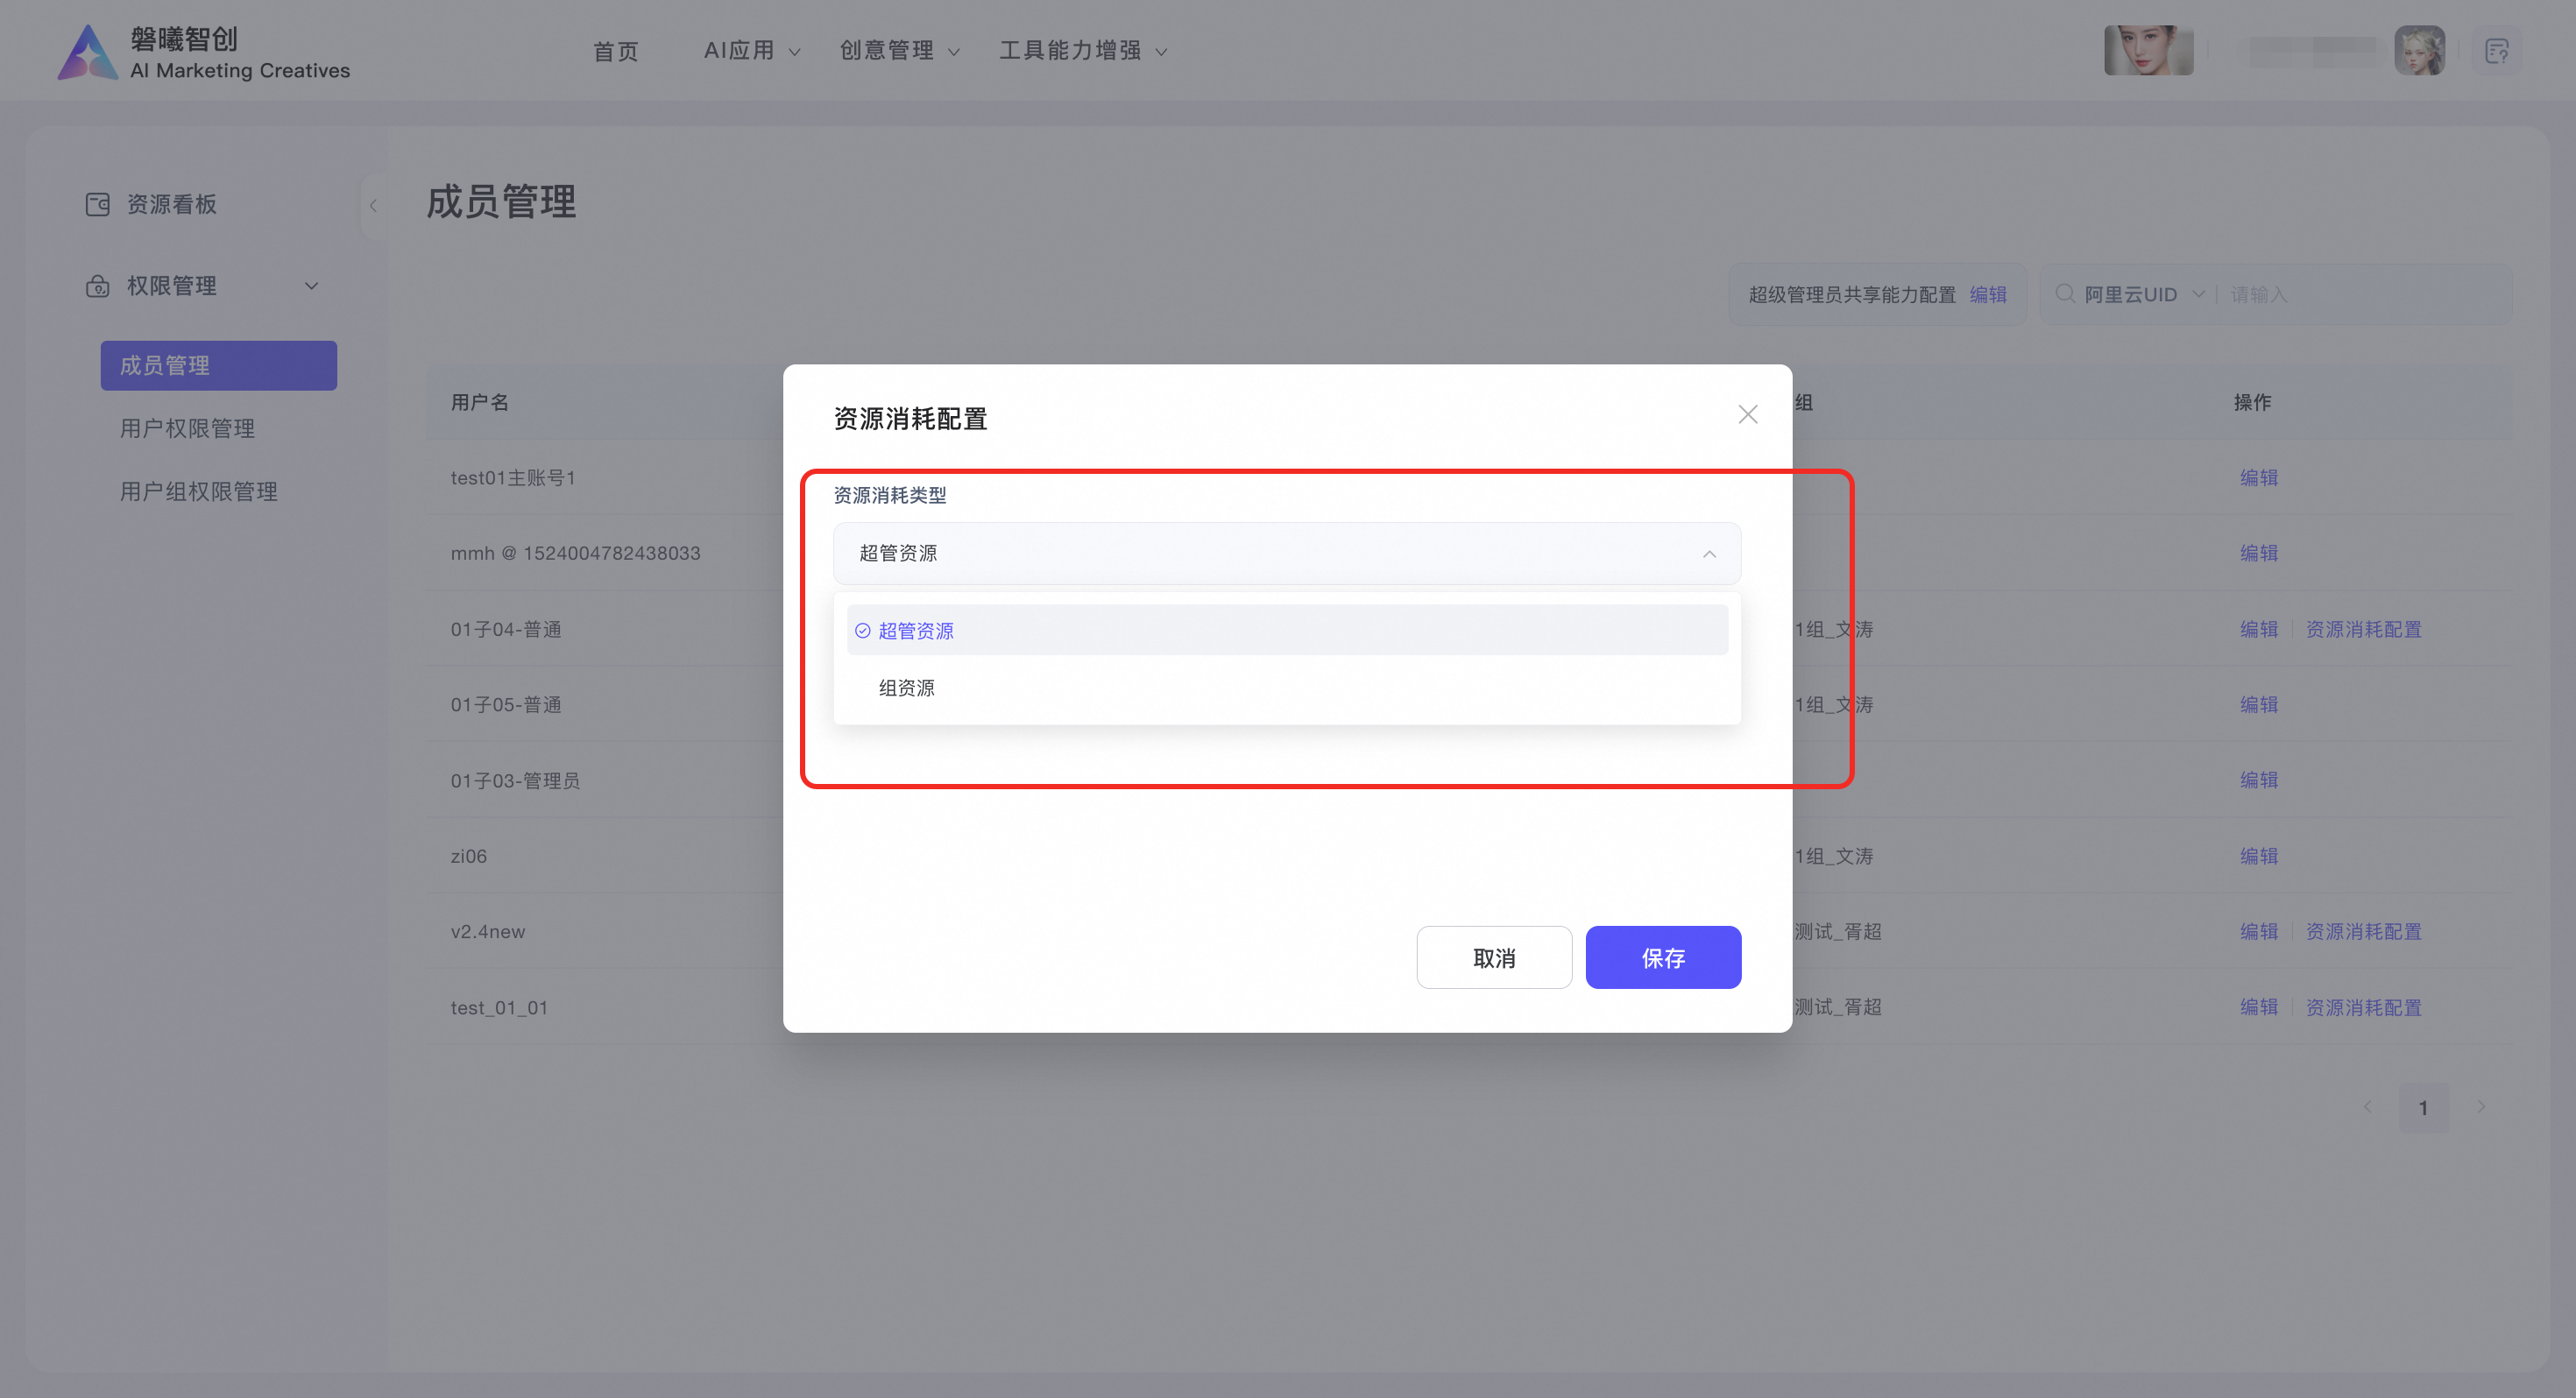
Group administrators can also configure resource consumption settings.
If you log on with a super administrator account, you can configure sharing capabilities for super administrators.
Turn on the AI sharing capability switch and select the AI Coach section to share script data, assessment point data, and practice task data.

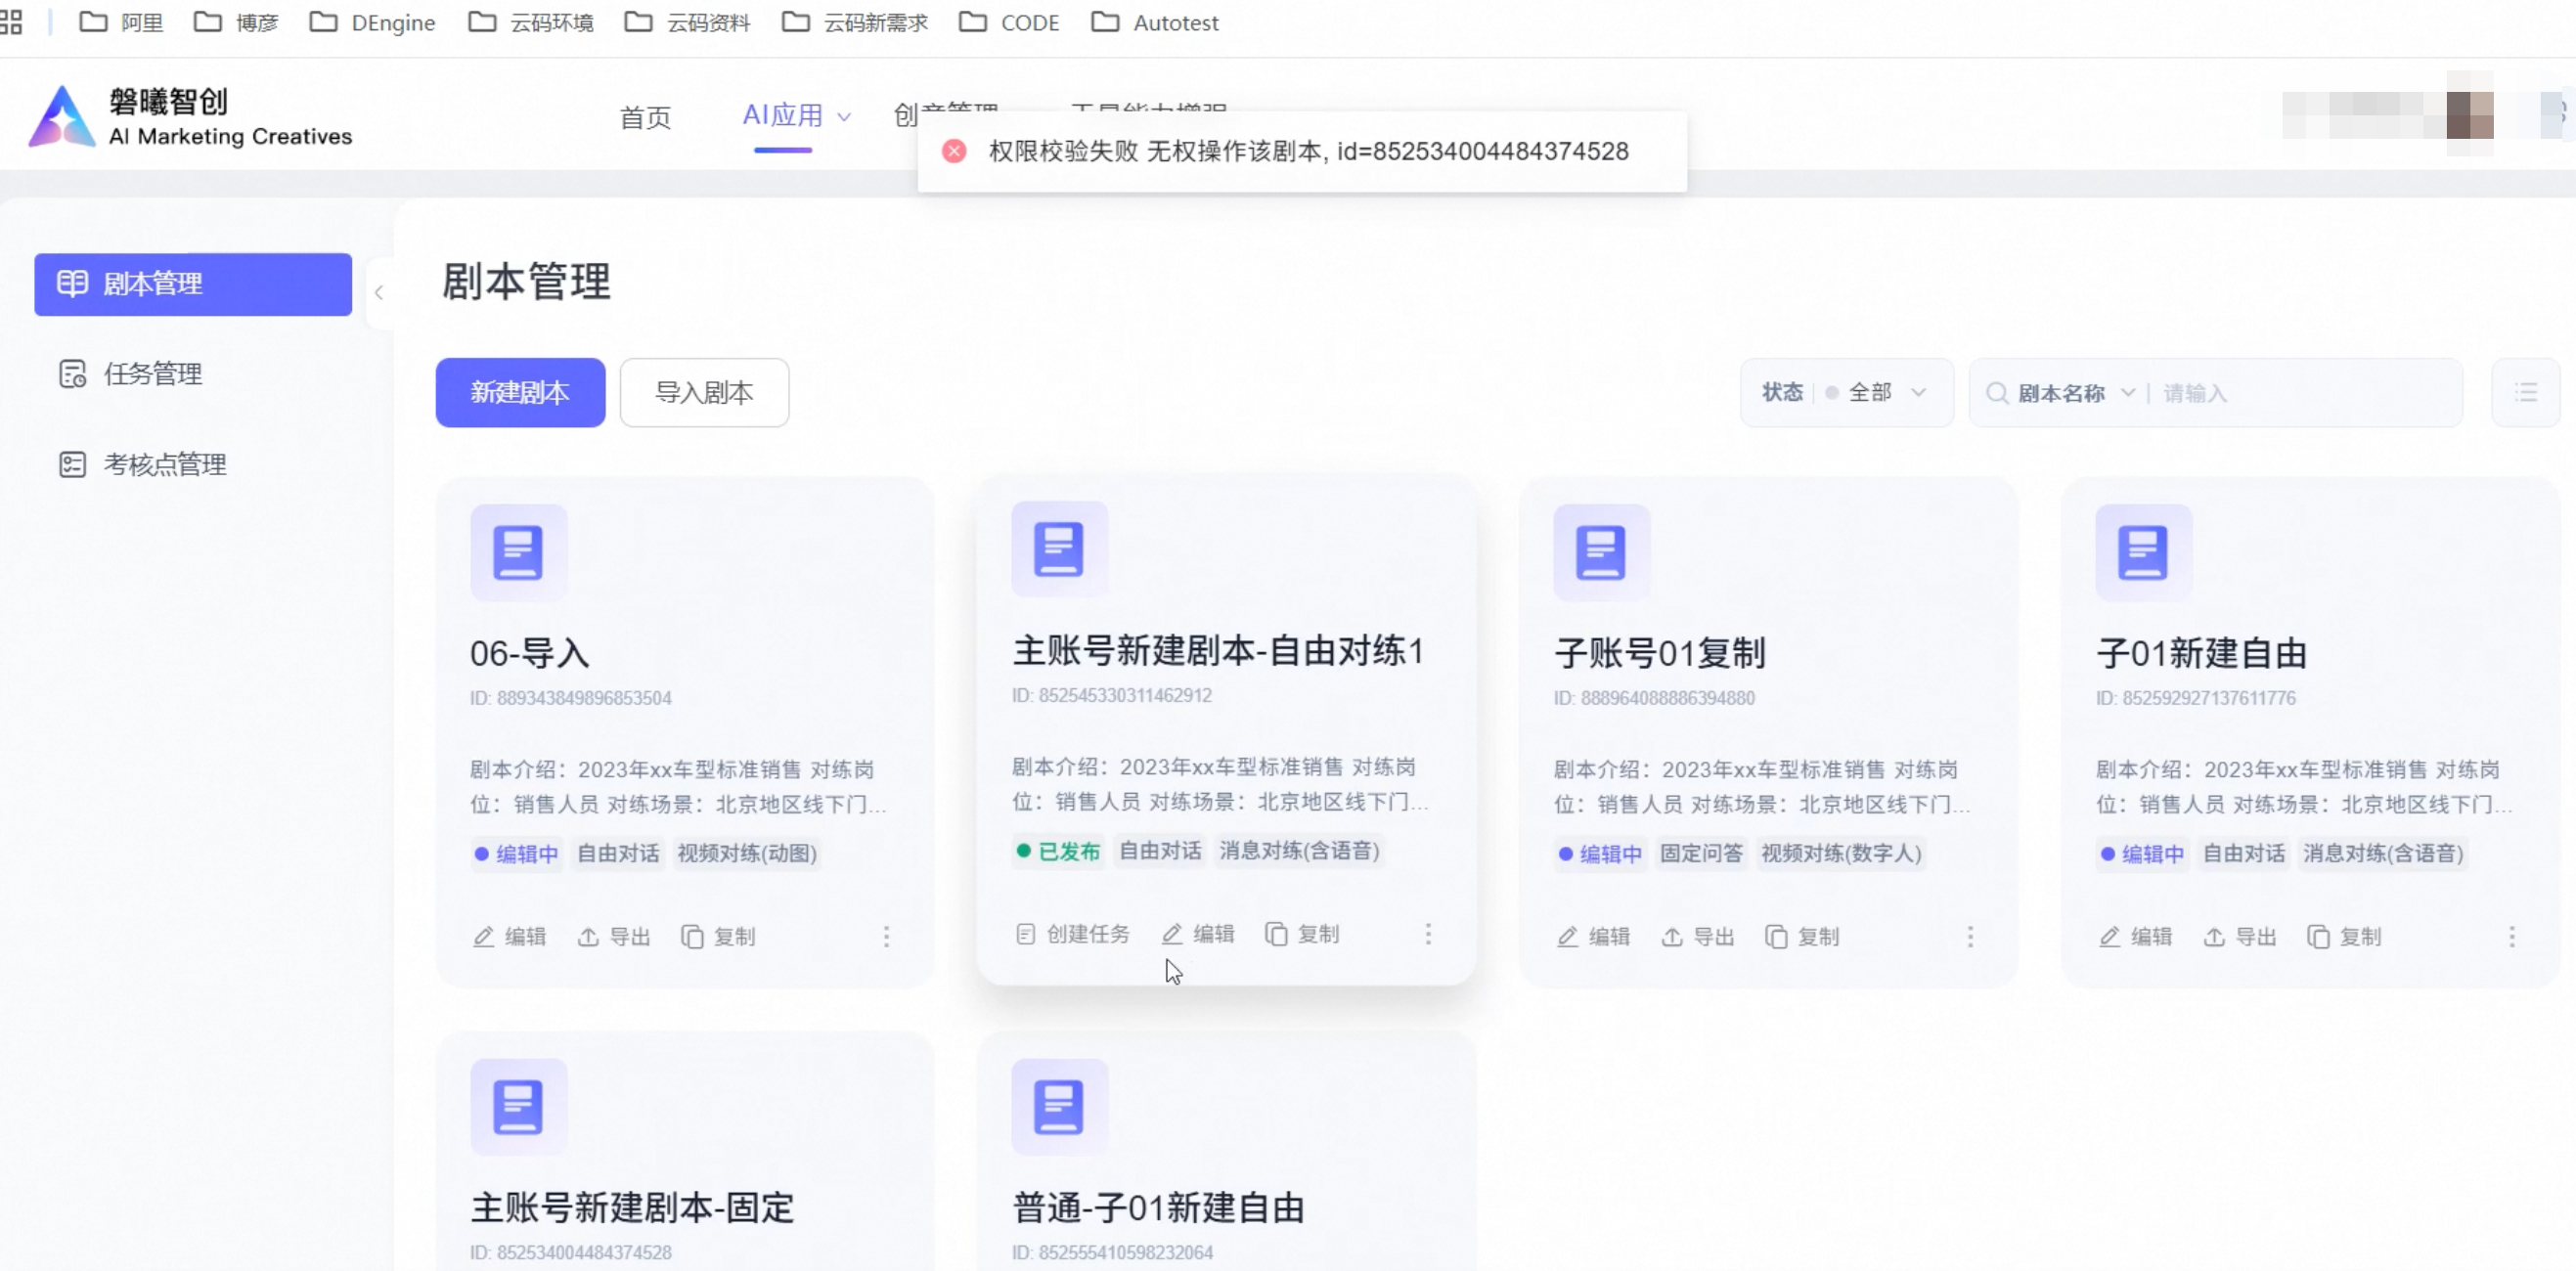
When sharing is enabled, other users can only view the data. They cannot edit or delete it.
5.2 User Permission Management
5.2.1 User Management
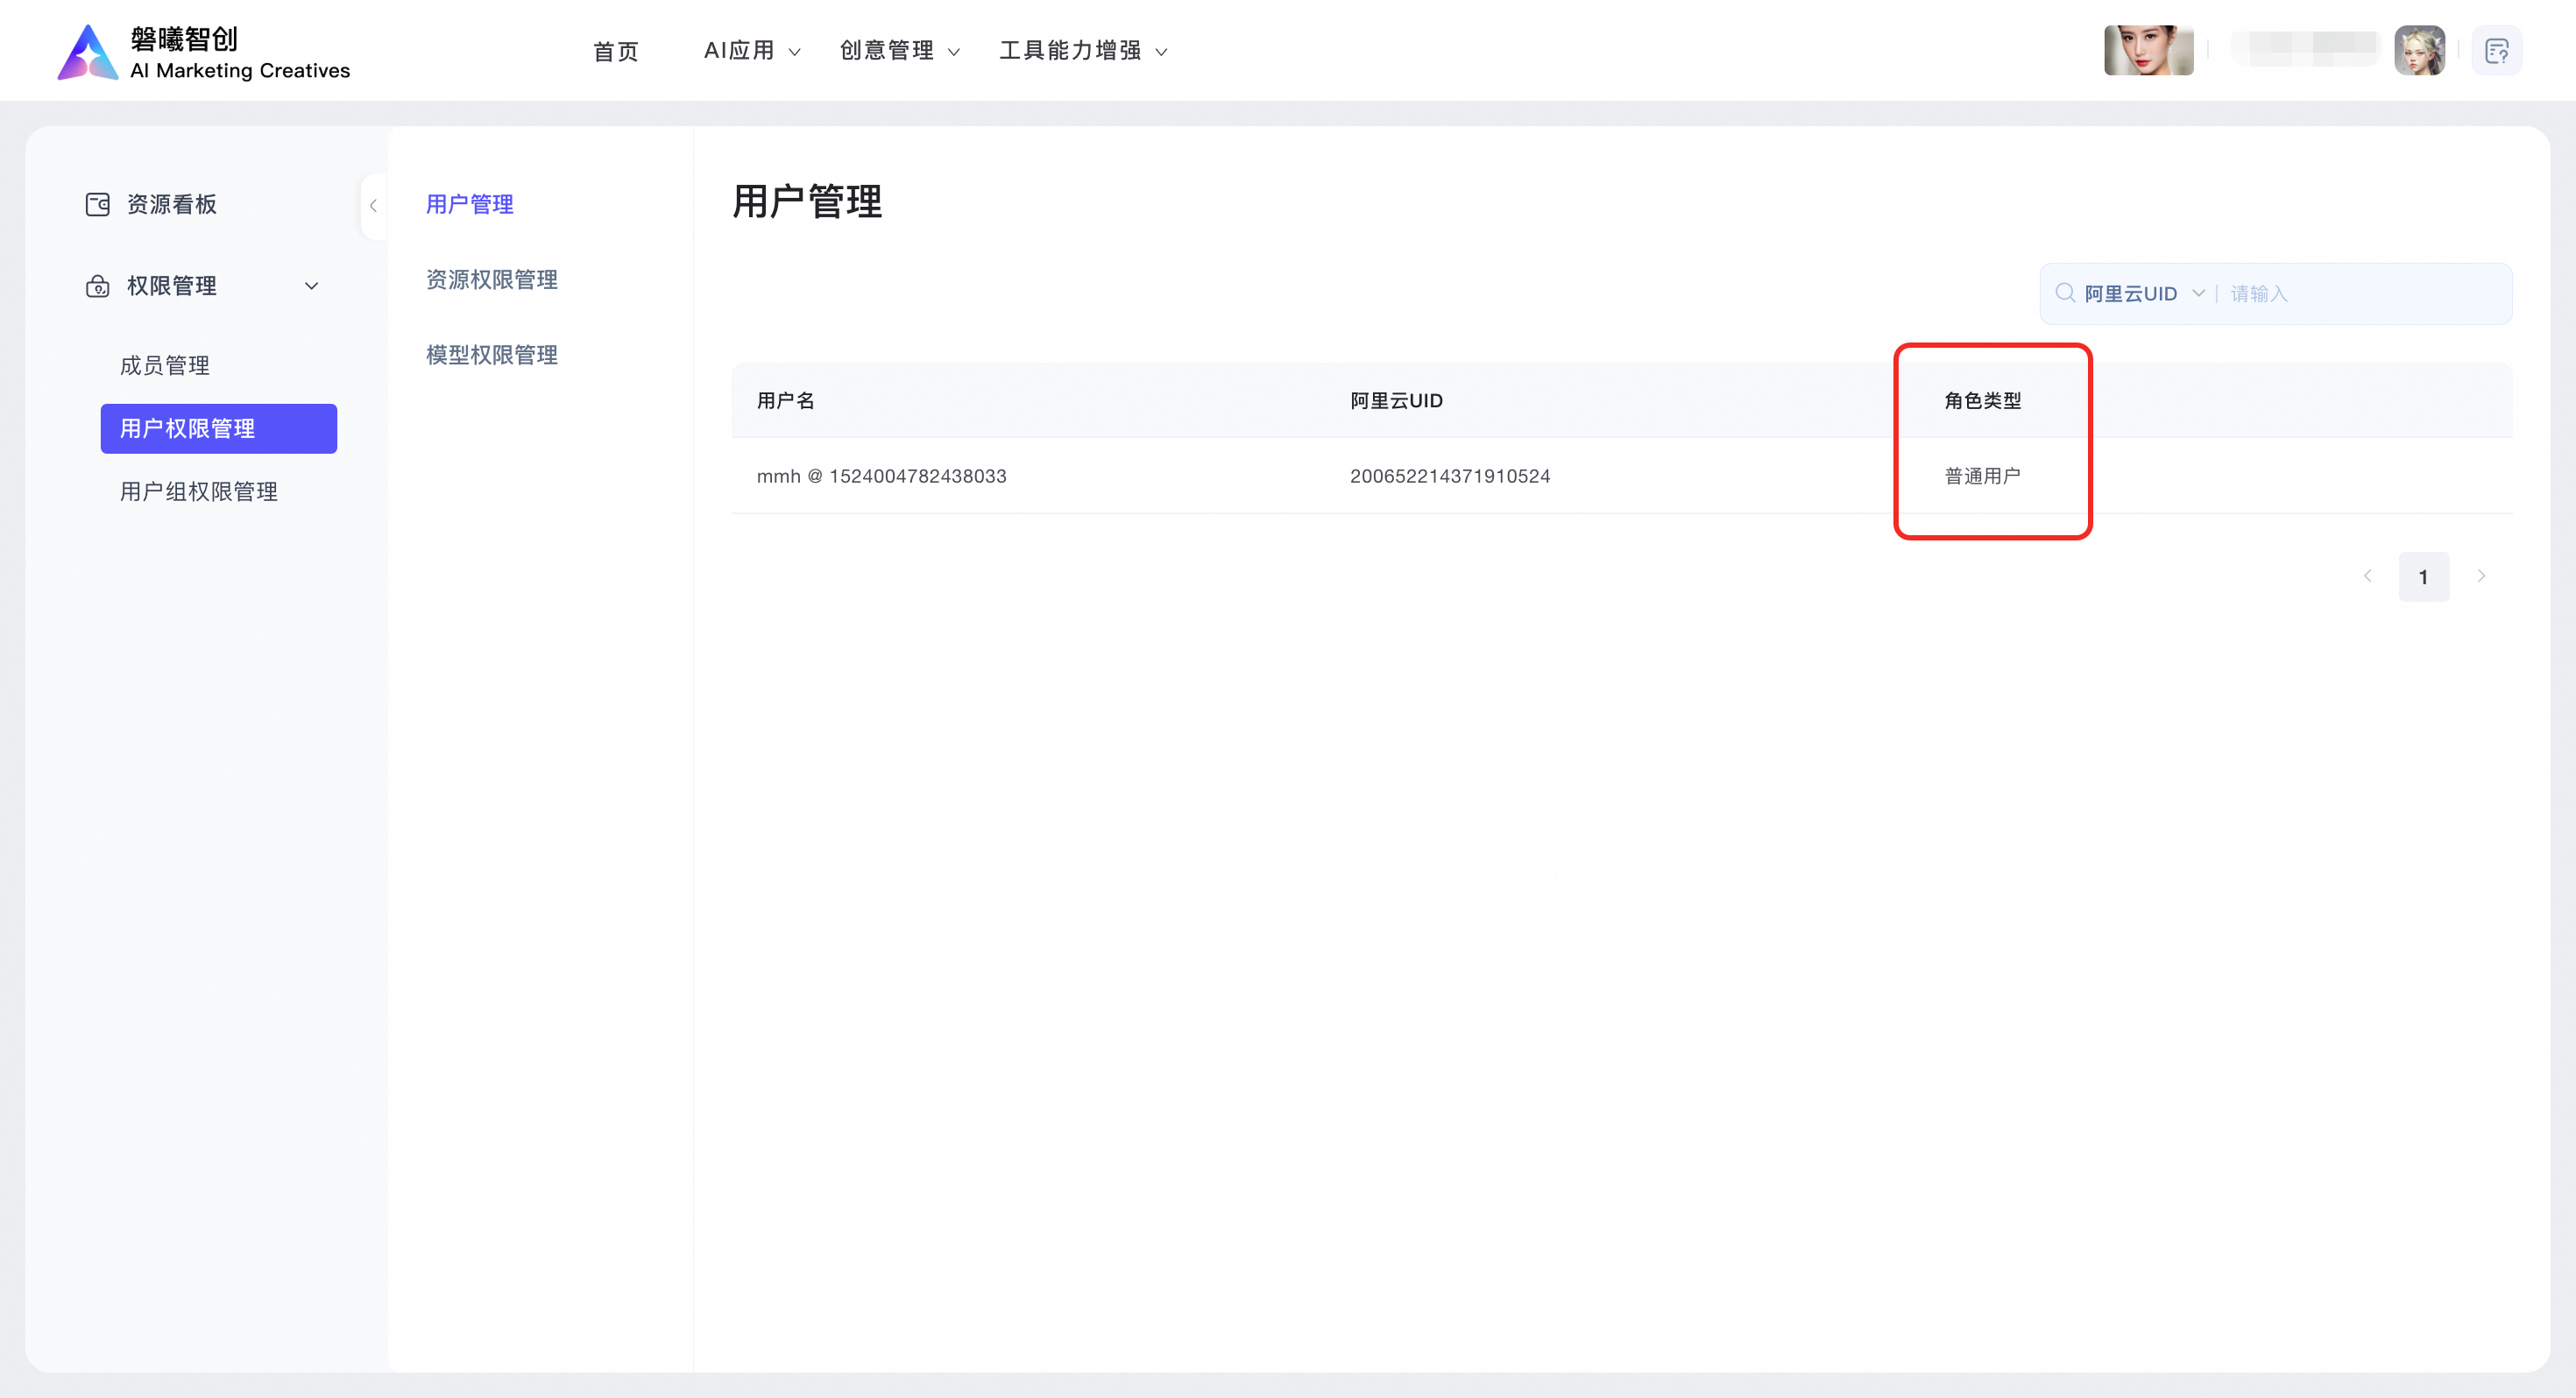
The User Management page displays the username, Alibaba Cloud UID, and role type. You can use the search box in the top right corner to look up user details.
5.3 User Group Permission Management
5.3.1 User Group Management
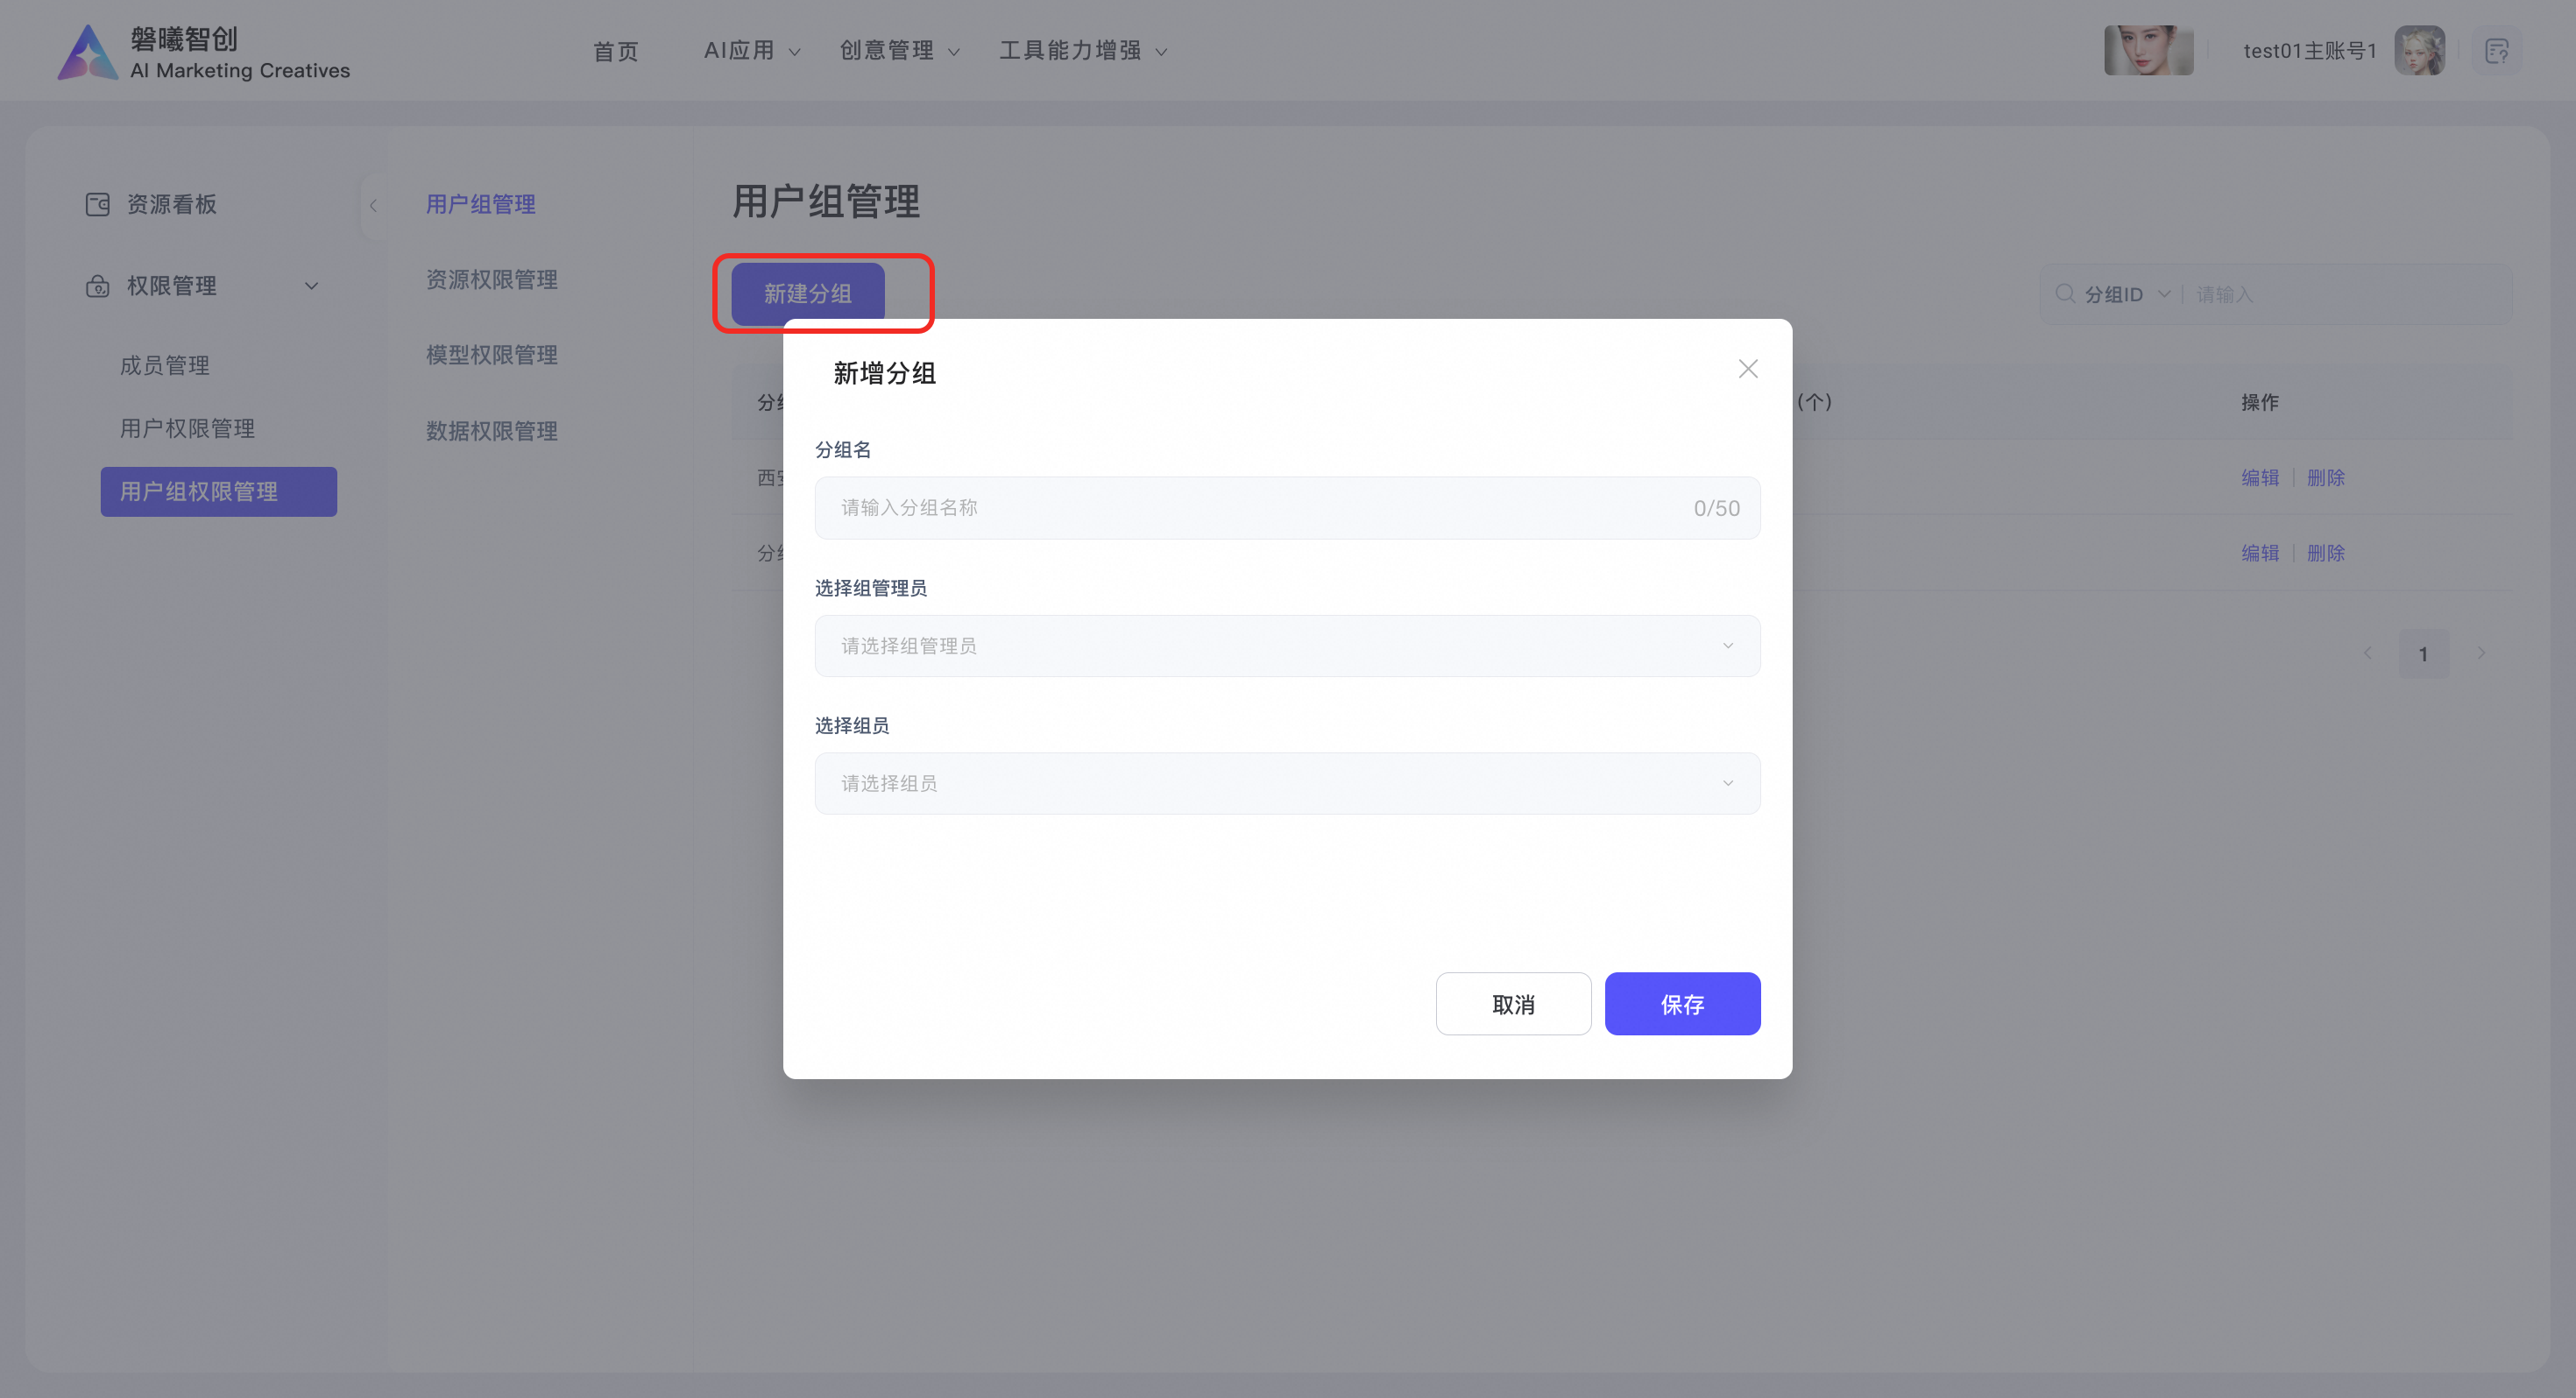
You can create a new user group by entering a group name of up to 50 characters, adding group administrators or members, and then saving the group.
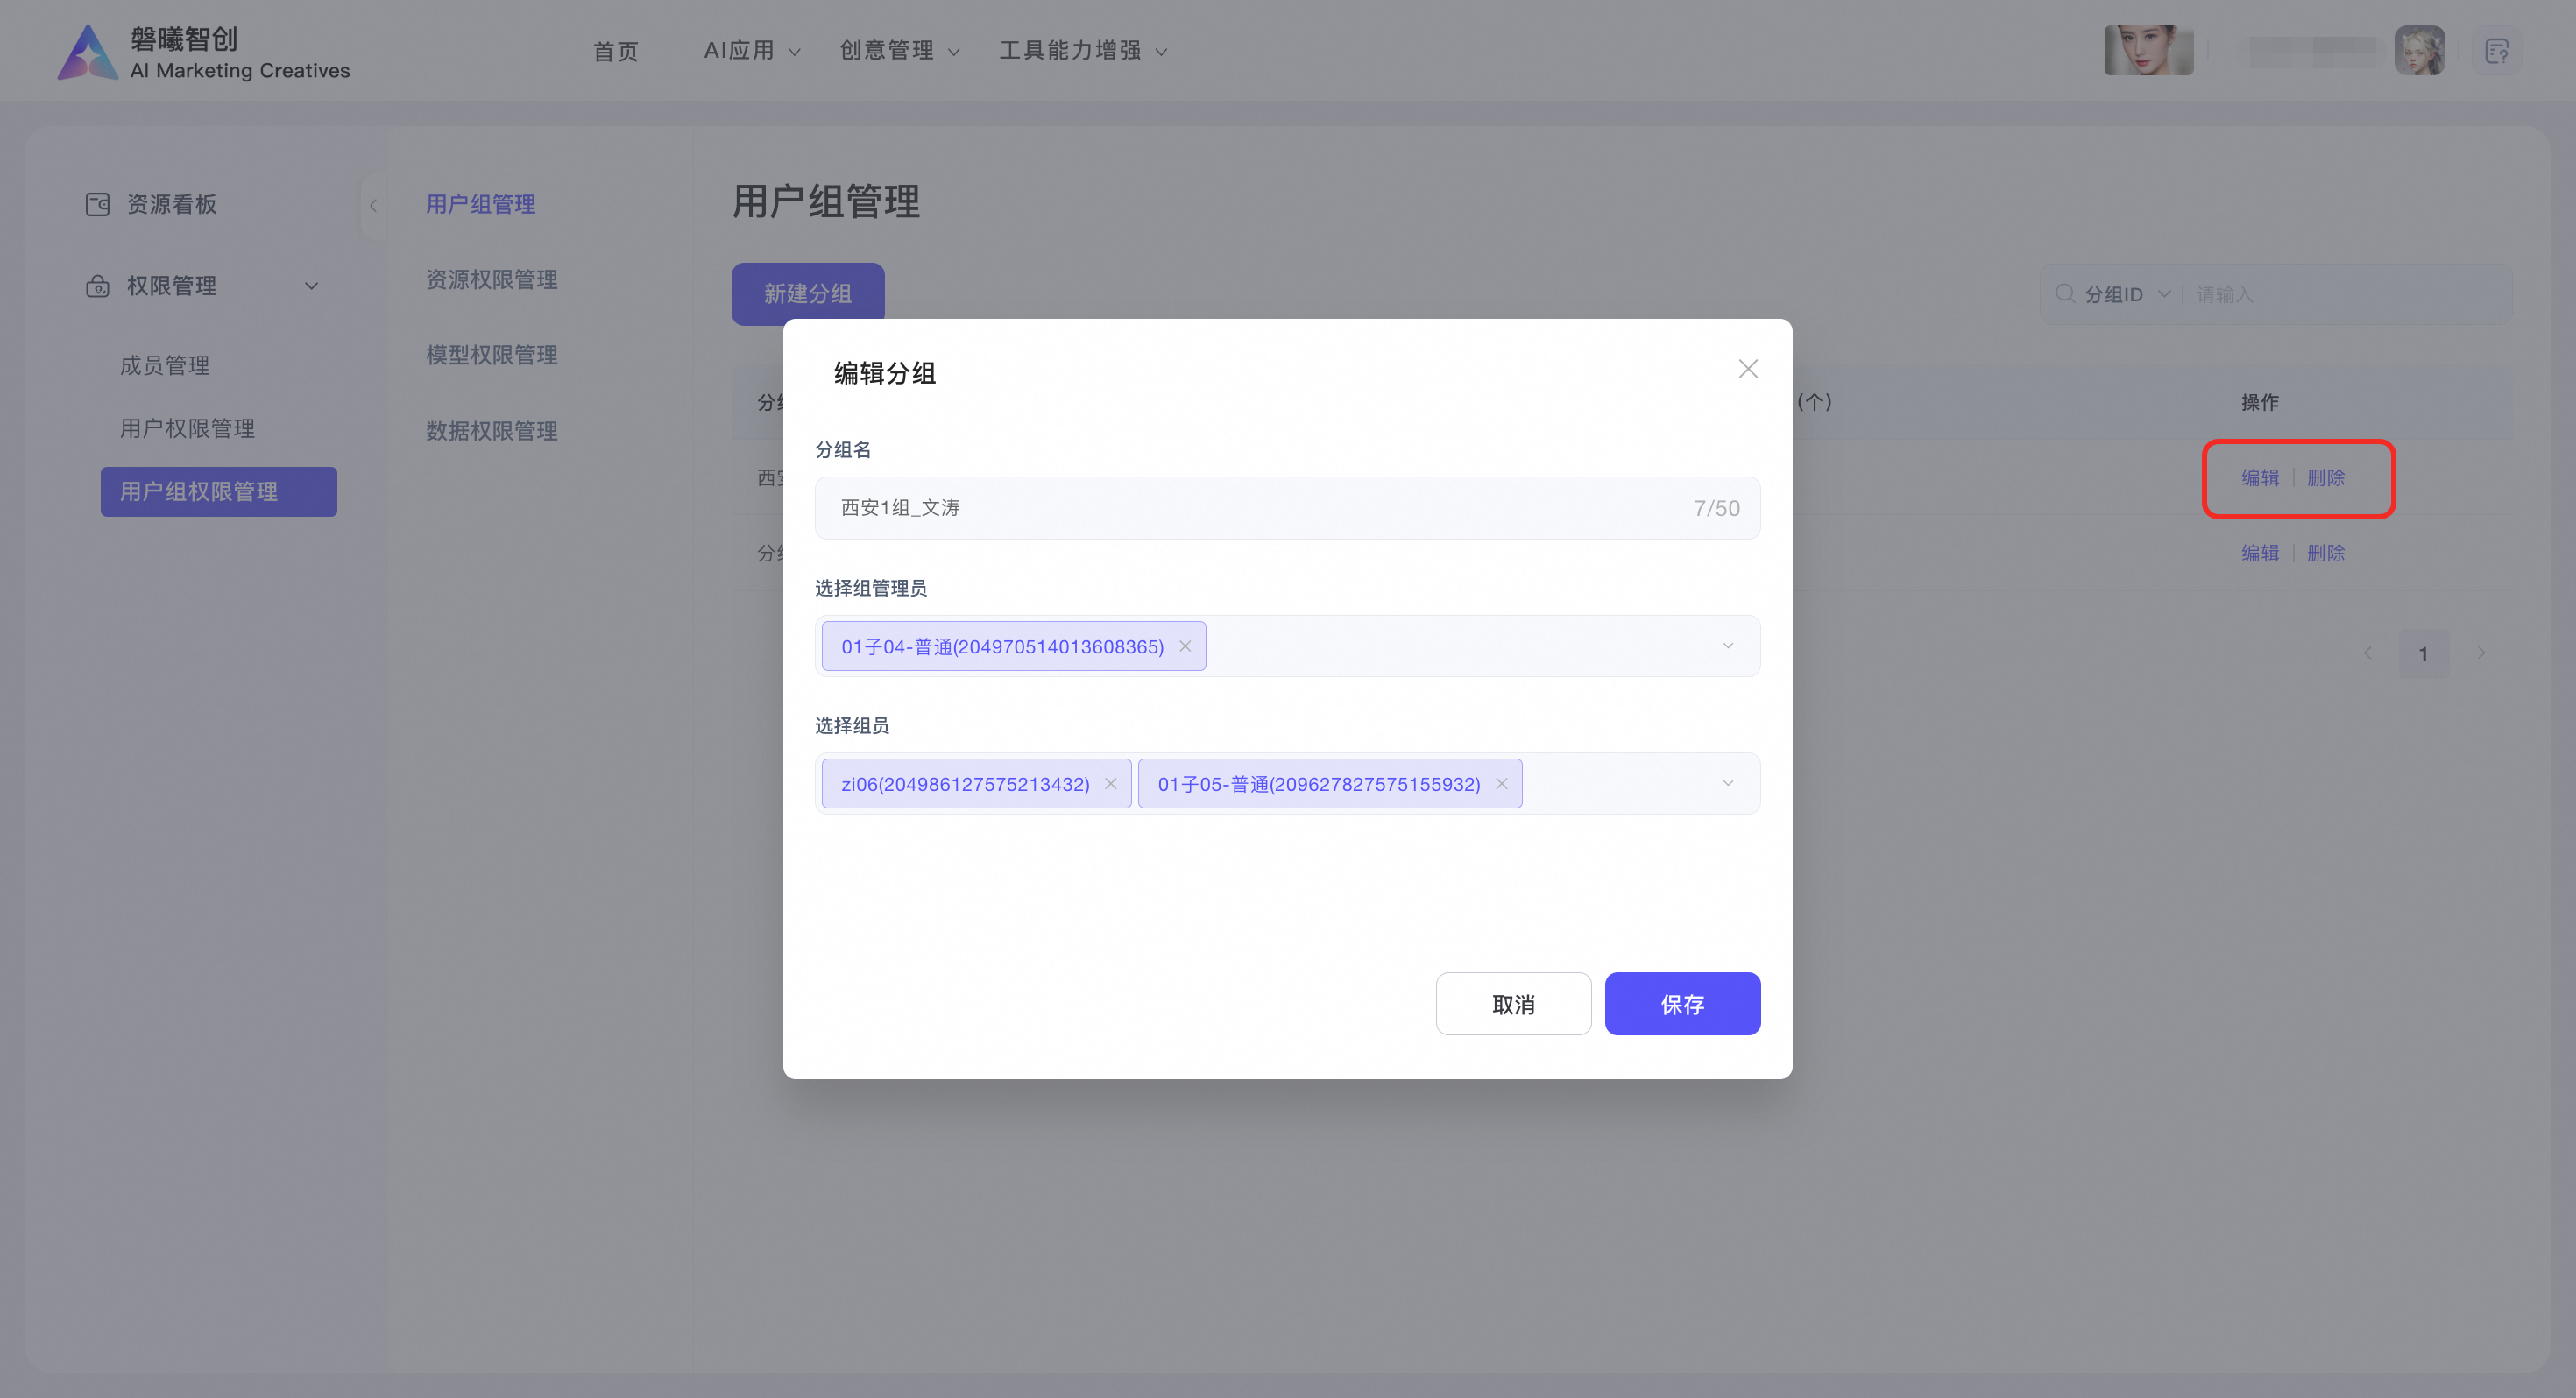
You can edit or delete existing groups.
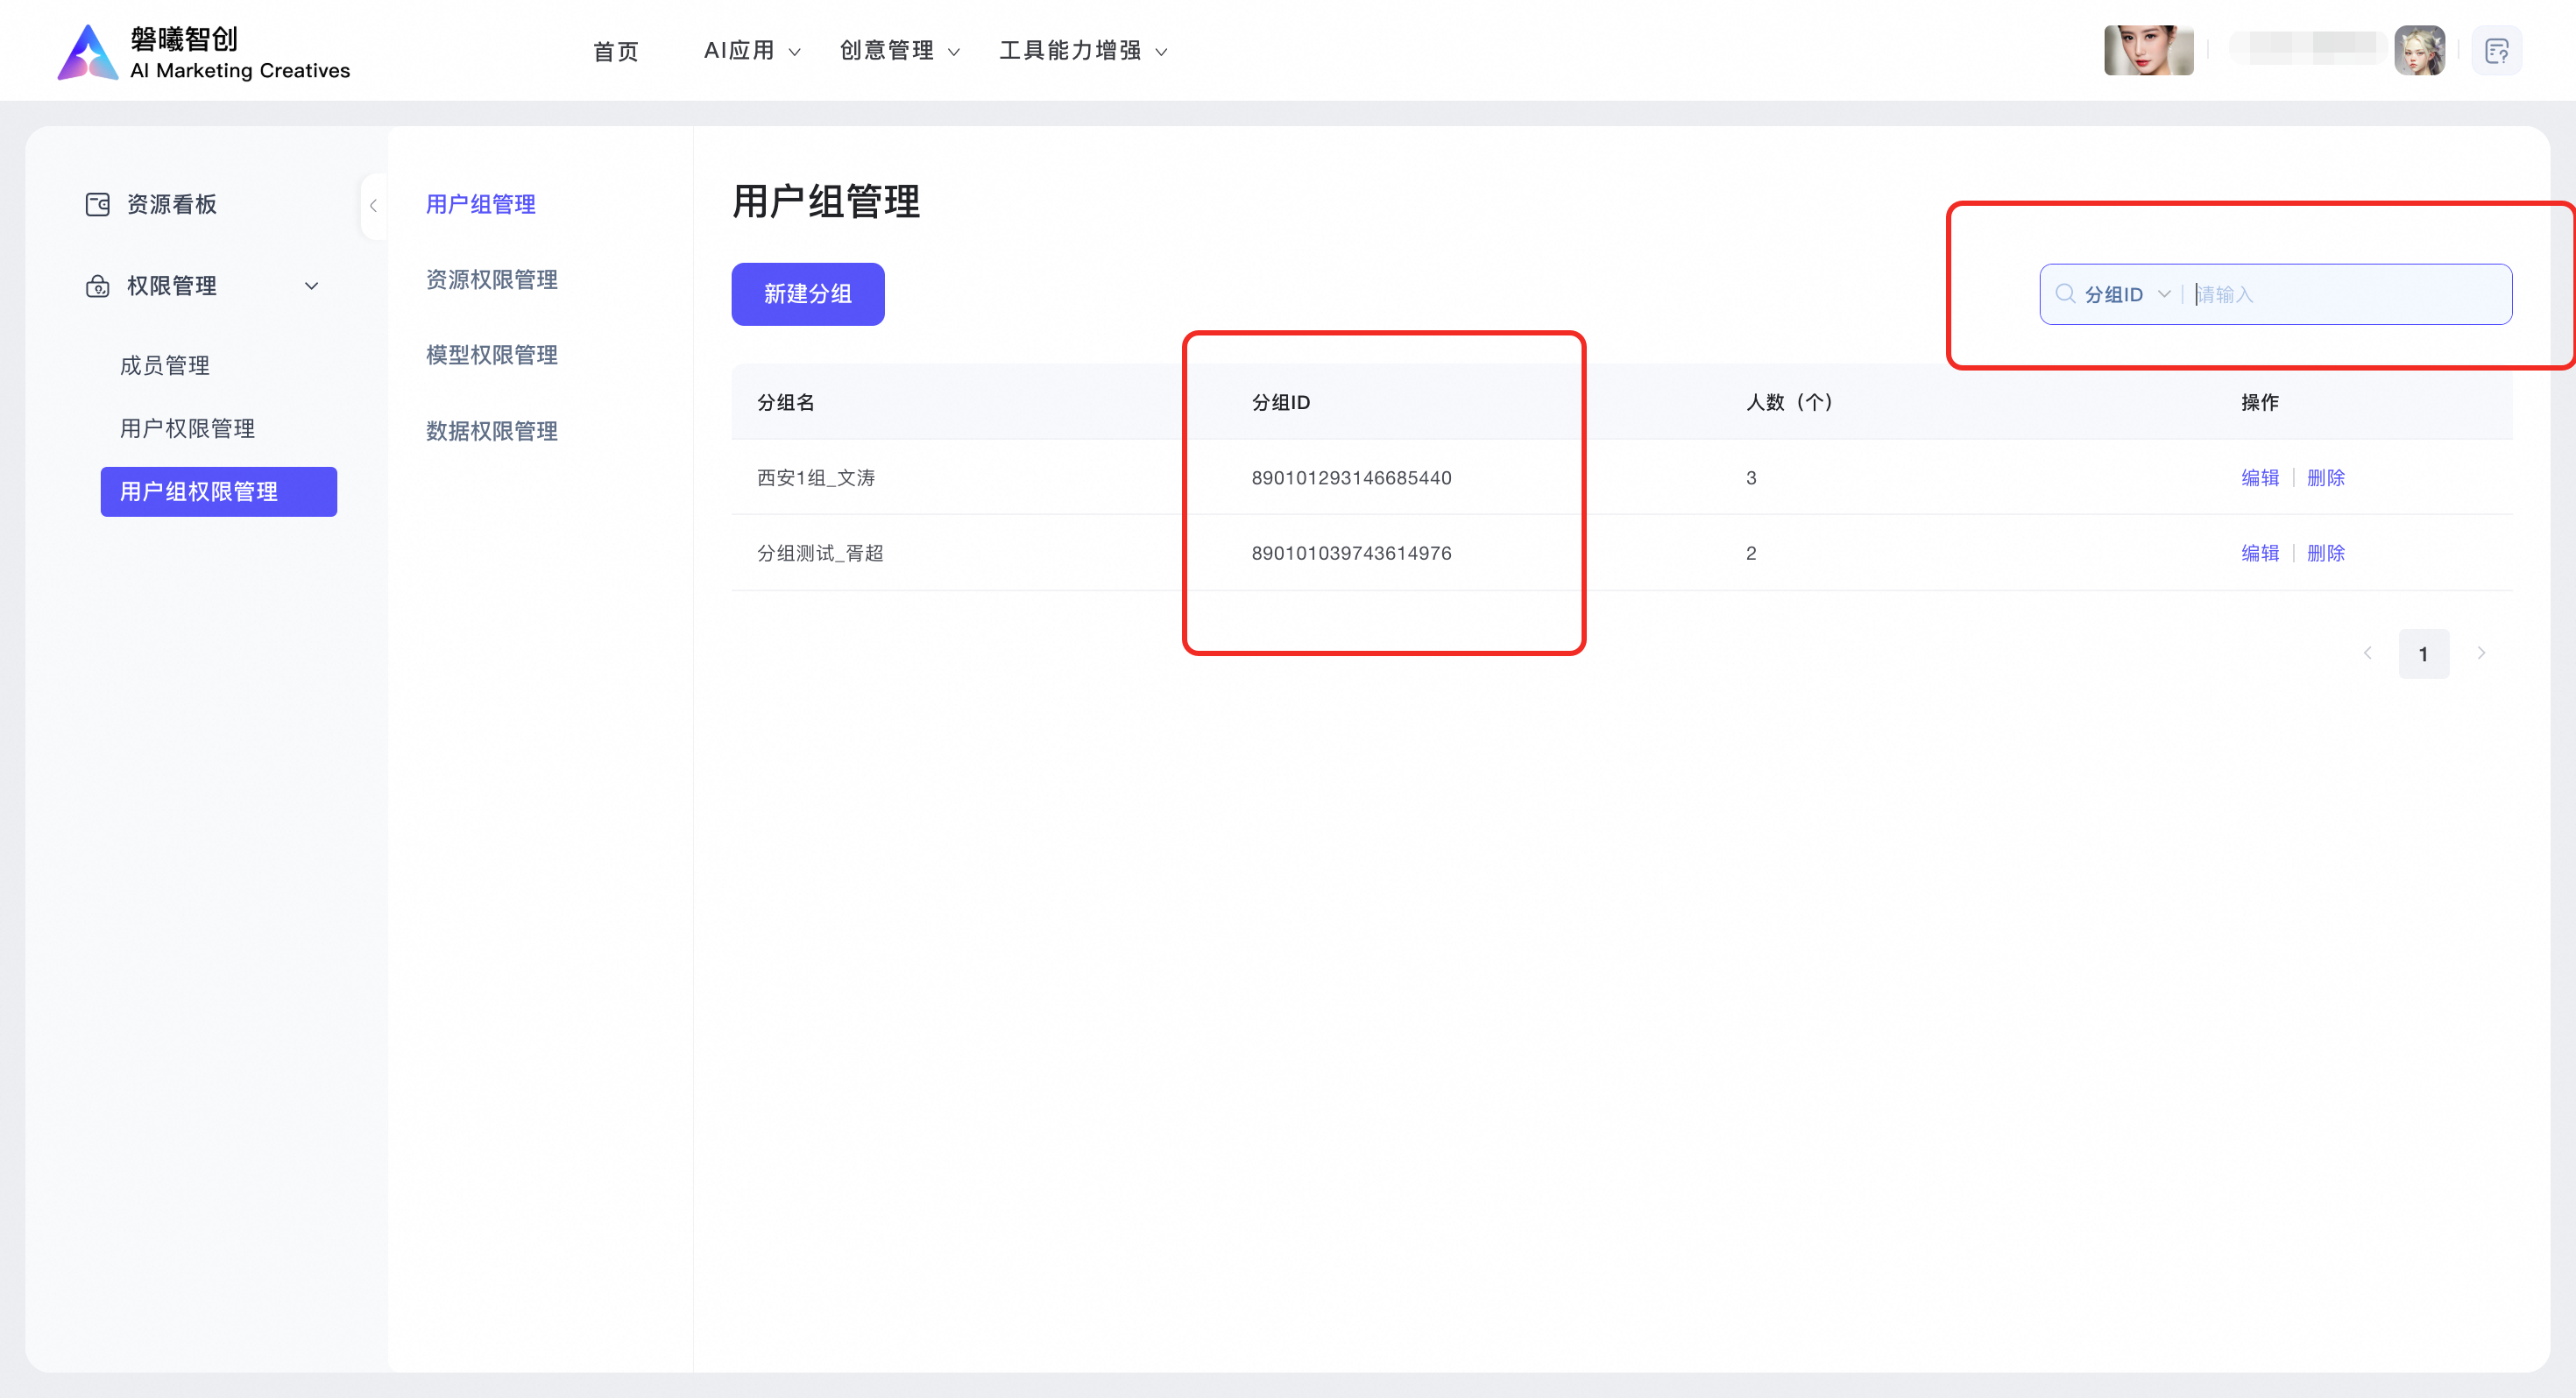
Each group has a unique ID. You can enter the group ID in the search box in the top right corner to find a specific group.
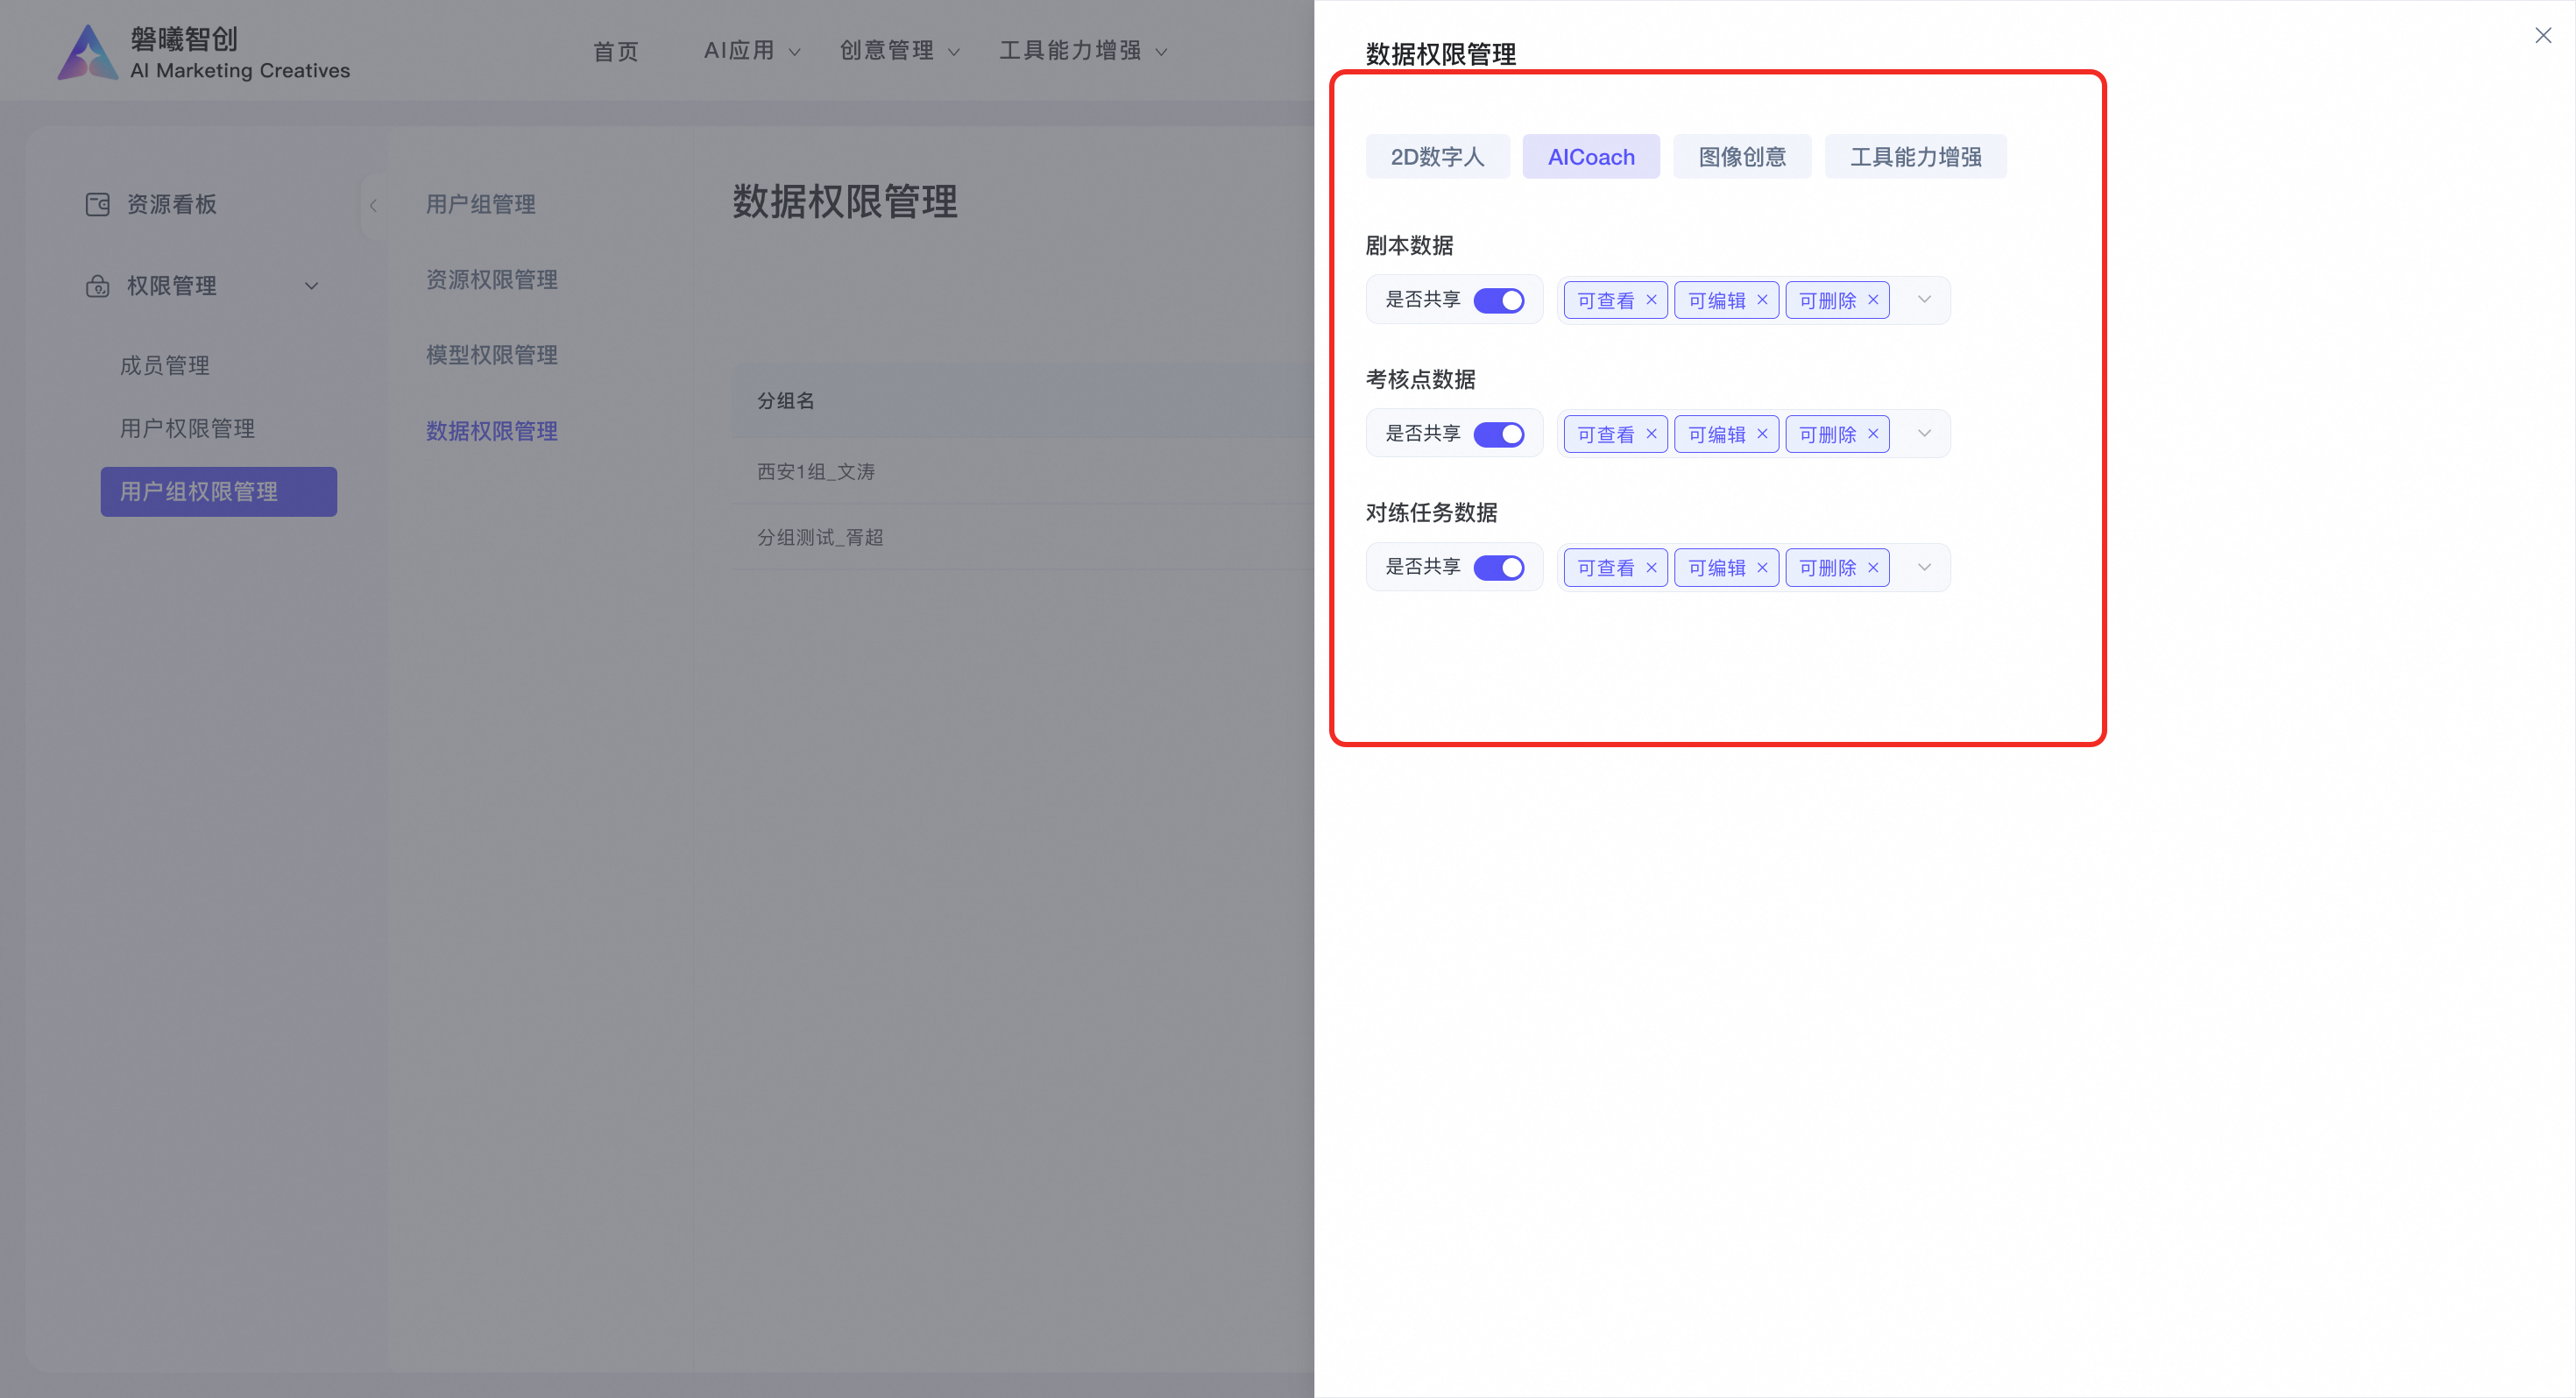
5.3.1 Data Permission Management
You can manage and edit group data permissions.
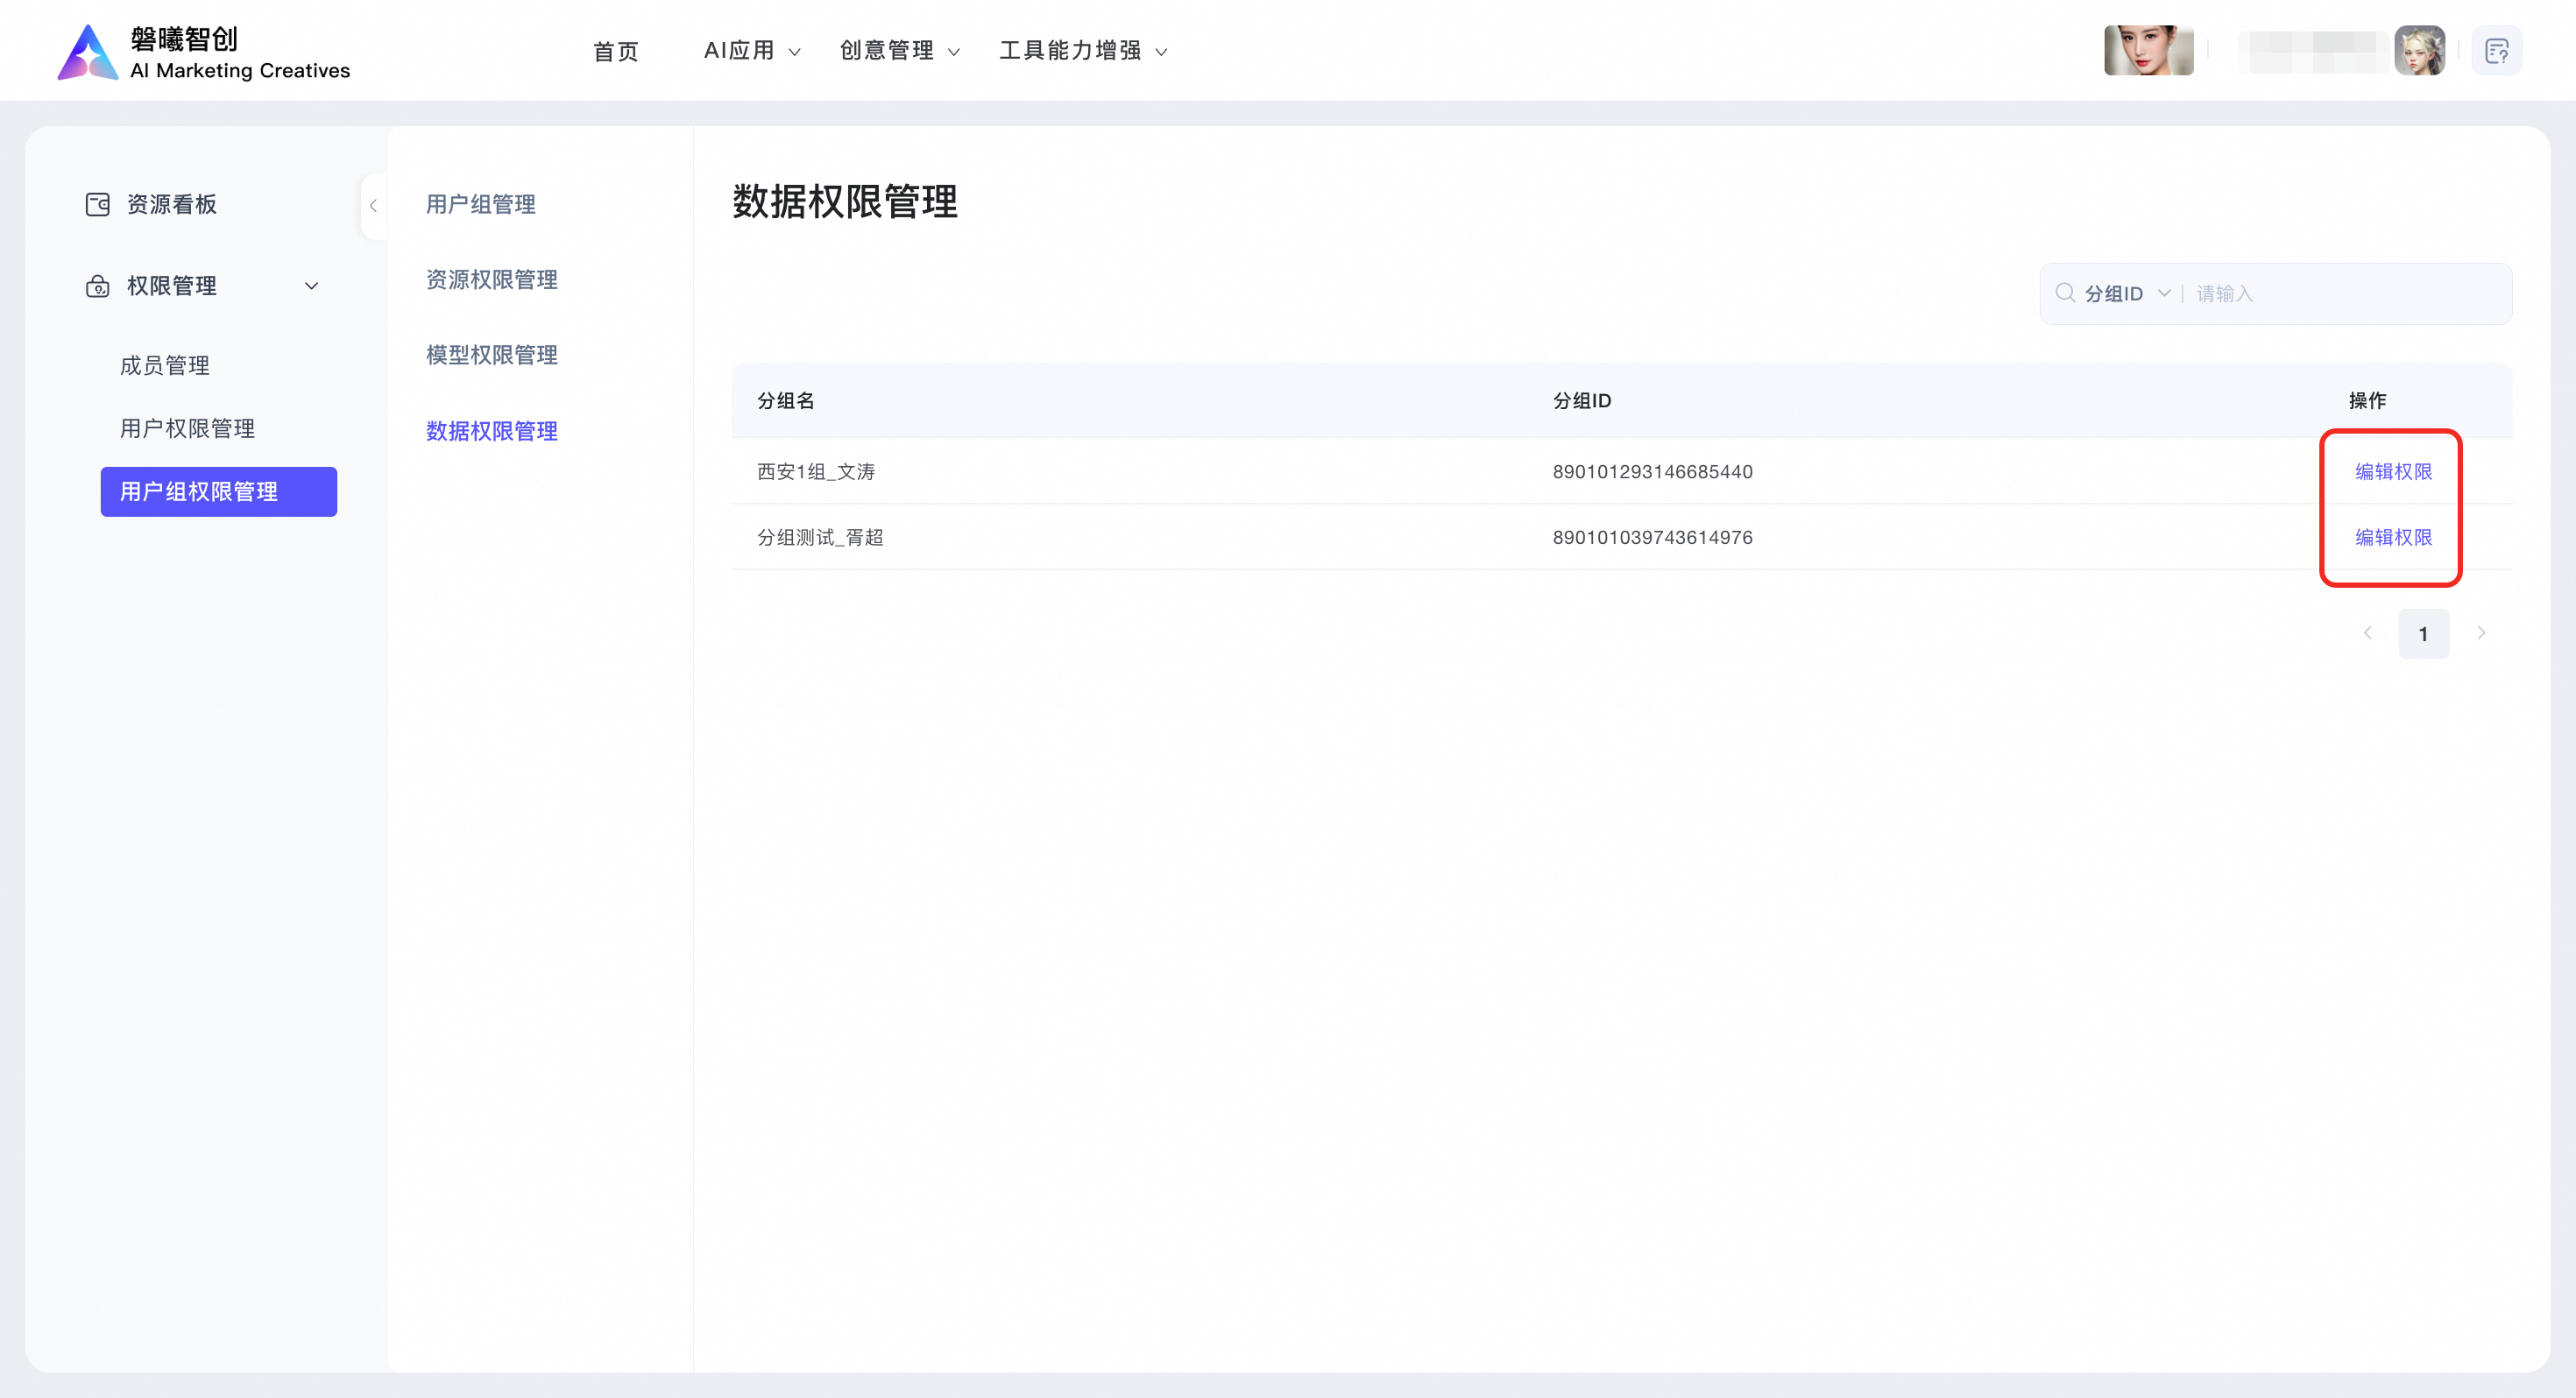
In the AI Coach section, you can set permissions for script data, assessment point data, and practice task data. You can choose from View, Edit, or Delete permissions.