Use HTTP subscriptions for topics and ARMS to send multi-channel alerts for custom data
This solution helps you distribute custom alert information to multiple notification channels, such as text messages, emails, and DingTalk groups. Using the HTTP subscription feature of the topic-based model in Simple Message Queue (formerly MNS) and the custom integration feature of Application Real-Time Monitoring Service, you can easily configure multi-channel synchronous notifications.
Benefits
Reliable data channel to trigger cloud product tasks: The core features of Simple Message Queue (formerly MNS), such as asynchronous decoupling, reliable transmission, and peak-load shifting, ensure stable and efficient delivery of notifications. This achieves loose coupling between applications and cloud services and maintains system stability during high concurrency.
Multiple notification channels: You can send alerts by phone, text message, or email, and through group chats or robots on instant messaging platforms such as DingTalk, Lark, and WeCom.
Flexible content formats: There are no restrictions on the format of alert content. Plain text, JSON, and other formats are supported.
Customizable notification policies: You can define different notification rules as needed. You can set parameters such as alert levels, time windows, and repetition counts. This allows for more precise and effective information delivery.
Solution architecture

Results
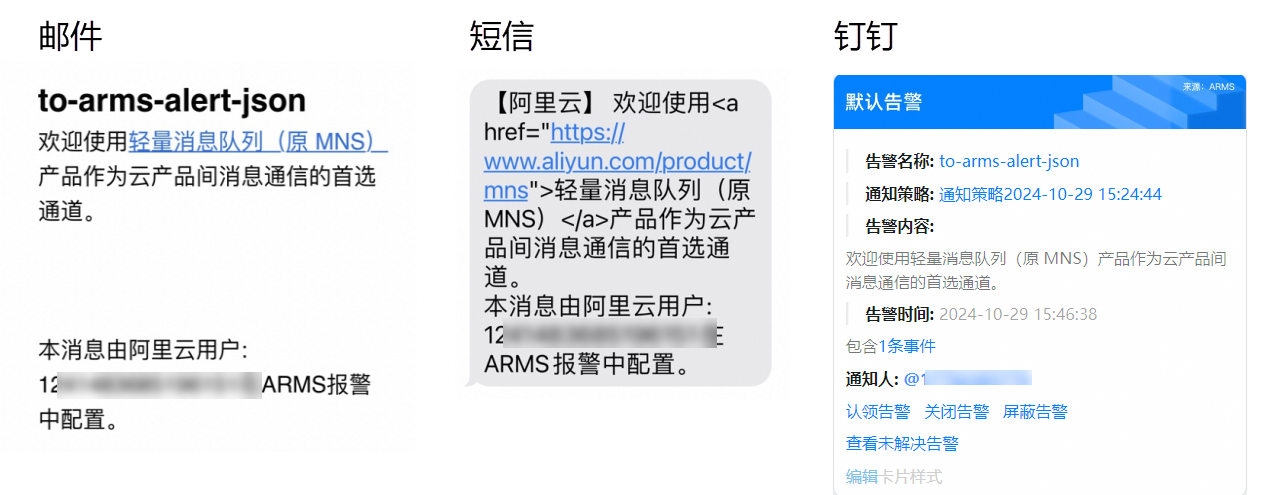
For example, you can send the following content to email, text message, and DingTalk channels at the same time.
Notification content: Welcome to <a href="">Simple Message Queue (formerly MNS)</a>, the preferred channel for messaging between cloud products.
The following shows the content received on the three channels:
Prerequisites
You have created a DingTalk robot and retrieved its Webhook address.
Create a DingTalk robot in the ARMS alert management system. For more information, see DingTalk Robot.
Create a contact in the ARMS alert management system and set the name, mobile number, and email address. For more information, see Create a contact for alert notifications.
NoteYou must verify the mobile number and email address before you can use them. For more information, see Verify a mobile number.
Procedure
Step 1: Create a Simple Message Queue (formerly MNS) topic
Log on to the SMQ console.
In the left-side navigation pane, choose Topic Model > Topics.
In the top navigation bar, select a region.
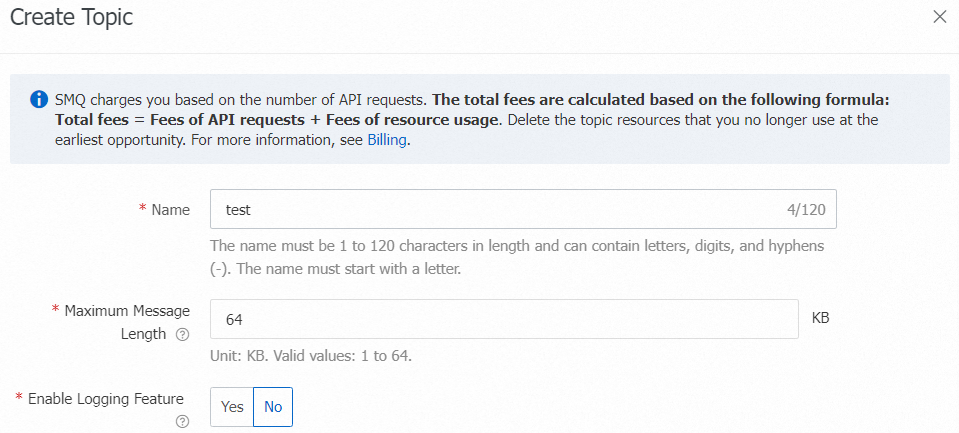
On the Topics page, click Create Topic. In the Create Topic panel, configure the following parameters and click OK.
Step 2: Push messages from the topic to ARMS
-
Log on to the ARMS console. In the left-side navigation pane, choose .
On the Alert Integrations tab, click Custom Integration.
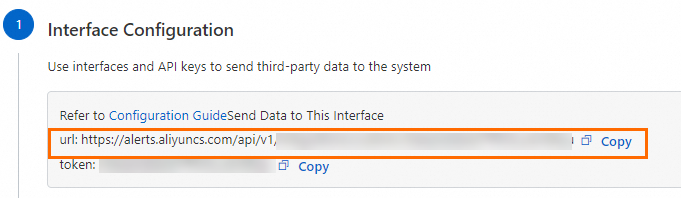
In the Create Custom Event Integration dialog box, enter a Name and Description for the integration, and then click Save and Configure. In the API Configuration section of the integration details page, copy the URL.
Return to the Simple Message Queue (formerly MNS) console. In the navigation pane on the left, choose .
On the Subscriptions page, click Create Subscription. In the Create Subscription panel, set the following parameters. Keep the default values for other parameters.
Parameter
Description
Example
Topic Name
Select the topic that you created in Step 1: Create a Simple Message Queue (formerly MNS) topic.
test
Subscription Name
Enter a name for the subscription.
testsubscription
Subscription Type
Select HTTP.
HTTP
Endpoint
Enter the integration URL that you copied.
https://alerts.aliyuncs.com/api/v1/integrations/custom/J3aaq2qQza****
Message Format
If the message body is not in JSON format, select JSON. If the message body is in JSON format, select SIMPLIFIED. This ensures that the full content pushed to ARMS is in JSON format.
JSON
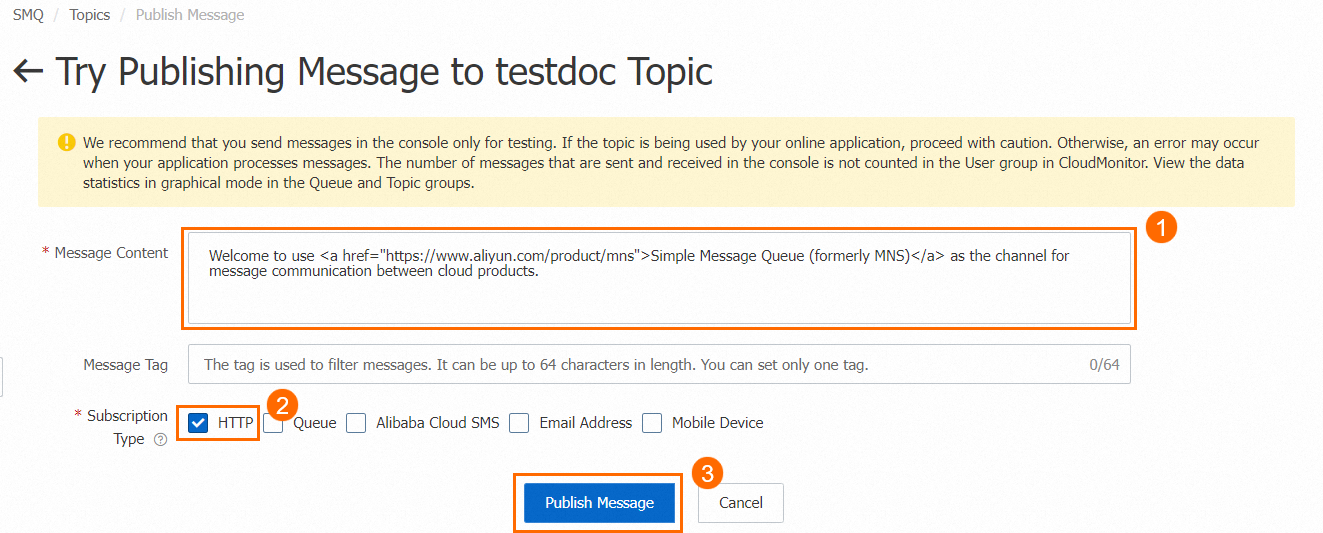
On the Topics page, find the topic that you created in Step 1: Create a Simple Message Queue (formerly MNS) topic. In the Action column, click Publish a message and perform the following operations.
 Important
This example uses the console to send a message. You can also send messages using an SDK. For more information, see SDKs.
When you send a message from the console, the message body is not encoded by default. When you send a message using an SDK, set the encoding method to No Base64.
After the message is pushed to ARMS, you can configure event mapping in the ARMS console based on the received message fields. For more information, see Step 3: Use the ARMS alert management system to parse the message body and configure a notification policy.
Step 3: Use the ARMS alert management system to parse the message body and configure a notification policy
In the Alert Integrations list of the ARMS console, find the custom event integration that you created in Step 2: Push messages from the topic to ARMS. In the Actions column, click Edit.
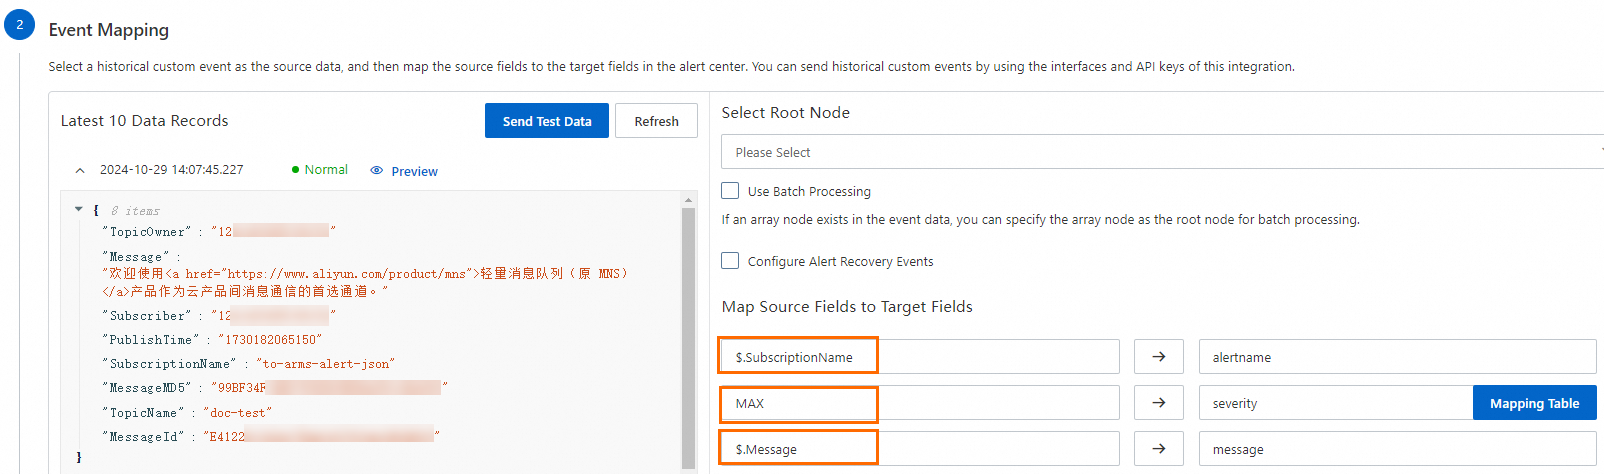
In the Event Mapping section of the integration details page, configure the mapping. In this example, SubscriptionName is mapped to the alert name (alertname), the alert level is set to MAX (P1), and the message body (Message) is mapped to the alert description (message). Then, click Save.

In the Actions column for the custom integration, choose to create a notification policy for the integration.
On the Notification Recipient tab, configure the following settings and click Save. You can keep the default configurations on the other tabs.
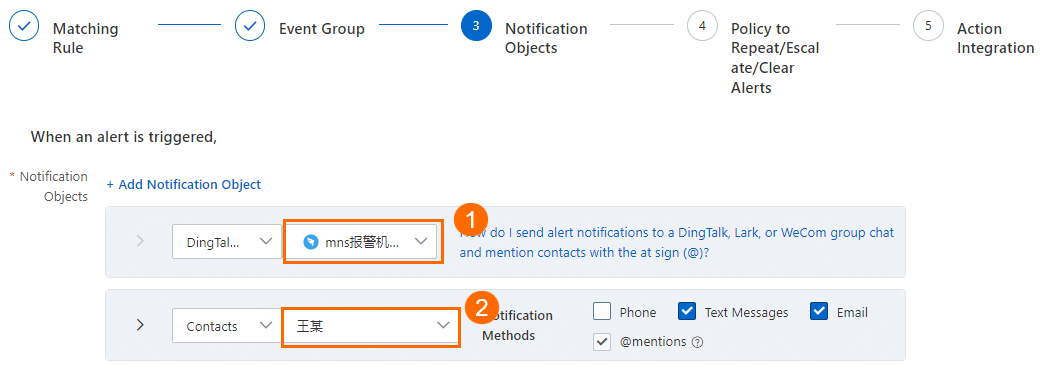
Notification Recipient: At ①, add the DingTalk robot that you created in the prerequisites. At ②, add the contact that you created in the prerequisites and select Text Message and Email as the notification methods.
Send Recovery Notification: Select Do not send recovery notification.
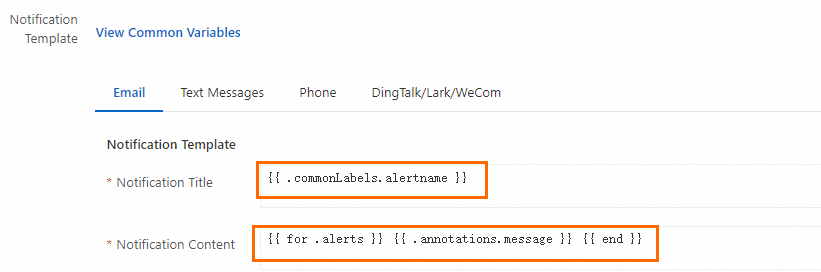
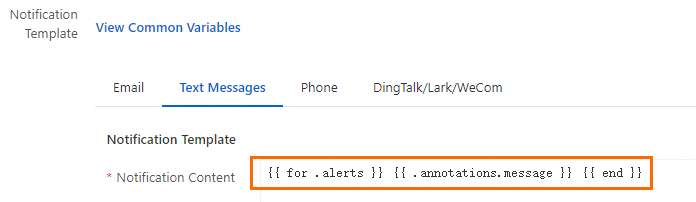
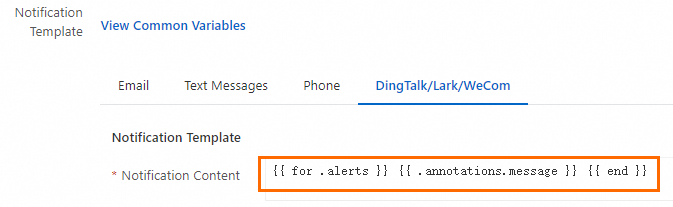
Notification Template: In the notification content variable field, enter
{{ for .alerts }} {{ .annotations.message }} {{ end }}.Email
Text message
DingTalk
Step 4: Verify the result
Return to the Simple Message Queue (formerly MNS) console. On the Topics page, find the topic that you created in Step 1: Create a Simple Message Queue (formerly MNS) topic. In the Action column, click Publish a message and perform the following operations.
Verify that the alert is received by the contact's email, as a text message, and by the DingTalk robot.