How to build a to-do application
Solution overview
This topic describes how to build a to-do application using Mobinext.
Prerequisites
This topic uses a MySQL database for data modeling. If you do not have a database with public network access, you can create one using Alibaba Cloud RDS. If you are new to Alibaba Cloud RDS, review the RDS workflow before you begin. For more information, see Step 1: Create an RDS MySQL instance and configure the database.
Create an integration
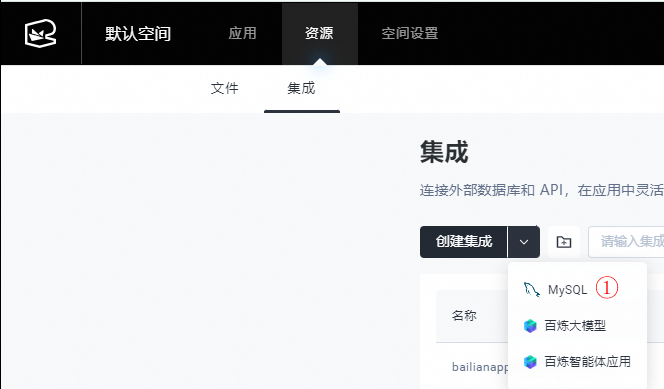
Go to the Mobinext console. Choose Resources > Integration, and then create a MySQL integration.
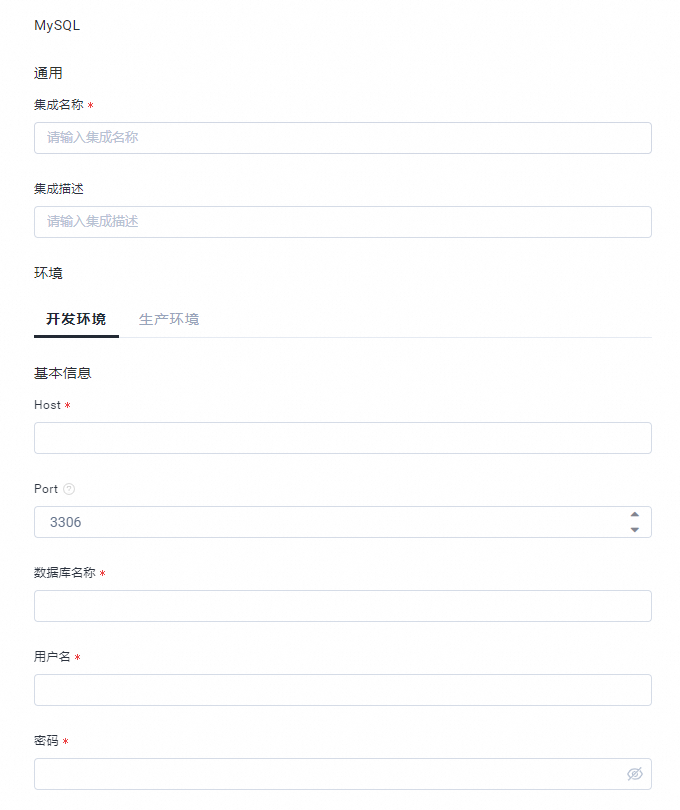
Configure the MySQL connection information. For more information, see Step 2: Connect to an RDS MySQL instance.
Save changes
If the database is restricted by a whitelist, add the IP addresses listed on the right side of the configuration page to the whitelist.
After you save the integration, go to the integration list page and click Edit to test the database connection.
Create an application
Go to the Mobinext console and create an application.
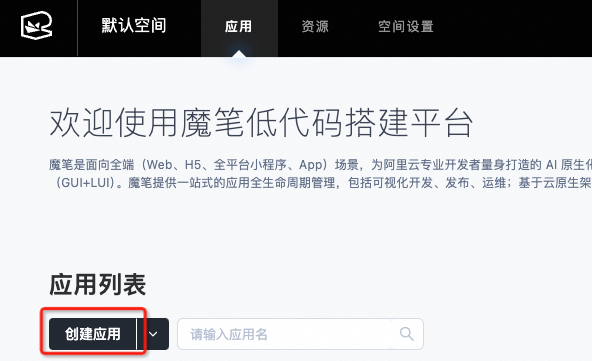
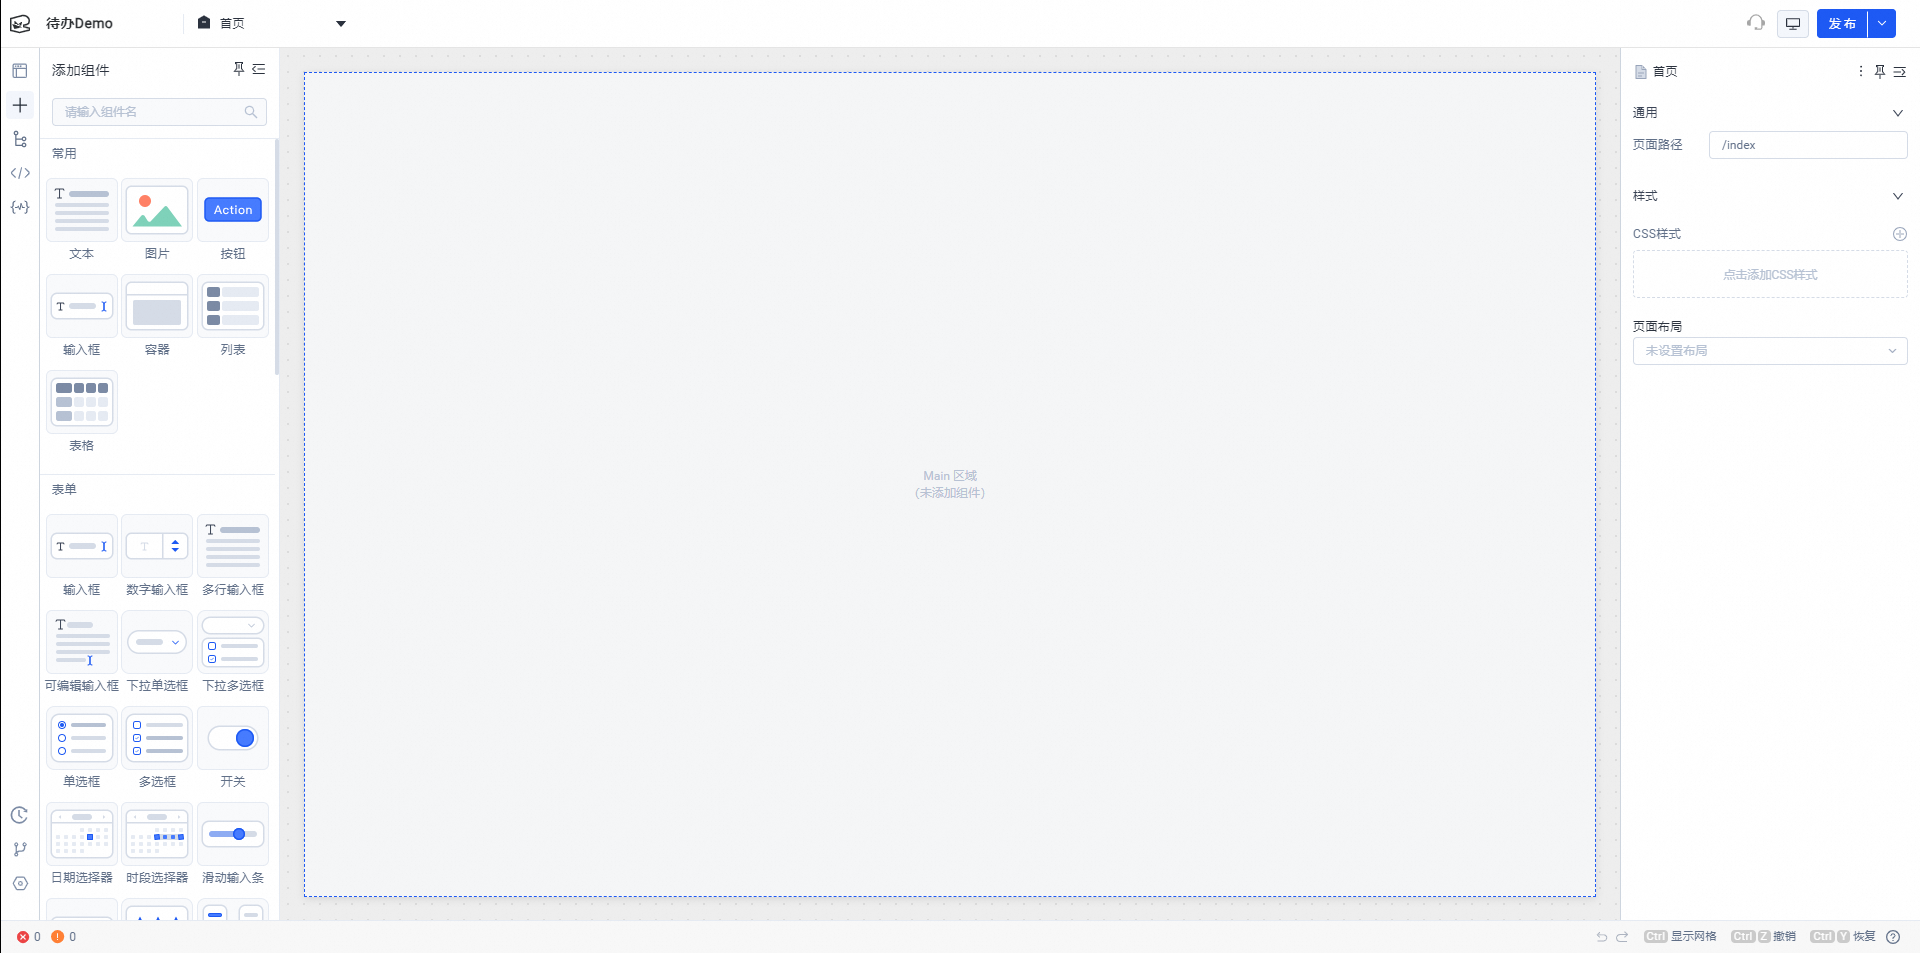
The application opens automatically after it is created.
Create an integration (createTable)
1. Create an integration.
2. Select the newly created database integration as the integration resource.
3. Double-click `action1` and rename it to `createTable`.
Create the `todo` table schema.
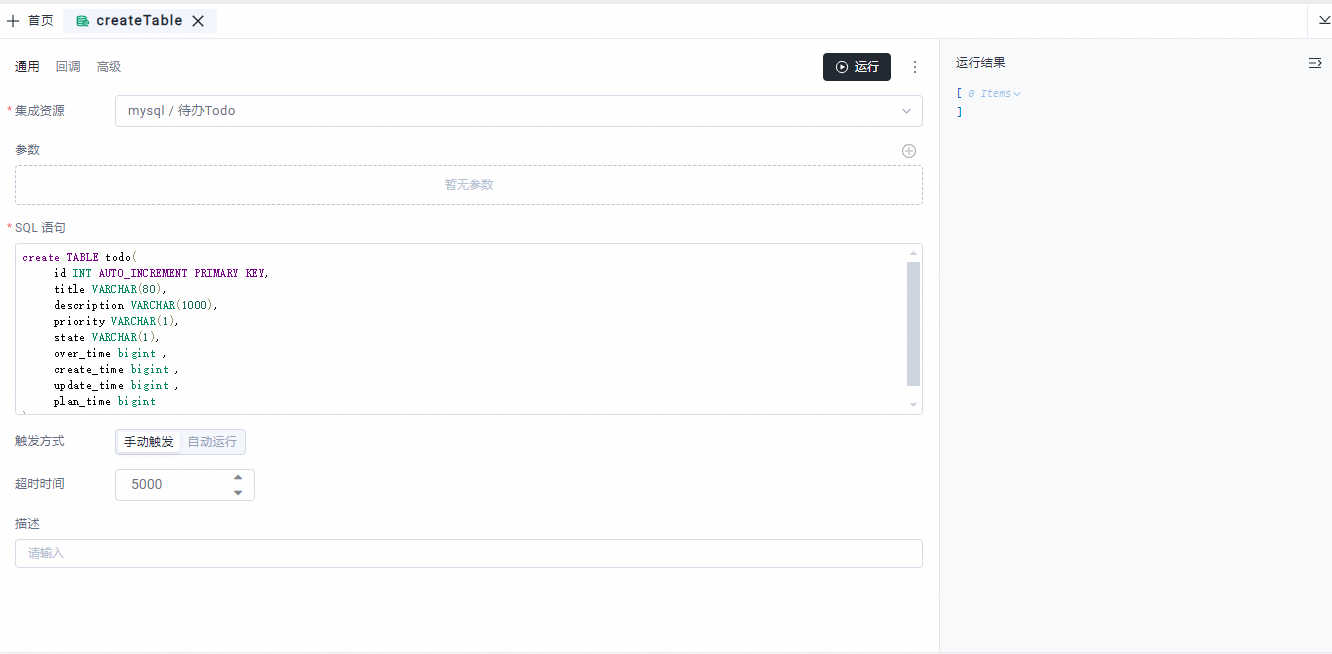
Enter the following SQL statement in the integration configuration and click Run.
create TABLE todo(
    id INT AUTO_INCREMENT PRIMARY KEY,
    title VARCHAR(80),
    description VARCHAR(1000),
    priority VARCHAR(1),
    state VARCHAR(1),
    over_time bigint ,
    create_time bigint ,
    update_time bigint ,
    plan_time bigint
);
Query the `todo` table (`todoRes`).
Enter
SELECT * FROM todoas the SQL statement and click Run. Configure this integration to run automatically.Create a display list for to-do items.
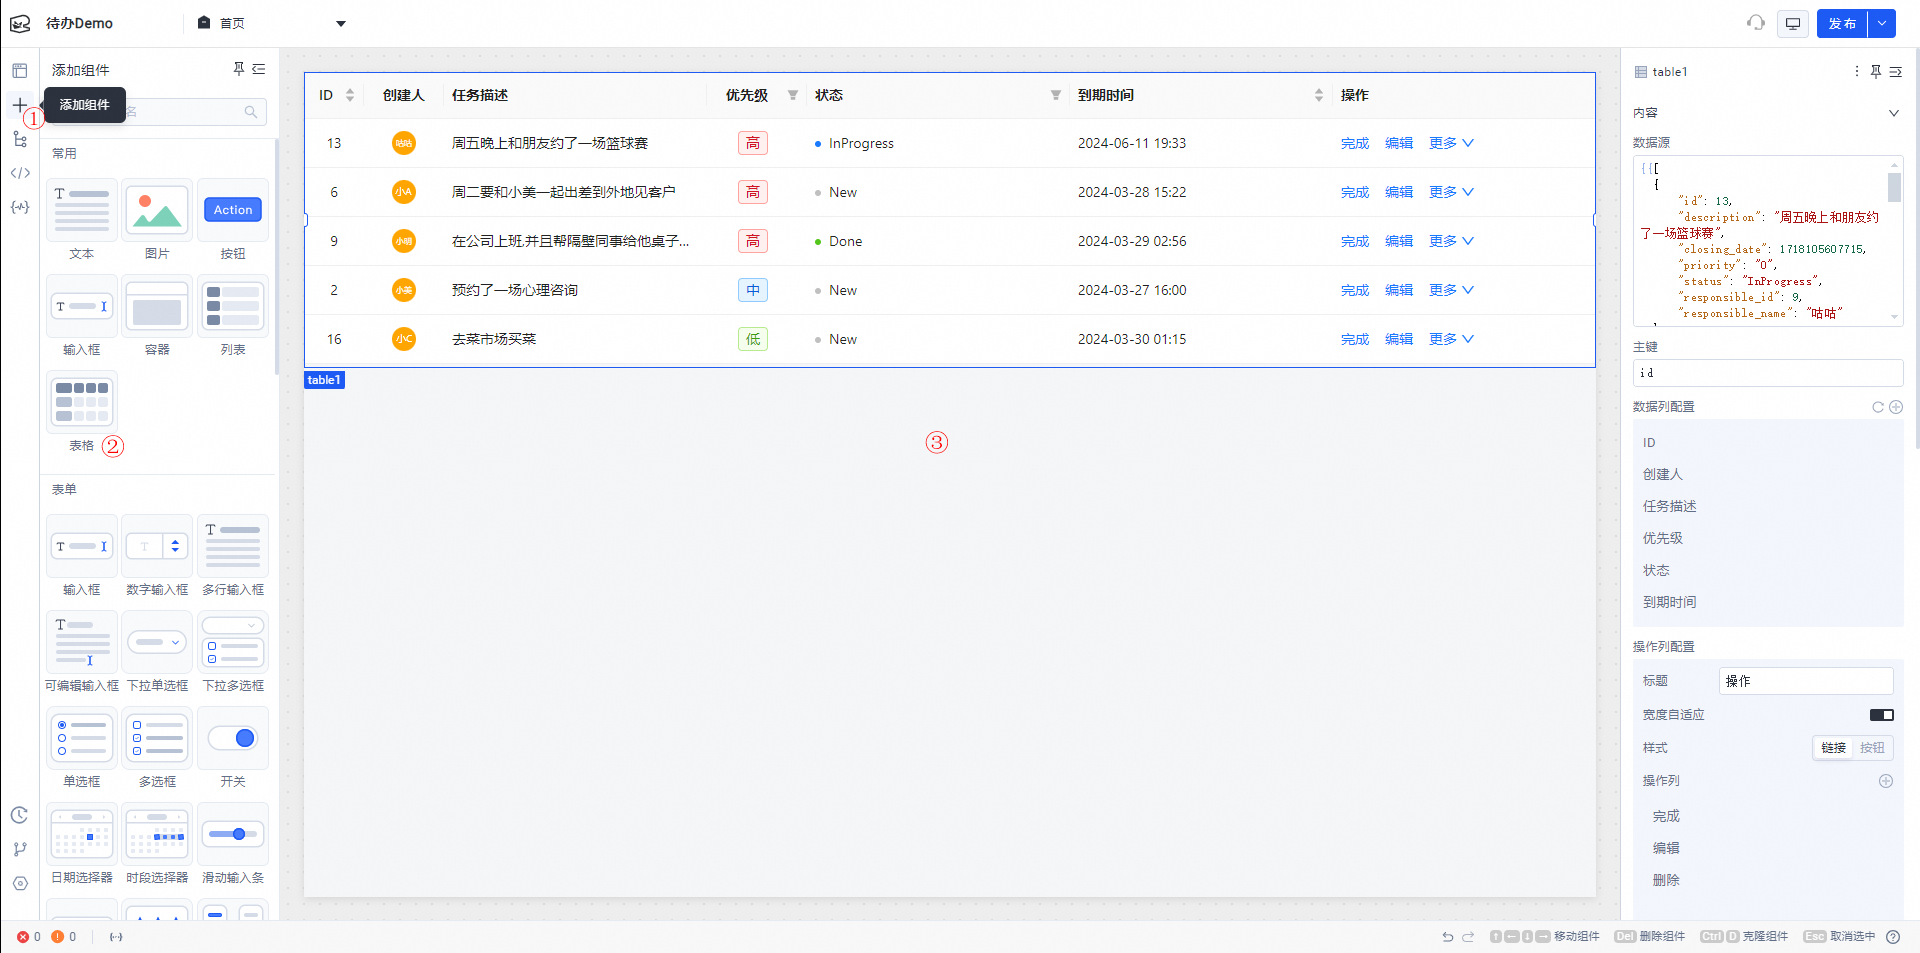
Select the table component (②) from the Add menu (①) and drag it onto the canvas (③).

Configure the data source: Replace the content in the data source field on the right with `{{todoRes.data}}`.
Configure data columns: In the Data Column Configuration section on the right, add an operation column. Configure it as shown in the following figure.
// Priority mapping rule
{{ currentItem.priority == 0 ? "High" :  currentItem.priority == 1 ? "Medium" :  currentItem.priority == 2 ? "Low" : "" }}
// Priority color
{{ currentItem.priority == 0 ? "red" :  currentItem.priority == 1 ? "grey" :  currentItem.priority == 2 ? "pick" : "black" }}

// Status mapping rule
{{ currentItem.state == 0 ? "Not Started" :  currentItem.state == 1 ? "In Progress" :  currentItem.state == 2 ? "Completed" : "" }}
// Status configuration
{{ currentItem.state == 0 ? "warning" :  currentItem.state == 1 ? "processing" :  currentItem.state == 2 ? "success" : "default" }}

// Creation time format
YYYY-MM-DD

// Data structure of the queried demo data
[{"id":1,"title":"Demo","description":"Demo","priority":"0","state":"0","over_time":null,"create_time":1721987000879,"update_time":1721987000879,"plan_time":null}]
Add components for adding data to the page. Include four input components (`inputTitle`, `inputDesc`, `inputPro`, and `inputState`) and one button component.
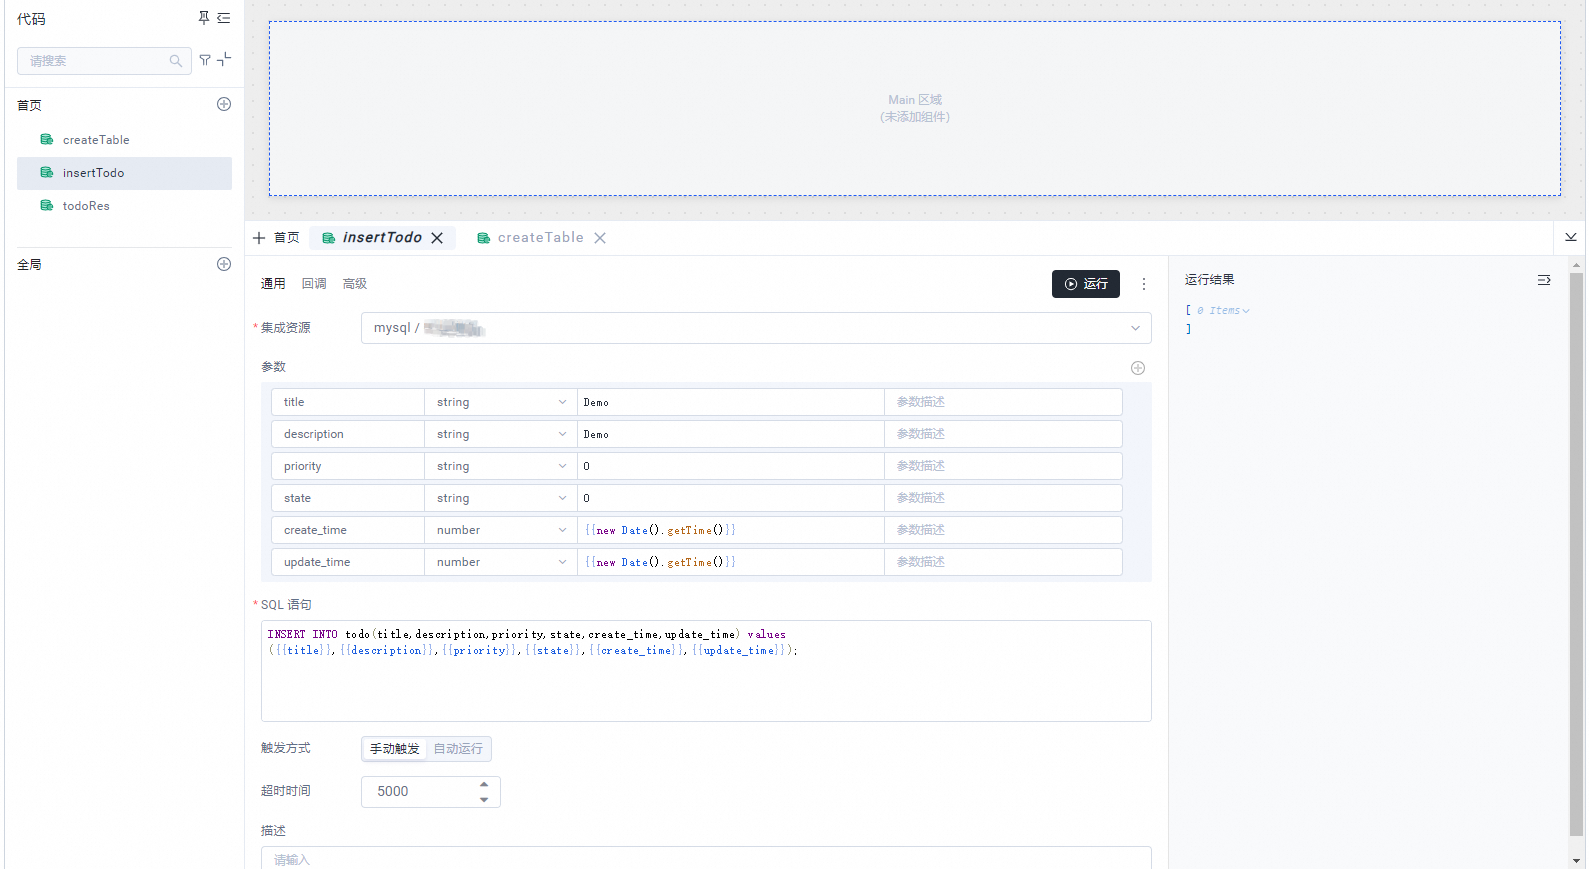
Add data to the `todo` table (`insertTodo`). Enter the parameters and the SQL statement, and then click Run. The newly inserted data appears.
INSERT INTO todo(title,description,priority,state,create_time,update_time) values
({{title}},{{description}},{{priority}},{{state}},{{create_time}},{{update_time}});
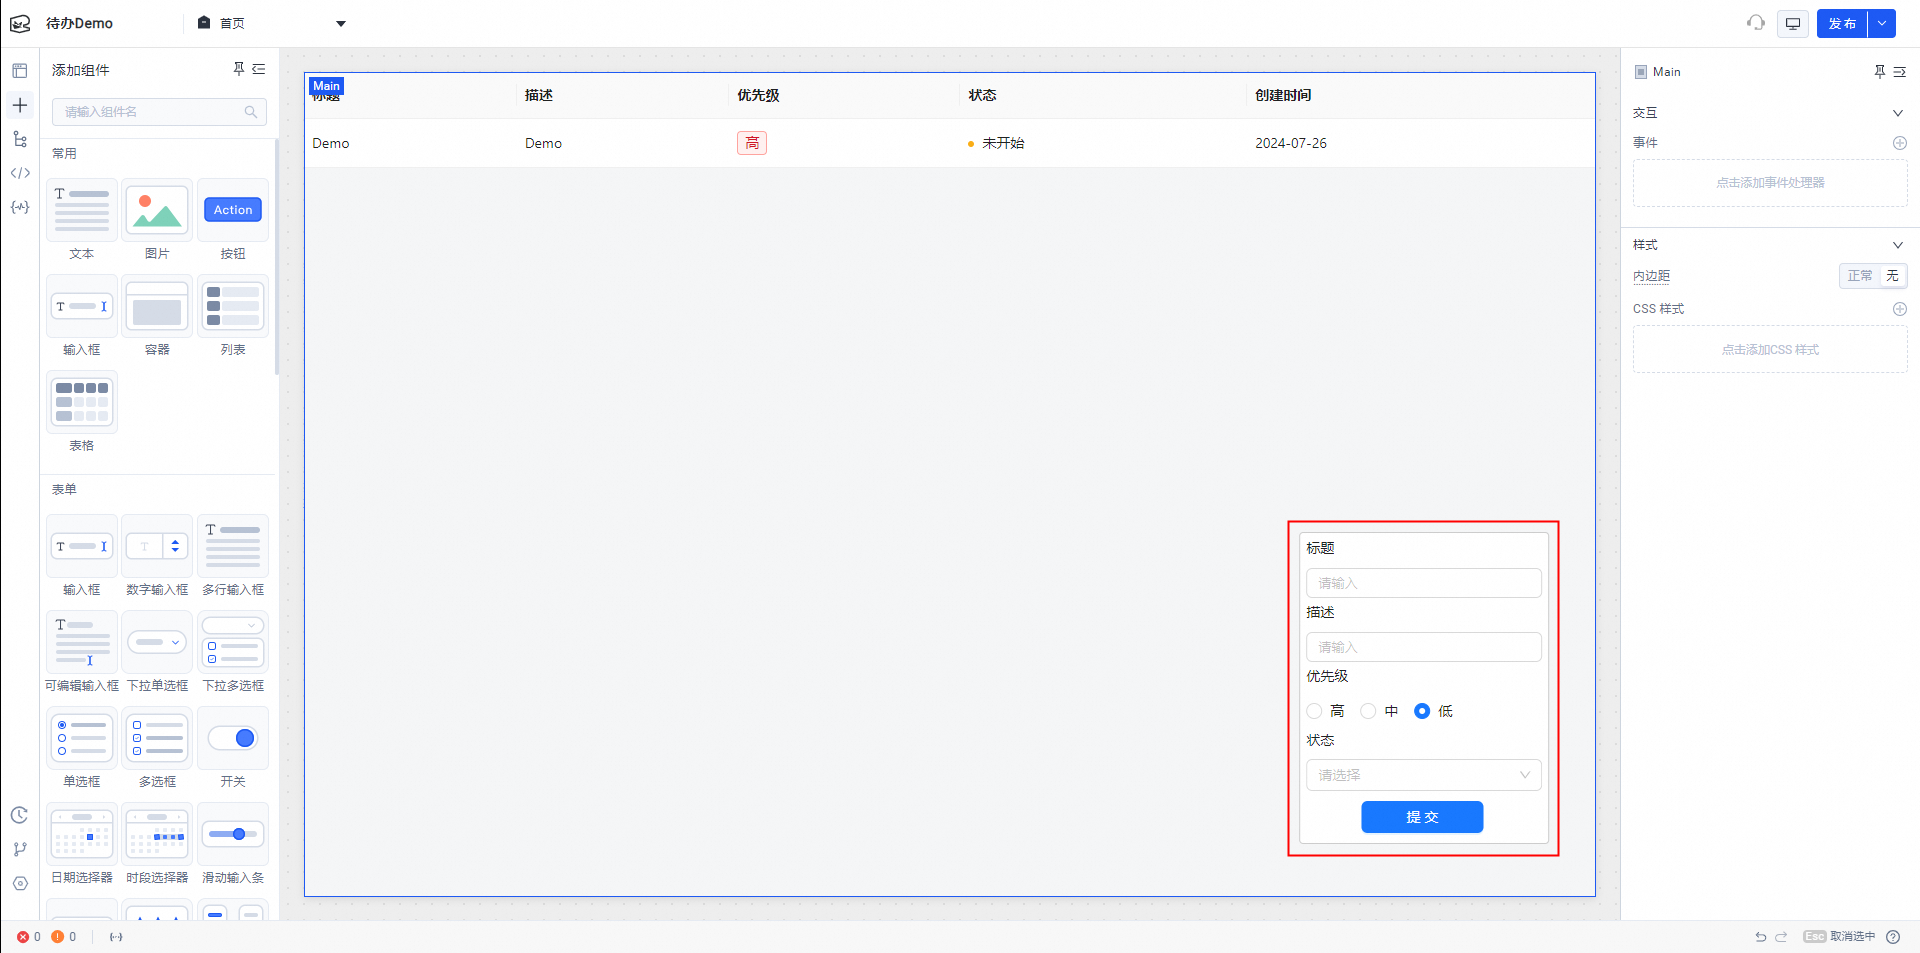
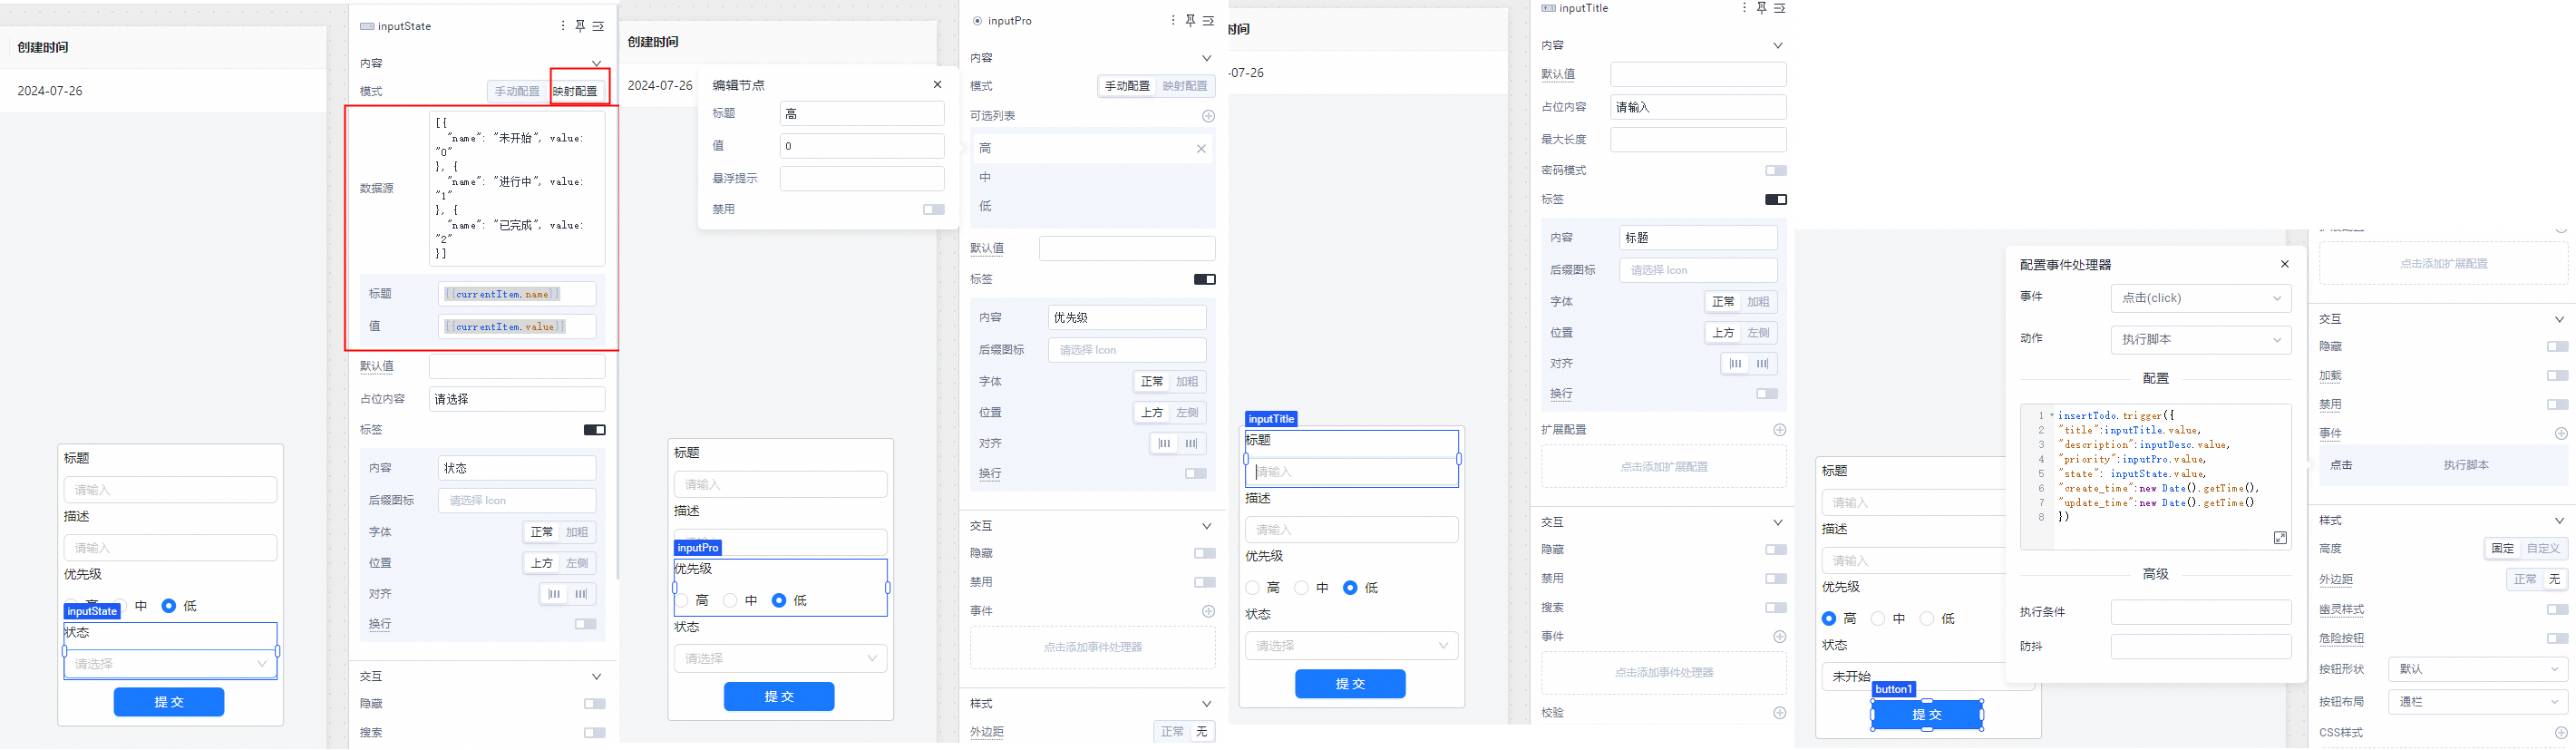
// Status mapping rule
[{
  "name": "Not Started", value: "0"
}, {
  "name": "In Progress", value: "1"
}, {
  "name": "Completed", value: "2"
}]

// Status title
{{currentItem.name}}
// Status value
{{currentItem.value}}

// Submit button click event script
insertTodo.trigger({
"title":inputTitle.value,
"description":inputDesc.value,
"priority":inputPro.value,
"state": inputState.value,
"create_time":new Date().getTime(),
"update_time":new Date().getTime()
});
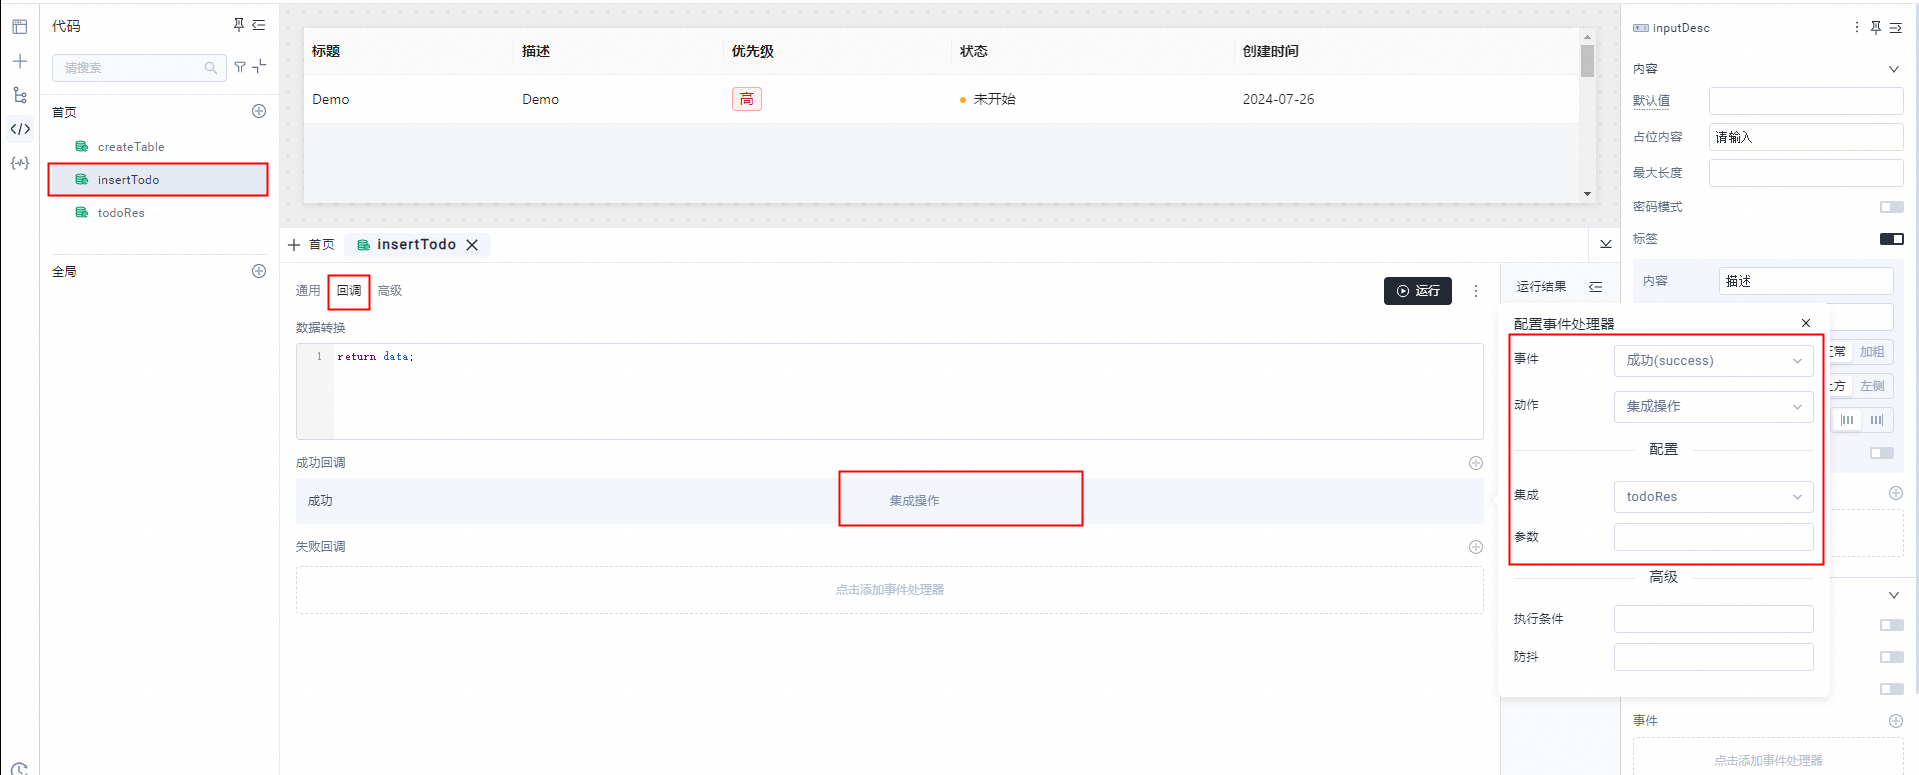
Adding a configuration data callback
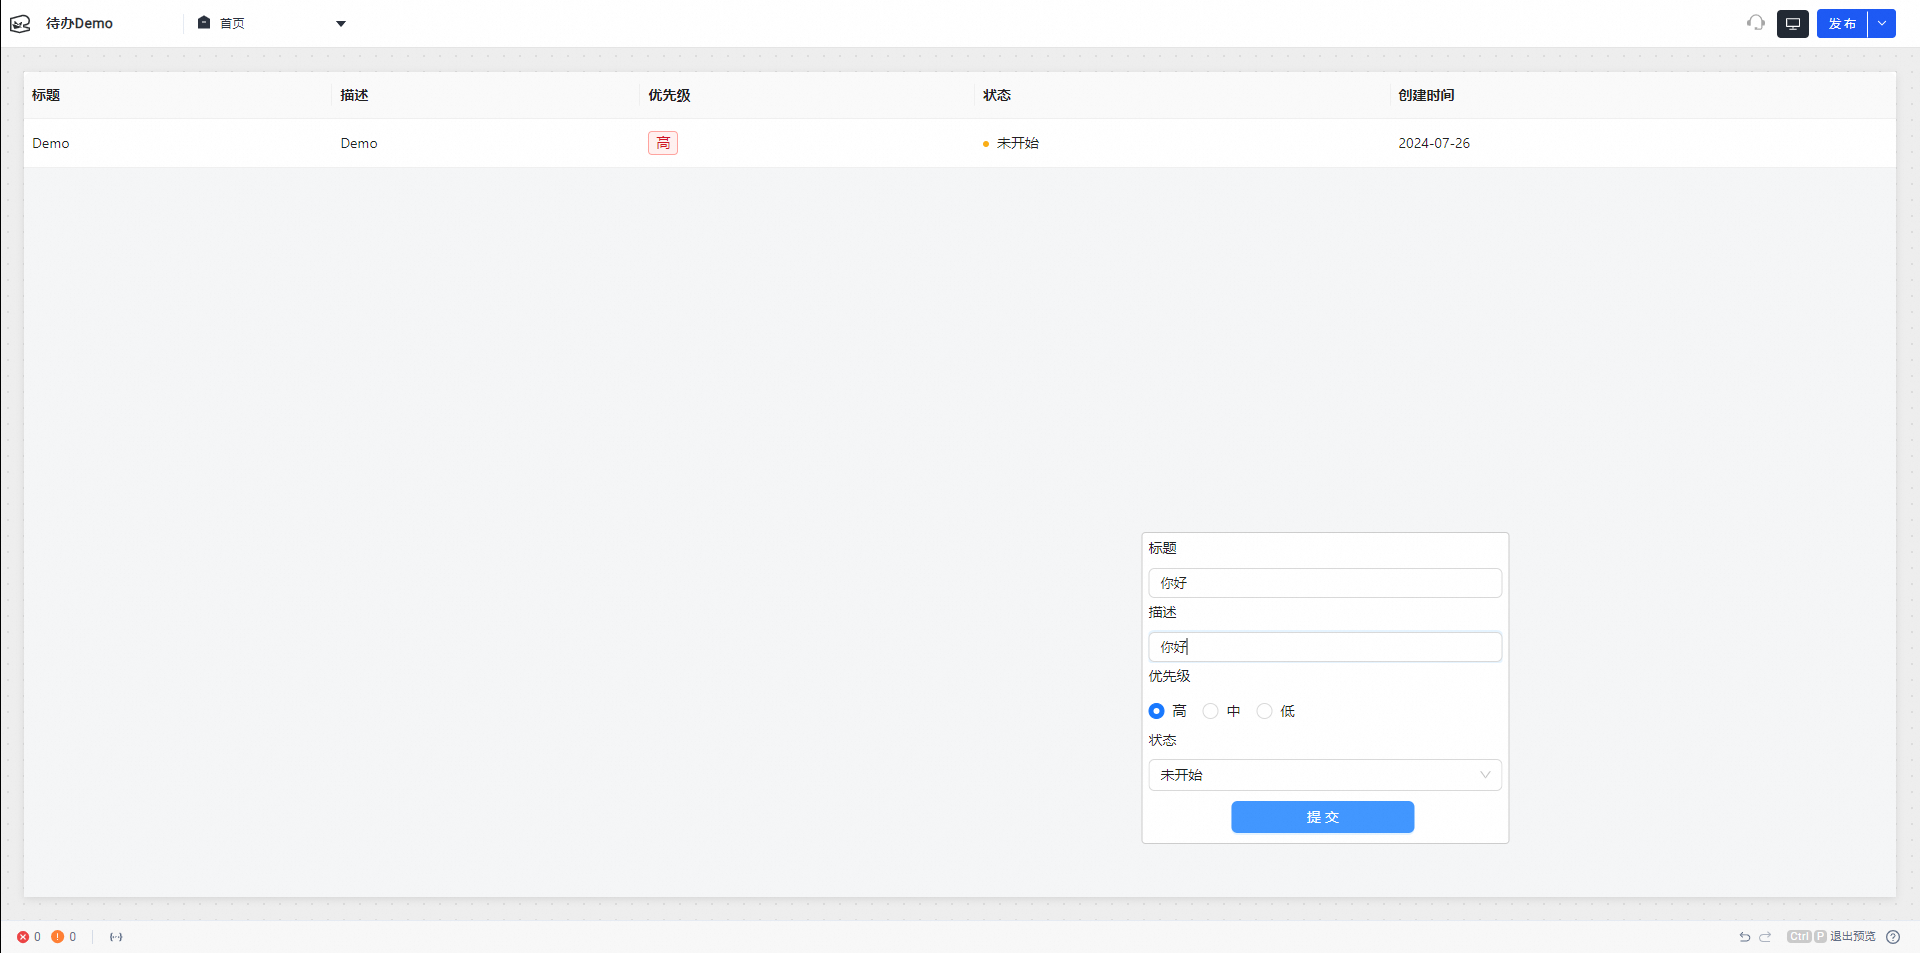
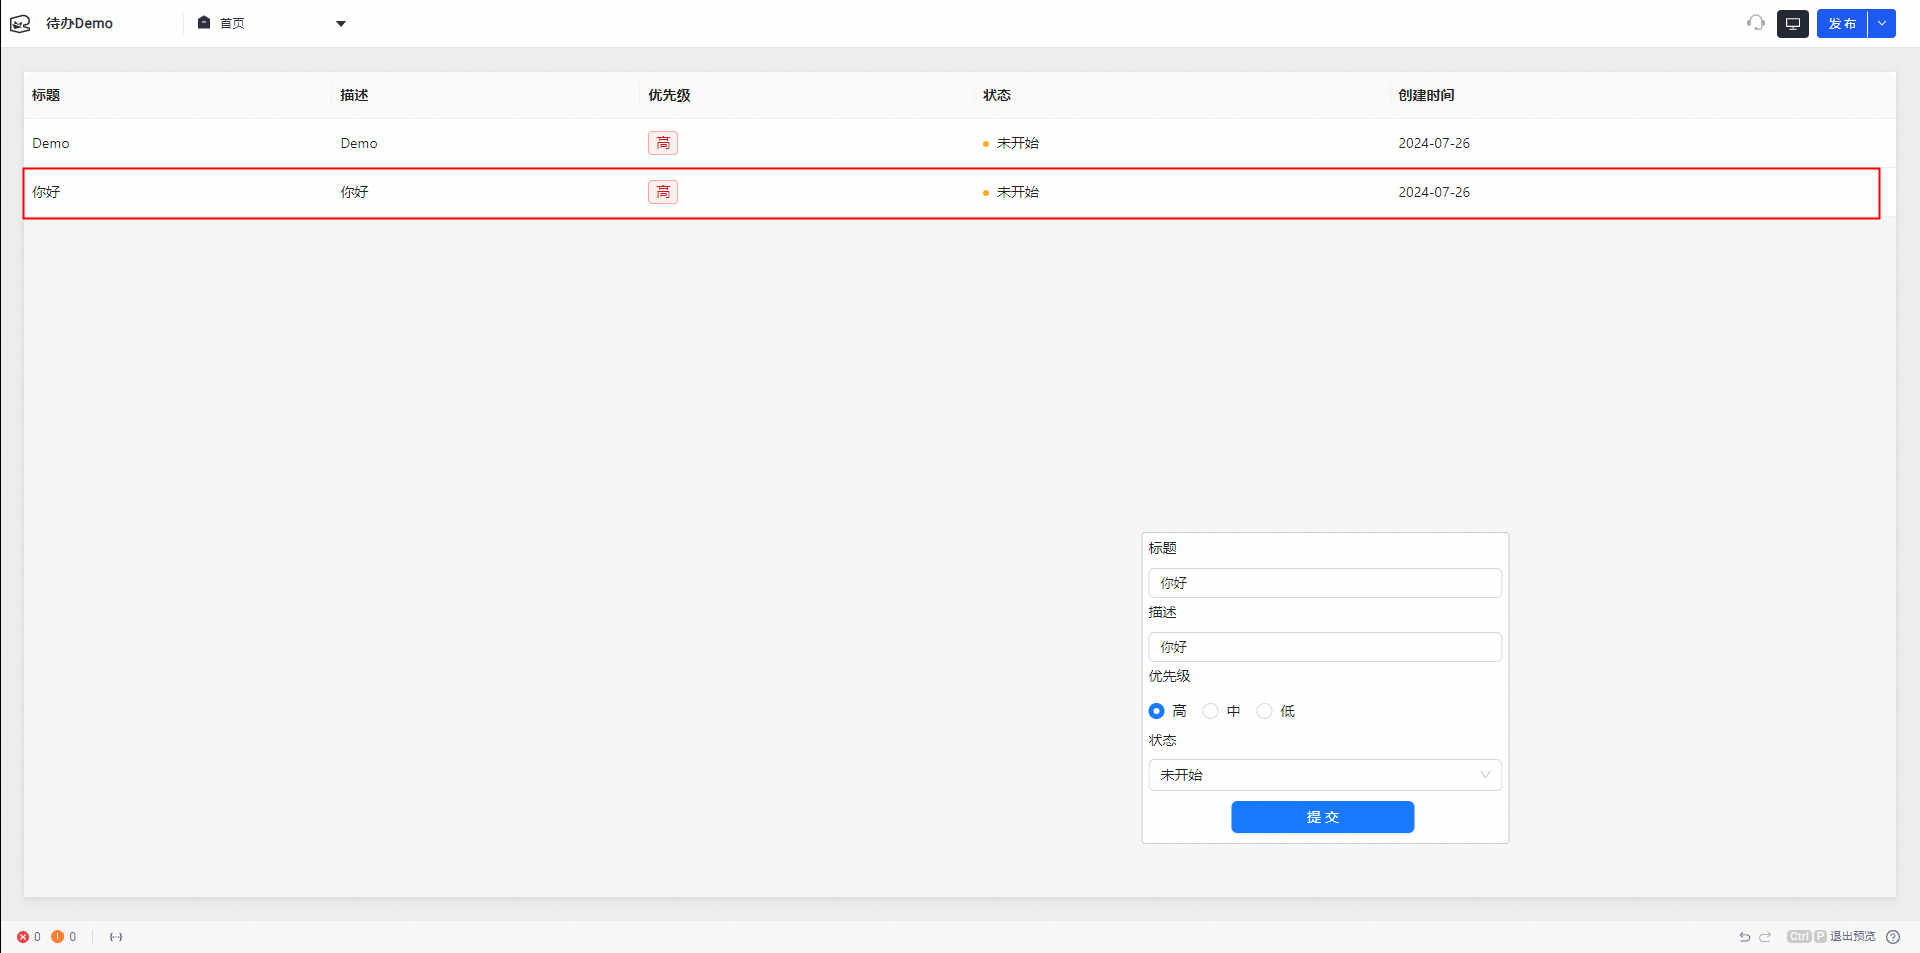
In the upper-right corner, click Preview. In preview mode, enter a title and description, and then click Submit.
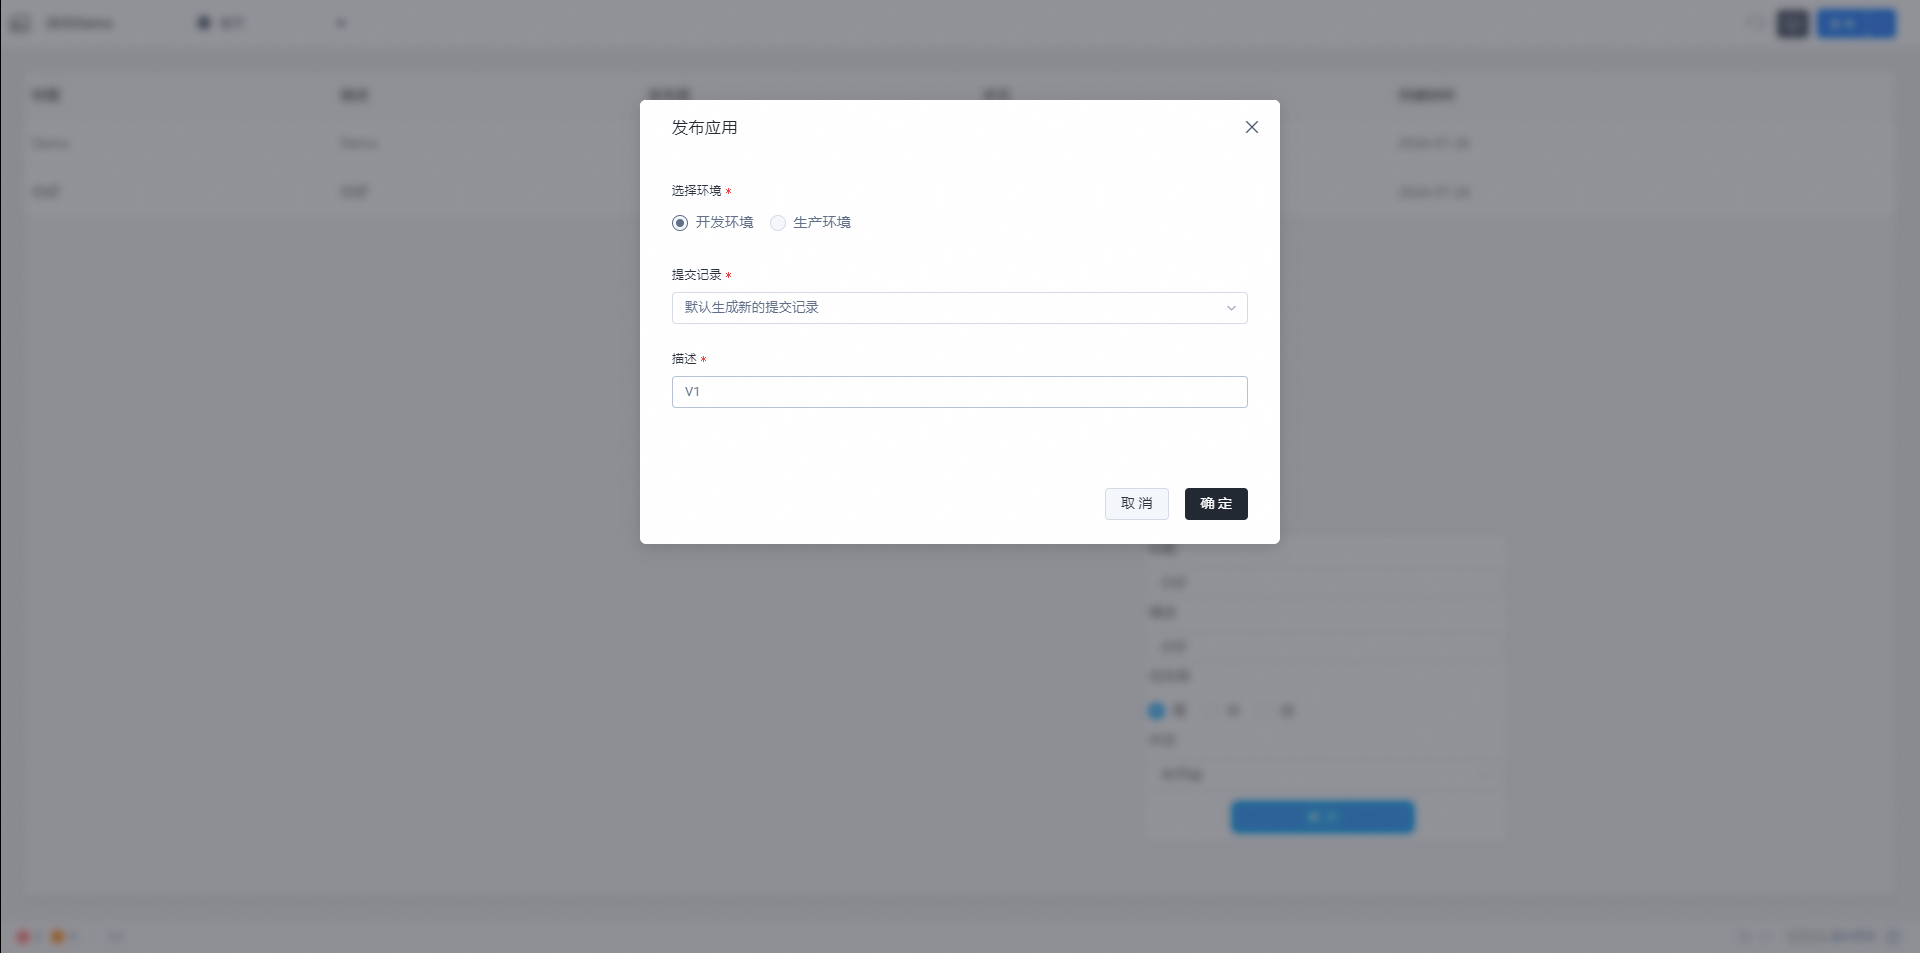
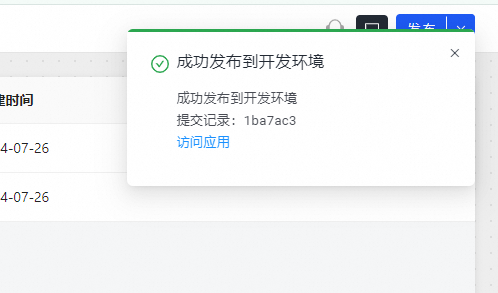
Publish the application. In the upper-right corner, click Publish and enter a description. After the application is published, click Access Application to open it.
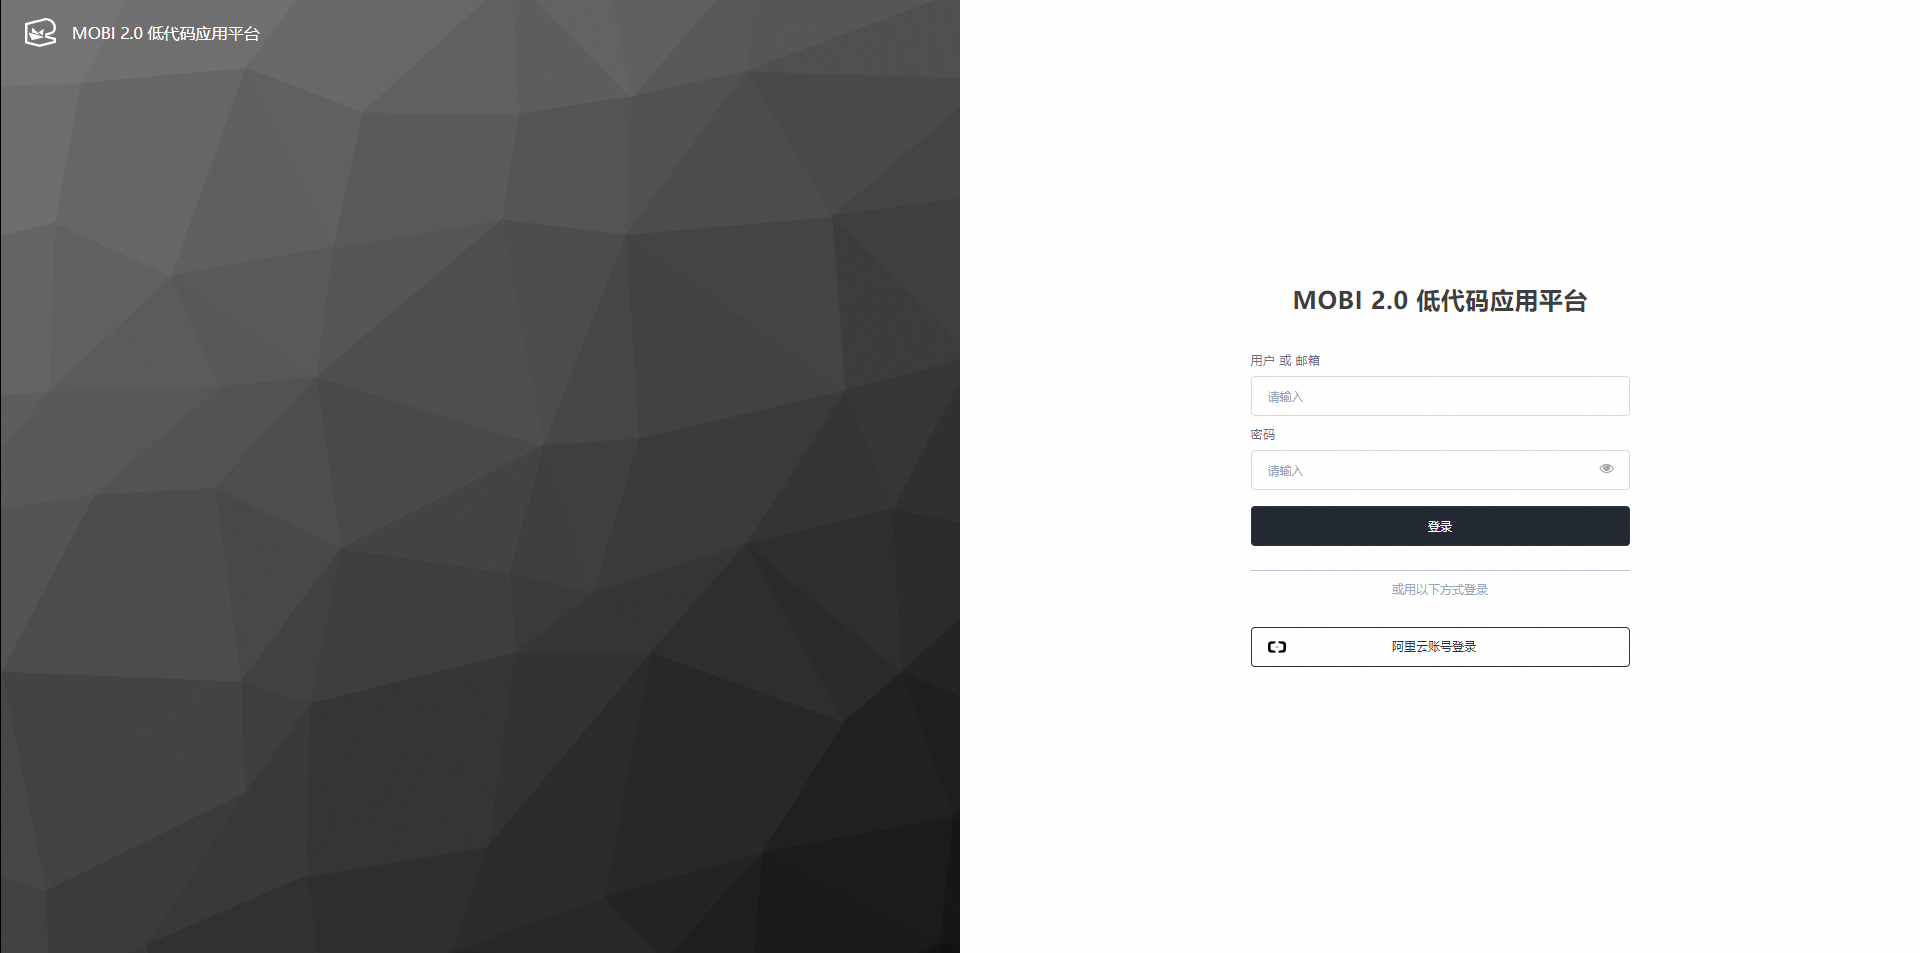
Log in with your Alibaba Cloud account.
Advanced: Optimize the page
Change the add new item UI to a drawer style
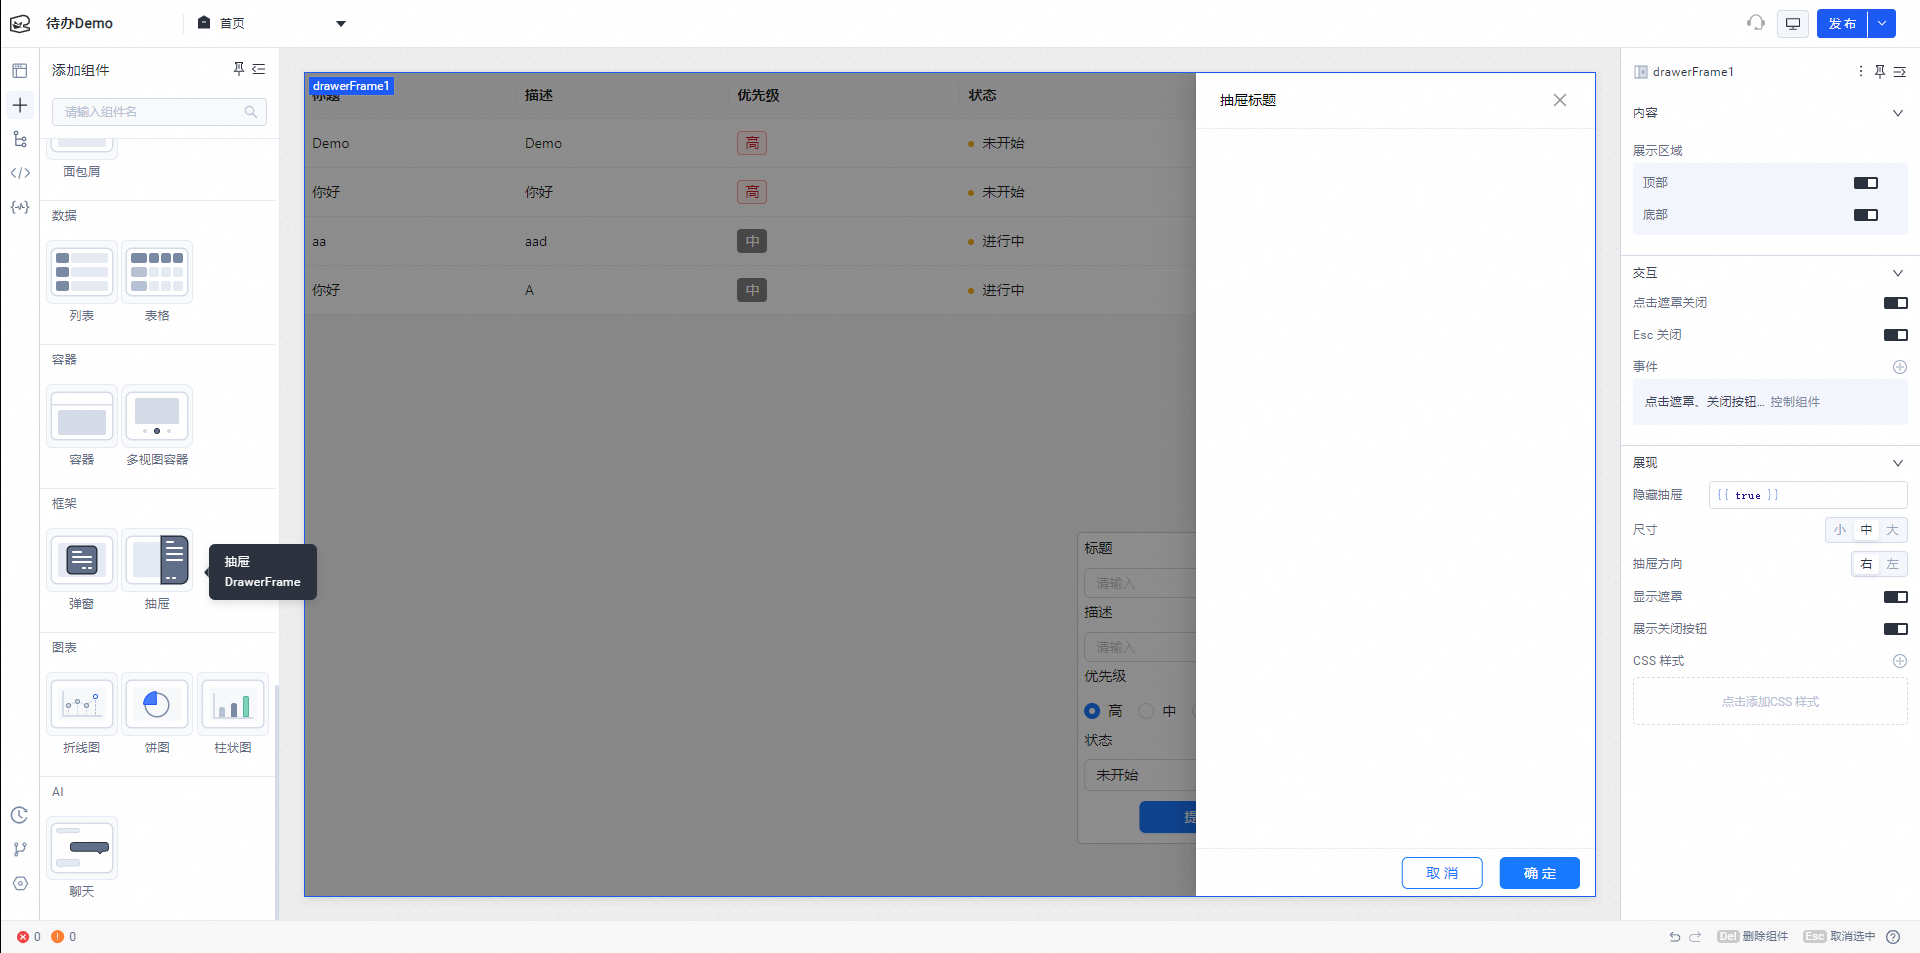
Drag the drawer component to the page on the right.
Add input fields and a submit button to the sidebar. Configure the button's script as described previously.
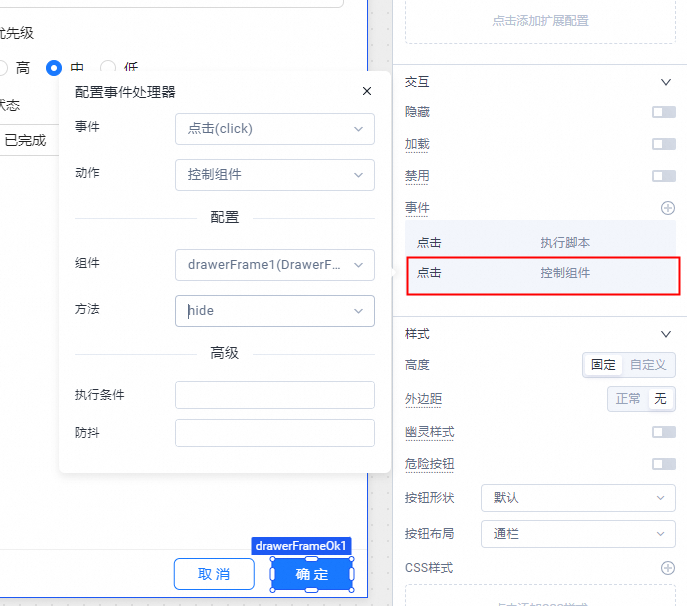
Add a close drawer action to the submit button.
Add a button to the page to open the drawer. Set the button's click event to show the drawer component (1) using the control component (2).
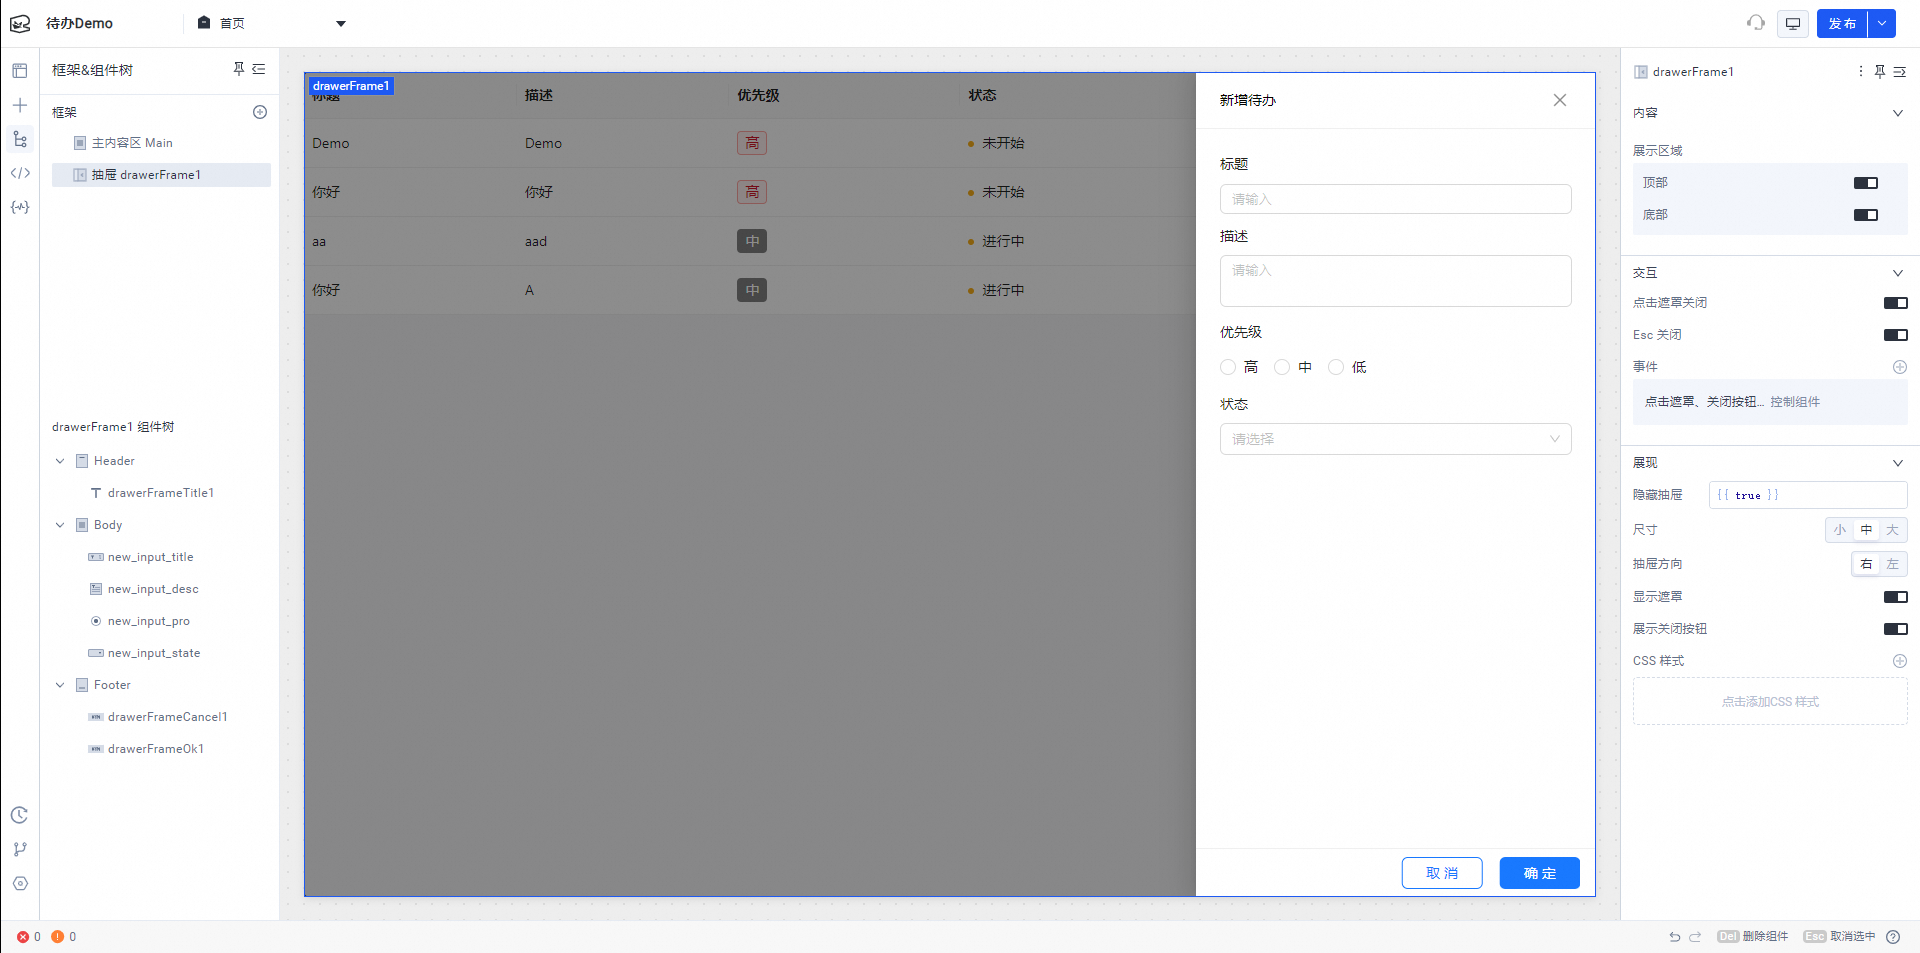
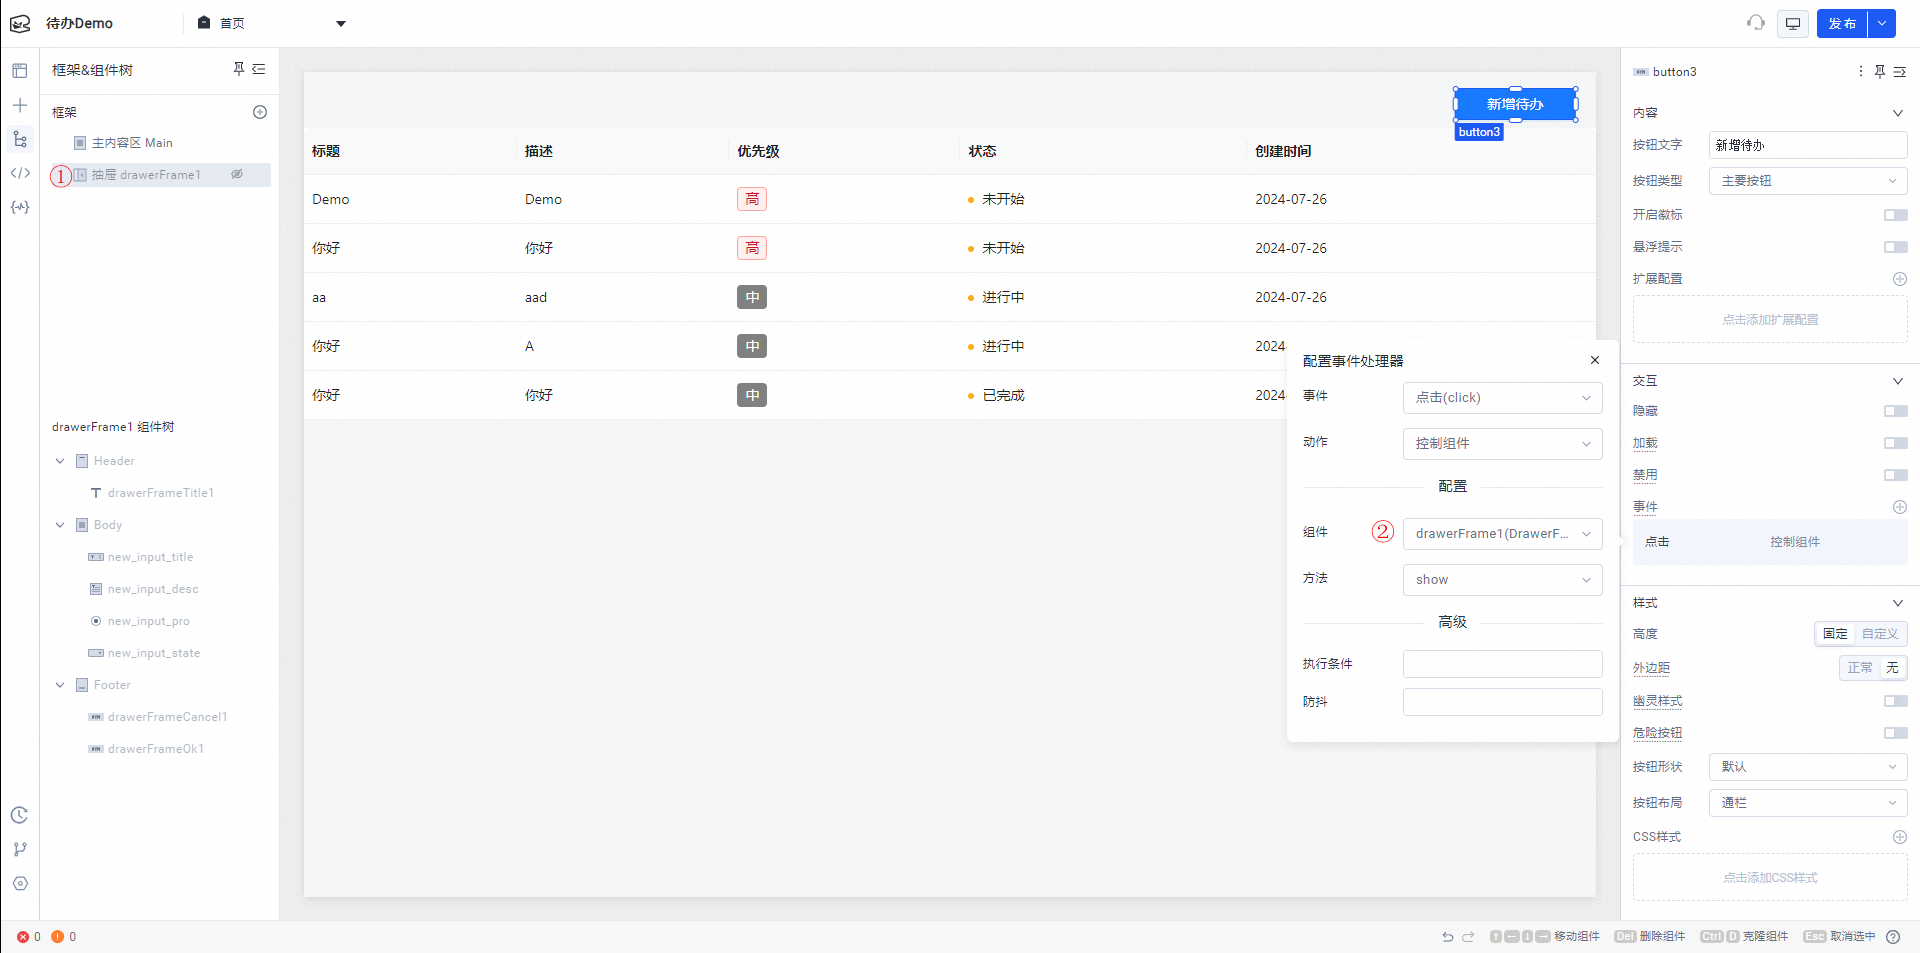
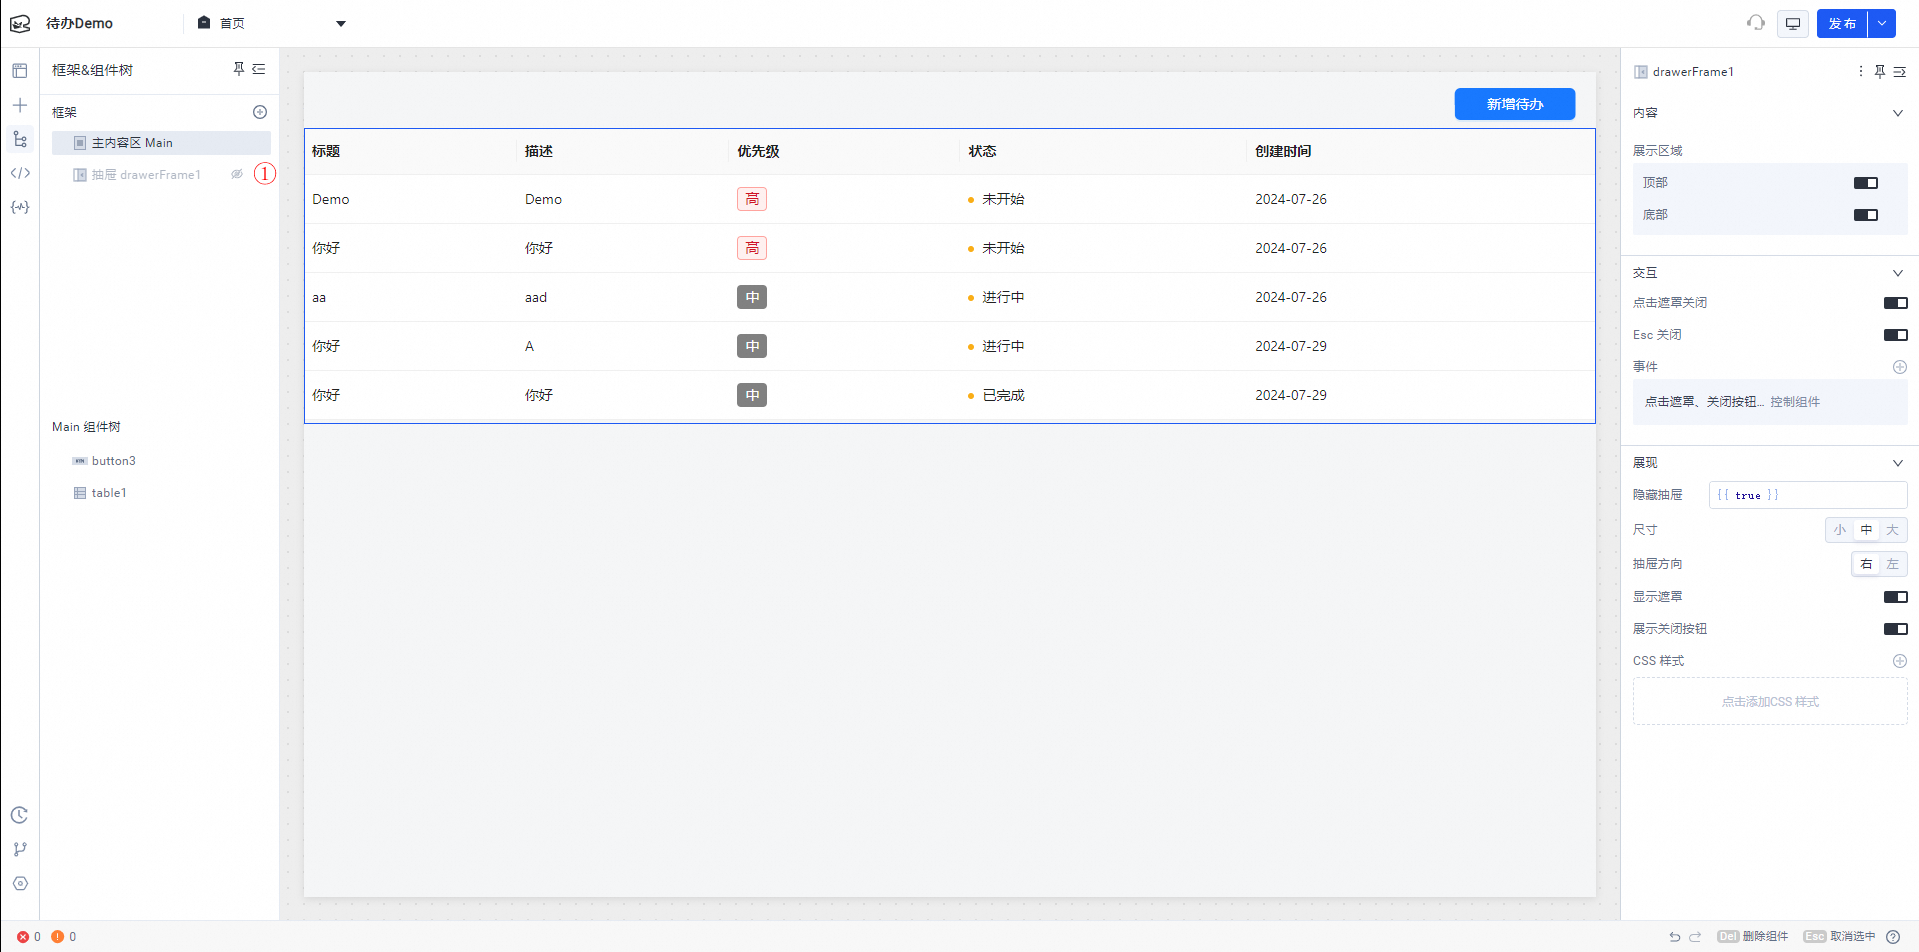
If the drawer component is not visible, click the drawer in the Frame & Component Tree to display it.
Edit a to-do item
Add a variable named `editTodoCache`.
Create a pop-up window for editing to-do items and configure the layout.
Component Property
Name
Default Value
Title
edit_input_title
{{editTodoCache.value.title || ""}}
Description
edit_input_desc
{{editTodoCache.value.description || "" }}
Priority
edit_input_pro
{{editTodoCache.value.priority || "0"}}
Status
edit_input_state
{{editTodoCache.value.state || "0"}}
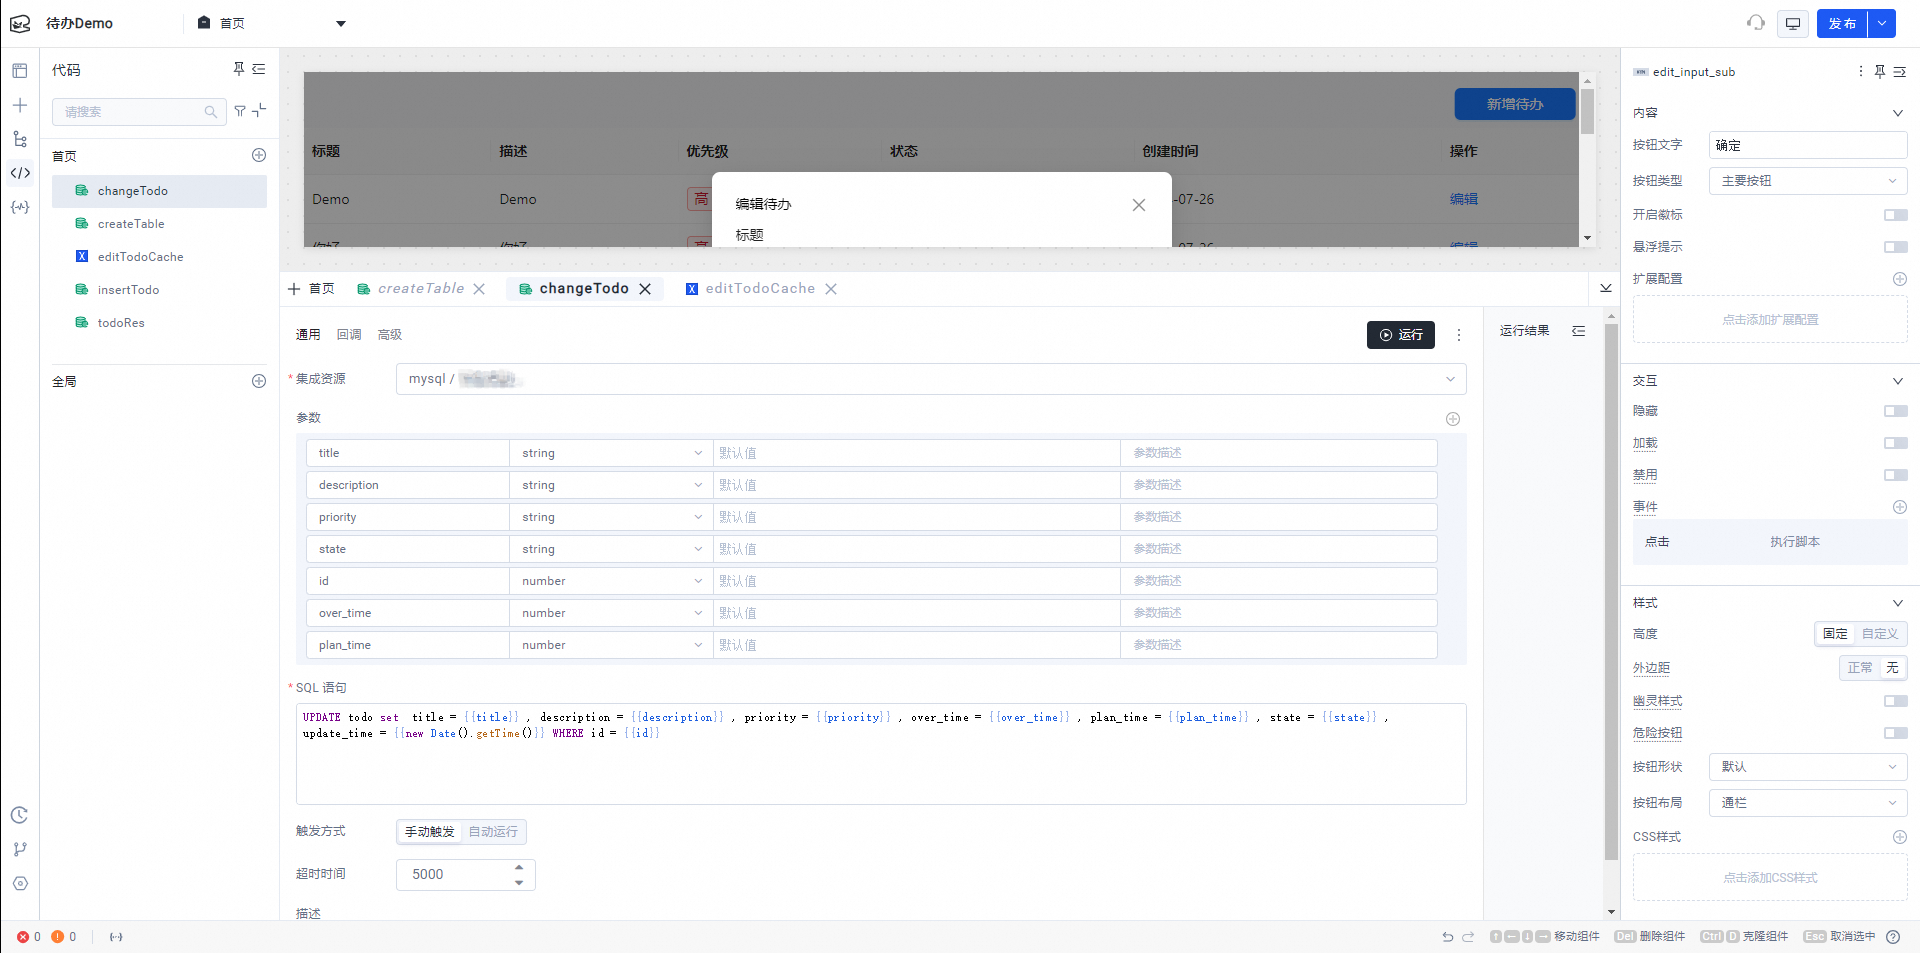
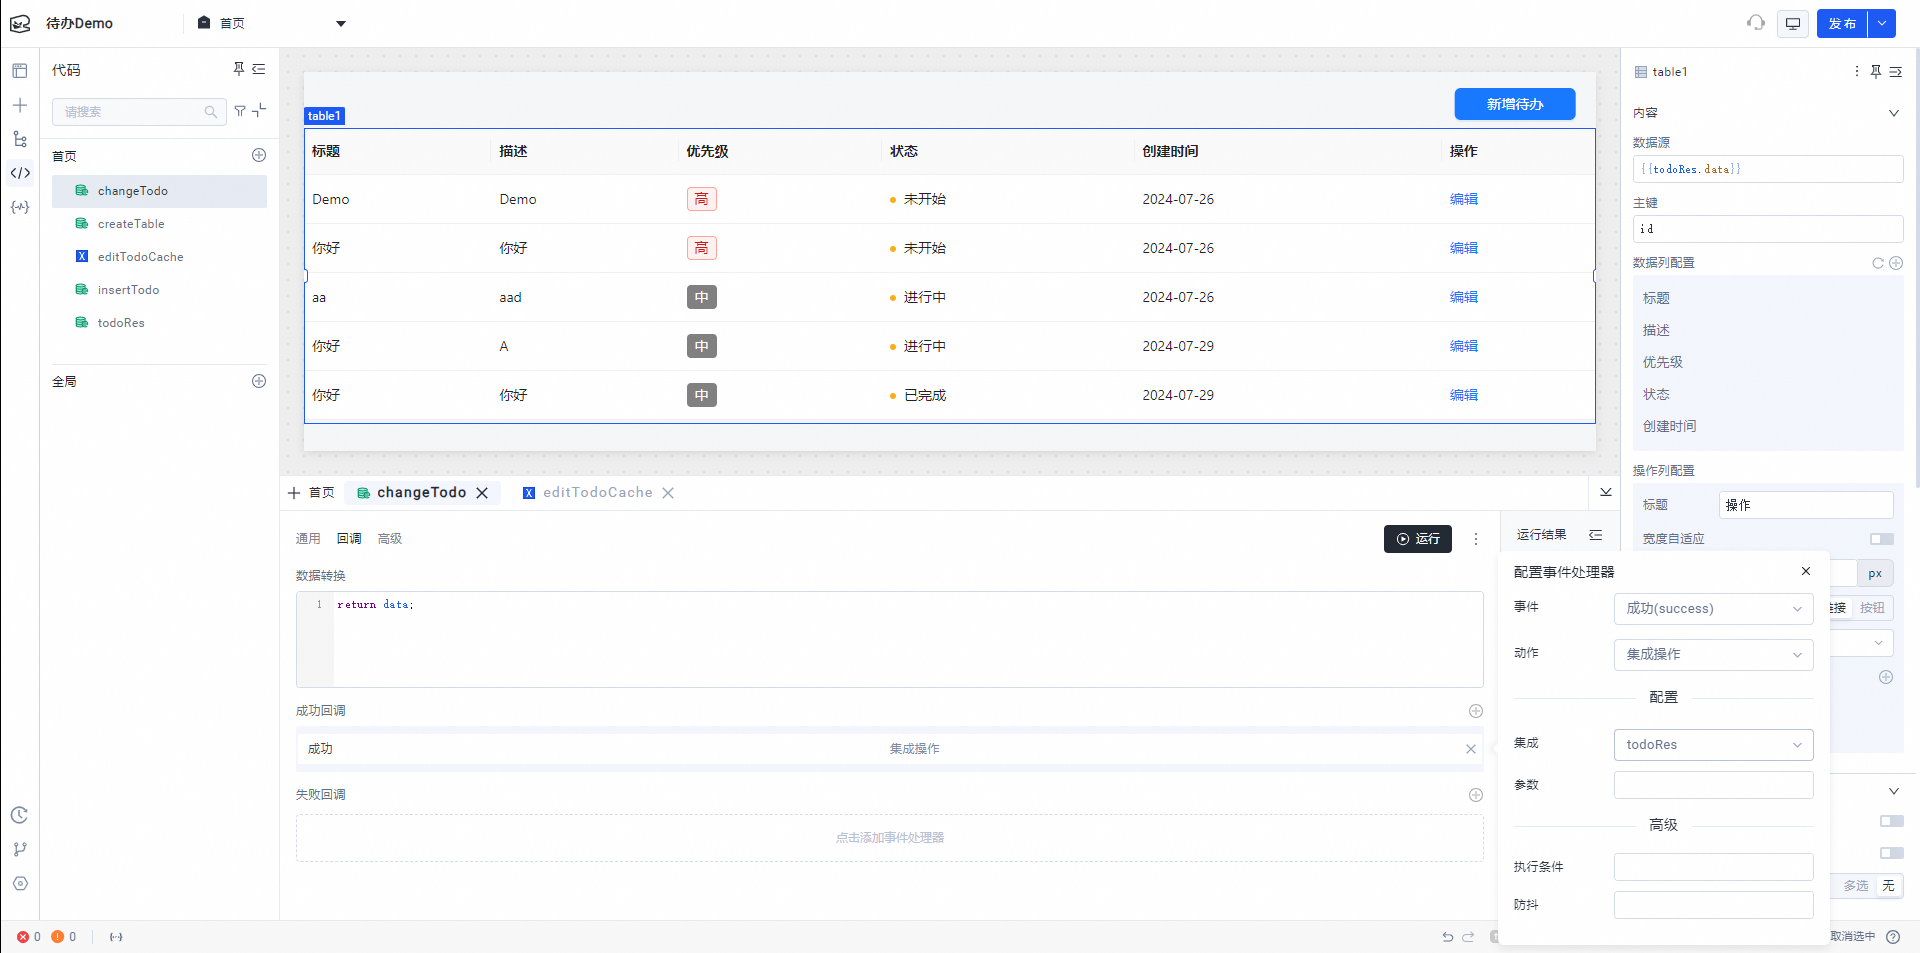
Create an integration named `changeTodo` to modify to-do items.
Configure the SQL statement.
UPDATE todo set title = {{title}} , description = {{description}} , priority = {{priority}} , over_time = {{over_time}} , plan_time = {{plan_time}} , state = {{state}} , update_time = {{new Date().getTime()}} WHERE id = {{id}}Configure the integration callback.
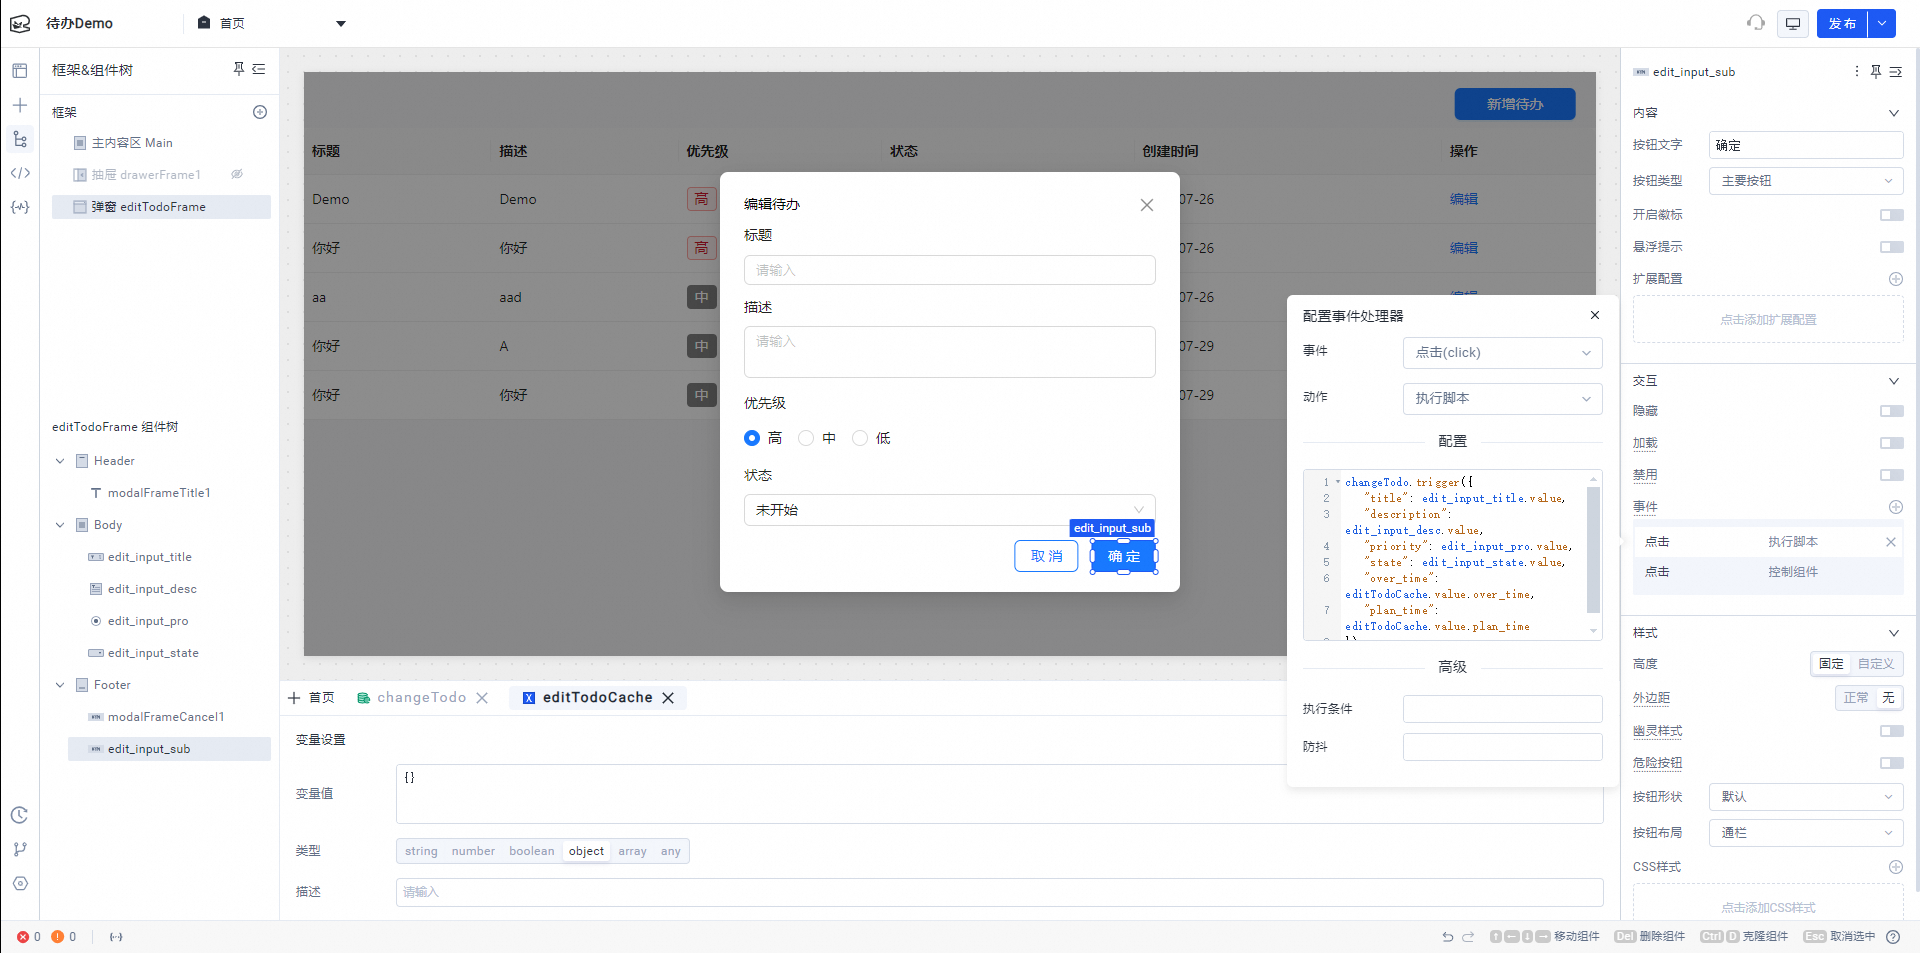
Configure the submit button for the to-do item editing pop-up window.
Change the editing configuration code to the following:
changeTodo.trigger({
  "title": edit_input_title.value,
  "description": edit_input_desc.value,
  "priority": edit_input_pro.value,
  "state": edit_input_state.value,
  "over_time": editTodoCache.value.over_time,
  "plan_time": editTodoCache.value.plan_time,
  "id": editTodoCache.value.id
});
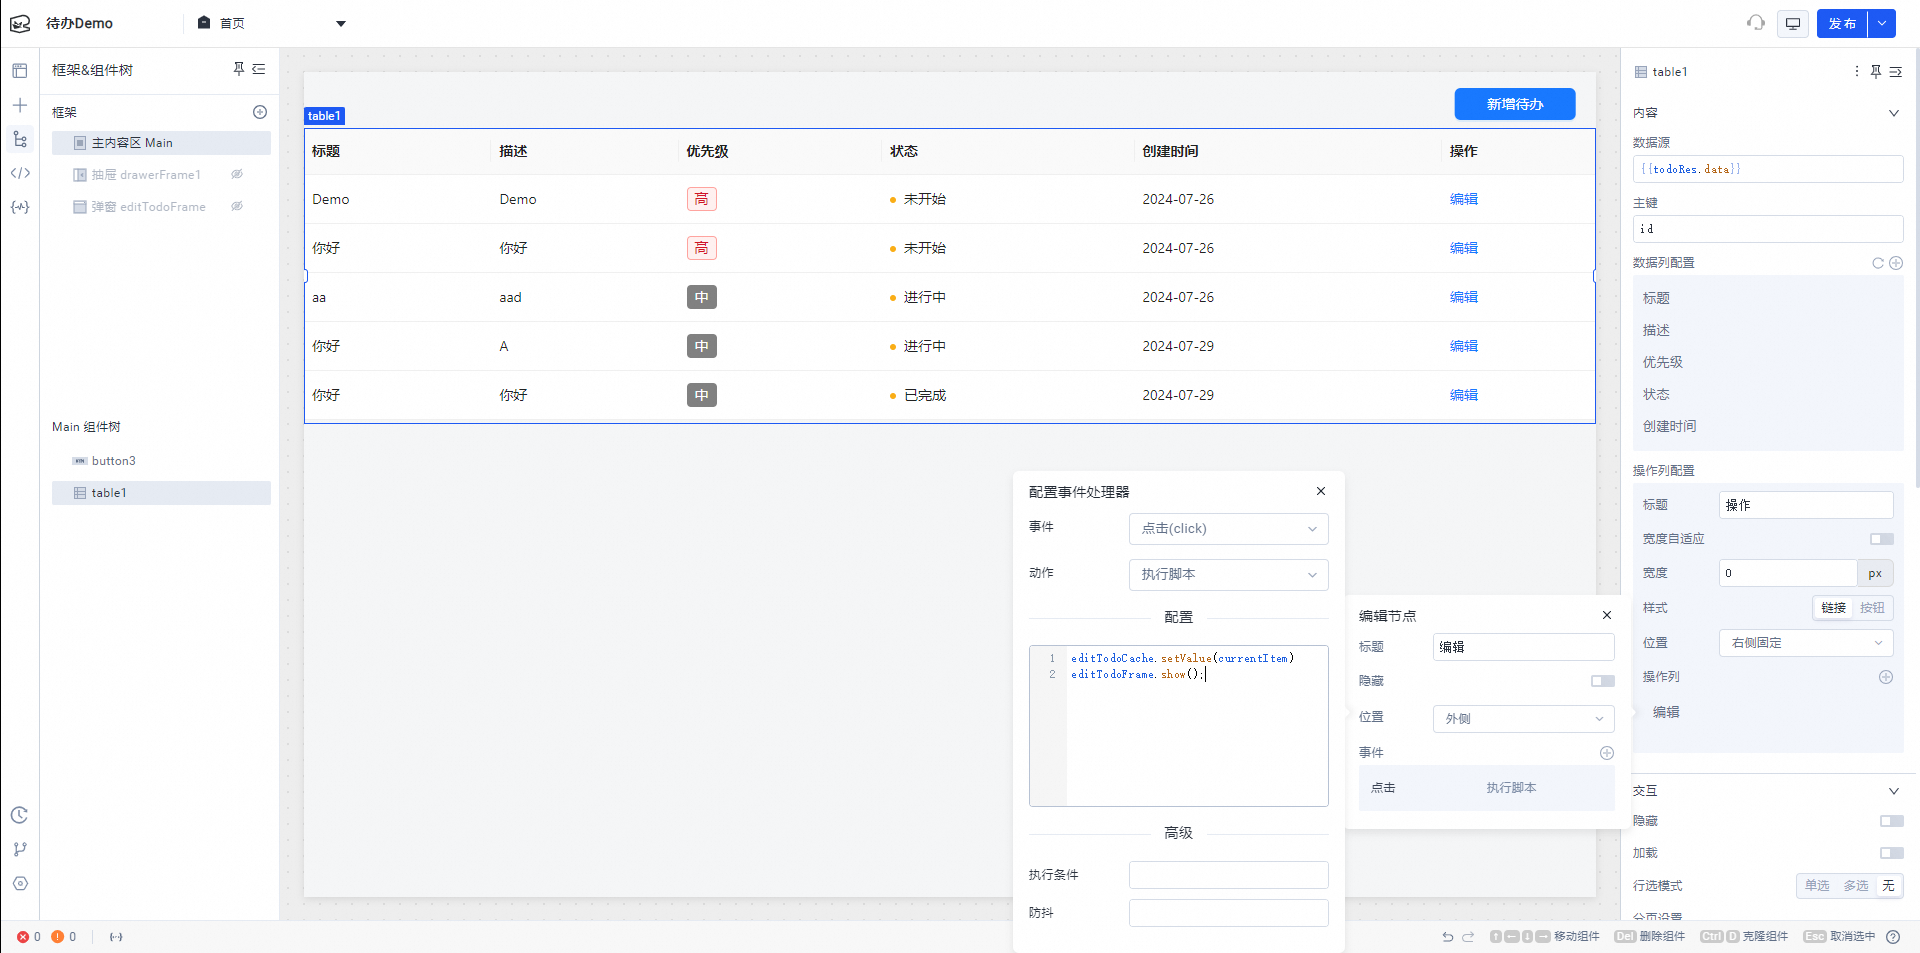
In `table1`, configure the operation column. Add an Edit button and configure it to assign a value to the temporary variable.
editTodoCache.setValue(currentItem);
editTodoFrame.show();
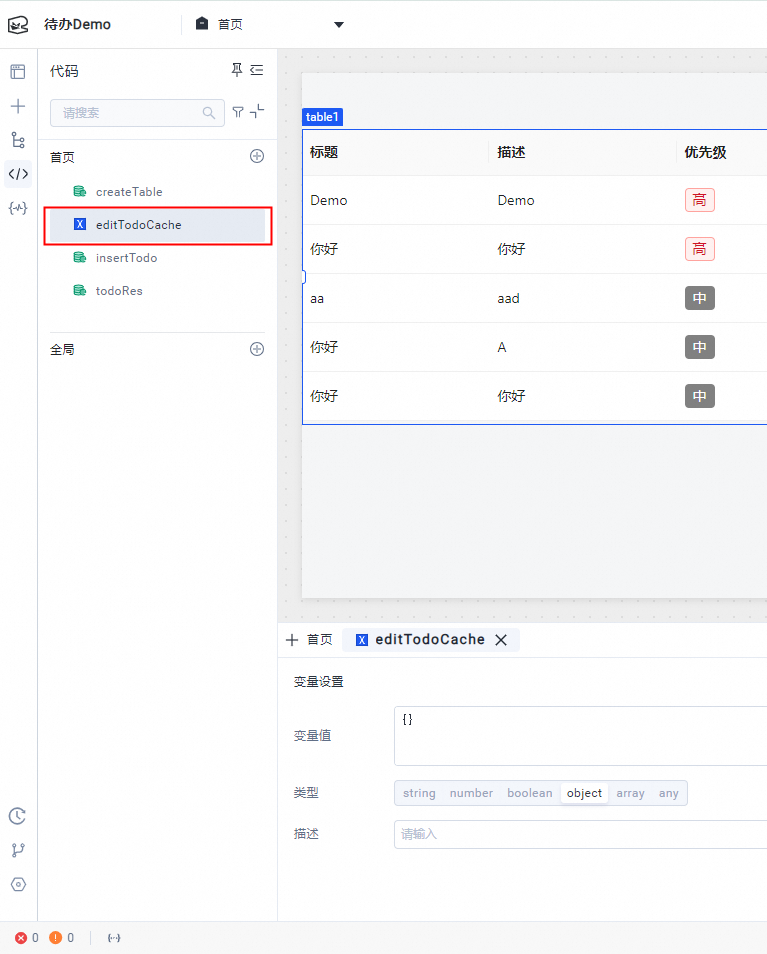
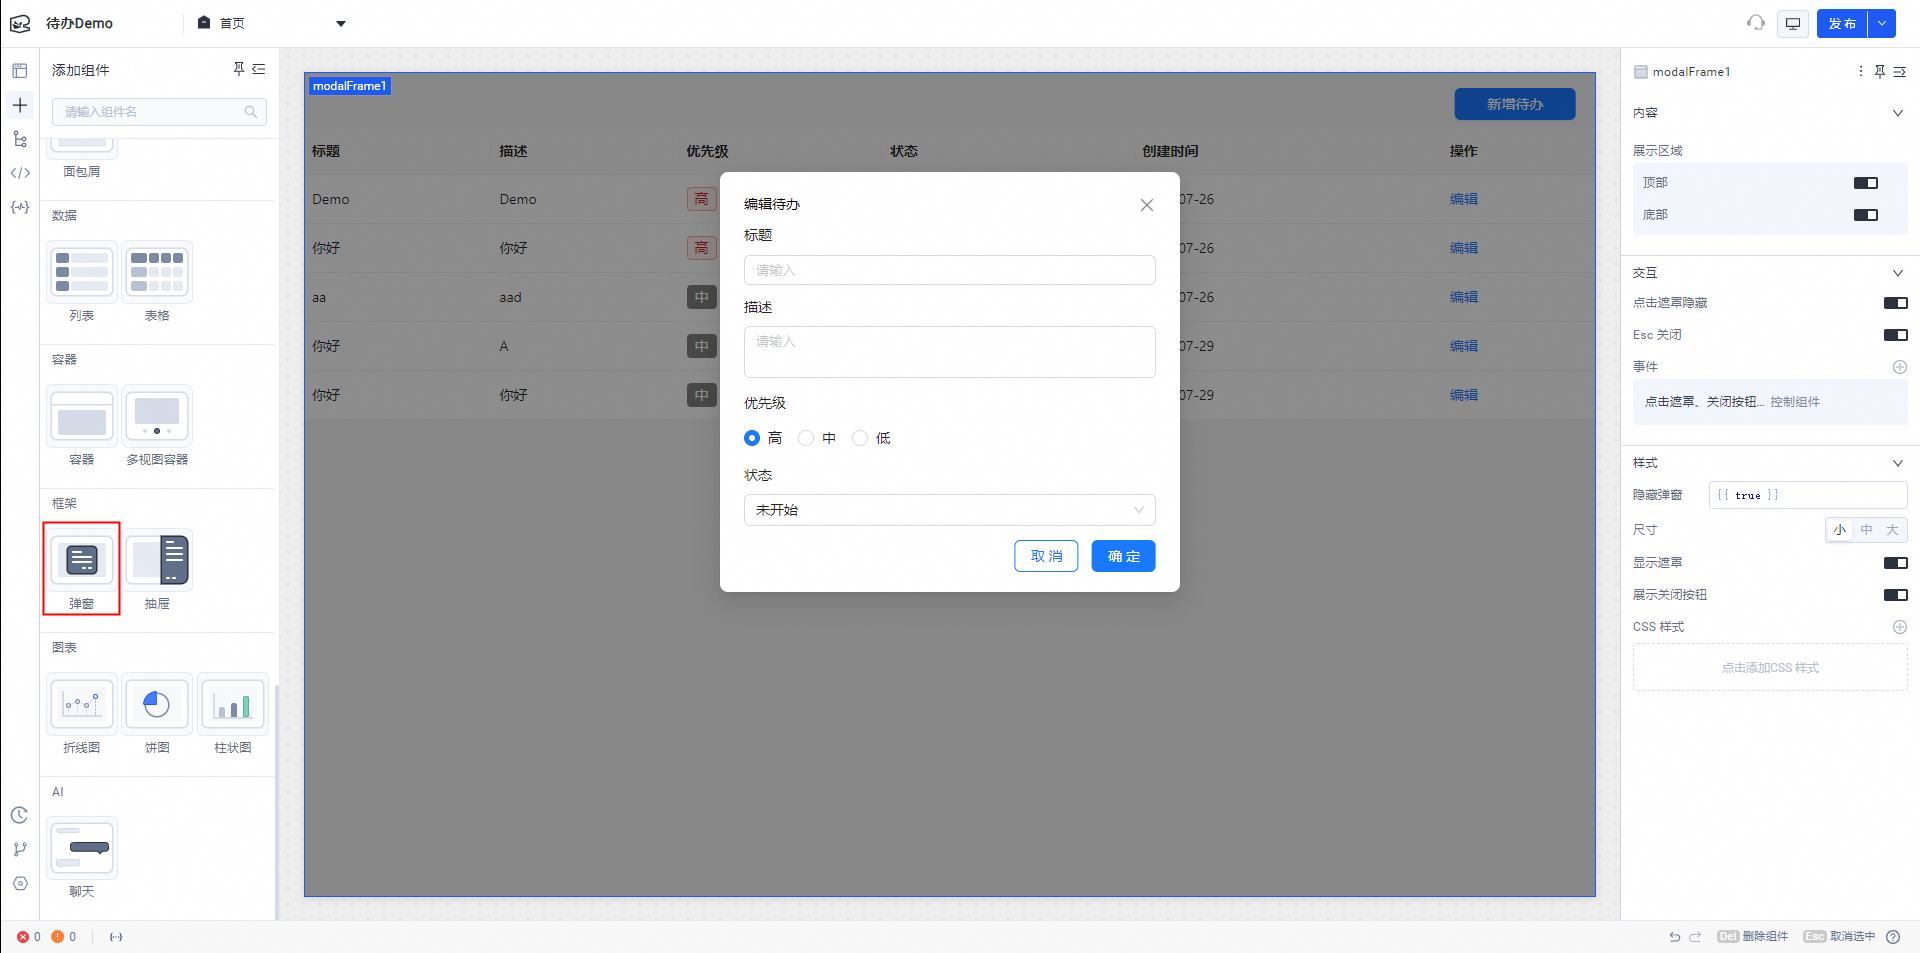
Add a status change for completing a to-do item
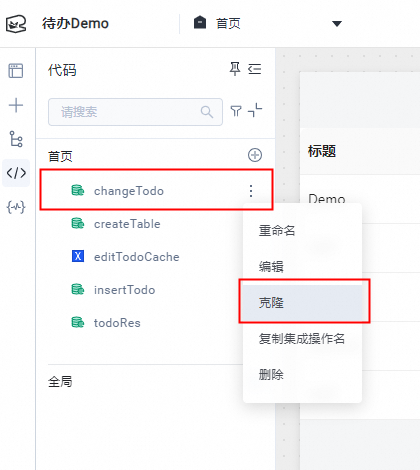
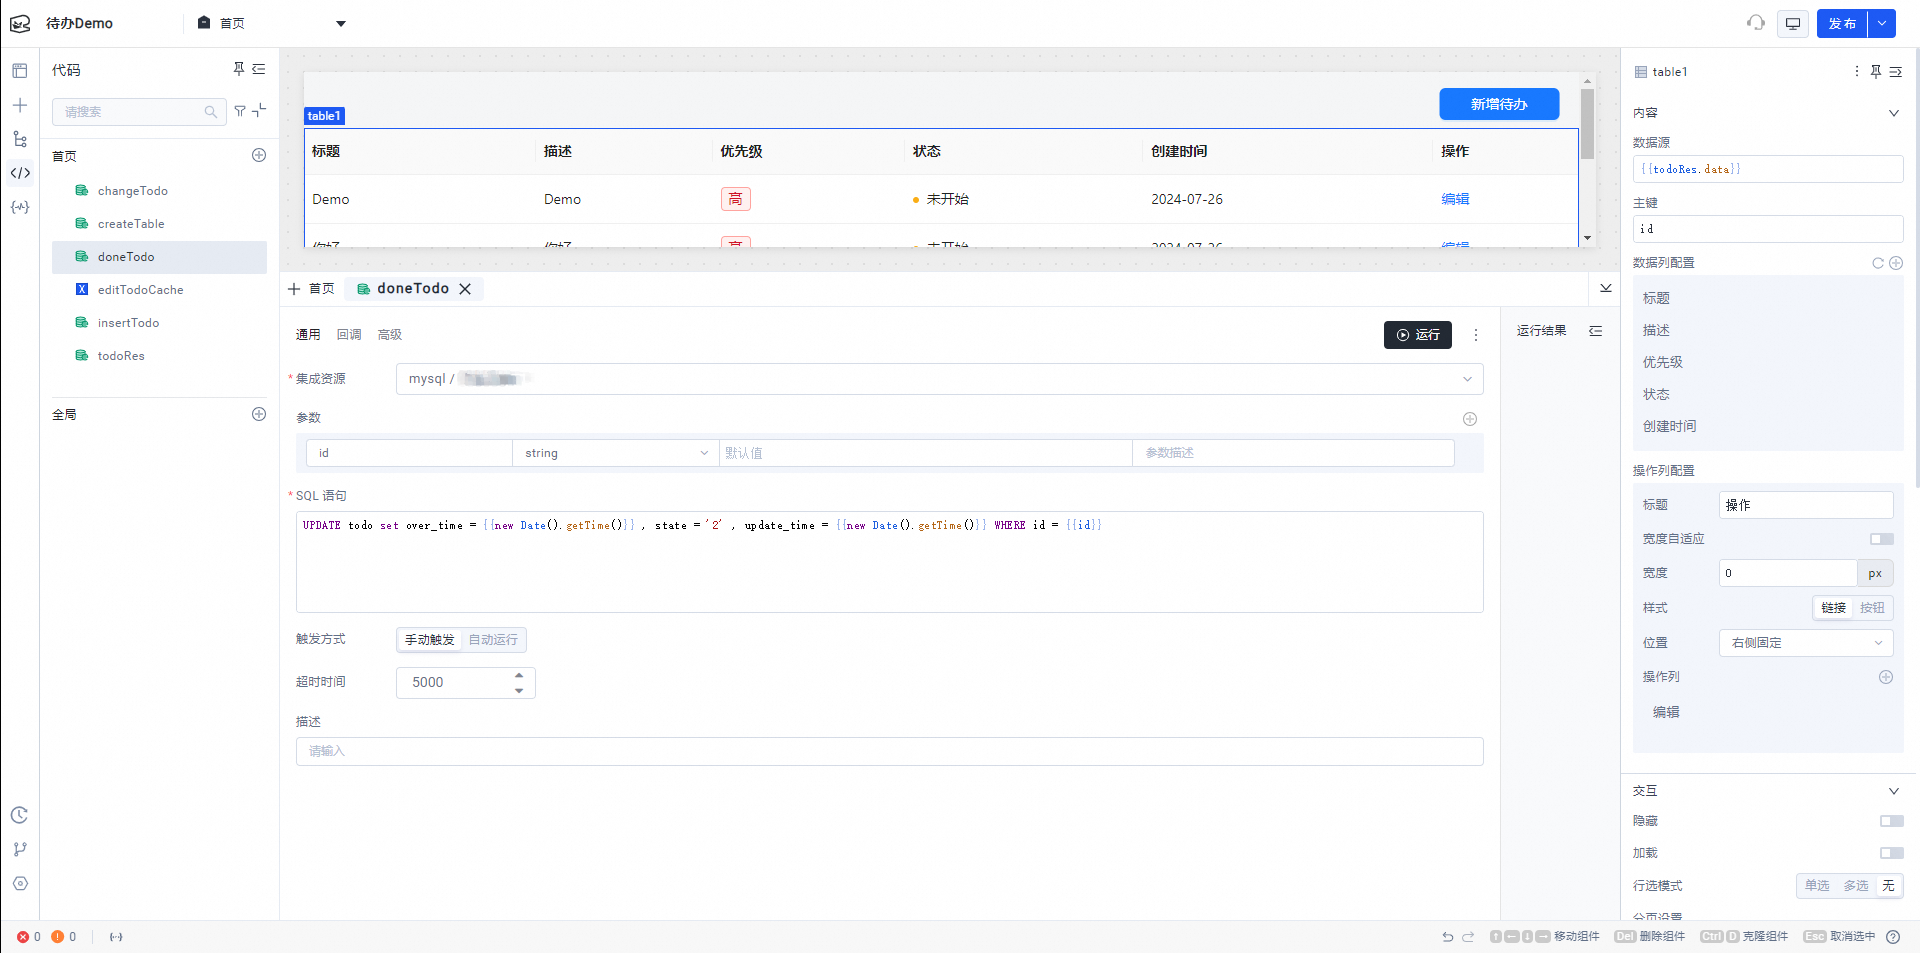
Clone the `changeTodo` integration and name the new integration `doneTodo`. This integration is used to mark an item as complete.
Edit the to-do to mark it as complete.
Delete all parameters except for the `id` parameter.
Change the SQL statement to
UPDATE todo set over_time = {{new Date().getTime()}} , state = '2' , update_time = {{new Date().getTime()}} WHERE id = {{id}}.
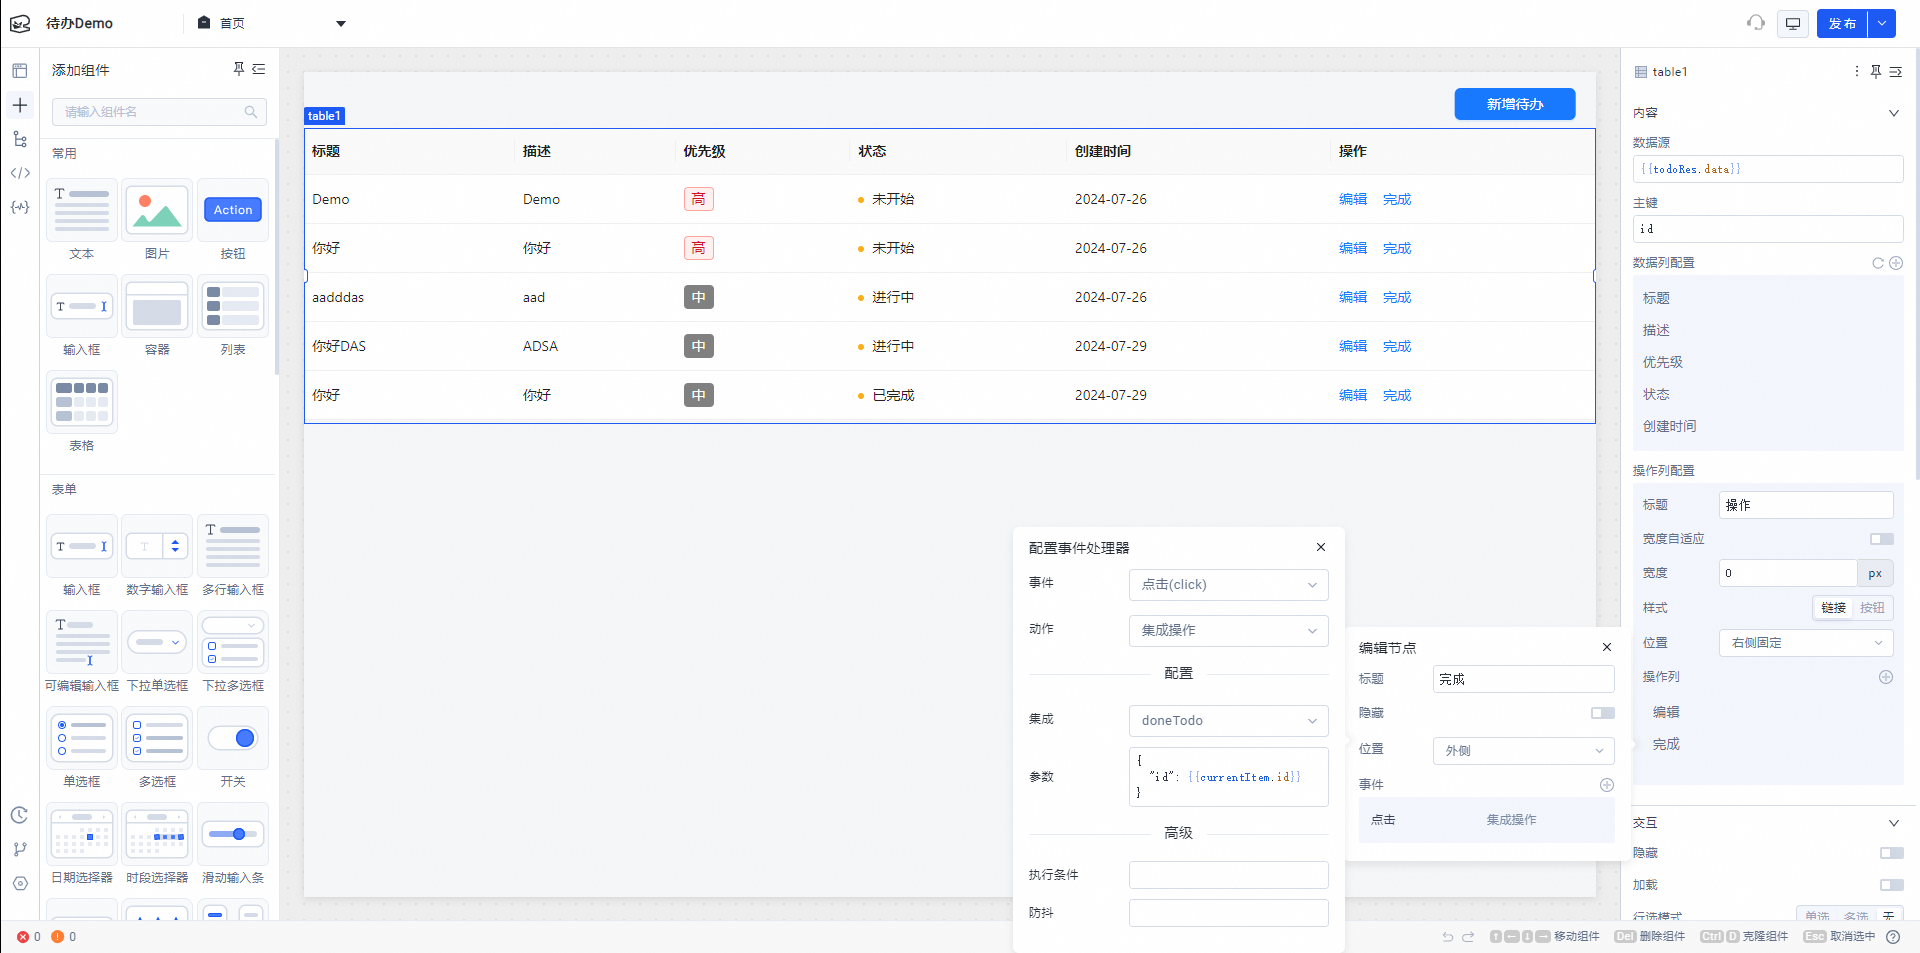
In the operation column of `table1`, add a Complete button.
Parameters: { "id": {{currentItem.id}} }Add a notification for the complete operation. In the success callback for `doneTodo`, configure a message to be displayed.
 Parameters: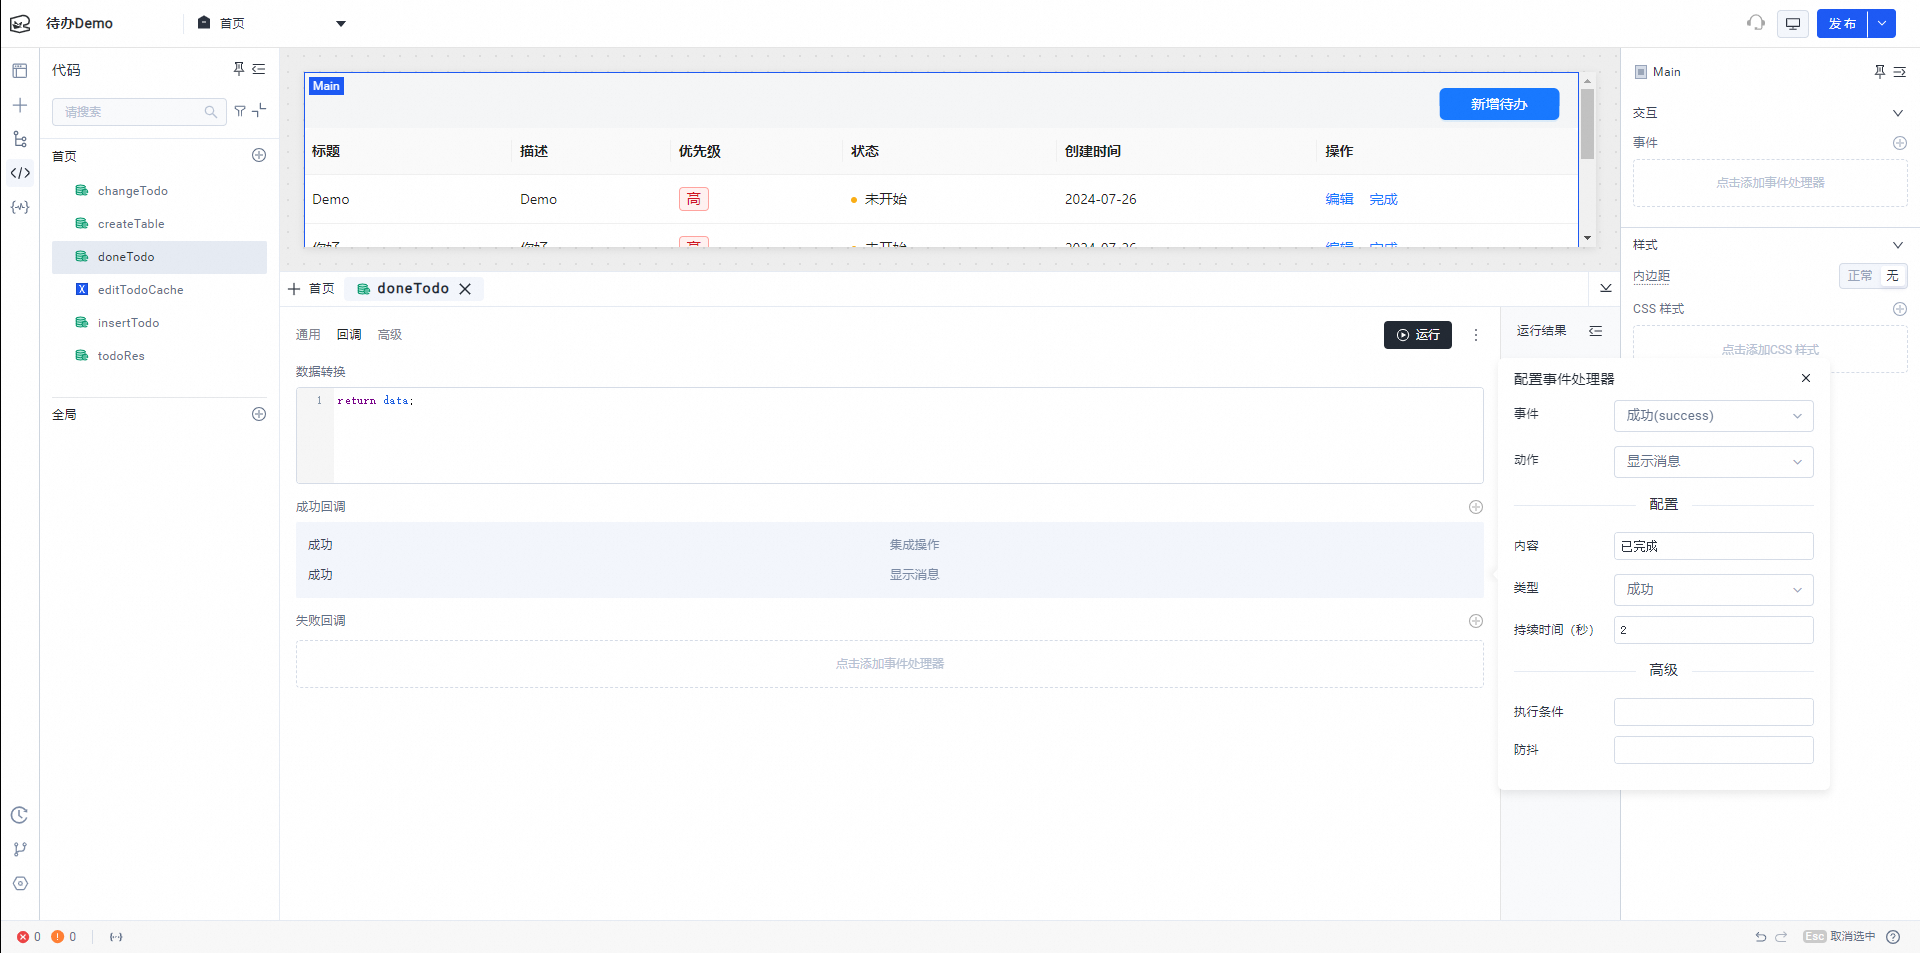
Delete a to-do item
Clone `doneTodo` and rename it to `delTodo`.
SQL statement: DELETE FROM todo WHERE id = {{id}}Change the callback message to "Deleted successfully".
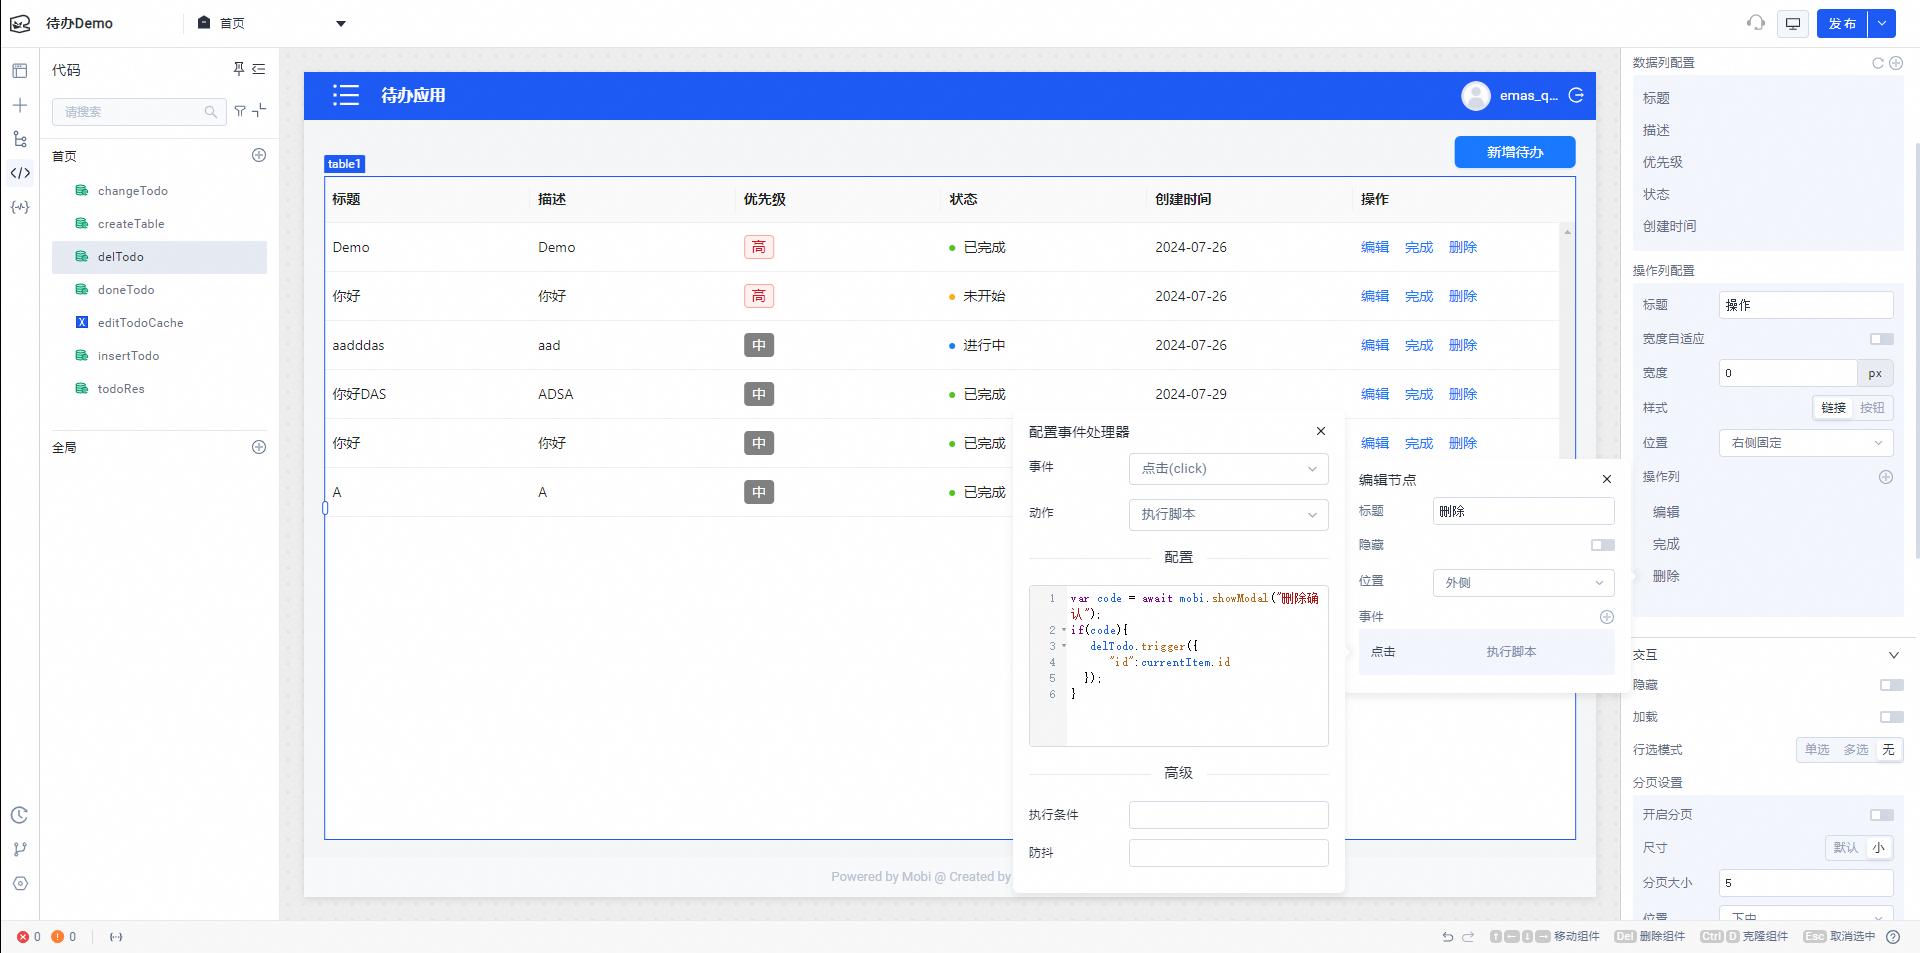
Add a Delete button to the operation column in `table1`.
Configure the execution script.
var code = await mobi.showModal("Confirm Deletion");
if(code){
  delTodo.trigger({
    "id":currentItem.id
  });
}
 SQL statement: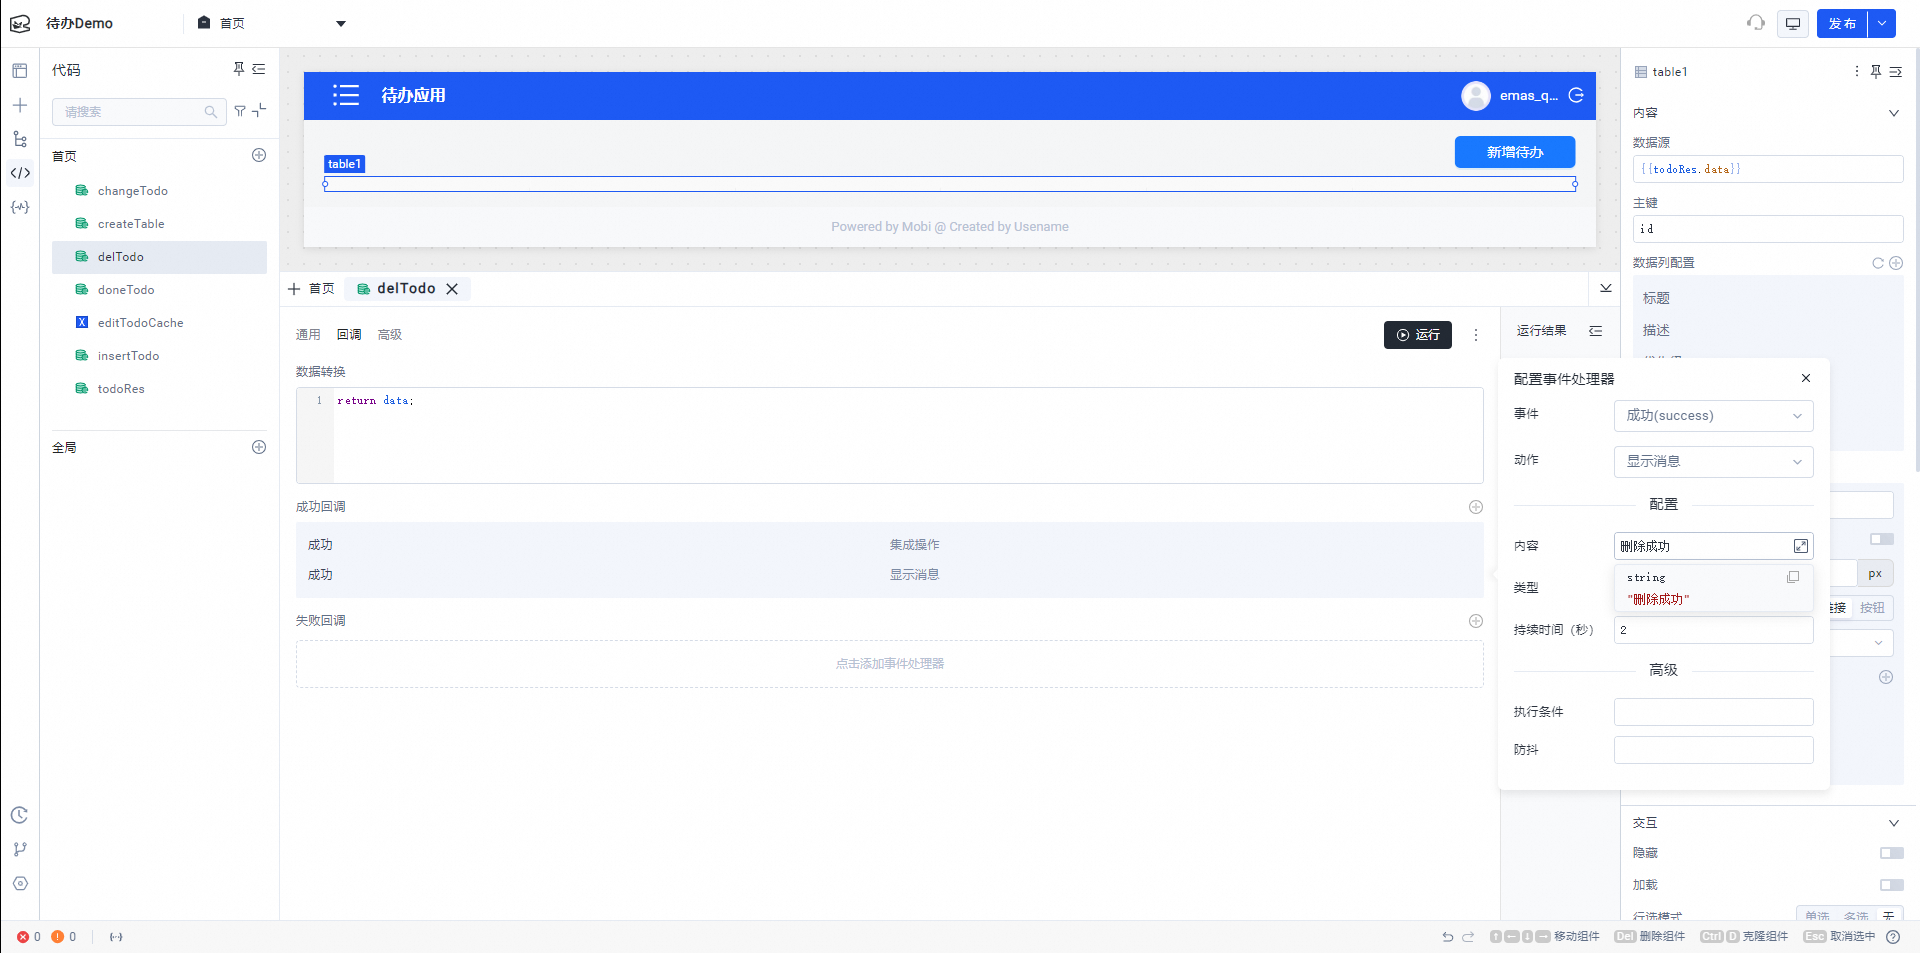
Add a layout to the application
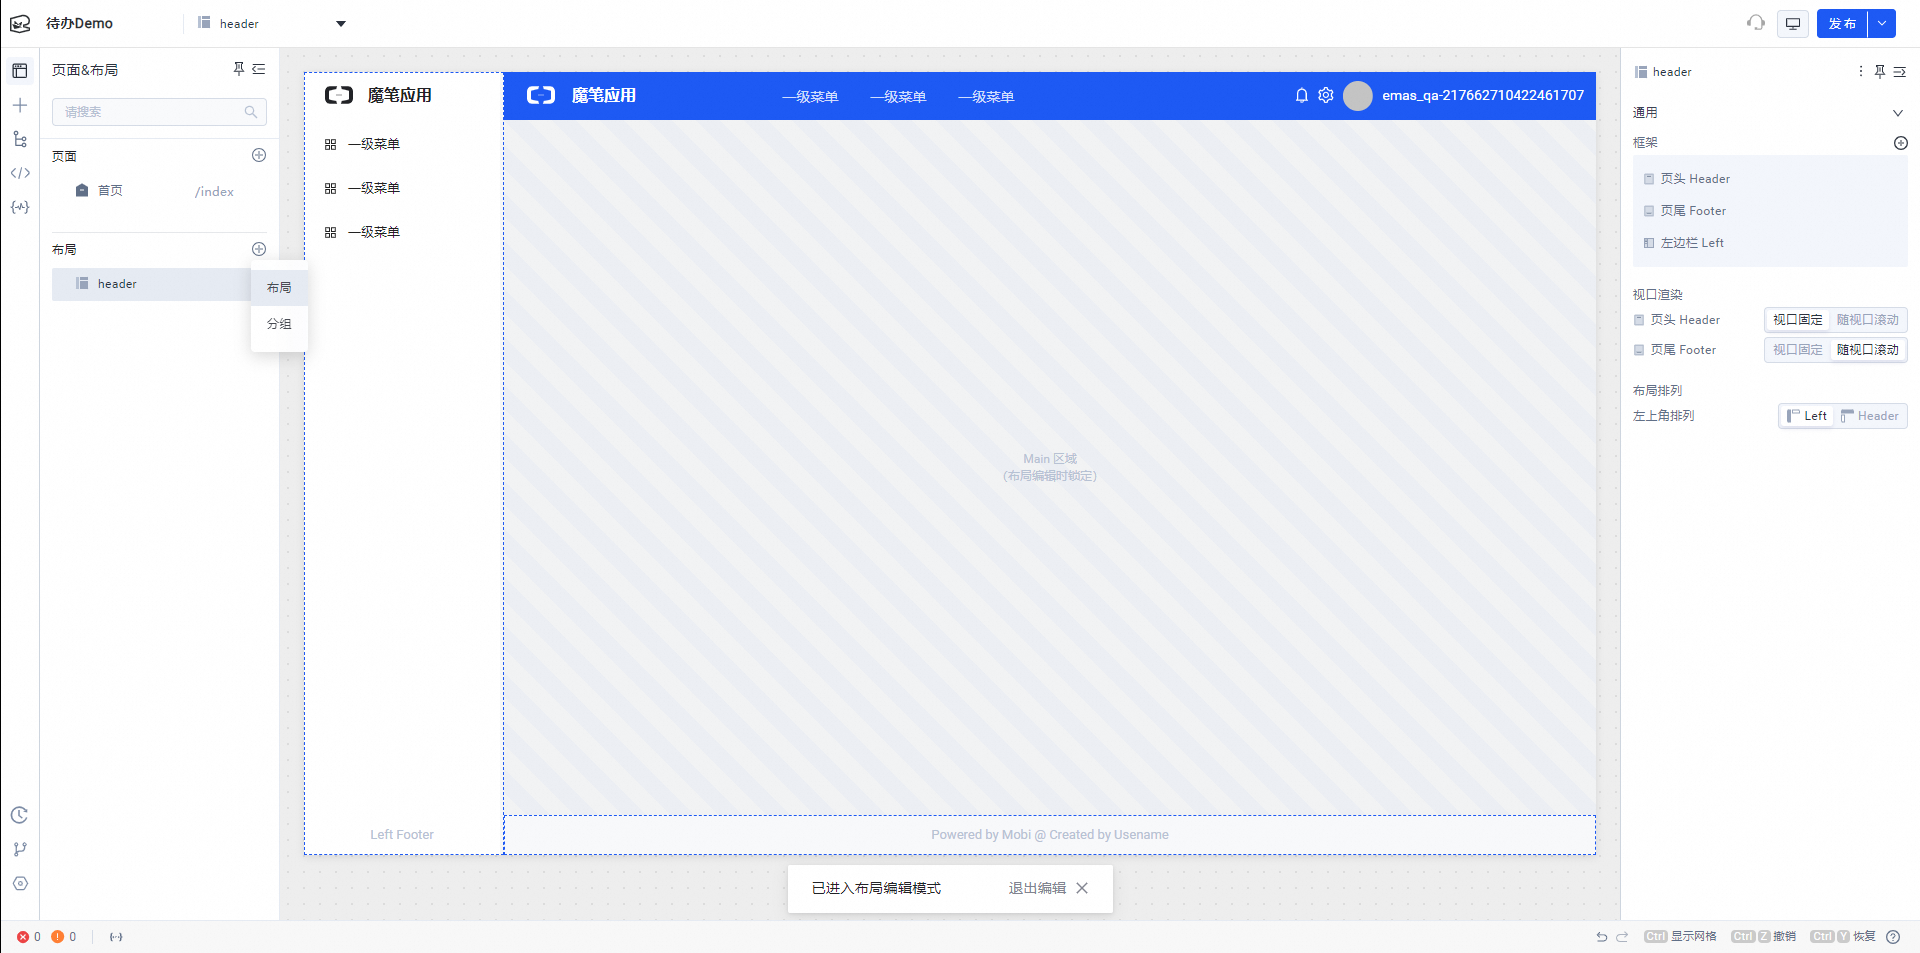
In Page & Layout, add a new layout and rename it to `header`.
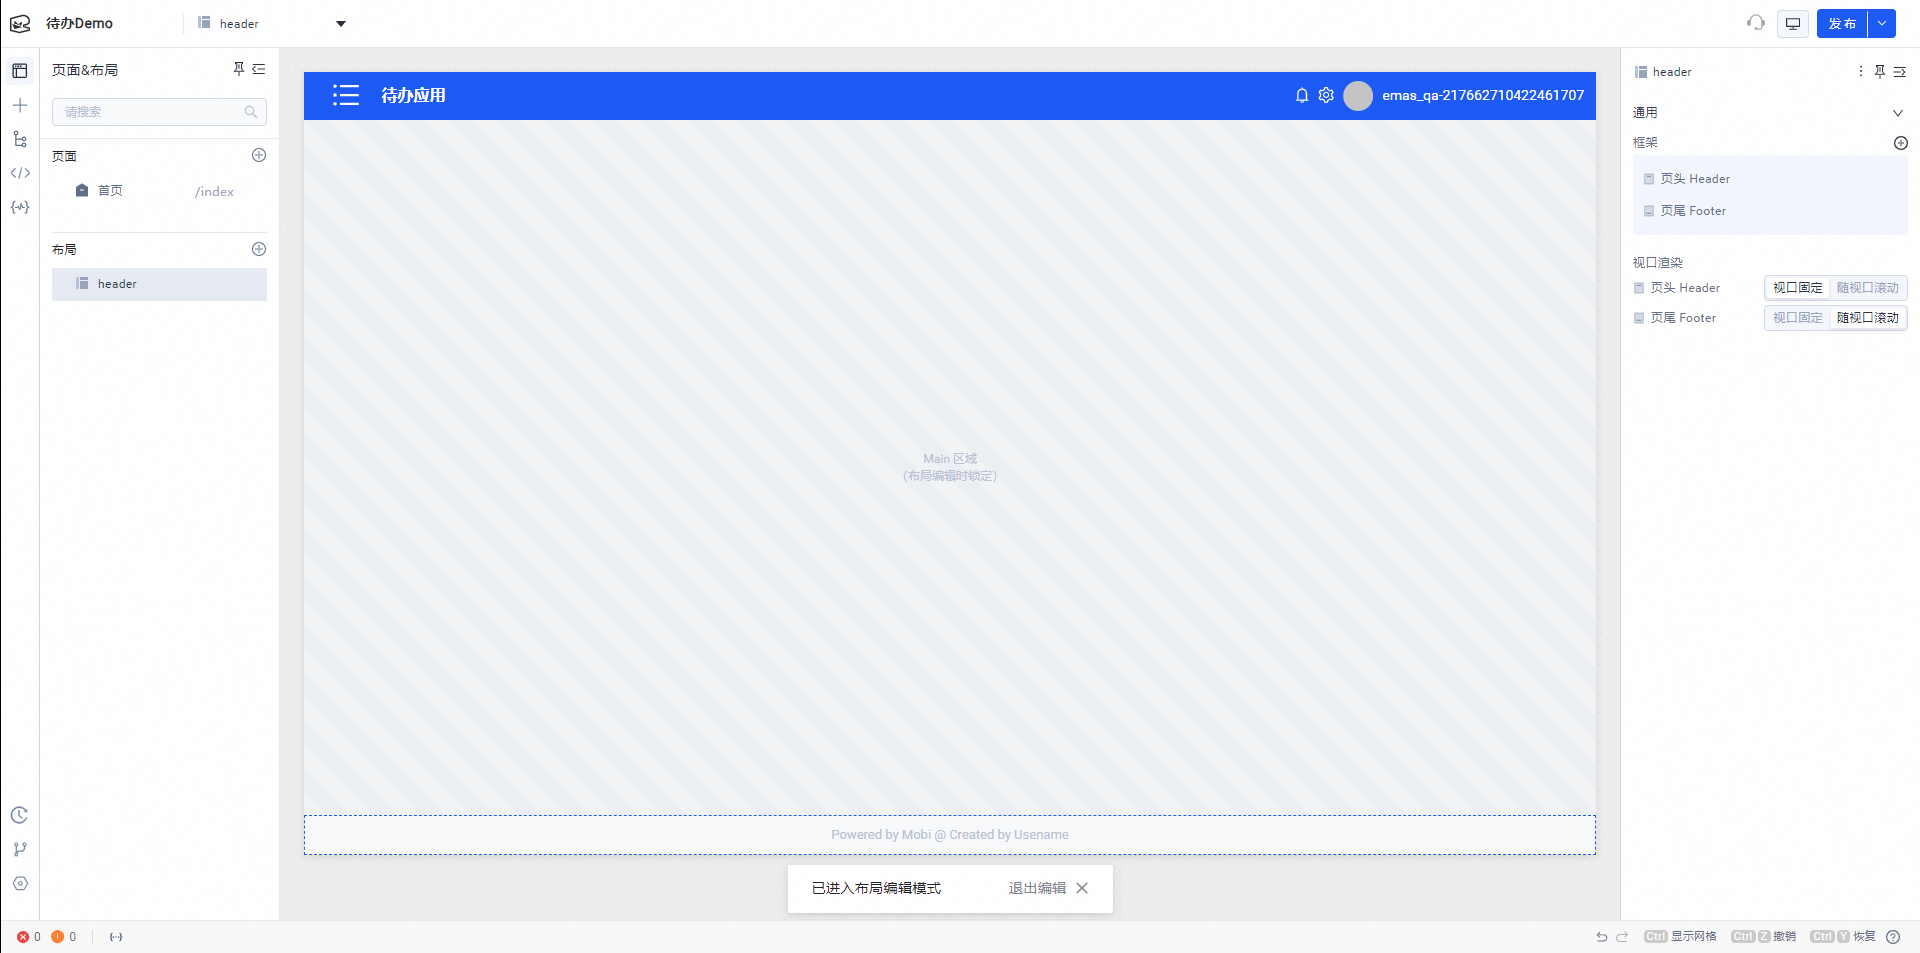
Delete the sidebar on the left.
Delete the top menu layout.
Change the top title text to "To-do Application".
Change the icon to a suitable one for demonstration purposes.
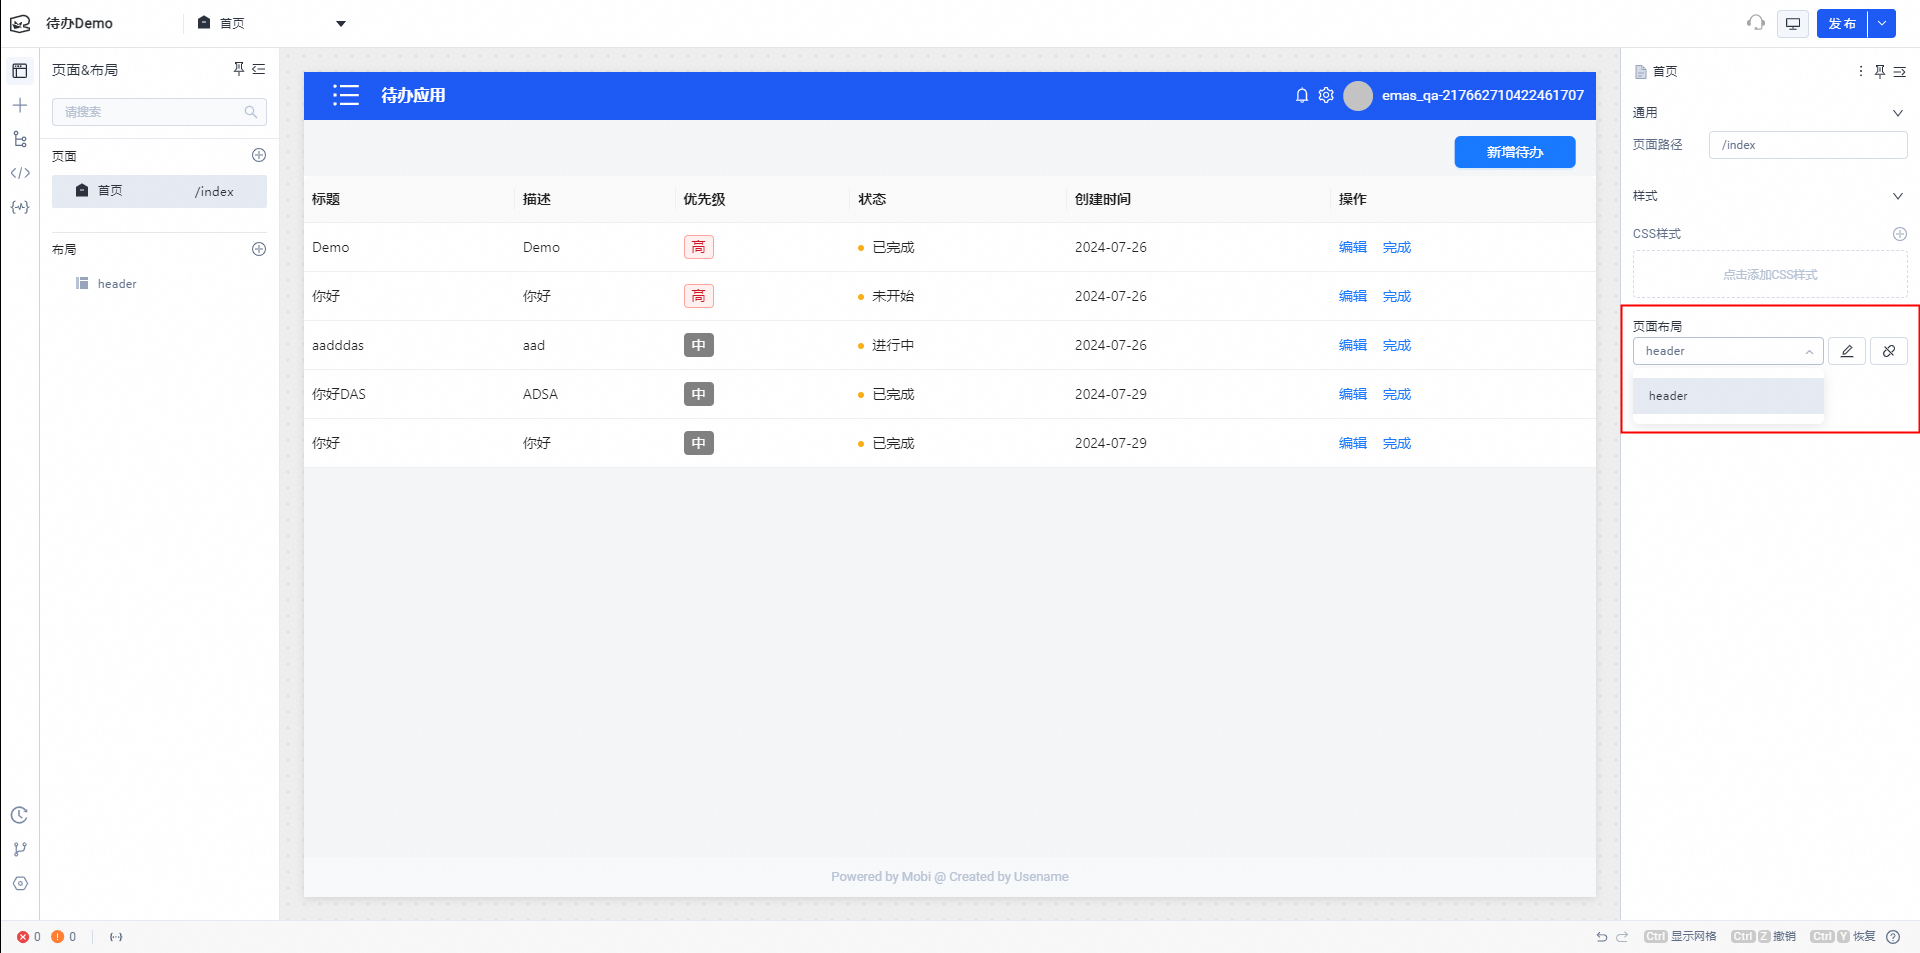
Set the page layout for the home page to the `header` layout you created.
Fine-tuning details
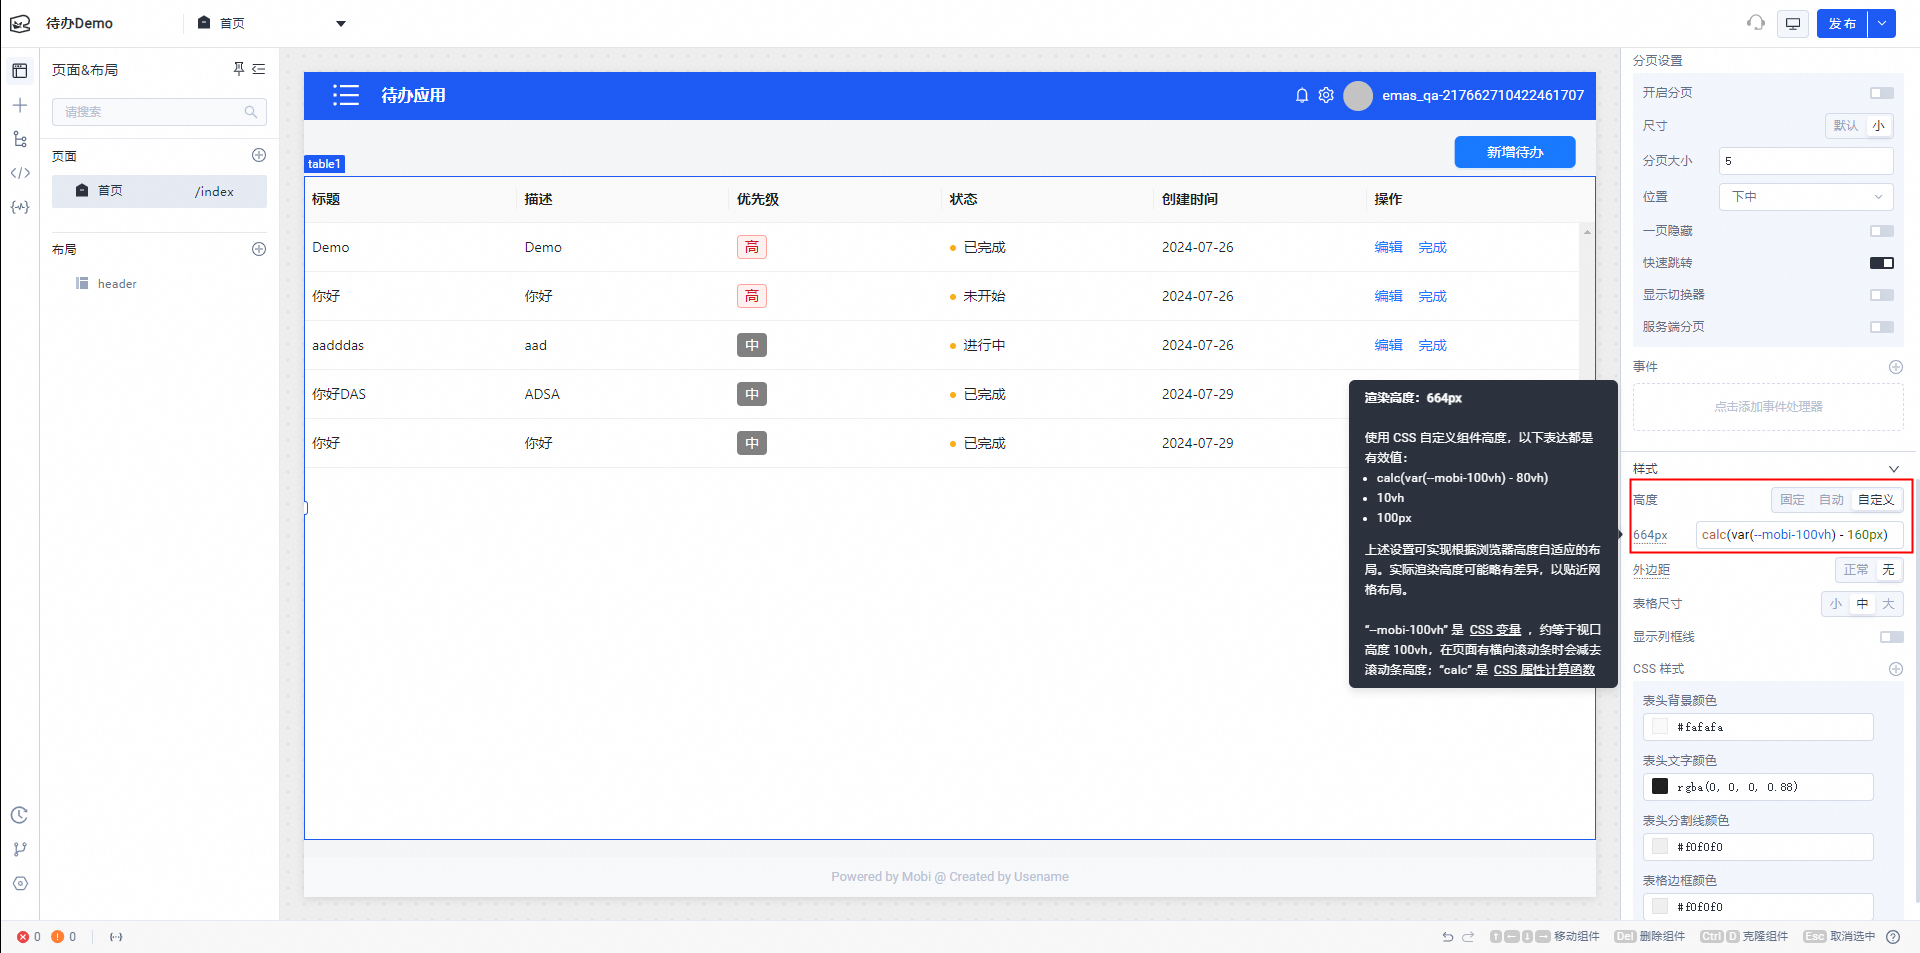
Set the custom height for the table to:
calc(var(--mobi-100vh) - 160px)In the top bar, configure the user profile picture node and set the default image source to:
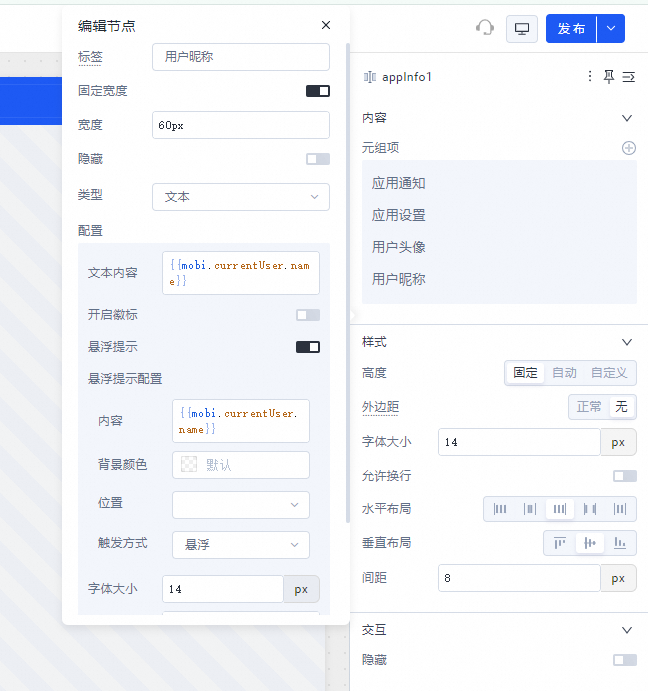
{{mobi.currentUser.profilePhotoUrl}}Set the user nickname to a fixed width and add a tooltip.
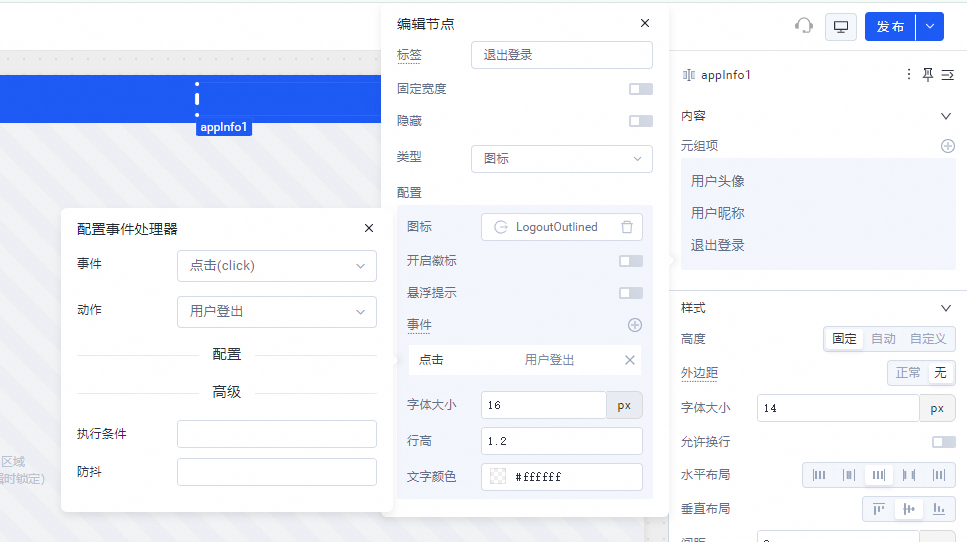
Add a logout button to the top bar.
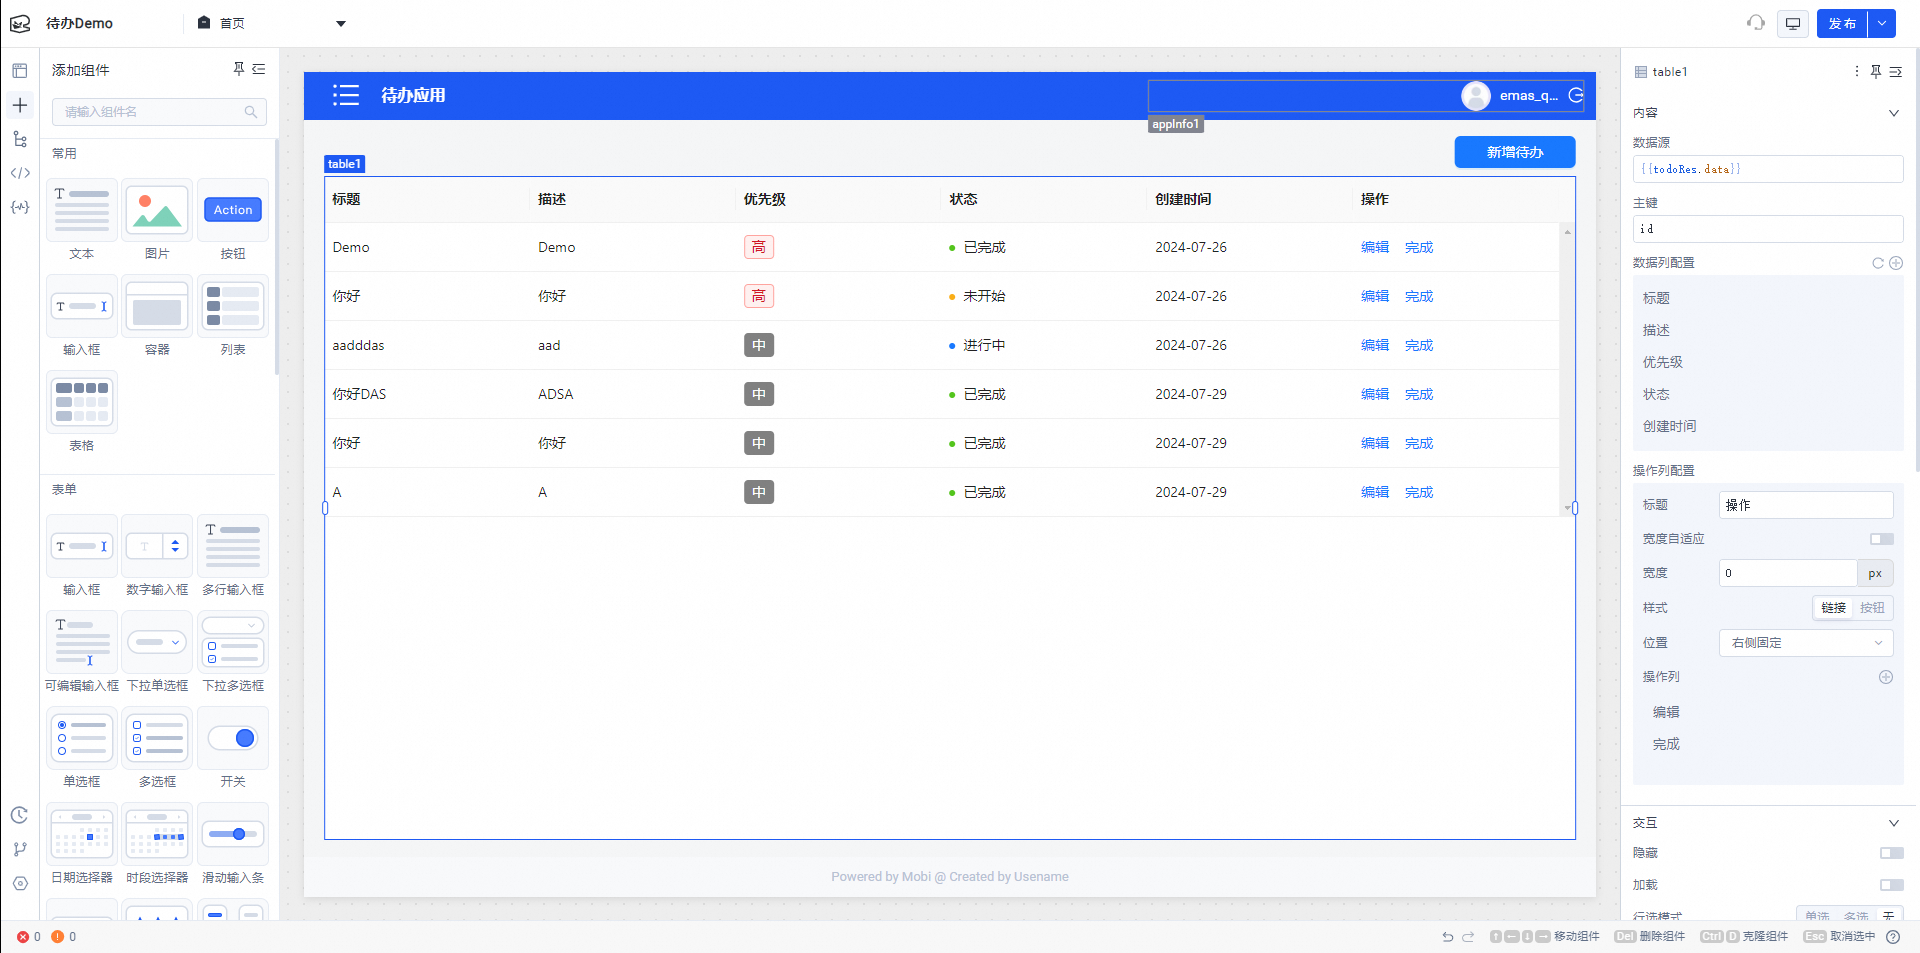
Adjust the table width. You can hold down the `Ctrl` key to view the component's position. To resize the component, hold down the `Ctrl` key and press the up or left arrow keys. To move the component, use the arrow keys.